Unity's Bulk Upload setting allows you to make batch changes to client data, see bulk operation history, and manage bulk jobs.
To access Bulk Upload, go to Settings > Bulk Upload.
On the main screen, the directory will show the Name of the bulk upload, along with the Created By, Created Date, Type Name, Operation, Is Actionable (true/false), and Time to Expiration information. Click the up/down buttons next to each column title to sort by that column. Use the Search bulk action bar to search through bulk actions. Use the Viewing drop-down menu to customize how much information you want to see on the screen. Click the + button to customize the table columns.
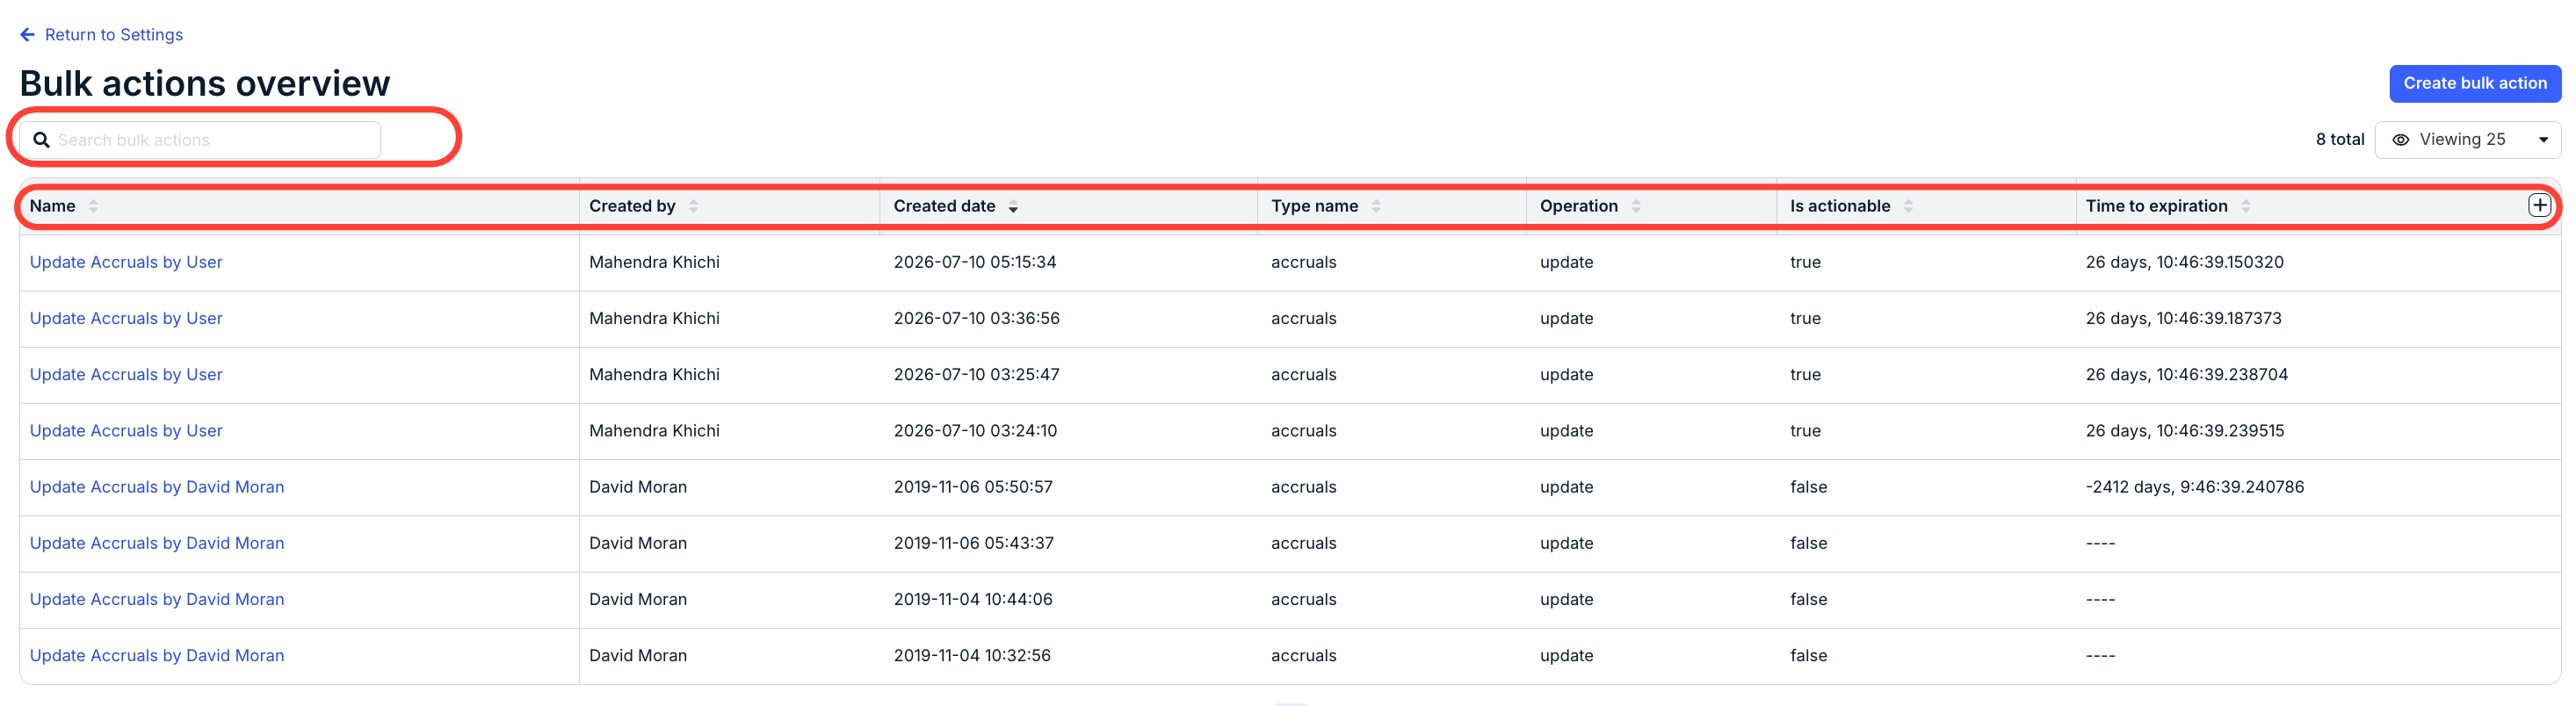
Click on the link in the Name column to open up the bulk action.
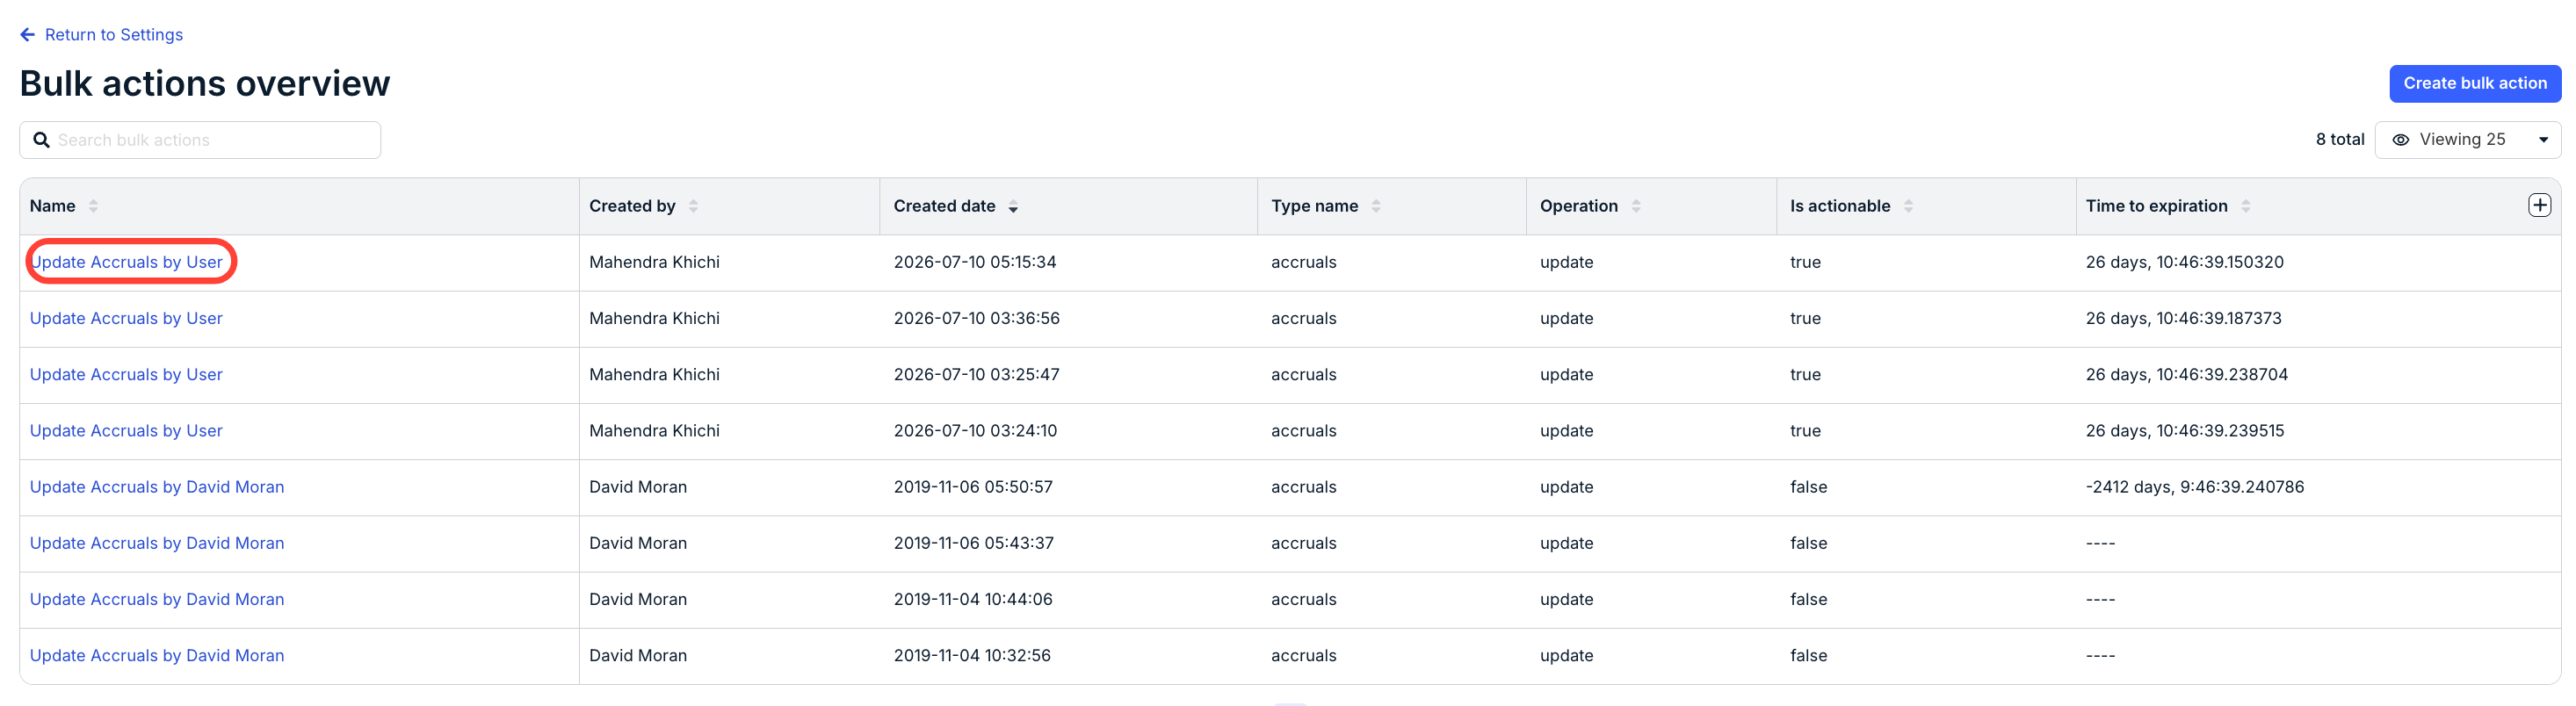
The Bulk Action screen will appear. Here, you can see the basic Info for the bulk action and the Job history. Here, you can click to download the Current job template or start a New Attempt. Within the Job history section, you can click to download the Template or View job template details.
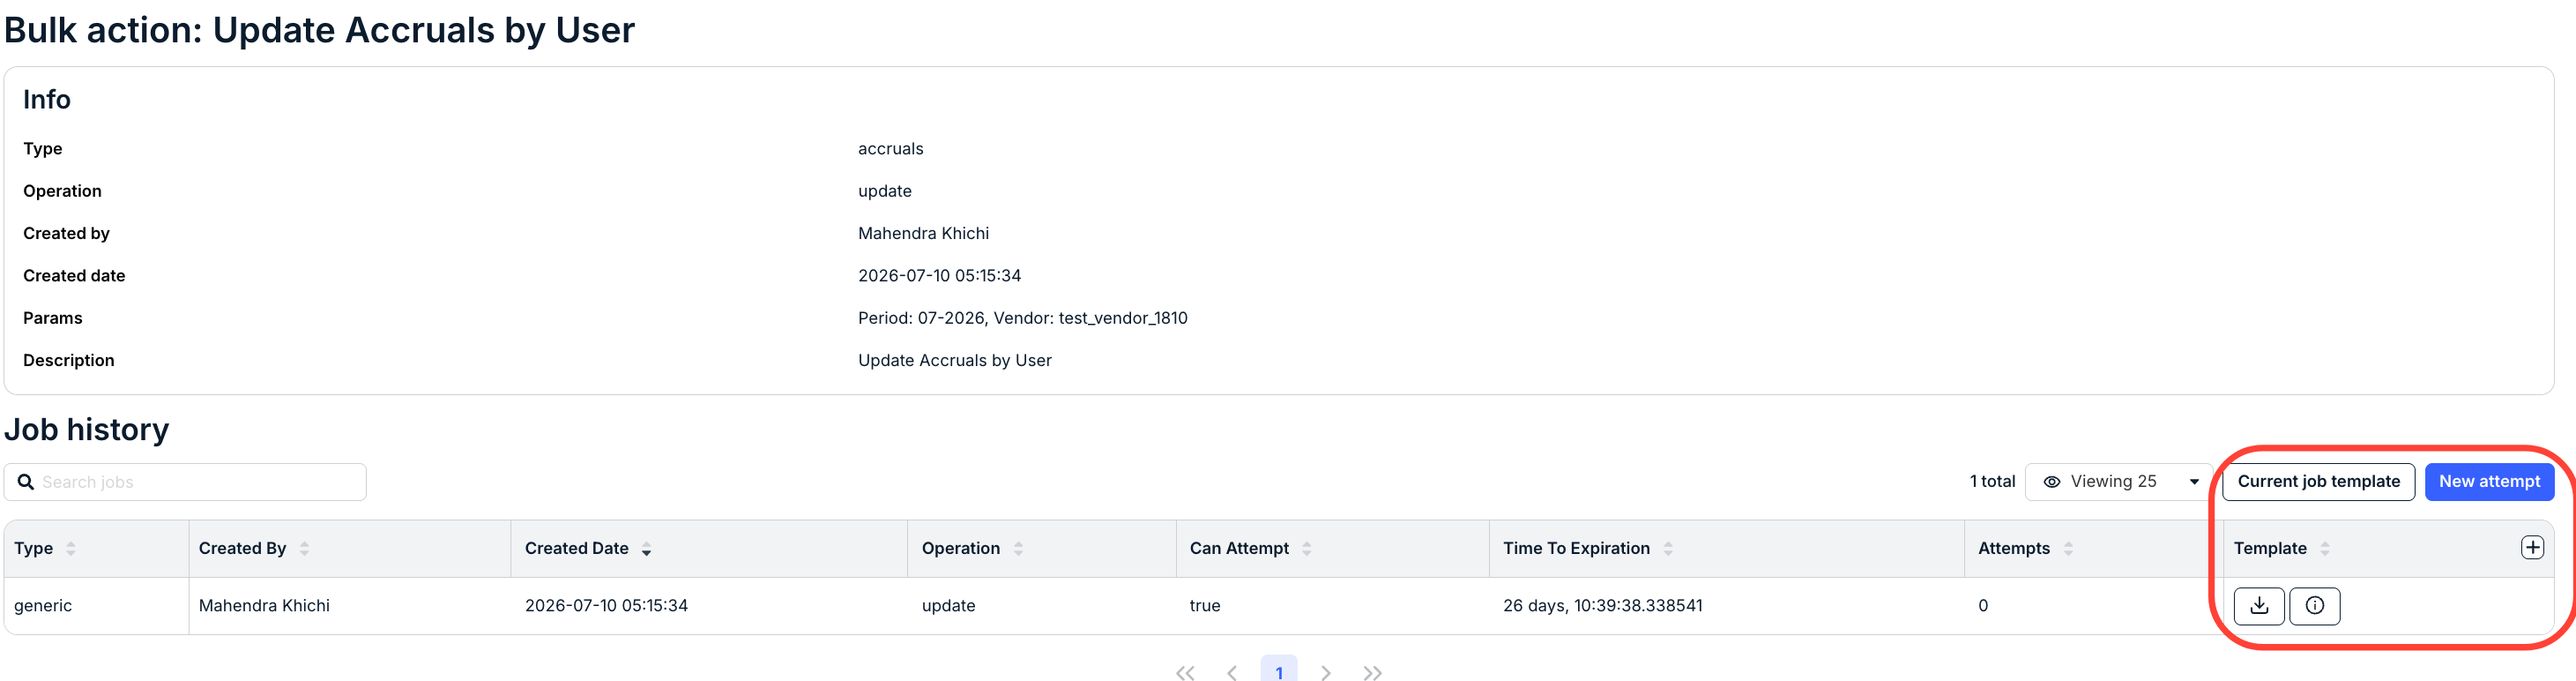
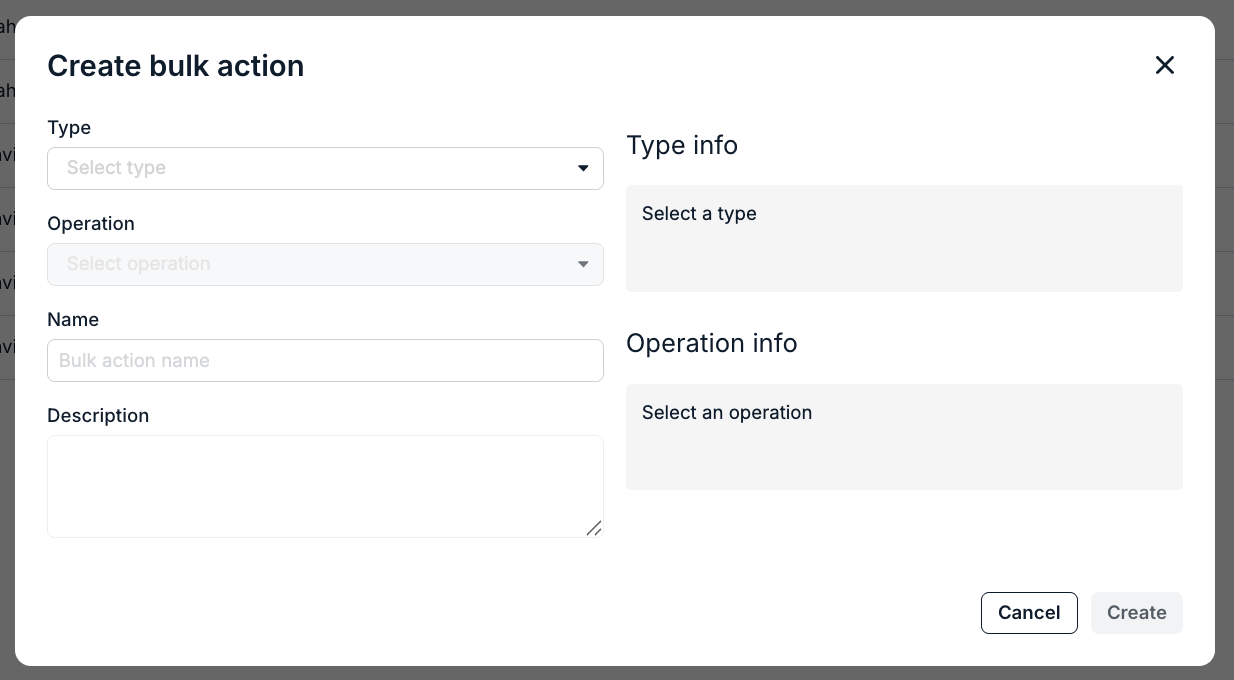
Click Create bulk action to start a new bulk action. You'll have to select the Type (drop-down menu), Operation (drop-down menu), Name and Description. Your selections will update under the Type info and Operation info sections. Click Create to create the action or Cancel to back out.
The new bulk action will appear in the Bulk actions overview directory.