Unity's Appeals function offers clients and vendors a streamlined process for reconciling adjusted fees or expenses. When an invoice is adjusted during the review process, clients can efficiently resolve disputed line items by sending the invoice back to the vendor for review. The vendor can then appeal any adjustments, providing justifications or supporting documentation for their charges, or accept the adjustments and the invoice will continue processing for payment.
Here's how to use the Appeals feature during the invoice process:
Setup
Contact Onit support to enable the Appeals functionality in the Unity administrative settings. Once enabled, you'll have to configure the appeal parameters in invoice settings.
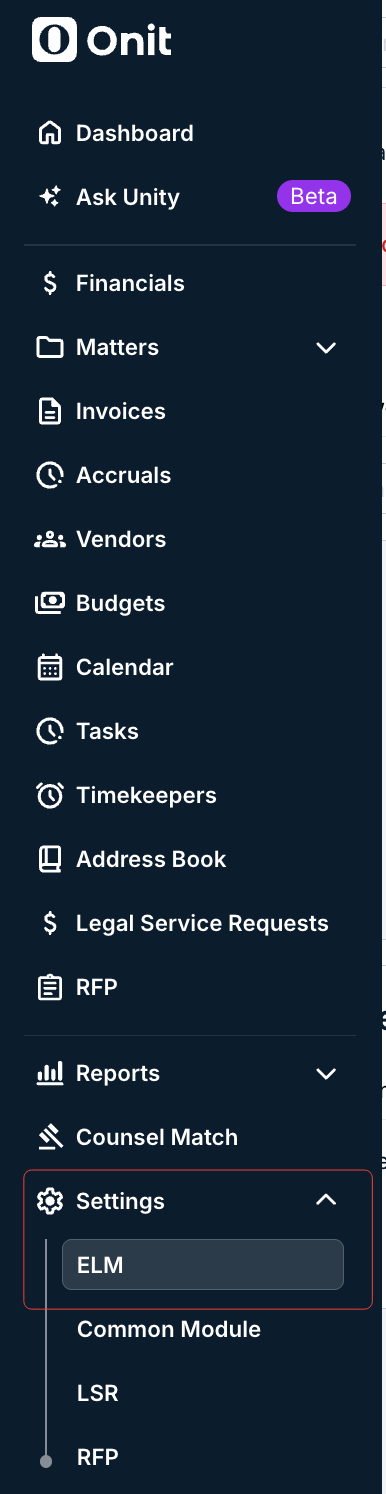
- Open up ELM Settings in the "Settings" section of the left-hand side menu.
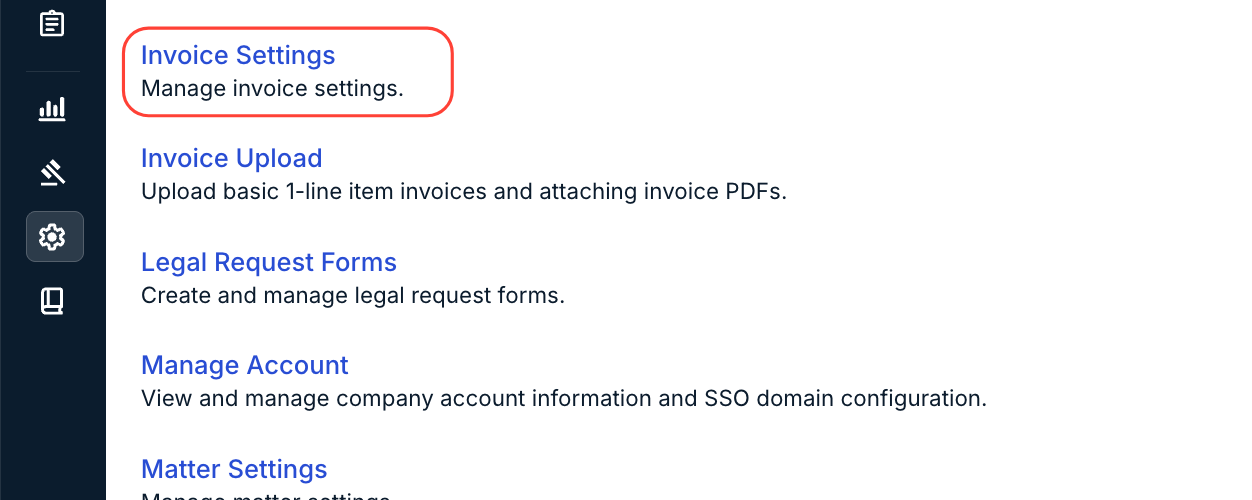
- Open up the "Invoice Settings" section.
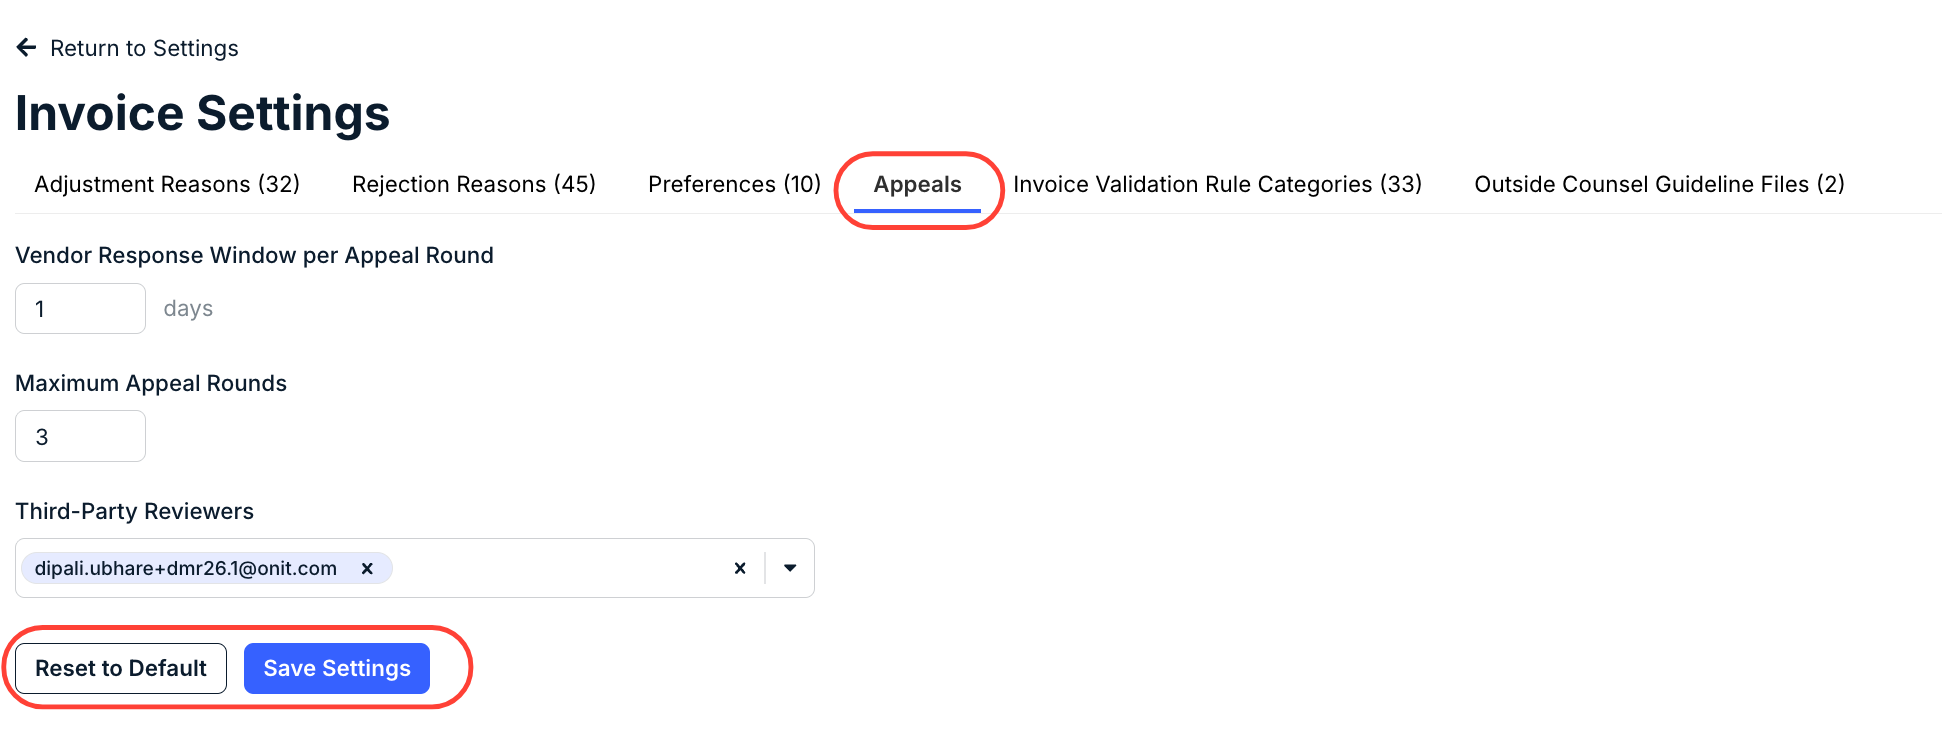
- Open the "Appeals" tab in Invoice Settings.
Here, you'll have to specify the:
- Vendor Response Window per Appeal Round - How long the vendor has to appeal (in days) per round.
- Maximum Appeal Rounds - How many rounds the vendor has for their appeals.
- Third-Party Reviewers - If your organization employs a third-party reviewer to examine invoices and appeals, select the party from the drop-down menu; click the X next to any selected reviewers to remove them from the list.
Click Save Settings to finalize the Appeals settings or Reset to Default to remove the changes.
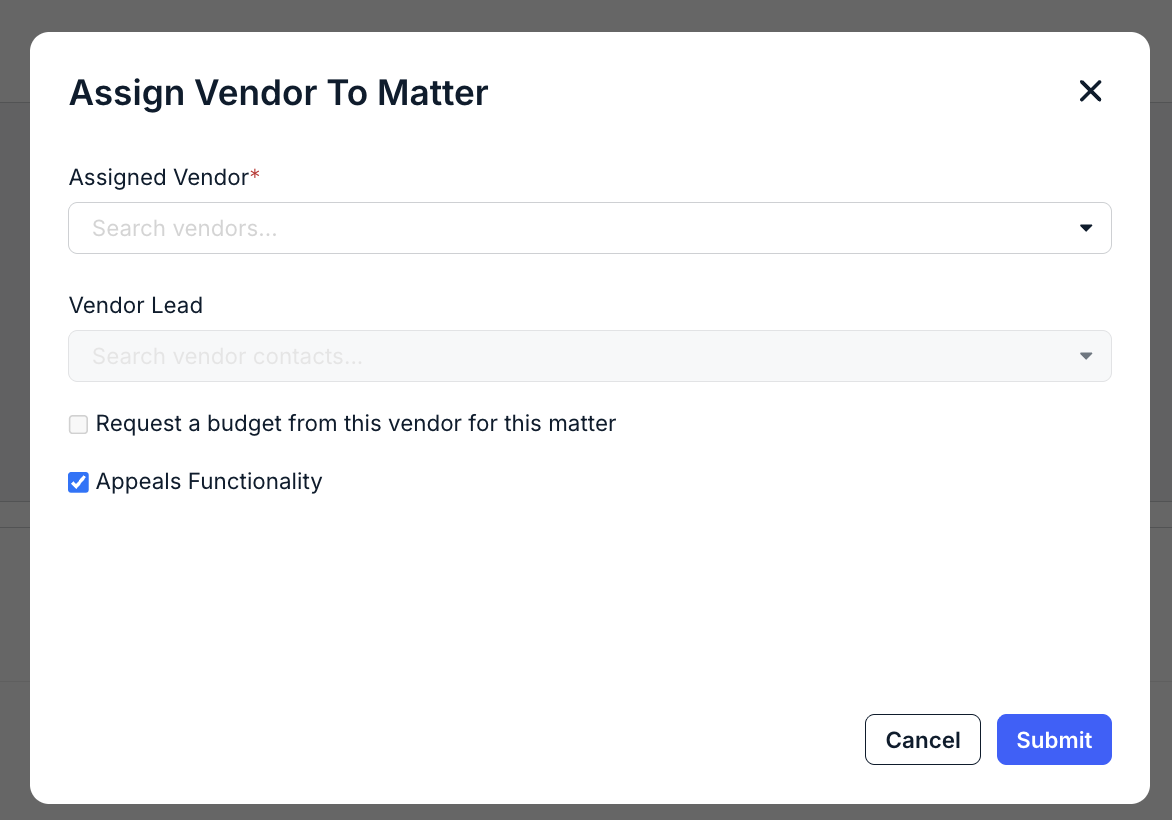
- Important: when assigning a Vendor to a Matter, check the "Appeals Functionality" box to enable appeals for that vendor.
Using Invoice Appeals
- Open up your desired invoice from the "Invoices" section on the left-hand side menu.
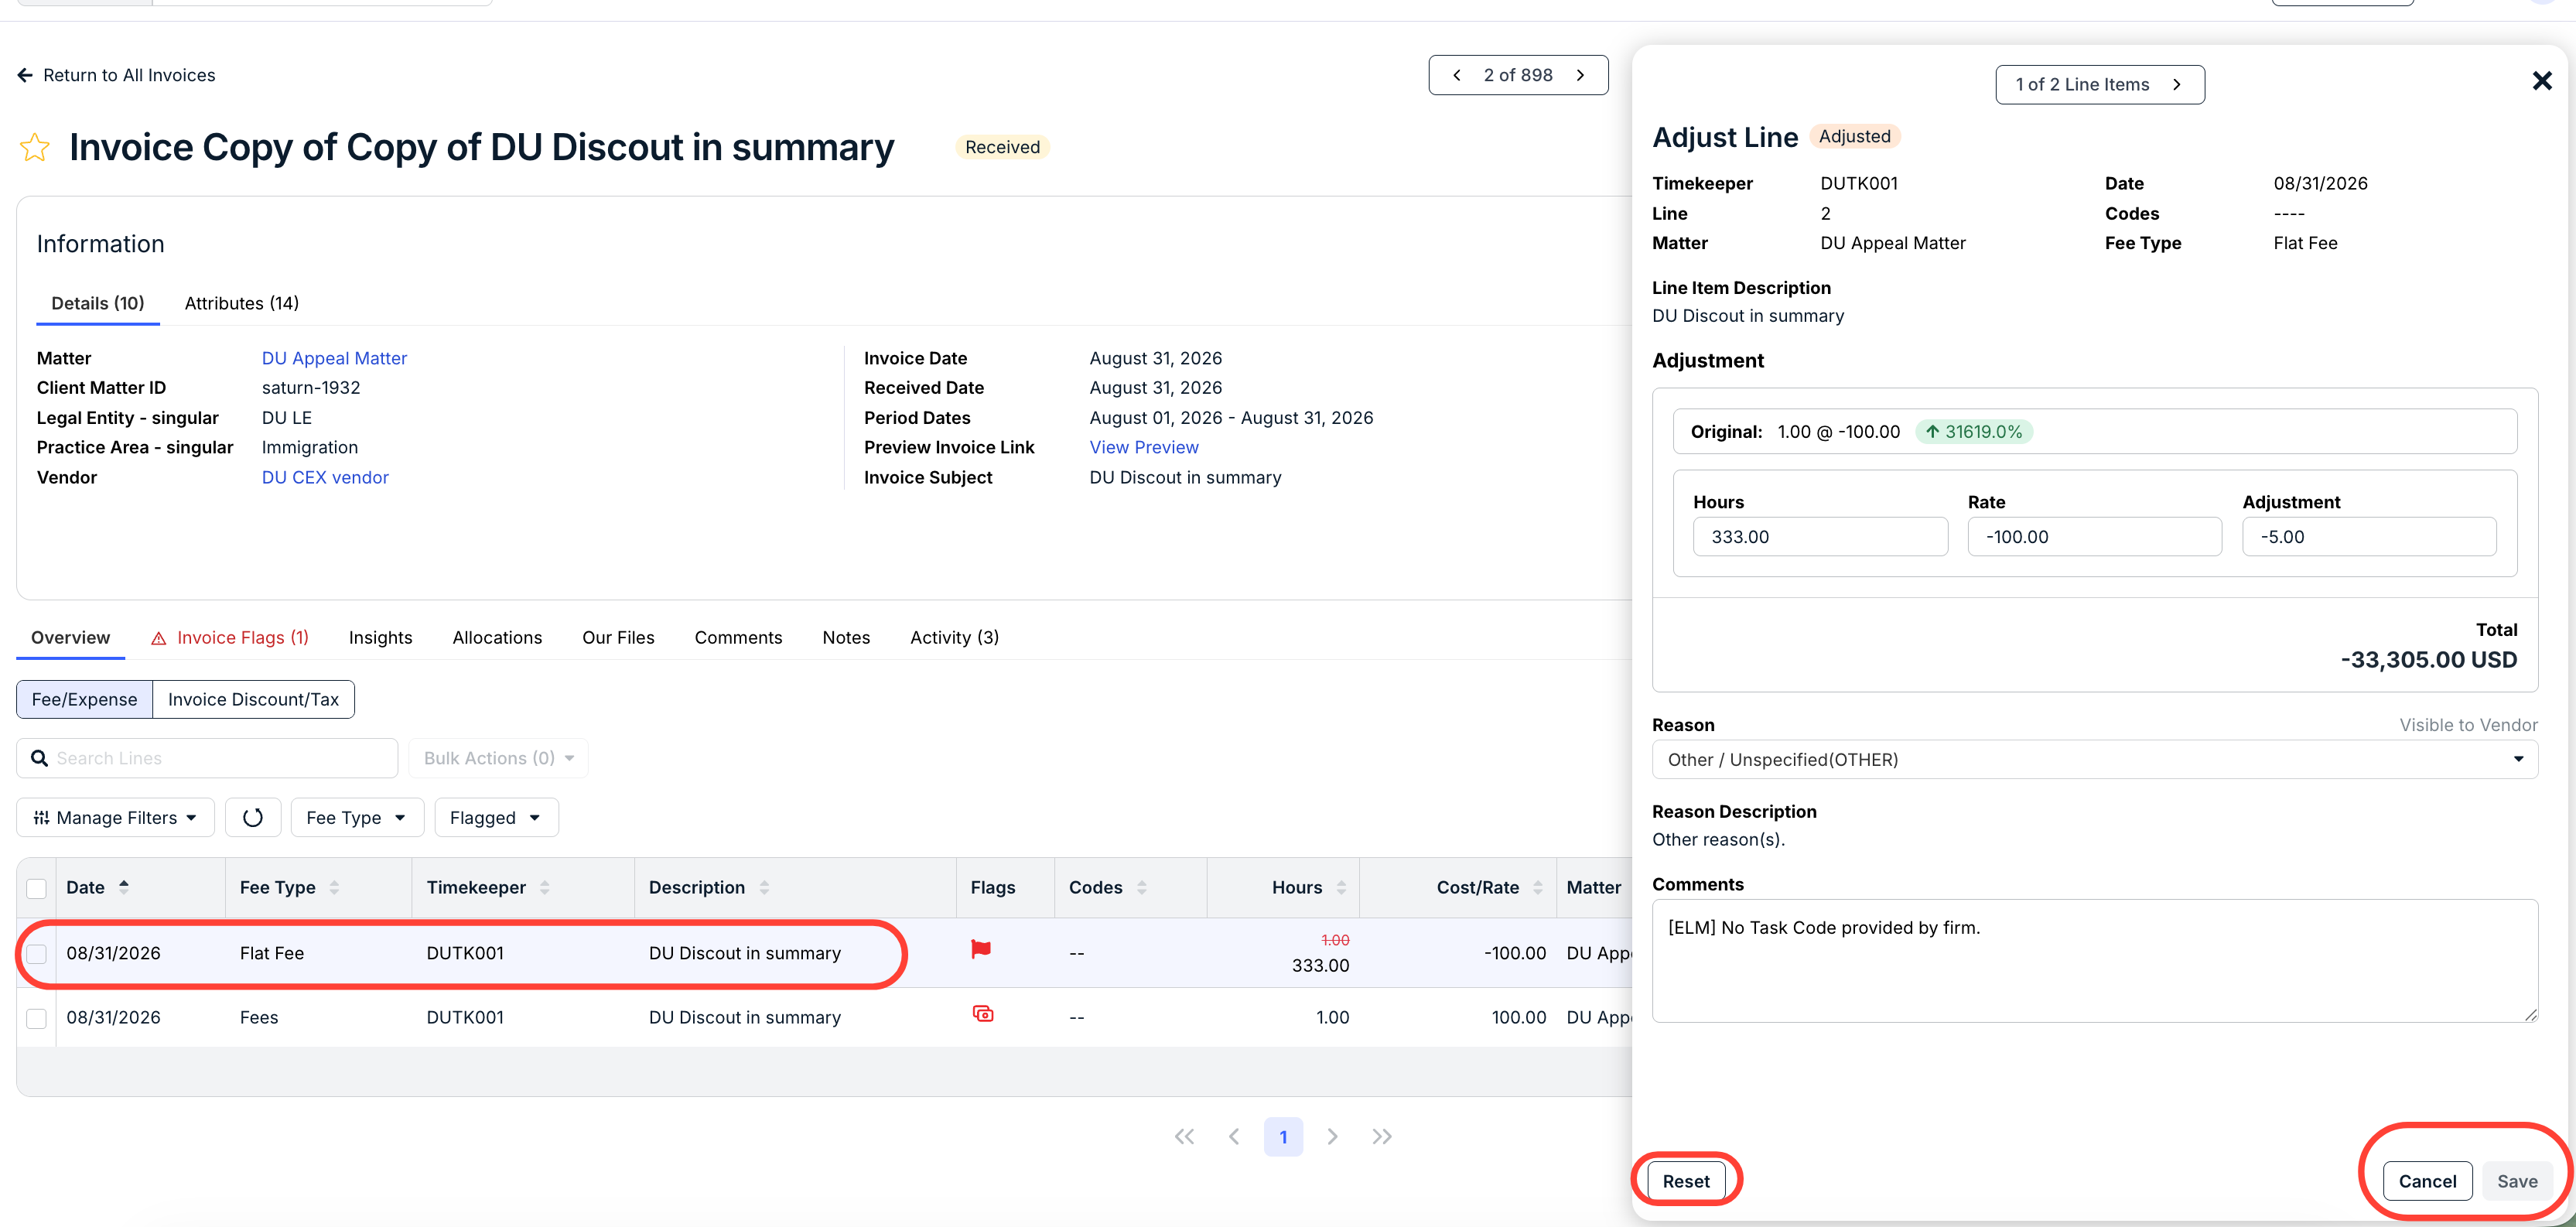
- Make any needed line-item adjustments or invoice level adjustments using the Adjust Invoice button at the top of the screen.
Click into one of the line items at the bottom of the page to make your adjustment. Click Save to finalize the change or Cancel to back out.
You can also click Reset to reset all of your changes.
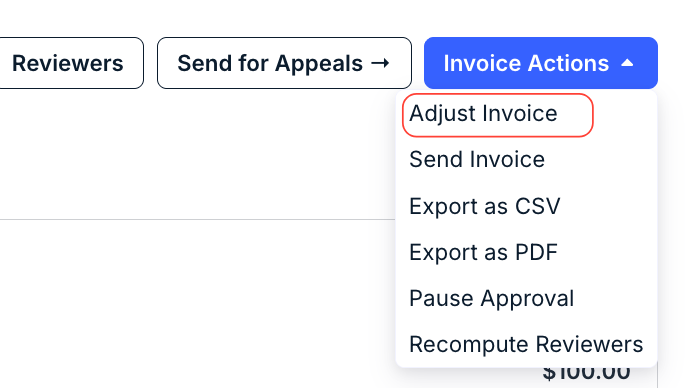
Open the Invoice Actions menu and then click on Adjust Invoice to perform invoice-level adjustments.
Click here to open the following Adjust Invoice screen 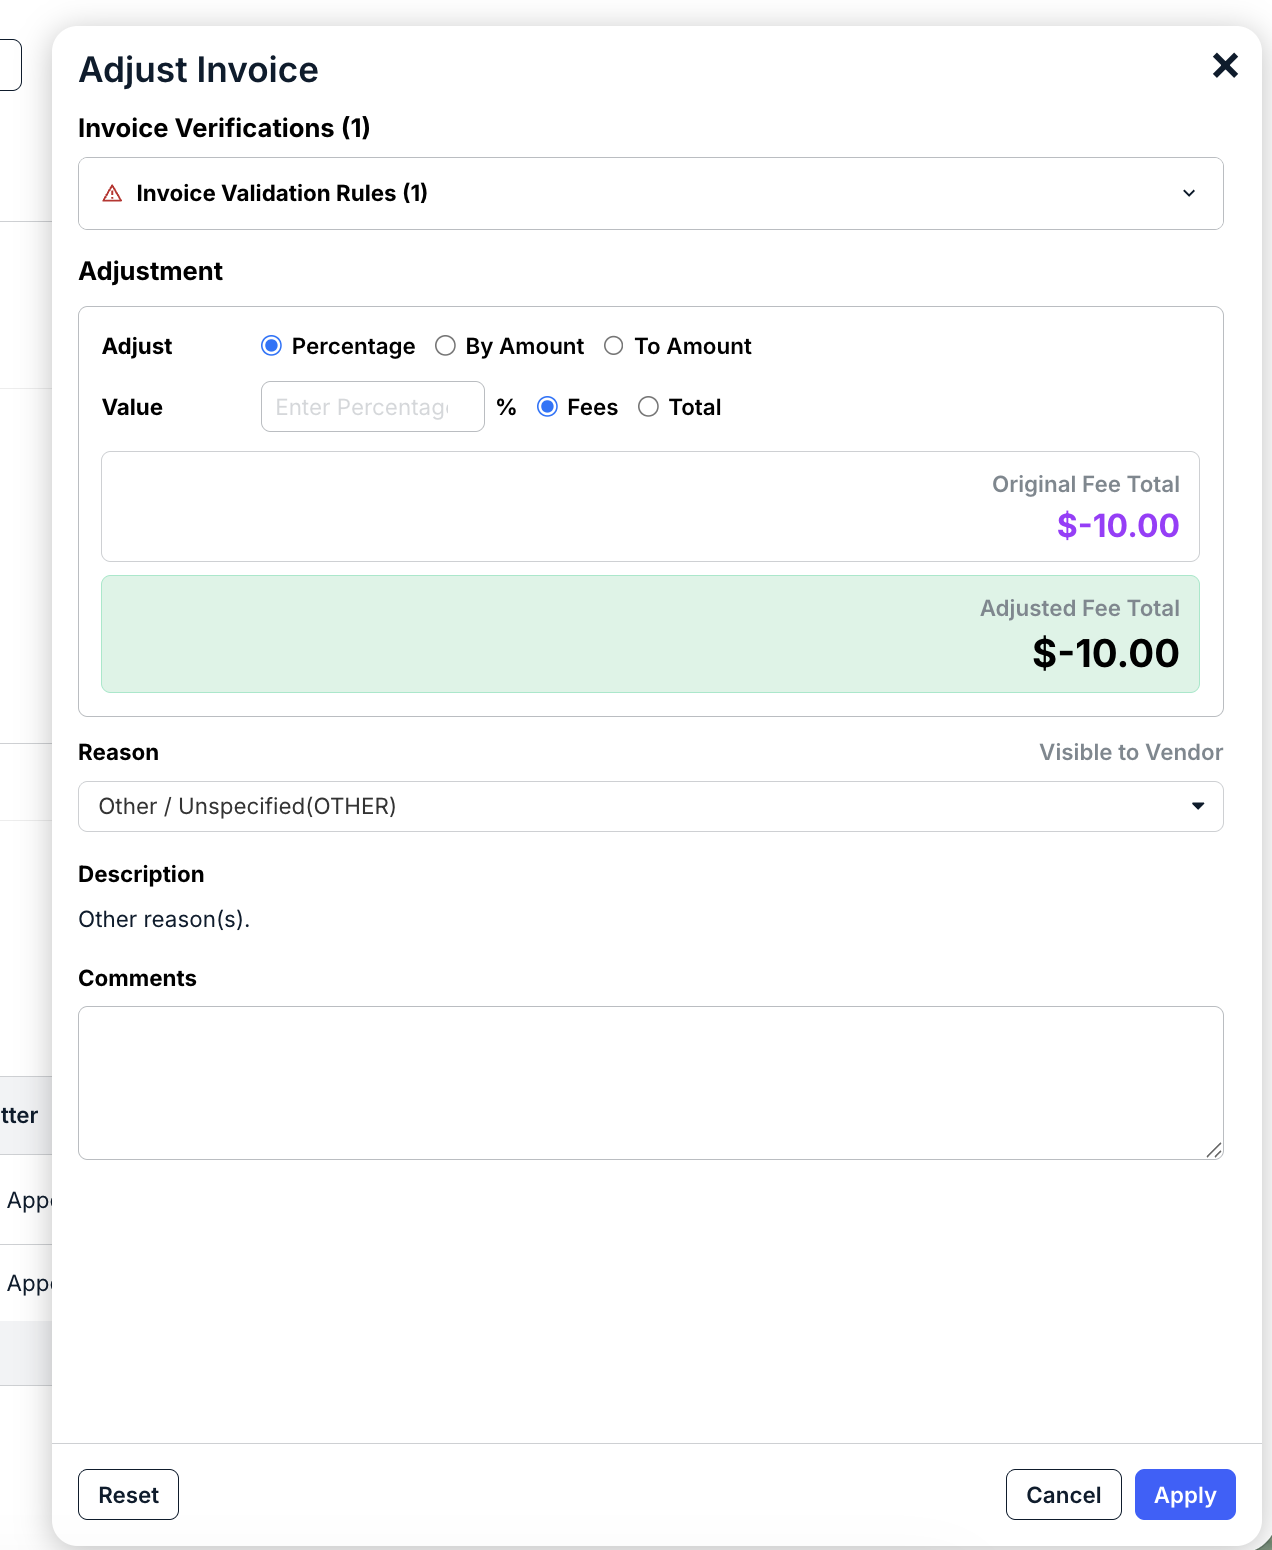
- After making the adjustments, click "Send for Appeals" at the top of the screen.
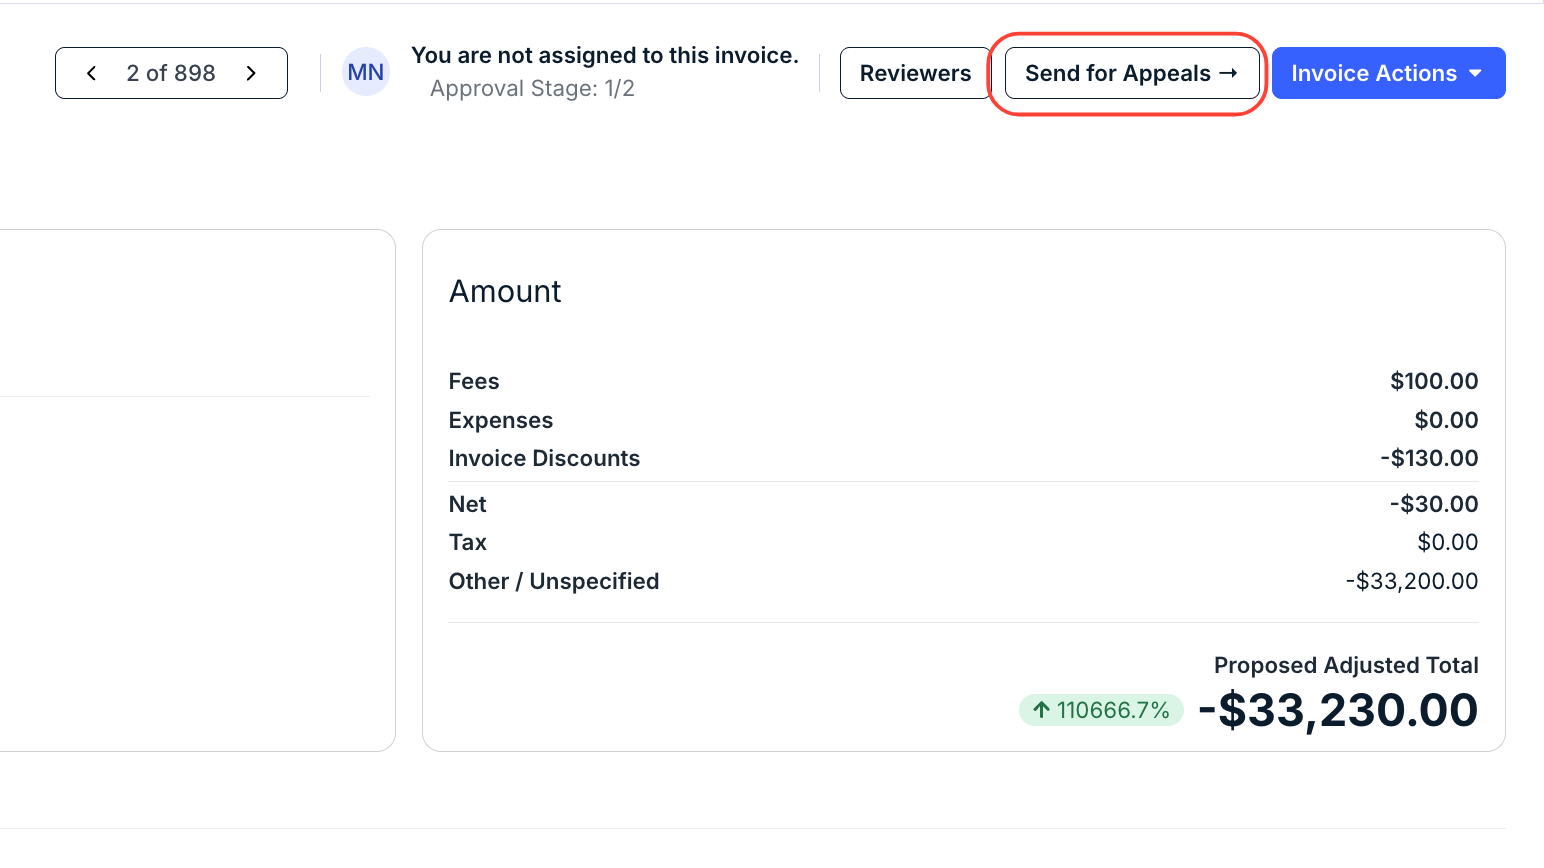
- Users will see a message at the top of their invoice screen that details how many days and rounds the vendor has left to appeal the invoice.
You'll also see a note at the top of the screen saying the invoice is in the Under Appeal phase.

The vendor will receive a notification email notifying them of the adjustment and letting them know how long they have to appeal the invoice. Vendor users will also receive a notification on the invoice directly within their Counsel Exchange account and see a banner on the top of the screen reminding them of the appeals deadline.
Vendors will see the specific line items that have been adjusted at the bottom of their screen. The vendor has two response paths:
• Accept the adjustment: Click Acknowledge Invoice Adjustment to accept and forward the invoice to the next designated approver on the client side.
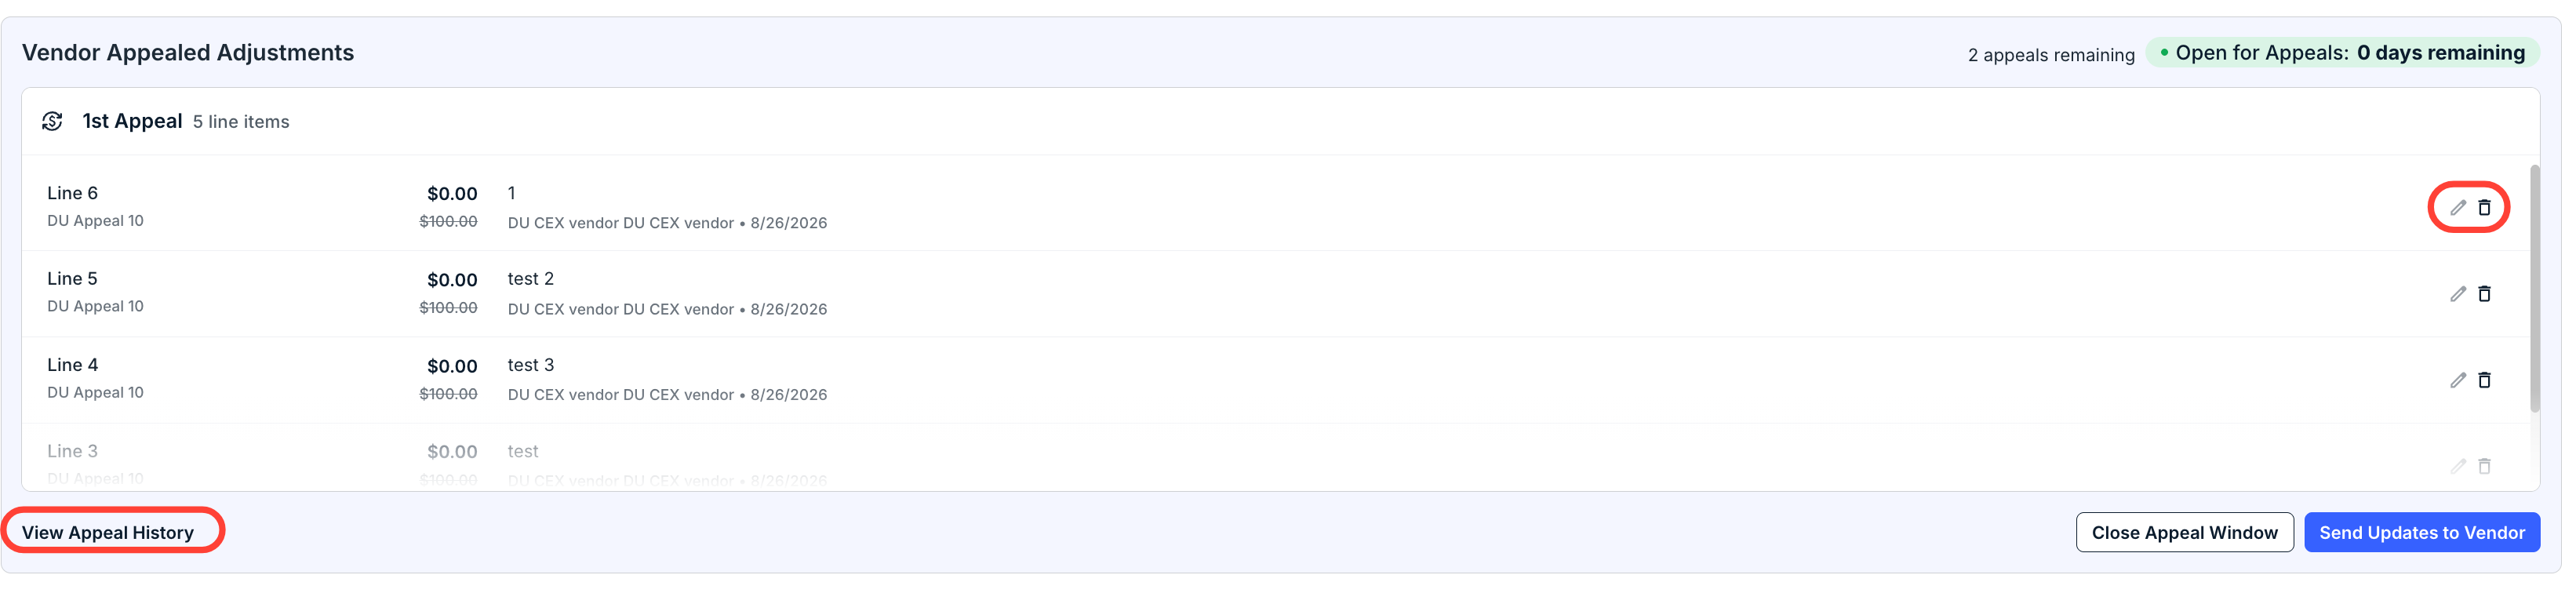
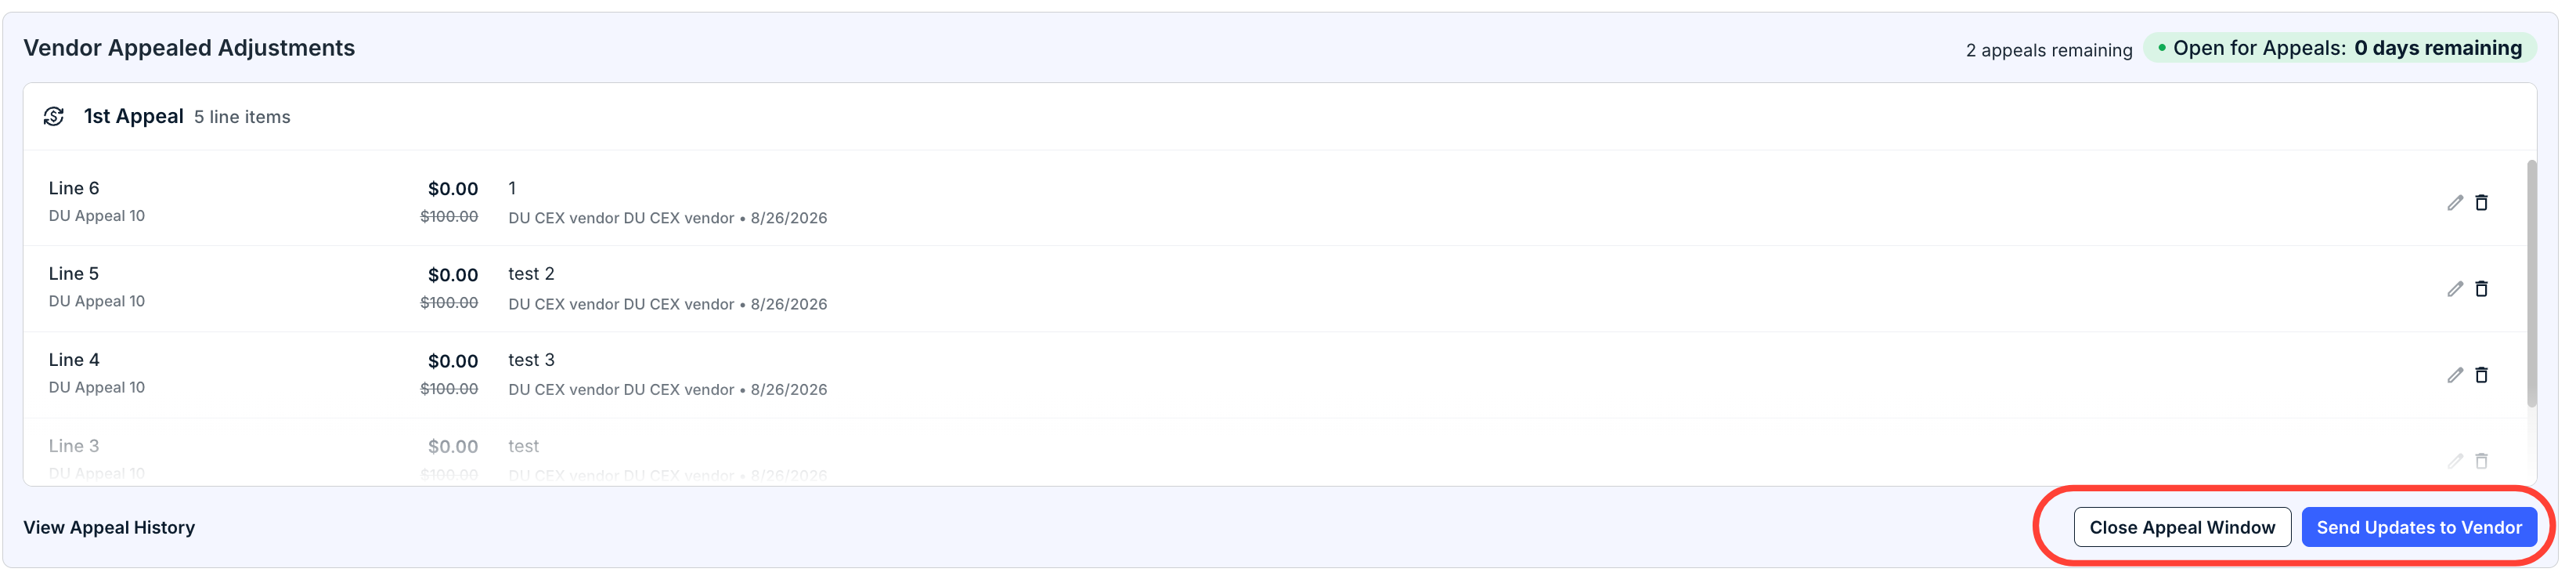
• File an appeal: Use + Add Line Comment to add a comment on each disputed line item detailing the requested change. The vendor can also add an overall comment and attach a supporting file before submitting. Then click Appeal to submit the appeal back to the client. - If the vendor wants to appeal the changes, you'll see the "Vendor-Appealed Adjustments" screen appear on the invoice.
You'll see all of their proposed changes on the screen, along with the number of appeals remaining and appeals days remaining.
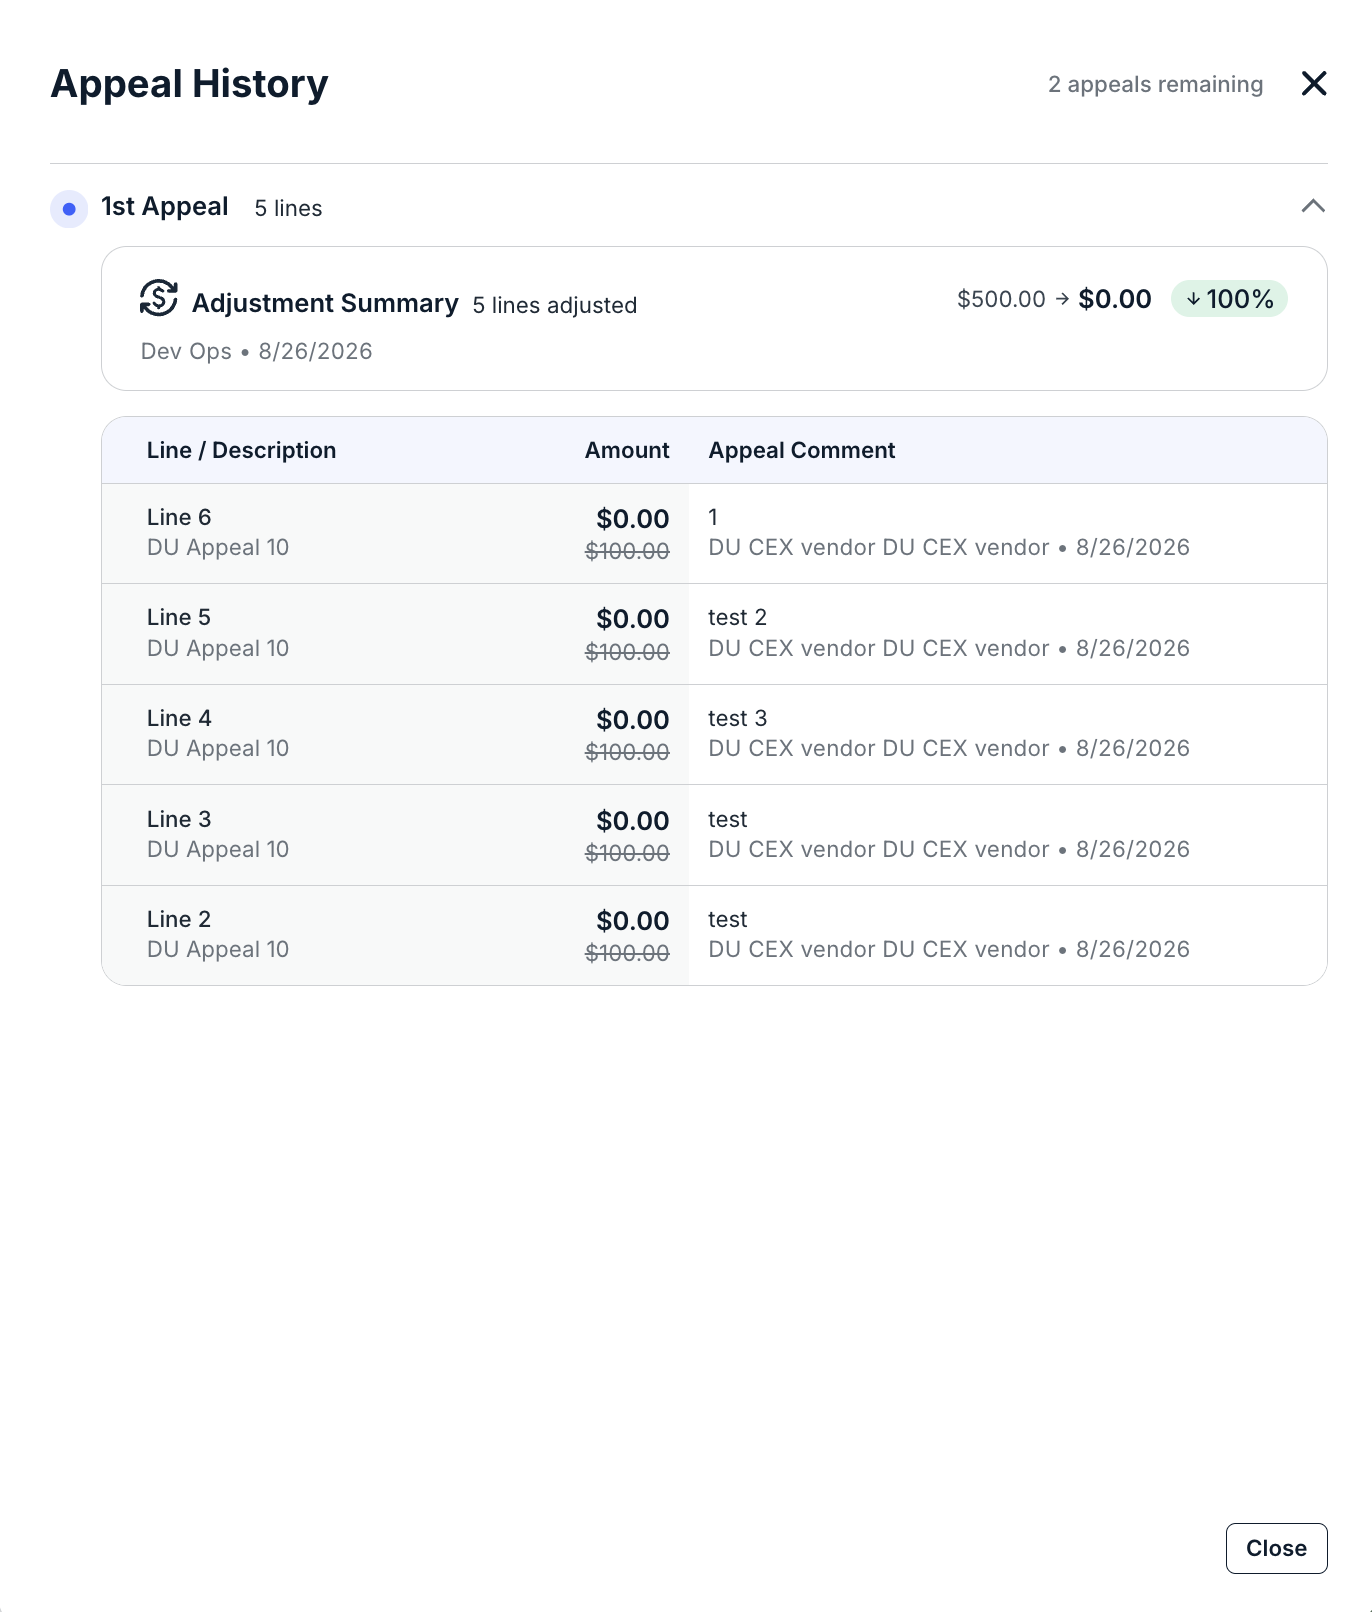
Click View Appeal History to view the appeal history. You can also click the Edit or Remove Adjustment buttons to adjust individual lines.
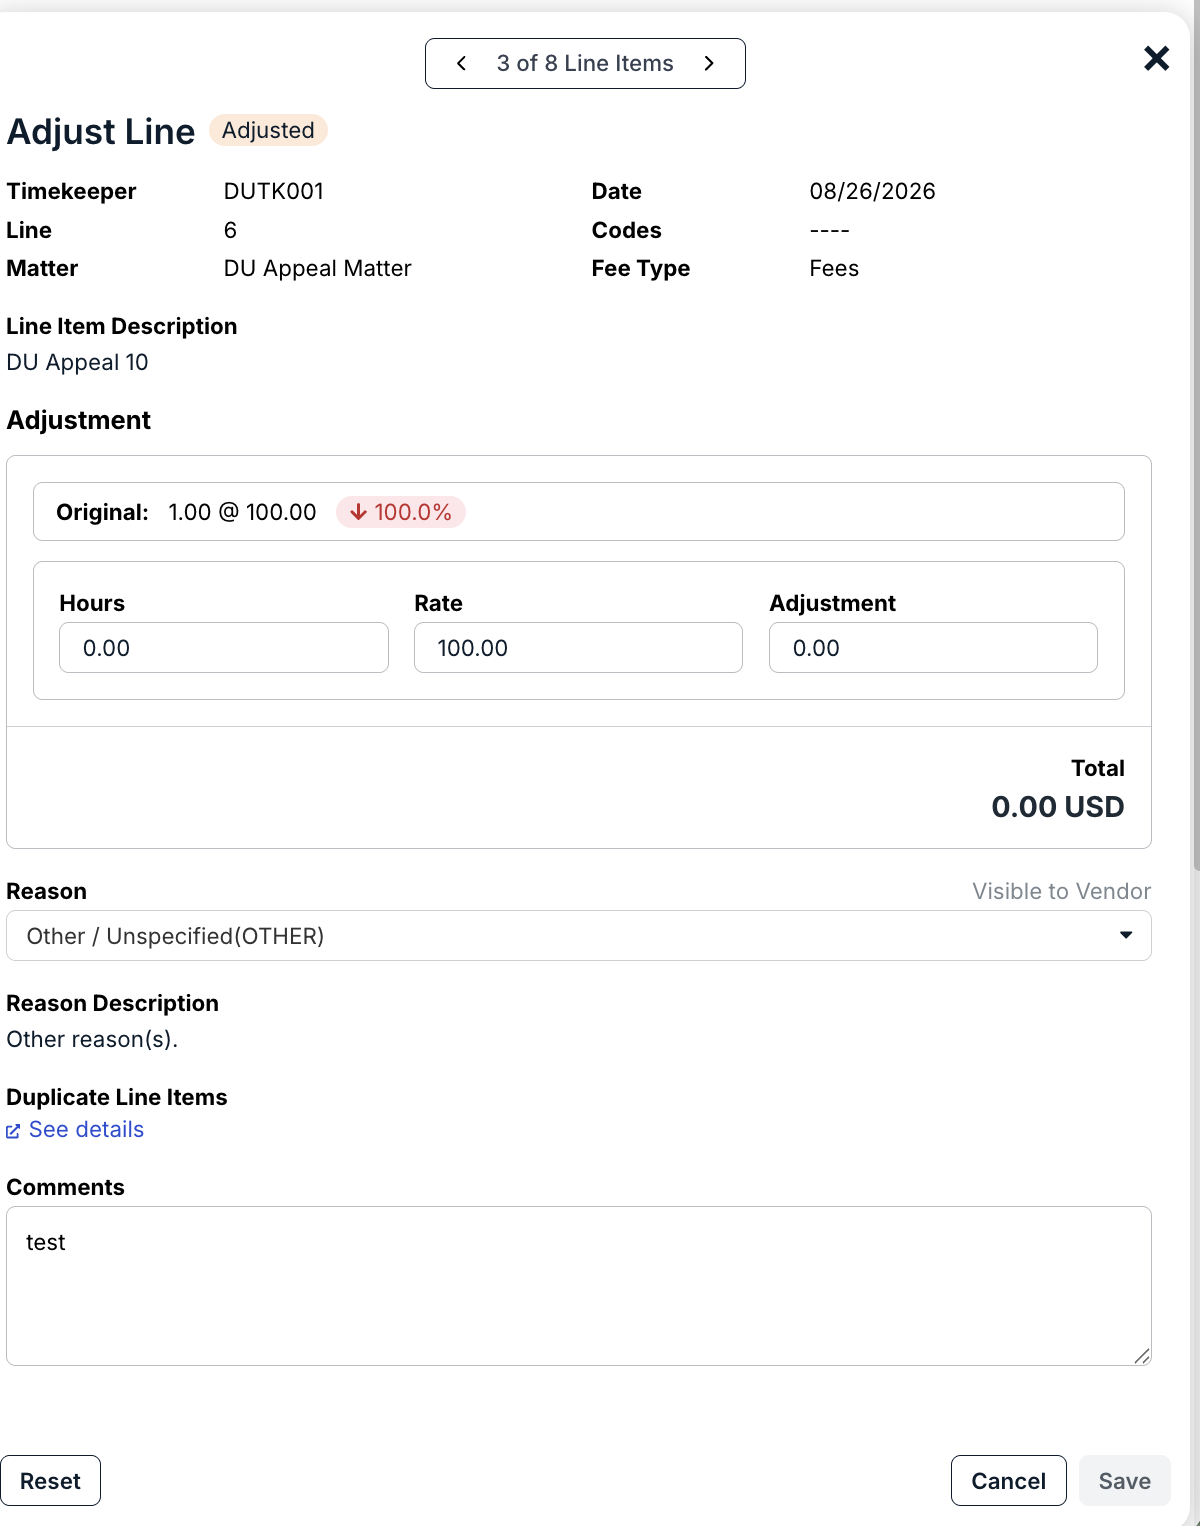
If you click the Edit button, you can adjust individual line items to re-send them back to the vendor. You can also add comments at this stage detailing the changes.
Click Save to save the change, Cancel to back out, or Reset to reset all your changes.
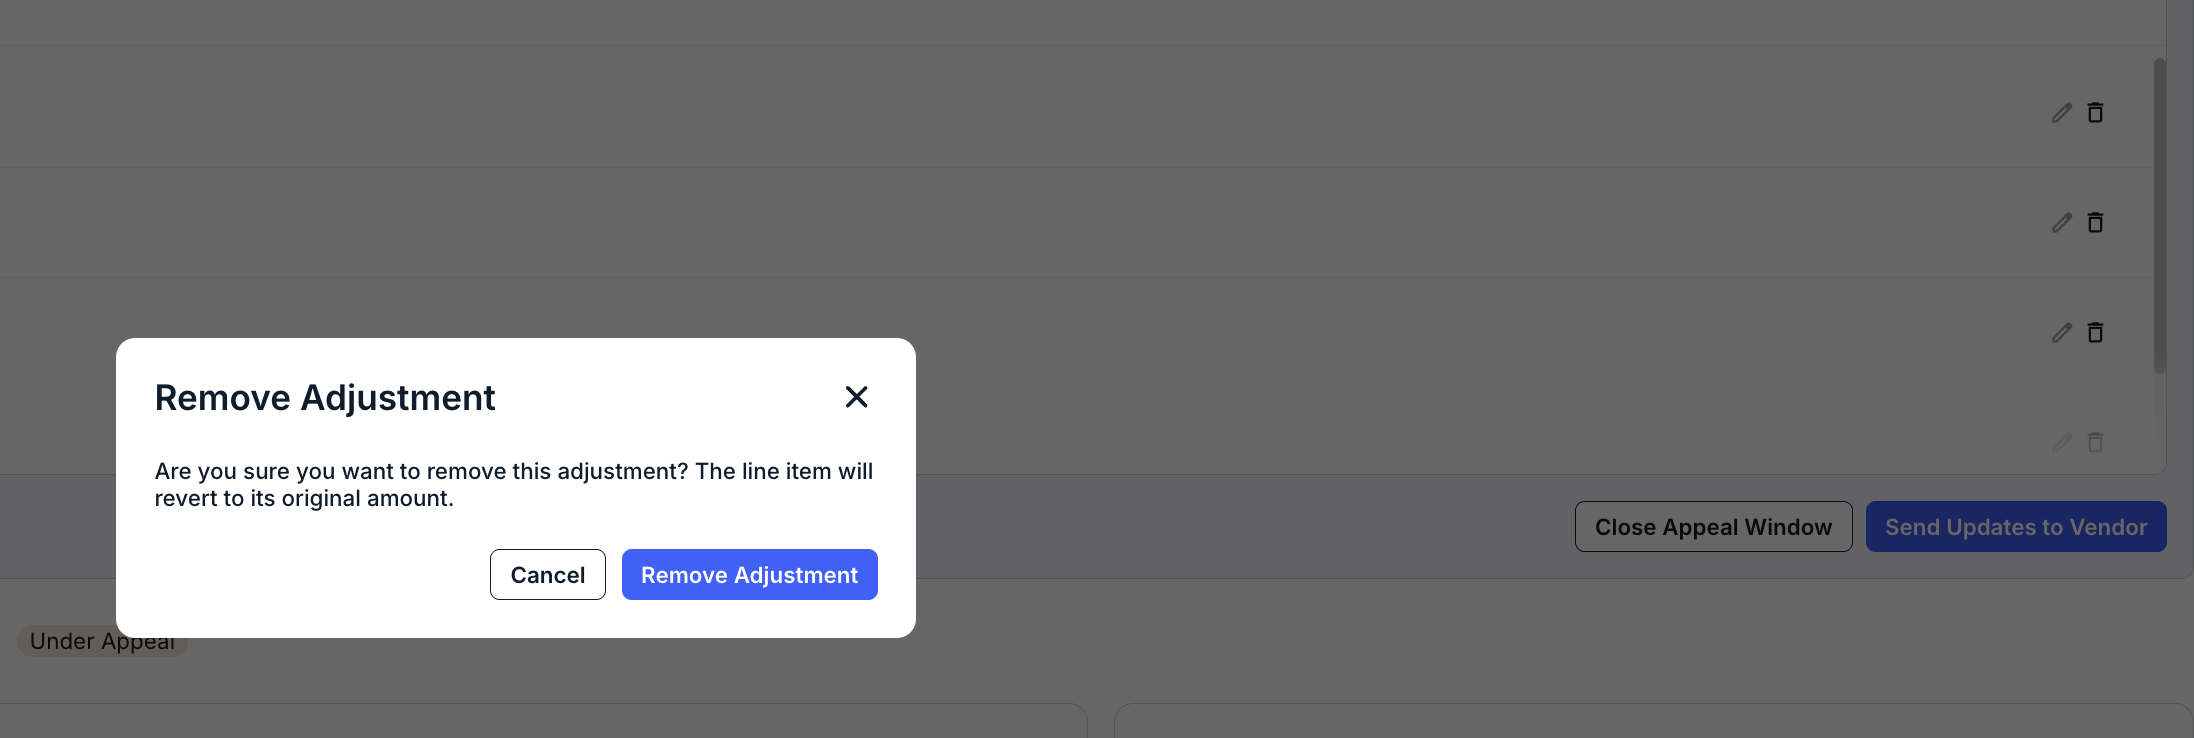
If you agree with their appeal, click the Remove Adjustment line; the line item will revert to the original amount. Click Remove Adjustment to remove the adjustment or Cancel to back out.
View Appeal History will show the full appeal history.
- Once you're done with the appeal, click "Send Updates to Vendor"
Here, you can also choose to Close Appeal Window.
- Repeat the appeals process until both parties are satisfied.
- Once you're done with the appeal, click "Send Updates to Vendor"