Legal Entities are individuals, companies, or organizations that have legal rights and obligations, typically for billing purposes. Invoices can inherit several attributes of this type to help categorize and track spend.
Unity includes two out-of-the-box allocatable attributes: Legal Entities and Cost Codes. On matters, a specific percentage of costs can be assigned among one, both, or none of these attributes. If allocated, this means that invoices submitted against that matter will automatically inherit those allocation settings. For example, 50% of each corresponding invoice's amount can be allocated to Legal Entity A and the other 50% can be allocated to Legal Entity B. How and if allocations are used depend on your organization's needs.
For instructions on how to add or edit allocations at the matter level, click here.
In addition to allocations, Legal Entities can be used across other records as a general attribute, such as vendor records or matters (if added as a field on the associated matter template). Legal Entities appear as a list of values if displayed as a general attribute field.
This article covers the following:
- Legal Entity List Page
- Adding a New Legal Entity
- Exporting Data
- Legal Entity Details Page
- Assigning Legal Entity Reviewers & Followers
- Legal Entity Actions
Legal Entity List Page
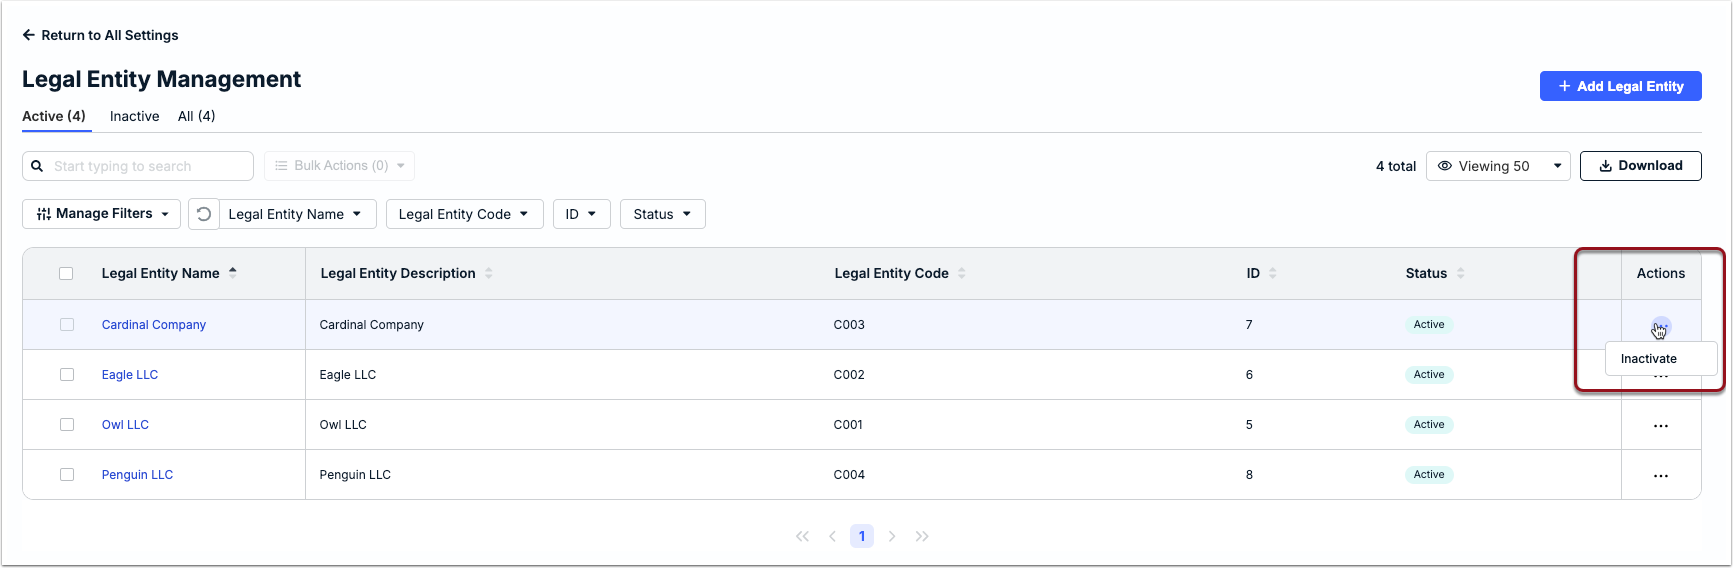
Go to Settings > Legal Entities to view, manage, or add Legal Entities for invoicing and reporting purposes. By default, active Legal Entities are displayed. Use the tabs above to see all or only inactive Legal Entities.
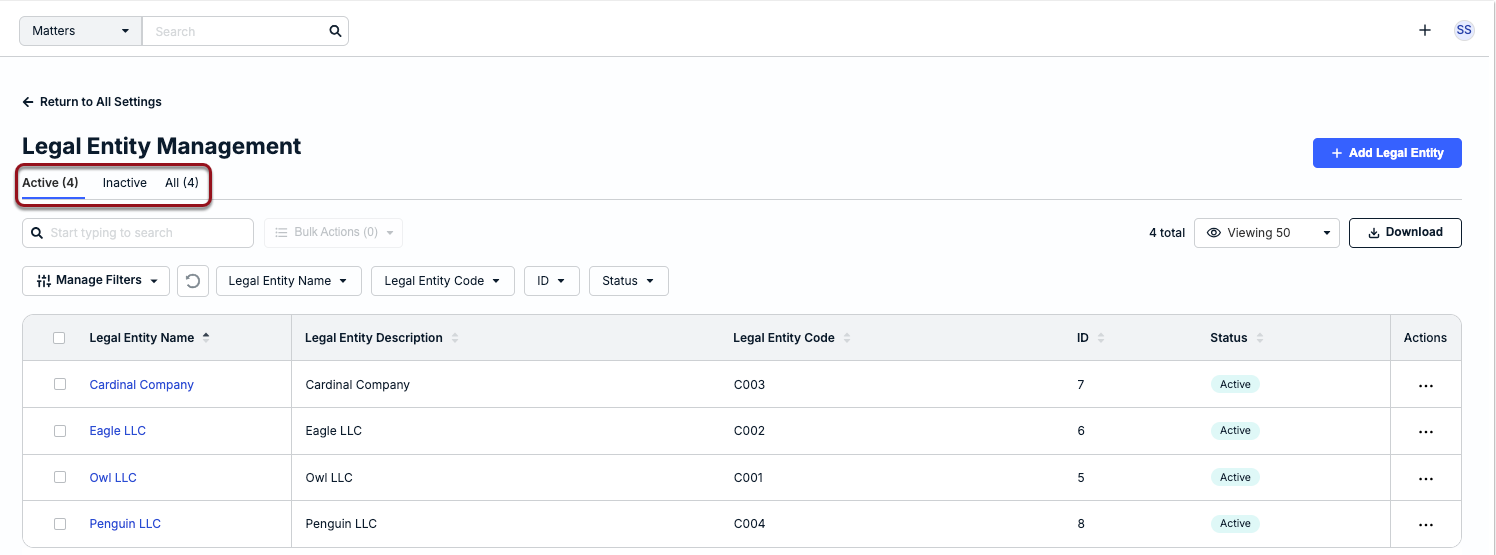
The following default columns of information are listed for each Legal Entity:
- Legal Entity Name: Name as it appears on lists of values for records on which a Legal Entity can be assigned (e.g., matters).
- Legal Entity Description: Notes or brief description to provide context to other users, if provided.
- Legal Entity Code: Accounting code associated with the Legal Entity.
- ID: System-generated number assigned when the Legal Entity was created.
- Status: Whether a Legal Entity is Active or Inactive.
- Actions: Displays ... (more) menu with the following options: Inactivate/Activate and Delete.
You can re-sort the list in ascending or descending order by clicking on any column name. By default, it is sorted by Legal Entity Name in ascending order. You can further narrow or customize this view by using the filters above the table.
Additionally, you can use the Search field above the list to find Legal Entities that match specific keywords, such as a Legal Entity Name or Code.
Adding a New Legal Entity
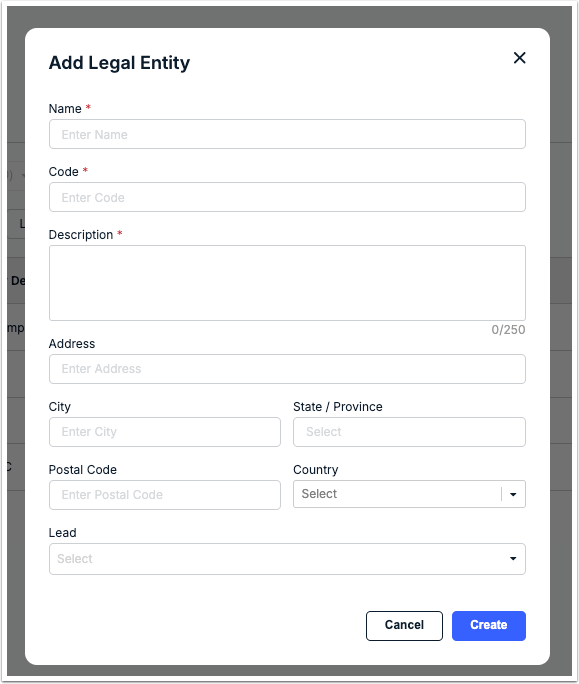
1. Click +Add Legal Entity in the top-right corner.

2. Fill in the requested fields and click Create in the bottom-right corner:
- Name (required): Enter the name as it should appear on lists of values where Legal Entities can be assigned.
- Code (required): Enter the code used for identification purposes.
- Description (required): Enter or edit a brief description to provide context and other important notes for other users.
- Address / City / State/Province / Postal Code / Country (optional): Enter address information for the legal entity, if applicable.
- Lead (optional): Assigning a user as a lead will automatically assign them as the first reviewer for invoices and/or matters associated with the legal entity if your organization is using built-in invoice/matter review rules to automate assignment.
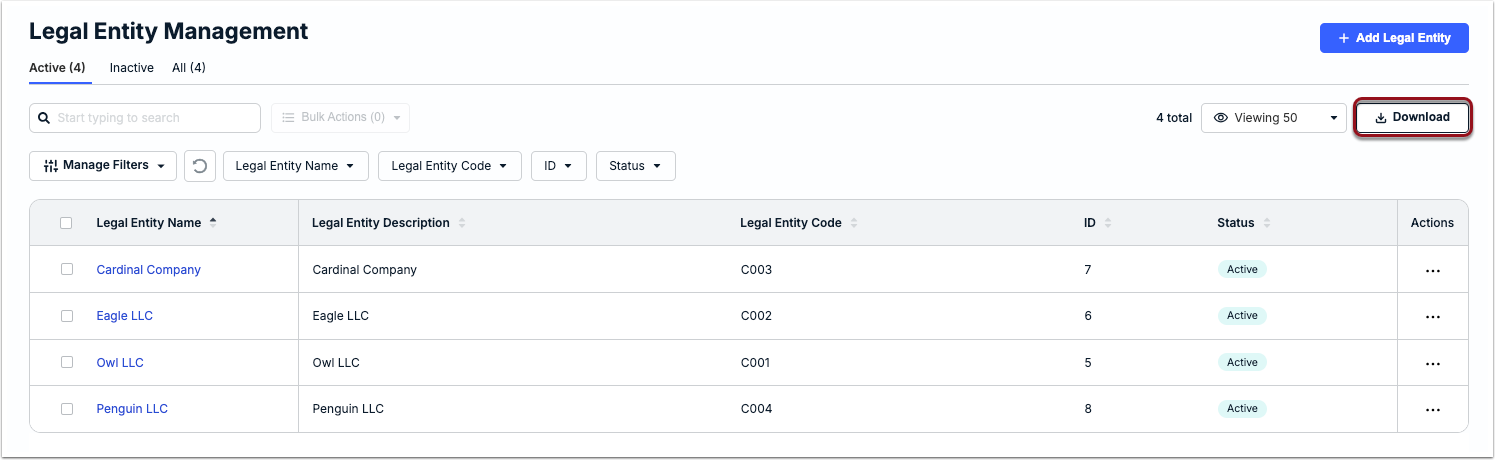
Exporting Data
Click Download above the table to export the current view of your Legal Entity list as an Excel file. This includes the following information: Name, Description, Accounting Code, ID, Legal Entity Status, and a link to each entity's page in Unity ELM.
Legal Entity Details
Follow the instructions below to edit any details.
1. Click on the name from the Legal Entities page.
2. From the Overview tab, hover over the value for a field and click the edit icon, or click + add... to fill in a blank field (see table below for field descriptions).
3. Click the checkmark to save your changes.
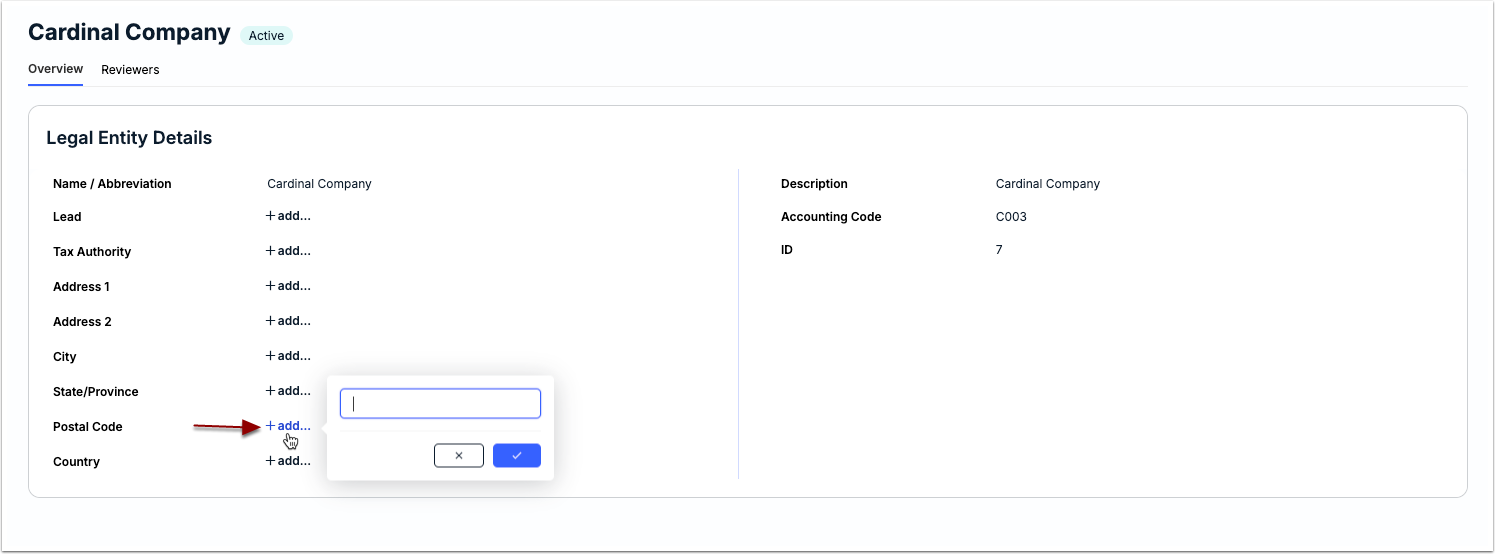
| Field | Description |
|---|---|
| Name/Abbreviation (required) | Name as it will appear in lists of values on records where a Legal Entity can be assigned (e.g., matters, vendors, invoices, etc.). |
| Lead (optional) | First and last name of the user assigned to the Legal Entity; this user is automatically assigned as the first reviewer on the Legal Entity so that they are linked to associated invoices/matters if your organization is using built-in review rules to automate assignment. |
| Tax Authority | Applies if the Value Added Tax (VAT) functionality is enabled in your organization. Select a tax authority to indicate who vendors are billing, if applicable. |
Address 1 Address 2 City State/Province Postal Code Country | Fill in or change the Legal Entity address, if applicable. |
| Description (required) | Enter or edit a brief description of up to 250 characters, including spaces, to provide context and other important notes for other users. |
| Accounting Code (required) | Code used for other identification purposes. |
| ID | System-generated number assigned when the Legal Entity was created. |
| Custom Attributes | If there are any custom attributes scoped to Legal Entity records, they will be displayed on the right side of the Overview tab. |
Legal Entity Reviewers & Followers
Users and/or User Teams can be assigned as reviewers to a Legal Entity so that they are automatically assigned as reviewers on associated matters and/or invoices. This applies if your organization is using Onit's built-in Invoice Review Rules and/or Matter Review Rules for automated assignment.
In addition to reviewers, admins can also assign internal users as followers if they need to remain informed of billing activity associated with the Legal Entity but do not need to review or approve the invoices.
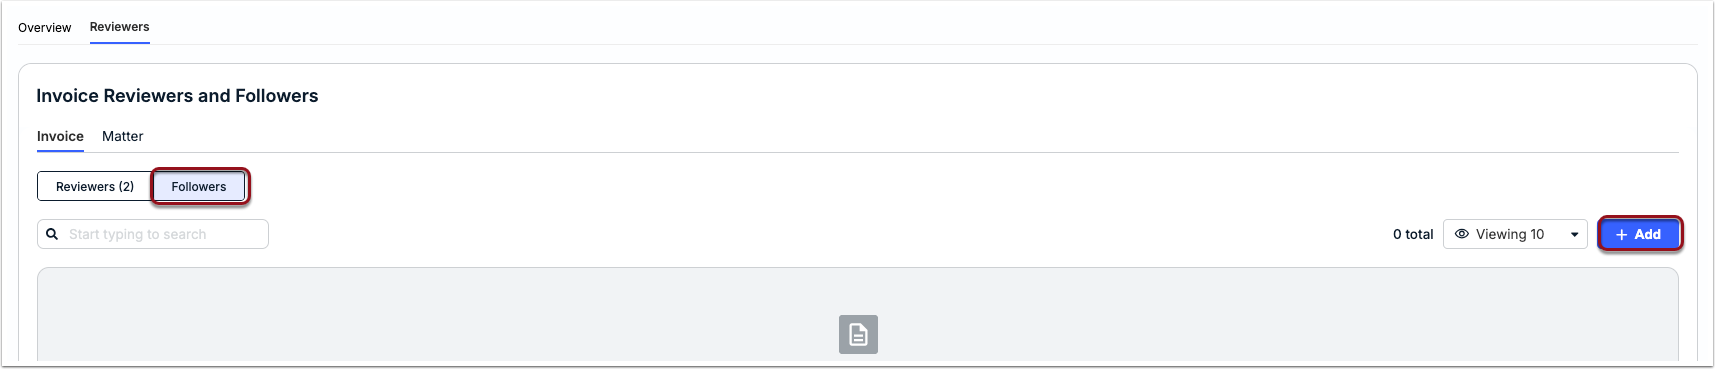
To assign reviewers and/or followers, switch to the Reviewers tab from the legal entity details page:
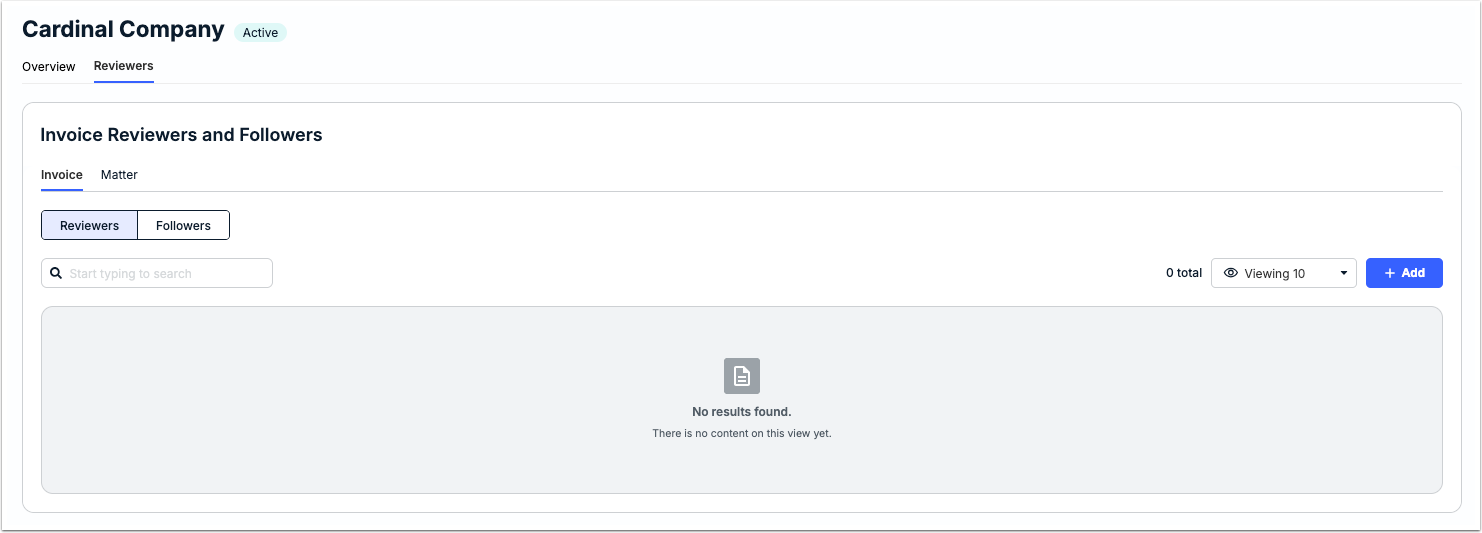
The Reviewers and Followers sub-tabs are separated into two sections: Invoice and Matter. This means you can assign reviewers and followers so that they are linked to all invoices submitted directly against the Legal Entity or to invoices submitted only against matters associated with the Legal Entity. For additional information about reviewers and followers in Unity, click here.
Reviewers
1. From the Invoice or Matter section of the Reviewers sub-tab, click + Add.
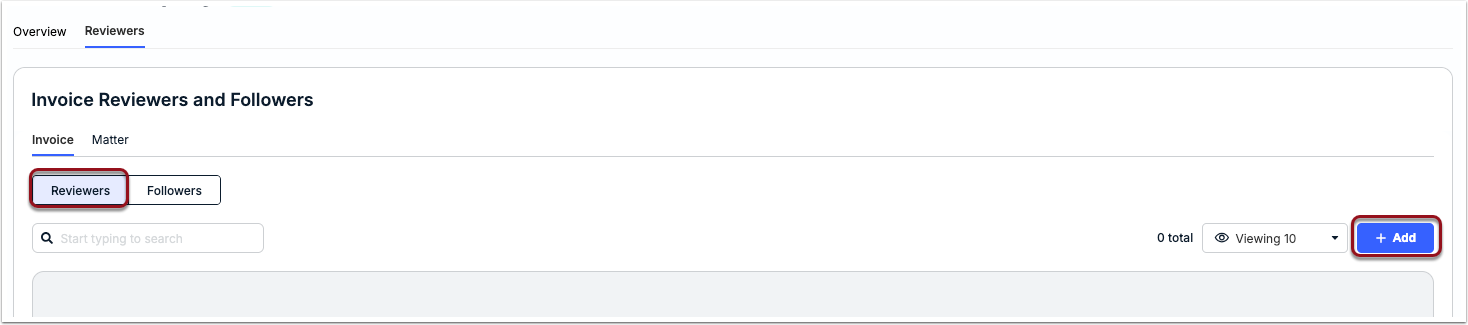
2. Select All of or Any of to indicate reviewer requirements for the first level.
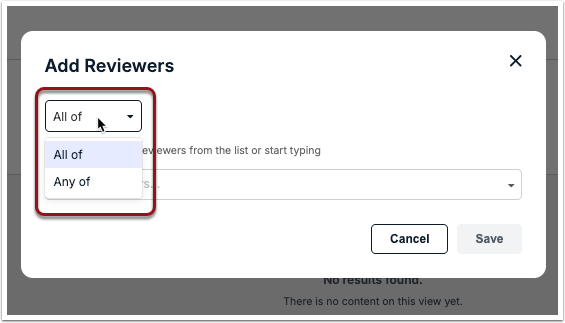
3. Select one or more users or user teams from the dropdown list and then click Save.
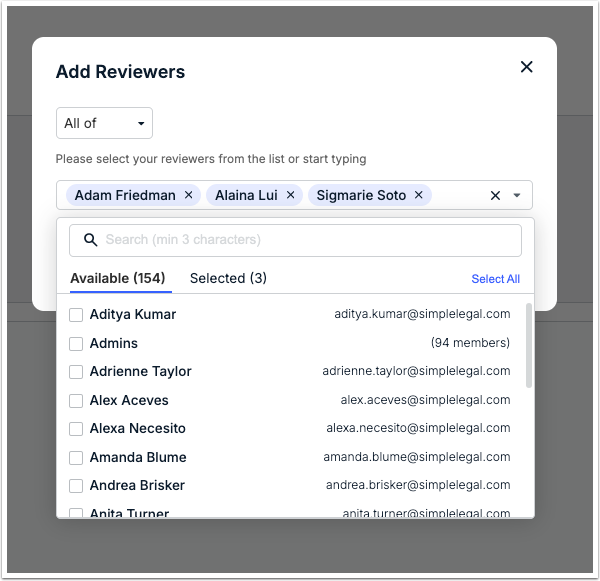
4. To add another level of reviewers, repeat steps 1-3.
Followers
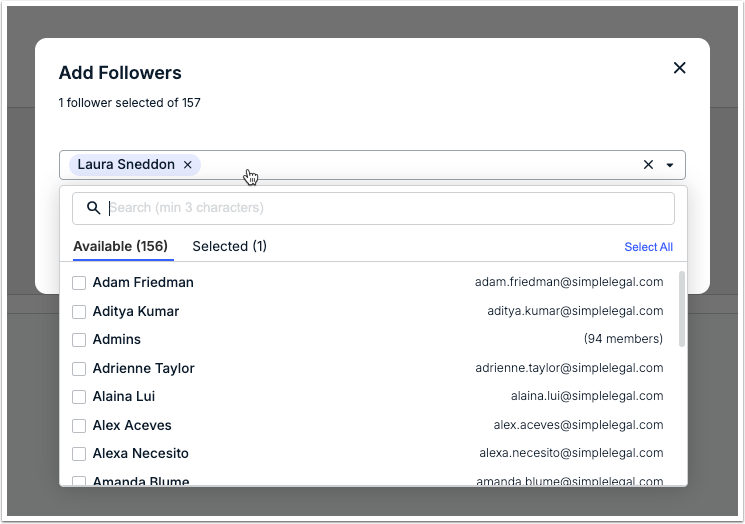
1. Switch to the Followers sub-tab and click + Add from the Invoice or Matter section.
2. Select one or more users or user teams from the dropdown list and then click Save.
Legal Entity Actions
From the Settings > Legal Entities page, you can manage individual entities or apply bulk actions.
Individual Legal Entity
Click the ... (more) option under the Actions column and select Inactive or Activate. Confirm when prompted.
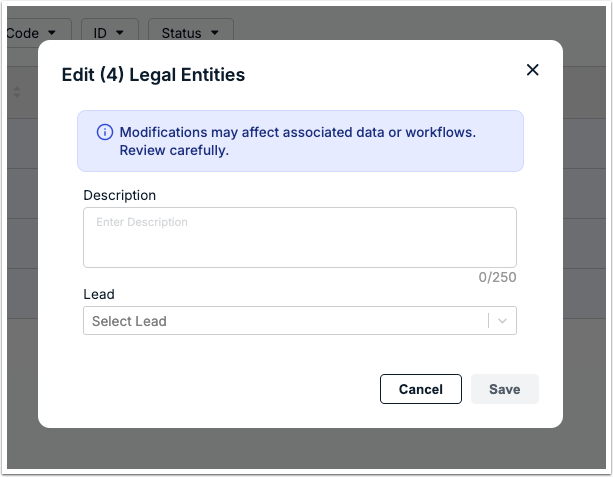
Bulk Actions
Select boxes for Legal Entities on the left side of the table and then click Bulk Actions. You can apply the following bulk actions: Activate/Inactivate or Edit.

Selecting Edit opens a window to modify the following fields: Description and Lead. Click Save to apply the changes across all selected Legal Entities.