Our Vendor Collaboration feature makes it easier and quicker for legal departments and outside counsel to communicate and share information directly from Unity and Counsel Exchange. This transitions the outdated back-and-forth email method to a more secure, controlled, and centralized system. Through this approach, legal departments and vendors can minimize delays and streamline how they collaborate.
Vendor Collaboration has three key components:
- General File Sharing: Allows sharing of general files between customers and vendors via Unity and Counsel Exchange, such as billing guidelines and other standard documentation not associated with specific matters. This can be shared with individual vendors and in bulk.
- Matter File Sharing: Allows sharing of files between customers and vendors via Unity and Counsel Exchange for specific matters. Gives granular control over access to sensitive information and versioning by allowing users to share files with only specific contacts.
- Matter Updates: Allows customers and vendors to post comments/notes about specific matters and receive responses via Unity and Counsel Exchange in real time from matter records.
Vendor Collaboration Roles for Counsel Exchange Users
To ensure robust access control and data protection, in-house legal teams must grant the relevant permissions to at least one contact with Counsel Exchange access from specific vendors. The roles described below must be assigned to enable the relevant collaboration functionality in Counsel Exchange.
| Role | Permission |
|---|---|
| General File Sharing | User can see files shared specifically with them in Counsel Exchange and can also share files on behalf of their firm. These files are tied to the vendor record; not a specific matter. |
| Matter File Sharing | User can see files shared specifically with them for a particular matter and can share files for a particular matter on behalf of the vendor |
| Matter Updates | User can see updates shared by the customer with the firm in the Counsel Exchange for a specific matter and can post/respond to updates. |
To assign one or more of these roles to an existing Counsel Exchange user:
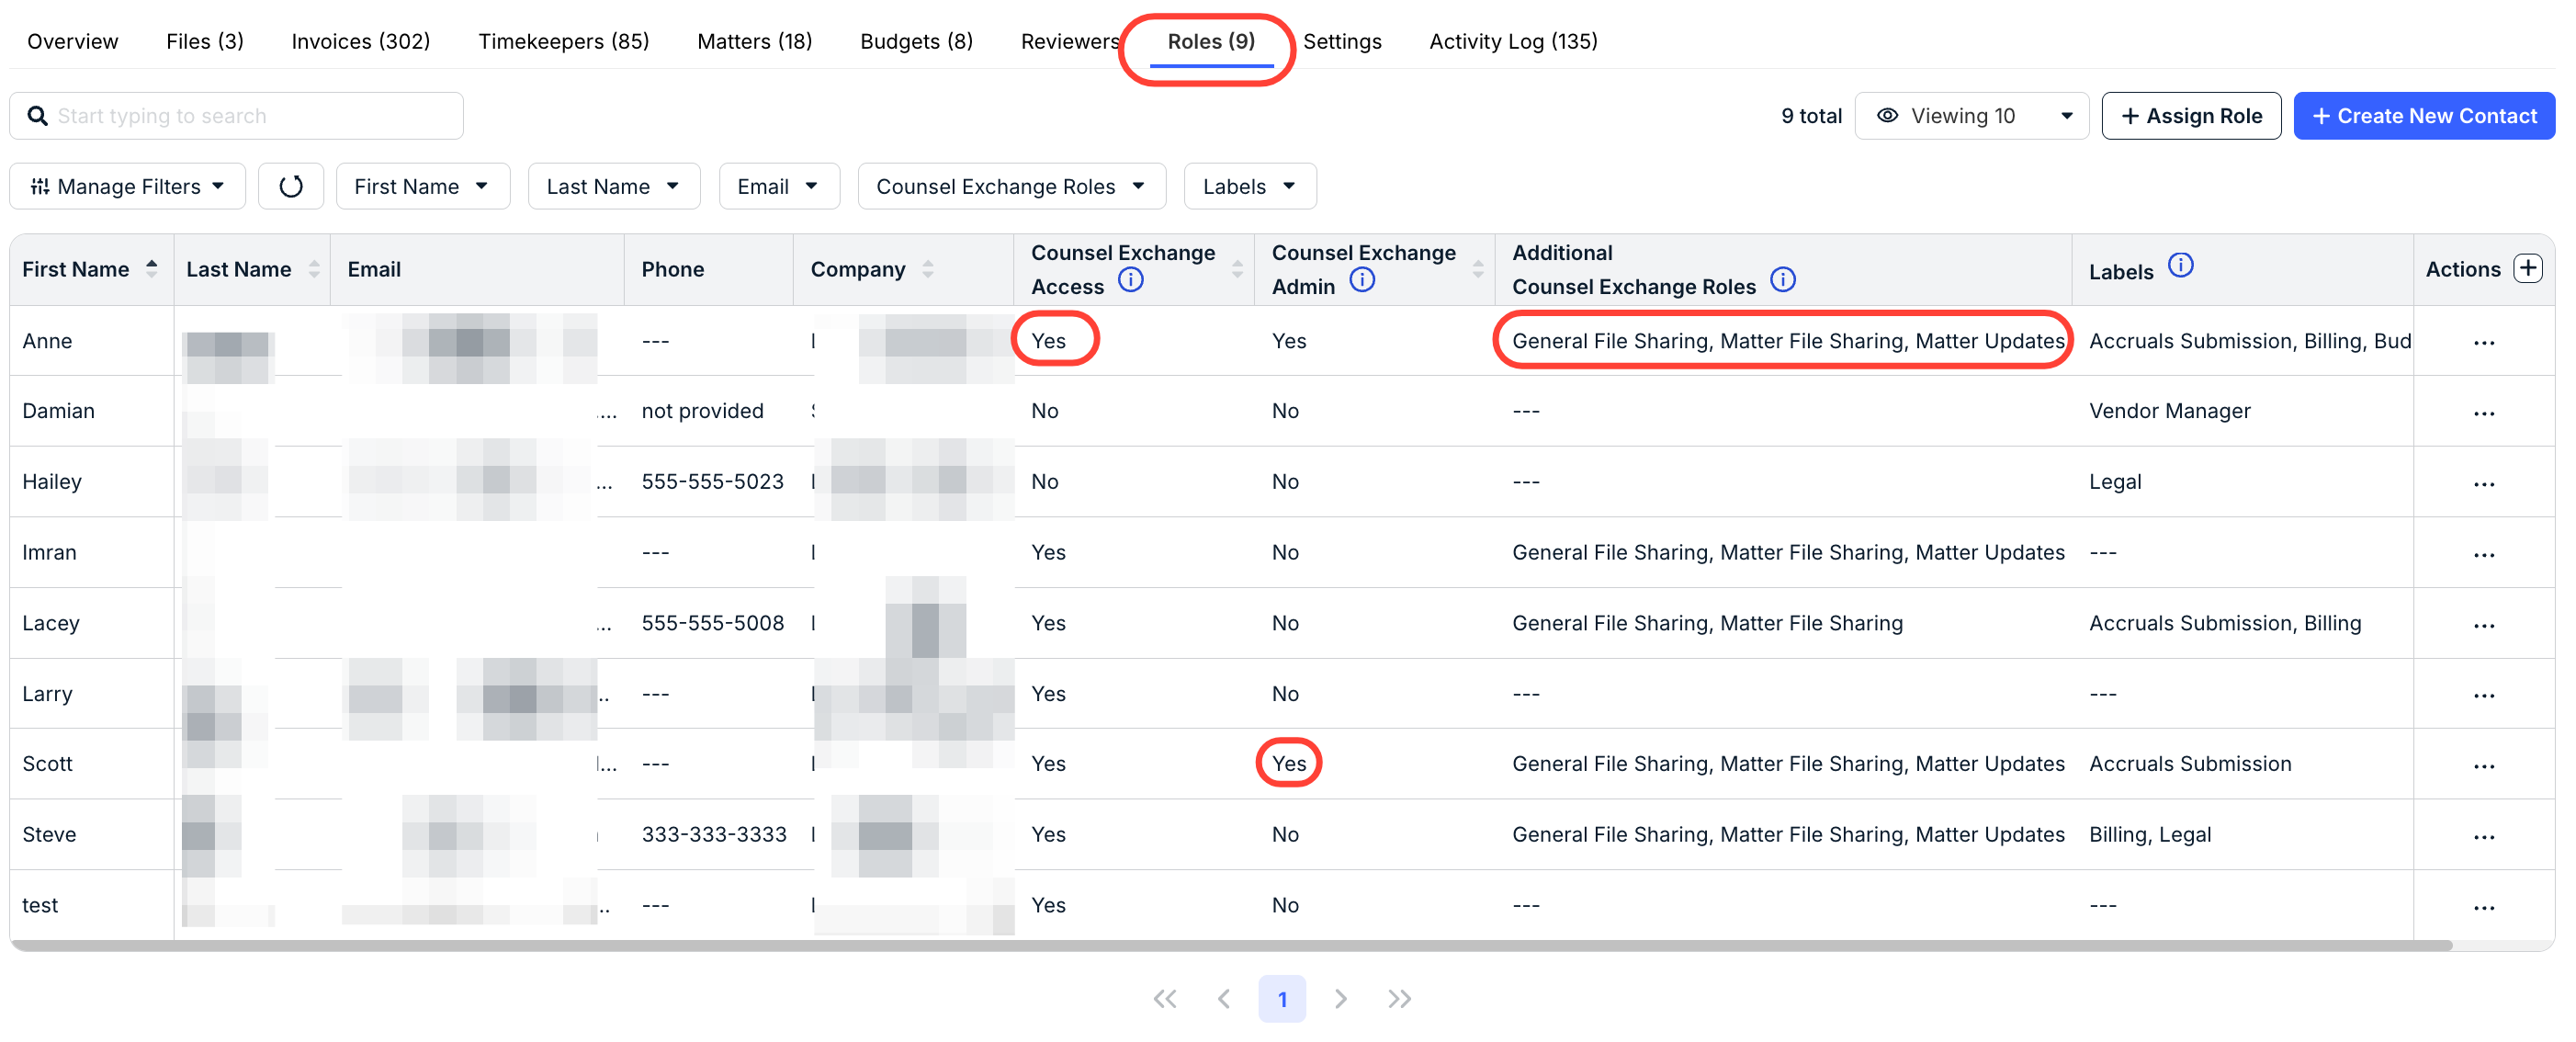
1. Open the vendor record and go to the Roles tab. This page allows you to see a user's current Counsel Exchange Access and Counsel Exchange Admin status, along with the Counsel Exchange Roles they are assigned.
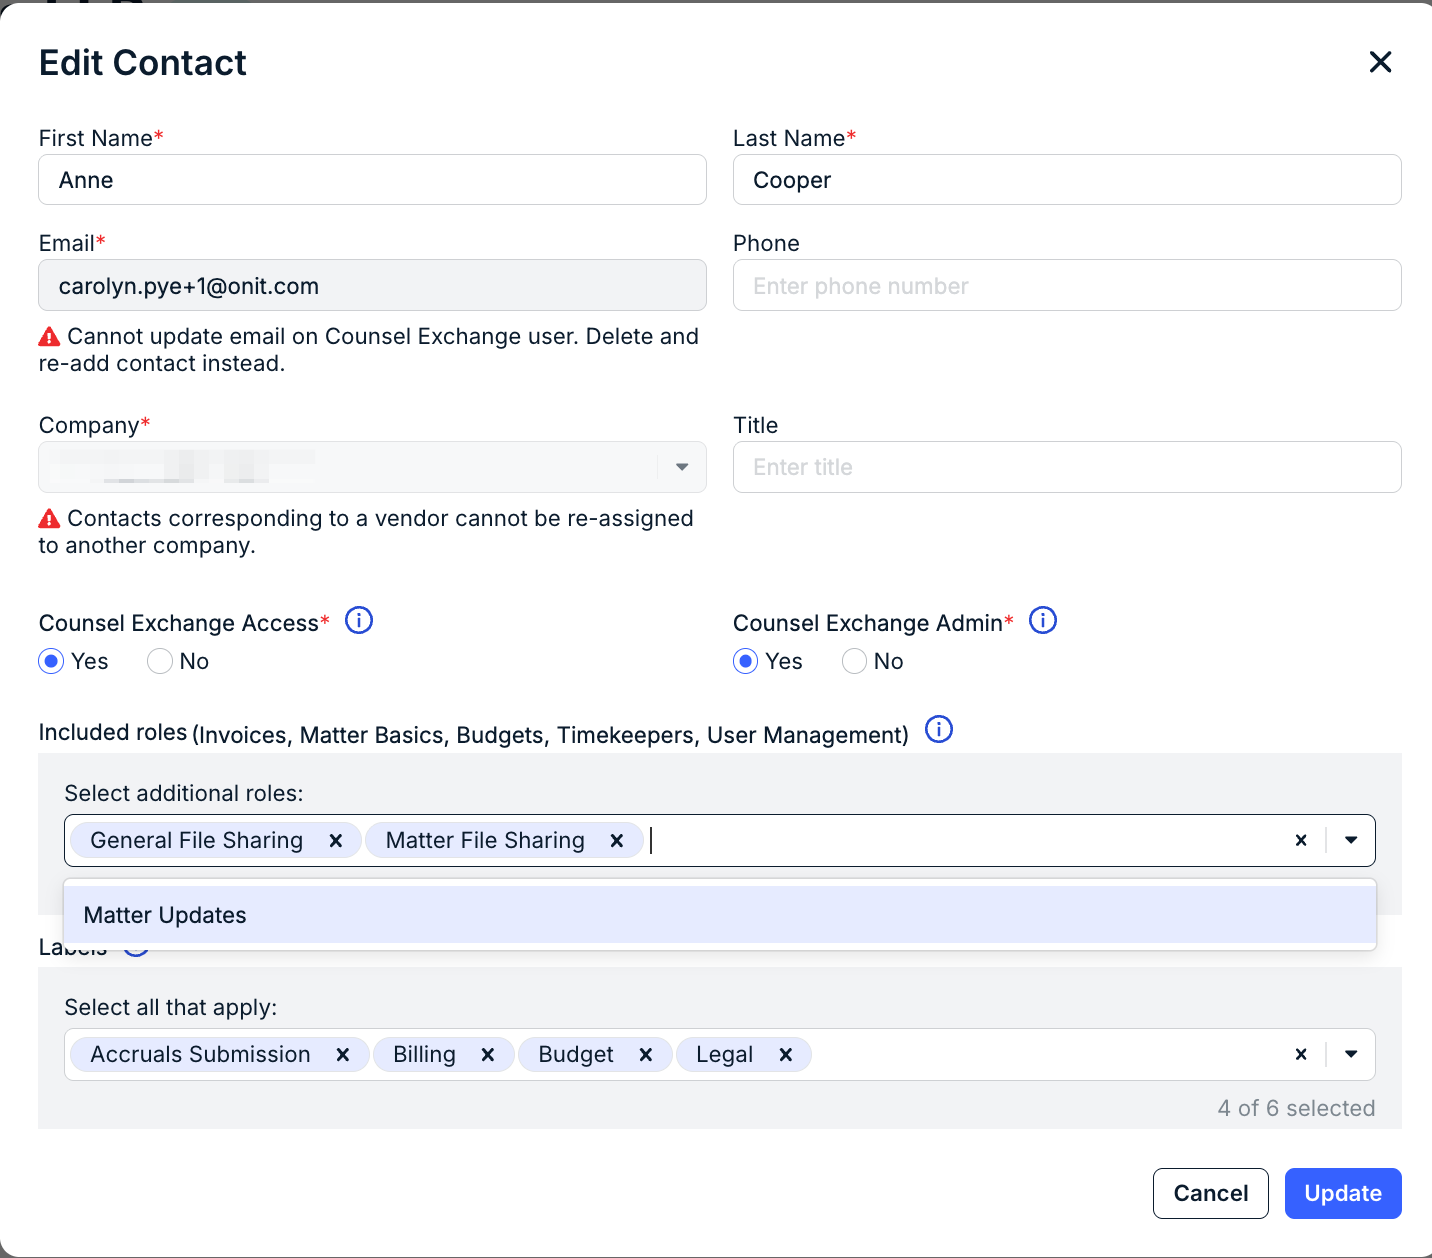
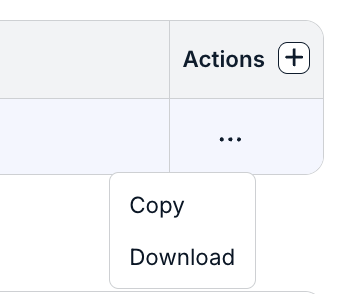
2. Click on the ... (more) option under the Actions column and select Edit.

3. Choose the desired roles under Select additional roles and then click Update.
General File Sharing
To ensure data protection and access control, general files must be shared with specific Counsel Exchange contacts. Sharing a file with one user does not mean that the other contacts with the general file sharing role from that firm will automatically have access to it.
Sharing General Files with Vendor Users
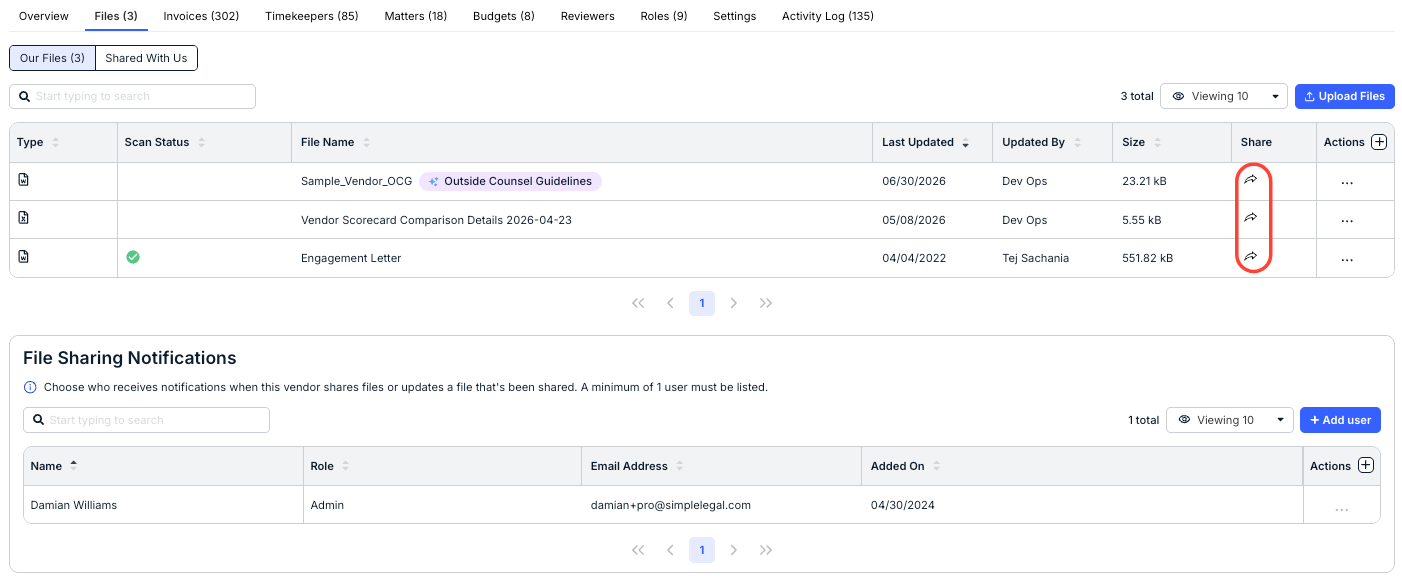
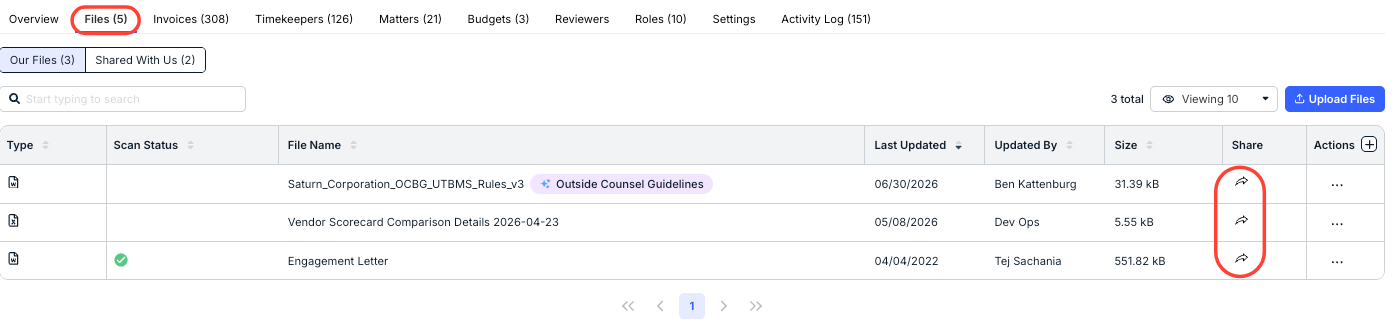
1. Open the vendor record and go to the Files tab.
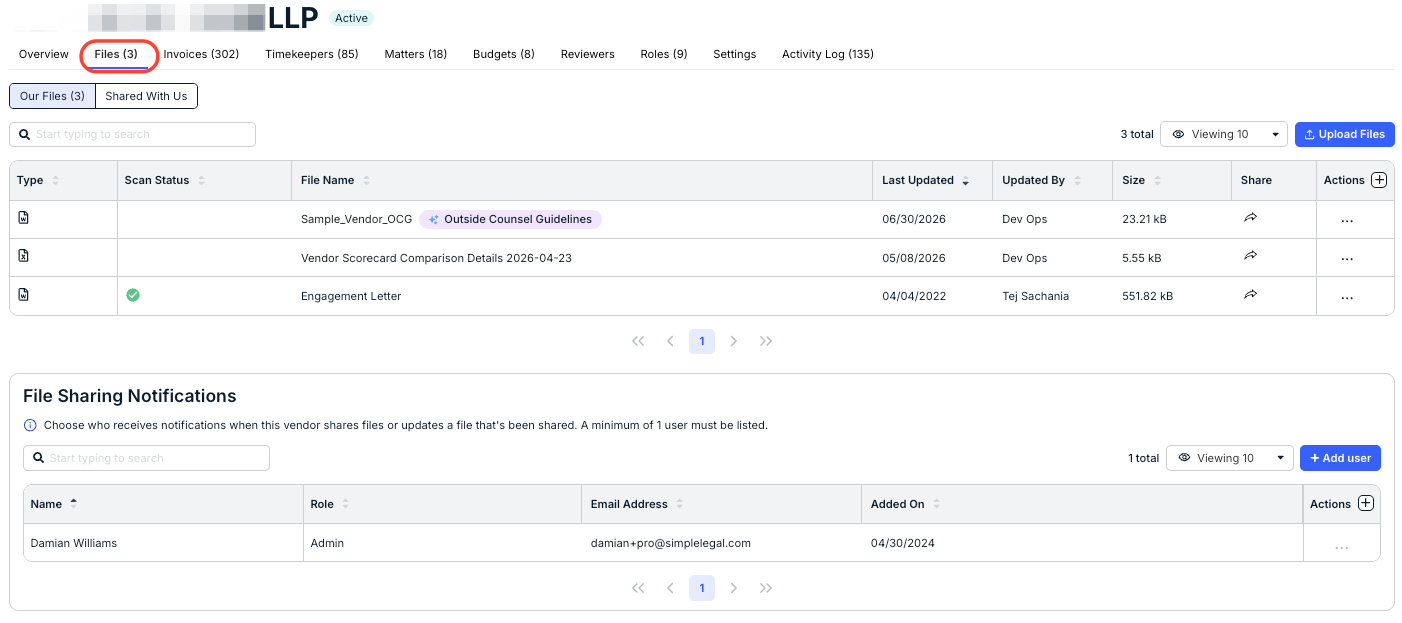
2. From the Our Files sub-tab, find the file you want to share or click Upload File to add a new file.
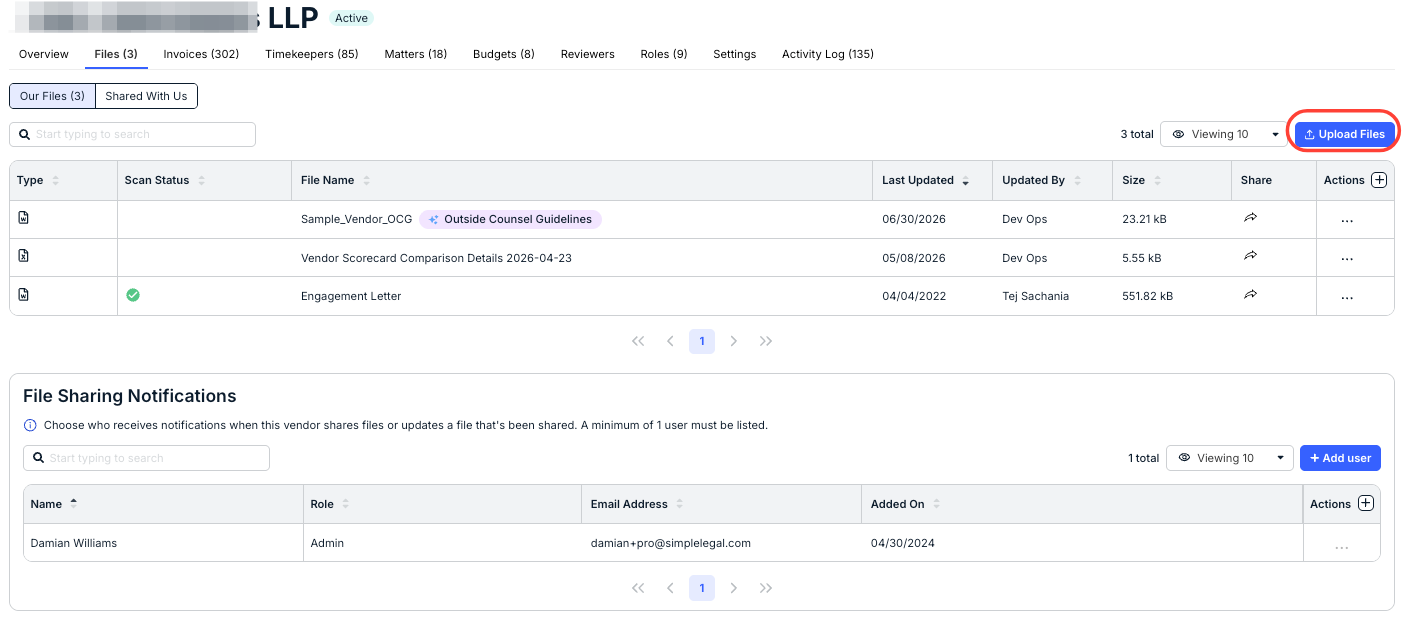
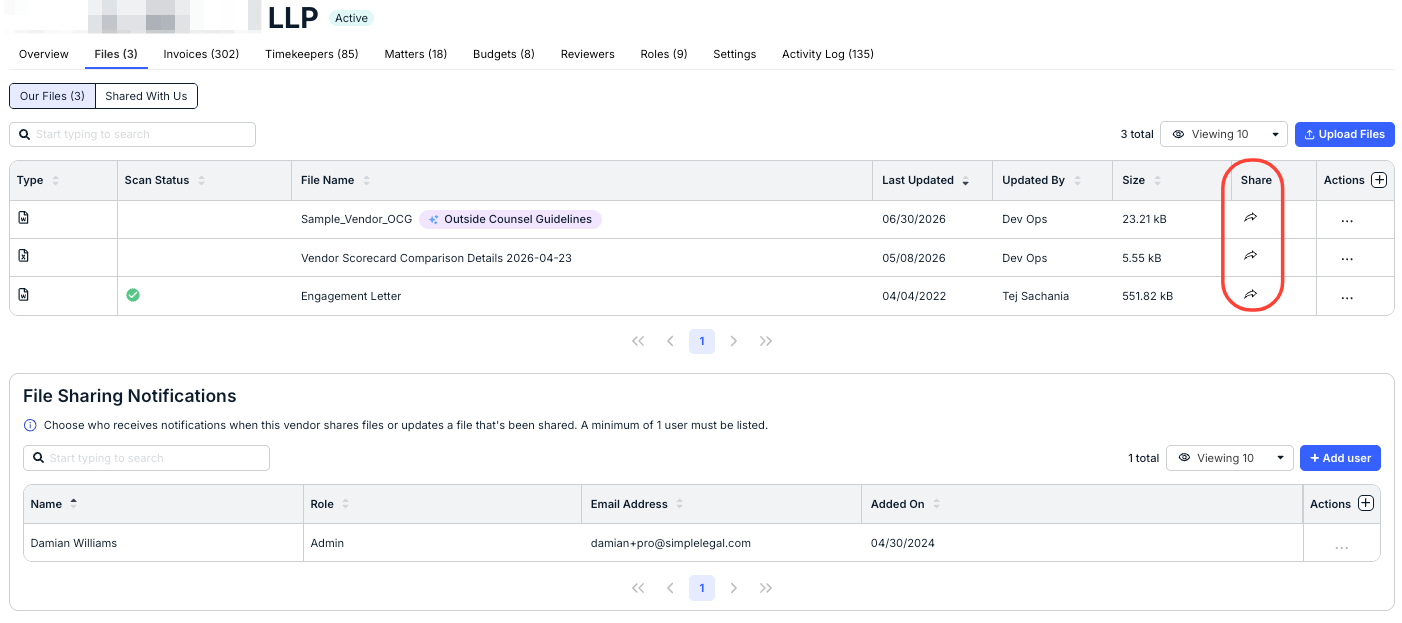
3. Click the icon under the Share column.
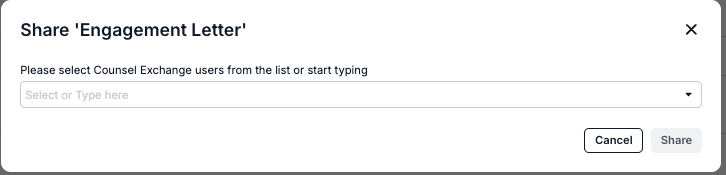
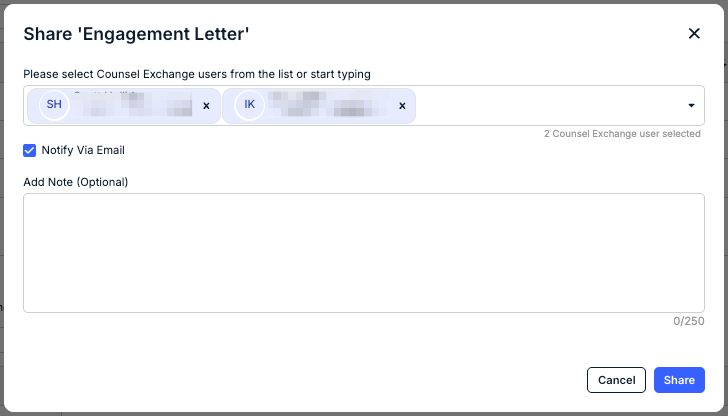
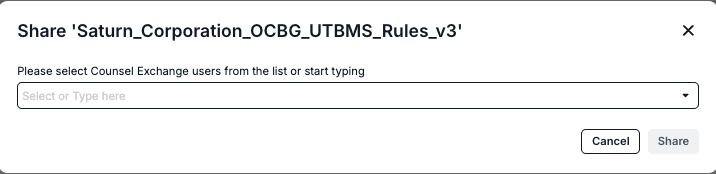
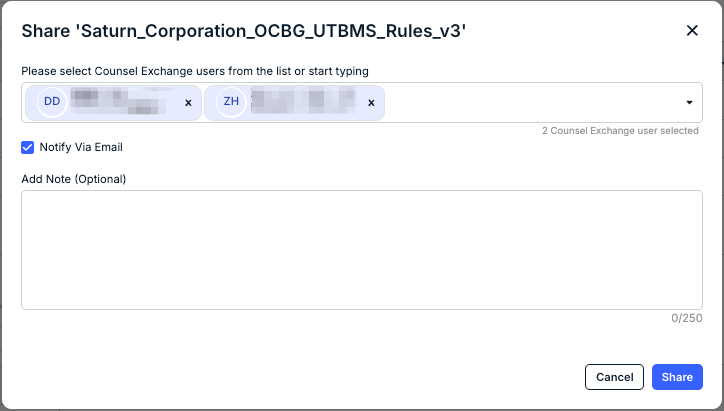
4. Select one or more vendor contacts, or start typing a name/email address to narrow the list.
5. Leave the Notify via Email option selected to trigger a notification (optional).
6. Enter a note or other details (optional) and click Share.
Unsharing a General File
1. Find the shared file under Files > Our Files in the vendor record.
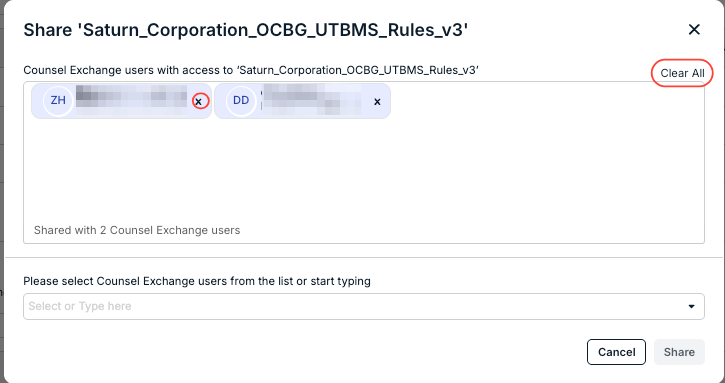
2. Click the blue icon under the Share column.
3. Click the x next to a user's name, or click Clear All to stop sharing with all specified users.
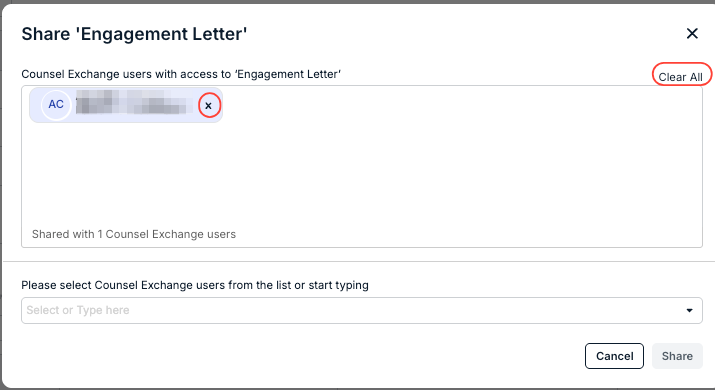
4. Click Save in the bottom-right corner the file sharing settings.
This means the user(s) will no longer be able to access the file from Counsel Exchange and will receive an email notification that the file is no longer being shared. You can re-share a file at any time by following the steps in the section above.
Reviewing Files Shared by a Vendor
To see general files shared by users from a firm, go to the Files tile in the record and switch to the Shared With Us sub-tab.
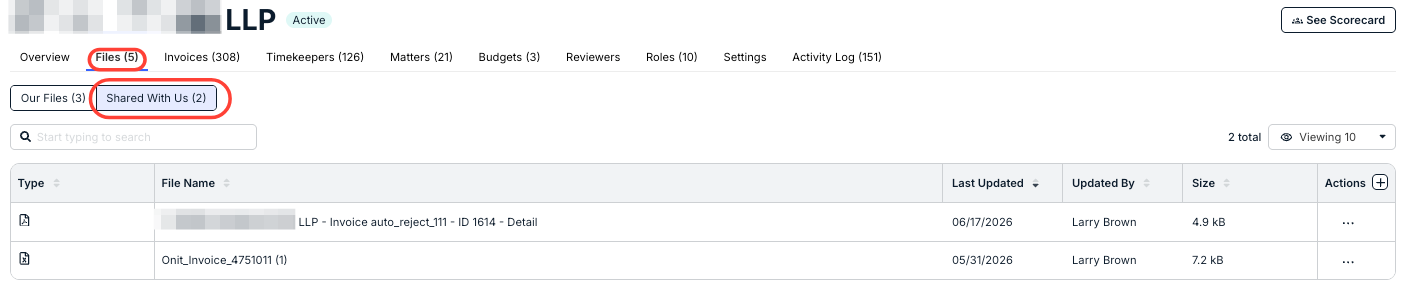
To view the file, click the... (more) option under the Actions column and select Download.
General files shared by a vendor cannot be renamed, deleted, or otherwise modified. If you need to make any changes for your records, use the Copy option to duplicate it under the Our Files tab.
General File Sharing Email Notifications
At least one Unity user with access to the vendor record should be designated to receive email notifications for general file sharing activity by Counsel Exchange users per the instructions below.
1. Open the vendor record and go to the File Sharing Notifications section under the Files tab.
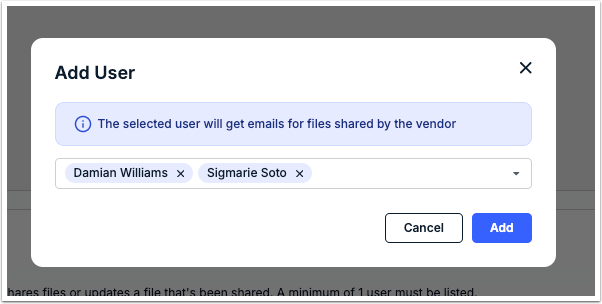
2. Click Add User in the top-right corner.
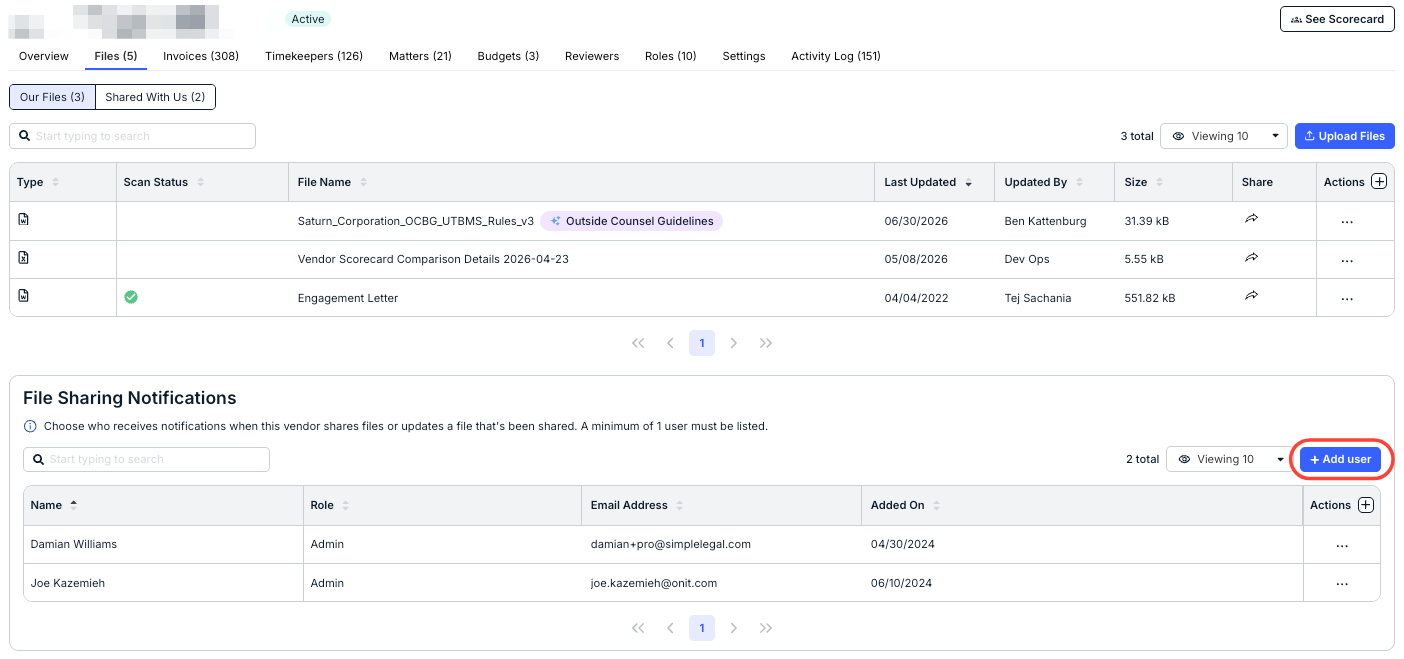
3. Select one or more Unity users, or start typing a name/email address to narrow the list; click Add.
General File Sharing in Bulk
Customers also have the option to share general files in bulk with selected vendors. These files are not associated with specific matters and can include billing guidelines and other standard documentation that need to be sent to vendors who are supporting your legal department.
Notes and Other Considerations
- Only active vendors who have Counsel Exchange access and at least one user with General File Sharing permission can be selected for general file sharing in bulk.
- General files shared in bulk will be shared with all Counsel Exchange users who have General File Sharing permission from each vendor. If you only want to share general files with specific users from a vendor, consider sharing the file from the vendor record.
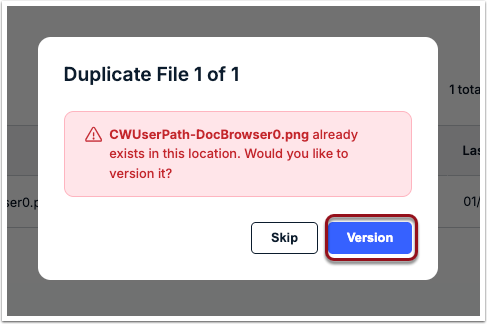
- If you bulk share a general file that has already been shared previously with one or more vendors (i.e., same file name), the file shared in bulk will overwrite the existing file in Counsel Exchange.
- When you upload a file for bulk sharing, it will still need to go through the virus scan in Unity. It will be shared with selected vendors once it passes the scan.
- Counsel Exchange users with the General File Sharing permission from selected vendors will receive an automated email notification that a file has been shared.
To share a file in bulk:
1. Go to Vendors from left navigation bar and click the Bulk Share Files button above the list.

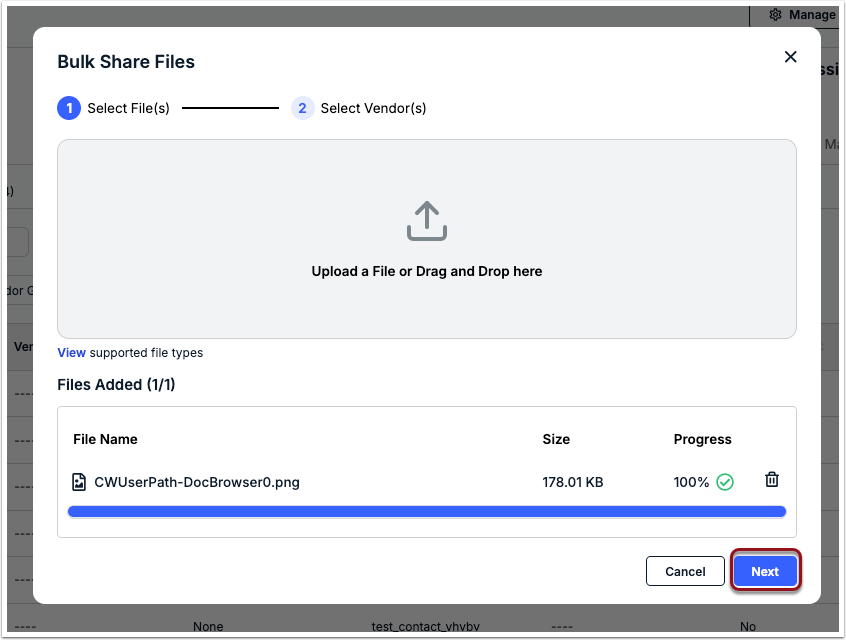
2. Click within the upload box or drag and drop one or more files into the window.
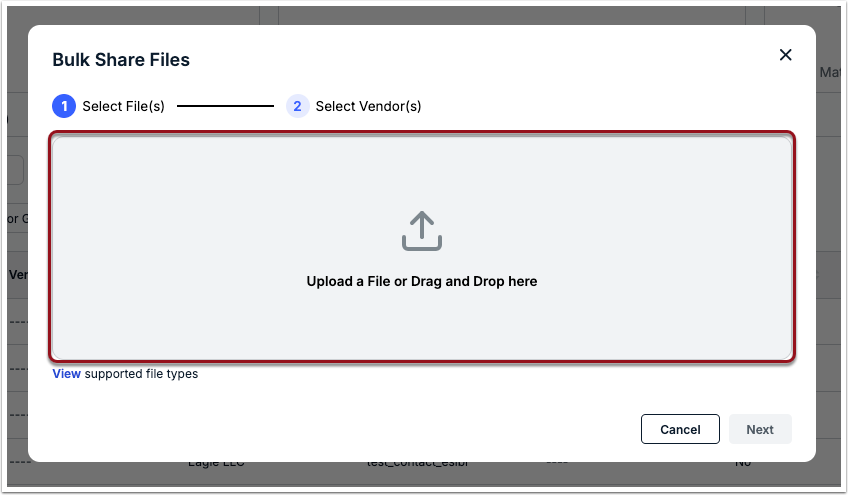
3. Click Next in the bottom-right corner.
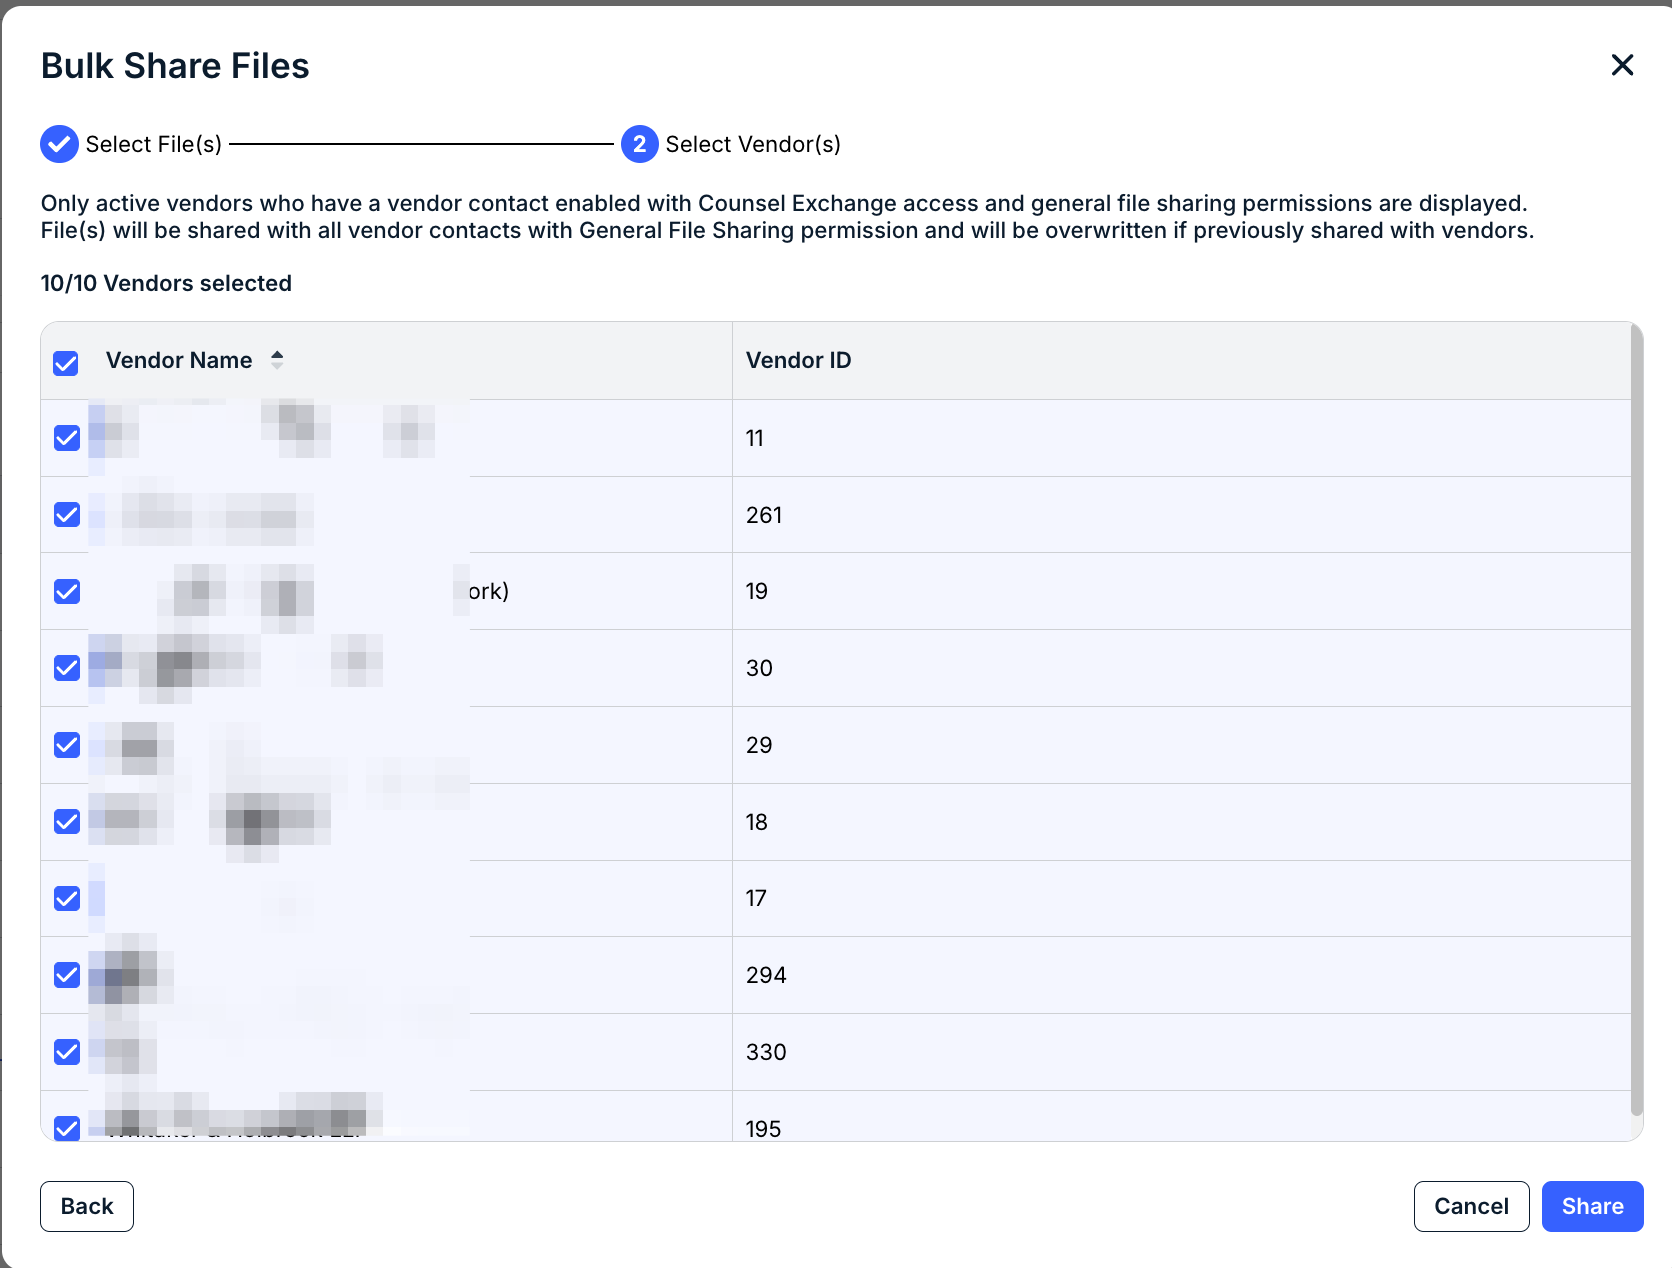
4. All eligible vendors for bulk sharing are selected by default; review the list and de-select names as needed.
5. Click Share in the bottom-right corner.
The shared file(s) will also appear under the Files tab of the individual vendor records in Unity. You can manually unshare or take other actions for the file(s) from there.
Matter File Sharing
To ensure data protection and access control, matter files must be shared with specific Counsel Exchange contacts. Sharing a file with one user does not mean that the other contacts with the matter file sharing role from that firm will automatically have access to it.
Sharing Matter Files with Assigned Vendors
1. Open the matter record and go to the Files tab.
2. Find the file you want to share or click Upload File to add a new file.
3. Click the icon under the Share column.

4. Select one or more Counsel Exchange contacts, or start typing a name/email address to narrow the list.
5. Leave the Notify Via Email option selected to trigger a notification (optional).
6. Enter a note or other details (optional) and click Share.
Unsharing a Matter File
1. Find the shared file under the Files tab of the matter record.
2. Click the blue icon under the Share column.
3. Click the x next to a user's name, or click Clear All to stop sharing with all specified users.
4. Click Save to update the file sharing settings.
This means that the user(s) will no longer be able to access the file from the matter in Counsel Exchange and will receive an email notification that it is no longer being shared. You can reshare a matter file with users at any time by following the steps in the section above.
Reviewing Matter Files Shared by a Vendor
To see matter files shared by Counsel Exchange users from assigned vendors, go to the Files tab in the matter record and switch to the Shared With Us tab.

To view the file, click the... (more) option under the Actions column and select Download. You also have the ability to Copy the file under the Actions menu.
Matter files shared by a vendor cannot be renamed, deleted, or otherwise modified. If you need to make any changes for your records, use the Copy option to duplicate it.
Uploading an Updated Version of a Matter File
If you need to upload an updated version of a previously shared matter file, it must have the same name and file type. When uploading the updated file, you have the option to share it with the same Counsel Exchange users who currently have access or share it at a later time.
To upload an updated matter file and manage sharing:
1. Go to the Files tab in the matter record.
2. Click the... (more) option under the Actions column for the file and select Add New Version.

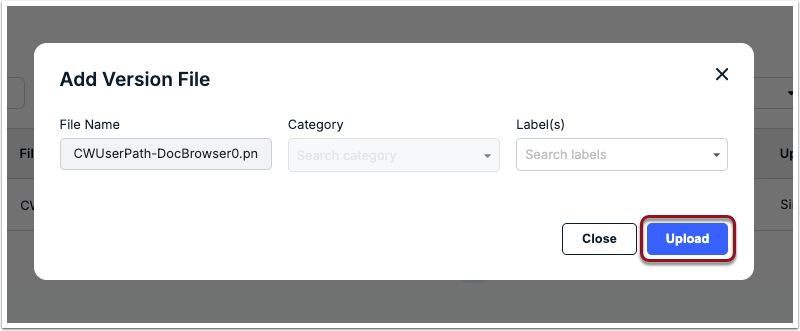
3. Choose the relevant file (REMINDER: it must have the same name and file extension).
4. Assign a Category or Label(s), if applicable, and then click Upload.
5. Choose Past Collaborators to share the updated file with the same Counsel Exchange users who currently have access, or choose New Collaborators to continue without sharing the file and share it a later time.
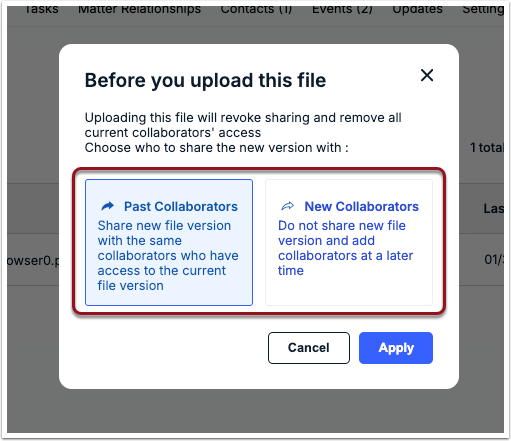
6. Click Apply.
If you chose to share with current collaborators, the relevant Counsel Exchange users will be notified via email that the file has been shared. You can check the Version column under Files > Our Files in a matter record to see the current version number for each file.
Matter File Sharing Email Notifications
At least one Unity user with access to the associated matter should be designated to receive email notifications for matter files shared by Counsel Exchange users per the instructions below. The notifications can only be managed by users with edit access to the matter.
By default, the assigned Matter Lead is designated to receive notifications. You must add at least one other user if the Matter Lead needs to be removed from receiving these notifications.
1. Go to the Settings tab in the relevant matter record.
2. Go to the Notifications tab and click on File Sharing.
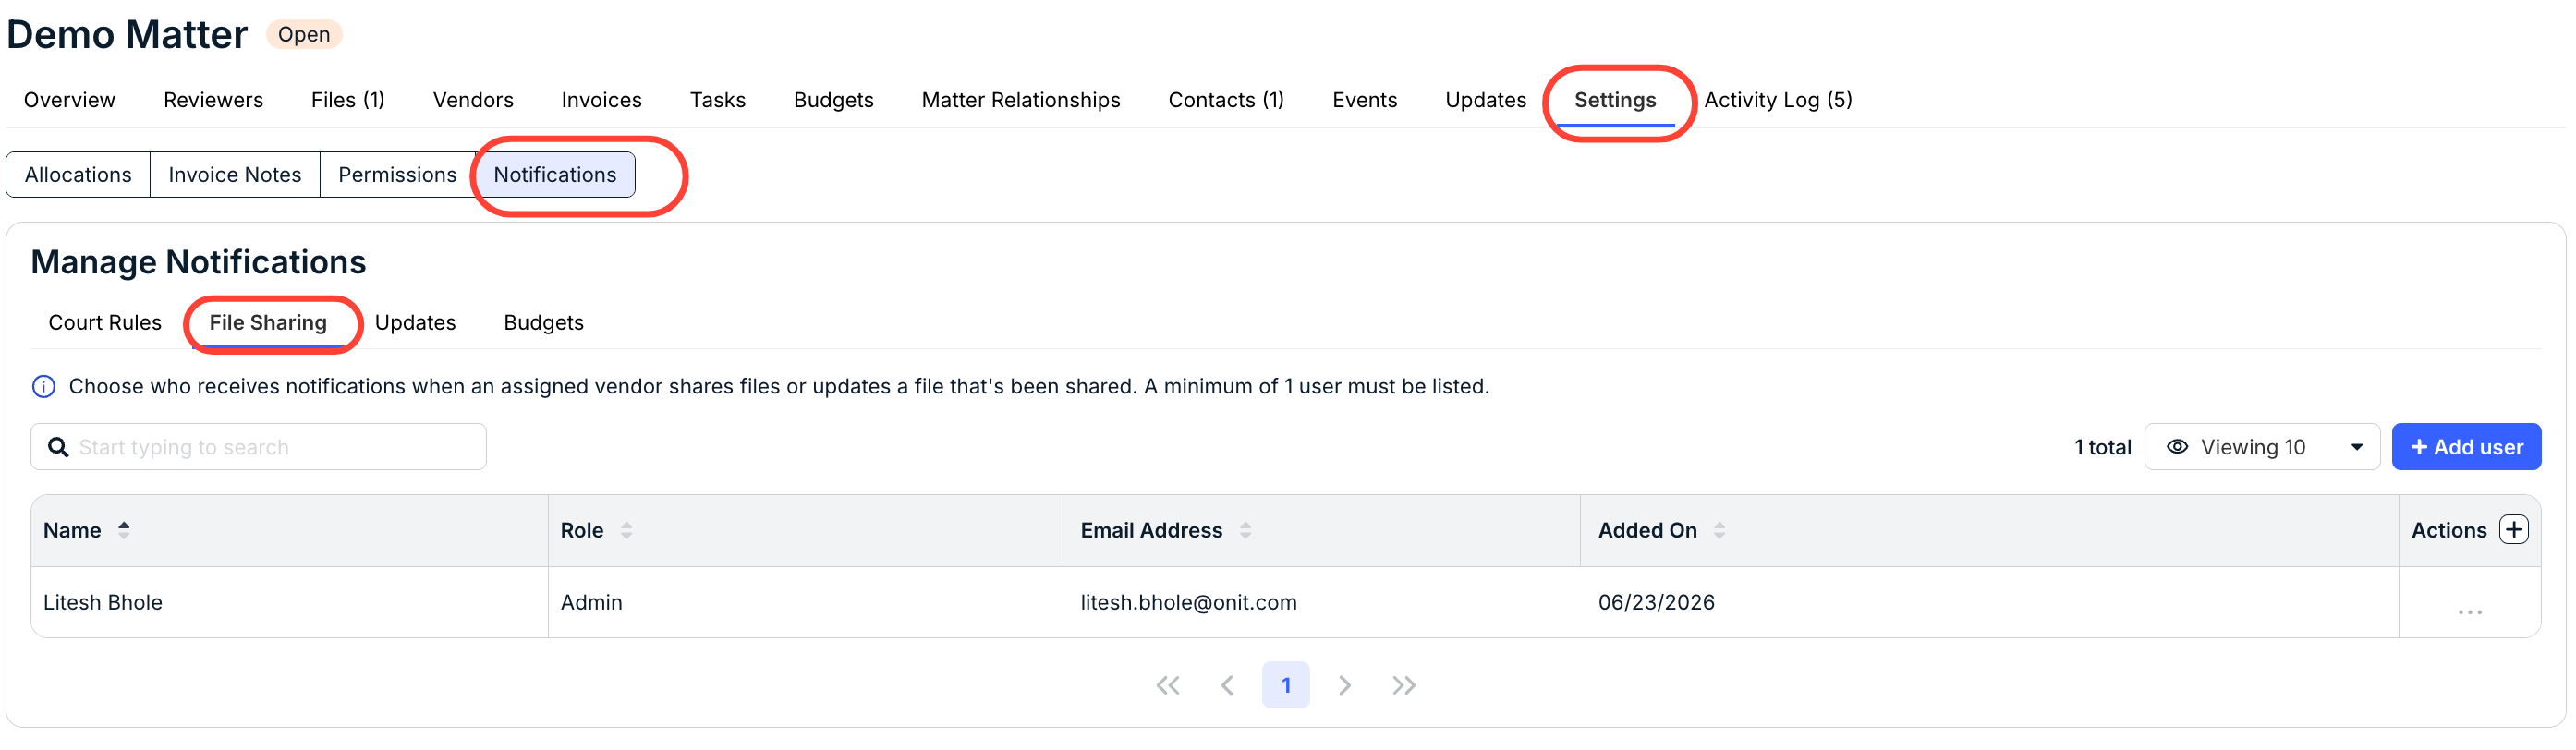
3. Click Add user in the top-right corner.
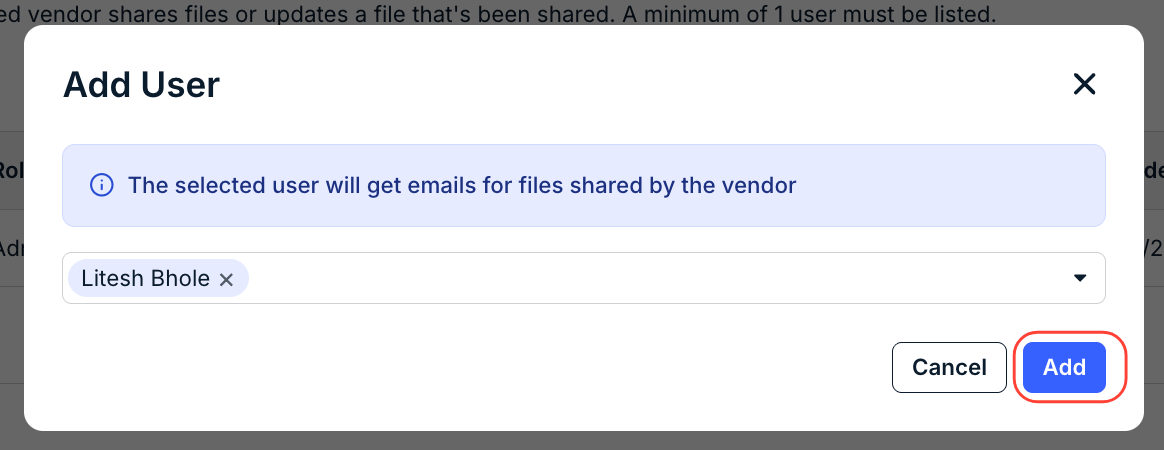
4. Select/de-select one or more users, or start typing a name/email address to narrow the list.
5. Click Add.
Matter Updates
In addition to streamlining communications with outside counsel, the Matter Updates feature creates a reliable audit trail and better transparency for matters.
Adding Matter Updates for Vendors
At least one contact from one or more vendors assigned to the matter must have the Matter Updates role assigned.
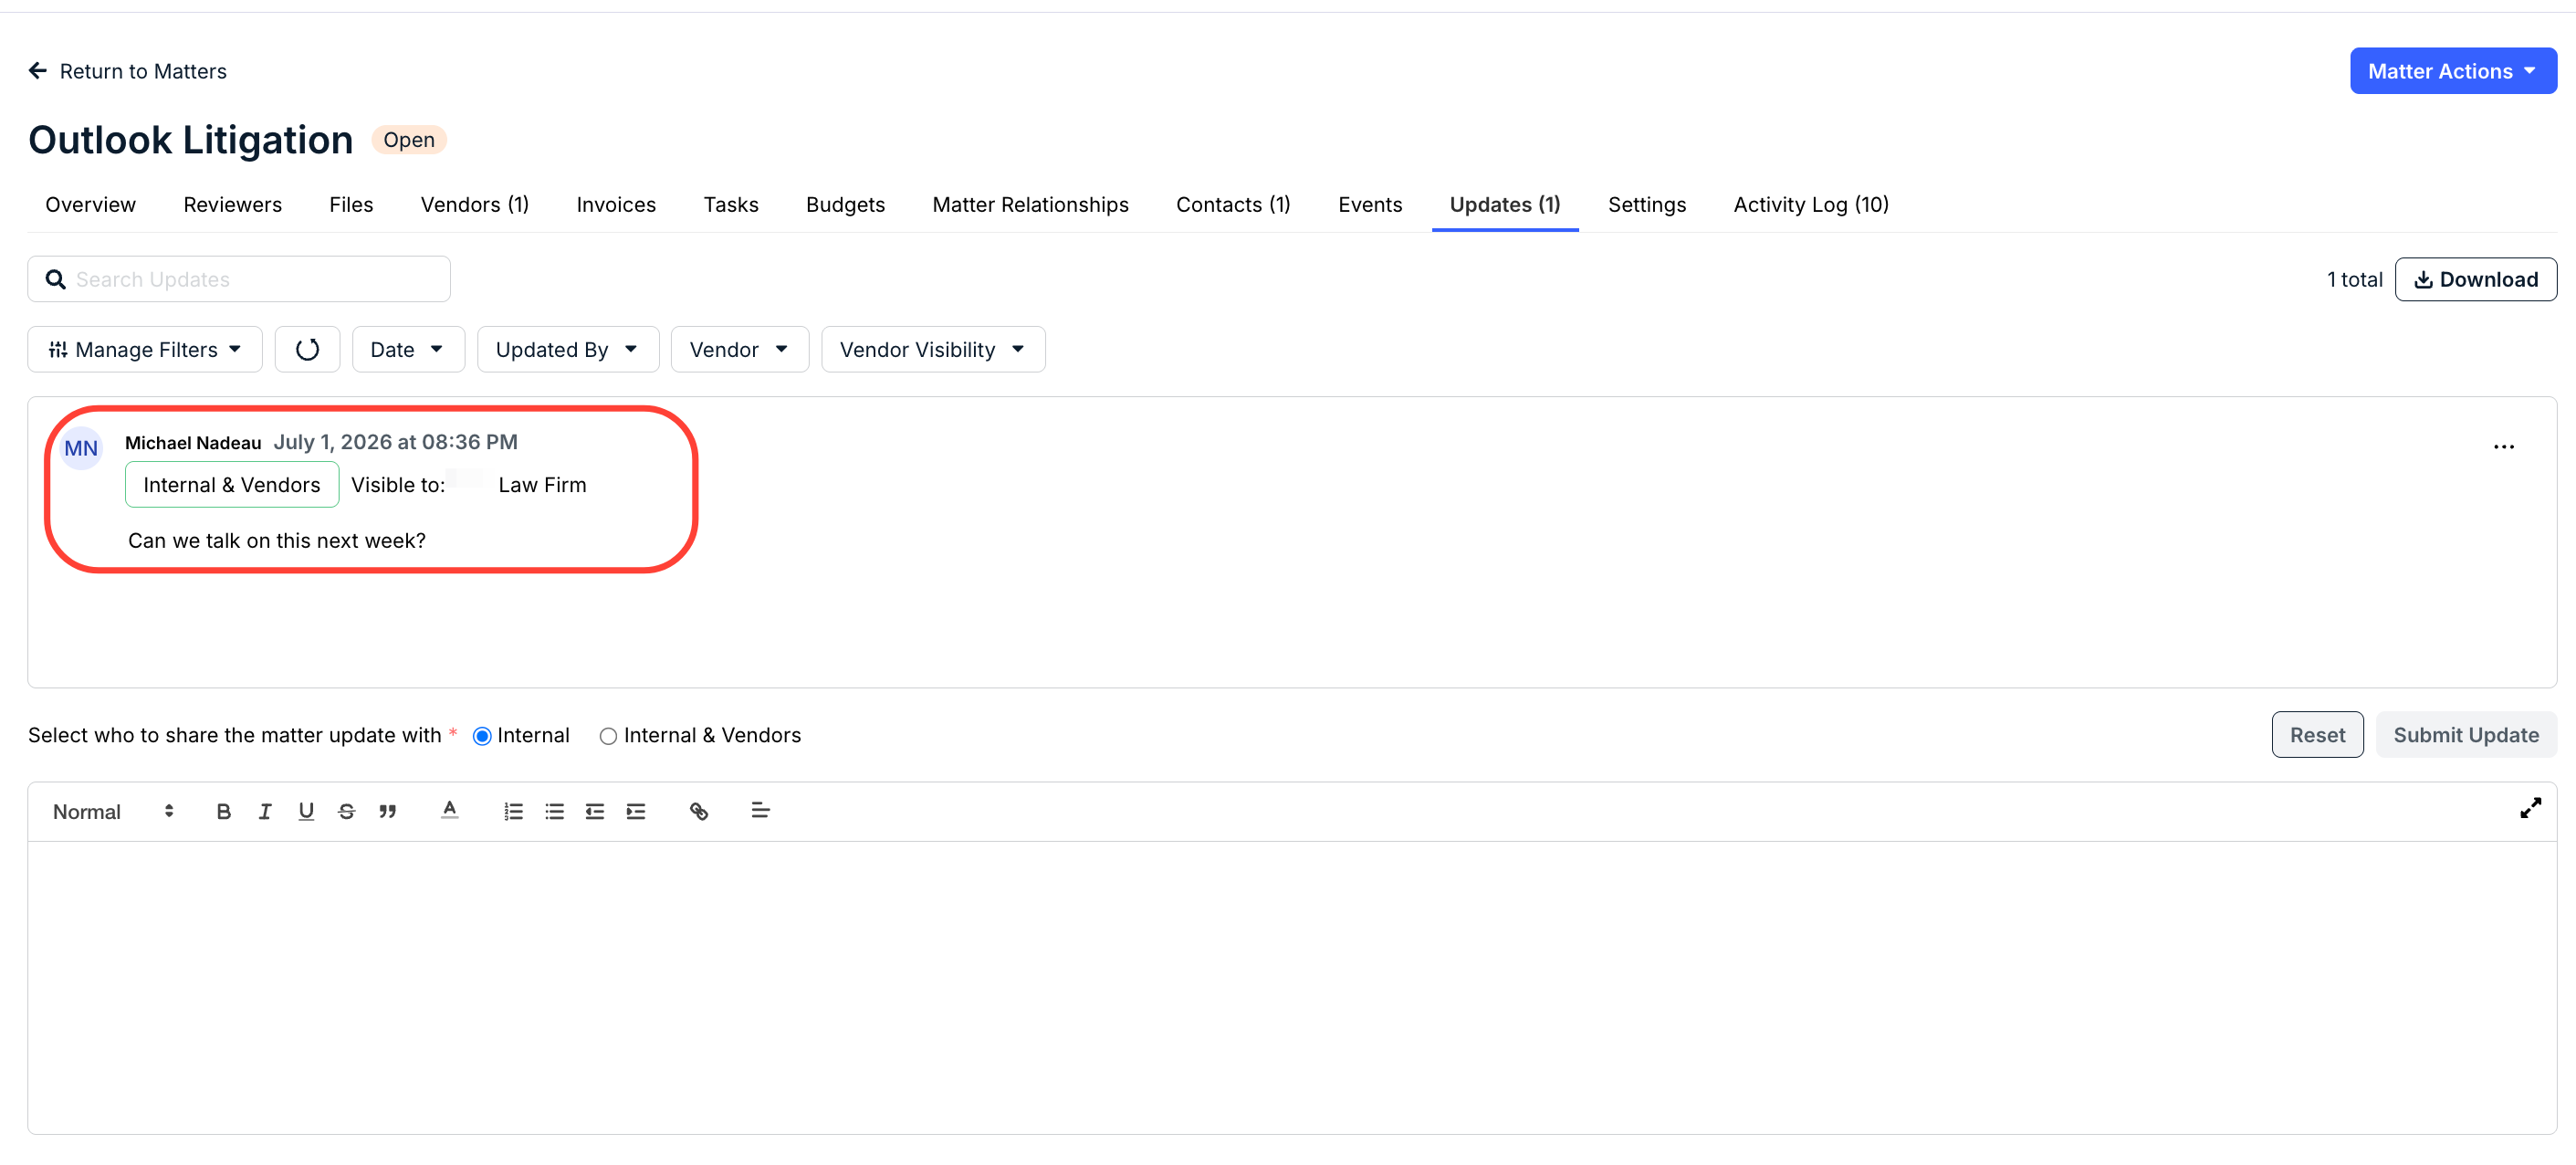
1. Open the matter record and go to the Updates tab.
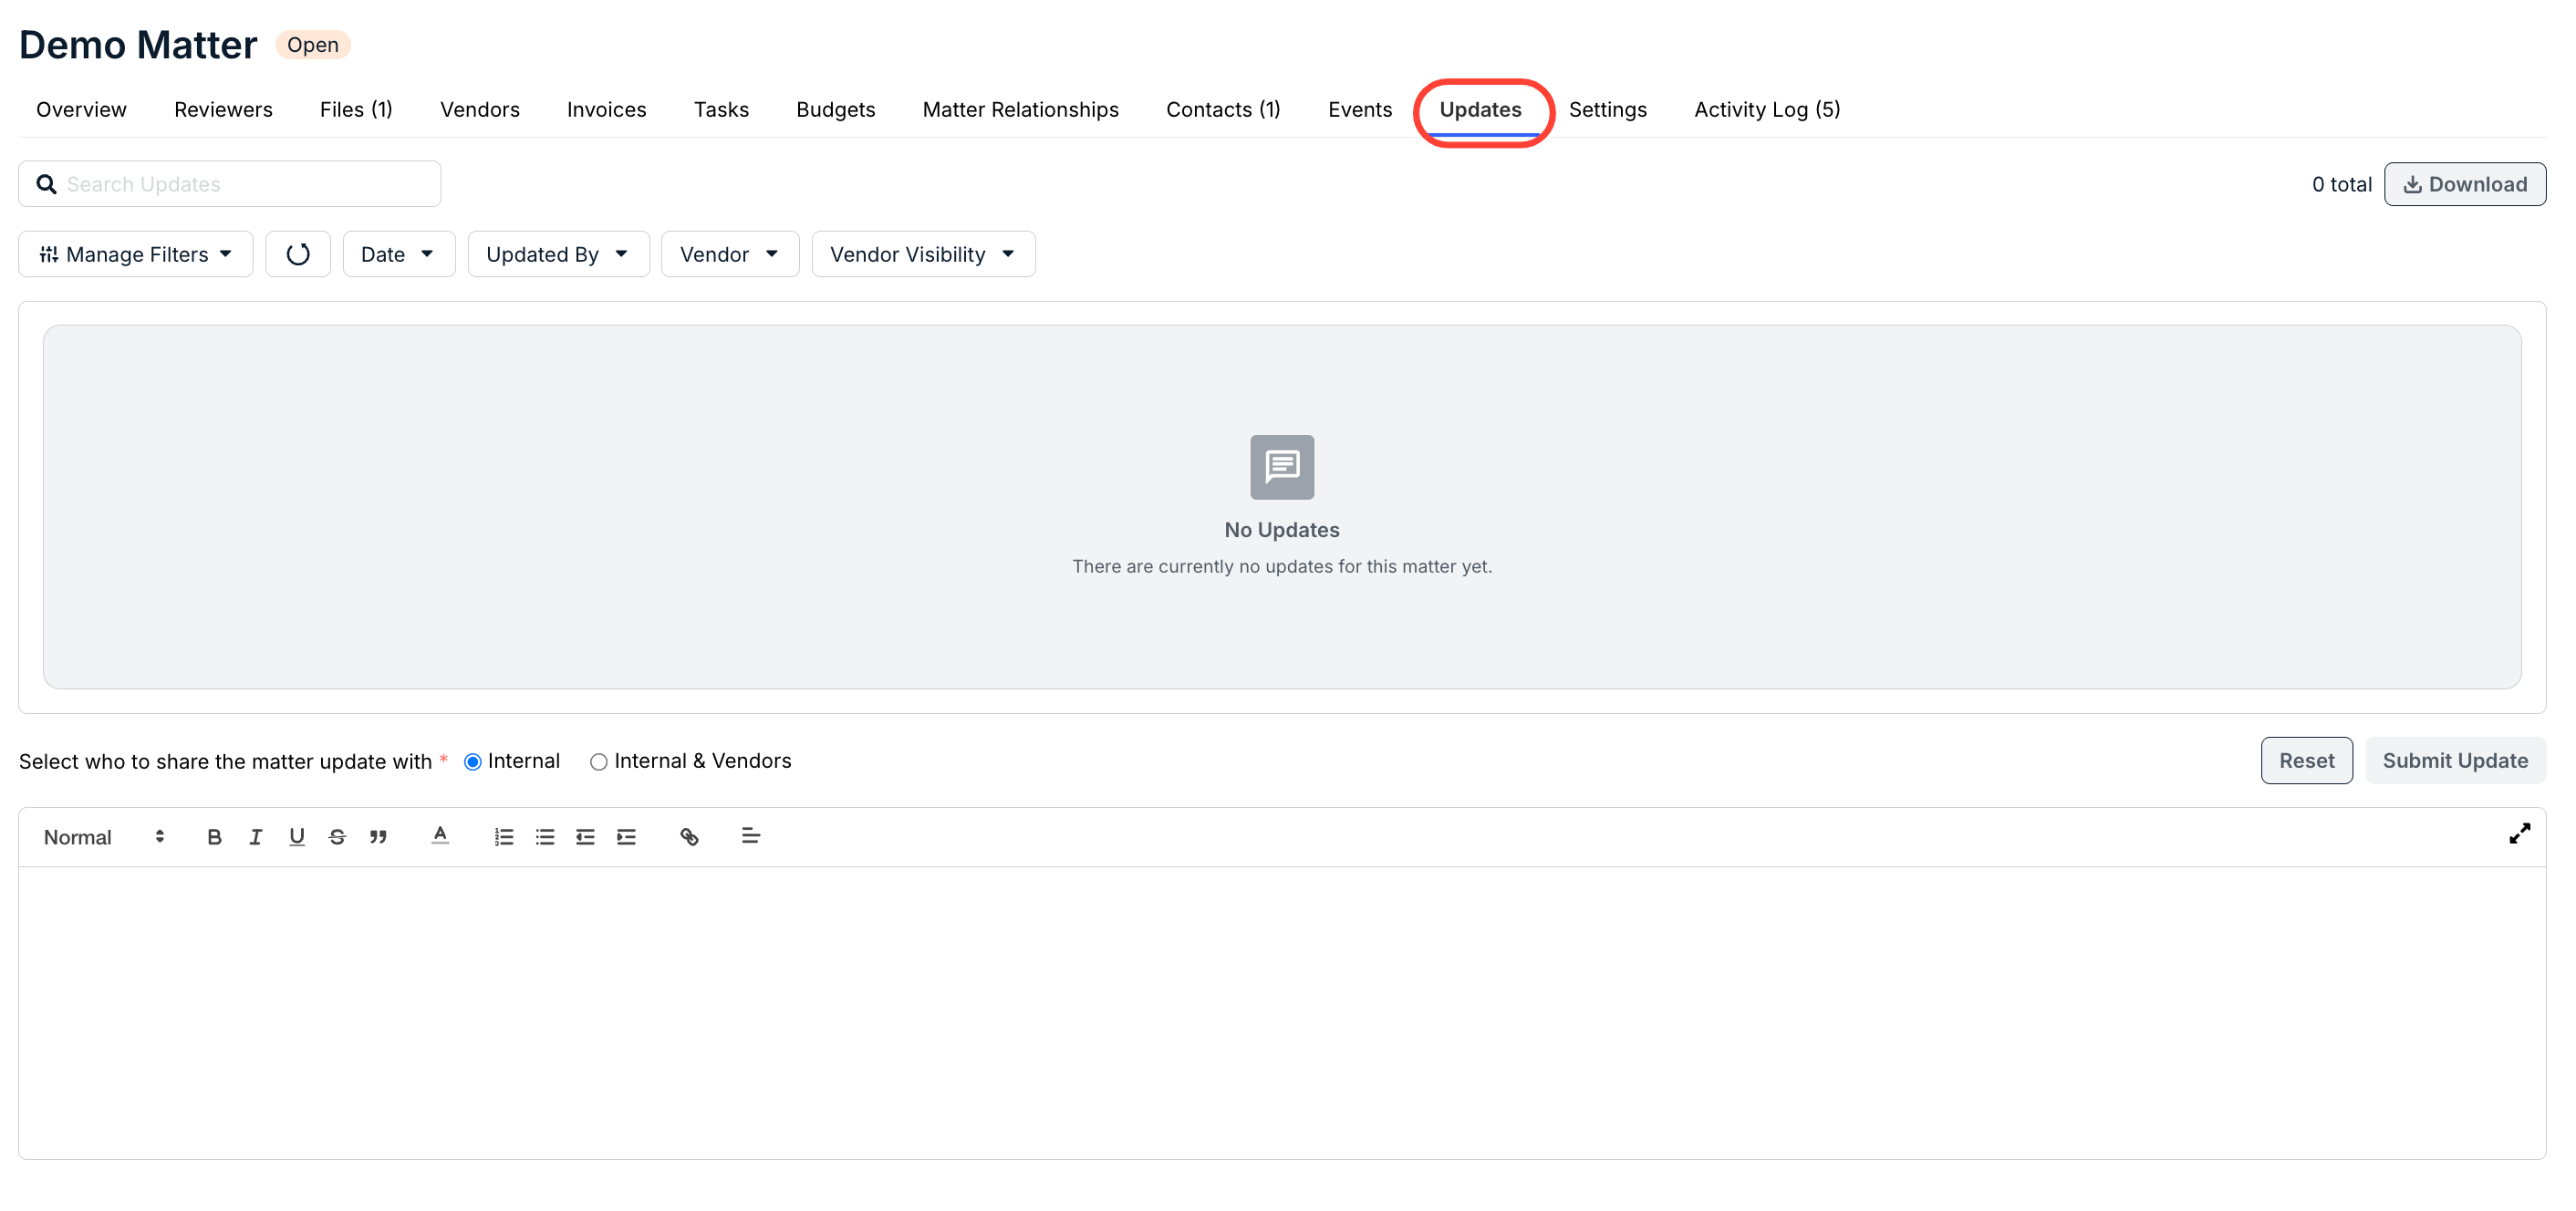
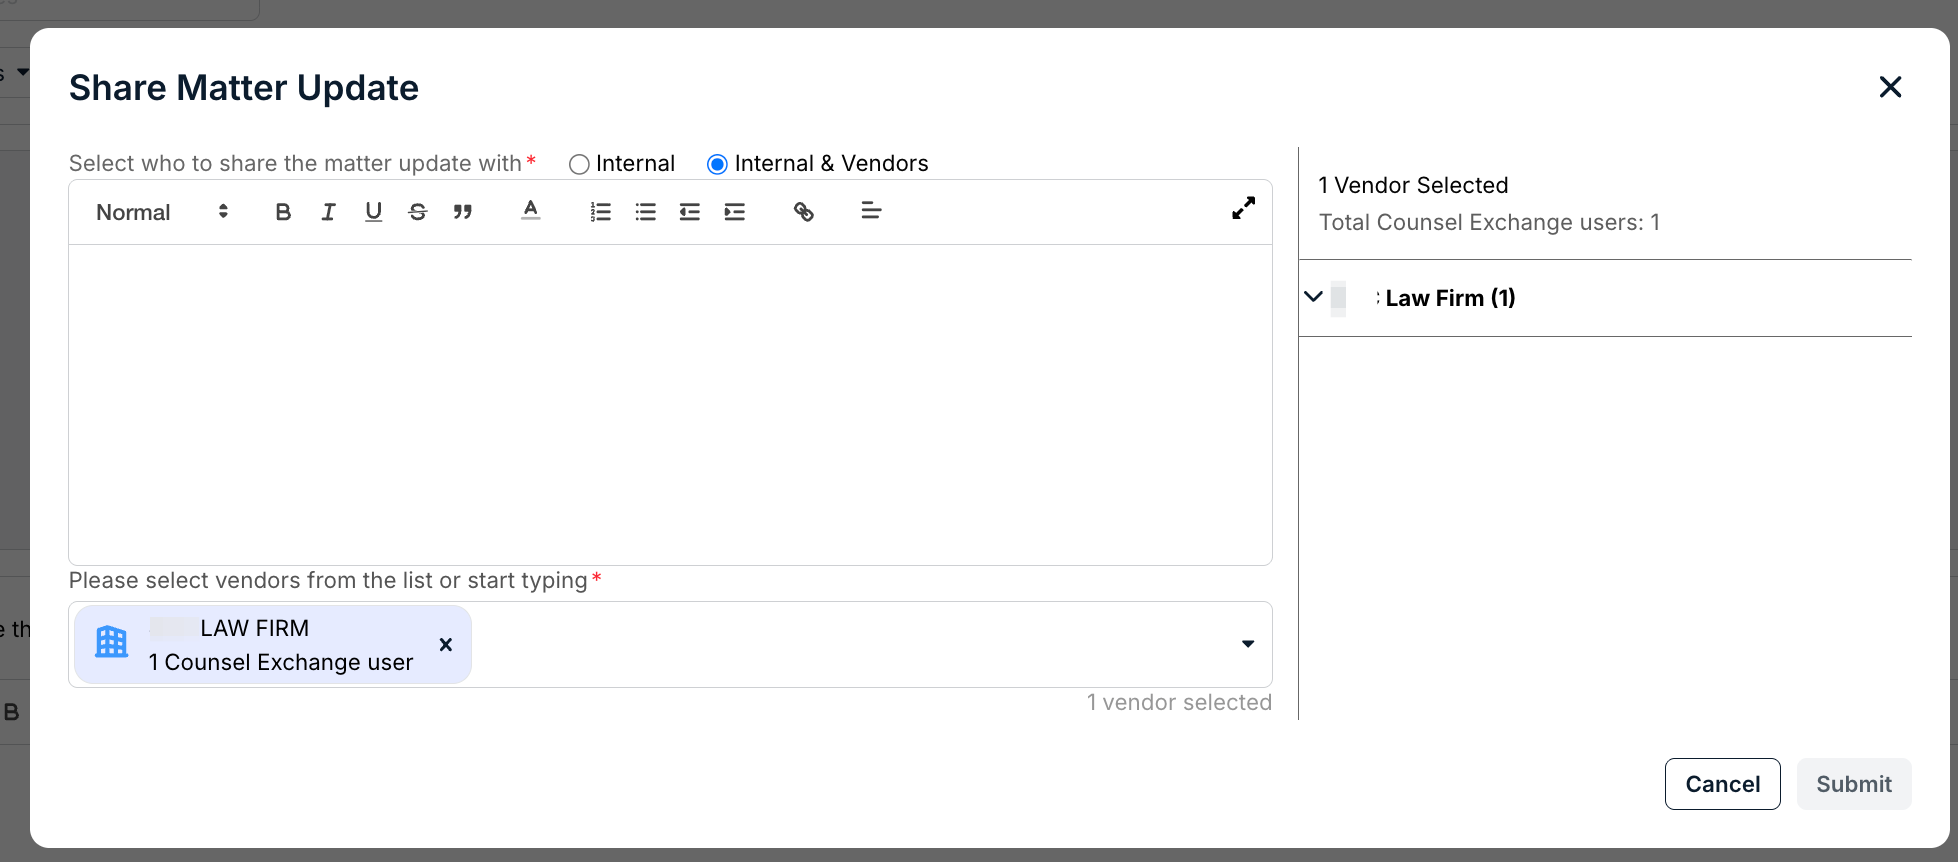
2. Select the Internal & Vendors visibility option above the text editor.

3. Enter the update into the text editor.
4. From the dropdown, choose which vendor(s) should see the information in the Counsel Exchange.
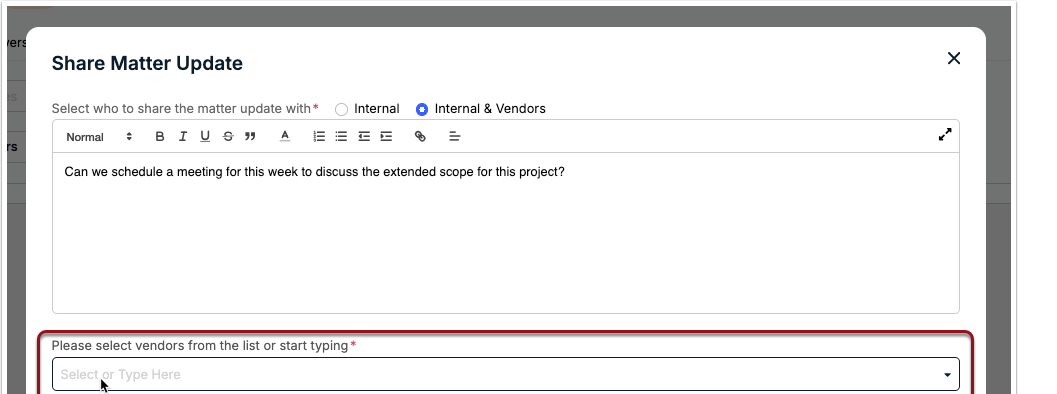
5. You can confirm which specific vendors and users will see the update on the right side of the modal. Click Submit.
The update will appear at the top of the Updates tab with an Internal & Vendors tag, along with the name(s) of the vendor(s) that can see the information in the portal. Comments shared by vendors display the name of the vendor user and firm for reference.