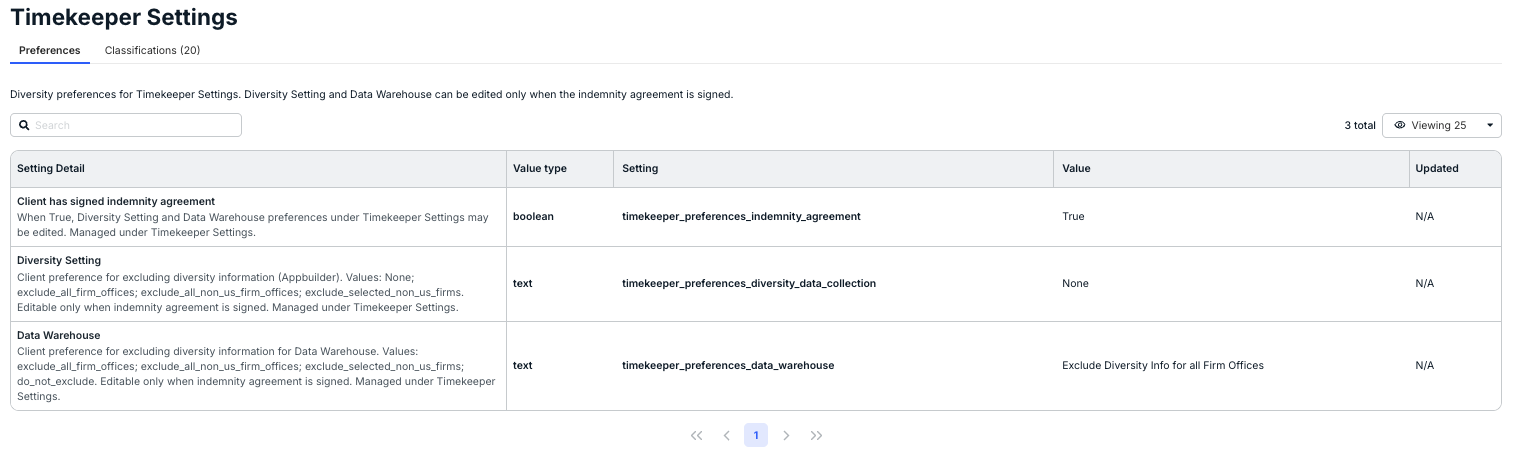
Use the Timekeeper Settings to specify timekeeper Preferences and Classifications. Once you create these settings, they can be applied to any vendor that is set up in your system.
The main Preferences screen will show the Setting Detail, Value Type, Setting, Value, and Updated note. Use the Viewing drop-down menu to choose how many preferences you want to see on the screen. Use the Search bar to search through the different preferences.
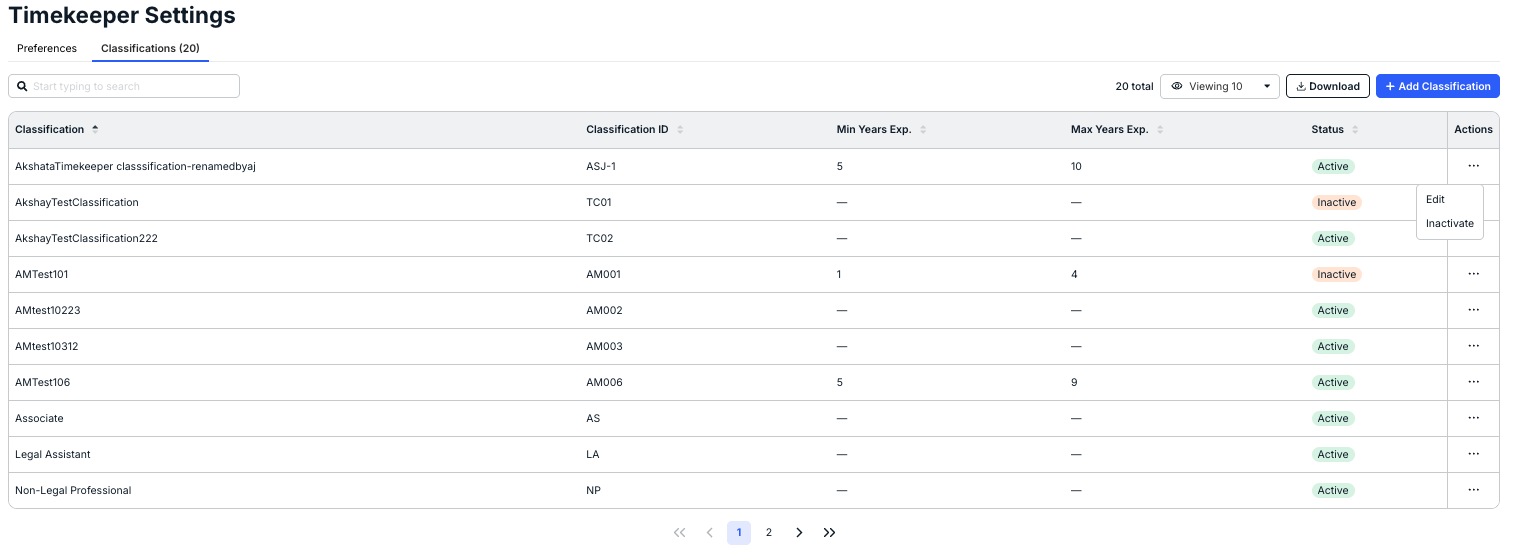
The Classifications tab will display the Classification, Classification ID, Minimum Years Experience, Maximum Years Experience, Status, and an Actions menu. Use the up/down menu at the top of each category to sort by that category. Use the Search bar to search through the classifications. Use the Viewing drop-down menu to specify how many records you want to see on the screen. Click Download to download the information.
Use the three-button Actions menu to Edit or Inactivate a classification.
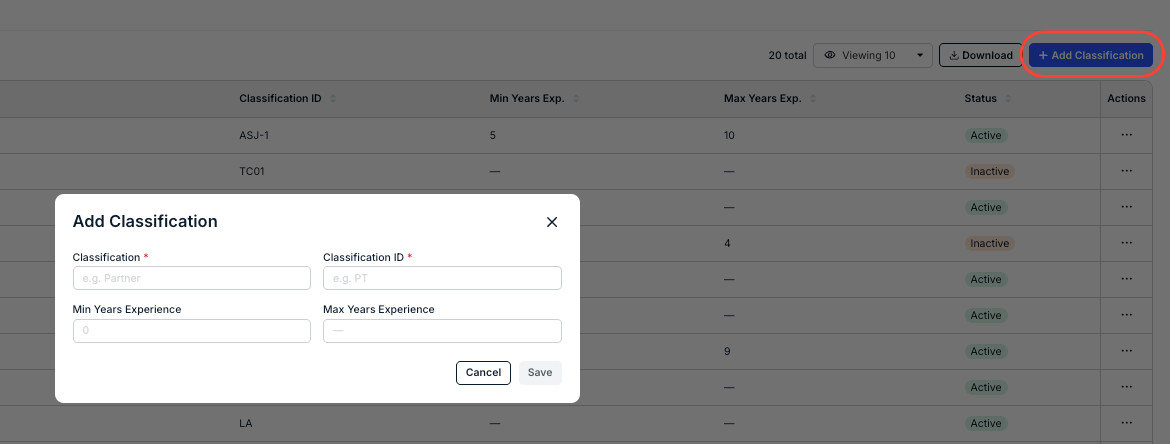
Click on Add Classification to add in a classification. Fill out the Classification (required), Classification ID (required), and Minimum and Maximum Years Experience. Click Save to save the classification or Cancel to back out.