This article covers steps for setting up tax authorities and rules that govern which tax codes/rates are applied to tax line items in vendor invoices.
VAT is dependent on where a vendor is doing the work and to which country they are submitting invoices. Based on the tax codes added in your environment, Unity matches the tax amounts on an invoice to the appropriate tax codes/rates.
Setting up this logic in Unity requires three main steps:
- Adding Tax Authorities
- Adding Tax Code Logic
- Associating Tax Authorities with Legal Entities & Vendors
The steps above allow Unity to apply relevant tax information as follows:
- Tax authority in a vendor record indicates where an invoice is coming from.
- Tax authority in a legal entity identifies who the vendor is billing.
- Tax code logic linked to the tax authority is used to confirm rates, splits, and other VAT details.
Adding Tax Authorities
1. Go to Settings > Tax Authorities and click + Add Tax Authority in the top-right corner.
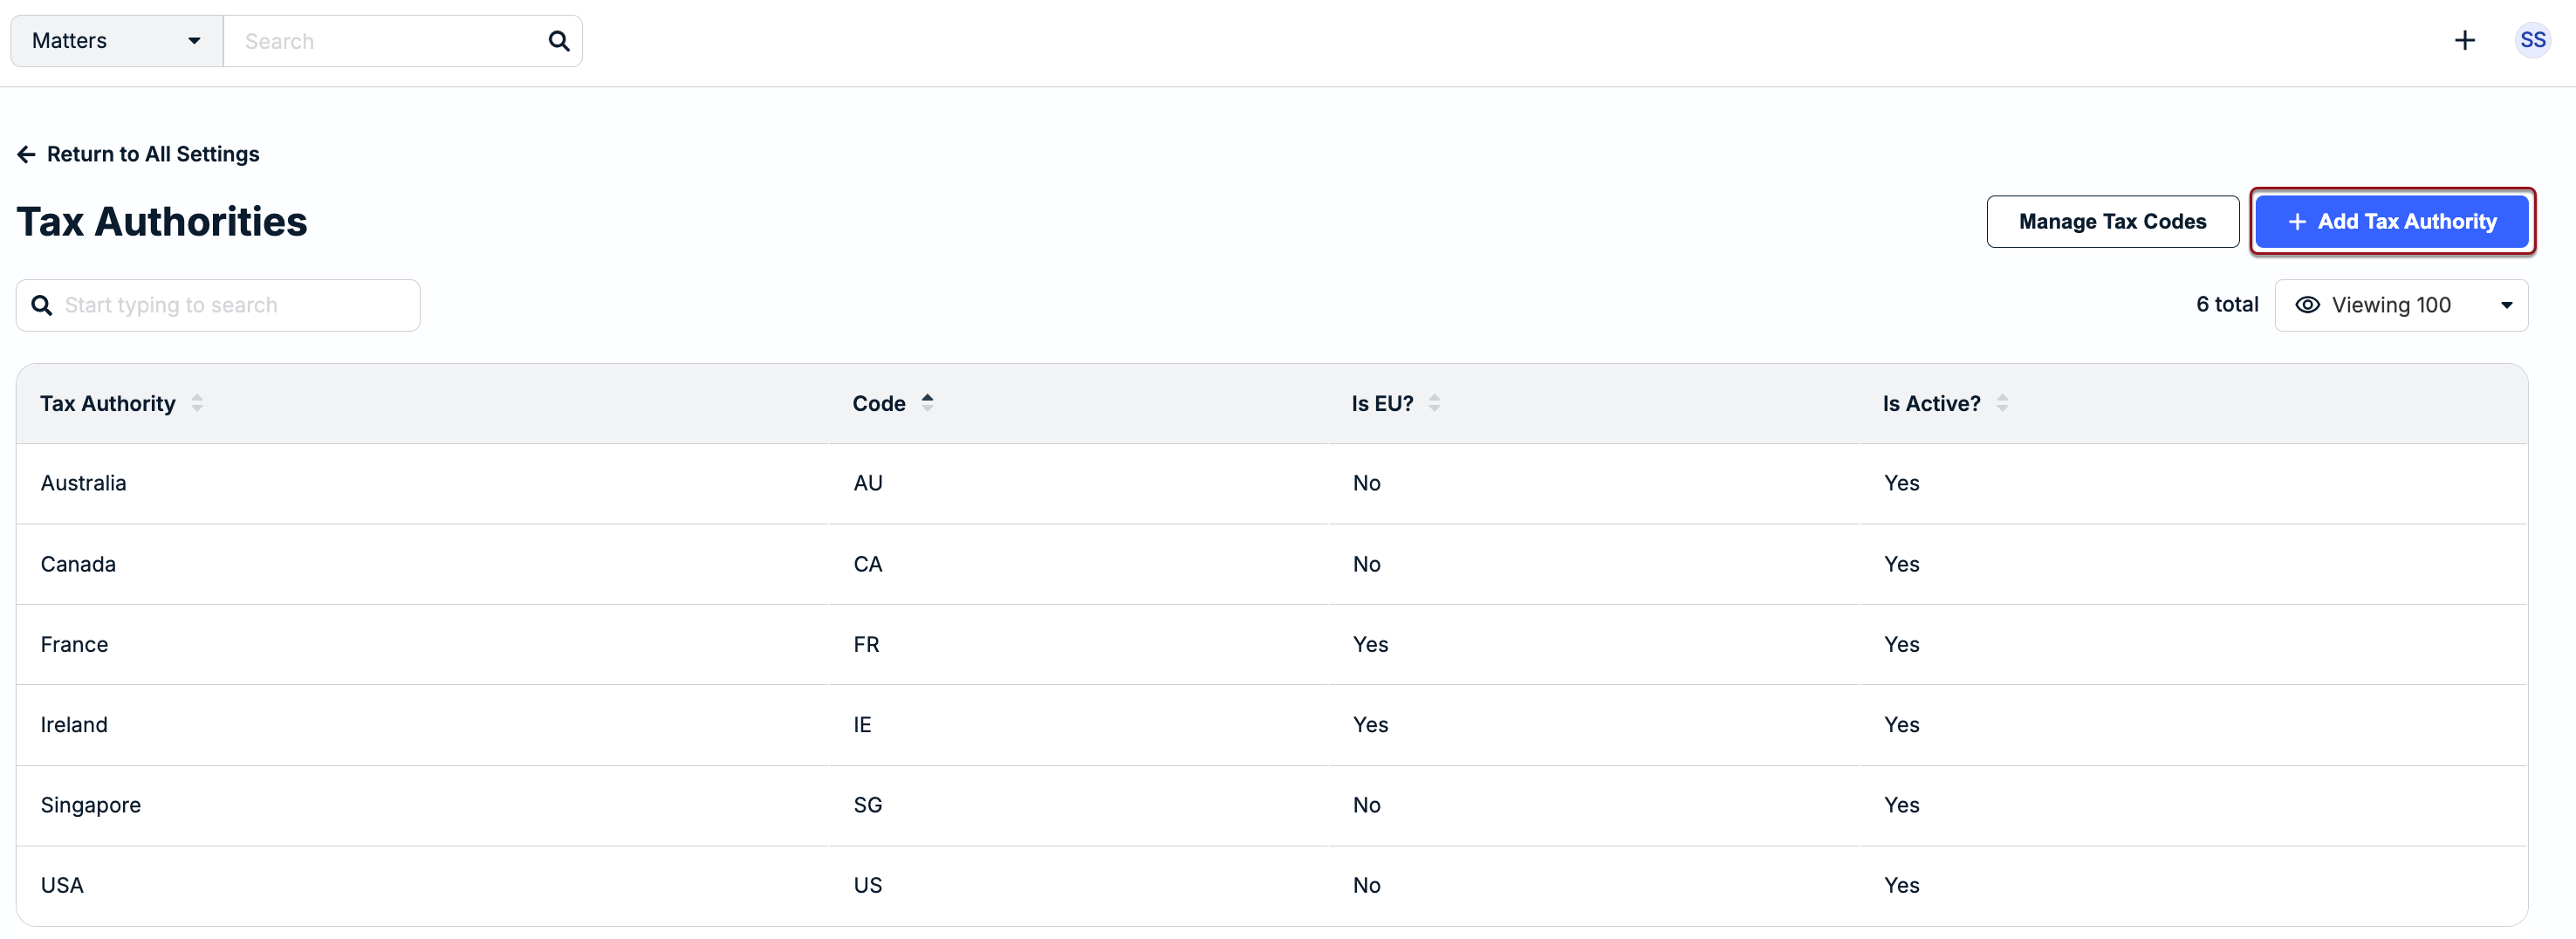
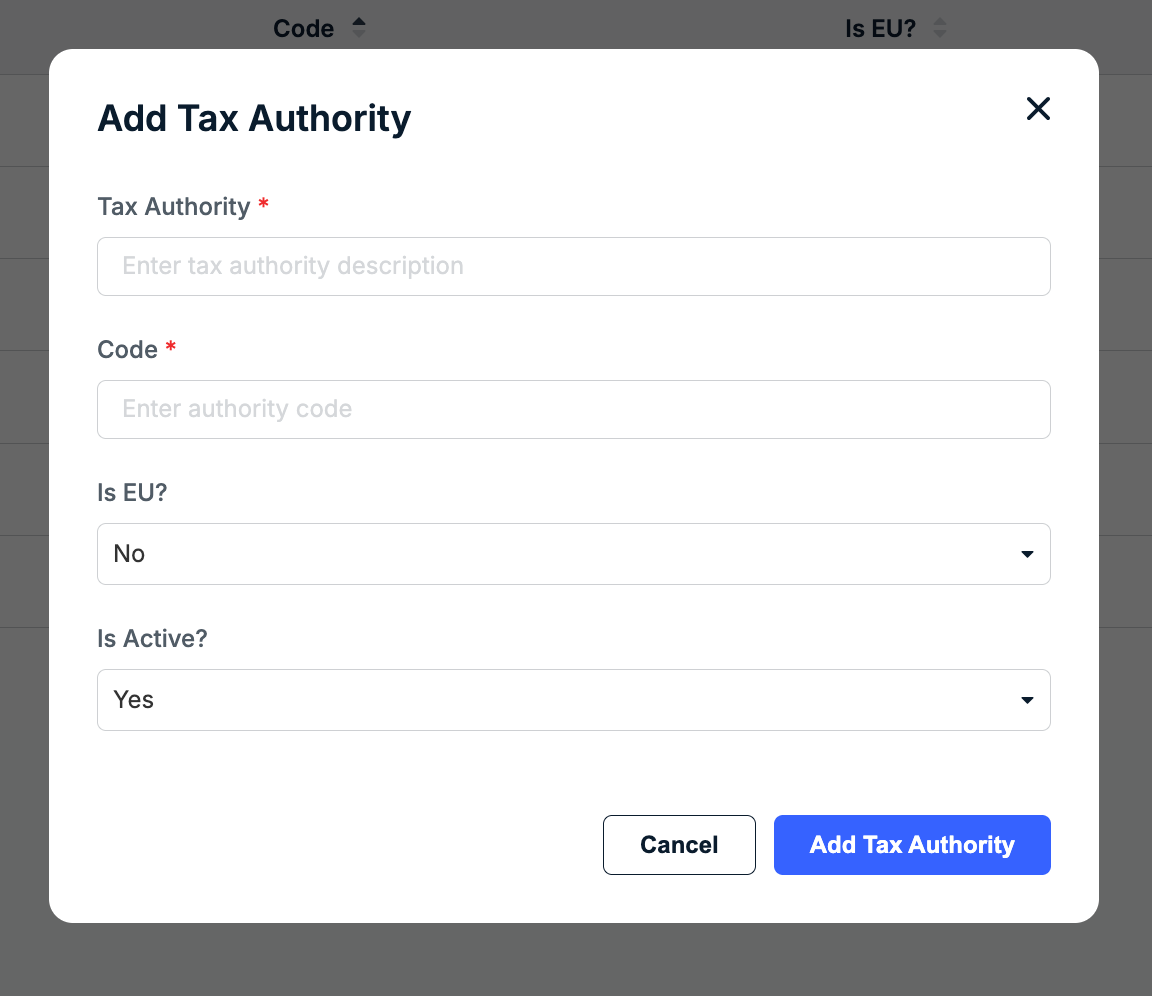
2. Enter the following information and then click Add Tax Authority:
- Tax Authority: Enter the country where the work is being completed (e.g., France).
- Code: Enter the corresponding code, which is usually a country abbreviation (e.g., FR = France).
- Is EU?: Select Yes if the country belongs to the European Union. This is required because countries in EU have additional tax considerations.
- Is Active?: Leave as Yes if the tax authority will be used for invoicing purposes. If you are not ready to enable this tax authority, select No.
3. Repeat Steps 1-2 for all tax authorities you need to add.
Adding Tax Code Logic
Once all Tax Authorities are added, enter the logic that enables Unity to match tax codes to tax amounts on invoices submitted by vendors as follows:
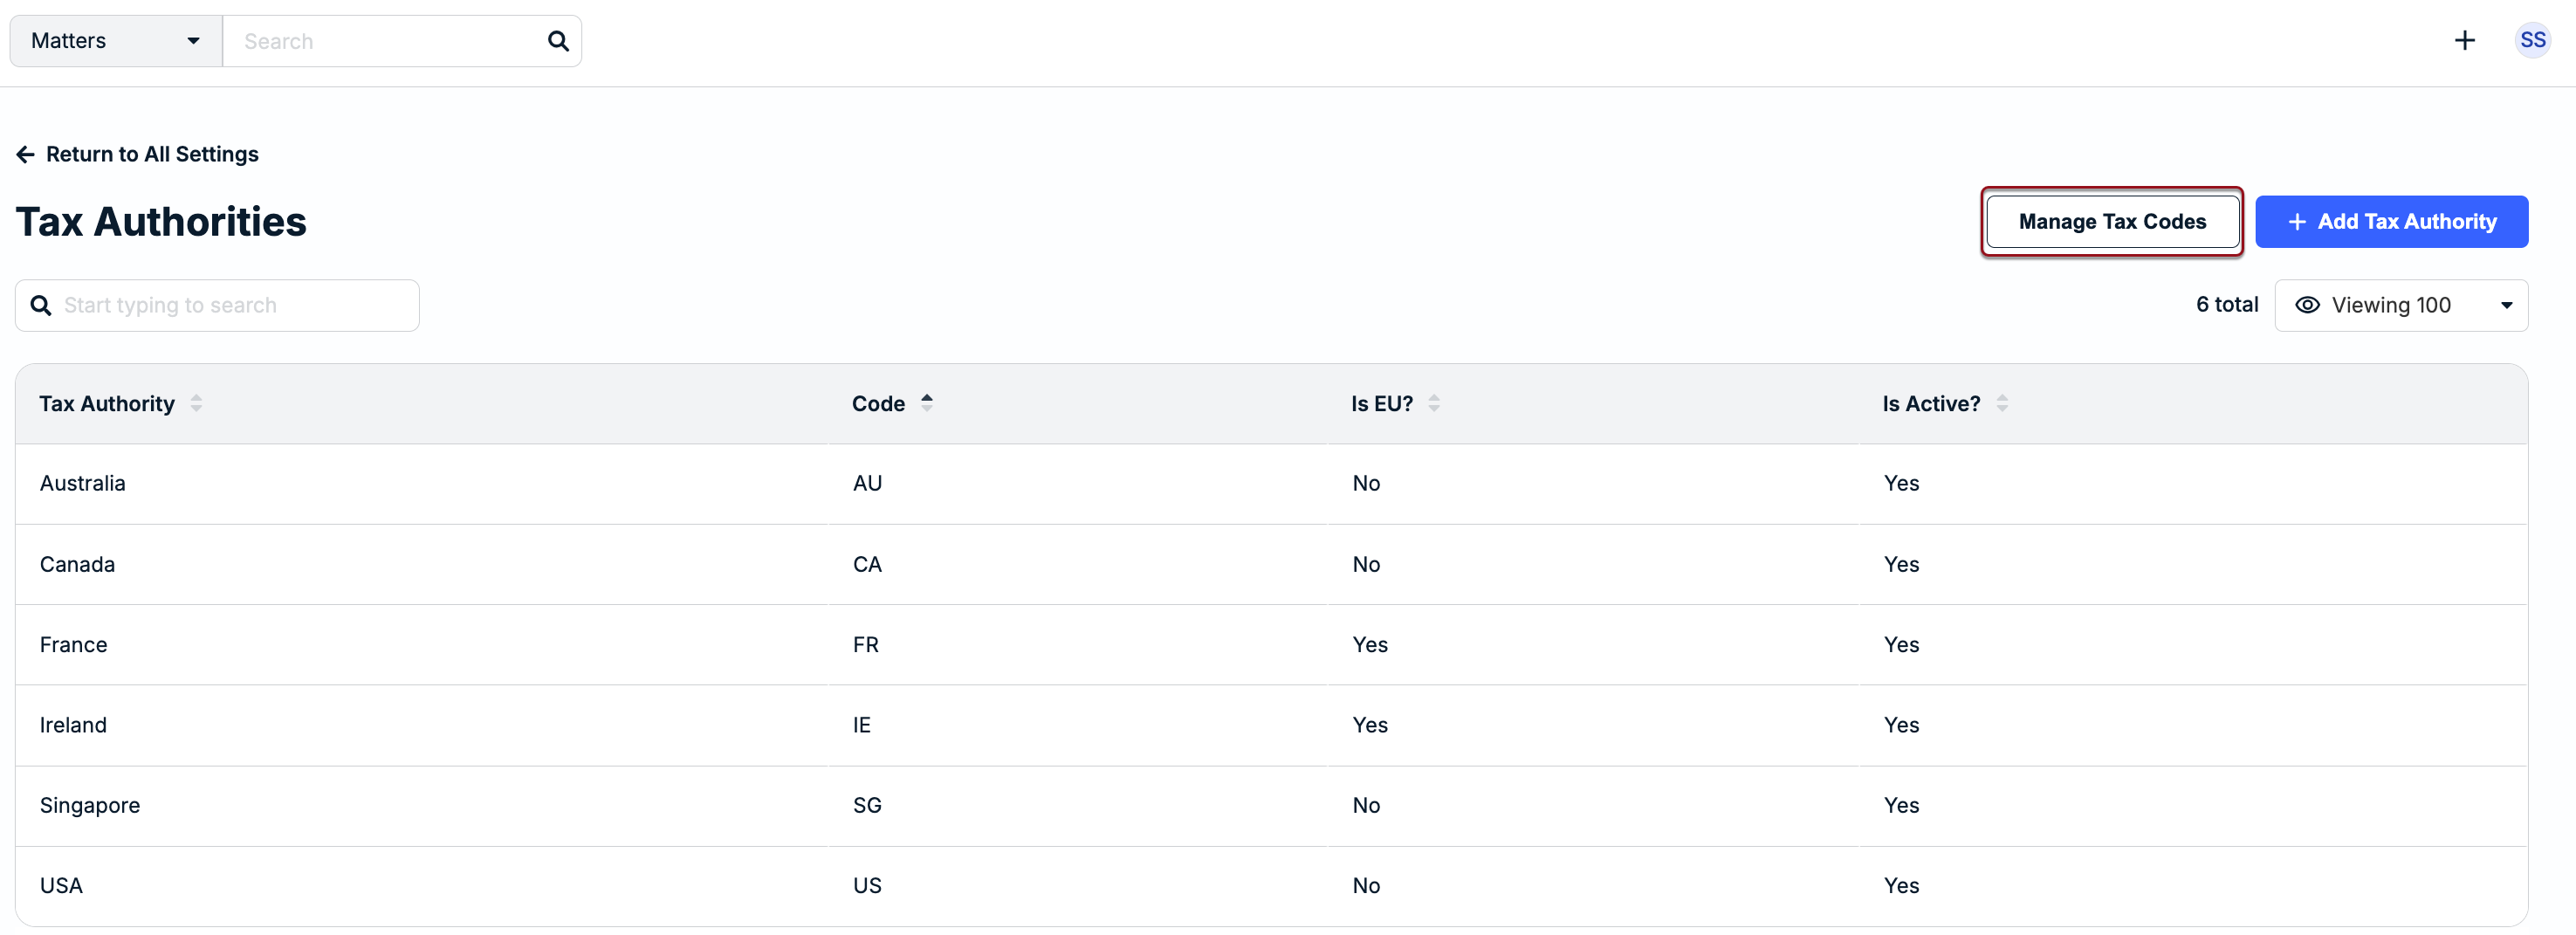
1. Click Manage Tax Codes from the Tax Authorities page.
2. Click + Add Tax Code.
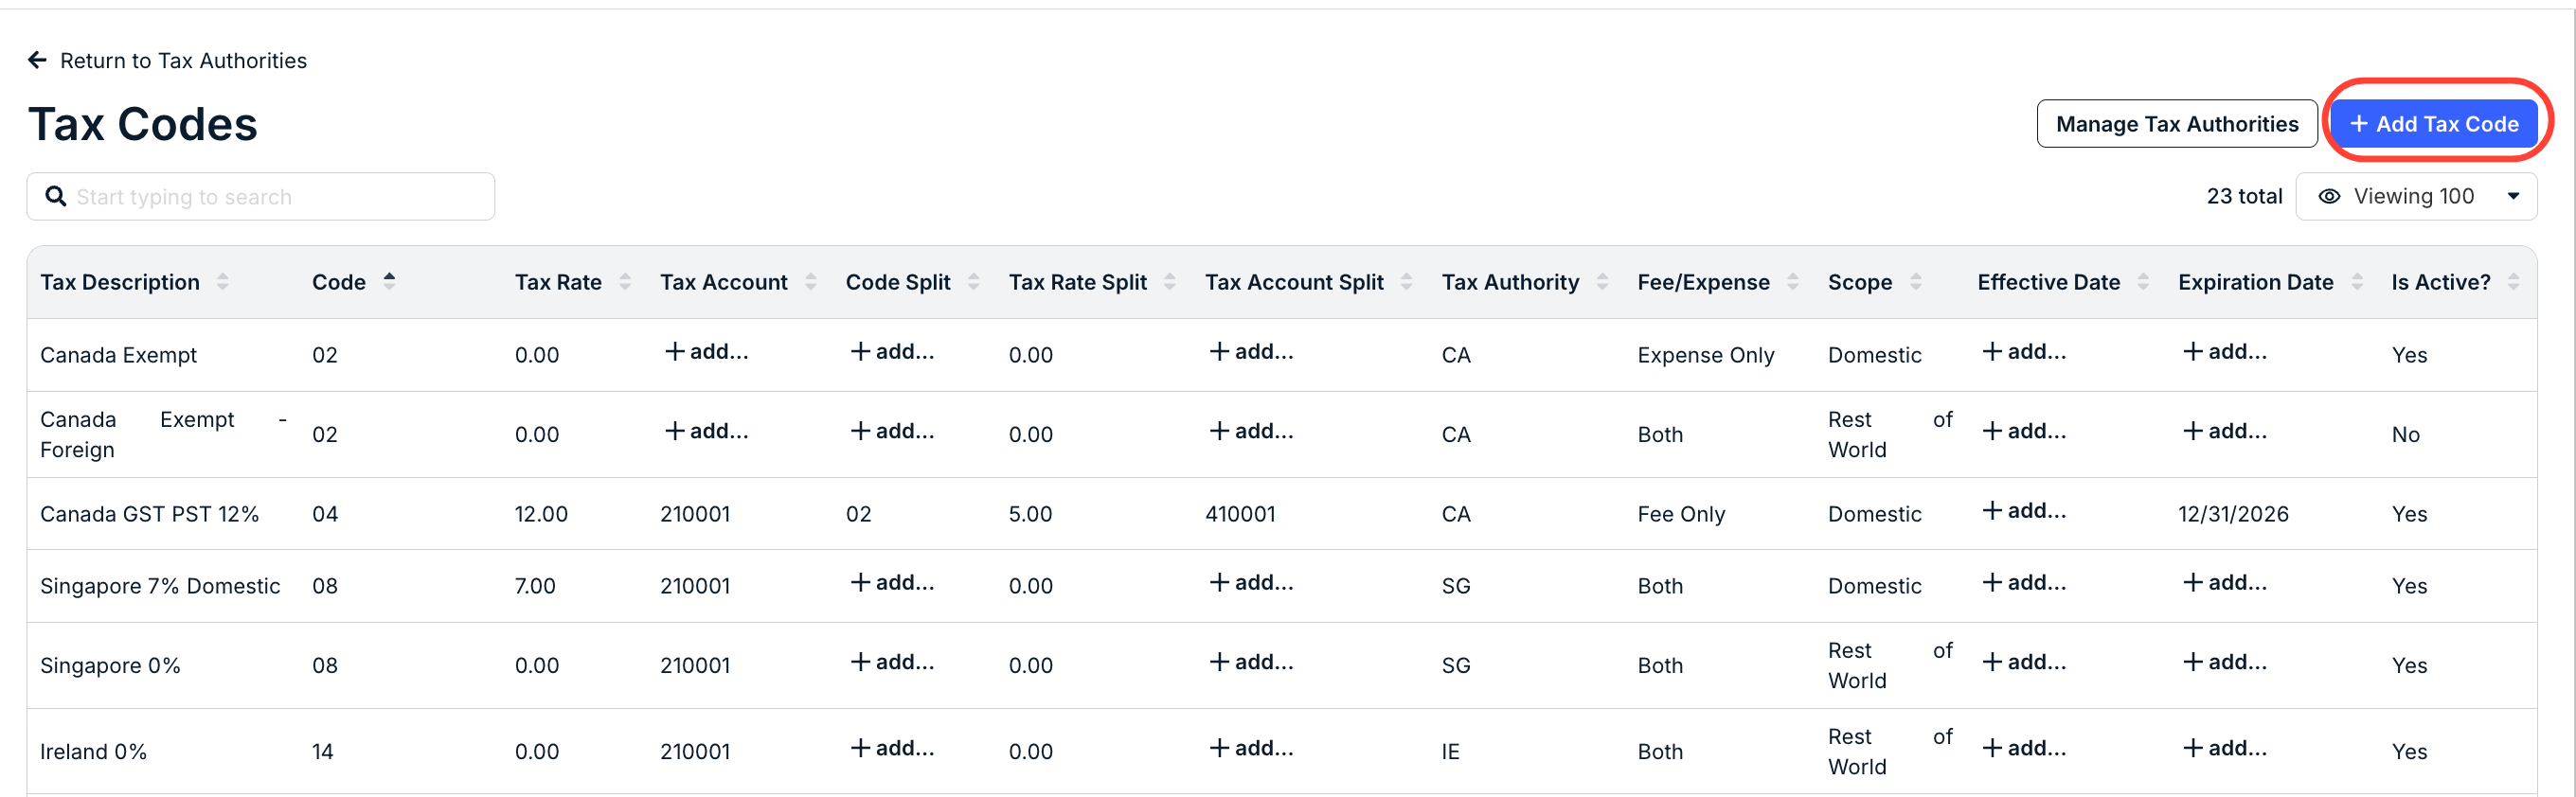
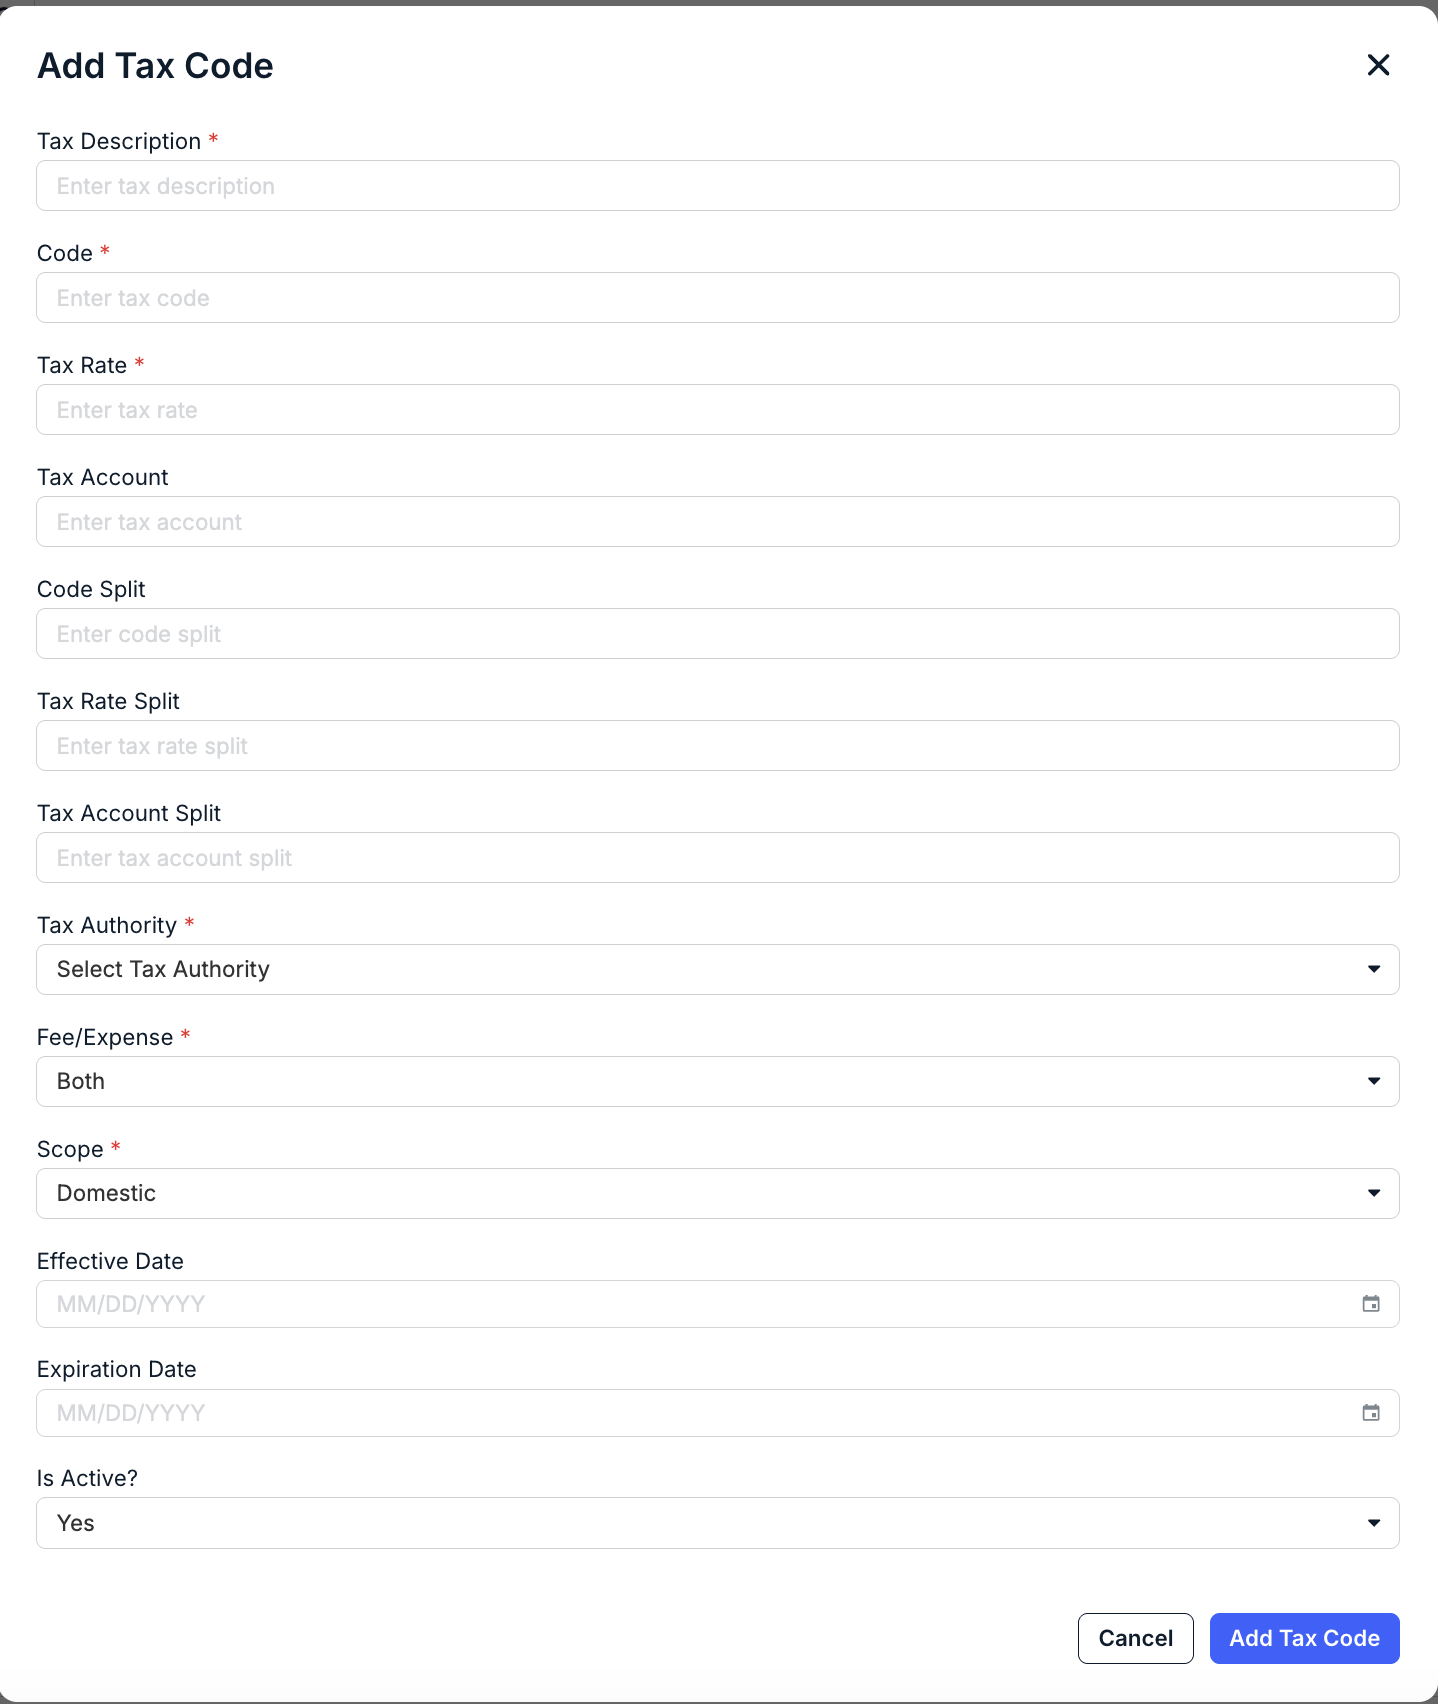
3. Enter the tax code information and then click Add Tax Code:
- Tax Description: Enter a general description of the tax.
- Code: Enter the code provided by your finance team to process the tax.
- Tax Rate: Enter the tax rate or percentage associated with the tax code.
- Tax Account: Enter the GL account provided by your finance team for allocation purposes.
- Code Split: If applicable, use this field to identify another tax code. This is only necessary for tax authorities that combine multiple taxes together (e.g., Canada).
- Tax Rate Split: The percentage or rate to be allocated to the designated Code Split, if applicable.
- Tax Account Split: Enter the GL account associated with the Code Split, if applicable.
- Tax Authority: Select the Tax Authority from the dropdown list that corresponds to the Code.
- Fee/Expense: Select Fee Only, Expense Only, or Both (default) based on which line item types can/will include taxes.
- Scope: Select whether the tax is Domestic (default), Intra EU, or Rest of World based on the selected Tax Authority. It is important that the Tax Authority and Scope align to avoid incorrect tax code logic being applied at the line item level.
- Effective/Expiration Date: Select the dates when this code should go into Effect and when it should Expire.
- Is Active?: Leave as Yes if you want the code to be enabled for matching.
4. Repeat Steps 1-3 for all Tax Codes you want to add.
Associating Tax Authorities with Legal Entities & Vendors
Once Tax Authorities and corresponding Tax Codes have been added, you can associate them with new/existing legal entities and/or vendor records in Unity.
Legal Entities
1. Go to Settings > Legal Entities.
2. Open an existing legal entity or click +Add Legal Entity to create a new one.
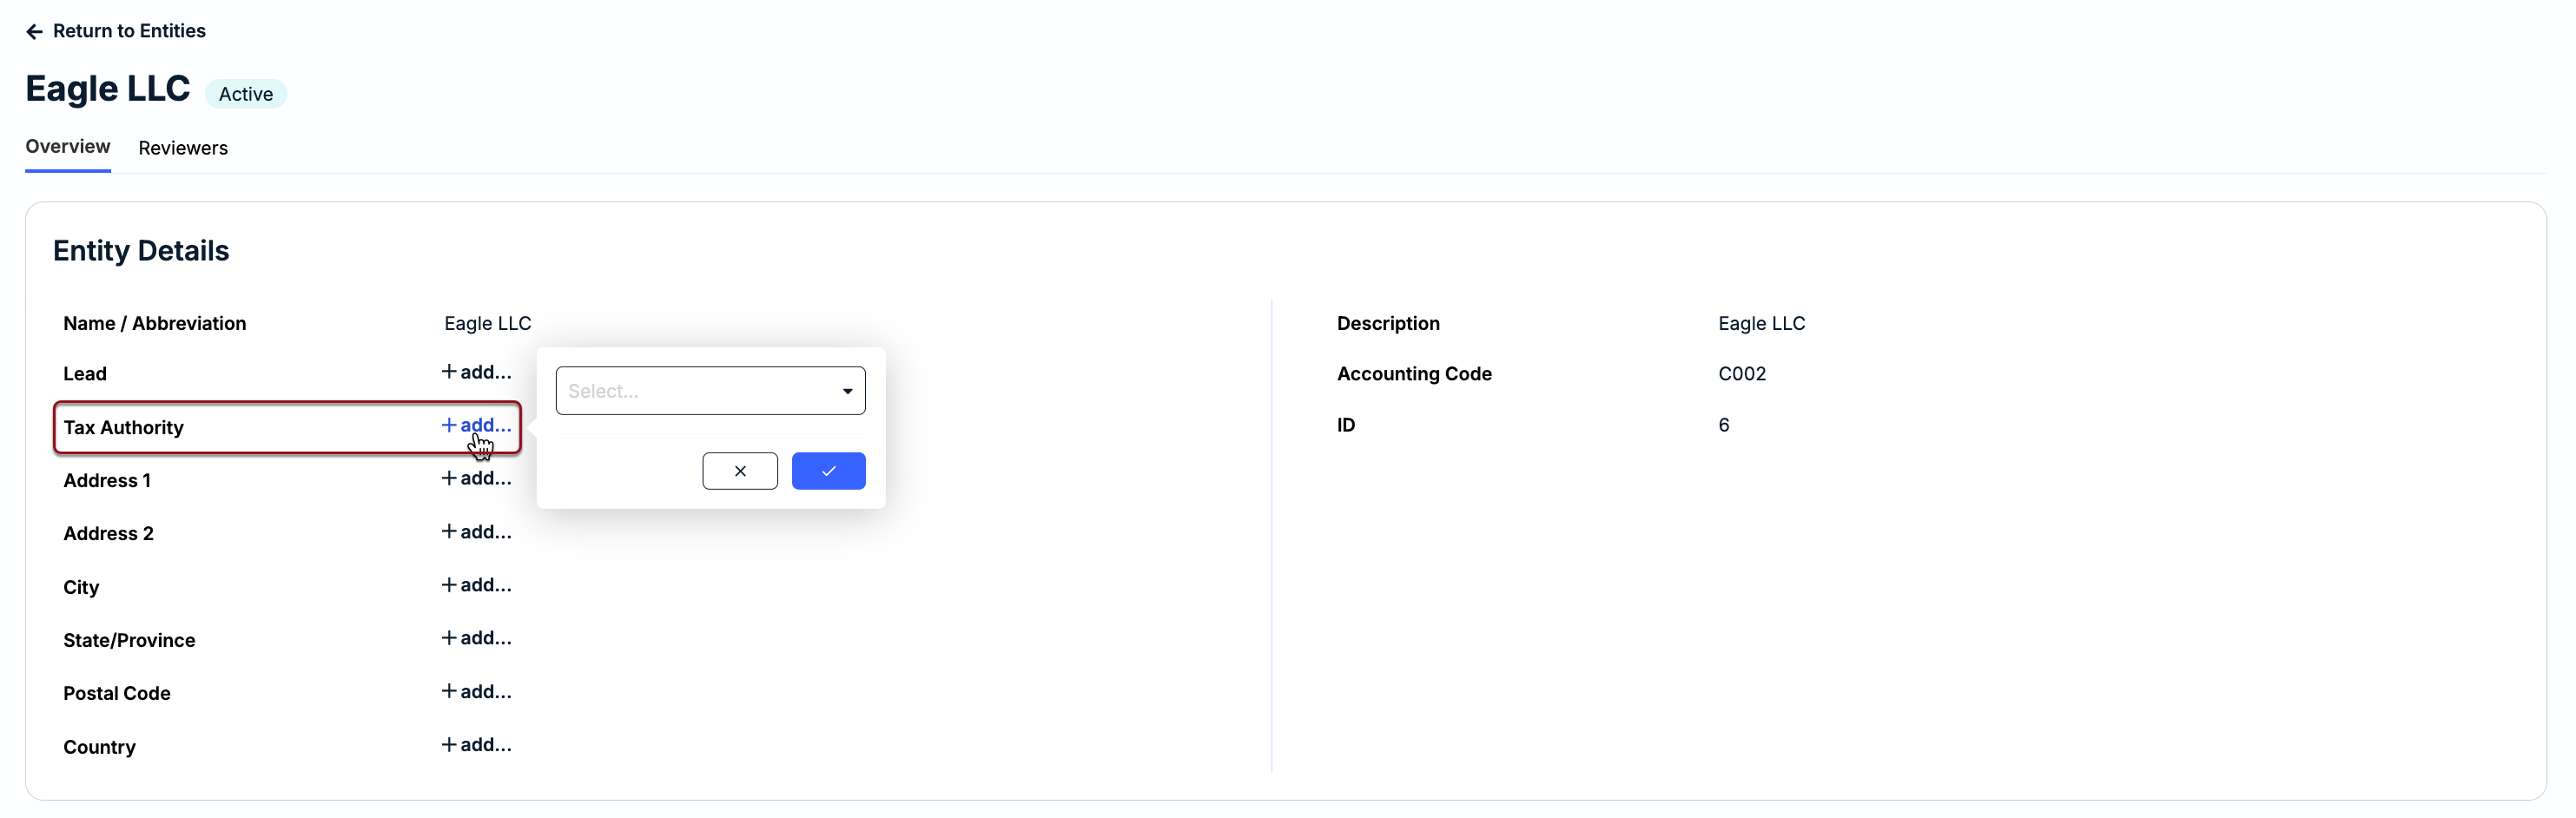
3. Click +add... next to the Tax Authority field in the first section of the legal entity record.
4. Select the Tax Authority from the list and click the checkmark.
Vendor Records
1. Open an existing vendor record or click + in the top navigation bar and select Add Vendor.
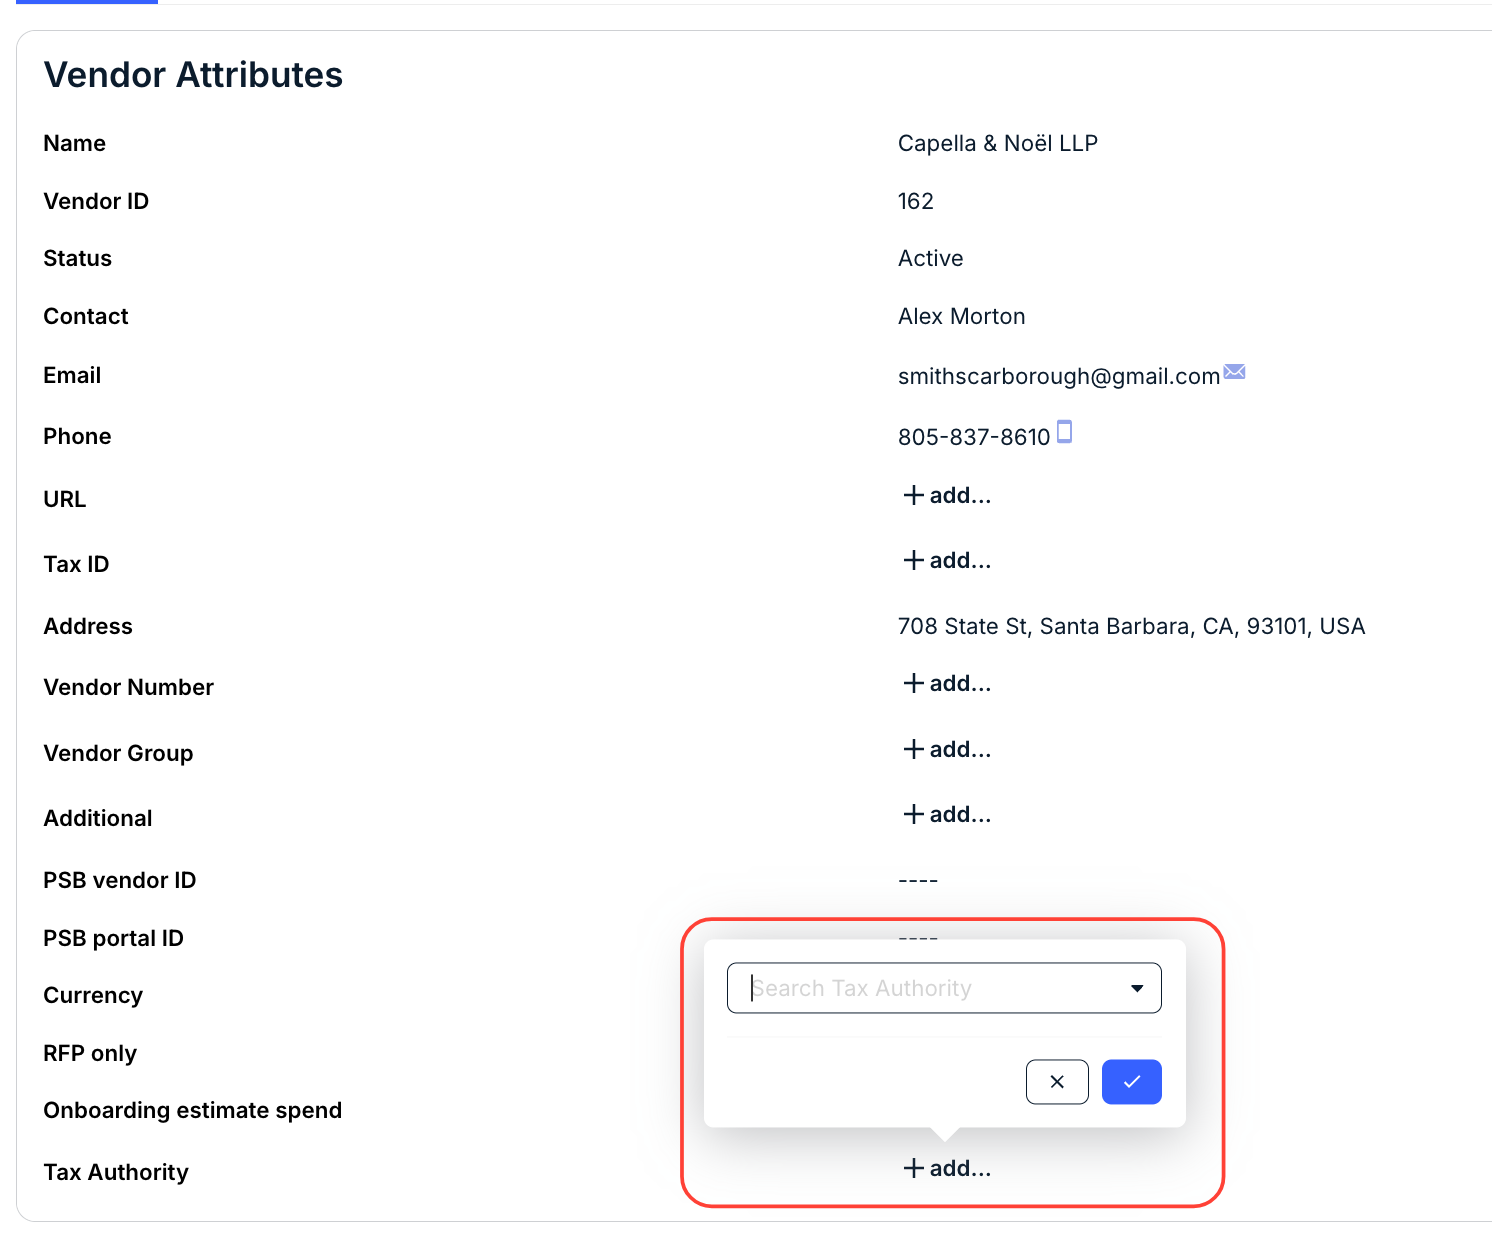
2. Click +add... next to the Tax Authority field under Overview > Attributes on the left side.
3. Select the relevant Tax Authority from the list and click the checkmark.
Consolidating Taxes on Invoices
Vendors submitting invoices with multiple VAT rates for the same country can combine their taxes into a single line item. For additional information on how vendors add taxes to LEDES and non-LEDES invoices in Counsel Exchange, refer to the articles below: