The Event Management feature helps legal departments create and track important matter-level events, such as meetings, conferences, court dates, and other court-related deadlines, from within Unity. This saves time and allows for better resource planning by allowing organizers to invite necessary attendees and set reminders for the event time/date.
This article covers the Settings > Events menu, which is used to manage the following:
- Court Rules: Displays any jurisdictions to which your organization is subscribed via third-party application CalendarRules.
- Integrations: Allows admins to set up and manage CalendarRules integration to generate matter-level events.
- Event Types: Allows admins to edit built-in types or add custom types for better event organization and filtering.
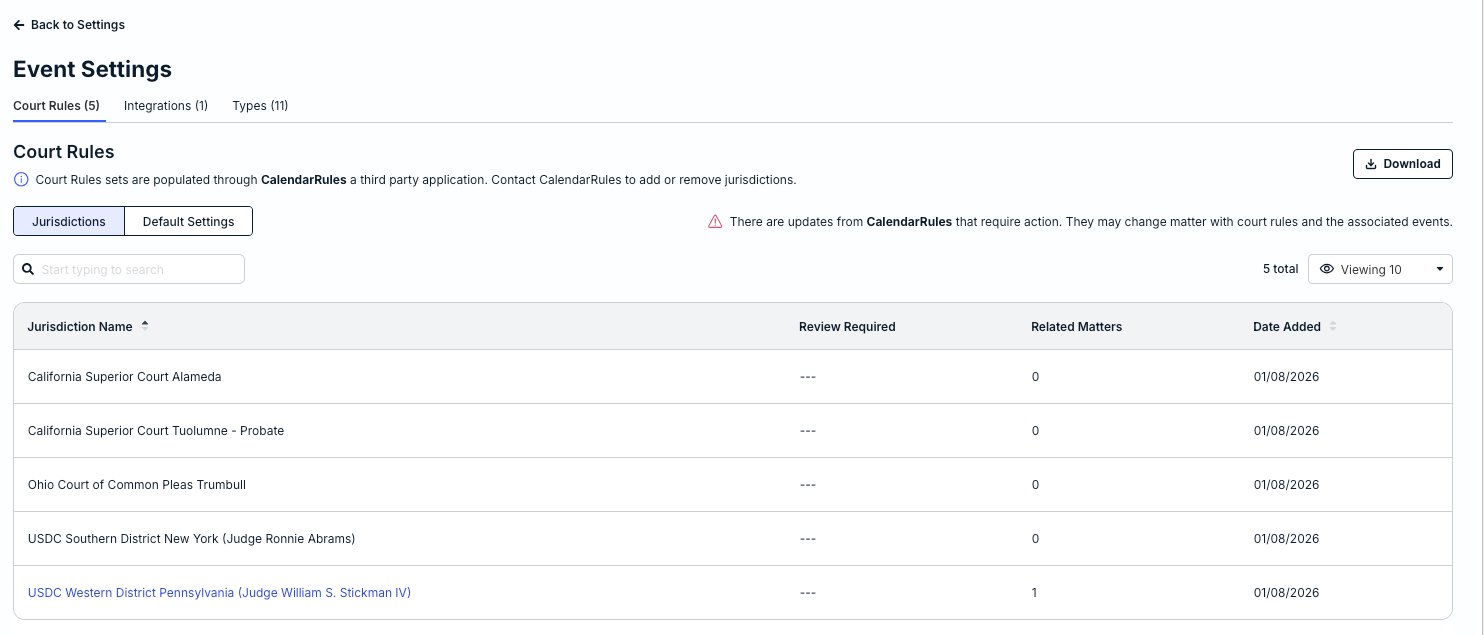
Court Rules
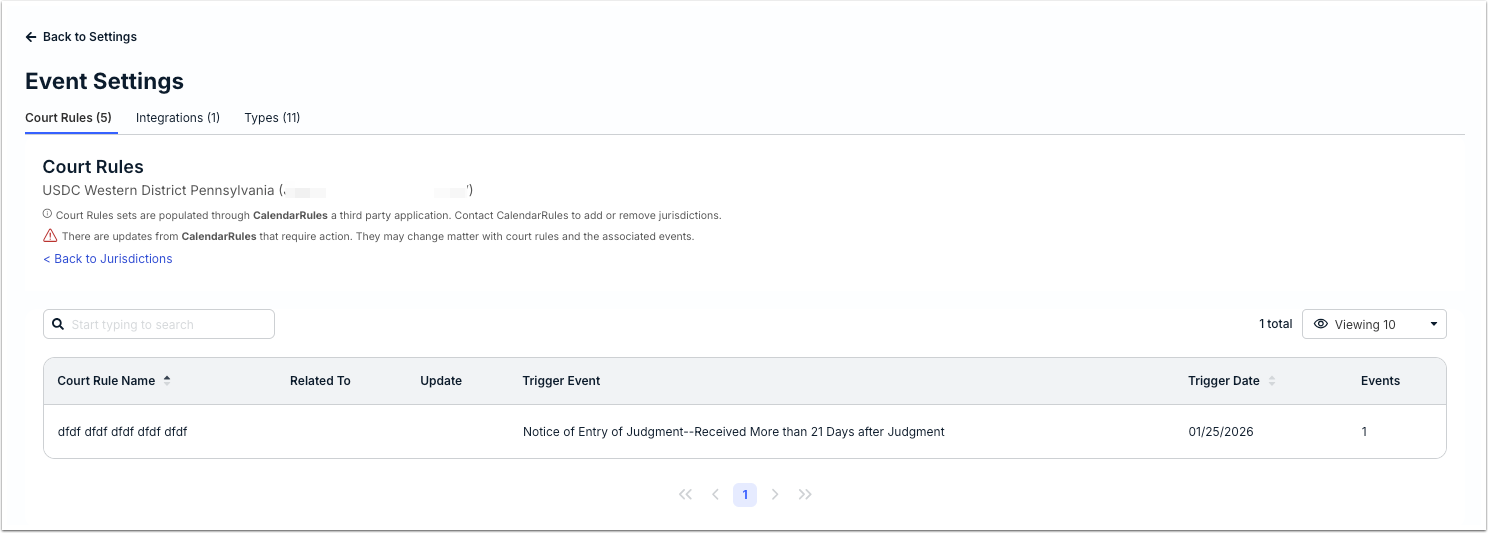
If your company has already subscribed to one or more courts via the third-party application CalendarRules and set up the integration in Unity, the names will be displayed under Settings > Events > Court Rules. The integration with CalendarRules in Unity allows users to generate matter-level events and automatically calculate court deadlines based on jurisdictional data.
If you subscribe to additional jurisdictions later via CalendarRules, they will also be displayed here. You do not need to manually reconfigure the integration or add a new token; the data from your CalendarRules account will auto-refresh. You can click Download in the top-right corner to export the list for further review offline.
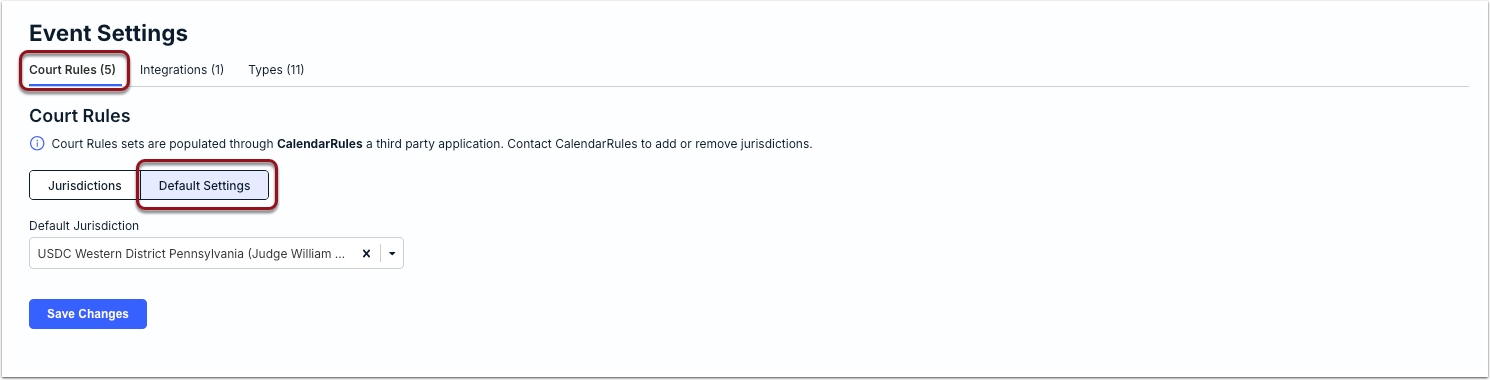
Default Court Rules Settings
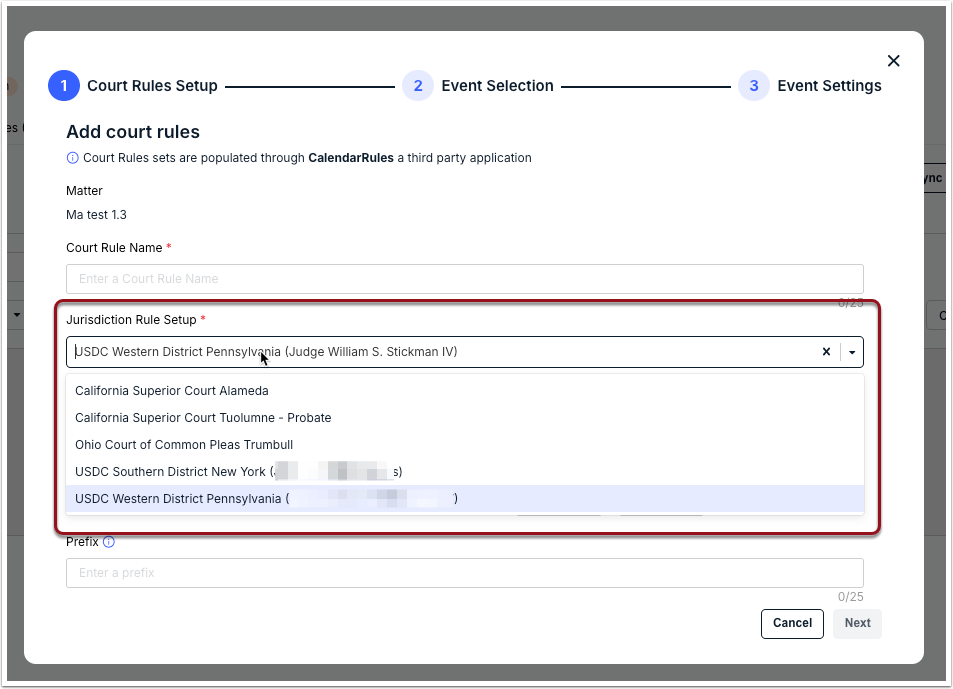
When users are creating events using Court Rules in Unity, they must choose from a list of jurisdictions as shown in the image below:
Admins can set a default jurisdiction to auto-populate when users are adding events via Court Rules. This can be managed by going to the Default Settings sub-tab under Settings > Events > Court Rules. Select a jurisdiction and click Save Changes. This will take effect for any new events added using Court Rules moving forward. Users can change/erase the default selection as needed.
Adding or Removing Jurisdictions
Jurisdictions can only be added or removed through third-party application CalendarRules. For additional information, visit the CalendarRules website.
Updates from CalendarRules
If CalendarRules updates information in their database for jurisdictions to which you are subscribed, a flag is displayed under the Review Required column on the Court Rules page. Review may be required to check for any impacts to existing matters and events using the Court Rule, such as trigger events or dates.
To see additional information about the updated jurisdiction, including the related matter name and the number of associated events, click on the hyperlinked jurisdiction name from the list.
Integrations
Before continuing with the steps in this section, review the following requirements and other considerations:
- CalendarRules is a third-party platform; pricing and subscriptions are not connected to or managed by Onit. Visit the CalendarRules website for additional information.
- A subscription to at least one jurisdiction through CalendarRules is required to set up and use the Unity integration.
- By continuing below, you may be taken out of Unity and to the CalendarRules website if you need to request a quote for a subscription.
Setting Up Integration
1. Go to Settings > Events and switch to the Integrations tab.
2. Click on Connect.
3. Copy and paste the CalendarRules token. If you do not currently have a token, click here for additional instructions.
4. Click on Connect.
Requesting a CalendarRules Subscription/Token
Review this section for instructions on how to request a quote for a CalendarRules subscription and token. If you have already purchased and obtained a token from CalendarRules, click here for instructions on how to set up the integration in Unity.
1. Go to Settings > Events and switch to the Integrations tab.
2. Click on Connect.
3. Click on Request a token.
4. Read the prompt and then click I agree if you want to continue with visiting the third-party CalendarRules site.
5. Review the CalendarRules information about court rules and subscription pricing. If you need additional information, visit the CalendarRules website to see their list of supported jurisdictions and FAQs.
6. Click on the arrows to the left of a state to see available jurisdictions and courts for each.
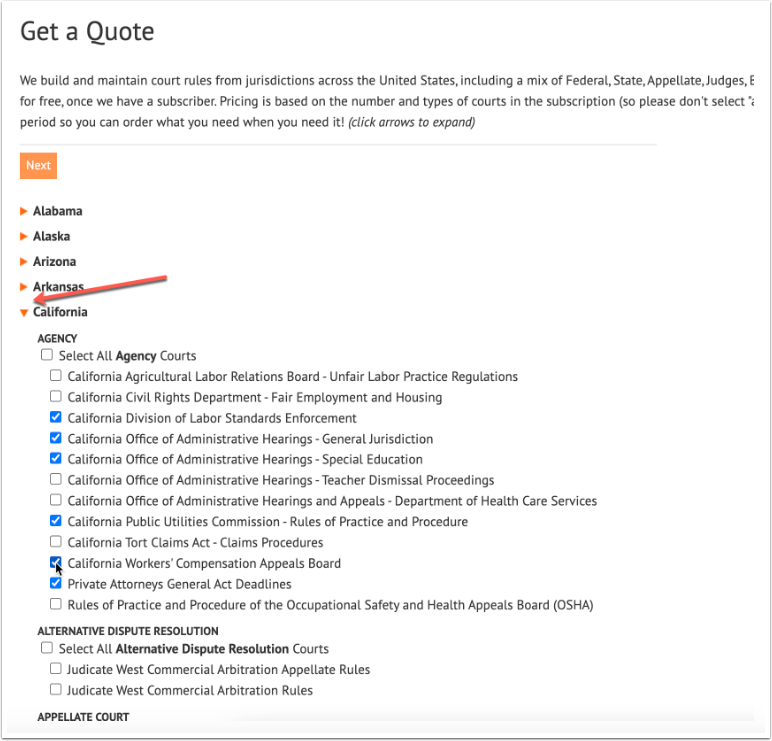
7. Select only the courts that apply under the relevant jurisdiction(s) and click Next.

8. Enter the requested information and click submit.
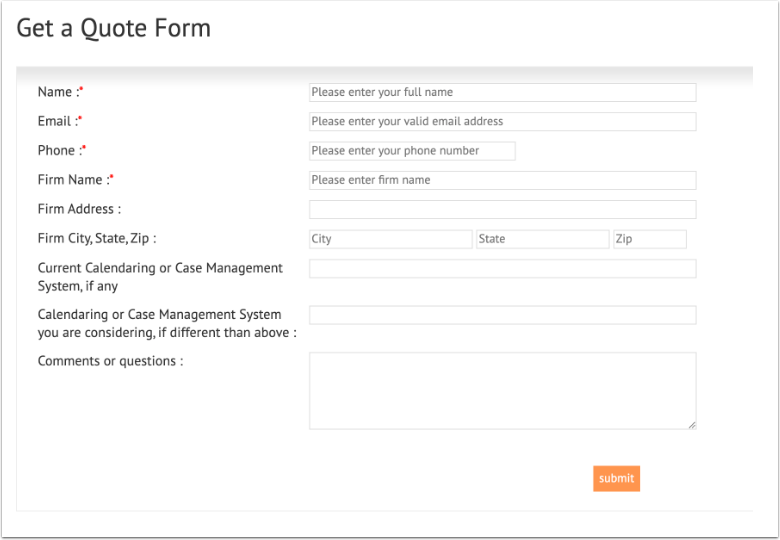
You will see a confirmation message that your quote request has been submitted. You will receive further instructions from CalendarRules on how to purchase a token.

Disconnecting CalendarRules Integration
If your organization is no longer using CalendarRules and needs to disconnect the integration, click the Disconnect button under Settings > Events > Integrations. You must select the acknowledgement box and click Disconnect again to continue.

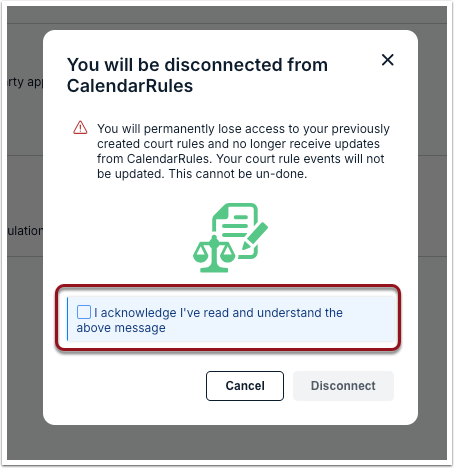
Disconnecting the integration means your organization will need to connect it again per the instructions above to use Court Rules for events in Unity.
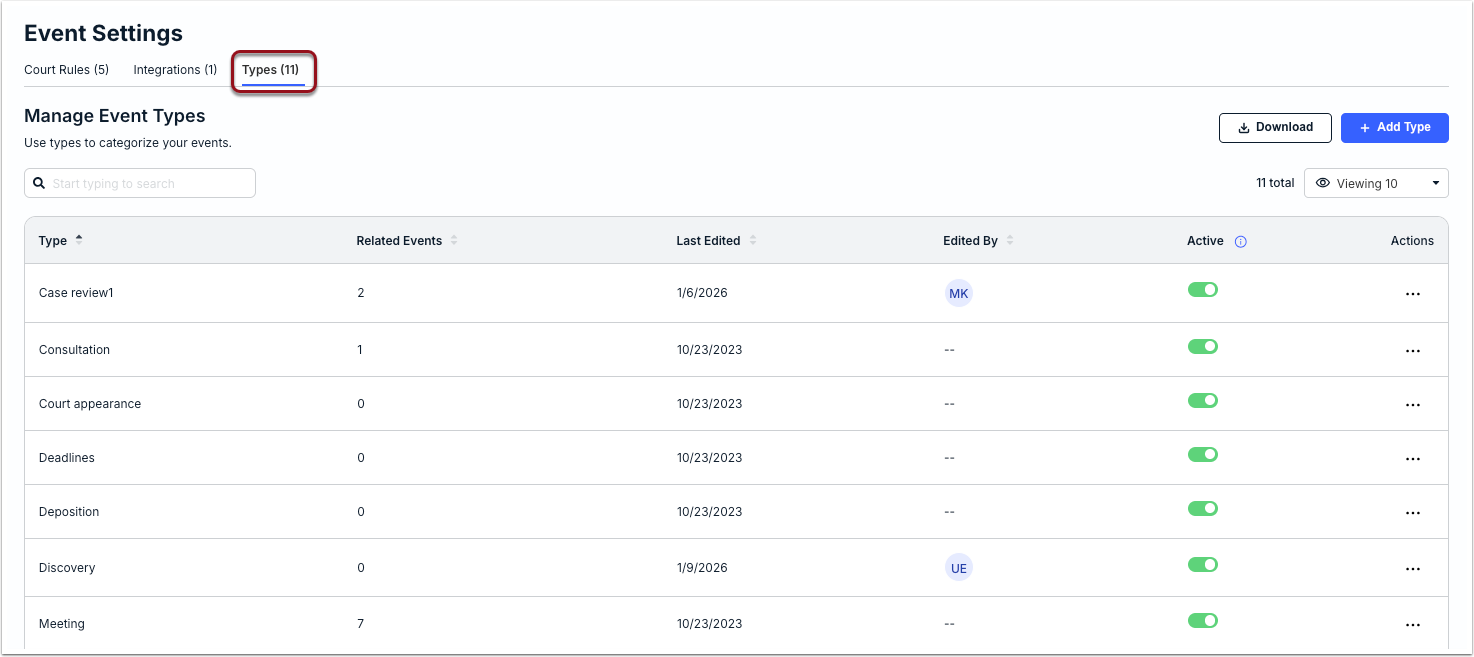
Event Types
Event types can be used to organize matter-level events into categories for better filtering, searching, and reporting. The categories should be descriptive of the type of event taking place for a matter. The following event types are built into Unity for all customers:
- Case Review
- Conference
- Consultation
- Court Appearance
- Deadlines
- Deposition
- Discovery
- Meeting
- Negotiation
- Training
- Trial
- Workshop
Admins can customize the built-in event types or add their own by going to Settings > Events > Types.
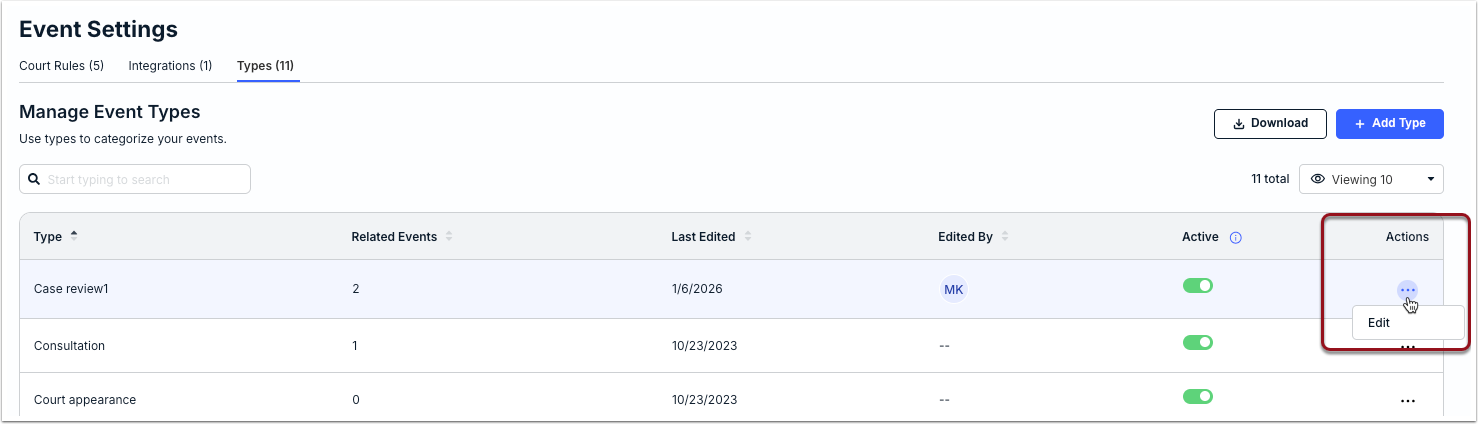
Edit Event Type
Click on the... (more) option under the Actions column for an event type and select Edit. This is useful if you need to customize the built-in options or update other types created by admins.
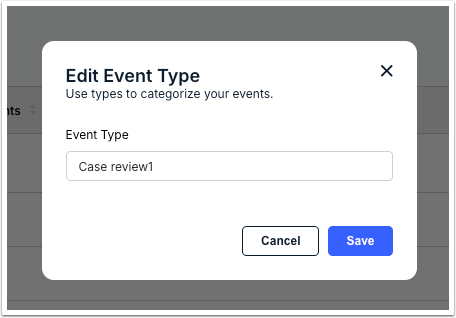
Update the event type name (up to 50 characters allowed) and click Save. The update will also apply to all current related events.
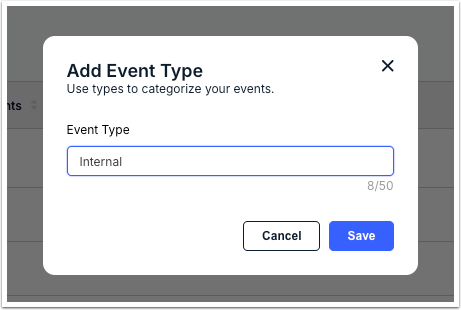
Create Event Type
If additional types would be useful for categorizing events, click + Add Type in the top-right corner of the Manage Event Types page to create a new one. New event types are automatically set to active and available for selection by users who are creating/editing events.
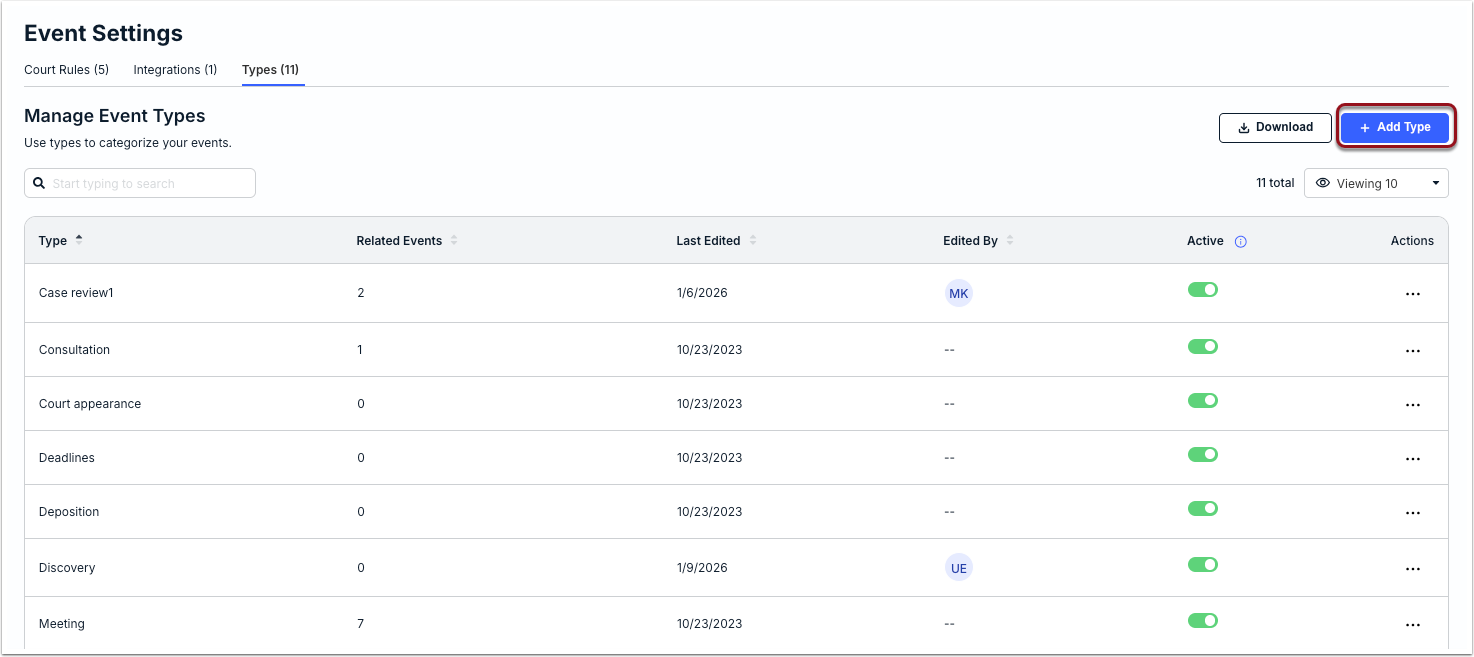
Enter the event type (up to 50 characters allowed) and click Save.
Deleting or Deactivating Event Types
Click on the ... (more) option under the Actions column and select Delete. Click Delete when prompted confirm.
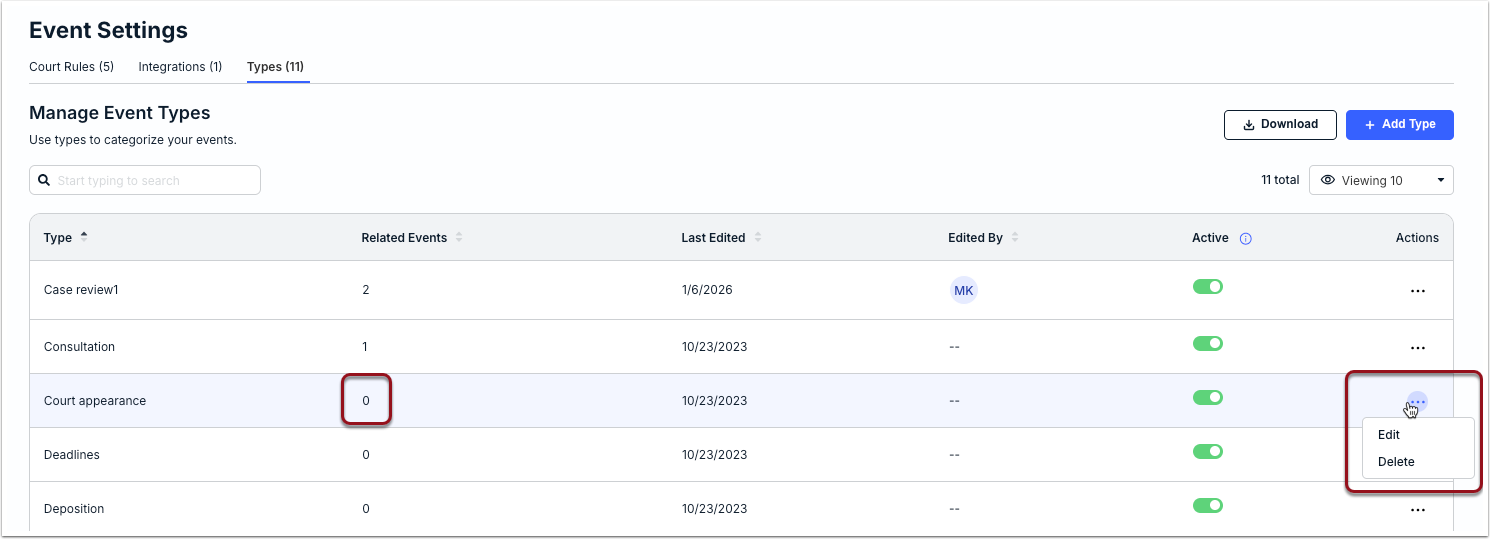
To deactivate an event type instead, click on the toggle under the Active column.