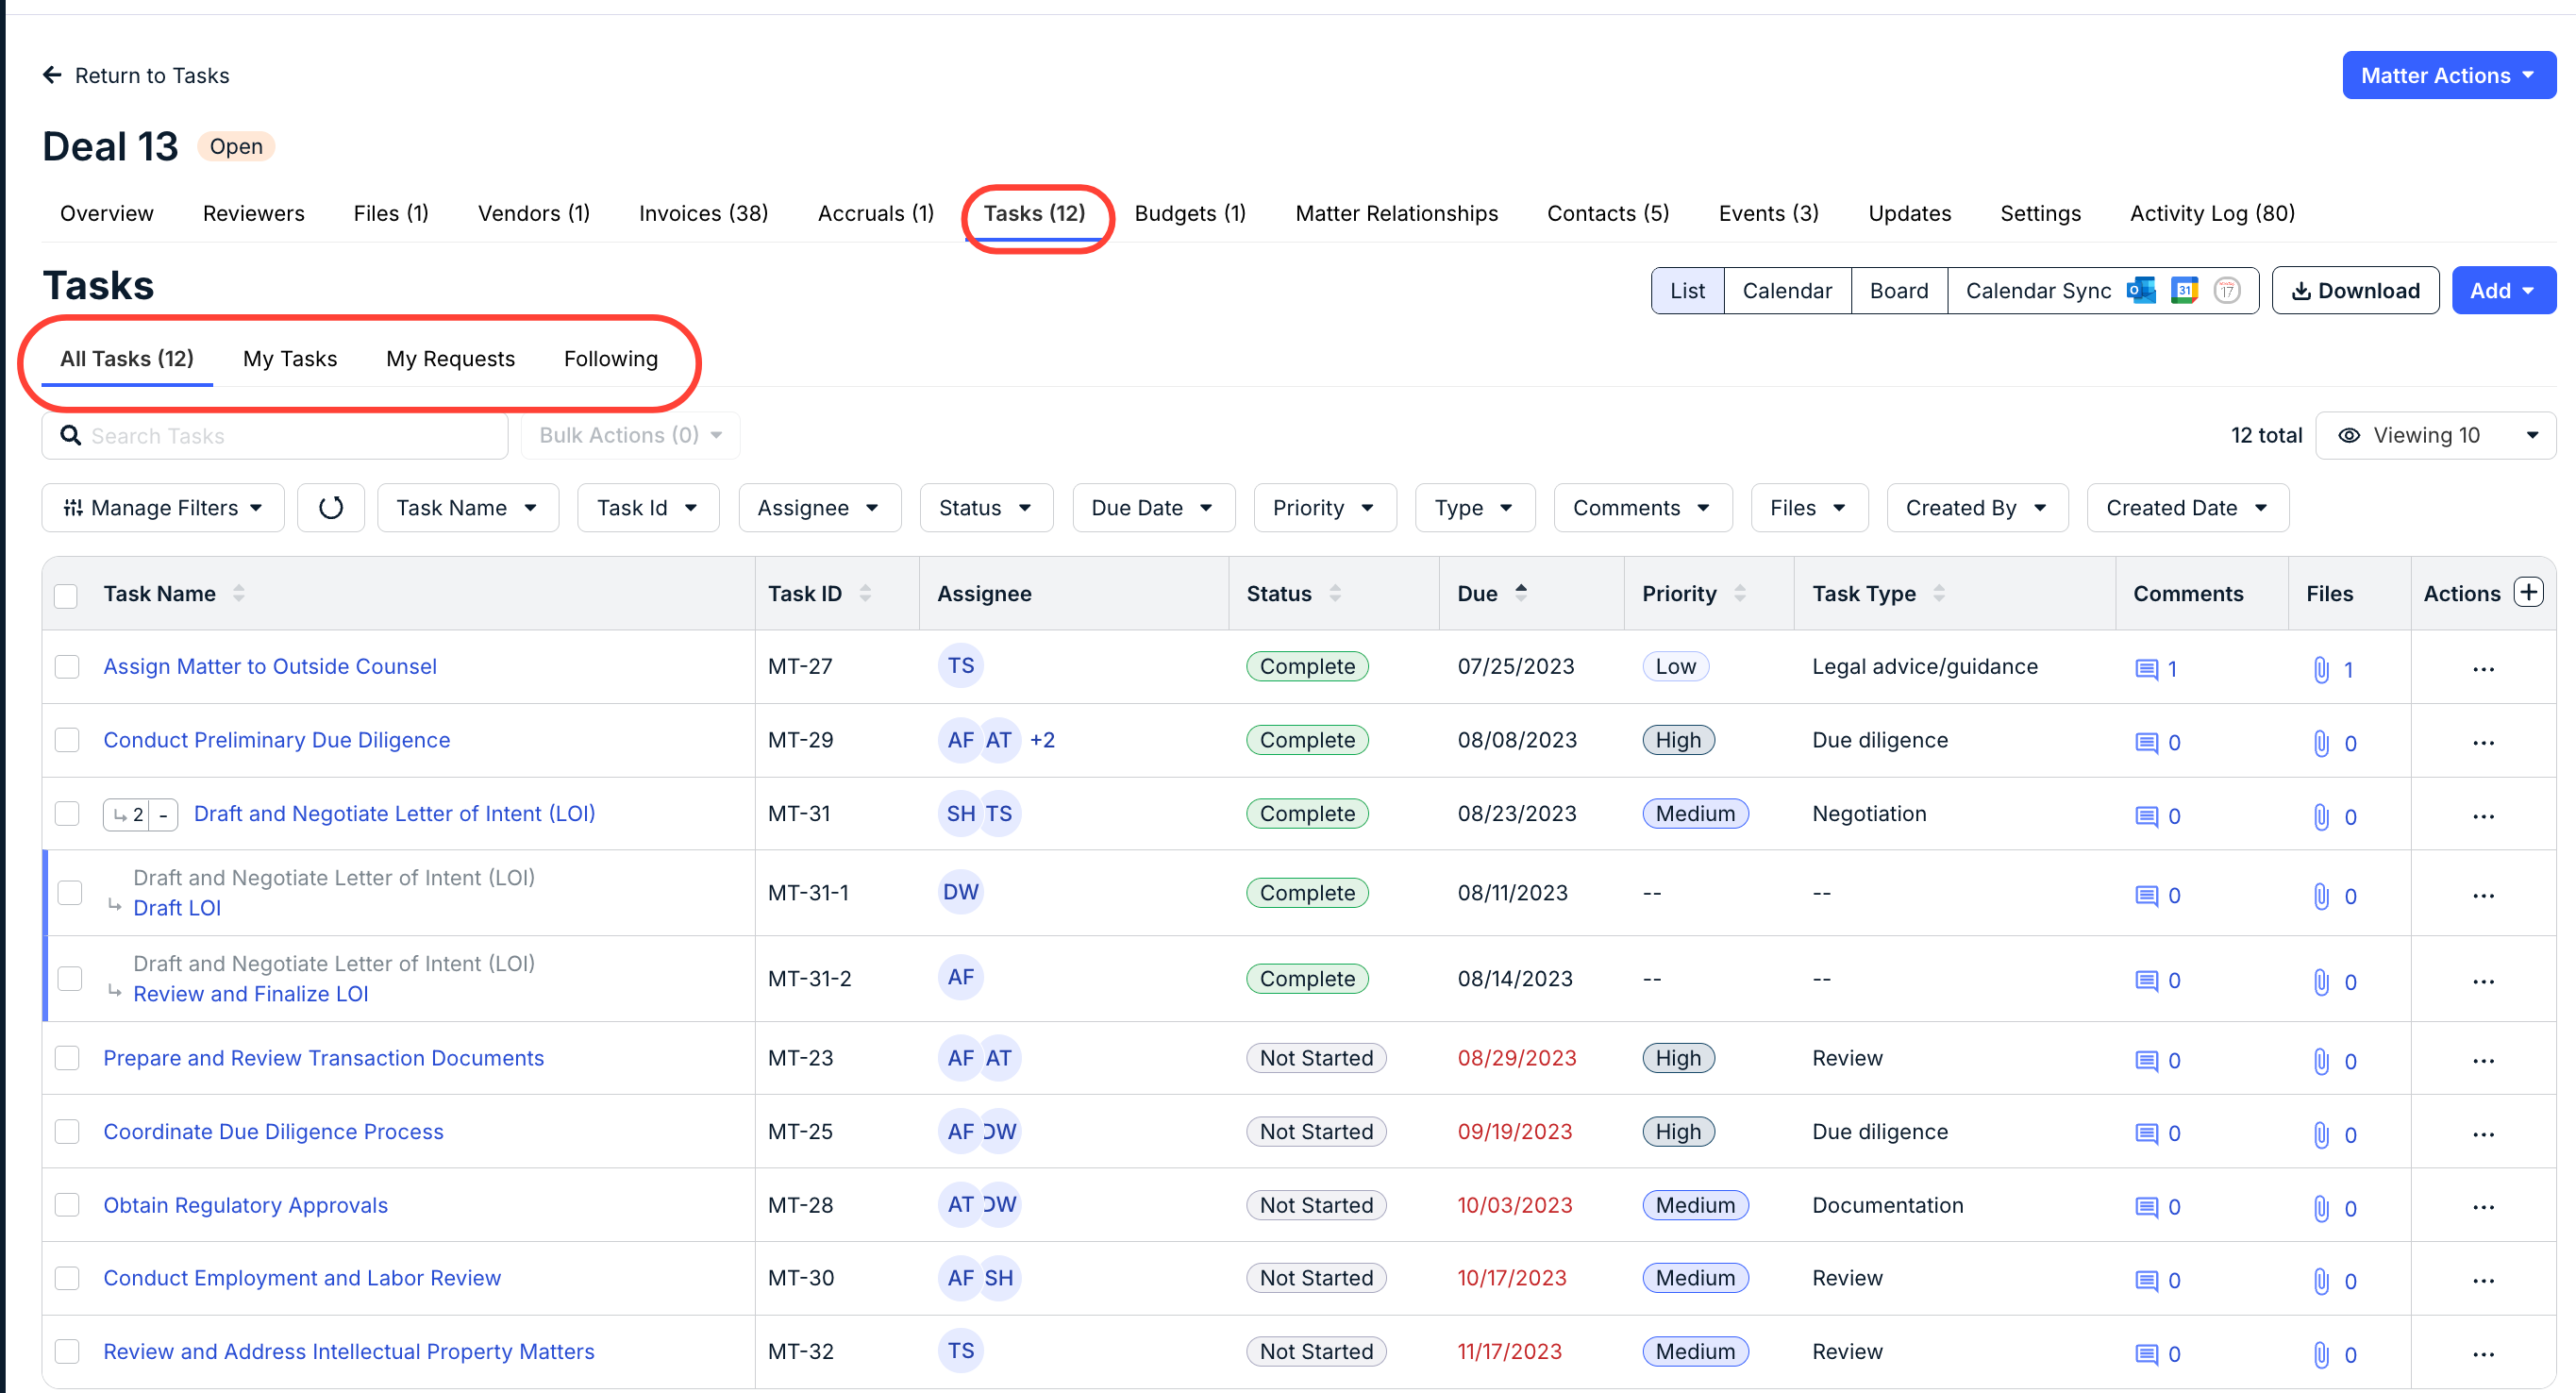
The Task Management feature helps your legal department assign, prioritize, and track matter-level workload and deadlines. Instead of having to rely on multiple third-party tools, tasks can be created/managed from Unity to save time for leads and assignees alike. This also allows users to keep others informed by attaching relevant files, adding important notes, and assigning followers. This article provides an overview of system-level settings for admins. If you are looking for information about creating or working with tasks at the matter level, click here.
Which users can add, update, and assign tasks and events at the matter level depend on permission settings in your environment as follows:
- Role-Based Permissions: Create/edit permissions are typically restricted to admins.
- Advanced Permissions: Create/edit permissions can be assigned and managed at the matter level for individual users and User Teams (if applicable).
With the tasks feature, admins can standardize and manage how tasks are used across matters in your environment, including building task templates and customizing labels for priorities and statuses.
To get started, go to Settings > Tasks to view current settings and/or make changes. This page is separated into four menus:
- Priorities: Labels to indicate the urgency and importance of individual tasks.
- Statuses: Labels to indicate the stage of a task from assignment through completion.
- Templates: Lists of standardized tasks that are frequently used in matters.
- Types: Categories to further organize tasks into groups based on the type of activity.
Managing Task Priorities
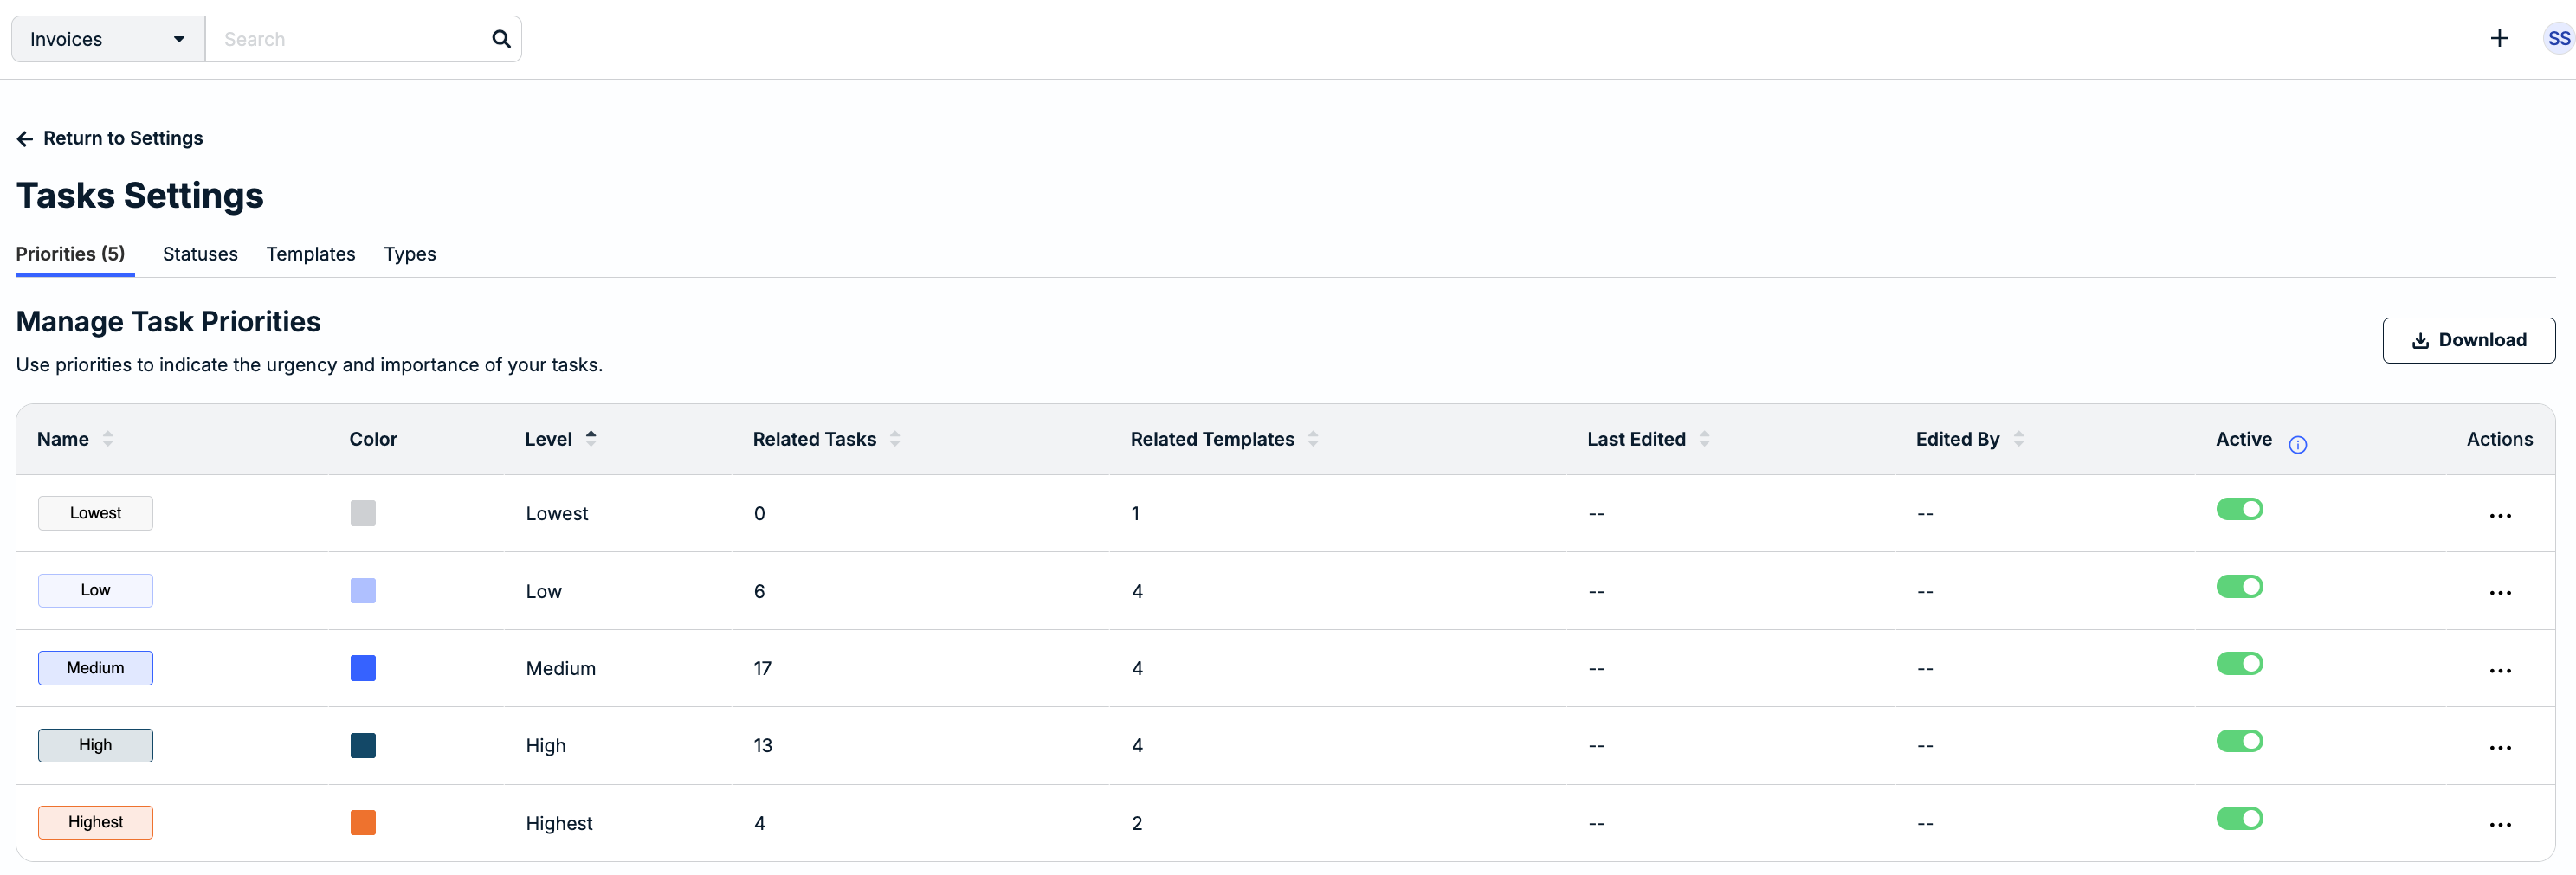
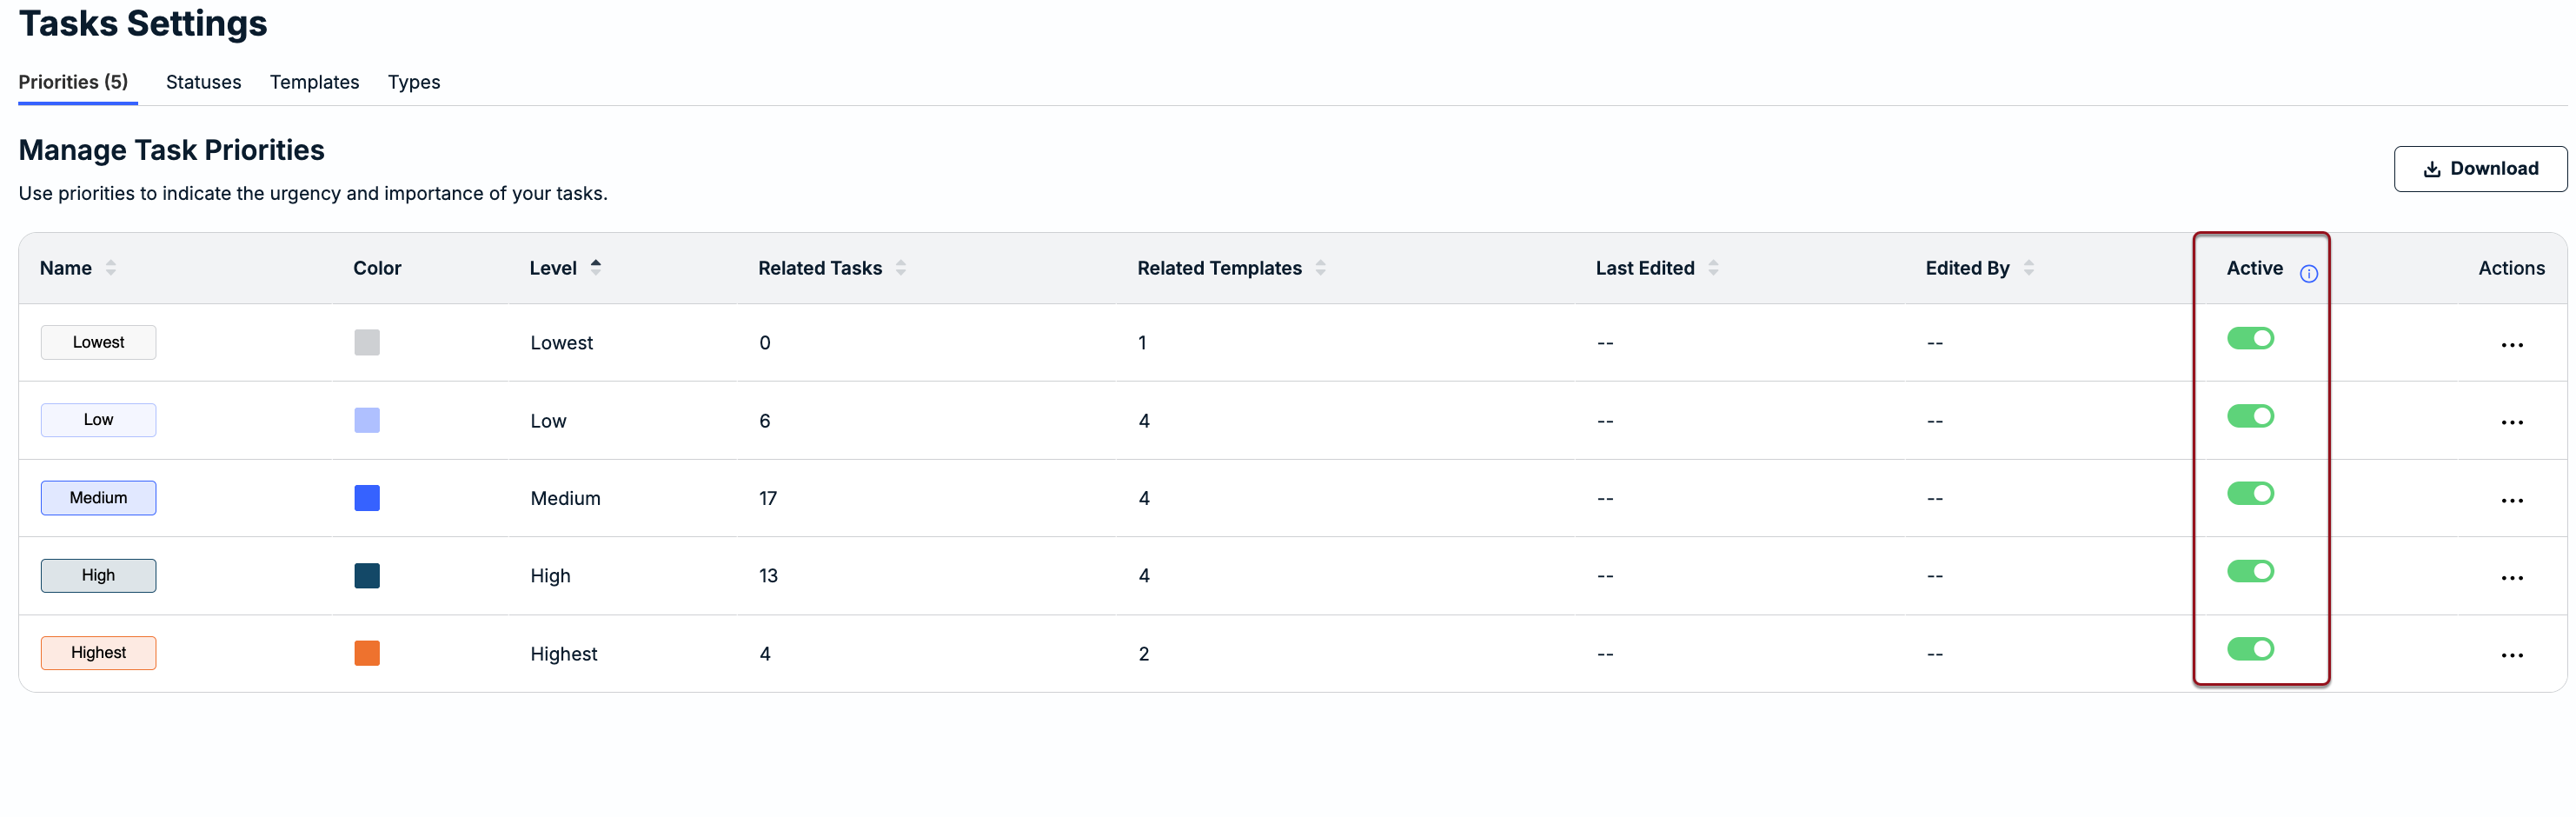
The Priorities tab displays the following information:
- Name: Text label shown to indicate urgency or importance at the matter level.
- Color: Color label currently shown at the matter level for each priority. The built-in colors can be changed as needed (skip below for instructions).
- Level: Default levels assigned to the built-in task priorities. These are read-only and will match the priority names if the built-in options have not been changed by an admin.
- Related Tasks: Number of matter-level tasks currently tagged with the priority.
- Related Templates: Number of templates with at least one task tagged with the priority.
- Last Edited: Date in MM/DD/YYYY format that the priority was last updated. This column is blank if the built-in priority has not been edited since the feature was enabled.
- Edited By: Initials of the admin who last updated the task priority. This column is blank if the built-in priority has not been edited since the feature was enabled.
- Active: Toggle to activate or deactivate a priority; built-in priorities are active by default.
- Actions: Displays the ... (more) option to edit the priority name and/or color.

Priorities indicate the urgency or importance of individual tasks to better help users assign and manage workload for matters. The following task priorities are built into Unity:
- Lowest
- Low
- Medium
- High
- Highest
Editing Task Priorities
To avoid clutter or overlap, a maximum of five task priorities are allowed. To edit a task priority:
1. Click on the ... (more) icon under the Actions column for a priority and click Edit.
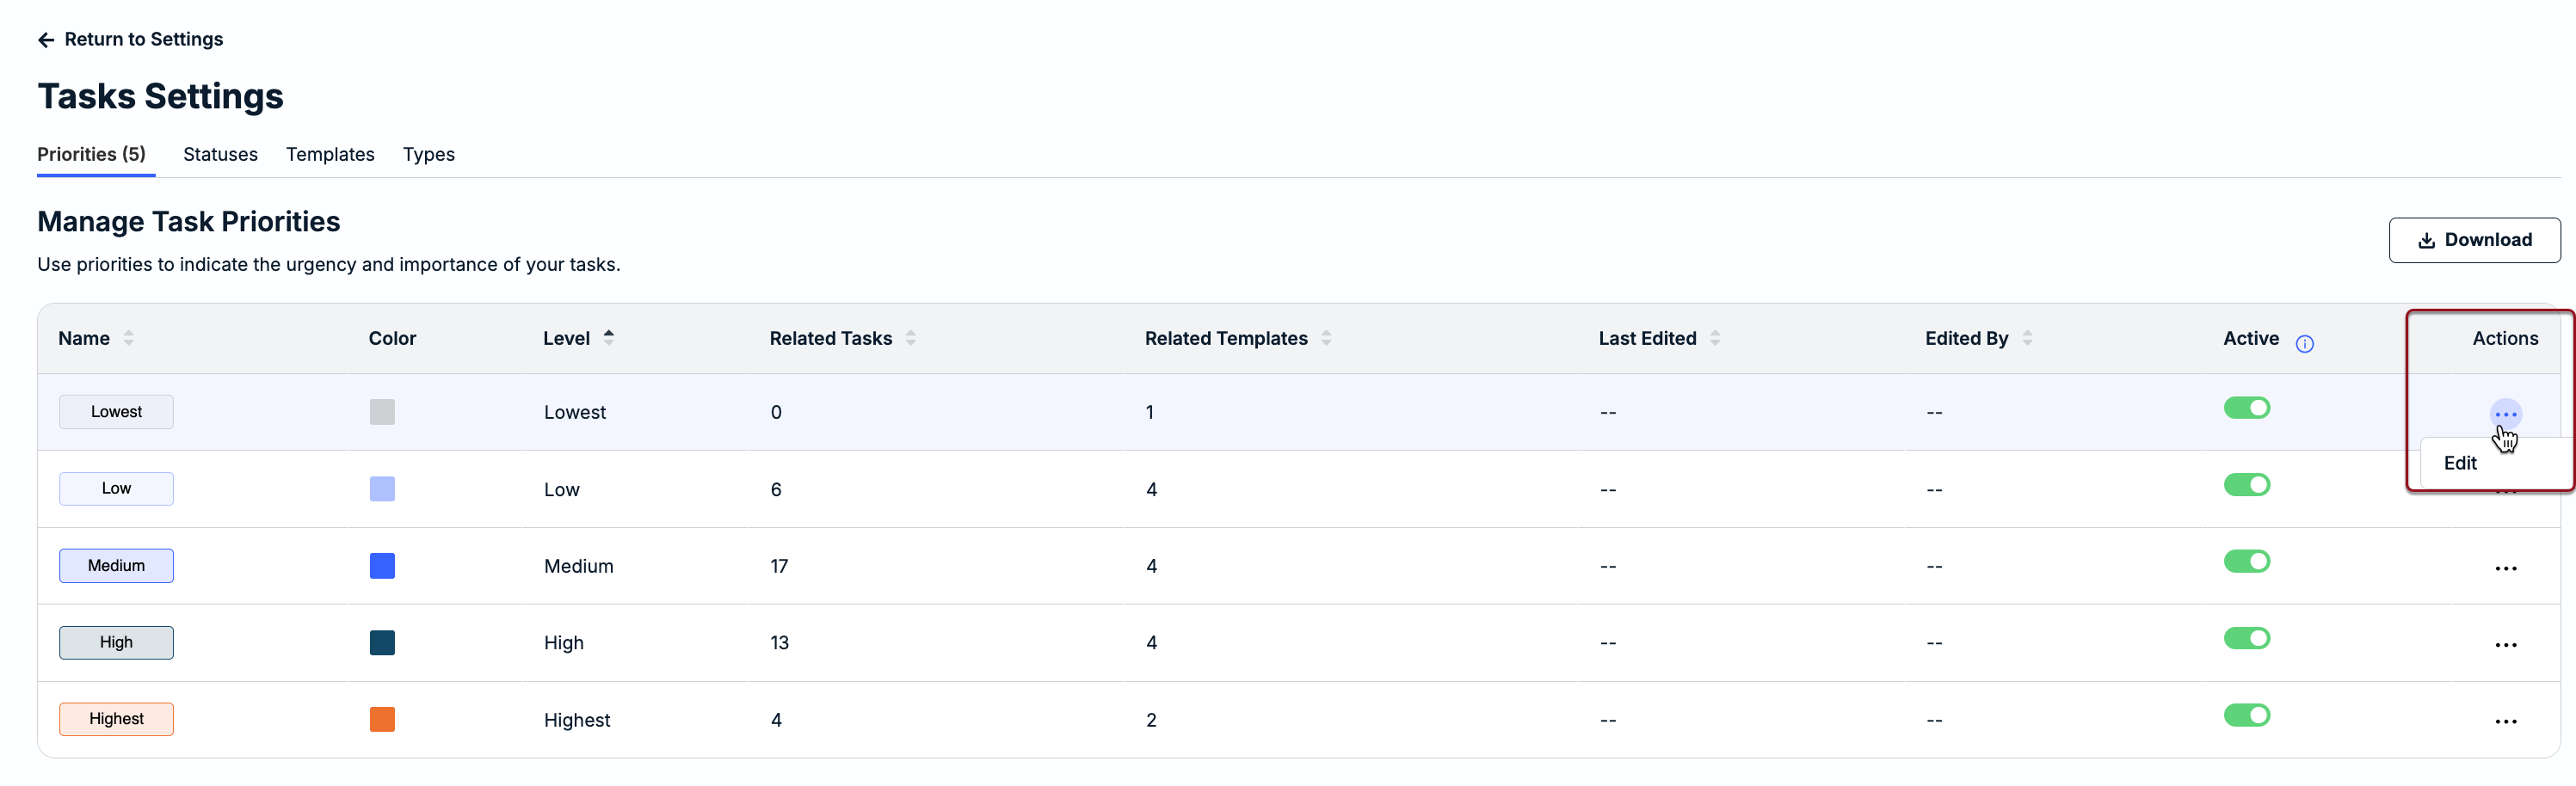
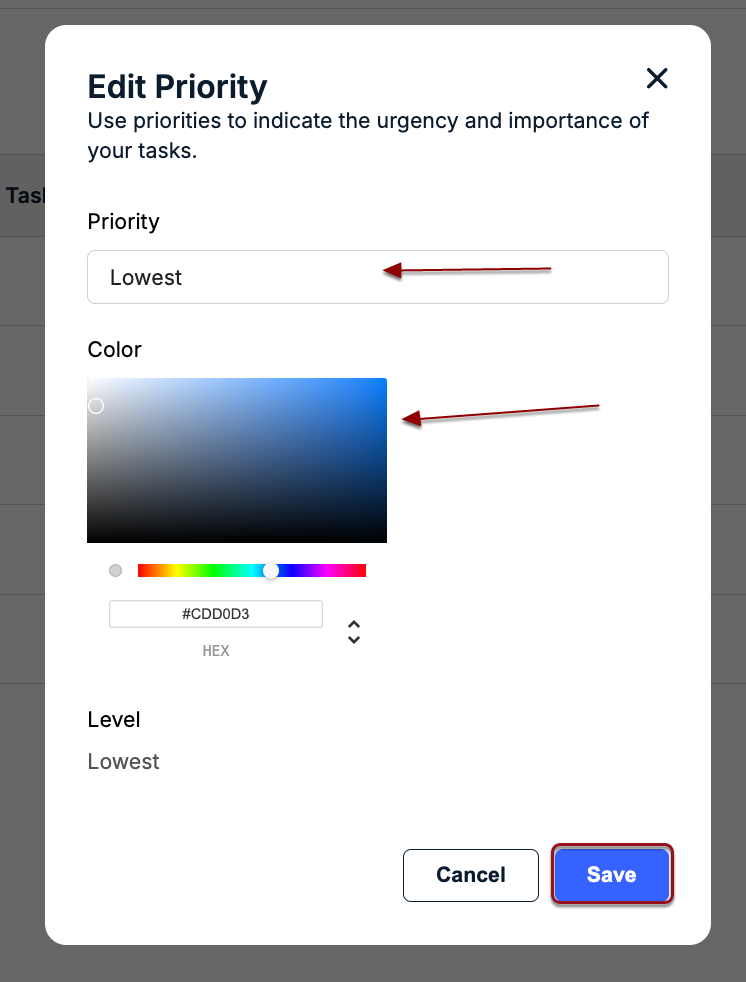
2. Do one or both of the following from the edit modal and then click Save:
- Change the name of the priority (up to 25 characters, including spaces)
- Use the color picker to change the label color, or enter the HEX code
Activating or Deactivating a Task Priority
By default, the built-in priorities provided by Onit are active and can be selected by users who create, assign, and manage tasks at the matter level. Deactivating a priority means that it cannot be selected when creating/updating individual matter-level tasks or template-level tasks moving forward. This will not, however, impact any existing matter-level tasks that currently use the priority.
To deactivate a priority, click the toggle under the Active column once.
If the priority is currently being used on at least one task on any templates, you will be prompted to choose whether you want to replace the priority with another active option or remove the priority from the associated task(s) in the template(s). The prompt window displays the number of templates on which at least one task is assigned the priority.
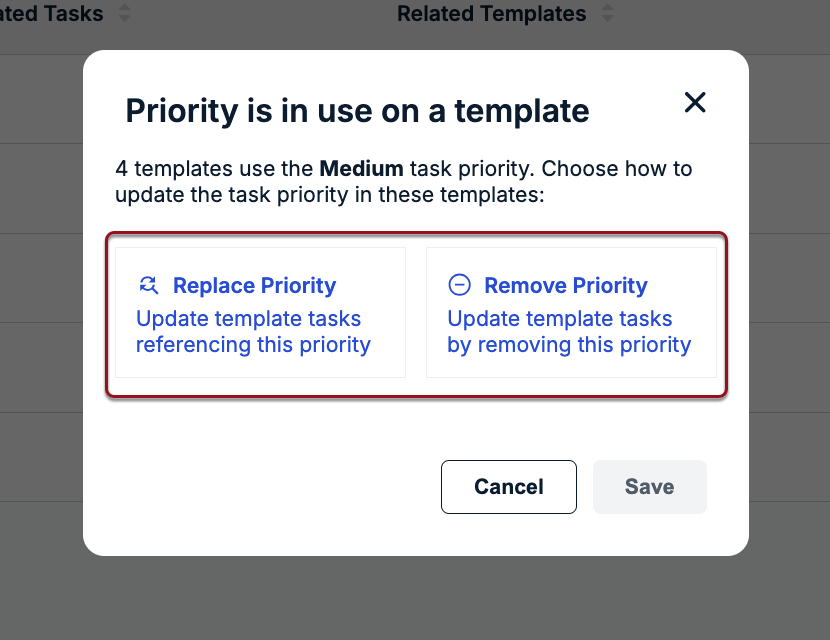
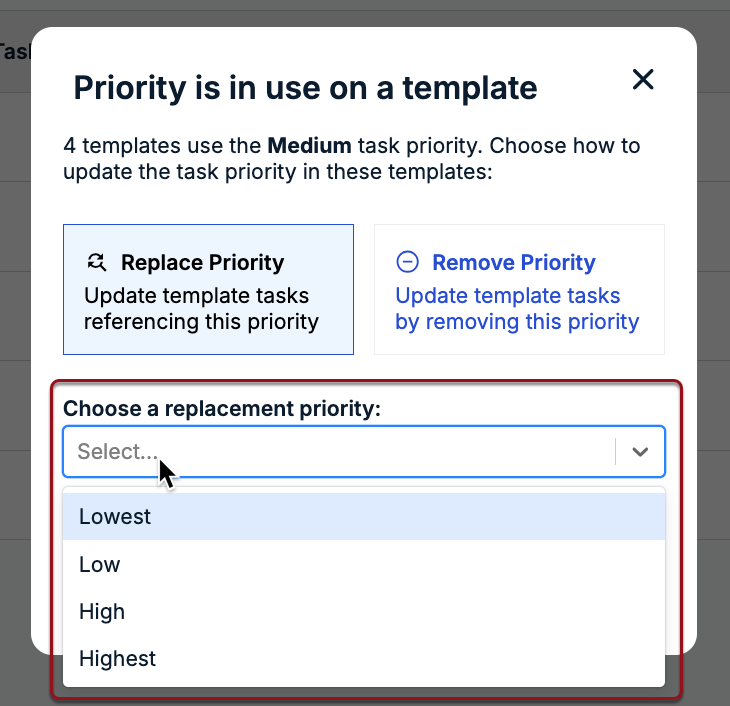
To change the priority on all associated template tasks, click Replace Priority, choose an active option, and then click Save.
To erase the priority from the associated template tasks, click Remove Priority and then click Save. This will make the priority on the associated template tasks none or null and can be updated directly from the template later if needed.
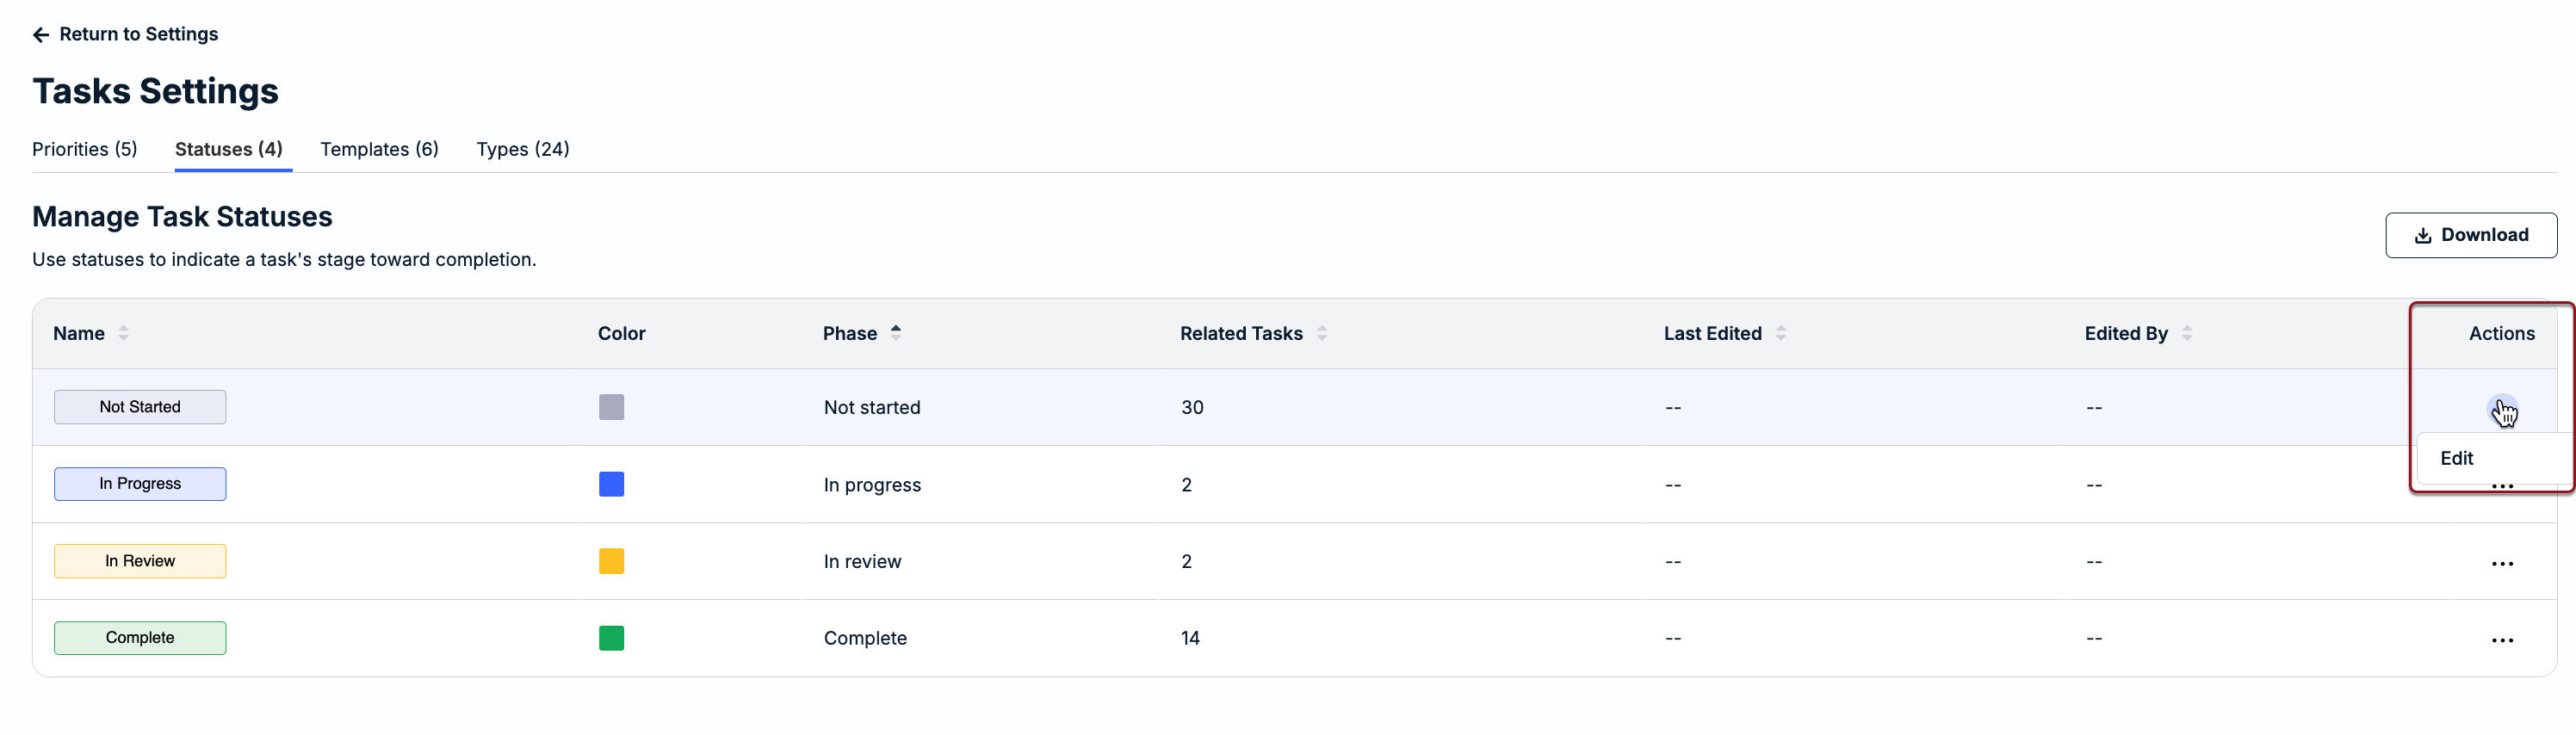
Managing Task Statuses
The Statuses tab displays the following information:
- Name: Text label shown to indicate progress for a task at the matter level.
- Color: Color label currently shown at the matter level. The built-in colors can be changed as needed (skip below for instructions).
- Phase: Default phases assigned to the built-in task statuses. These are read-only and will match the status names if the built-in options have not been changed by an admin.
- Related Tasks: Number of matter-level tasks currently tagged with the status.
- Last Edited: Date in MM/DD/YYYY format that the status name or color was last updated. This column is blank if the built-in status has not been edited since the feature was enabled.
- Edited By: Initials of the admin who last updated the status name or color. This column is blank if the built-in status has not been edited since the feature was enabled.
- Actions: Displays the ... (more) option to edit the status name and/or color.
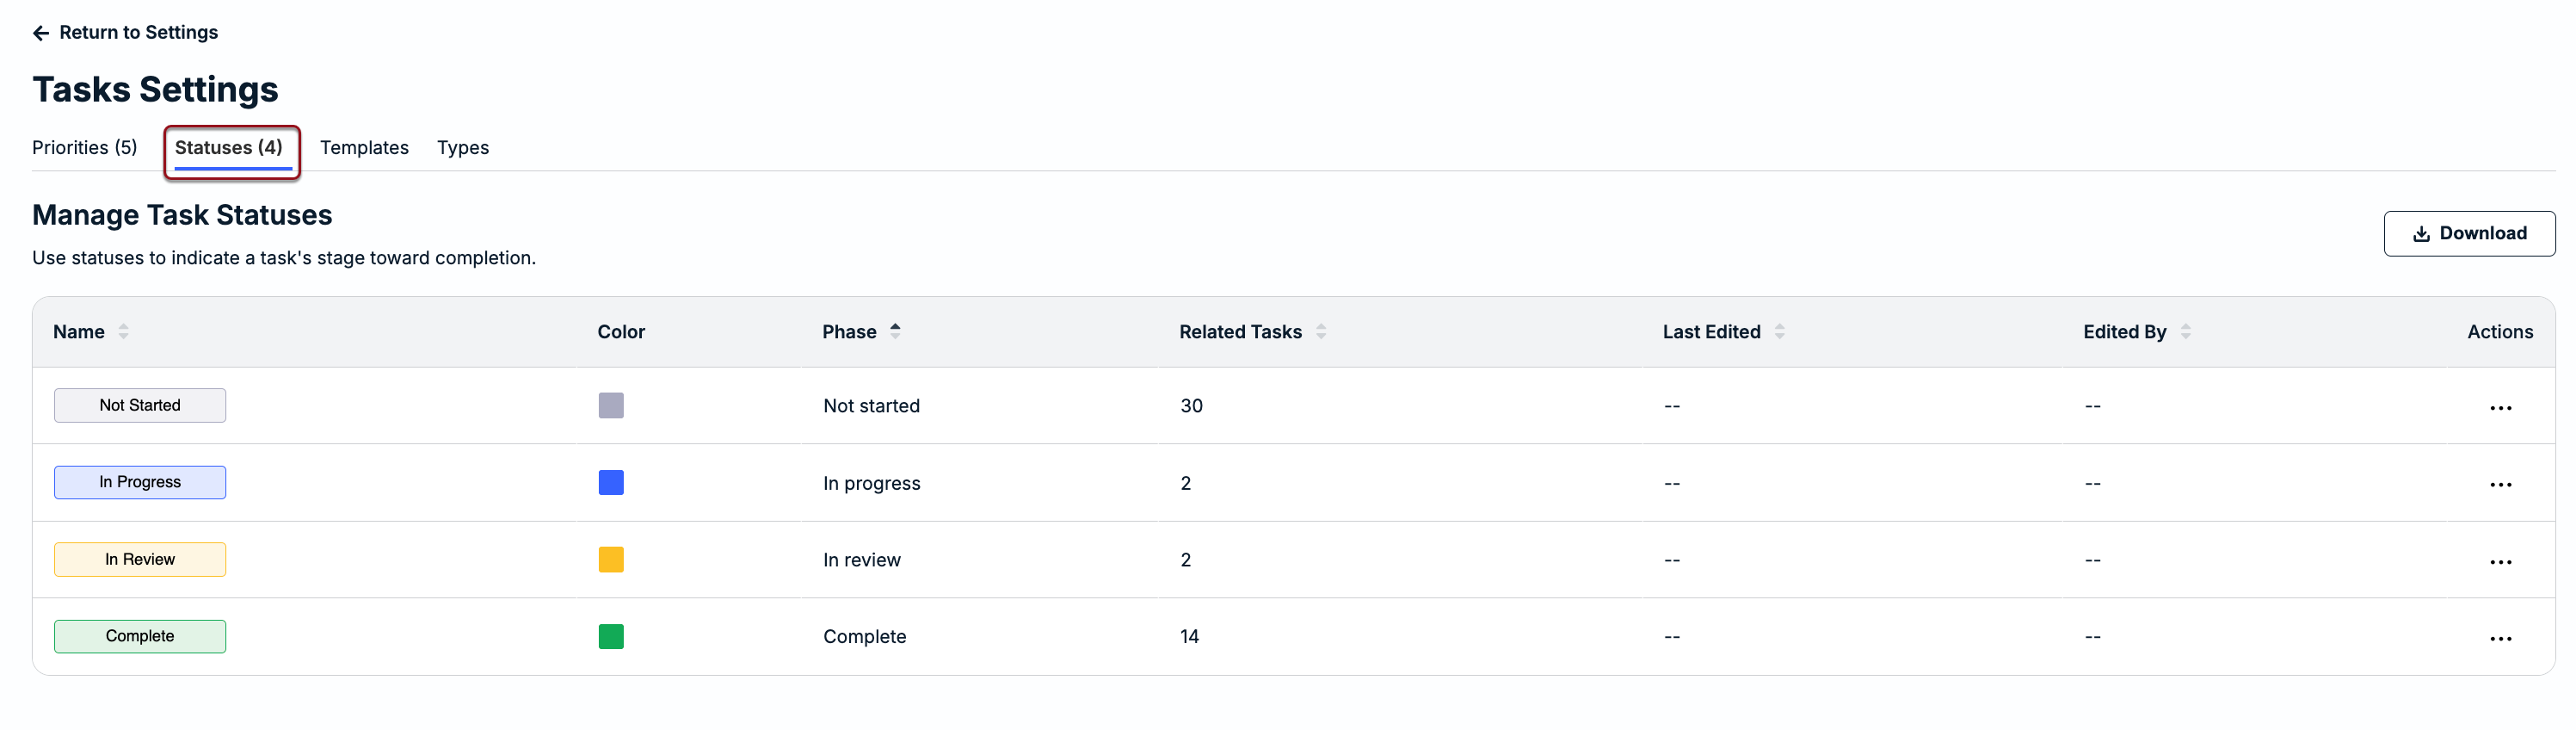
Statuses are used to track progress on matter-level tasks from assignment through completion. The following task statuses are built into Unity:
- Not Started
- In Progress
- In Review
- Complete
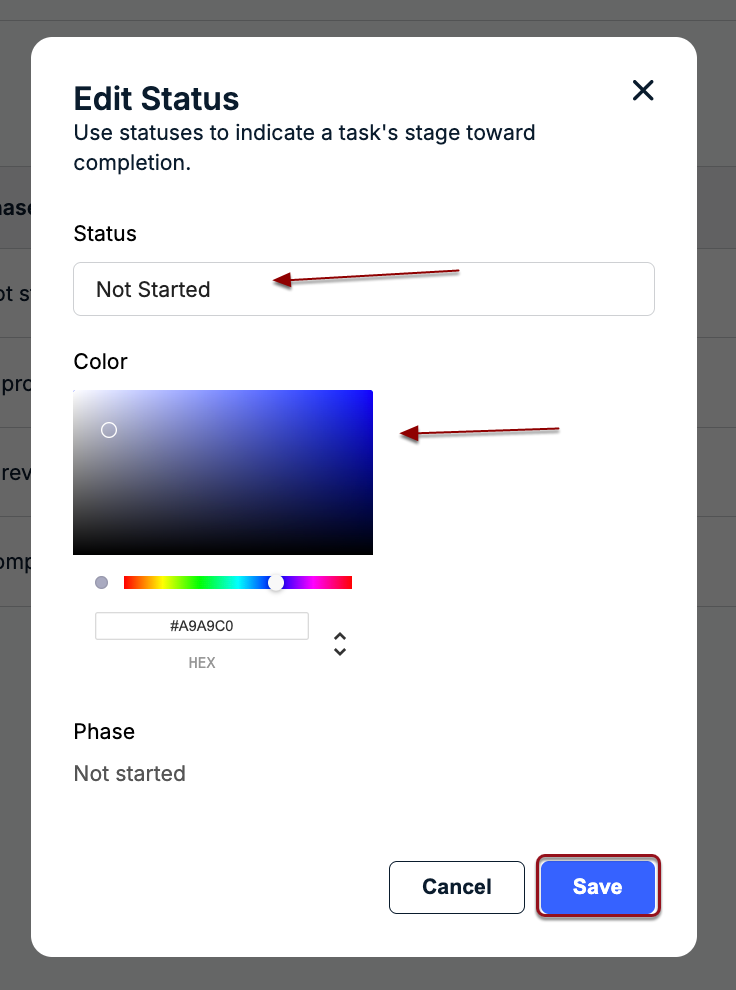
Editing Task Statuses
1. Click on the ... (more) icon under the Actions column for a task status and click Edit.
2. Do one or both of the following from the edit modal and then click Save:
- Change the name of the status (up to 25 characters, including spaces)
- Use the color picker to change the label color, or enter the HEX code
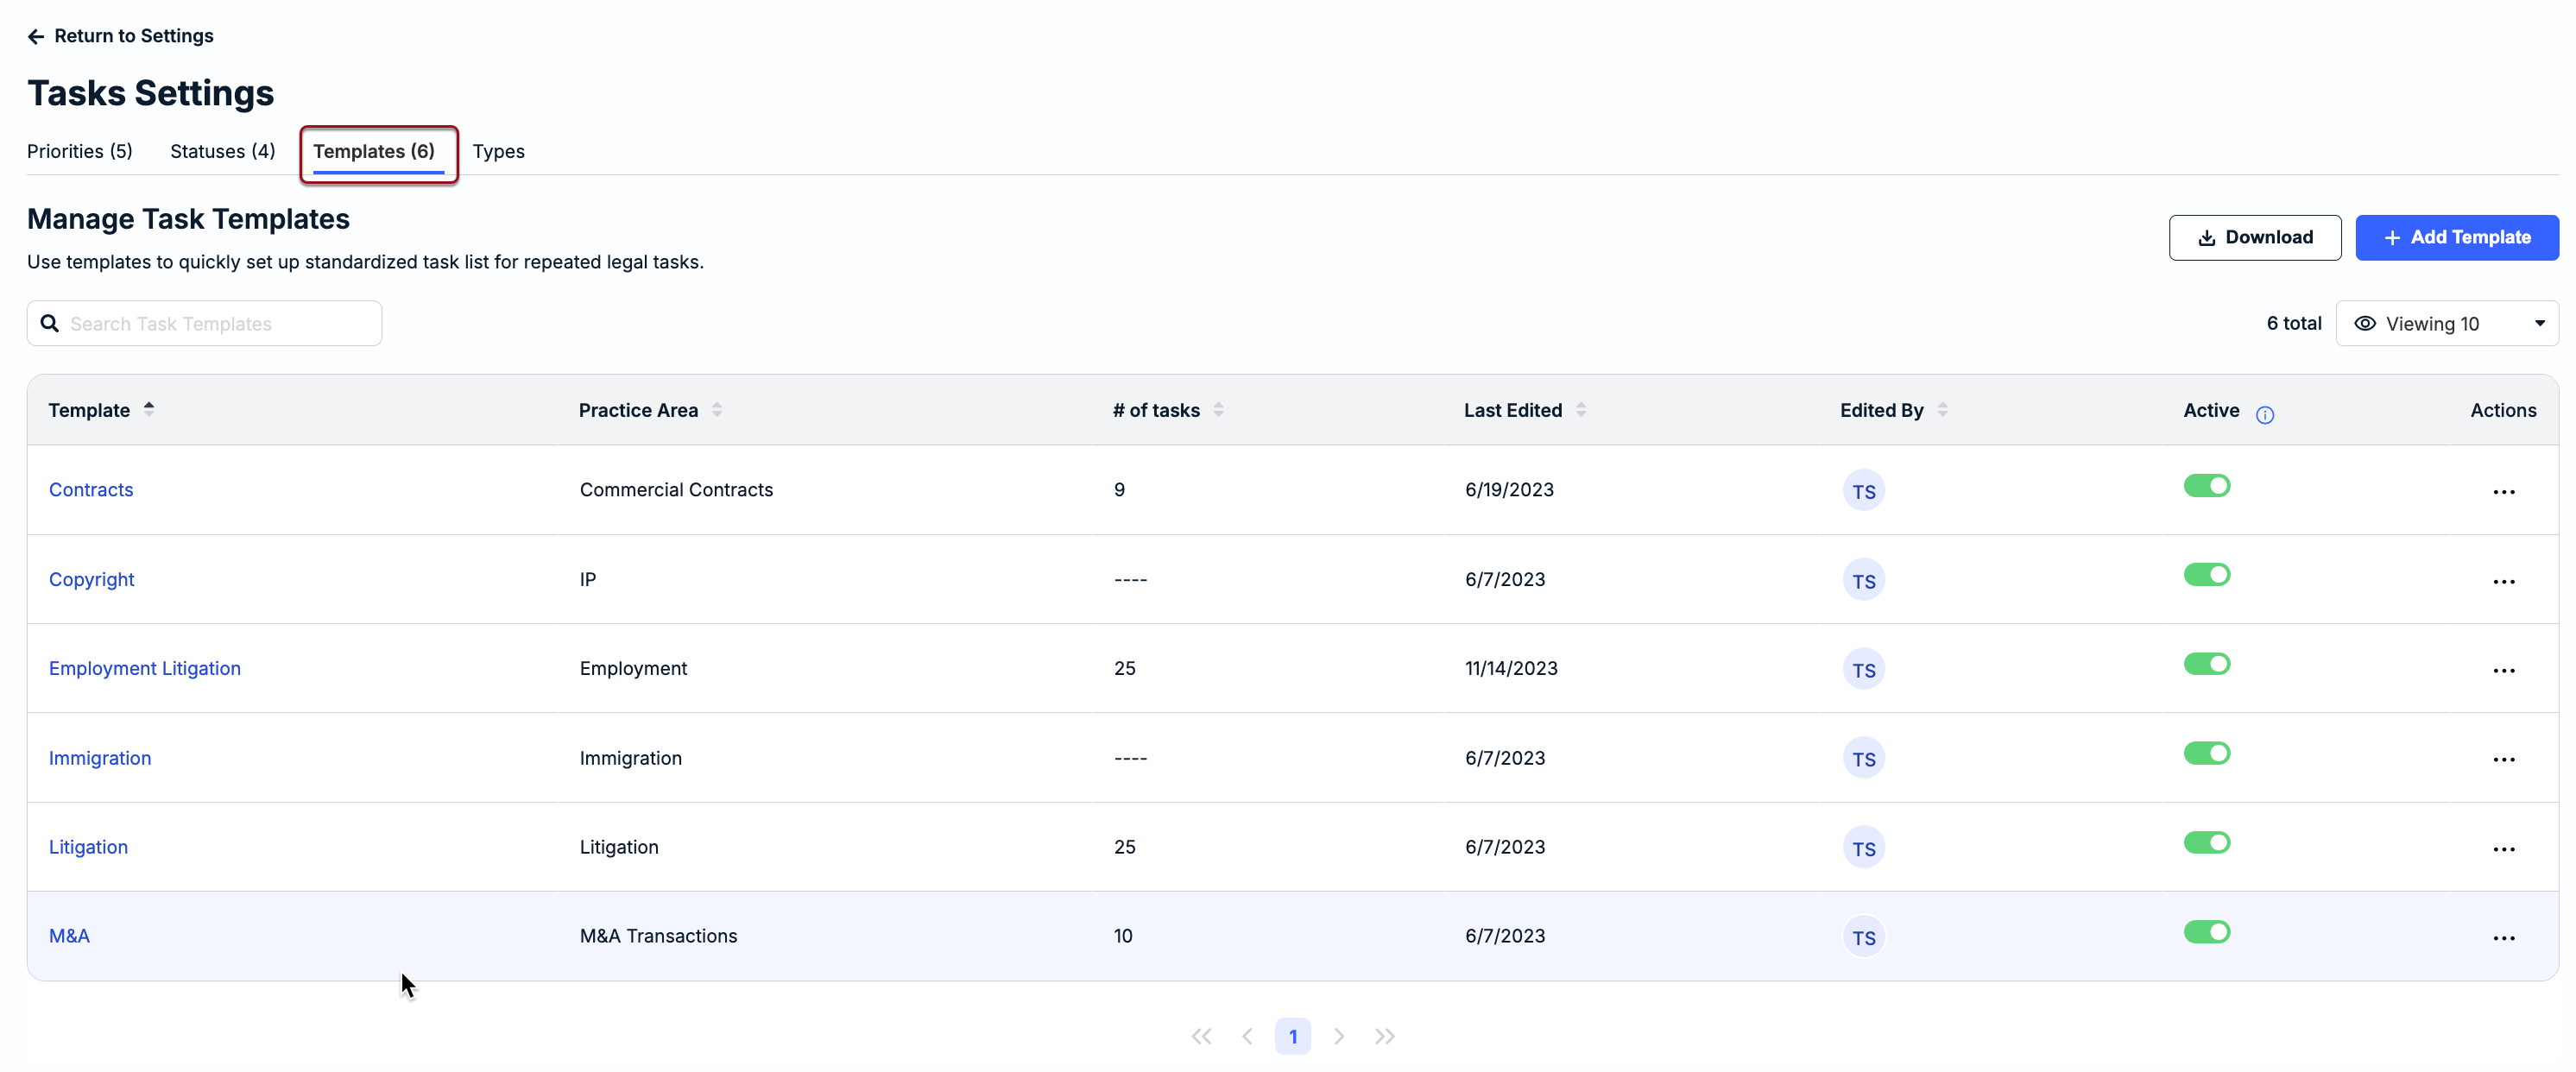
Managing Task Templates
Admins can build templates to help users create and assign standardized lists of repeated tasks that are common across matters. Depending on your needs, the templates can be used for tasks across all matter records or can be restricted based on Practice Area (or Matter Group), if applicable.
The Templates tab displays the following information:
- Template: Name of the template as it appears to users for matter tasks. Clicking on the name allows you to view and edit the tasks saved under the template.
- Practice Area: Name of the Matter Group to which the template applies. Categorizing templates by Matter Group is optional.
- # of tasks: Number of tasks that are included in the template. Displays ---- if there are no tasks.
- Last Edited: Date in MM/DD/YYYY format that the template was last updated.
- Edited By: Initials of the admin who last updated the template.
- Active: Toggle to make the template active or inactive. New templates are active by default.
- Actions: Displays ... (more) option to edit, delete, or duplicate a template. Clicking Edit allows you to update the template name, description, and/or matter group (if applicable).
Creating a New Task Template
1. Click + Add Template in the top-right corner.

2. Enter and select information as follows:
- Template Name (required): Up to 50 characters including spaces. This name will appear as an option to users who choose to create a task from a template.
- Description (optional): Enter a brief description to provide context for other admins. This description does not appear to users who are creating matter-level tasks.
- Matter Group (optional): Choose an option if the task template should only be available for matters associated with a specific Matter Group. Only one option can be selected.
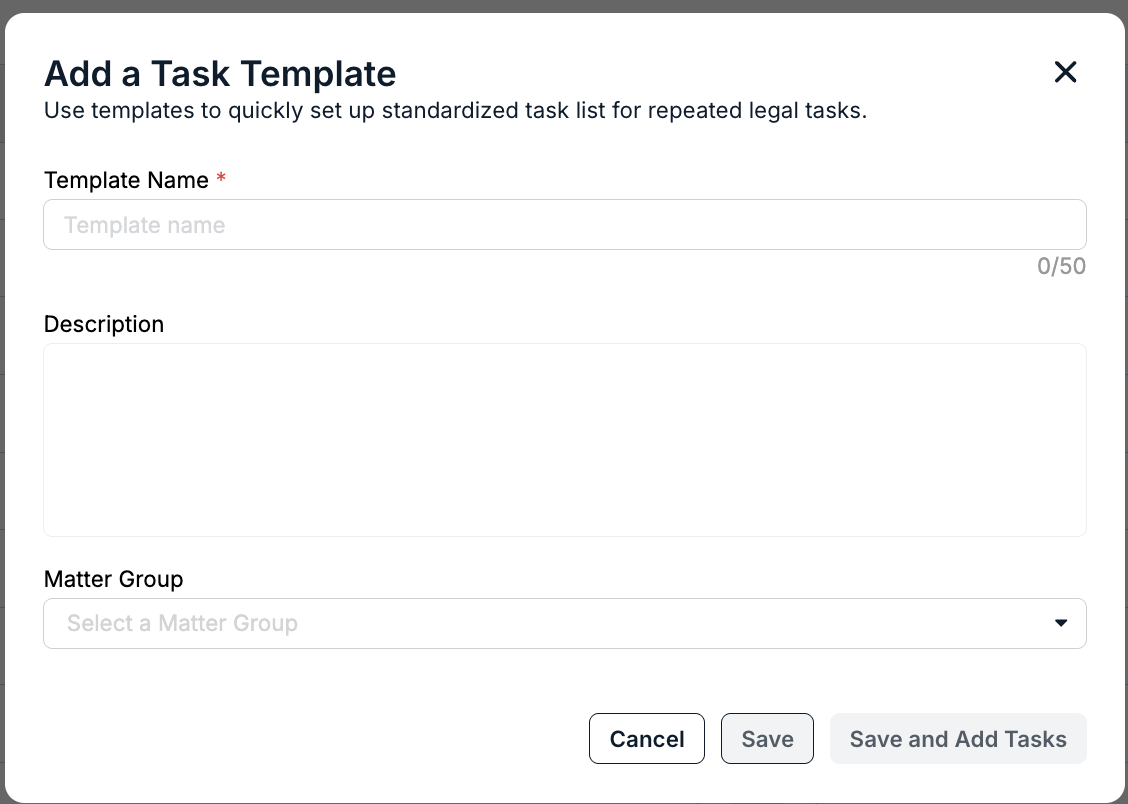
3. Click Save to finish setting it up later, or click Save and Add Tasks to continue.
If you need to update the name, description, or matter group, click on the ... (more) option under the Actions column and select Edit.
Notes and Considerations
- New task templates are active by default; if you need to finish setting up a template before it's available to matter-level users, click the toggle under Active to temporarily hide the template.
- Task templates that do not have at least one task are displayed in the list of options on matter records but cannot be selected by users.
- Templates with one or more tasks can be edited but cannot be deleted. You must first remove the associated tasks to delete a template.
Setting Up Tasks on a Template
To start adding tasks:
1. Click on the hyperlinked template name from the Templates tab and then click Add Task in the top-right corner.
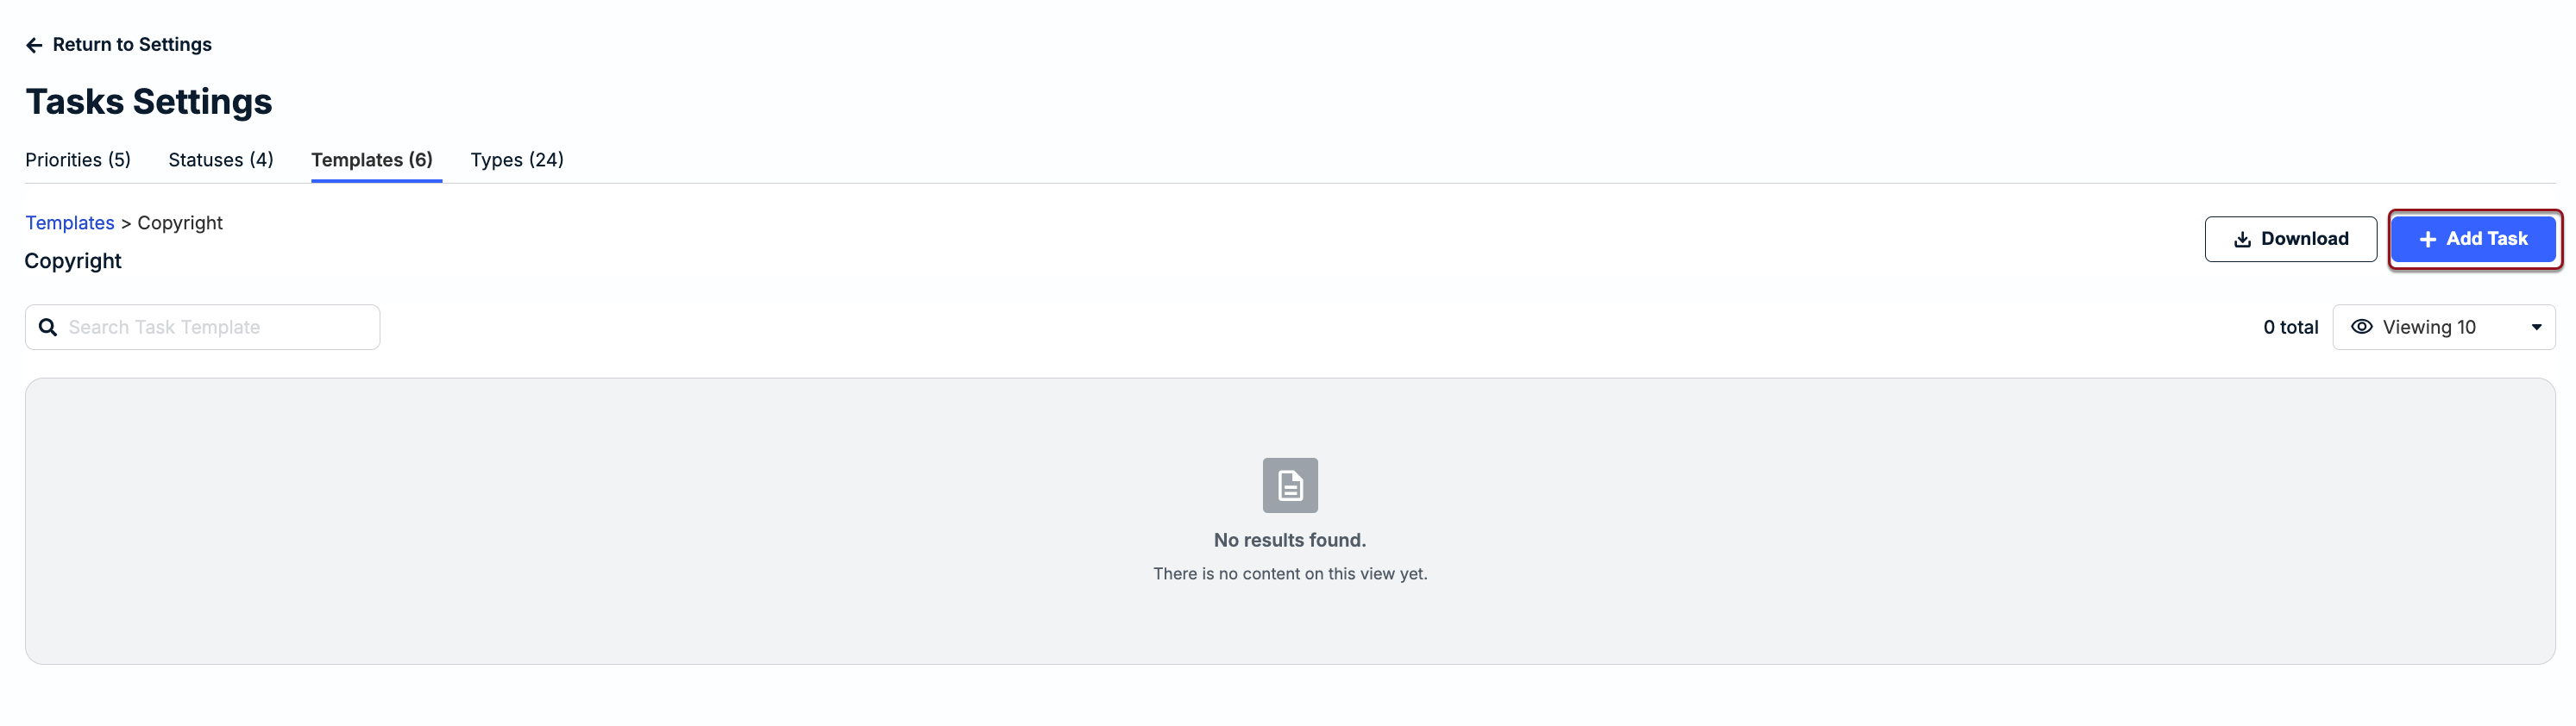
2. Fill in or select options for the fields described below and then click Save Task.
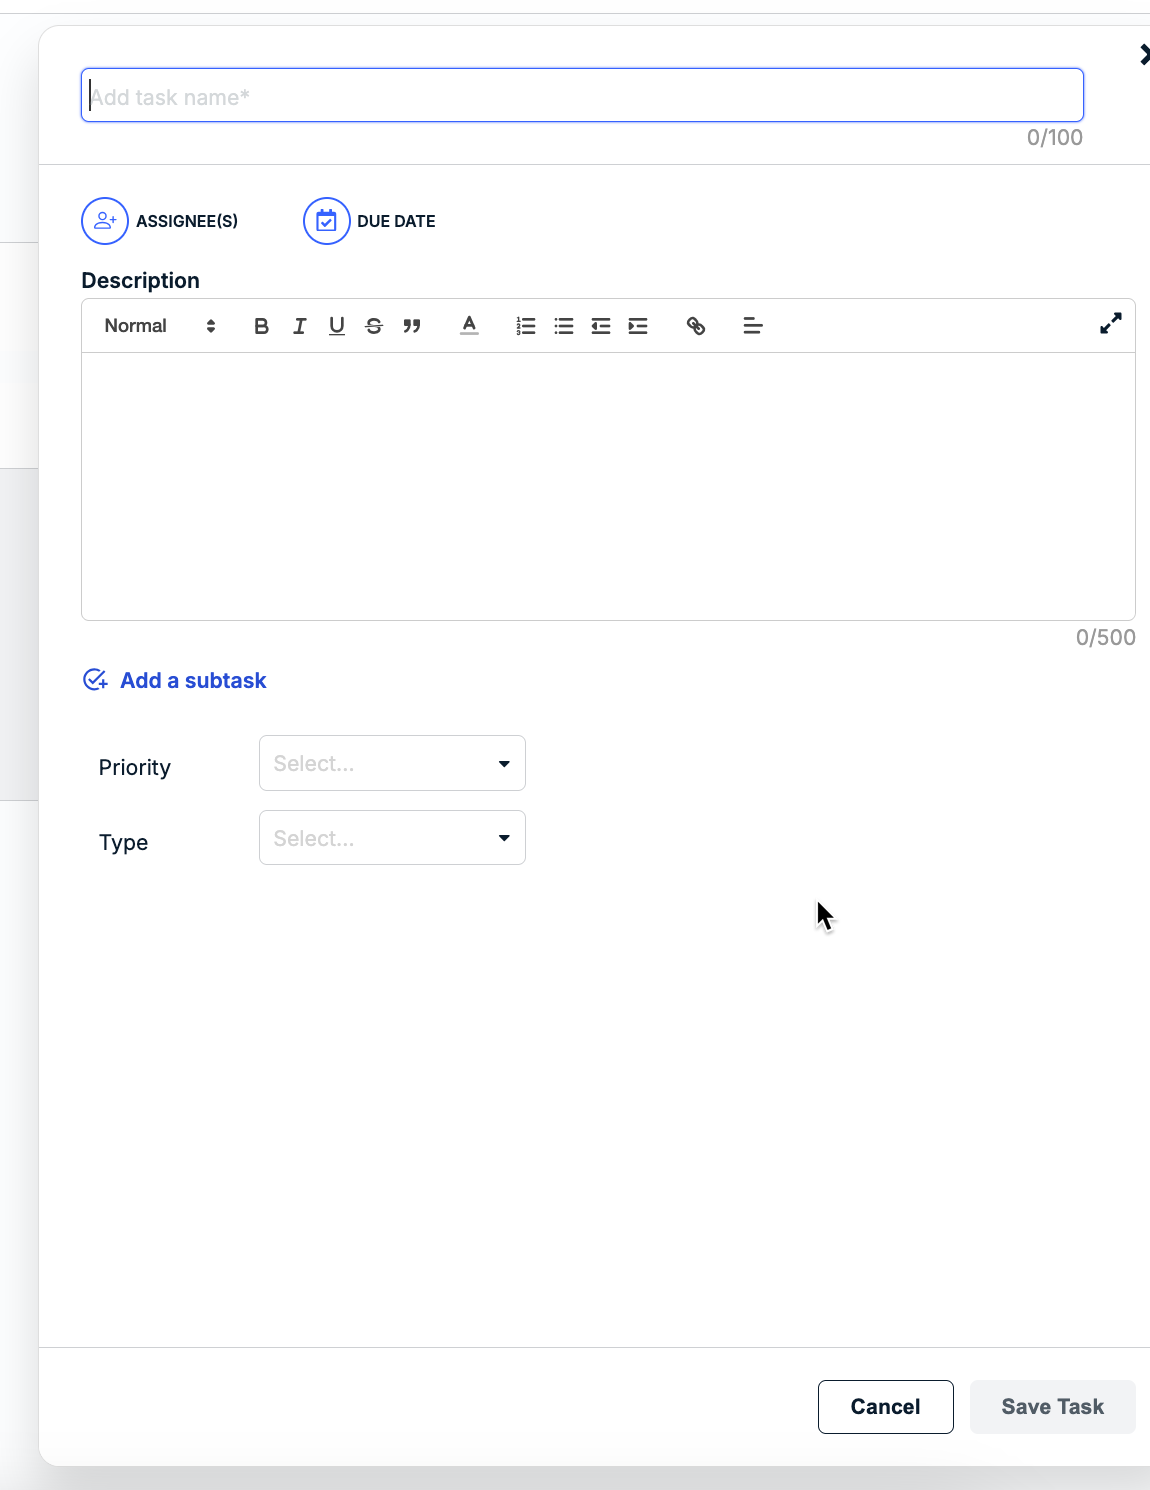
| Add task name* | Enter a descriptive task name of up to 100 characters (including spaces). Task names within a template do not have to be unique and can be identified by the system-generated ID assigned once the task is added. |
| Assignee(s) (OPTIONAL) | Click on the assignee icon to select one or more users and then click Apply. You can scroll through the list or use the search field to filter by name. Only users with permissions to edit the matter can be assigned. Choosing the assignee(s) for a task in a template means that the user(s) will automatically be added to the task in relevant matters unless overwritten by the task creator when prompted. This is helpful if the same default assignee(s) apply across matters. Leave this blank, however, if the assignees should be determined on a matter-by-matter basis. |
| Due Date (OPTIONAL) | Click on the calendar icon, choose one of the following, and then click Apply:
This setting is useful if there are default turnaround times for repeated tasks across matters. These fields should be left blank, however, if the due dates need to be determined and set on a matter-by-matter basis. |
| Description (OPTIONAL) | Use the text editor to enter a description and any additional notes or details (up to 500 characters including spaces). The editor allows for standard formatting, such as headings, lists, underlining, and indentation. Task creators can customize and edit the description as needed. This can be left blank if the descriptions are unique to specific matters. |
| Add a subtask (OPTIONAL) | If applicable, you can enter one or more additional to-do items under a task by clicking + Add a subtask, entering the name, and clicking Save. You can add other details, such as choosing a priority and adding a description, after you finish creating the primary task. |
| Priority (OPTIONAL) | Select an option from the list. Which options are available depend on settings (e.g., Low, Medium, or High) and are managed by admins in your environment. This is optional and useful if the task should have a default priority across all matters. If task creators determine the priority on a matter-by-matter basis, you can leave this field blank. |
| Type (OPTIONAL) | Select a category based on the nature of the task (e.g., Due Diligence, Negotiation, etc.). Which options are available depend on settings and are managed by admins in your environment. |
For additional information on how tasks are created by users based on templates, click here.
Managing Task Types
The Types tab displays the following information:
- Type: Text label shown for the category. Active task types are available as options in a dropdown list when creating a task at the matter level.
- Related Tasks: Number of matter-level tasks currently tagged with the type.
- Related Templates: Number of templates with at least one task currently tagged with the type.
- Strategic Value (1-10): Number assigned to the task type for reporting purposes.
- Complexity (1-10): Level of complexity assigned to the task type for reporting purposes.
- Last Edited: Date in MM/DD/YYYY format that the task type was last edited. This column is blank if the built-in type has not been edited since the feature was enabled.
- Edited By: Initials of the admin who last updated the task type. This column is blank if the built-in type has not been edited since the feature was enabled.
- Active: Toggle to activate or deactivate a task type; built-in types are active by default.
- Actions: Displays the ... (more) option to edit or delete a task type. The delete option is not available if a task has 1 or greater under Related Tasks.

Task types can be used to organize matter-level tasks into categories for better filtering, searching, and reporting. The categories should be descriptive of the action or deliverable that needs to be completed for a matter. The following task types are built into Unity for all customers:
- Analysis
- Assessment
- Communication (external)
- Communication (internal)
- Discovery
- Documentation
- Draft/Revise
- Due Diligence
- Exhibit Preparation
- Fact Gathering
- Filing
- Interview
- Investigation
- Legal Advice/Guidance
- Legal Training
- Manage Data/Files
- Meeting
- Negotiation
- Rendering Opinion
- Review
- Strategy
- Witness Preparation
Creating Custom Task Types
If additional types would be useful for categorizing tasks, create a new one by following the steps below:
1. Click + Add Type in the top-right corner of the Types tab.

Before continuing, review the following considerations:
- Task type names must be unique and can be up to 50 characters, including spaces.
- Confirm that there are not overlapping or similar task types to avoid clutter and confusion.
- New task types are automatically set to active and available for selection in matters and templates. Click the toggle under the Active column to deactivate it if needed.
2. Enter the task type name (required) and select options for the following fields (optional):
- Strategic Value (optional): Rank the strategic value of a task type for reporting and planning purposes by selecting a number between 1 (lowest) and 10 (highest).
- Complexity (optional): Rank the complexity of a task type for reporting and planning purposes by selecting a number between 1 (lowest) and 10 (highest).
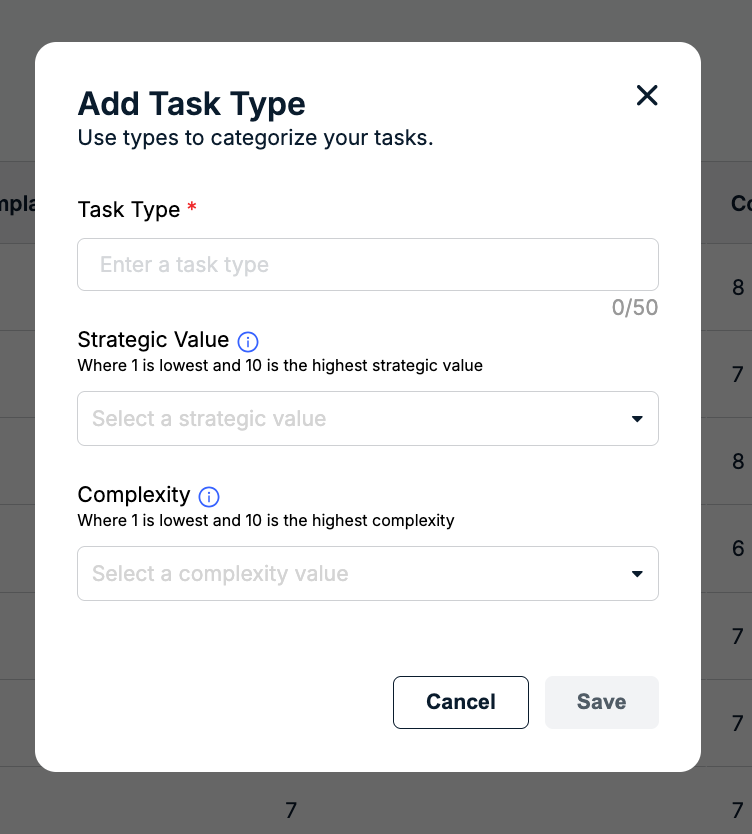
3. Click Save.