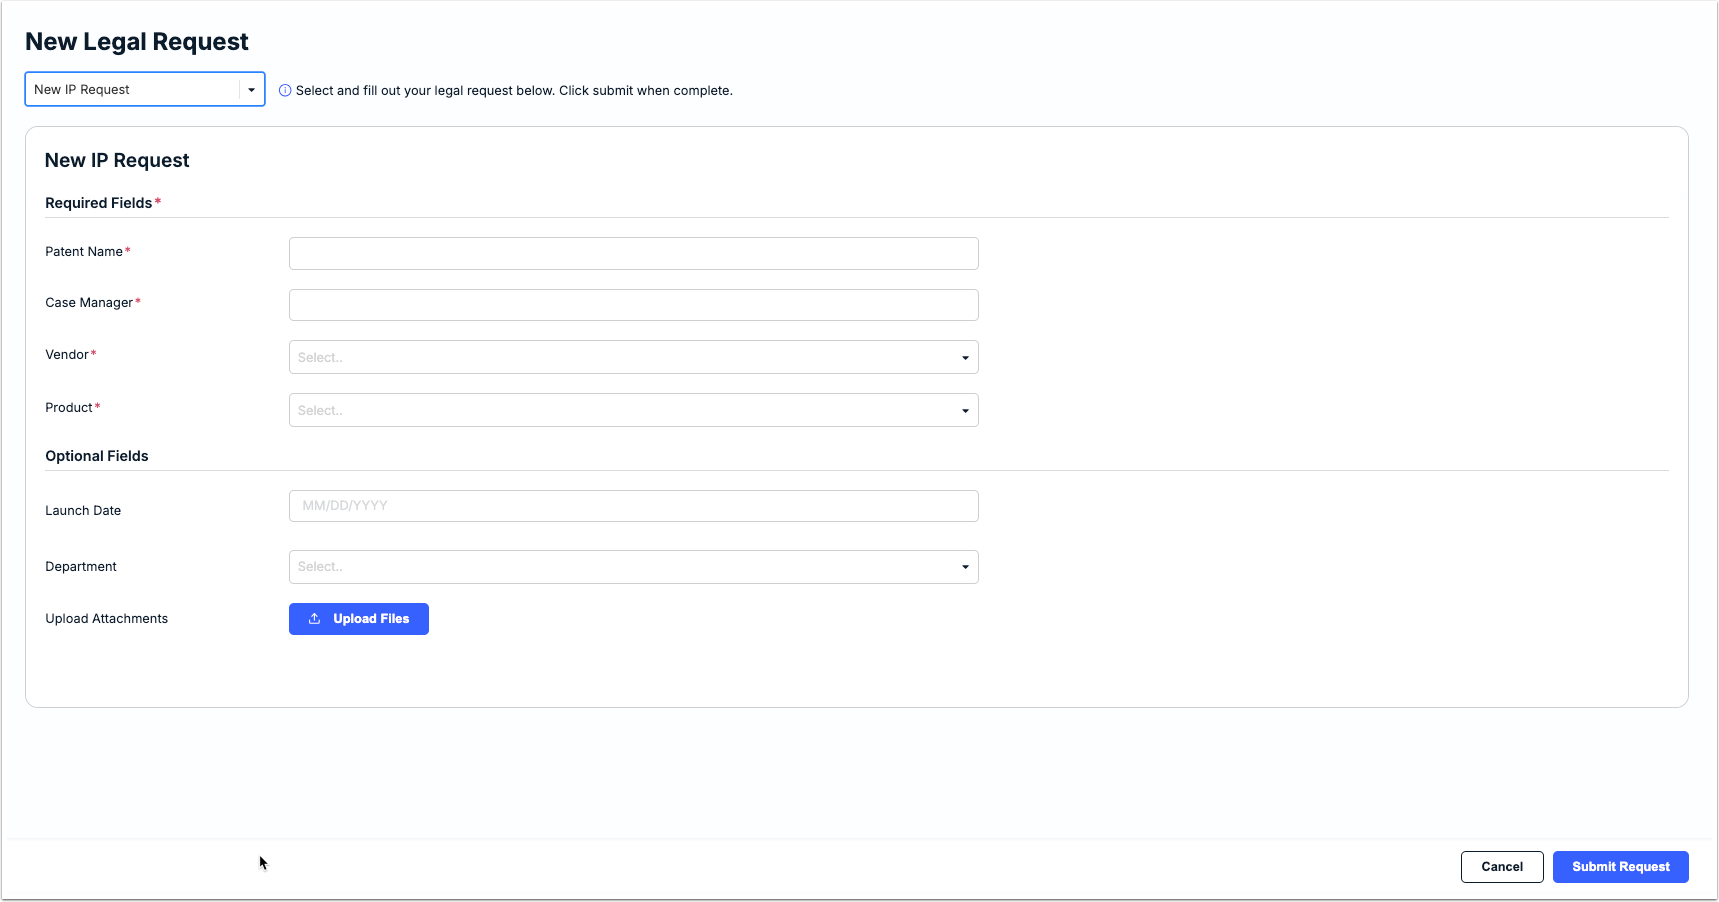
The Legal Requests feature gives companies a standard way for other teams to request help and support from the legal department. For example, if R&D has an invention, they can submit a request for the legal department to investigate its patentability. Below is an example of how a legal request form appears to users/requestors in Unity.
Admins must create and publish a minimum of one legal request form for users to start submitting requests in your environment. Follow the steps in this article to add a new form and review submitted legal requests.
Before continuing, consider the following about legal requests forms to make sure that you are addressing needs and other scenarios:
- Once a form is published, fields cannot be added or removed. If changes are required later, the form must be cloned, updated, and republished. This means the original form will need to be archived so that users can no longer select it to submit requests.
- Will one standard legal request form work for all users and types of requests they may need to submit, or would two or multiple forms be required? For example, would it make sense to create separate forms for different types of matters (or matter groups)?
- Determine the key information users should submit for a request (e.g., required fields vs. "nice to have" fields). Make sure to mark fields as required or optional based on how much must be collected up front and how much can be filled in by admins during review.
Creating & Publishing a New Legal Request Form
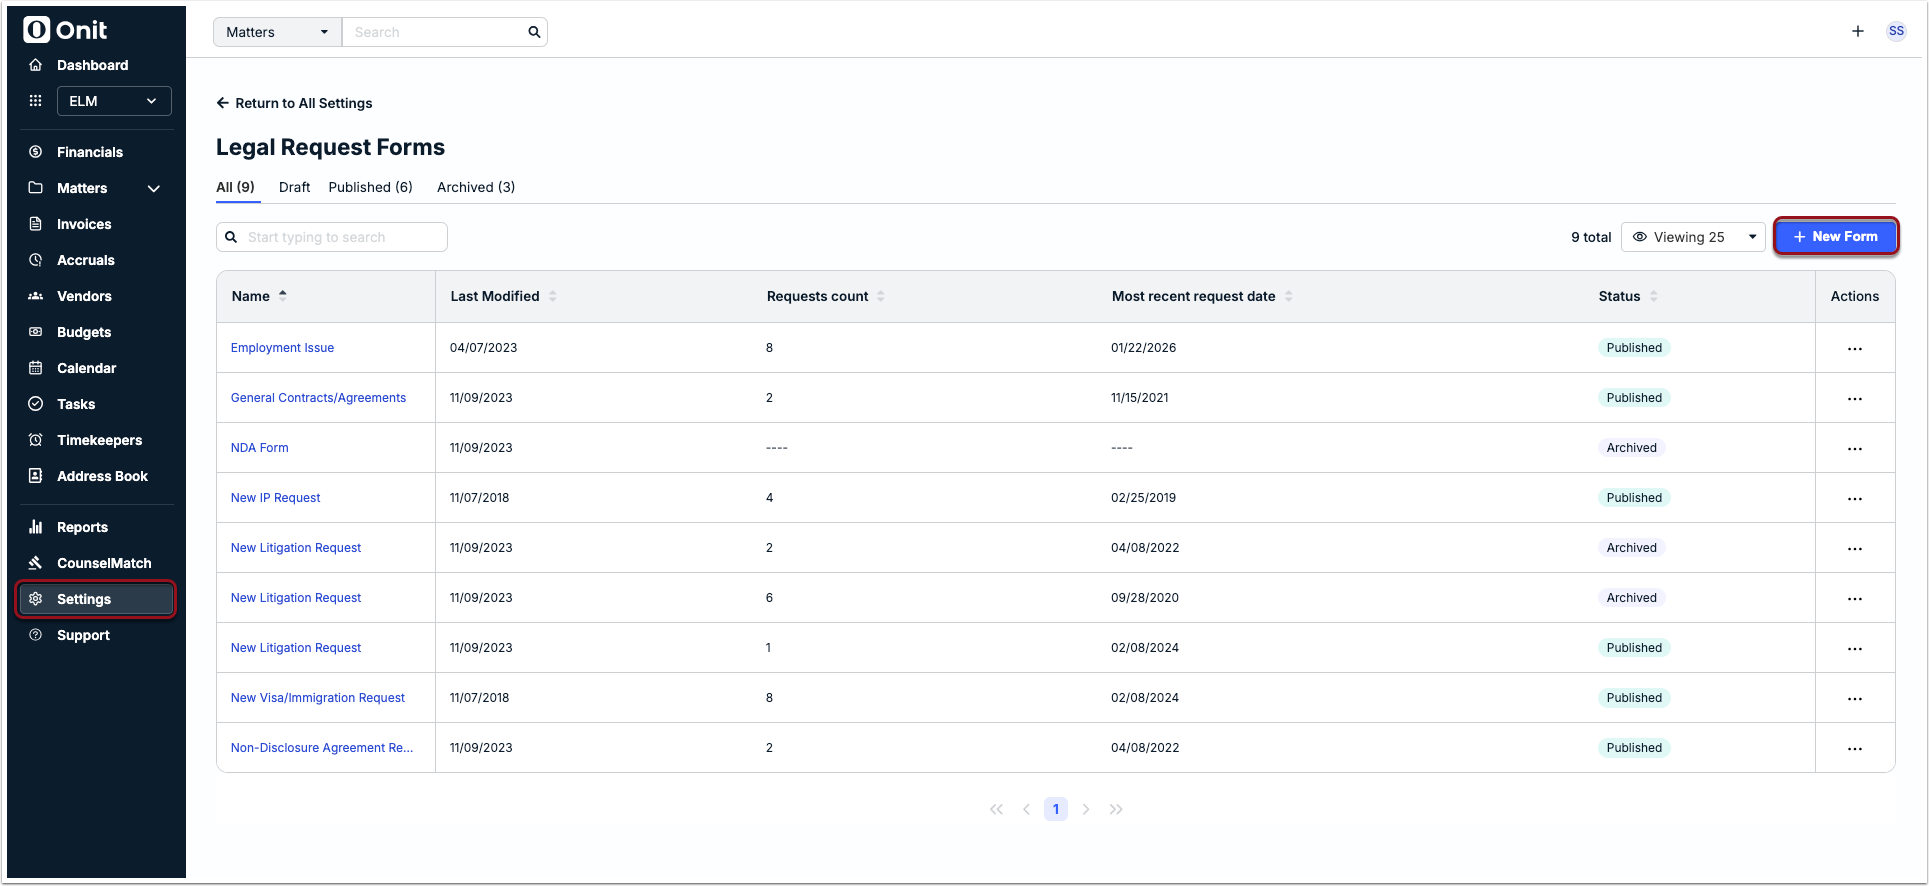
1. Go to Settings > Legal Request Forms and click + New Form in the top-right corner.
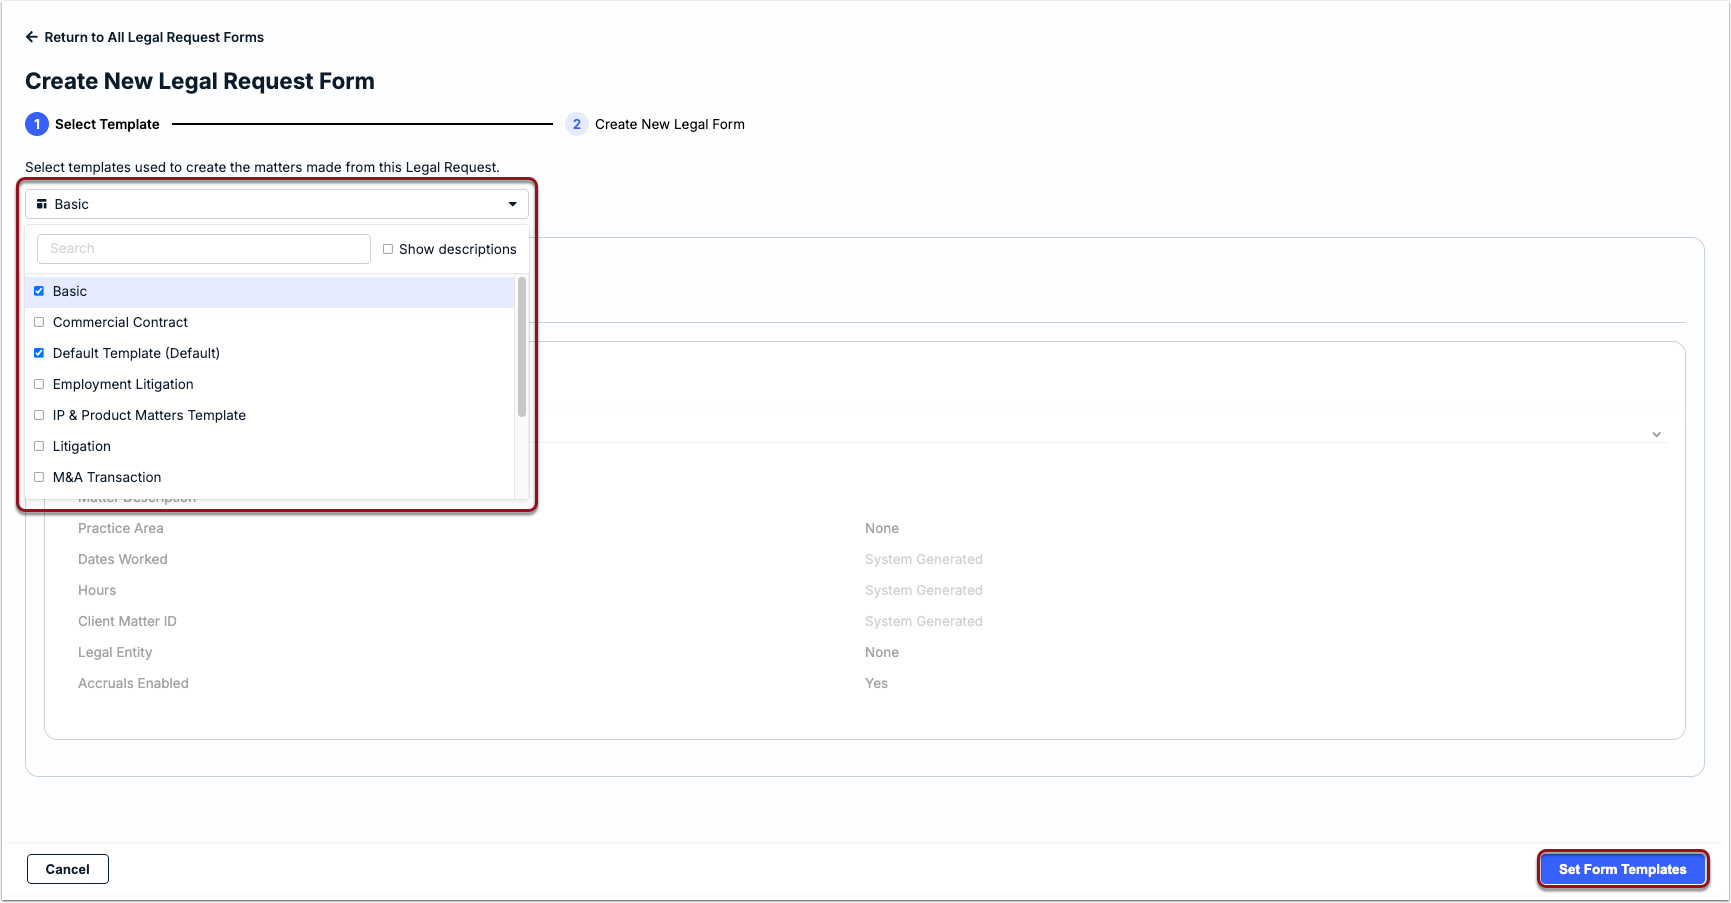
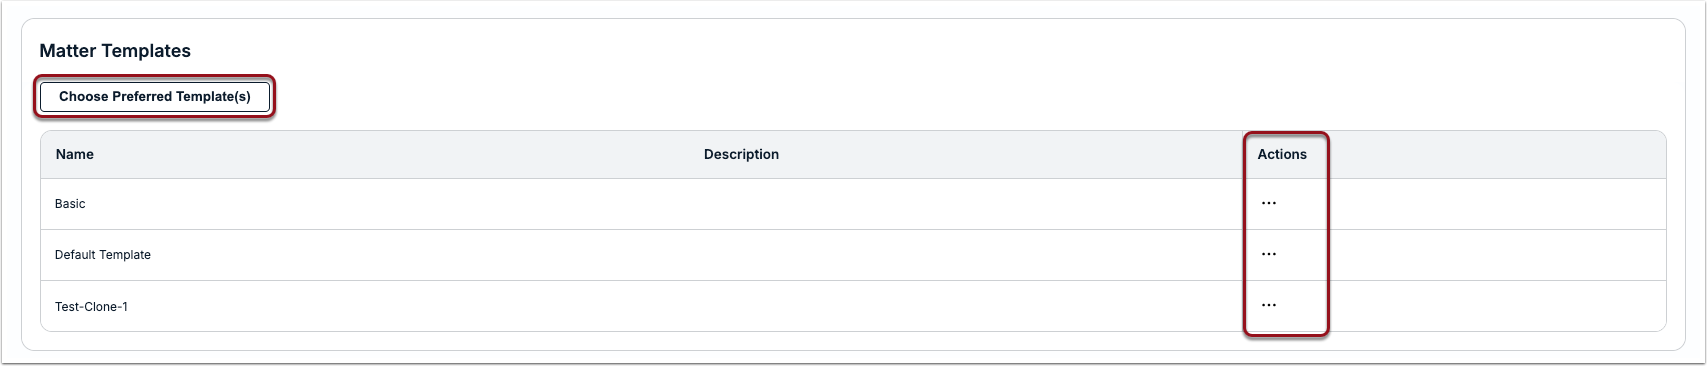
2. Choose at least one matter template from the dropdown list and click Set Form Template in the bottom-right corner.
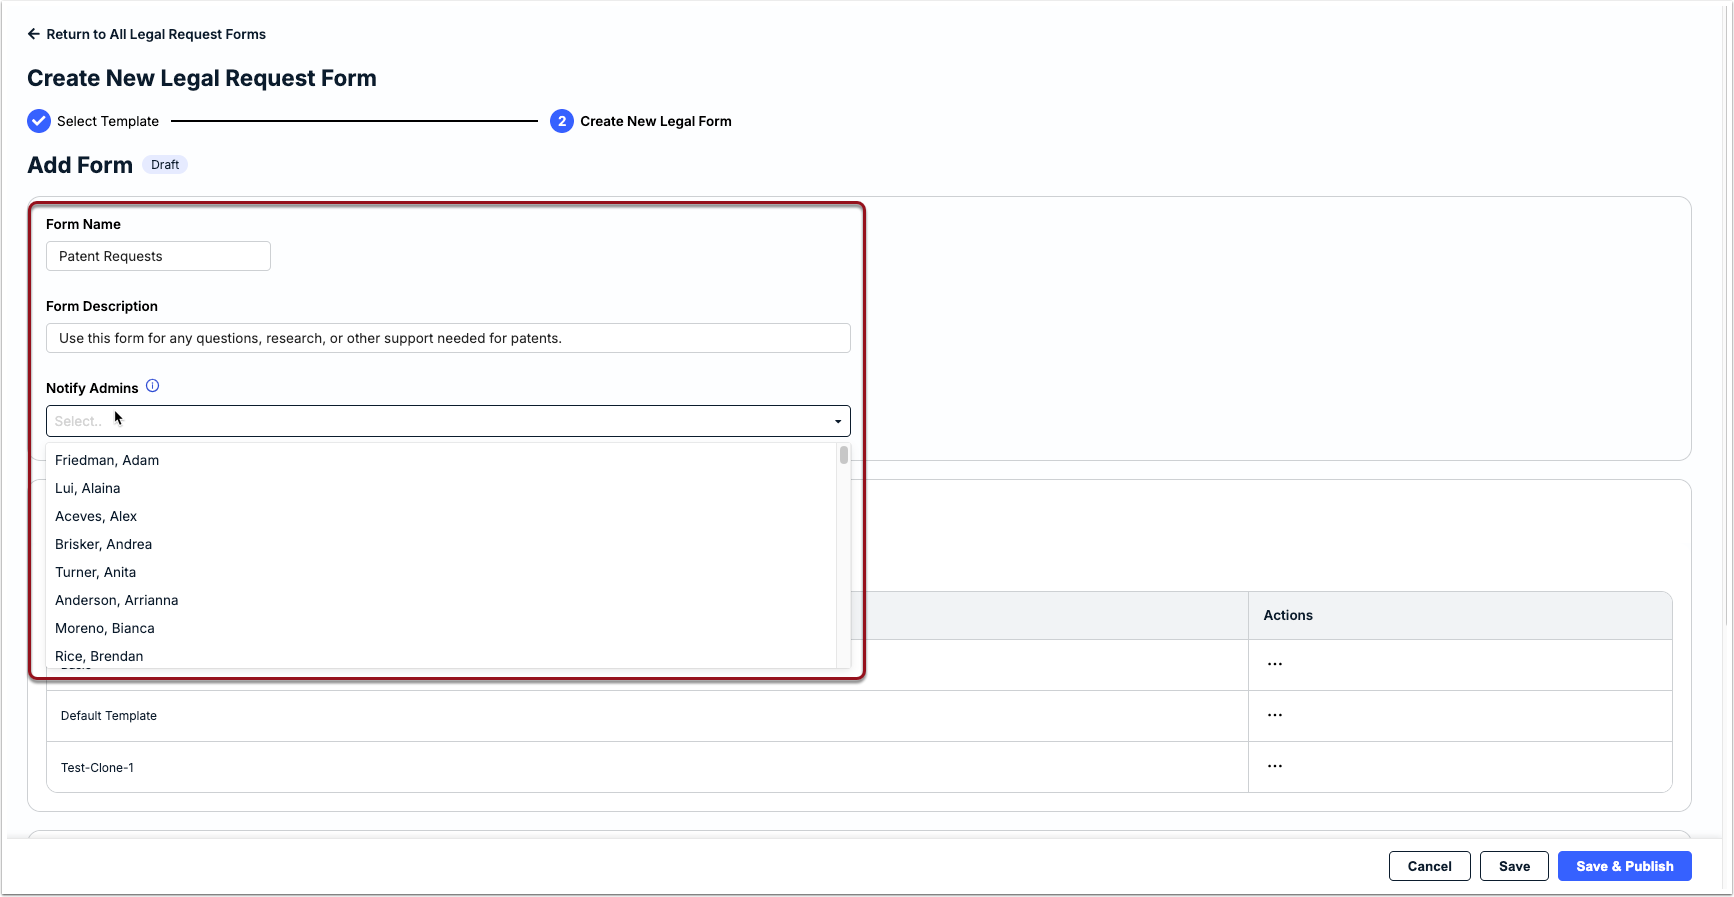
3. Enter a Form Name (required) and Form Description (optional but recommended).
4. Go to the Notify Admins dropdown and choose which admin(s) should be notified of new requests submitted using this form.
5. Review the matter template(s) selected and/or click the ... (more) option under Actions and select Remove. To go back to the first step and choose additional templates, click Choose Preferred Template.
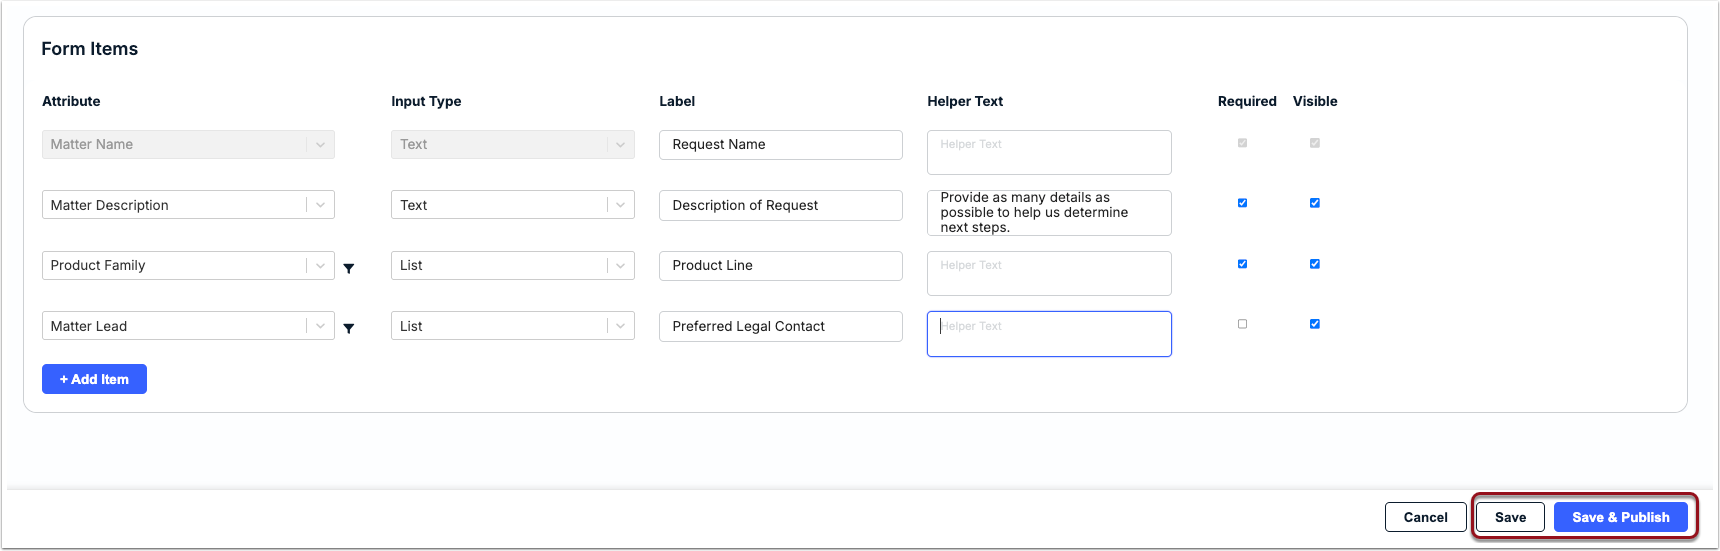
6. Under the Form Items section, add fields to collect/track information for legal requests. There should be one row per field in the legal request form (a minimum of two rows are required).
The first row is a default required field that cannot be removed. The Label: Request Name and Helper Text that will appear to users can, however, be edited as needed.
For the second row, you can leave it as Attribute: None and Input Type: Text if you want to collect general data, or you can select an attribute name from the dropdown list if you would like to use existing system fields, such as existing lists of values (e.g., Vendor, Practice Area, Matter Lead, or Custom Attribute Lists) or text fields (e.g., Matter Description). Make sure to add a label (required) and any helper text (optional). For example, you can select Matter Description for attribute and set the label as Description of Request.
For more details on options for configuring fields in a request form, skip to the table below.

7. Click + Add Item to add and configure a third row for the form, including choosing whether the field is required and/or visible for users. You can also change the order of the fields by hovering over a field to drag and drop it in the preferred position.
8. Repeat Step 7 until all fields have been added to the form and then click Save to store it as a draft or Save & Publish to make it available to requesters immediately.
Field Options for Legal Request Forms
Refer to the table below for more information on which options to select for Attribute, Input Type, Label, Helper Text, Required, and Visible when adding a new field/row in a form per Steps 6-7 above.
| Field | Description |
|---|---|
| Attribute | Select from standard system fields or custom attributes in a matter record, such as Matter Name, Description, or Vendor. If a legal request is approved, the data from these fields will map to the relevant fields when the new matter record is created. If the selected attribute is a list, click the filter icon that appears to the right of the attribute to limit the options available for users to select from. For example, allow users to select from specific vendors or practice areas when filling in the legal request form. |
| Input Type | Options include text, text area (i.e., multi-row text field), list, date, yes/no, and currency. This automatically populates based on the selected attribute. If you select None, you can choose from text (for short inputs) and text area (for longer inputs). |
| Label | Name of the field as it should appear to requesters who are filling out the form (e.g., Legal Request Name, Legal Request Description, Firm, etc.). |
| Helper Text | Text providing an explanation of more context on what users should enter or select for a specific field on the request form to make sure the relevant data is being captured and minimize back-and-forth. |
| Required | Select to make the field mandatory for submitting the form; de-select or leave blank to mark the field as optional. |
| Visible | Leave this box selected if the field should appear to requesters on the form. De-select this box to hide the field from the published form. |
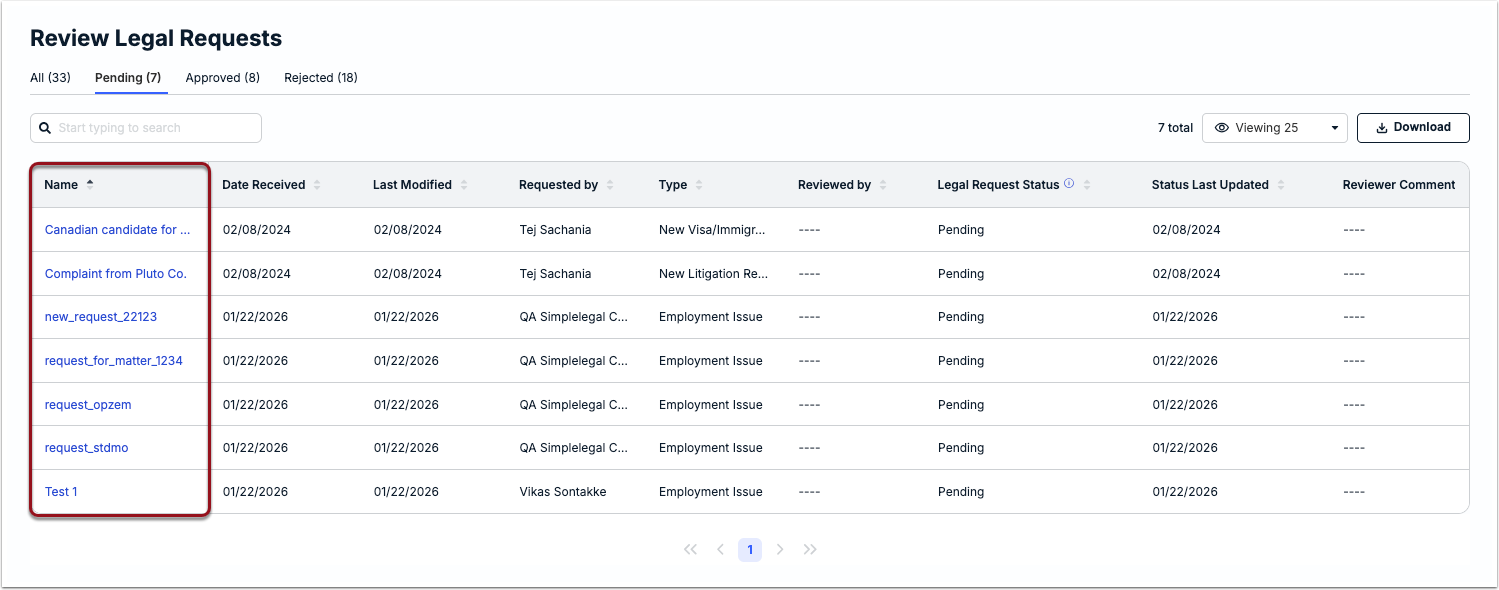
Reviewing Submitted Legal Requests
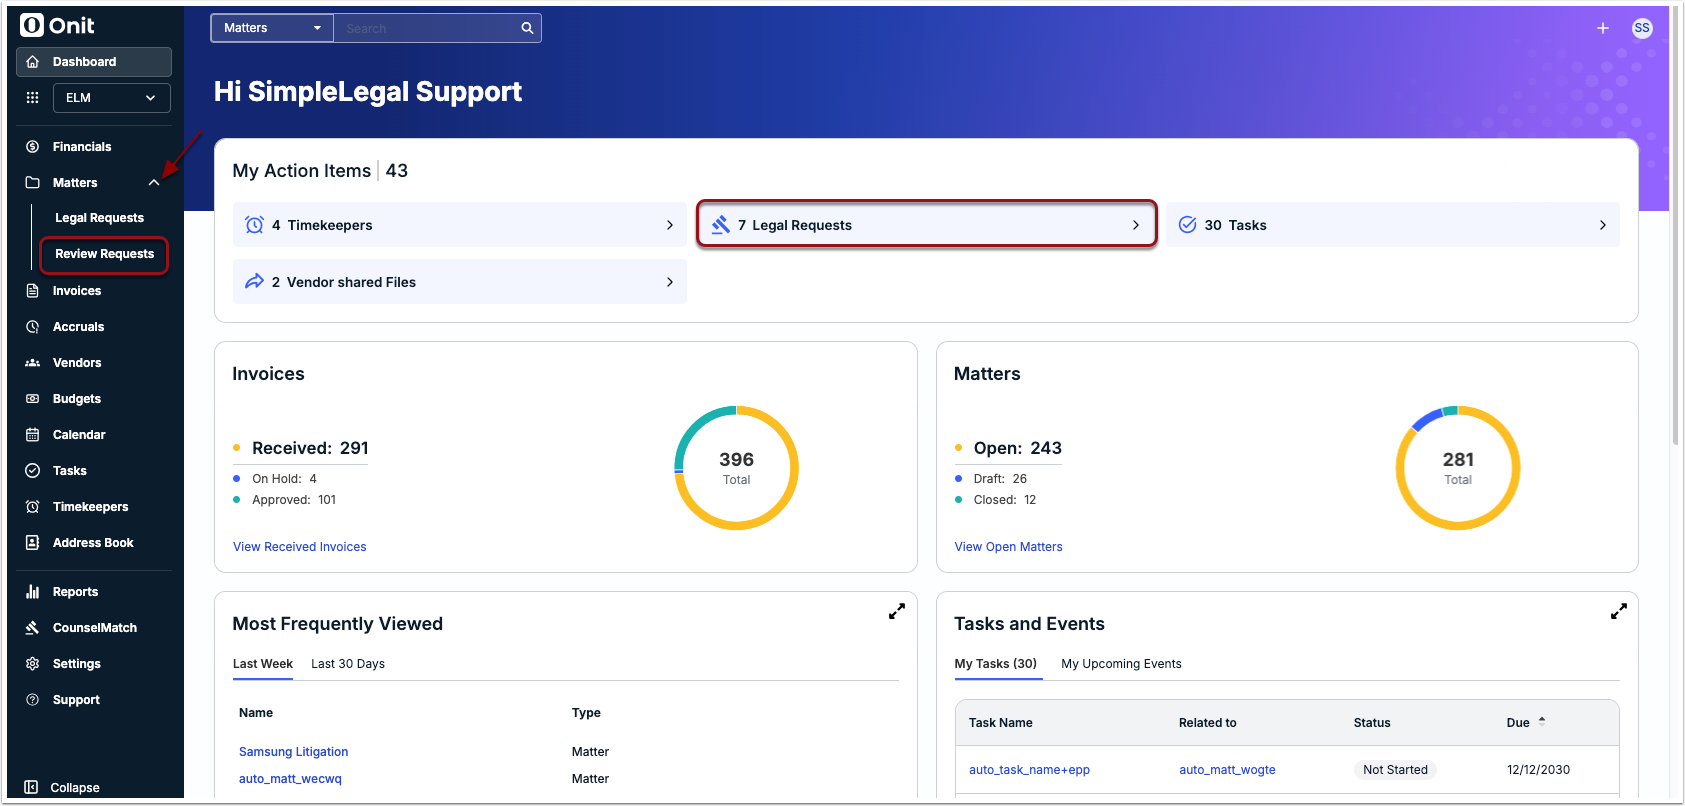
If you are designated as an admin to receive notification on any new requests submitted for a specific form, you will receive an email with a link to the request. Admins can also access pending legal requests by clicking on Legal Requests from the My Actions Items section of the Unity dashboard or by clicking on the caret next to Matters on the left-side navigation bar and clicking on Review Requests.
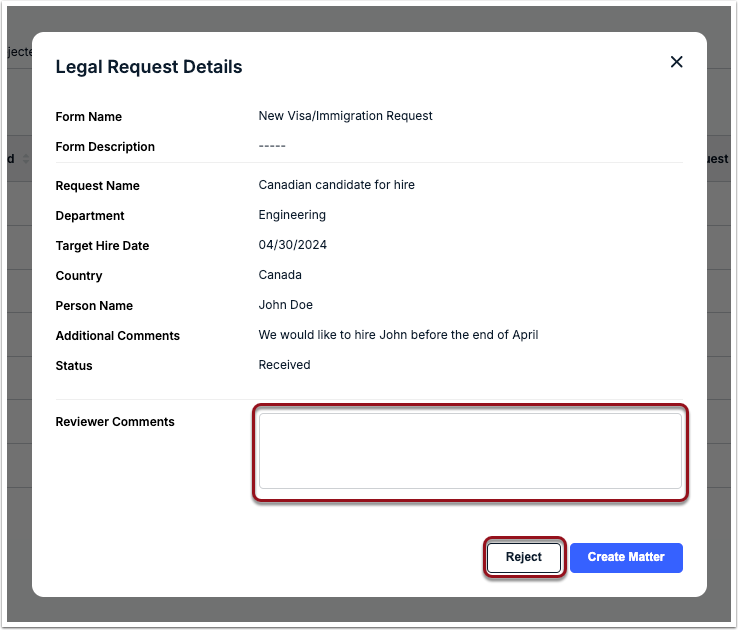
Click on the legal request name from the list to view the details provided by the requester.
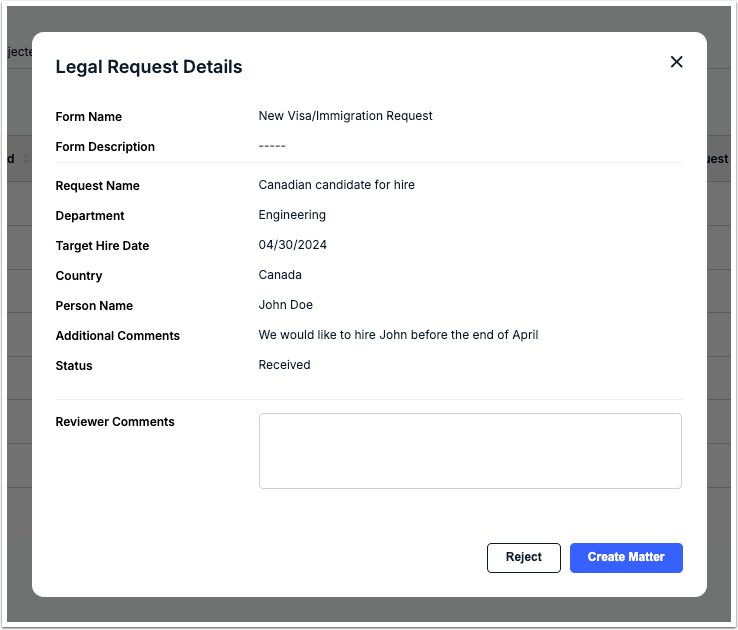
Converting a Legal Request into a Draft Matter
The steps below apply if you have reviewed a legal request and have determined it should be taken forward as a matter. If you need to reject a legal request, skip to the next section.
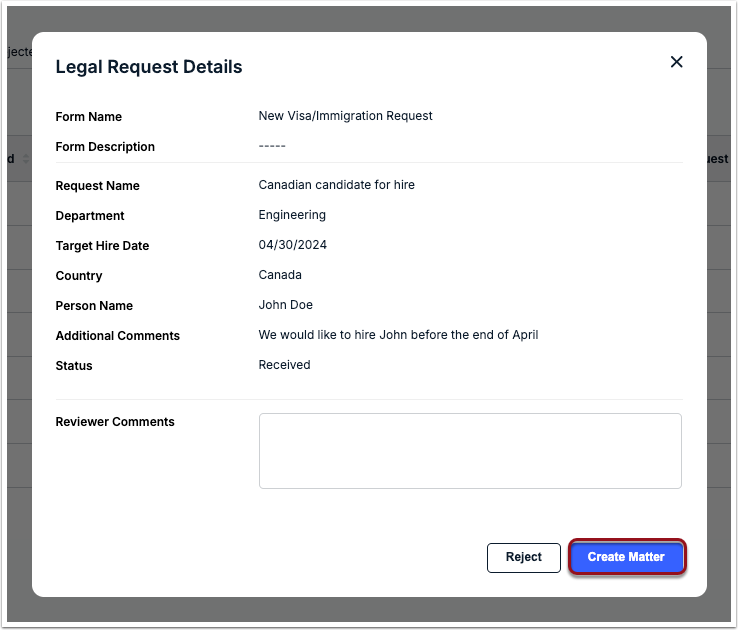
1. From the legal request details window, click Create Matter in the bottom-right corner.
2. If multiple matter templates are associated with the legal request form, select one from the dropdown list.
3. Click Next in the bottom-right corner.
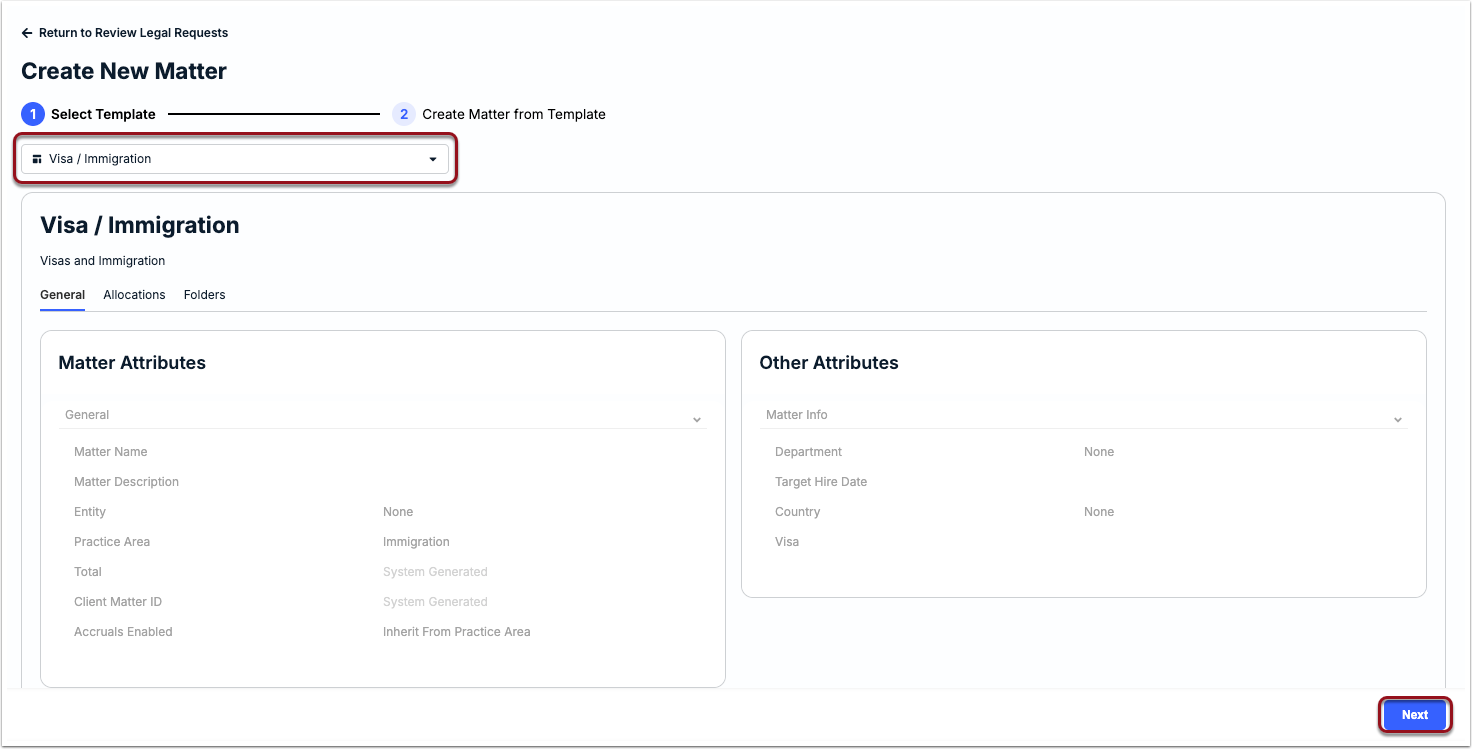
4. Review the populated and available attributes for the new matter and make any changes under the Process Request section on the right side of the page.
5. Click Create on the right side when ready.
When the matter is created, it becomes available as a draft matter under the Matters List and can be updated/edited as needed. The matter will remain in draft status unless otherwise published by an admin.
To reference the information from the original form, go to the Legal Requests tab in the matter record. If the request included an attachment, the original file will appear under the Legal Requests tab and the Files tab of the matter record.
Depending on settings in your environment, the requestor will be notified of this action. The requestor may also be notified of other status updates, such as the matter being published or closed.
Considerations for Fields/Attributes on Converted Matters
When a legal request is converted into a new matter, the attributes that carry over to the matter record depend on the selected matter template and whether the fields match fields on the legal request form. Please review the following notes and other considerations:
- Fields that appear on the right side of the page when converting the request into a matter are those marked as required on the legal request form (not the matter template).
- Template fields marked as required have an impact on the matter only at the time the record is created. For example, required fields need to be filled in to publish the matter.
- If a field is present on the right side of the page from the legal request form but is not on the template, it will appear under the Removed Attributes section and will not appear on the matter.
Rejecting a Legal Request
1. From the legal requests details window, enter any necessary comments (optional) and click Reject in the bottom-right corner.
This will move the legal request to the Rejected tab. The notification sent to the requester will include any comments you added.
Managing Legal Request Forms
Cloning a Form
From Settings > Legal Request Forms, click on the name of the form from the list and click Clone in the top-right corner.
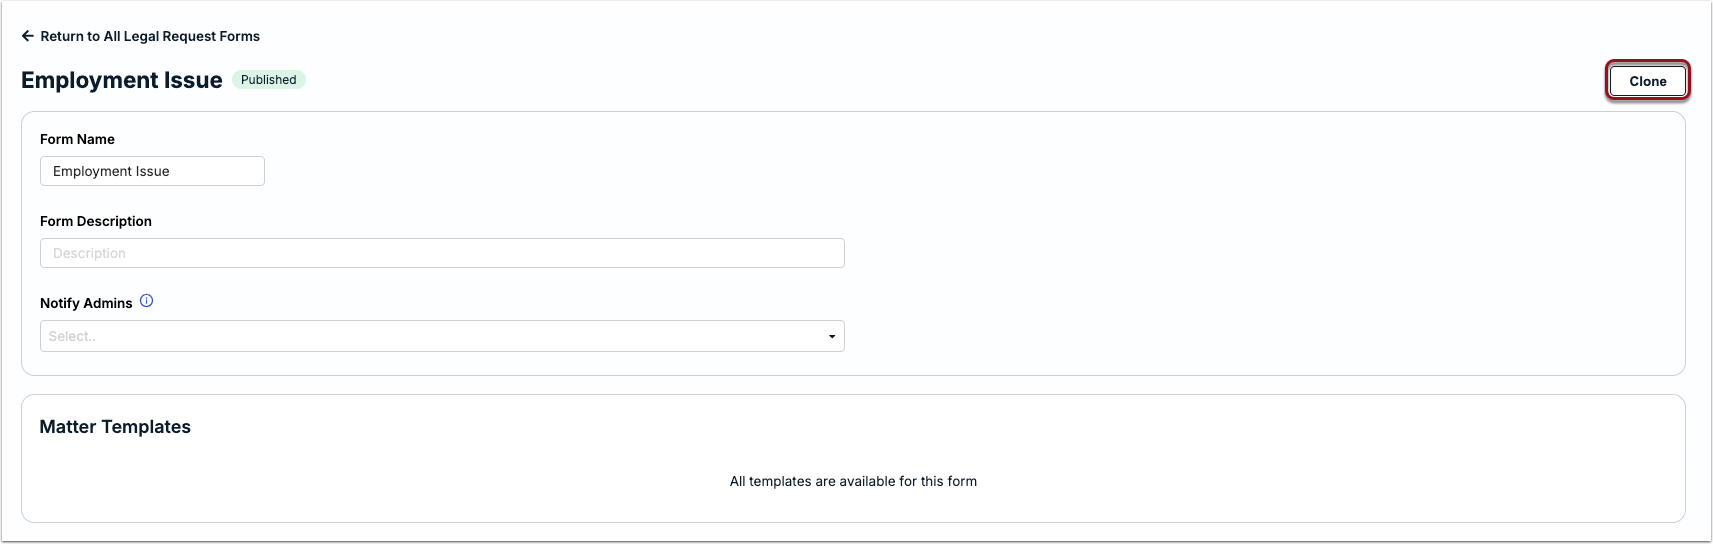
The page refreshes to show the cloned form in draft status. Make sure to update the Form Name and other fields as needed before saving and/or publishing the new form.
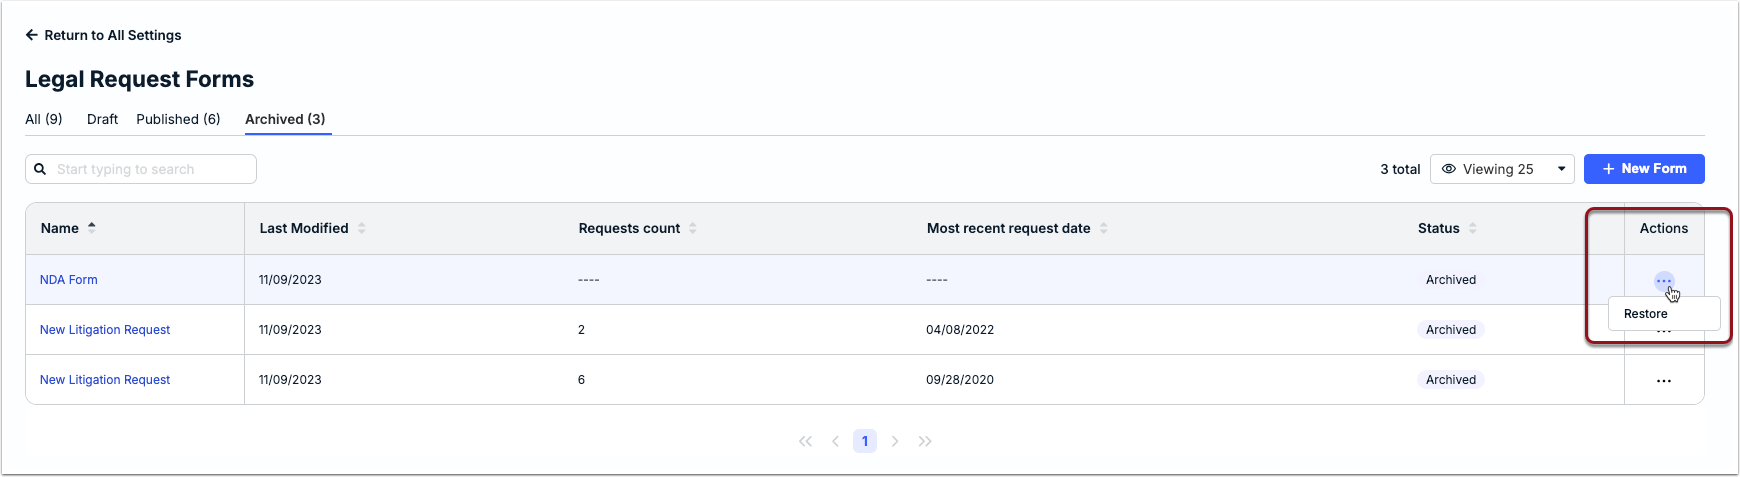
Archiving or Restoring a Form
From the All or Published tab, click on the ... (more) option under Actions and select Archive.
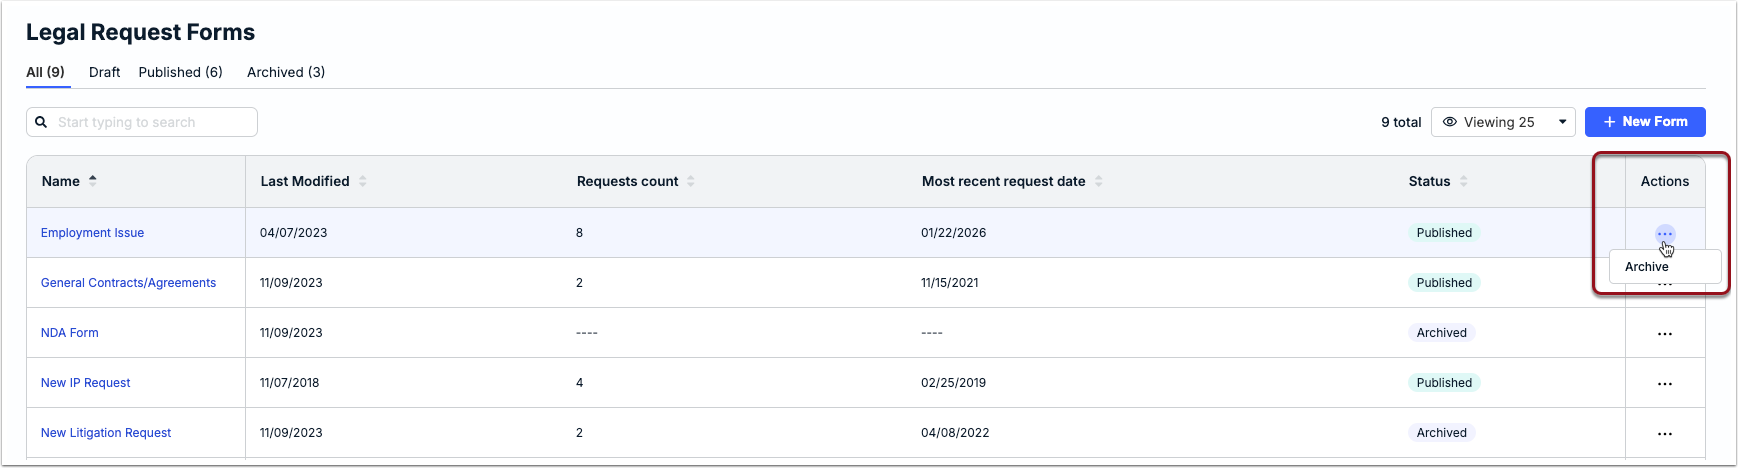
If you need to revert the form to published status so that it is available to requesters, switch to the Archived tab, click on the ... (more) option under Actions, and select Restore.