Invoice Validation Rules streamline the invoice review process and give customers better control over how to enforce their billing guidelines. By configuring and managing rules that address unique needs, customers can automate corrective action and/or flagging for invoices that violate billing guidelines or service agreements. Rules can be set up to do any of the following depending on specified criteria:
- Add Task Code
- Add Activity Code
- Add Expense Code
- Flag Invoice
- Flag Invoice Line Item (i.e., fee or expense)
- Adjust Invoice Total
- Adjust Line Item Total
Examples of how customers can use rules include the following:
- Set an expense code (if missing) based on specific keywords in the line item description
- Adjust line item total for copy/fax/scanning charges that exceed a maximum amount
- Flag invoices that exceed a maximum amount for specific vendors or matters
This article covers the following topics:
Getting Started
NOTE: If you do not have the invoice validations option, you may need to have it enabled in your account. Contact support for assistance.
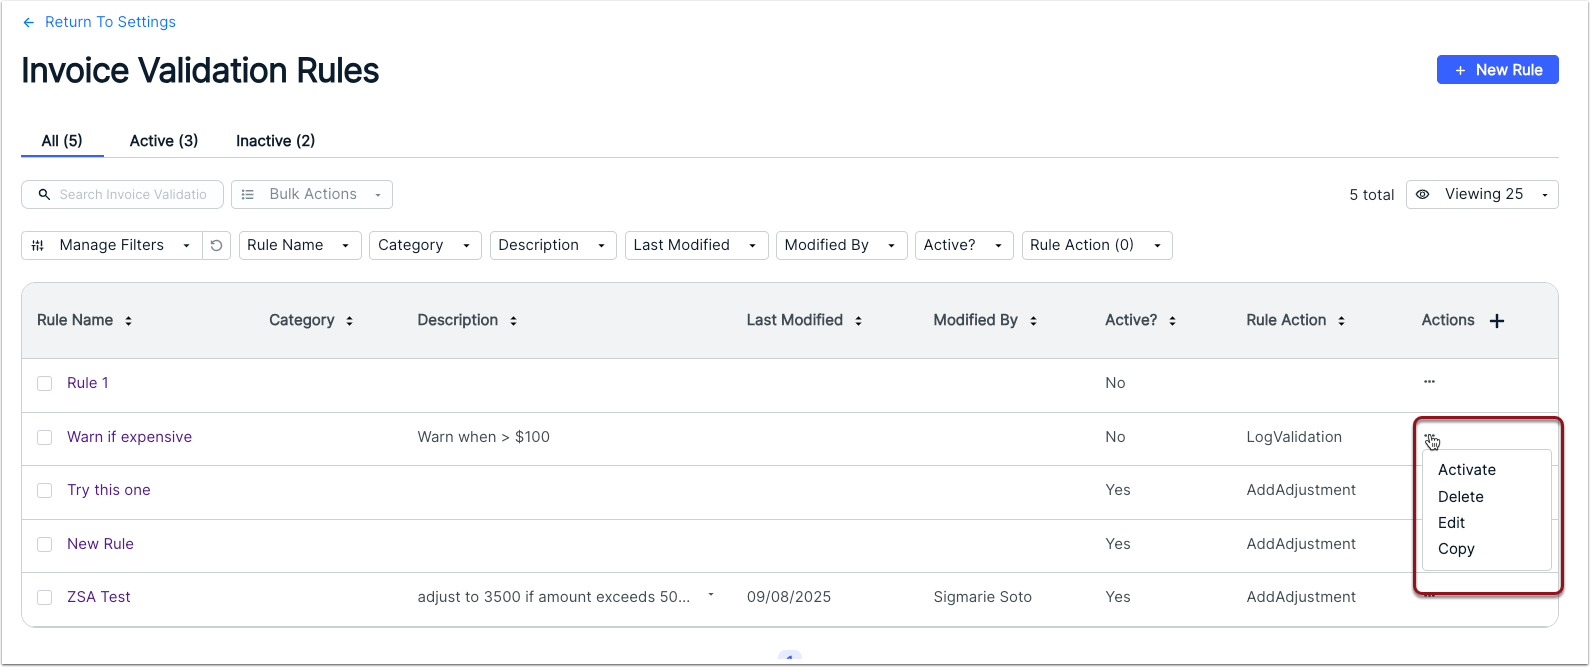
Invoice Validation Rules can only be accessed, edited, and created by admins. To get started, go to Settings > Invoice Validation Rules. By default, all active and inactive rules are displayed. Use the tabs to narrow the list.
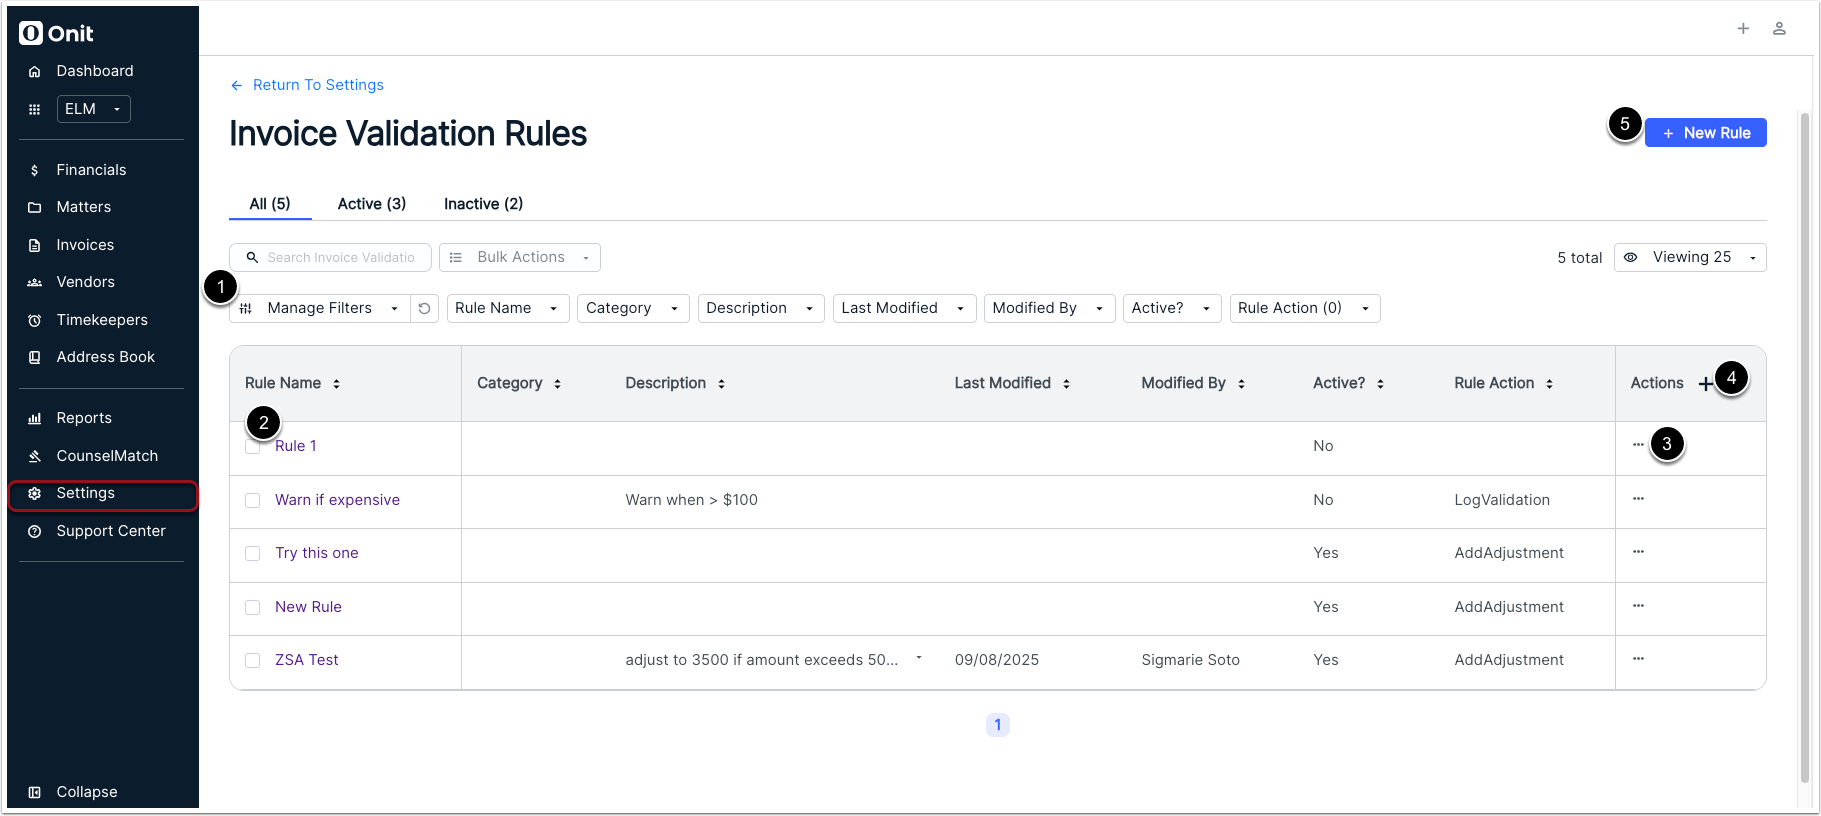
Admins can take various actions from this page:
- Filter the list of existing rules by various criteria, such as category and last modified date.
- Open active or inactive rules to view general information, conditions/paramaters, and the activity log.
- Use the Actions column to edit, delete, clone, or activate/deactivate rules.
- Hide any default columns or change the order of the columns.
- Create a new rule from scratch.
Creating a New Rule
Follow the instructions below to create a new rule. If there are existing rules that can be customized to meet your need, we recommend making a copy of it instead to avoid having to start from scratch.
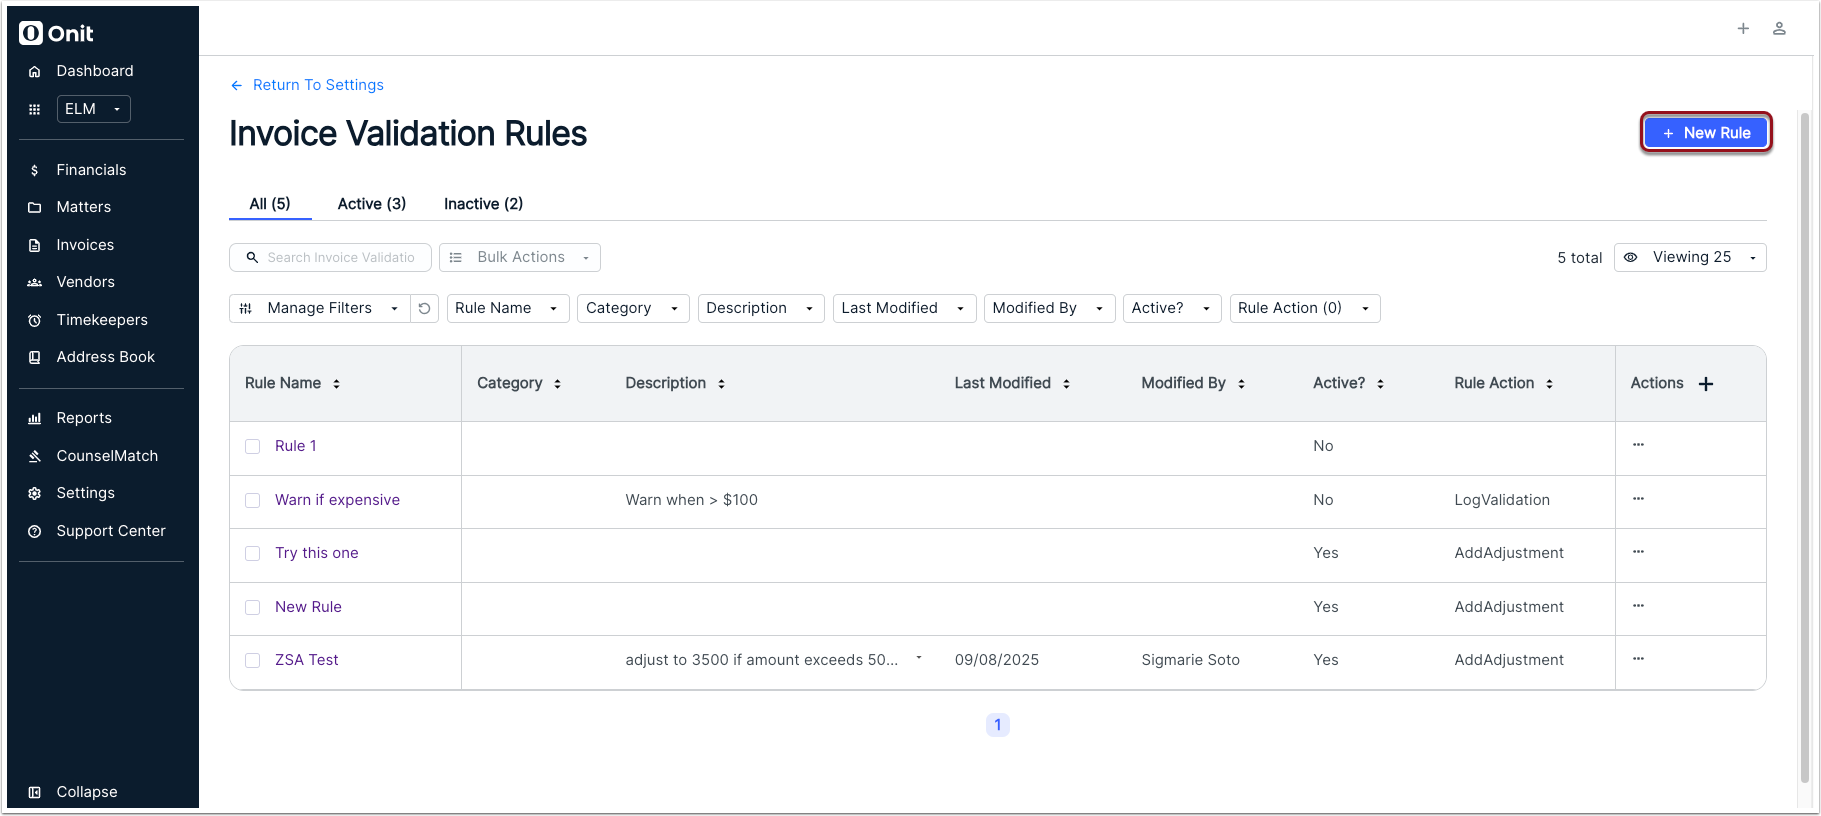
1. Click + New Rule in the top-right corner of the Invoice Validation Rules list page.
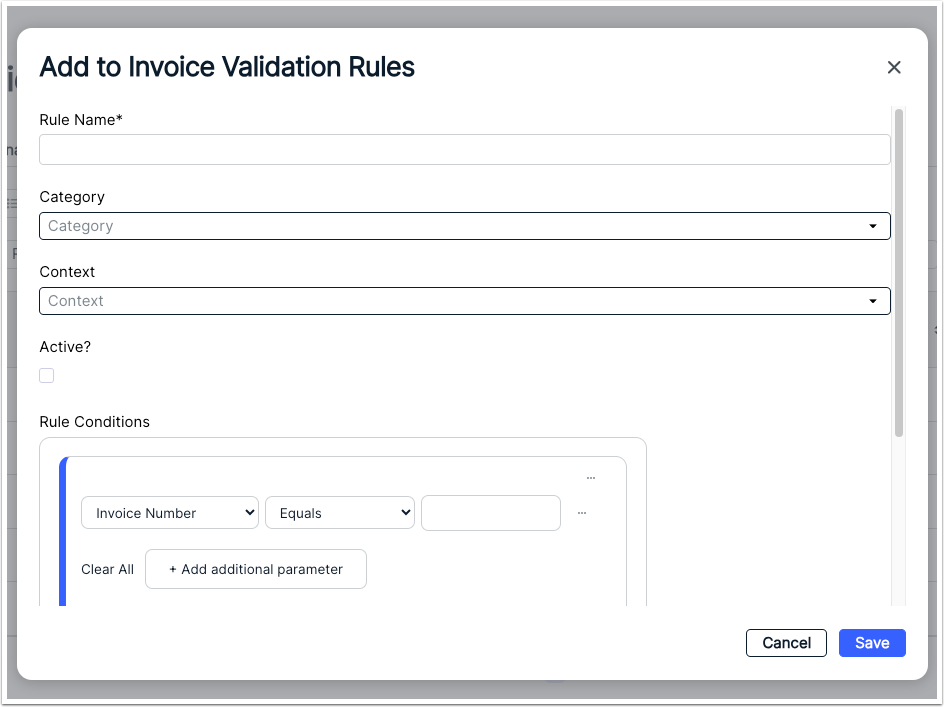
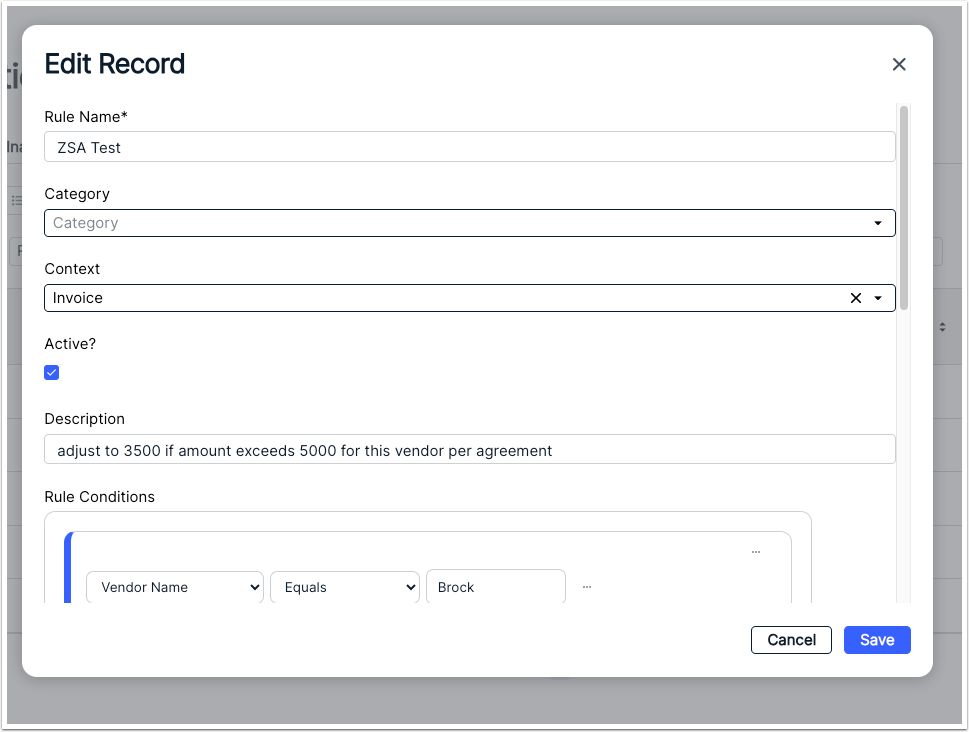
2. Enter/select the general rule information, such as the name, category, and description (see the table below for details).
| Field | Description |
|---|---|
| Rule Name | Name as it will appear to other admins in the system. |
| Category | Categories are optional and can be used for better filtering, tracking, and reporting. We provide a built-in list of categories that can be customized and expanded by admins. |
| Context | Whether the rule applies to a Fee, Expense, or the entire Invoice. |
| Active? | New rules are set to inactive by default; select the box if you want the rule to run against all invoices once saved. IMPORTANT: We recommend ensuring that the conditions and actions of your rule do not overlap or conflict with other rules to avoid manual rework or invoice processing issues. |
| Rule Conditions | Invoice Validation Rules are set up like IF/THEN statements (i.e., if the defined conditions are met, then trigger the specified action. At a high level, a condition is made up of the following:
For more information on adding conditions and condition groups to a new rule, skip to Step 3 below. |
| Description | Enter a brief description to provide context to other admins from your organization. |
| Rule Action | Choose from one of three actions: UpdateAttribute, LogValidation, or AddAdjustment. Click here for additional information. |
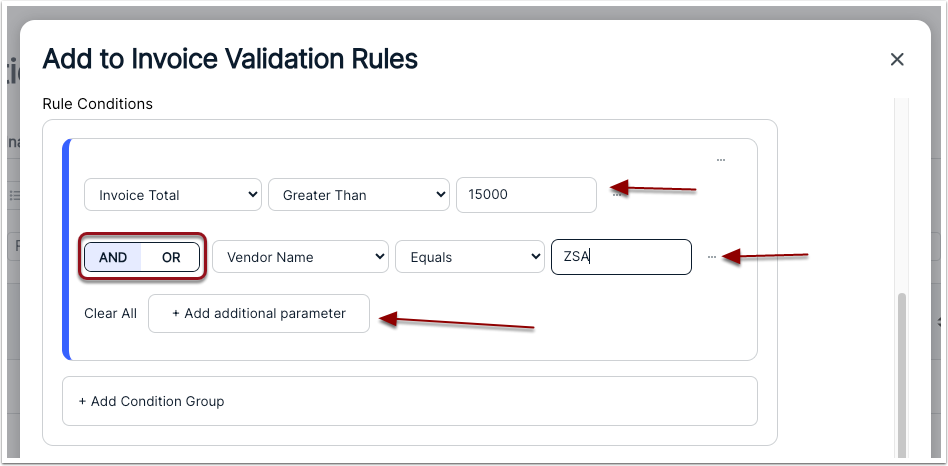
3. Set up your first condition and then click +Add additional parameter (if applicable) to make it an AND/OR condition. In this example, the condition is checking for invoices that are over a certain amount AND were submitted by a specific vendor.
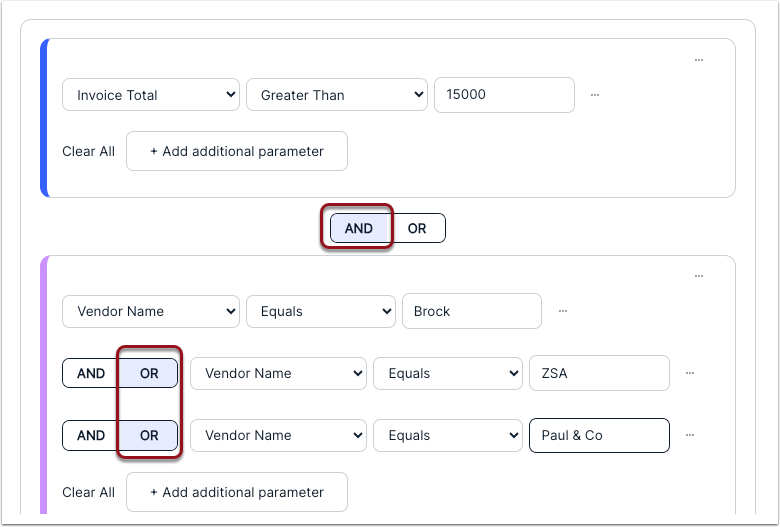
4. Click +Add Condition Group (if applicable) to add a second group and select AND or OR. For example, if you need this rule to look for invoices of a certain amount across multiple vendors, you can set up the first condition for the Invoice Total only and then add a second condition group (separated by AND) with parameters separated by OR to check for the specific vendors.
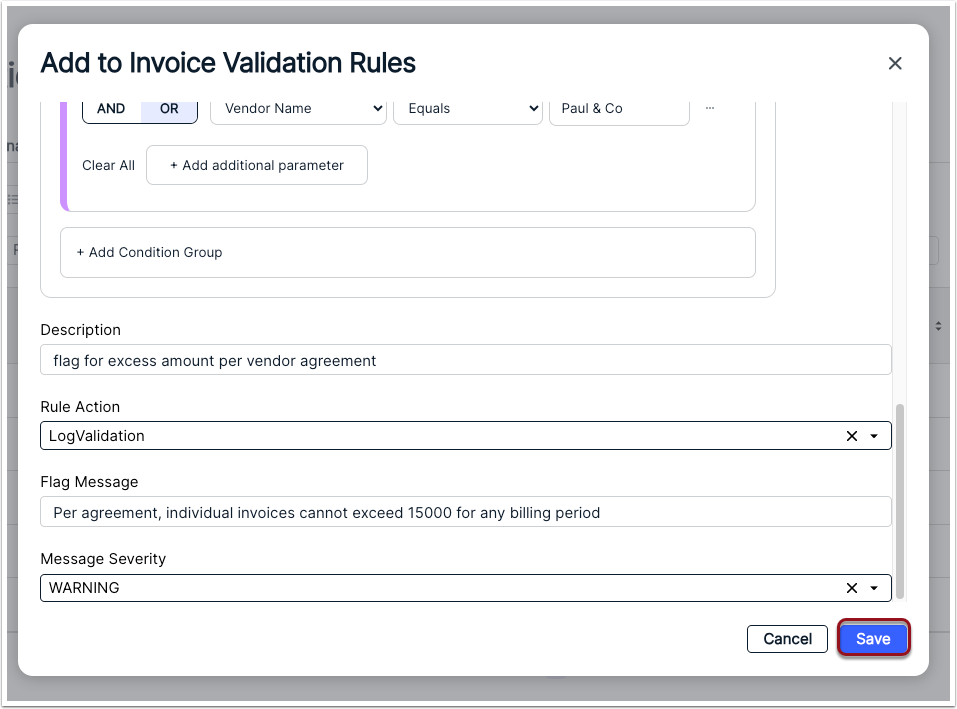
5. Select the Rule Action: UpdateAttribute, LogValidation, or AddAdjustment, and then fill in the remaining fields. The remaining fields that appear depend on the selected action. See the sections below for more details.
6. Click Save in the bottom-right corner.
UpdateAttribute
Select this action to add a Task Code, Activity Code, or Expense Code to line items on invoices that meet your conditions. Choose which code you want to add from the Field Name field.
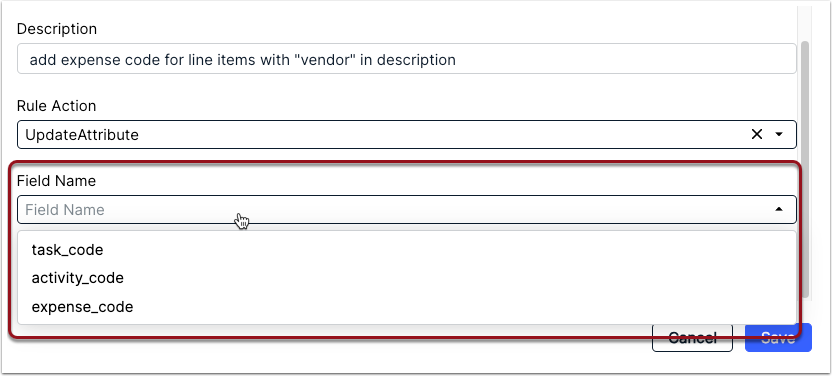
For example, you can set up a condition to look for line items with certain keywords in them, such as "vendor" or "third party," and have it add the E118 expense code for litigation support vendors.
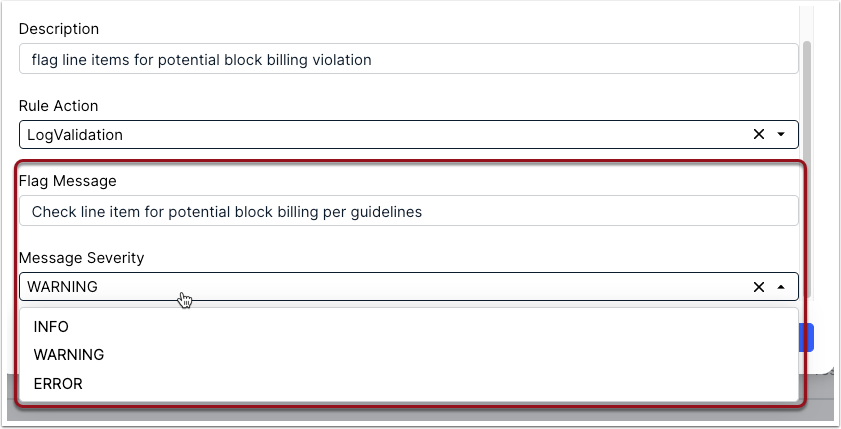
LogValidation
Use this action to flag invoices based on certain conditions. This allows you to add notes about the flag and the message severity. In the example below, the rule is set up to flag invoices for potential block billing if a line item exceeds 10 units/hours.
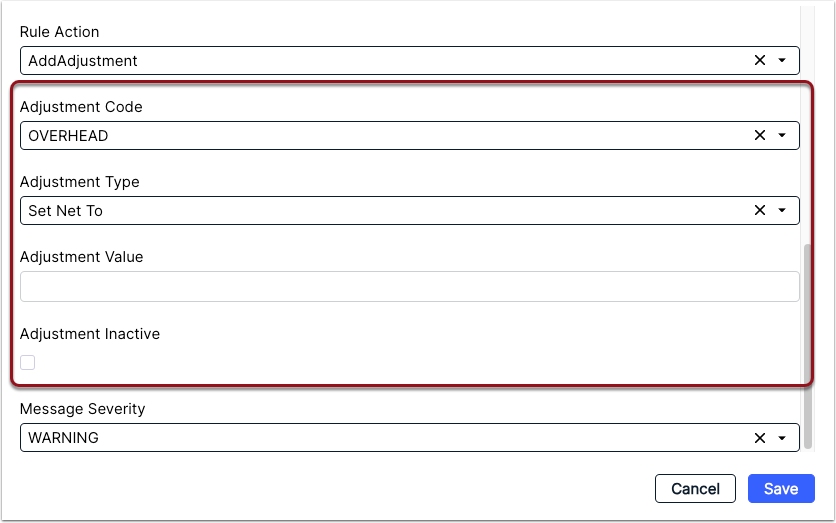
AddAdjustment
Choose this action if you need to adjust the invoice total or an individual line item based on the specified conditions. This requires that you select/provide the following information:
- Adjustment Code: The reason for the adjustment; this is a predefined list with standard options, such as BLOCK (i.e., Block Billing), CONF (i.e., Conferences), LATE, LOCAL, OVERHEAD, POSTAL, and VAGUE (i.e., Vague Description).
- Adjustment Type: Select Set Rate To (i.e., applies to line items only) or Set Net To (i.e., applies to invoice totals or line items). Which option you select depends on what you selected for the Context field in Step 2 above.
- Adjustment Value: Enter the adjustment amount.
- Adjustment Inactive: Select this box if you do not want the adjustment to be automatically applied at this time. It is active by default (if the rule itself is set to active).
- Message Severity: Choose INFO, WARNING, or ERROR.
Editing a Rule
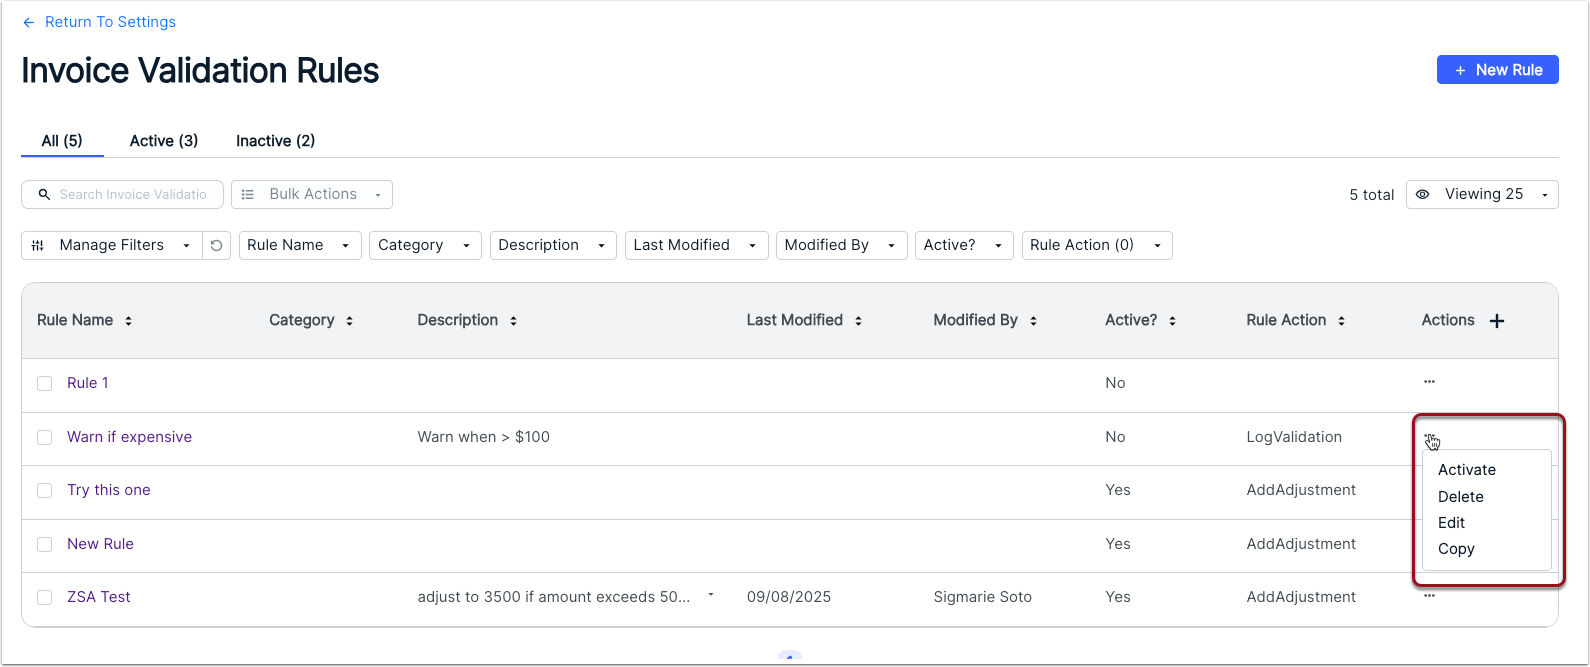
Click on the ... (more) option under the Actions column and select Edit to modify fields or conditions.
Update the relevant fields (e.g., name, category, conditions, and actions) and then click Save.
Cloning a Rule
If there is a rule that can be customized and used for a different need, you can make a copy of it by clicking the ... (more) option under the Actions column and selecting Copy.
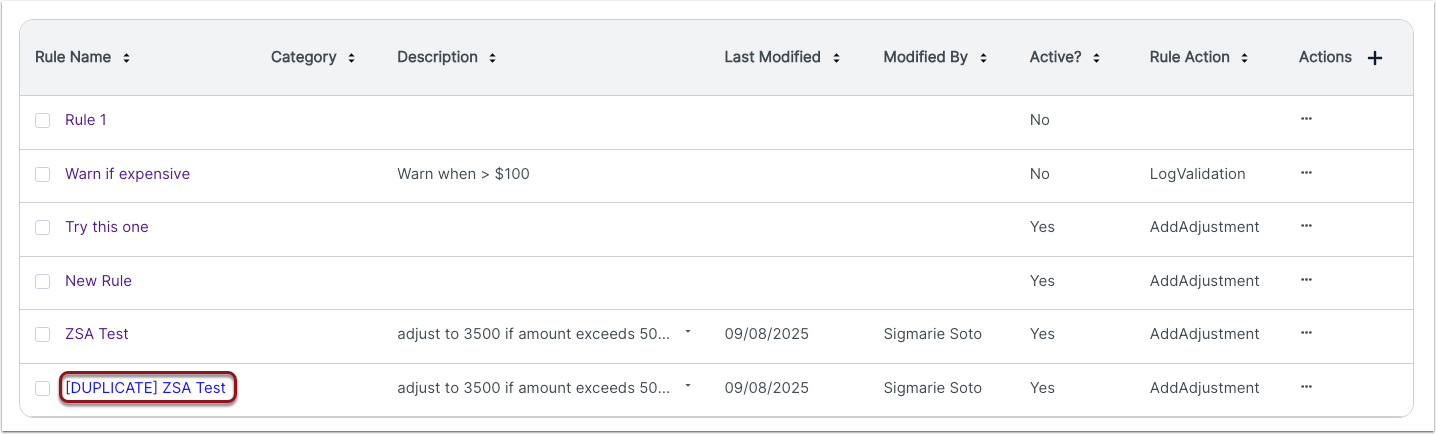
The copied rule will appear on the list and the name will be prefixed with [DUPLICATE]. Click on the ... (more) option under the Actions column to customize the name, general fields, and conditions/actions.
Activating/Deactivating Rules
When creating a new rule, you have the option to set it as active or leave it as inactive (default). Before activating a rule, make sure you have confirmed the conditions and automated actions so that they do not overlap with the other active rules. Once a rule is active, it will run against all submitted invoices and trigger the automated action if it meets the specified conditions.
There are two ways to activate/deactivate rules:
#1. Click the ... (more) option under the Actions column and select Activate or Inactivate.
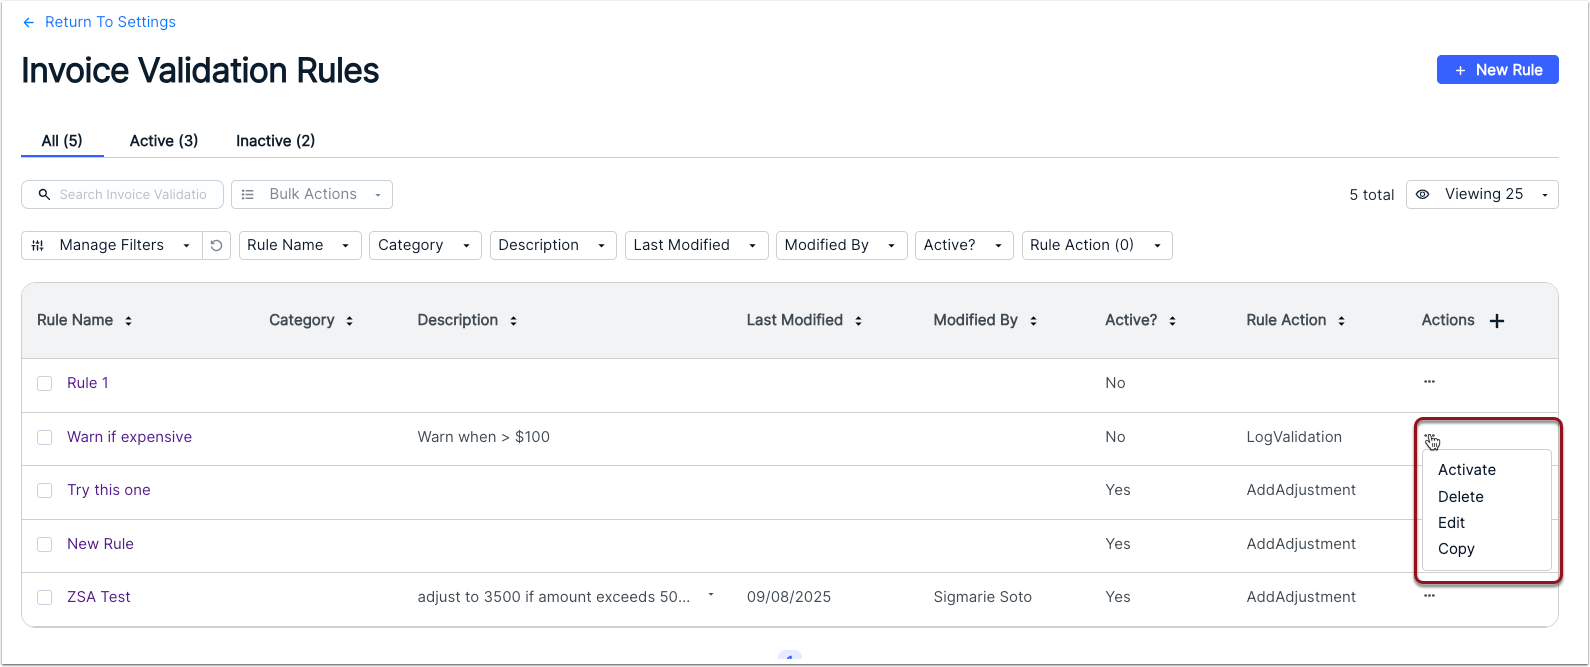
OR
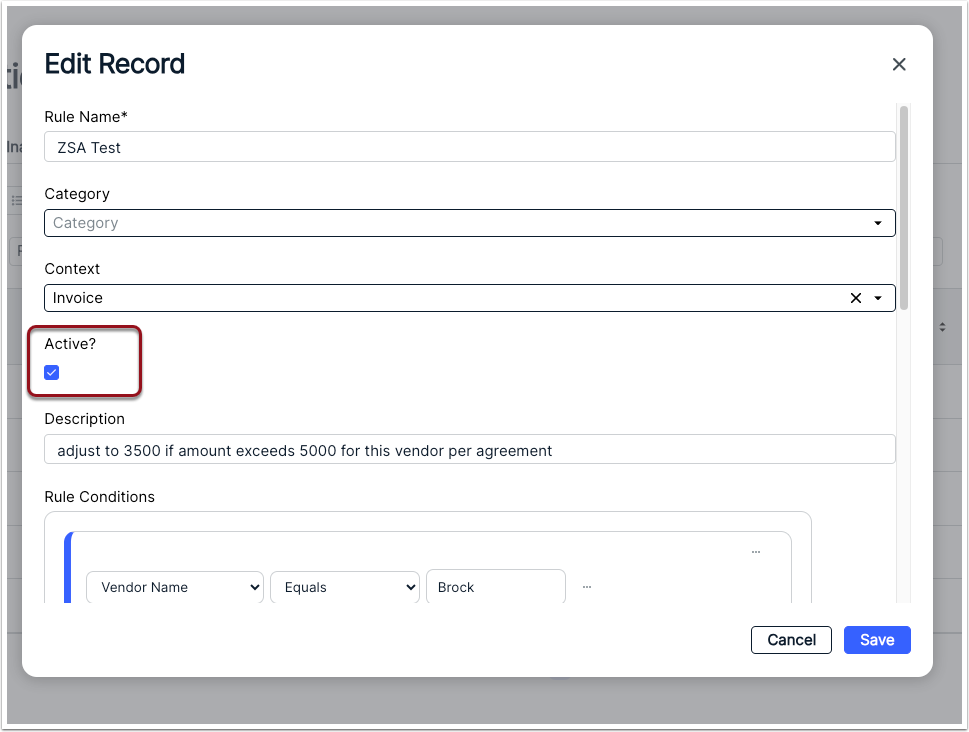
#2. Open the rule for editing and select/de-select the Active? box; click Save.