Admins can customize Unity to record additional details beyond those captured and tracked by our general attributes (e.g., Matter Name, Description, Legal Entity, Cost Code, etc.). These additional data fields are referred to as custom attributes and can be associated with matters, vendors, invoices, and other types of records depending on customer needs.
Before moving forward, think through the information your company needs to record and report on. What data do you need beyond what is already built into the system? Some ways our customers use custom attributes include the following:
- Setting custom attributes as allocatable to assign portions of spend to accounting-type attributes other than our built-in fields (e.g., Cost Codes or Legal Entity).
- Scoping attributes to matters, legal entities, invoices, vendors, and/or purchase orders (if applicable) to capture and link datapoints across various types of records.
- Adding custom attributes to matter templates so that they automatically populate as required or optional fields when new matters are created.
- Categorizing similar/relevant custom attributes into display groups for better organization.
This article covers the following:
- Supported Field Types
- Custom Attributes Management Page
- Attribute Scope
- Display Groups
- Allocatable Attributes
- Adding Custom Attributes
- Custom Attributes on Matter Templates
- Deleting Custom Attributes
Supported Field Types
When creating a custom attribute, you must give it a name and select a field type based on its function and purpose. Supported field types are listed and briefly described below.
| Field Type | Description |
|---|---|
| Text | Open text field for shorter inputs, such as names, titles, or brief descriptions. Supports input of letters, digits, and other symbols. |
| List | Dropdown field with a defined list of values users can choose from, such as an office location, region, sub-type, or department name. |
| Date | Date field that allows manual input or use of a calendar picker. |
| Yes/No | Allows users to select from Yes or No values only for tagging purposes. |
| Text Area | A multi-row open text field, such as for notes or instructions. Supports input of letters, digits, and other symbols. |
| Currency | Consists of two fields: one for currency code (list of values) and one for the currency value (numeric field). |
| Number | Numeric-only field, such as for number of items or projects. Supports input of digits and decimal places, where applicable. |
| Percentage | Numeric-only field to display percentage values, such as for a discount percentage. Supports input of digits and decimal places, where applicable. |
Custom Attributes Management Page
This section covers how to manage data fields under Settings > Custom Attributes. For step-by-step instructions on how to add a new custom attribute, click here.
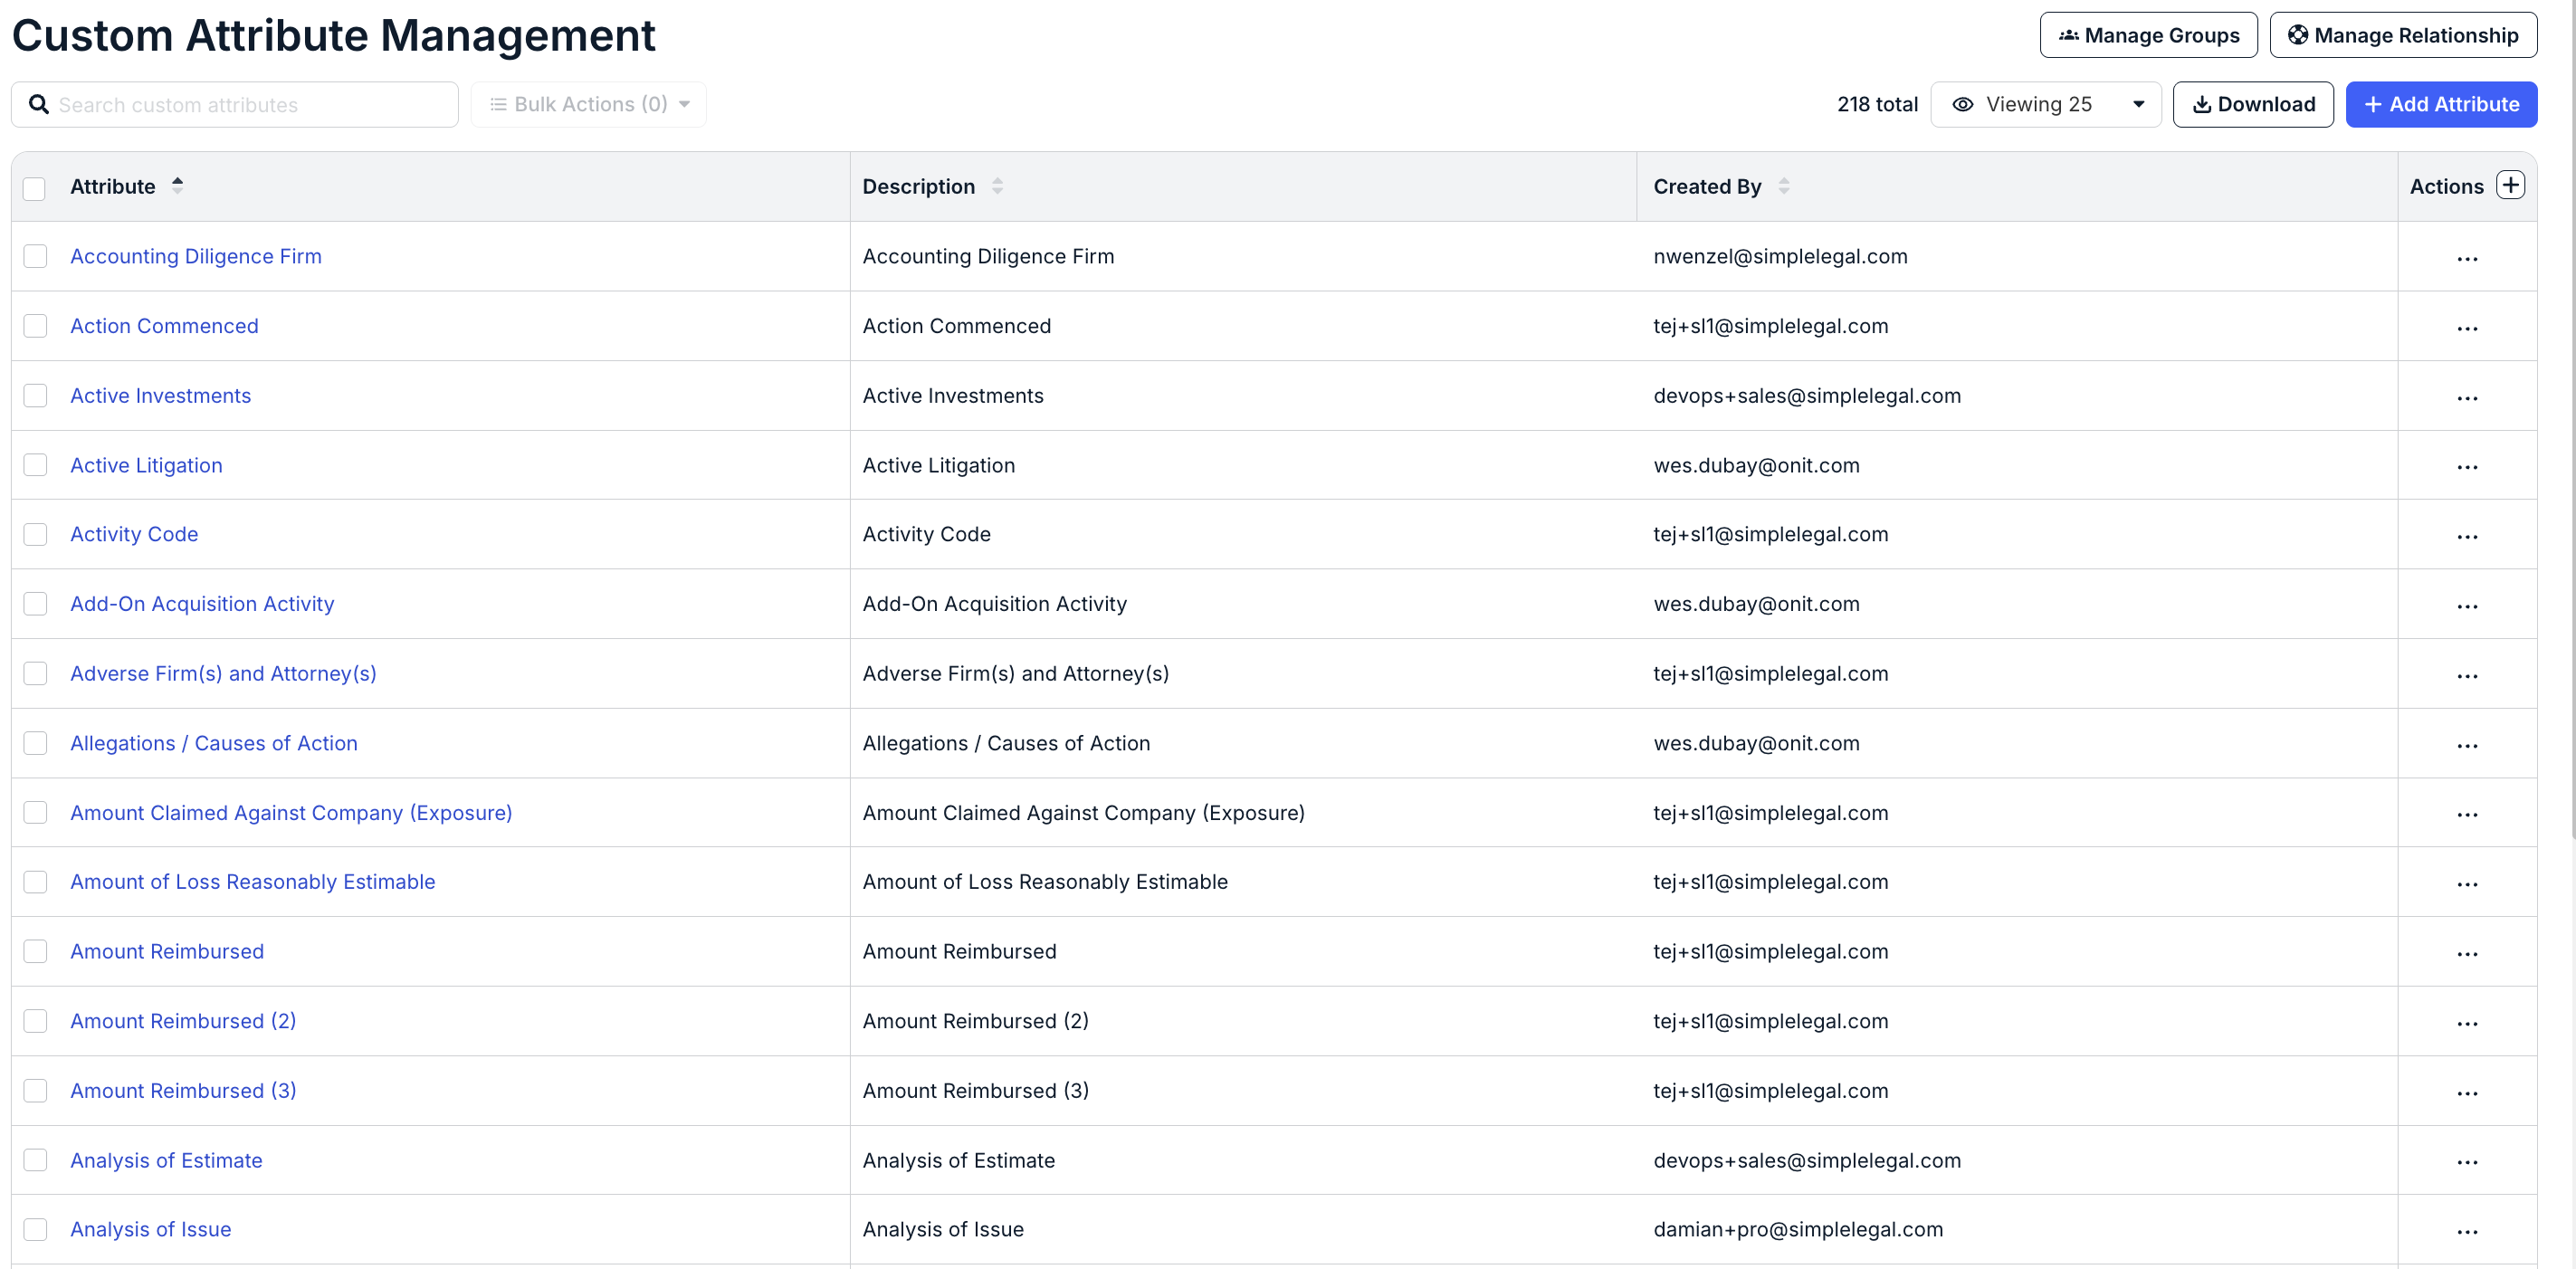
This page displays the following information:
- Attribute: Name of the custom attribute as it appears to users. If provided, the description is listed under the name.
- Description: Brief notes added by an admin to provide context to other users.
- Created By: Email address of the admin who created the custom attribute.
Attribute Scope
Custom attributes can be scoped to one or more of the following types of records: Matters, Invoices, Legal Entities, Vendors, and Purchase Orders (if applicable). See the table below for an overview of how custom attributes are applied when scoped to the supported record types.
| Attribute Scope | Record Placement |
|---|---|
| Matters | For a custom attribute to appear on a matter, it must first be added to a matter template. Where it appears on a matter record and whether it is optional, required, or read-only depends on the template setup. |
| Vendors | Custom attributes scoped to vendors are optional and appear at the bottom of the Settings tab, following the Default Template field. |
| Invoices | Custom attributes scoped to invoices are optional and appear in the top section of the invoice details page. |
| Legal Entities | Custom attributes scoped to legal entities are optional and appear under the Settings section of the record. |
| Purchase Orders | Custom attributes scoped to purchase orders are optional and appear under the Purchase Order Attributes section of the record. |
Display Groups
Display Groups are labels that can be created in Unity to categorize similar custom attributes based on certain criteria or qualities, such as matter type. New custom attributes are stored under the built-in Custom display group unless additional display groups are created.
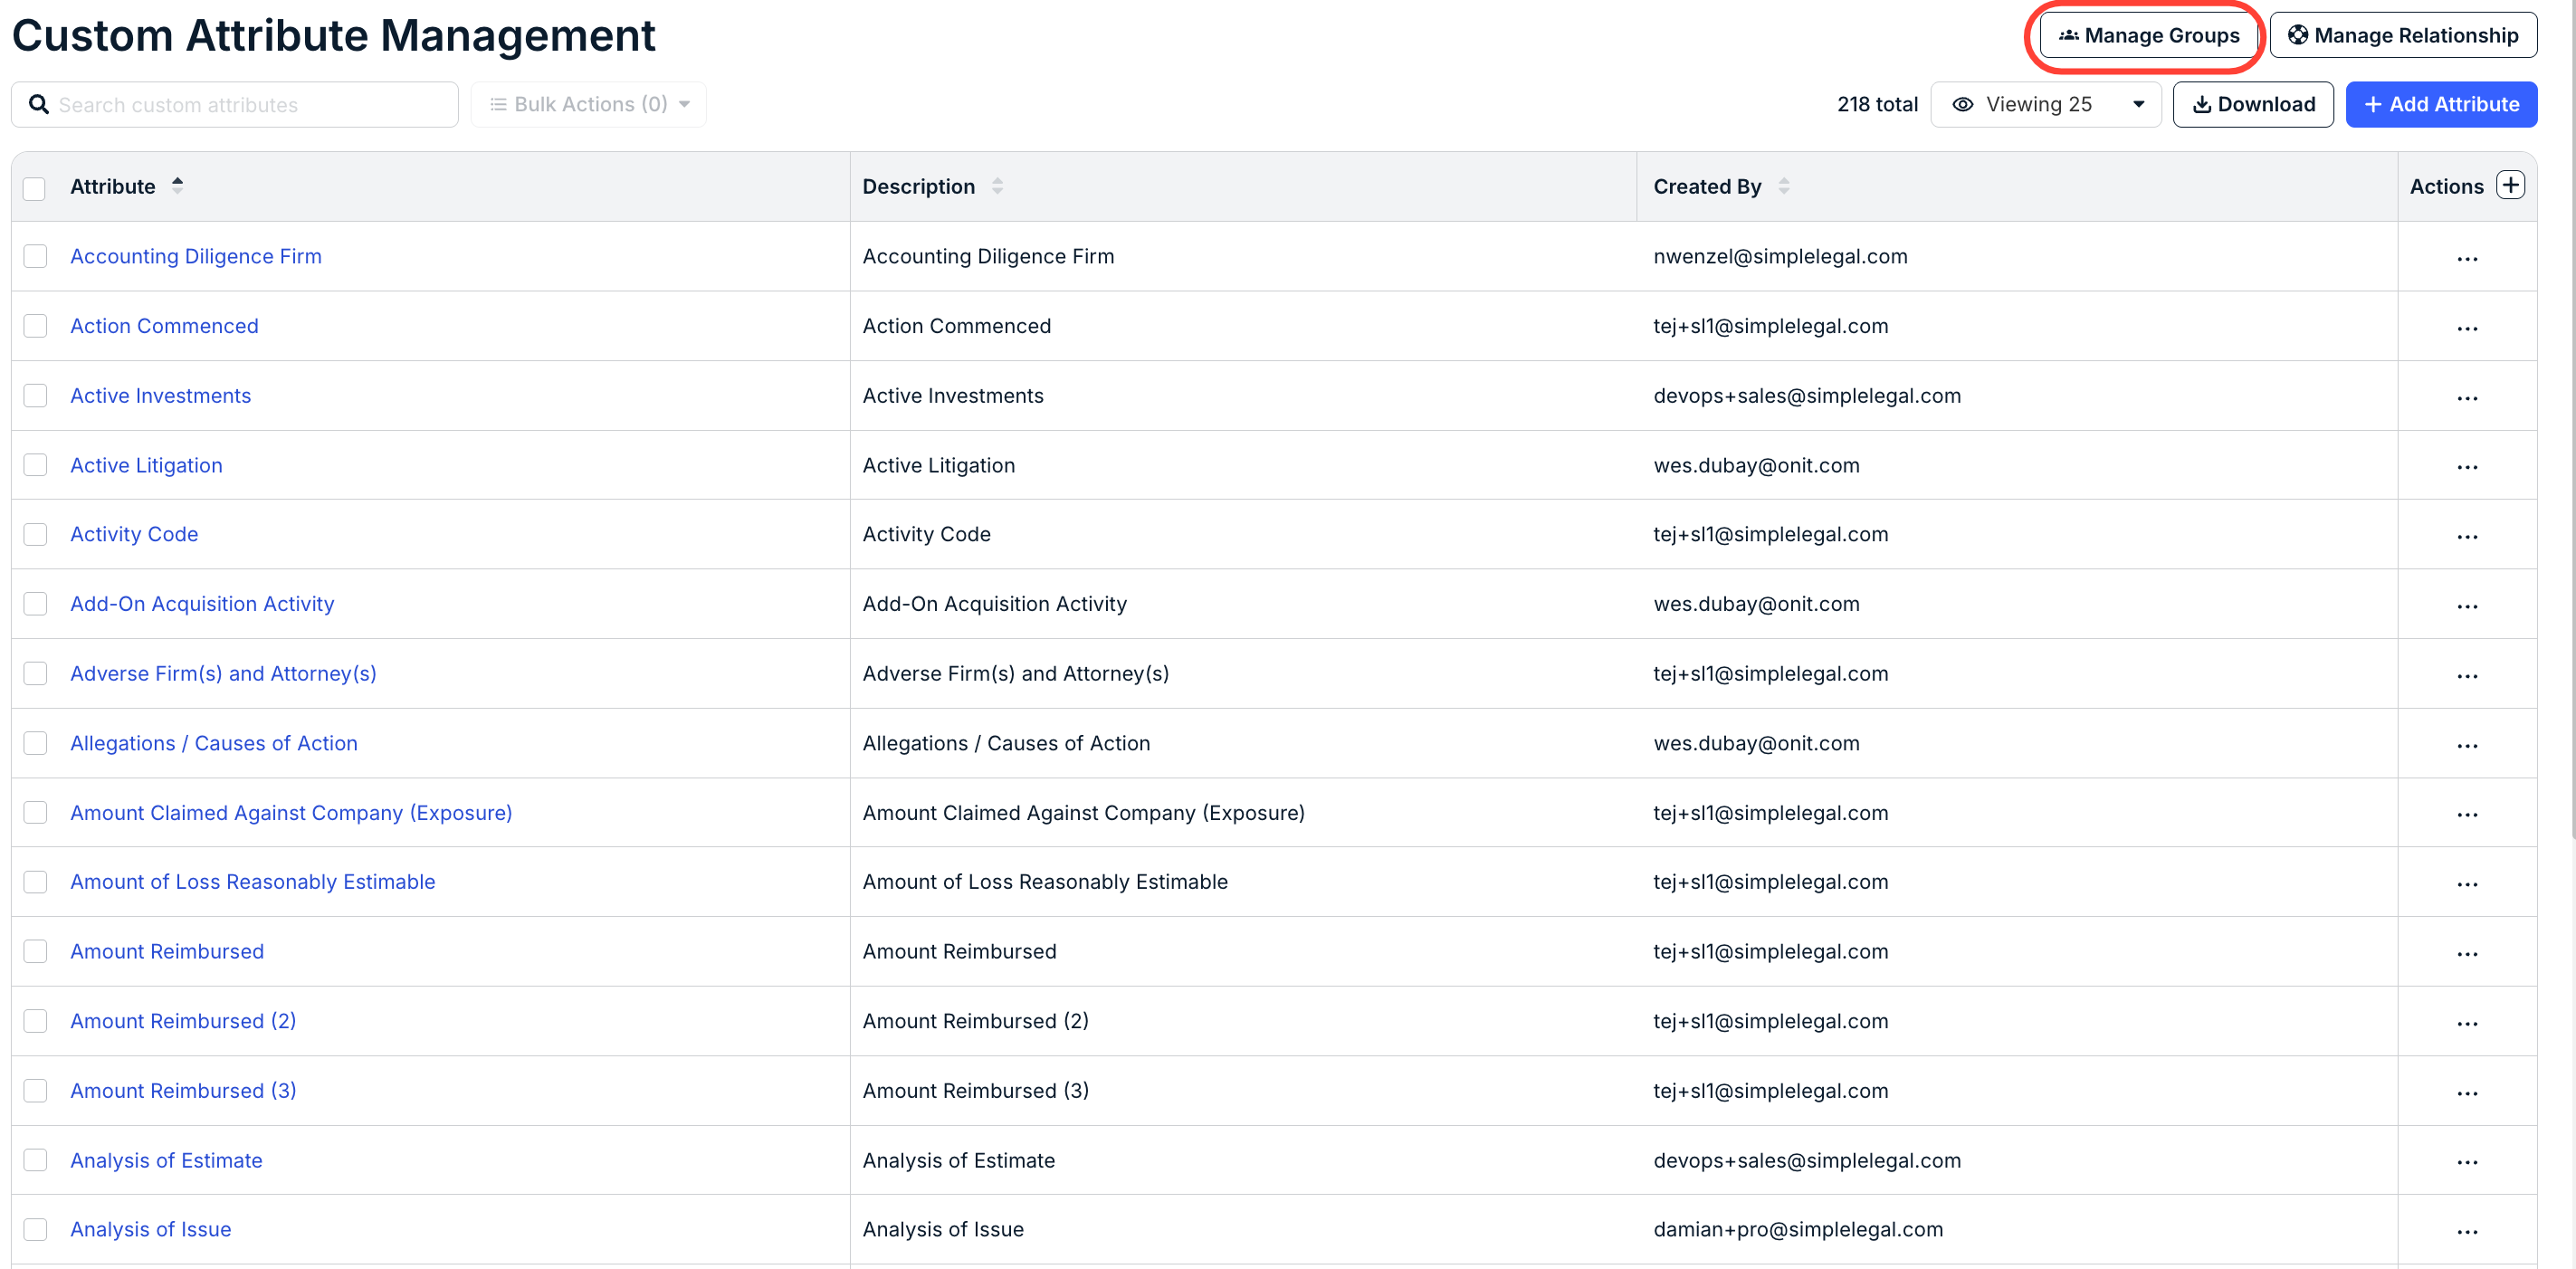
Using display groups is helpful for organizing larger numbers of custom attributes. To view or add display groups in your environment, go to Settings > Custom Attributes and click the Manage Groups button at the top of the Custom Attributes Management page.
From here, you can do the following:
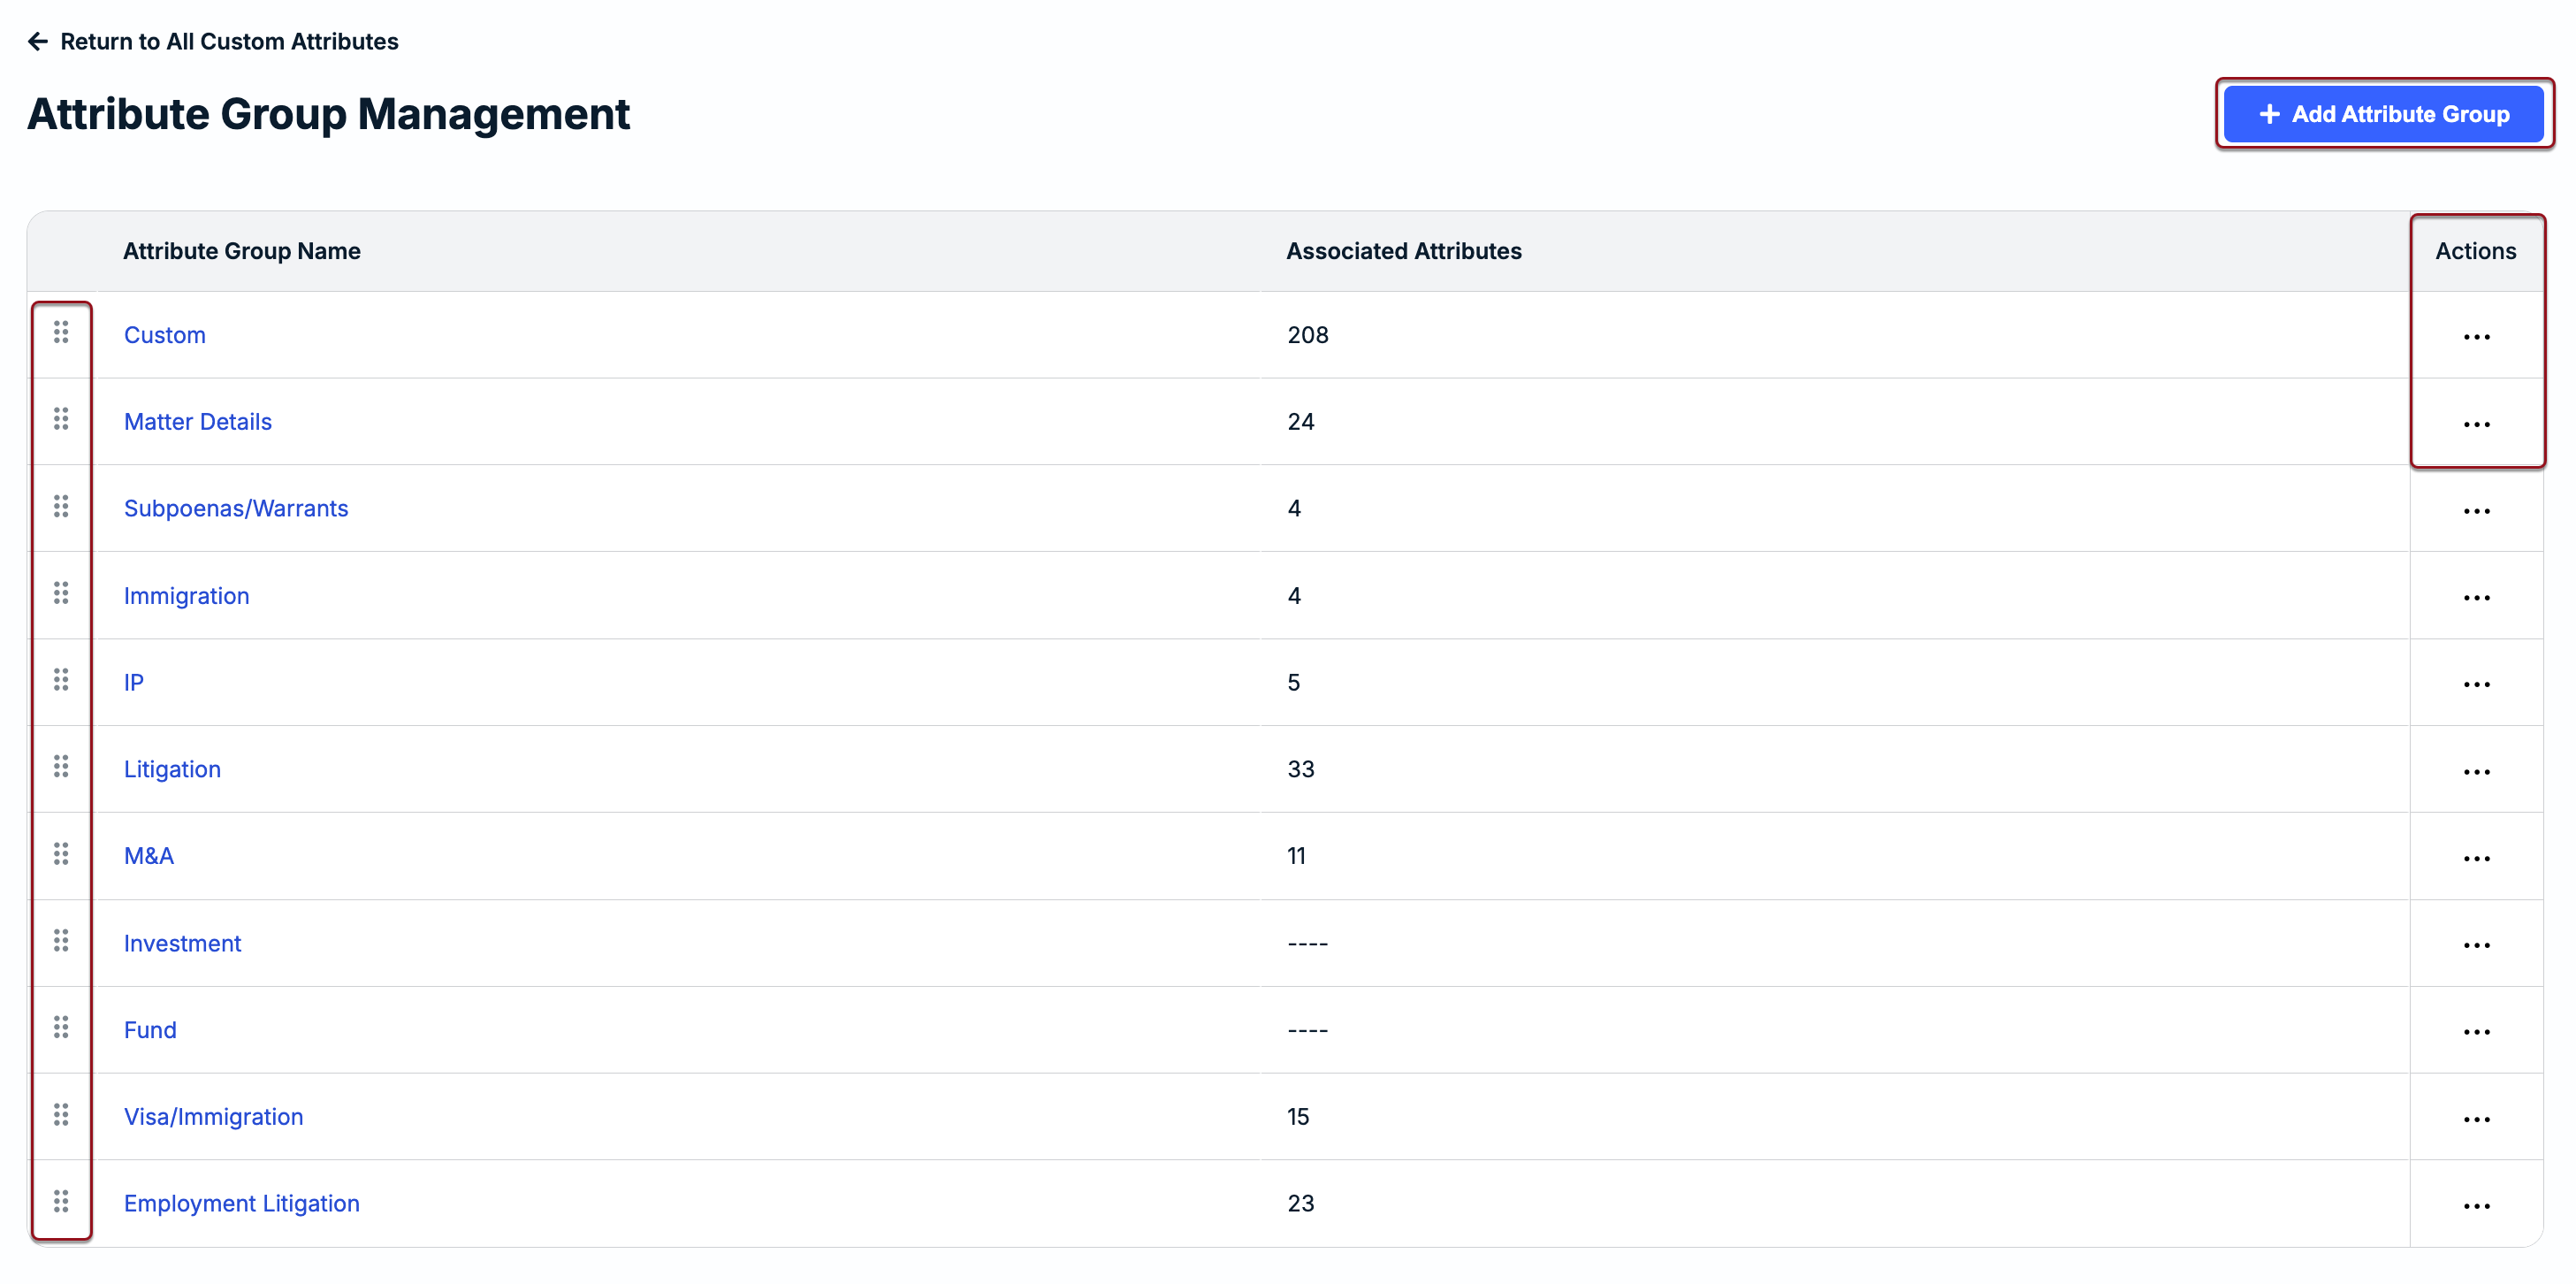
- Click + Add Attribute Group in the top-right corner to create a new display group. Once it is added, it can be assigned to new or existing custom attributes in your environment.
- Use the drag-and-drop handles at the far-left of the table to change the order of the display groups as they appear to users.
- Use the ... (more) option under the Actions column to rename a display group or delete it. NOTE: A display group can only be deleted if there are no custom attributes attached to it.
- Click on a display group name from the list to view which custom attributes are currently linked to it.
Additional considerations:
The following conditions must be met for a display group and its associated custom attributes to appear as options when setting up or updating a matter template:
- List-type custom attributes must have Allocatable set to No. Any attributes set as allocatable will not appear under the display group when creating a matter template.
- All custom attribute types must be scoped to matter records to appear under the display group when creating a matter template (i.e., Attribute Scope = Matters).
Allocatable Attributes
All customers have two built-in allocatable attributes: Legal Entity and Cost Code. These attributes can be used to assign portions of spend at the matter or invoice level. For additional information about allocations, click here.
Custom attributes can serve as additional markers to group invoices based on other associated characteristics. We recommend that admins first think through the information the company needs to capture and report on, and whether those needs are addressed by the out-of-the-box fields for Legal Entities and Cost Codes.
If our default allocatable attributes (i.e., Legal Entity and Cost Code) do not address your needs, you can set up relevant custom attribute lists as allocatable to assign portions of spend. The option to set a custom attribute as allocatable is not available if the field type is Text, Date, Yes/No, Text Area, or Currency. For instructions on setting up custom attributes, click here.
Adding New Custom Attributes
1. Go to Settings > Custom Attributes.
2. Click + Add Attribute in the top-right corner.

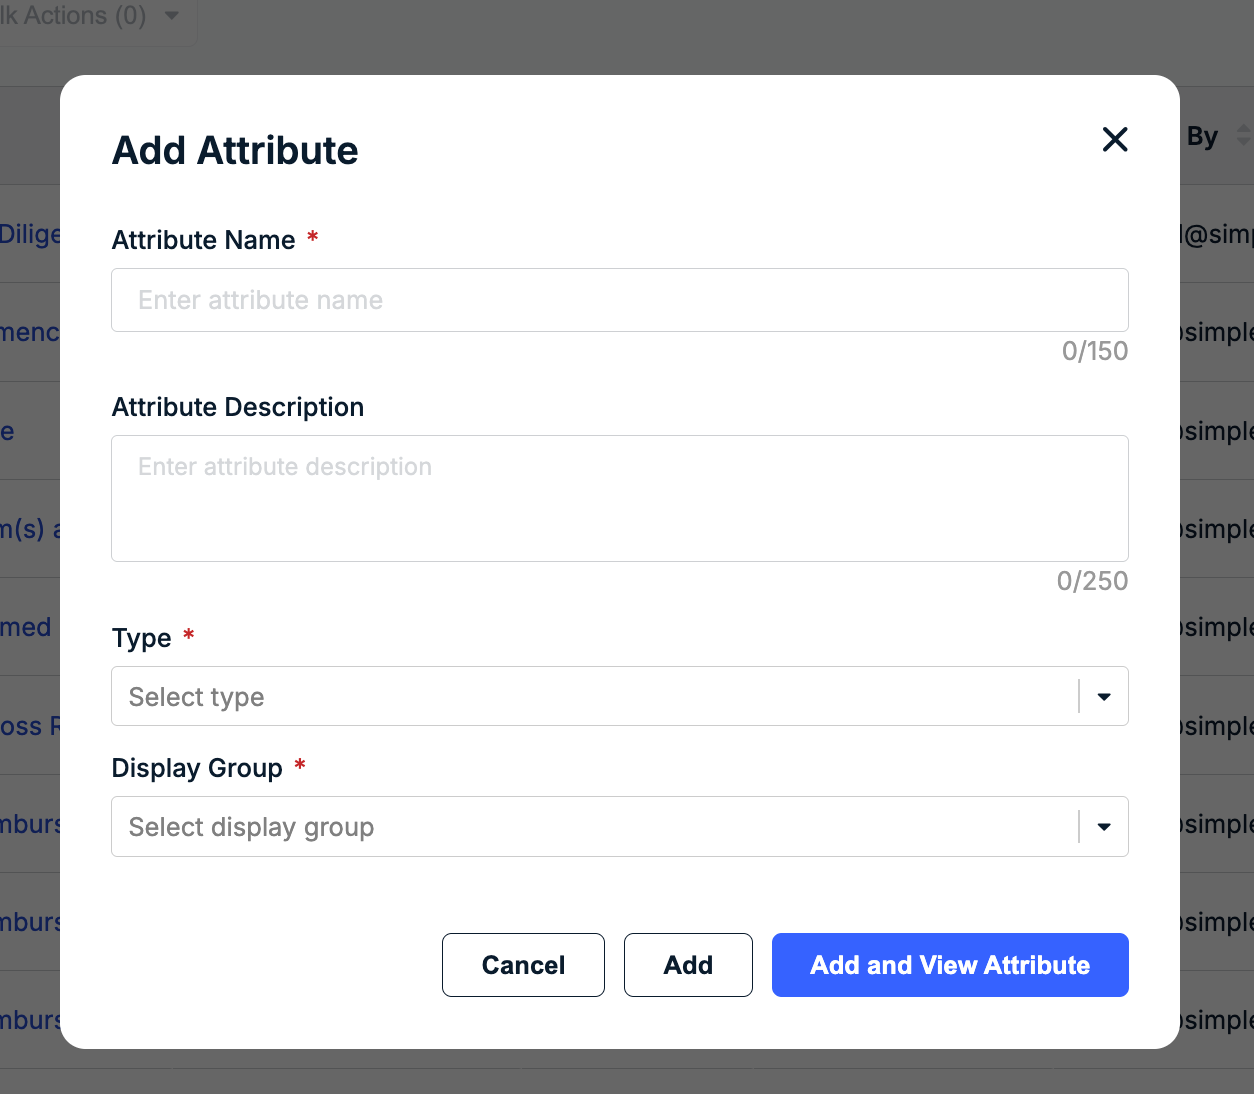
3. Enter or select the following and then click Add and View Attribute:
- Attribute Name (required): Custom attribute name as it should appear in scoped records.
- Attribute Description (optional): Any optional text as a guide to other admins.
- Type (required): Select from Text, List, Yes/No, Date, Currency, Text Area, Number, or Percentage. If creating a list attribute, refer to the next section for instructions on how to add list values. For descriptions of field types, click here.
- Display Group (required): Choose which group the custom attribute belongs to. If there are no other display groups, only Custom is displayed. For additional information, click here.
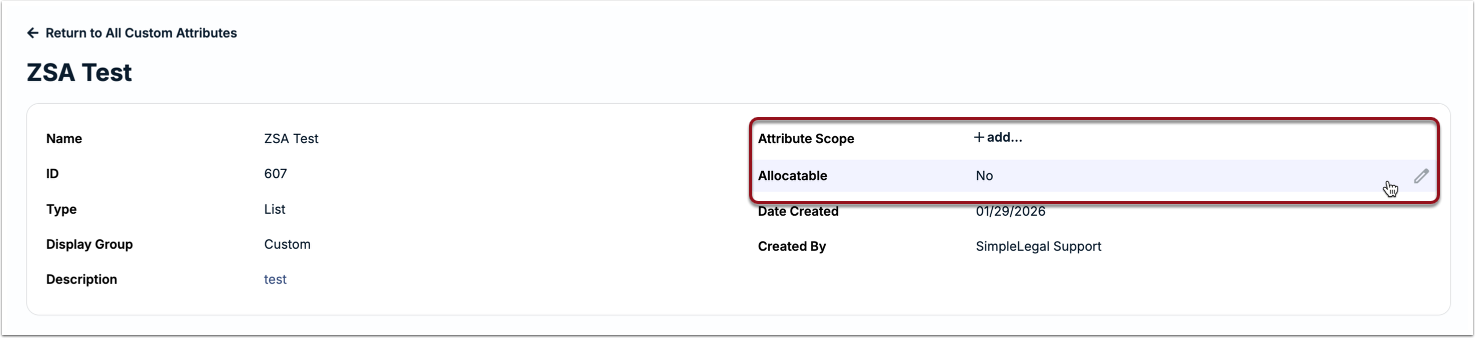
From the details page of the custom attribute, do the following:
- Click +add... next to Attribute Scope and select one or more options (e.g., Matters, Vendor, etc.); click the checkmark.
- For list attributes only, hover over the value for Allocatable and click the edit icon if you want to change it to Yes for allocation purposes.
Adding Values for List Attributes
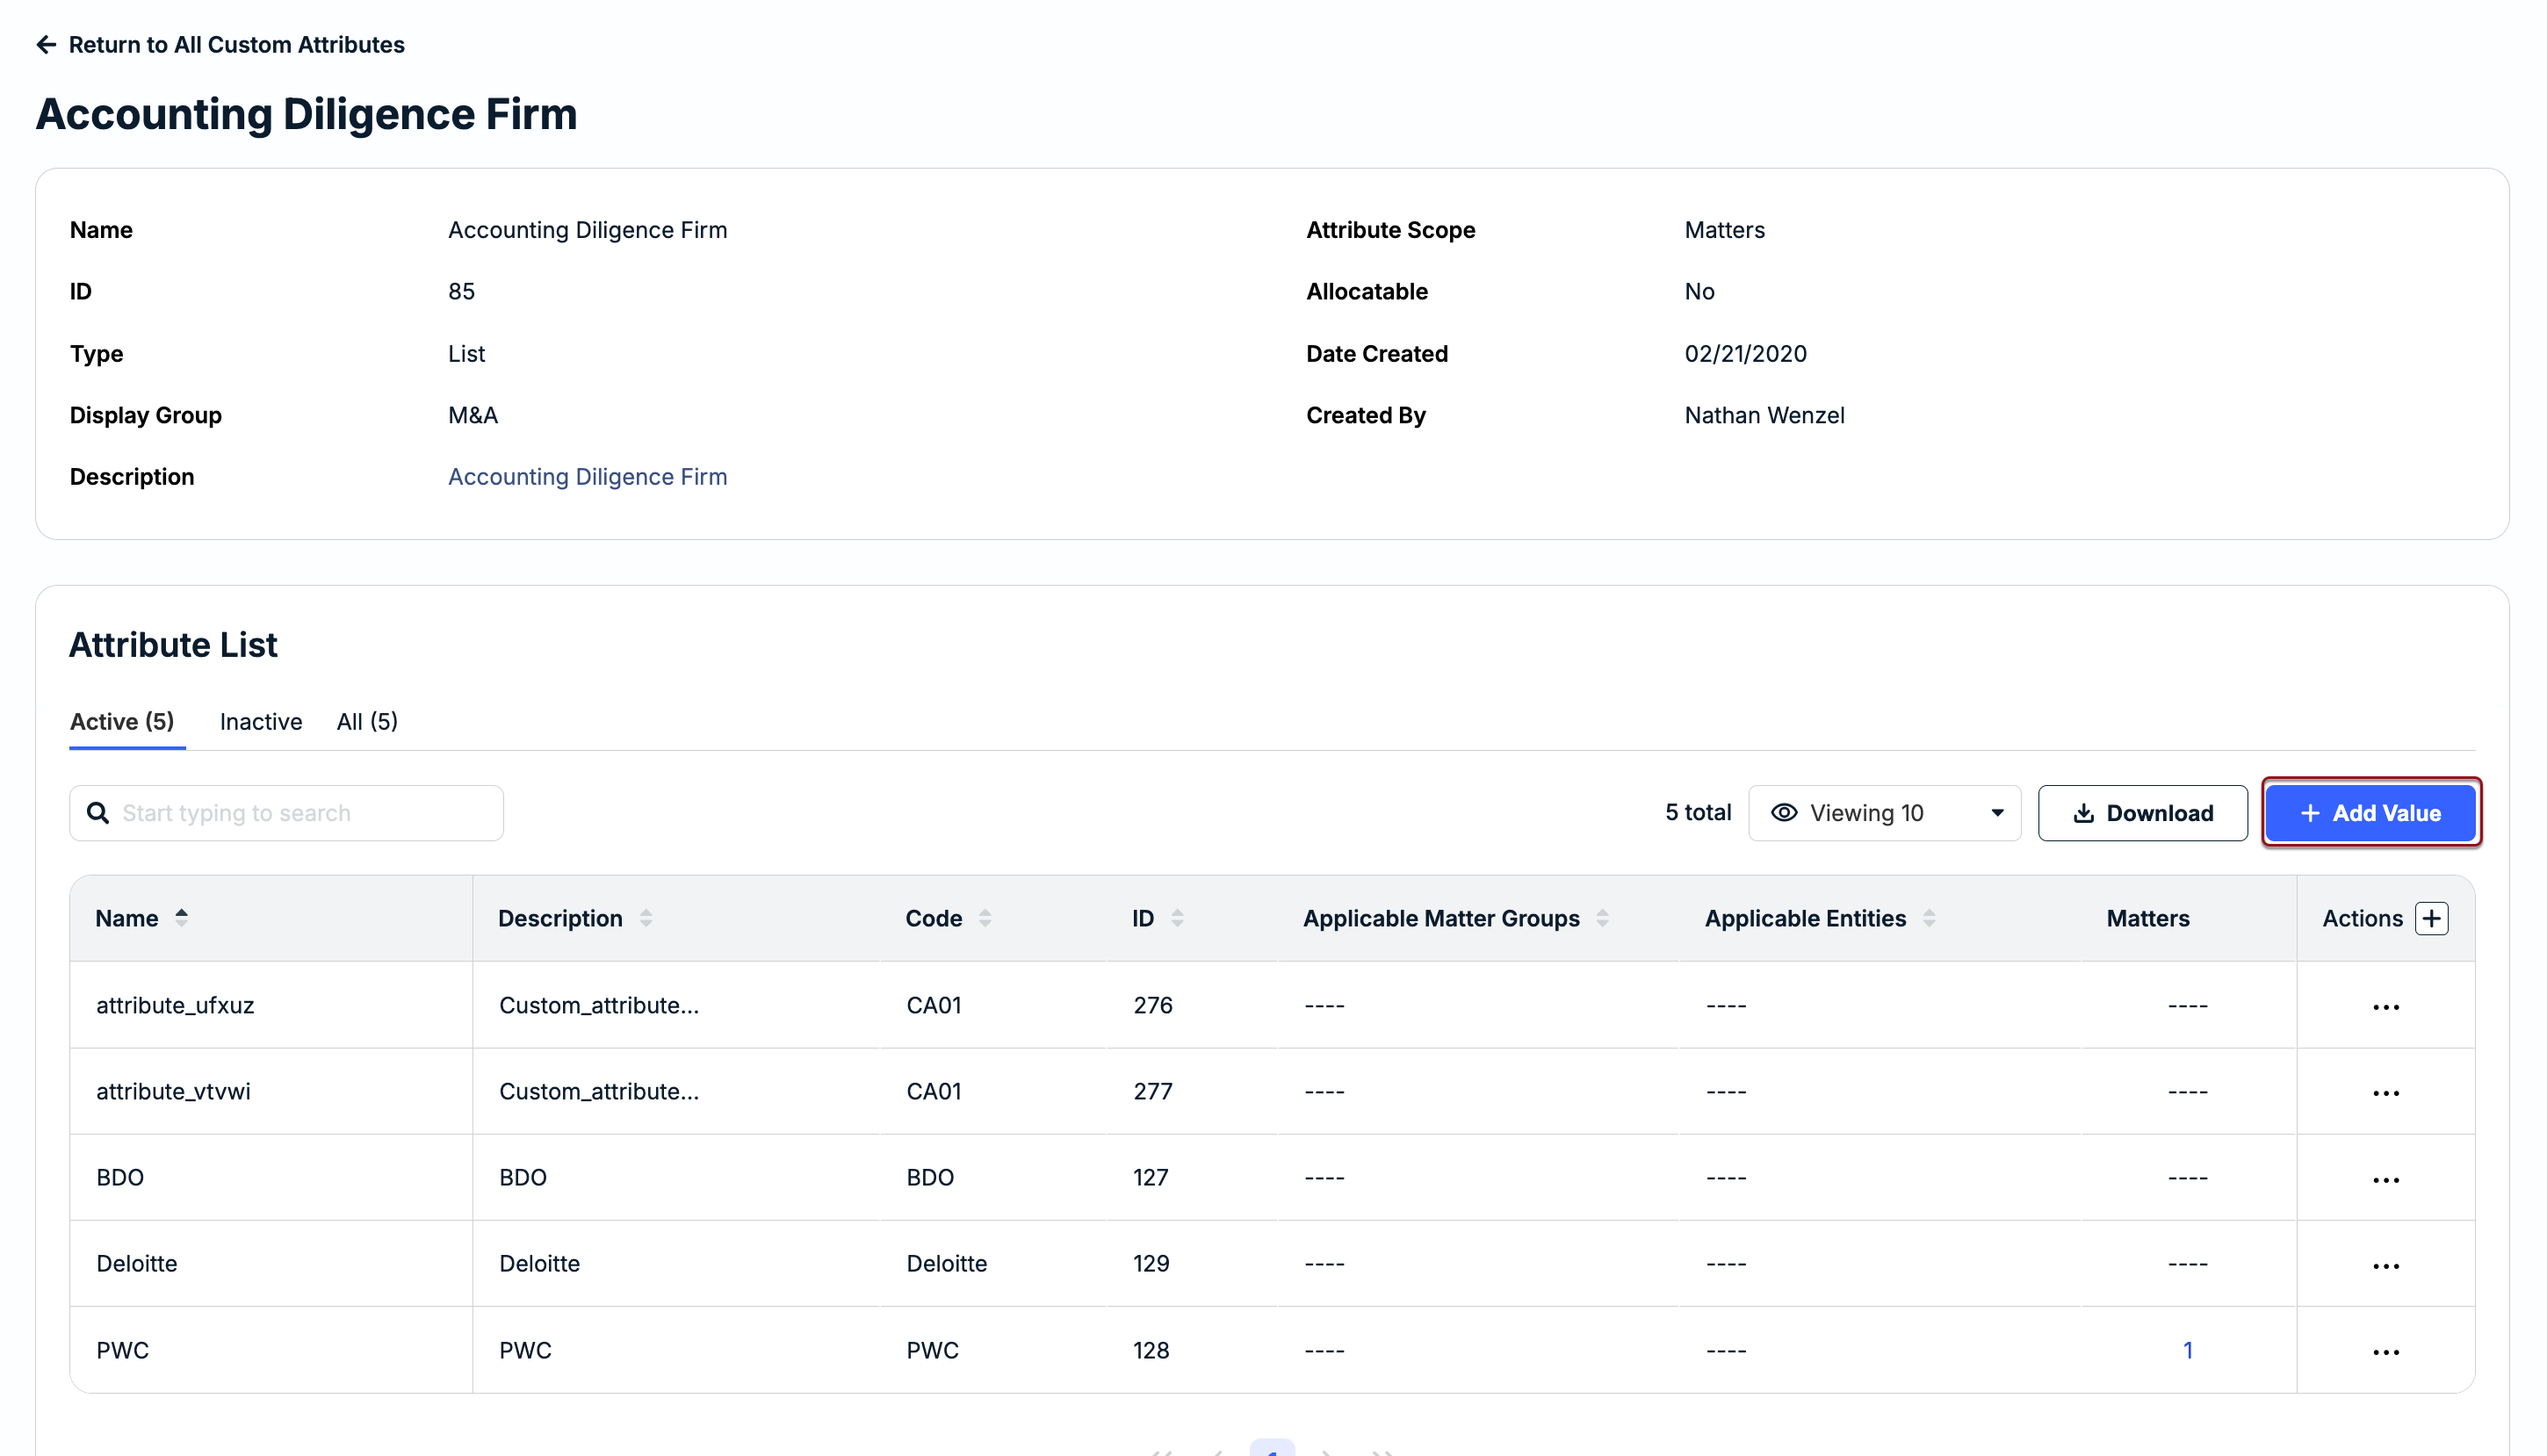
From the details page of the custom attribute list:
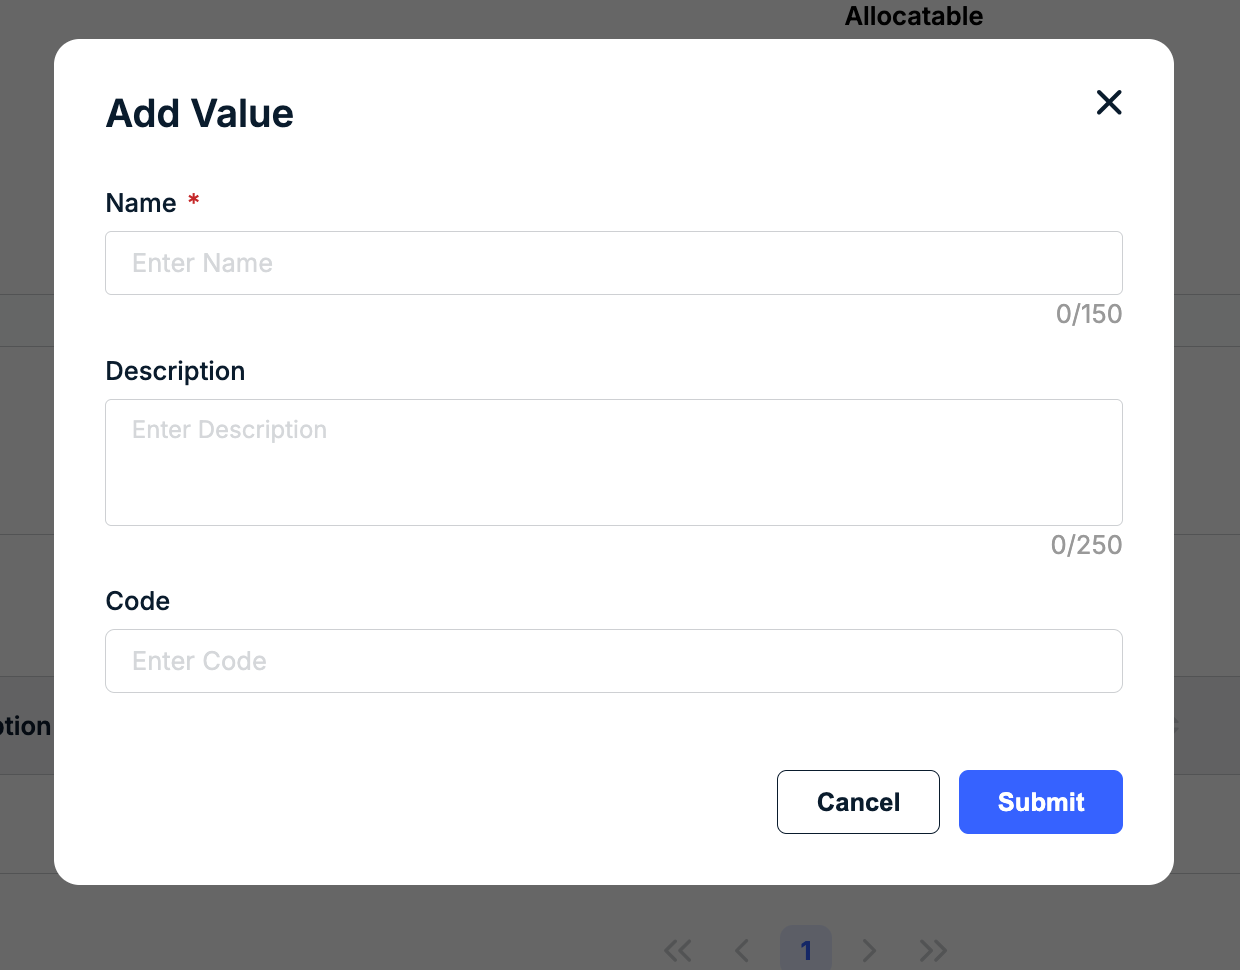
1. Click + Add Value under the Attribute List section.
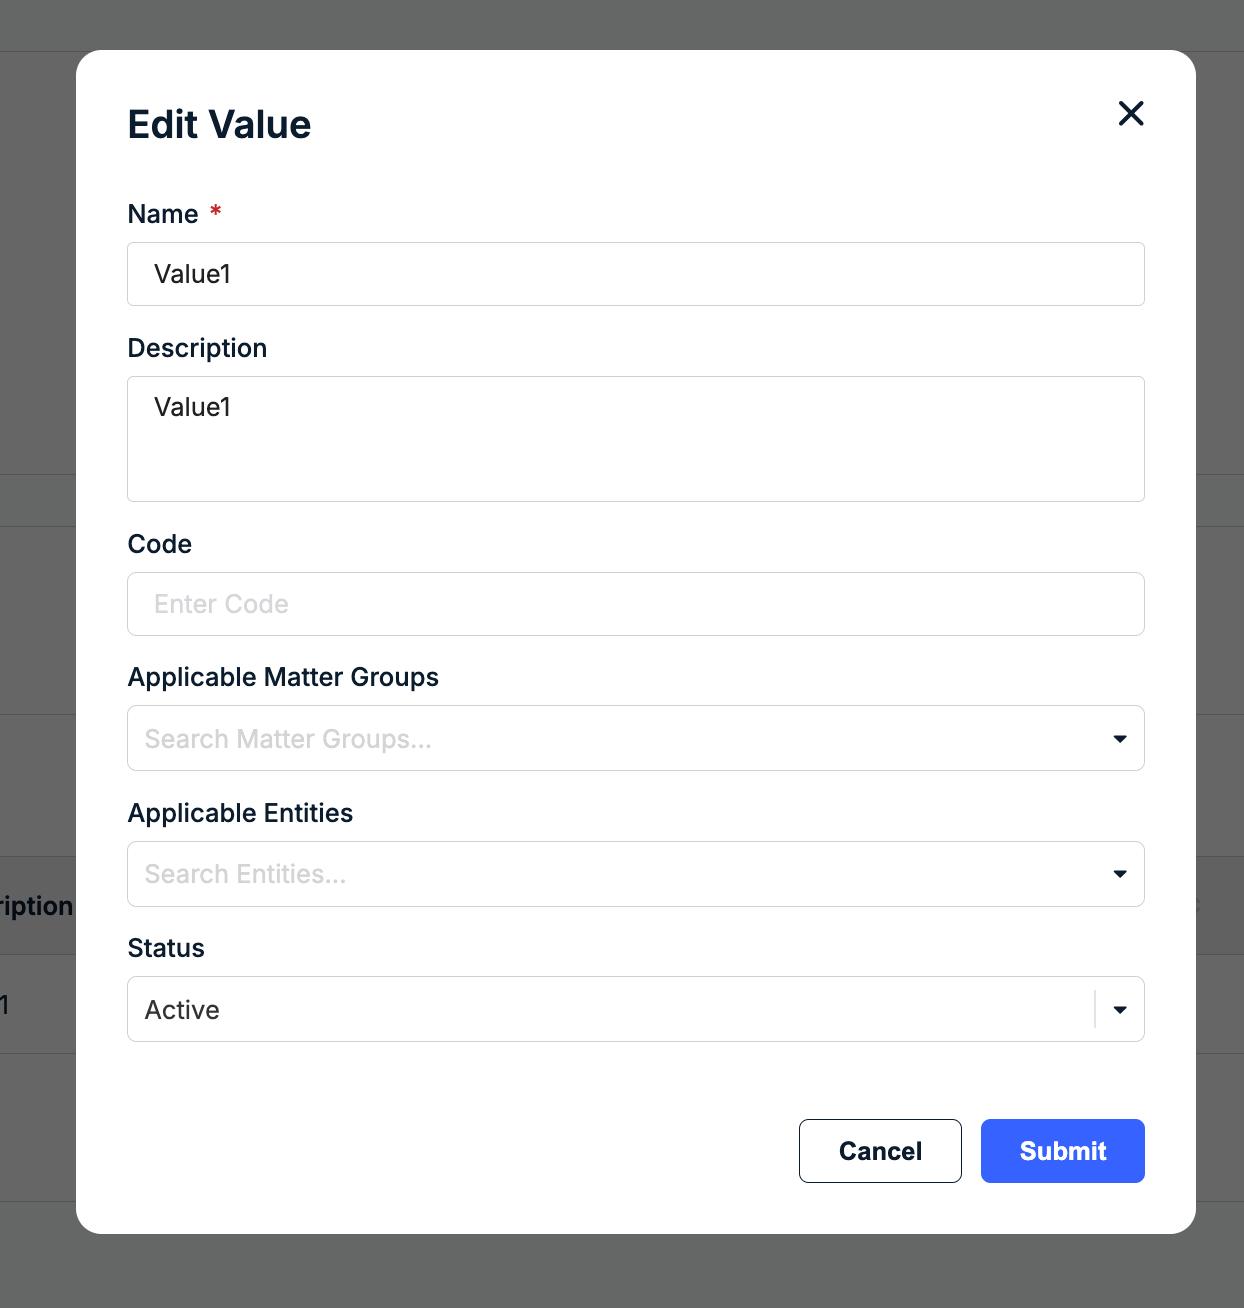
2. Enter the list value in the Name field (required), fill in the description/code fields (optional), and click Submit.
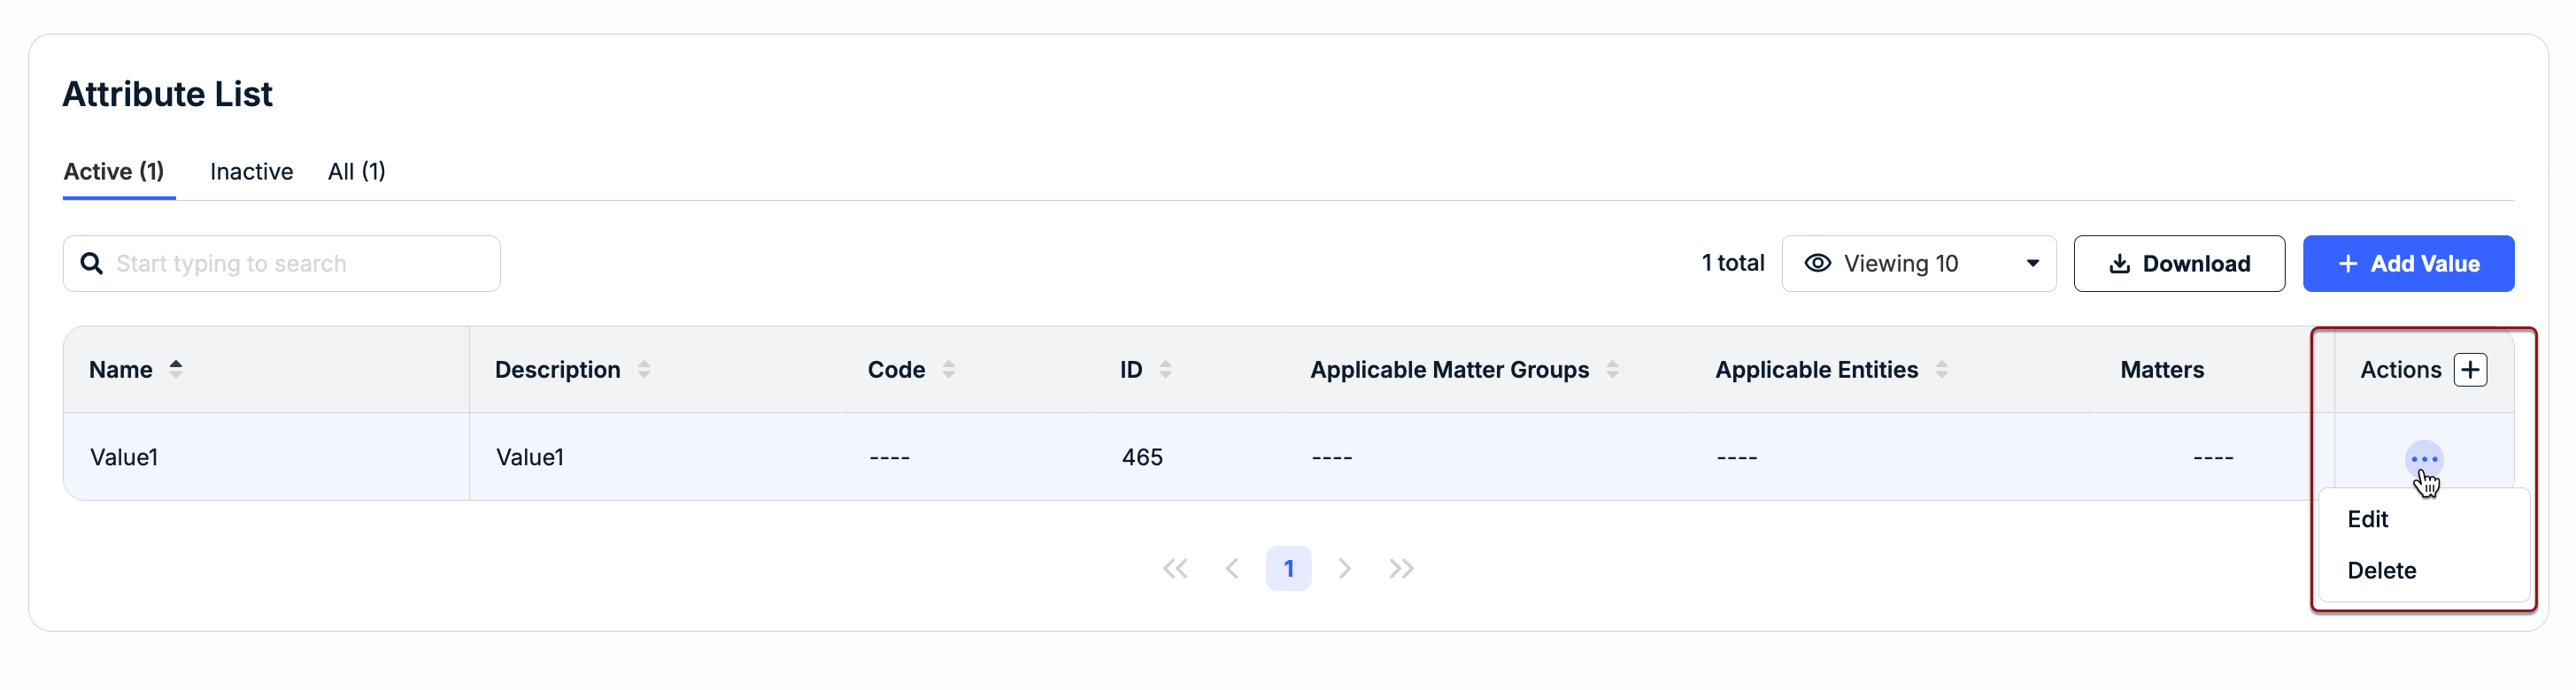
Once you've added the list value, you can go to the ... (more) option under the Actions column and select Edit to update the name, code, description, or assign Applicable Practice Areas and/or Legal Entities for auto-filtering on associated records. Click Submit.
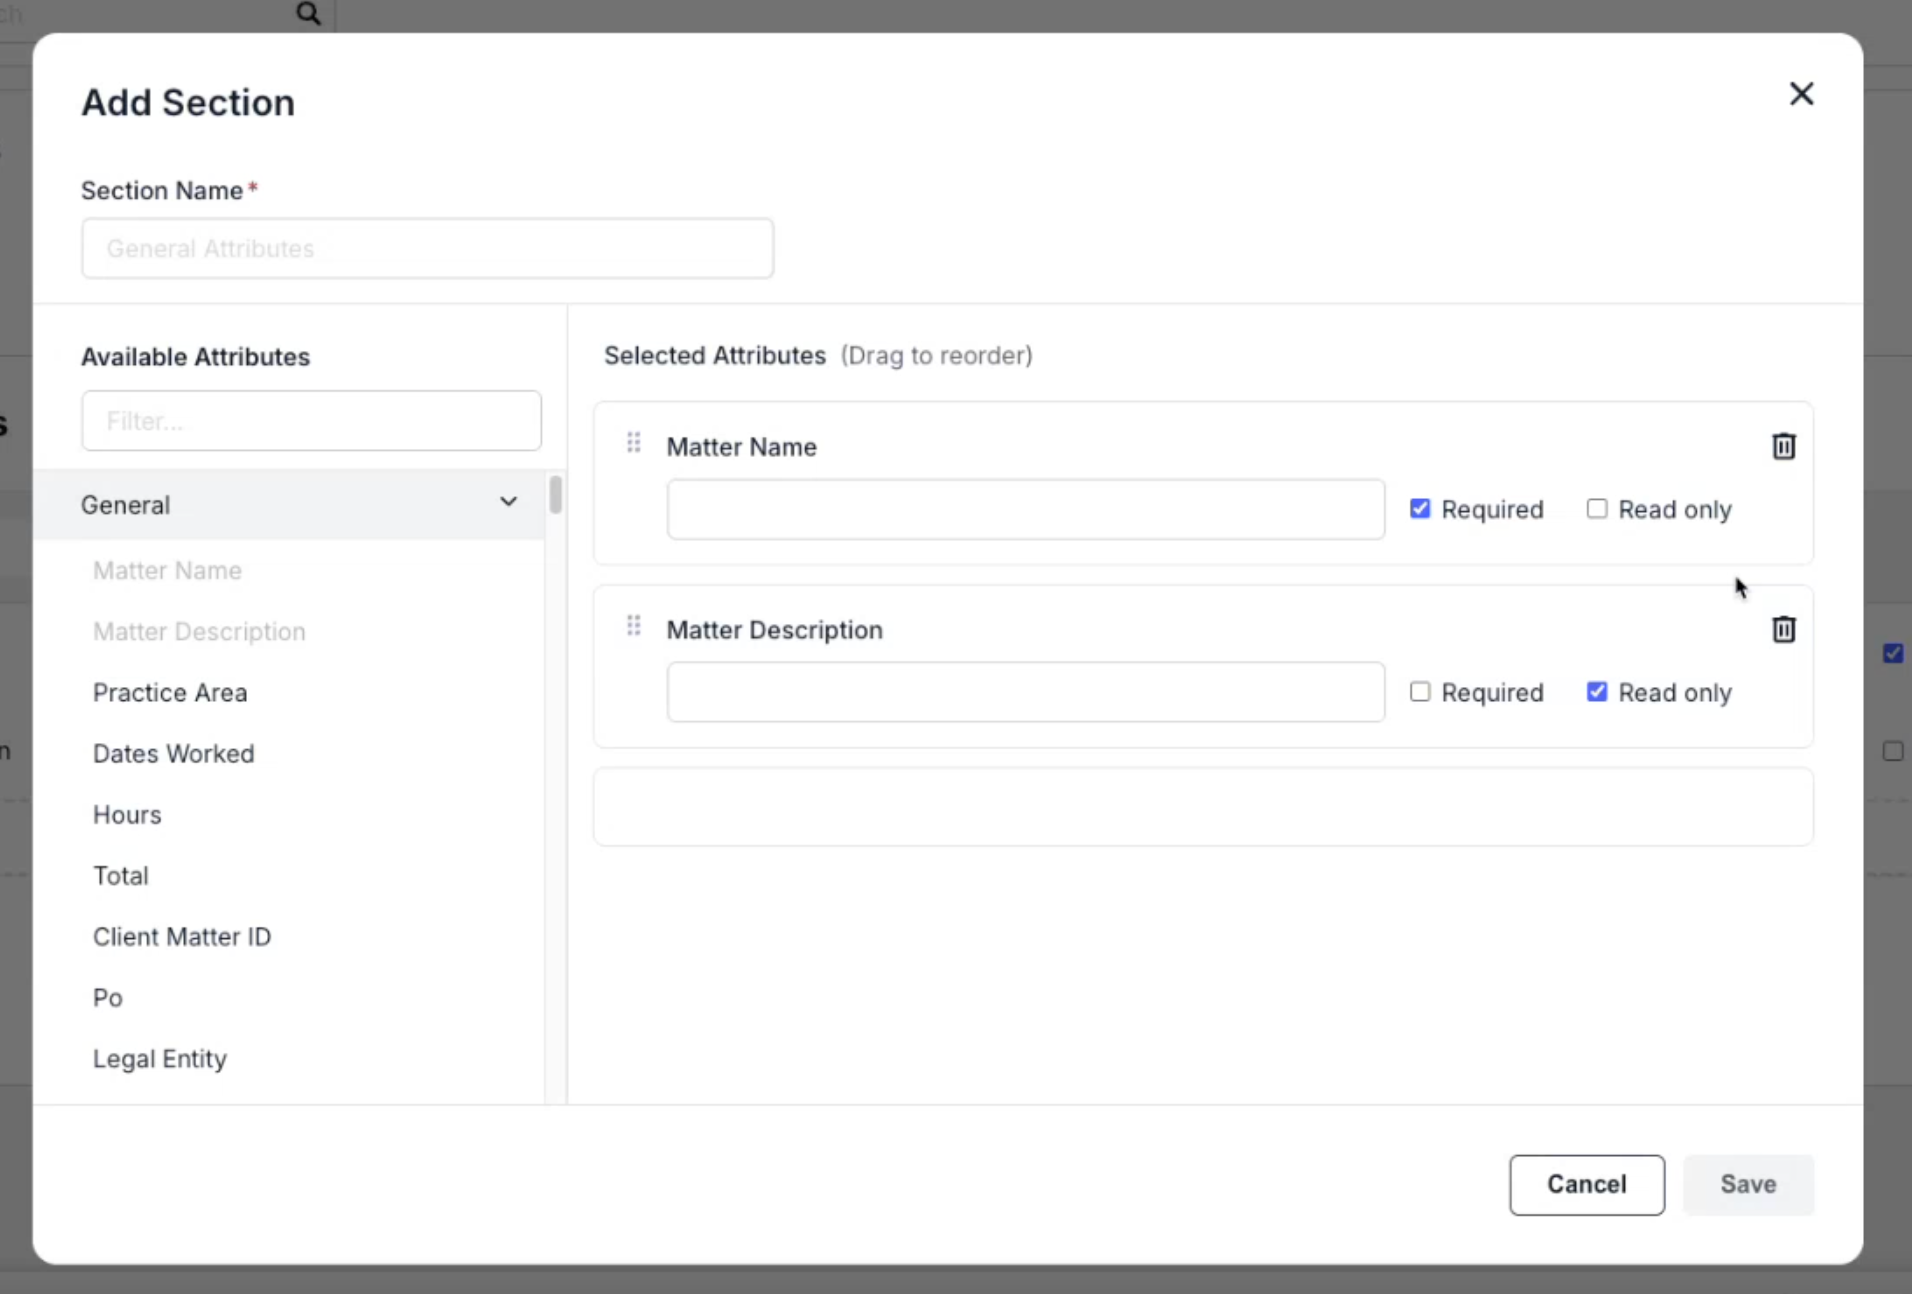
Custom Attributes on Matter Templates
You can make a custom attribute appear on matters by adding it to the matter template as a required, optional, or read-only field. Custom attributes that are scoped to matters appear on the left side of the window when you are adding or updating a section on the matter template. For more detailed instructions on creating matter templates and adding attributes, click here.
Deleting a Custom Attribute
Click the ... (more) option under the Actions column and select Delete. Click Yes when prompted to confirm.
