Customers can use our Purchase Order (PO) functionality to capture and track spend for specific matters and/or vendors. If all relevant accounting information is coded within POs in your organization's financial system, this can be used as a standard attribute for recording and verifying invoices as well as a way to provide better visibility into expected vs. actual spend.
This article covers the following:
- Associating PO Numbers with Invoices
- Adding a PO
- Closing a PO
- Deleting a PO
- Tracking Spend on Existing POs
- Adding a PO Field to a Matter Template
- Notes & Other Considerations
Associating PO Numbers with Invoices
Once enabled, PO information must be added to start associating PO numbers with invoices. PO numbers can then be assigned in one of the four following ways:
#1: Assigning a PO number to an individual matter
To use this option, a PO field must be added to the relevant matter template(s) by an Admin. For additional information, click here.
When a PO is assigned to a matter record, all invoices submitted against that matter will be linked to the designated matter-level PO number.
This means that if multiple vendors are assigned to the matter, invoices from all vendors on that matter will be linked to the same PO number. If you need to assign the PO number to a specific vendor on the matter or different PO numbers to each vendor, consider using Option #2 below.
#2: Assigning a PO number to a vendor on an individual matter
When a PO number is assigned to a specific vendor on an individual matter record, all invoices submitted by the vendor for that matter will be linked to the designated vendor PO number. The PO number can be assigned by going to the Vendors tab in the matter.
If a different PO number is assigned at the matter level in this case, the PO number assigned to the specific vendor on that matter will override the matter-level PO number.
#3: Assigning a default PO number to a vendor record
When a default PO number is assigned to a vendor record, all invoices submitted by that vendor across all matters will inherit the vendor's default PO number.
The exception for the default PO number is if the vendor is on a matter that is assigned a matter-level PO number. In this case, the matter-level PO number will override the vendor's default PO number.
#4: Assigning a PO number to individual invoice
PO numbers can be assigned from individual invoice records. Using this option will override the PO number assigned at the matter level.
Adding a PO
New POs will be set to Open so that they can be associated with matters for tracking purposes. Follow the steps below to add a PO:
1. Go to Settings > Purchase Orders from the left-side navigation bar.
2. Click + Add Purchase Order in the top-right corner.

3. Enter the following information and then click Save in the bottom-right corner:
- Purchase Order (required): Enter the PO number or other ID.
- Amount (required): Enter the budgeted or agreed amount per the PO.
- Description (optional): Add any relevant PO information that needs to be captured.

Closing a PO
If the scope of a PO has ended or the associated matter has been closed, you can close the PO so that invoices can no longer be billed/tracked against it.
From the Open tab of the Purchase Orders list, click on the Yes toggle under the Open column to move it to closed status.
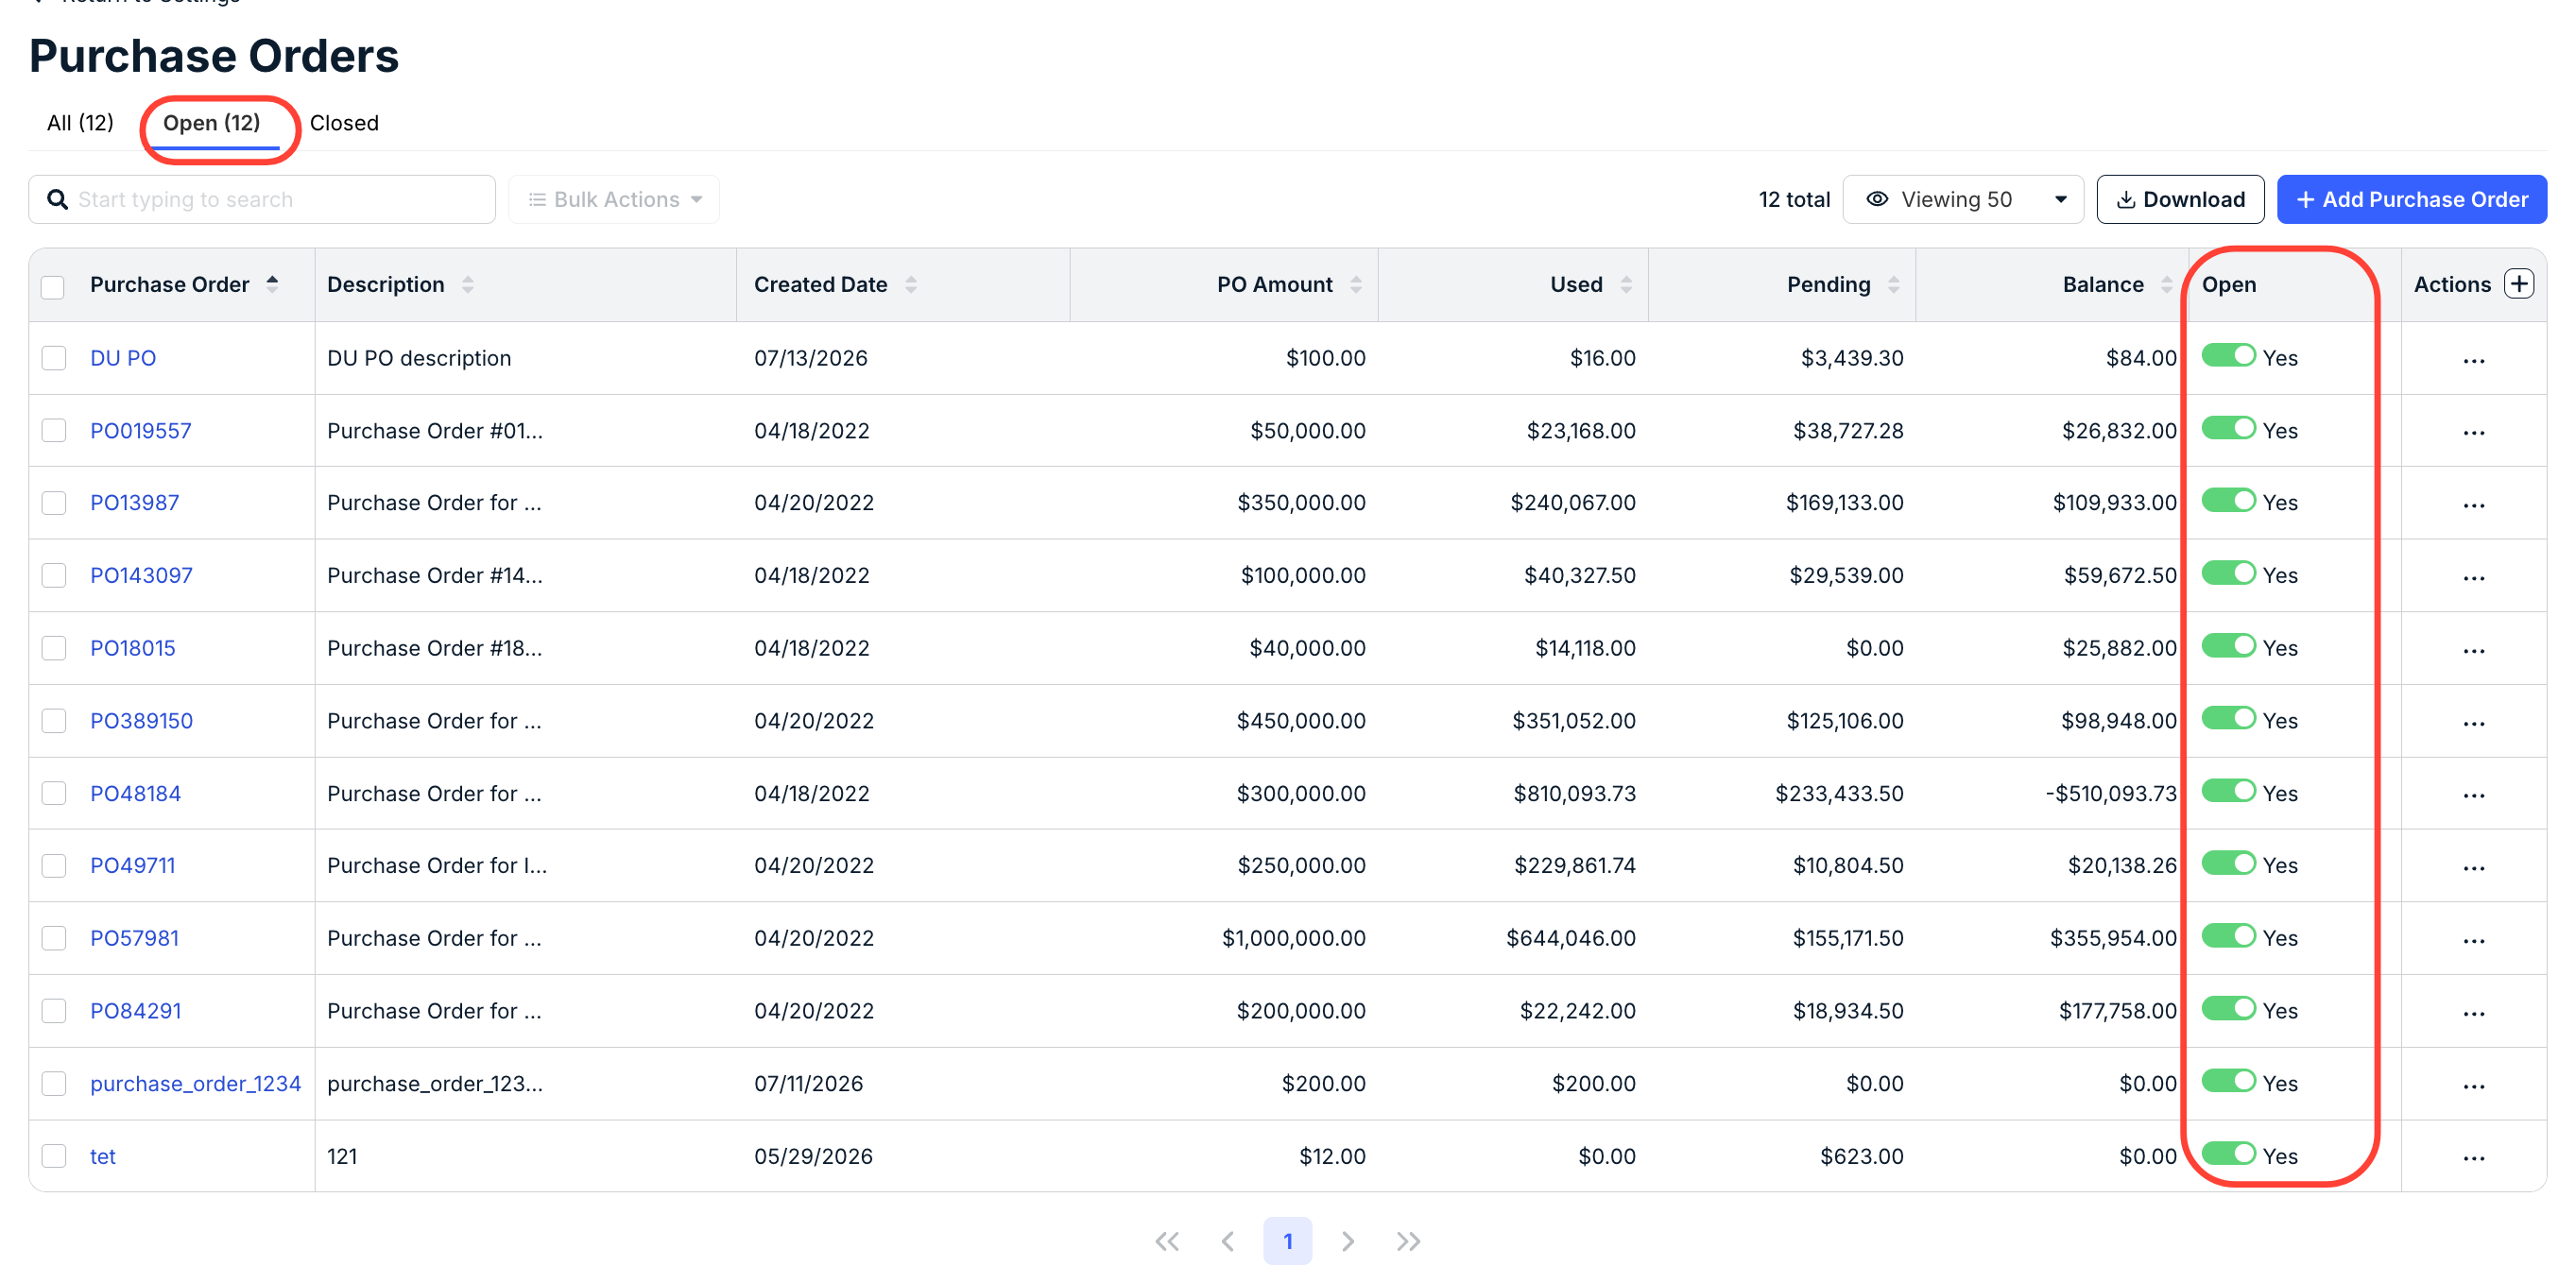
You can also change the status of a PO by opening its details page and clicking the Open toggle once.
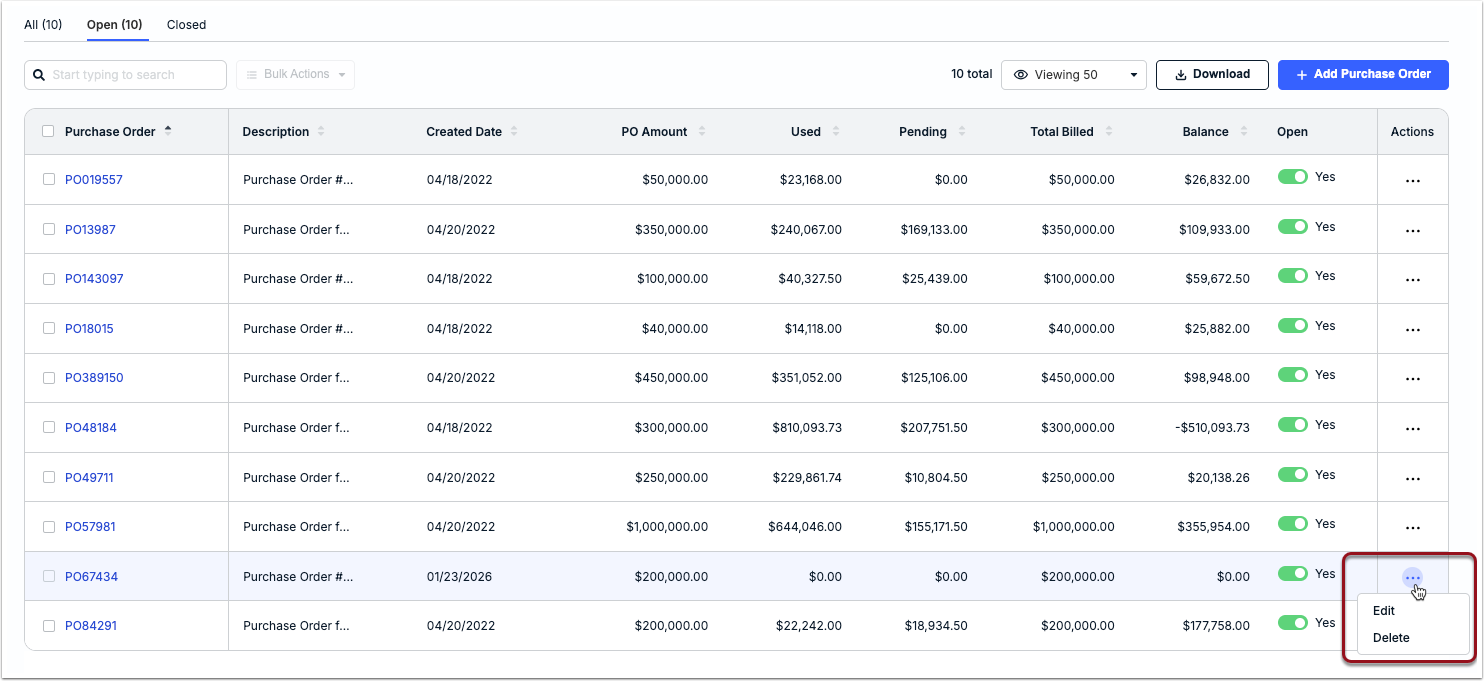
Deleting a PO
A PO can only be deleted if it is not currently associated with any invoices, matters, or other records. Click ... (more) under the Actions column from the Purchase Orders list and select Delete. Click Yes when prompted to confirm.
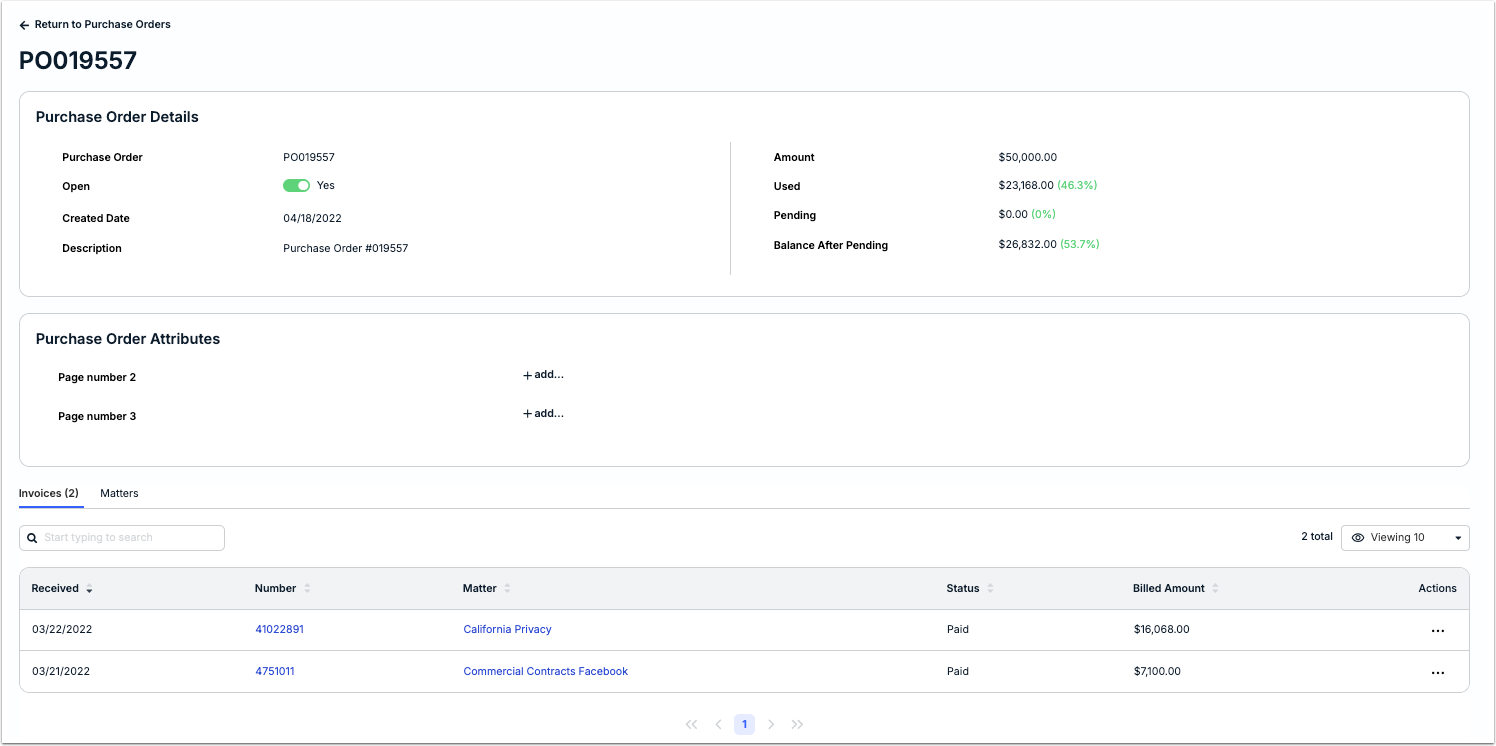
PO Details Page
Click on a PO name from the list page to view general information about the PO, including a percentage breakdown of how much of the PO amount has been used (i.e., paid), is pending, and is remaining. You can also scroll down to the bottom of the page to view which invoices and matters are associated with the PO number.
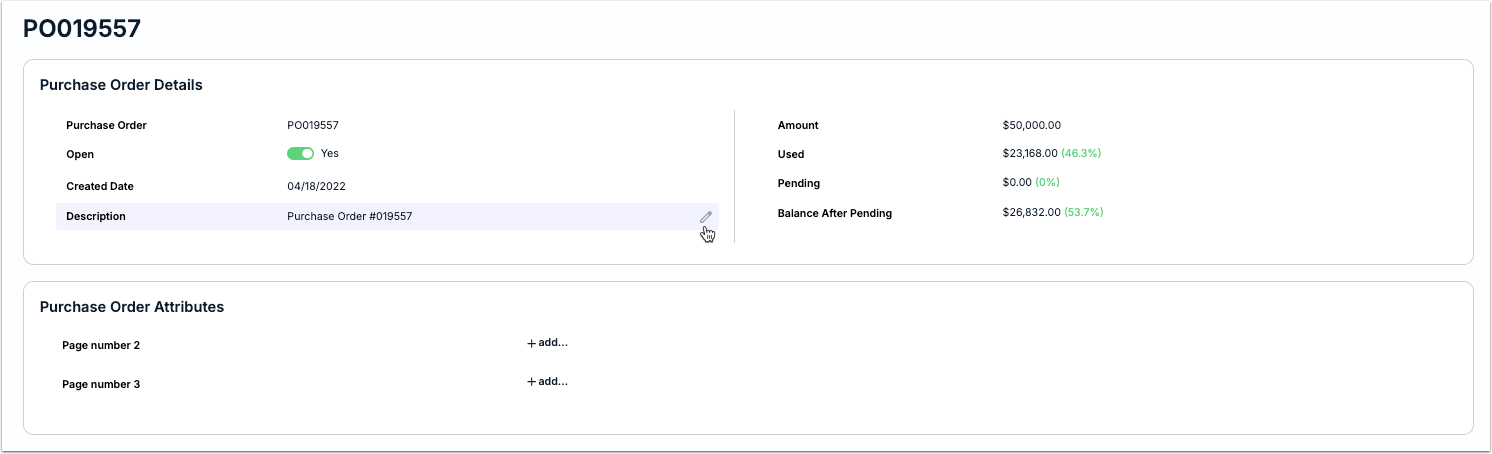
Follow the steps below to edit details, such as the Description or Amount, or fill in values for any custom attributes scoped to Purchase Order records (see Purchase Order Attributes section on details).
1. Hover over the value for a field and click the edit icon to make a change, and/or click + add... to fill in values for any PO-related custom attributes (see the table below for field descriptions and whether they can be edited).
2. Click the checkmark to save your changes.
| Field | Description |
| Purchase Order (read-only) | PO number or other ID. |
| Open (editable) | Yes indicates it is active and can be associated with invoices or other records. Set to No if the PO should be inactive and not available for selection. |
| Created Date (read-only) | Date the PO was added to the system. |
| Description (editable) | Any relevant PO information to provide context or additional notes to other users. |
| Amount (editable) | Budgeted or agreed amount per the PO. |
| Pending (read-only) | Sum of invoice amounts linked to the PO currently pending review. |
| Used (read-only) | Sum of amounts for approved invoices linked to the PO. |
| Balance After Pending (read-only) | Budgeted amount minus the totals for Used and Pending. |
| Custom Attribute(s) (editable) | If there are any custom attributes scoped to Purchase Order records, they will be displayed at the bottom of the Attributes section. Click + add... |
Adding PO Field to a Matter Template
If users should be able to assign PO numbers to individual matters, you must update relevant matter templates to include a dropdown field with PO options.
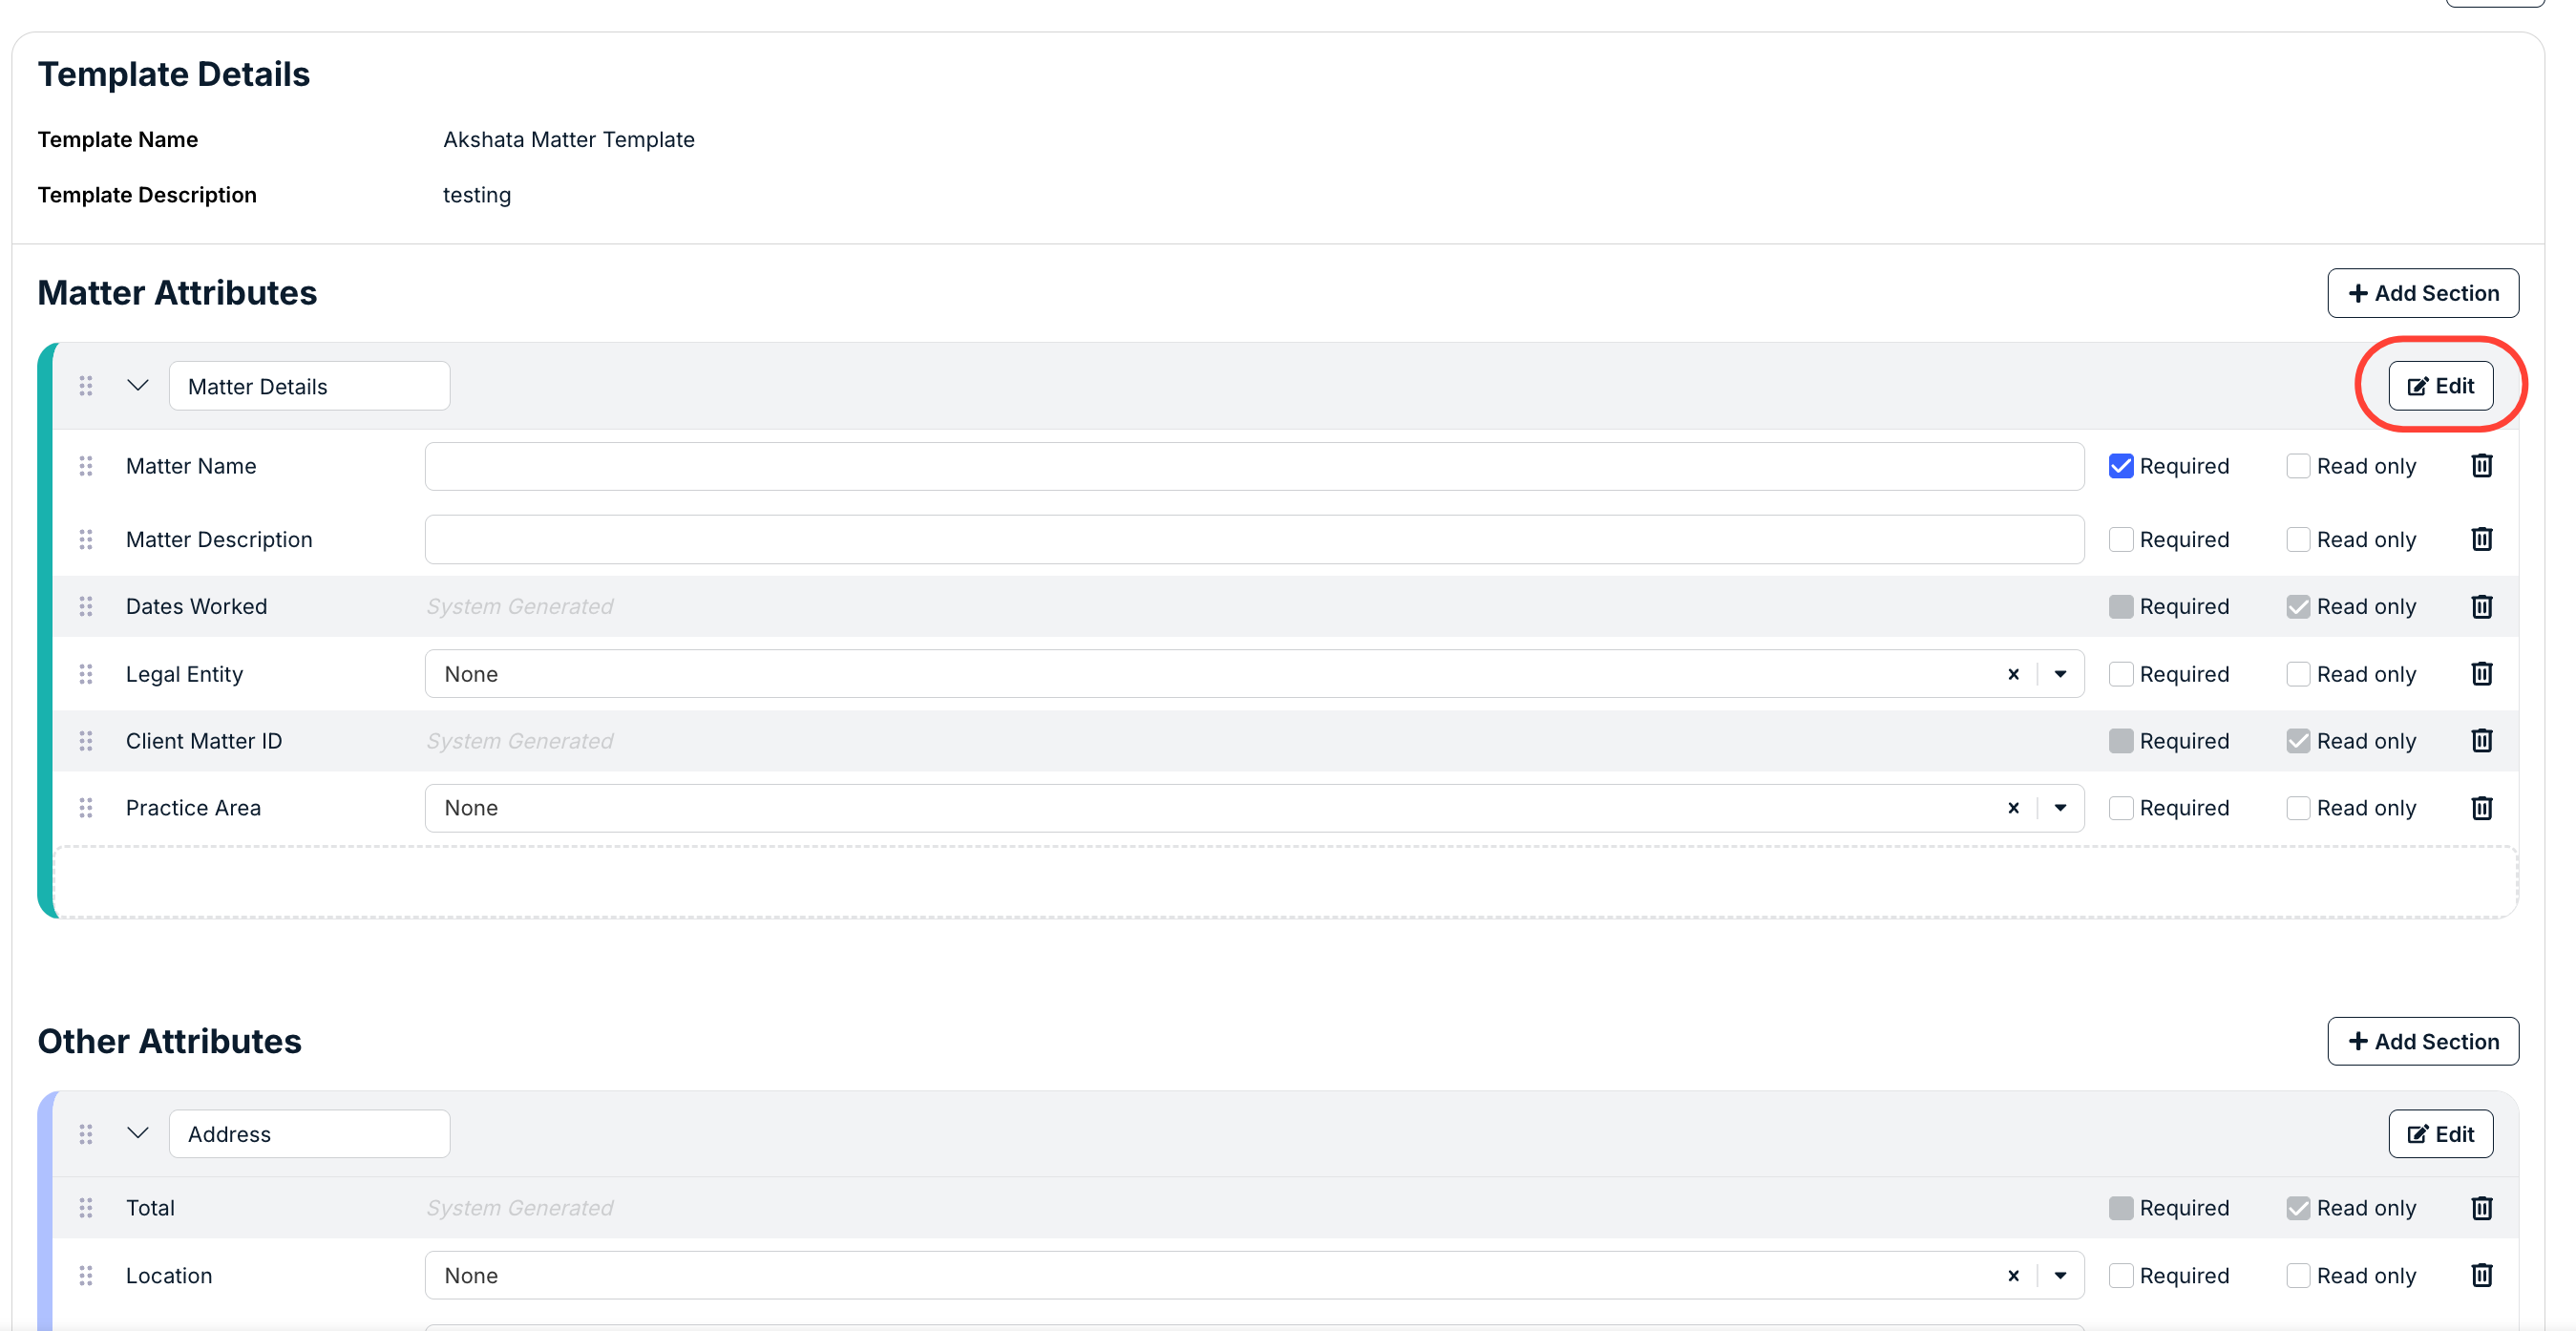
1. Go to Settings > Matter Templates to find and open the relevant matter template.
2. Click Edit under the relevant attributes section of the matter template.
3. Drag and drop the Po field from the left side of the window to the relevant position on the right. Leave it as optional or mark it as required and then click Save.
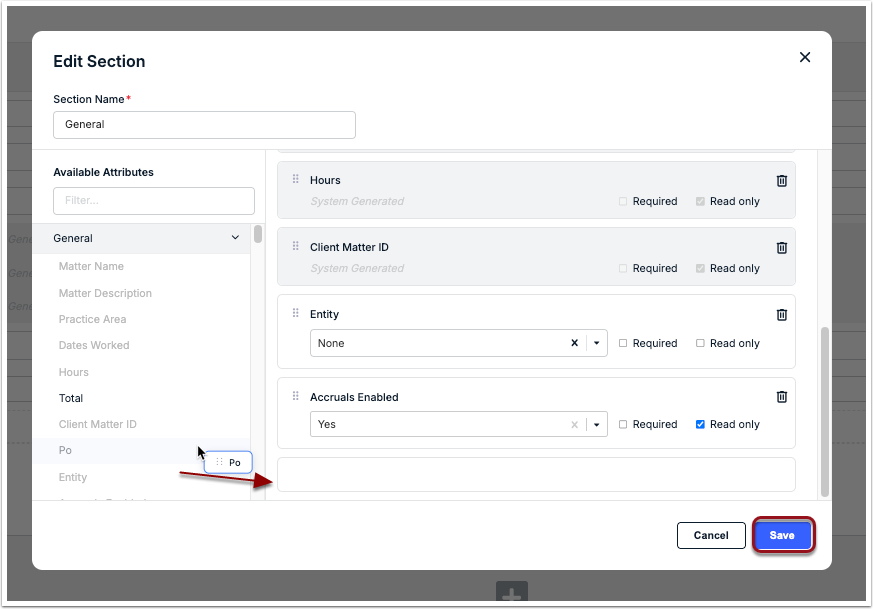
4. Click Save at the bottom of the page.
Notes & Other Considerations
- An invoice can only be associated with one PO number. It is important to make sure that the correct PO number is being linked to invoices to ensure spend data accuracy.
- Onit can exclude taxes when calculating the remaining amount on a PO if your company chooses. Contact [email protected] for help.
- There may be PO-related billing rules or requirements for invoices, such as maximum approval amounts, depending on other settings in your environment.
- POs can only be added in your default system currency, regardless of vendor currency.
- When a PO is created, it is recorded under Settings > Activity Log with general information (e.g., date, time, and user name) for tracking by Unity admins.