A matter template is a collection of pre-defined sections and fields that set which attributes are required and optional for new and similar matters so that customers can capture data in a consistent manner and standardize the matter creation process.
Unity eBilling comes with a default built-in matter template that admins can tailor with allocations and custom attributes. If your legal department supports multiple practice areas or areas of focus, admins can create templates from scratch or clone/customize the default template to capture relevant information for each area. For instance, if your company has a high volume of IP matters, you could have a high-level IP template or one template specific to trademarks and one template specific to patents.
Using multiple templates depends entirely on your organization's needs and the type of information you want to capture for different types of matters. A template can be used to do the following for all associated matter records:
- Define which general/custom attributes are required vs. optional for users
- Automatically set default values for required and/or optional fields
- Make certain fields read-only if there is a need to lock in information for certain types of matters
- Group fields in a matter into sections for better organization
The number of templates that can be active/published is driven by your organization's Unity plan. If the limit has been reached, you will not be able to publish additional templates. Contact support to upgrade.
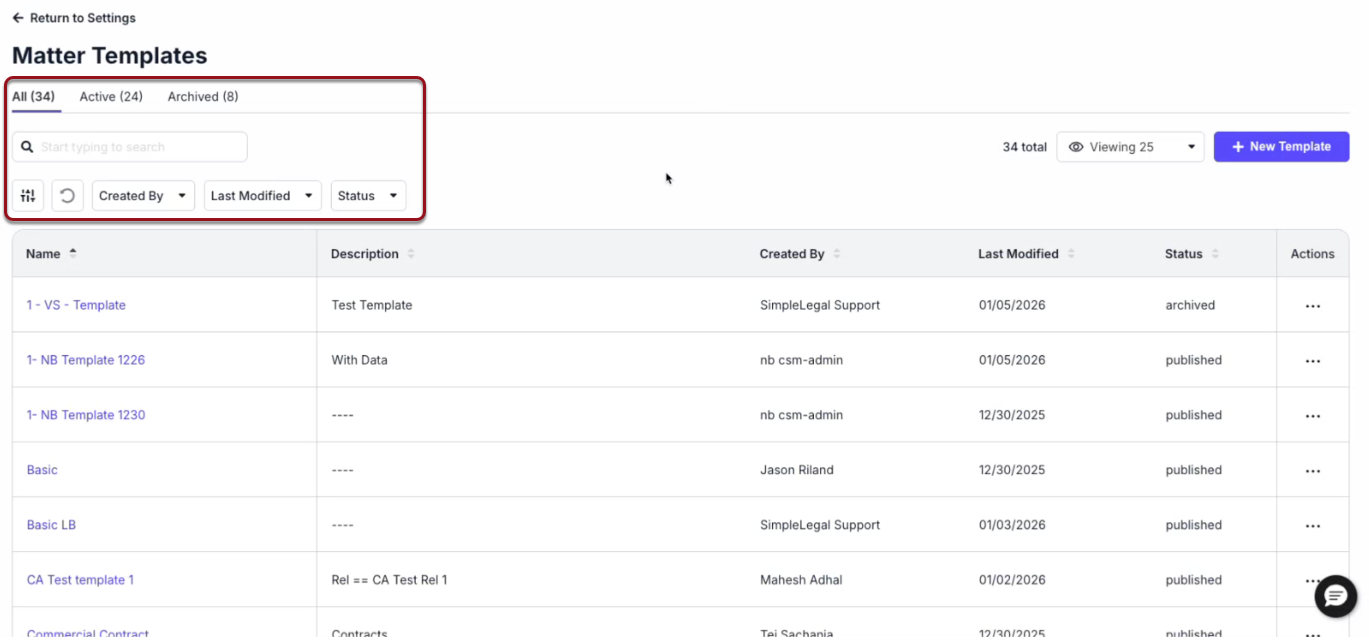
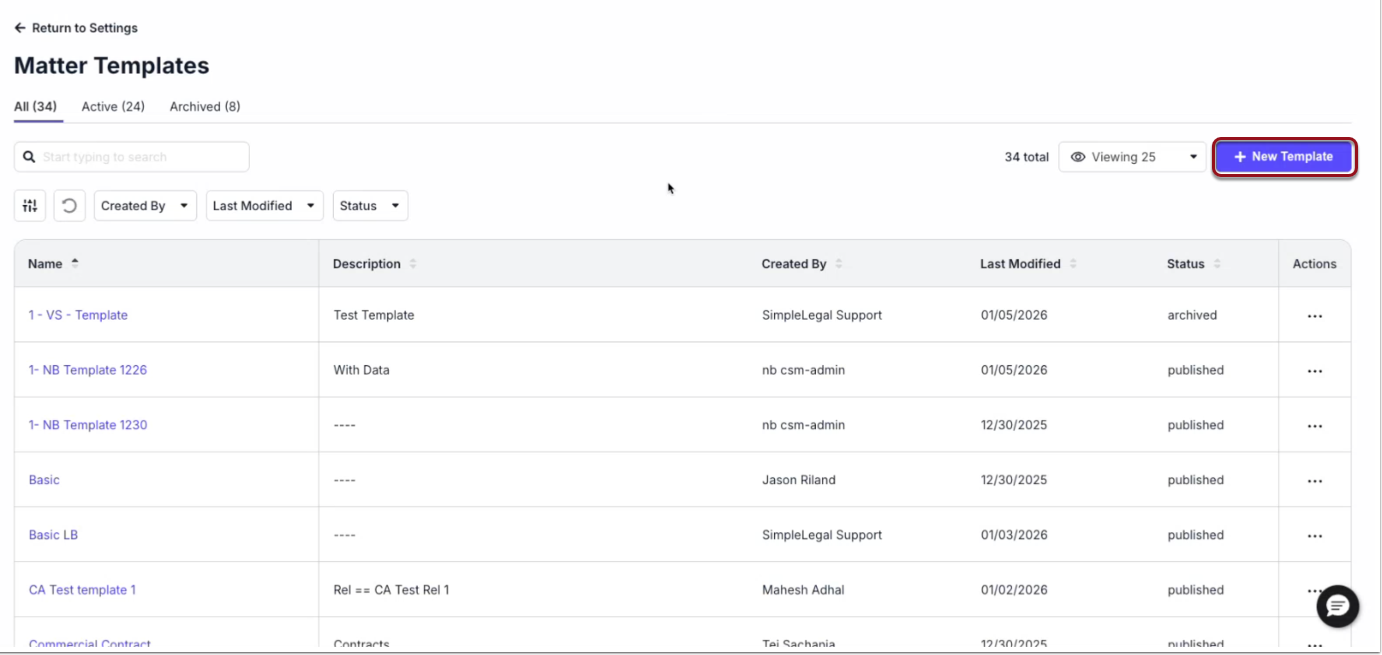
To see and manage the list of existing matter templates or create a new one, go to Administration > Matter Templates. By default, this page shows active and archived templates. Use the tabs, search box, or filters to narrow the list.
This guide covers the following topics:
- Cloning and/or Editing an Existing Matter Template
- Creating a New Matter Template
- Saving or Publishing a Template
- Setting a Default Matter Template
- Updating Matters Impacted by a Template Change
- Archiving a Matter Template
Cloning and/or Editing an Existing Matter Template
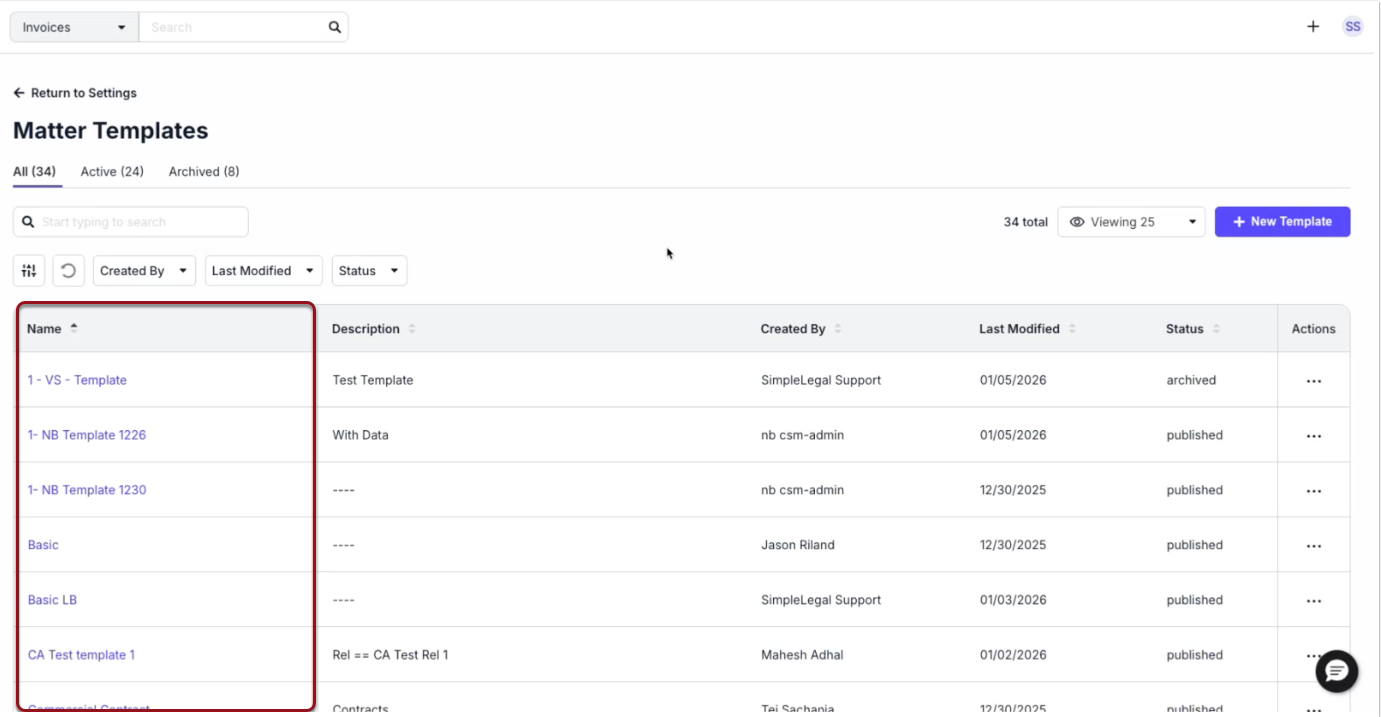
Click on a template name from the list to open it for editing.
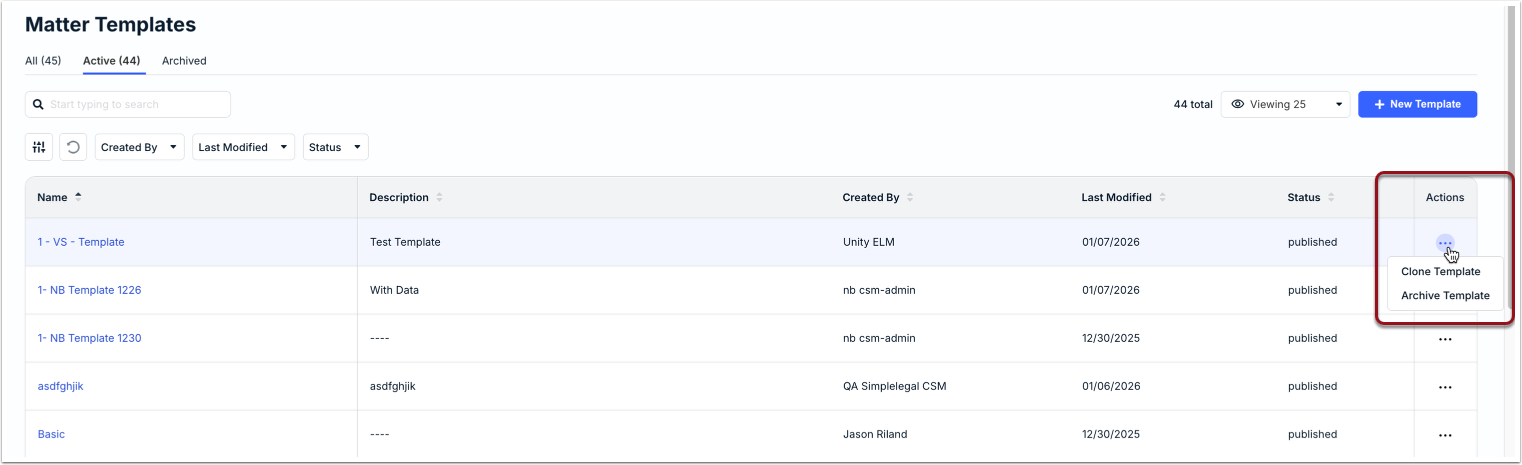
If you want to make a copy of an existing template and customize it instead of replacing the current version or starting a new template from scratch, click on Clone in the top-right corner.

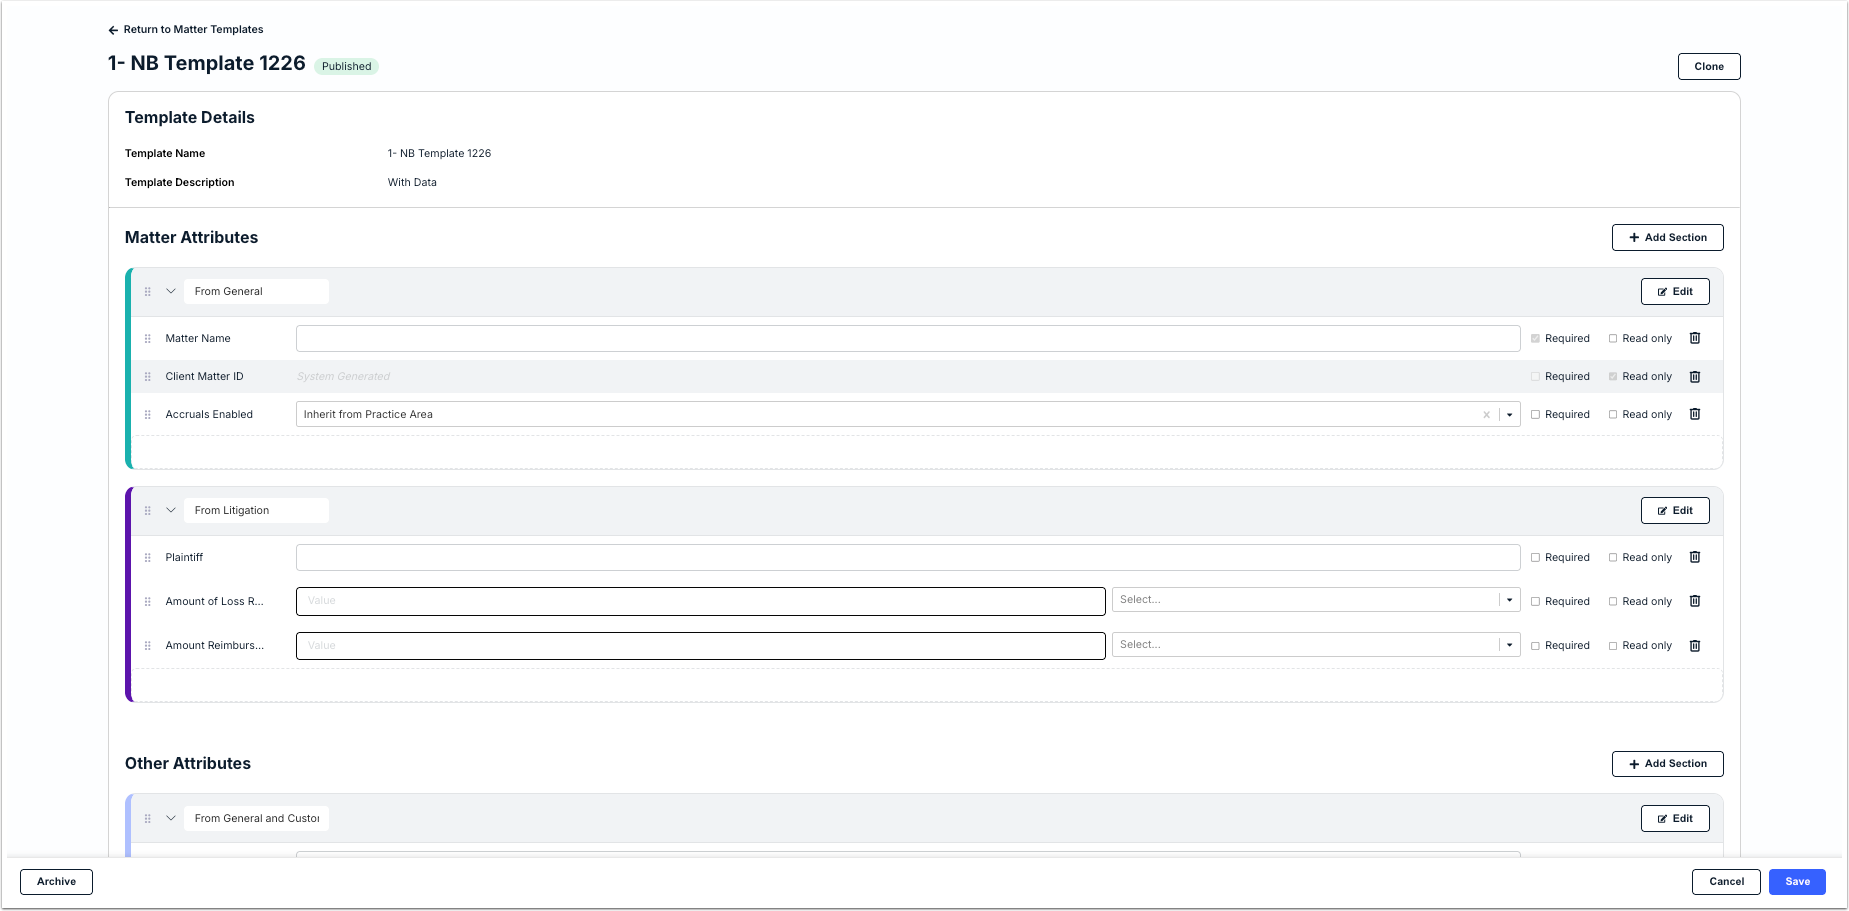
The image below shows the matter template form. See the table that follows for descriptions of the fields and sections that can be modified and further configured.
Creating a New Matter Template
Click + New Template in the top-right corner of the templates page.
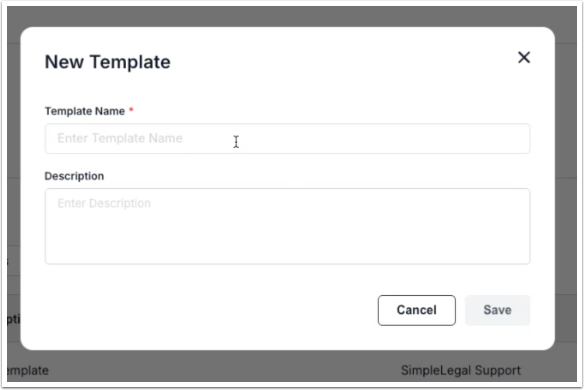
Enter the template name (required) and description (optional), and then click Save.
See the sections below for instructions on how to customize and configure each section of the template form.
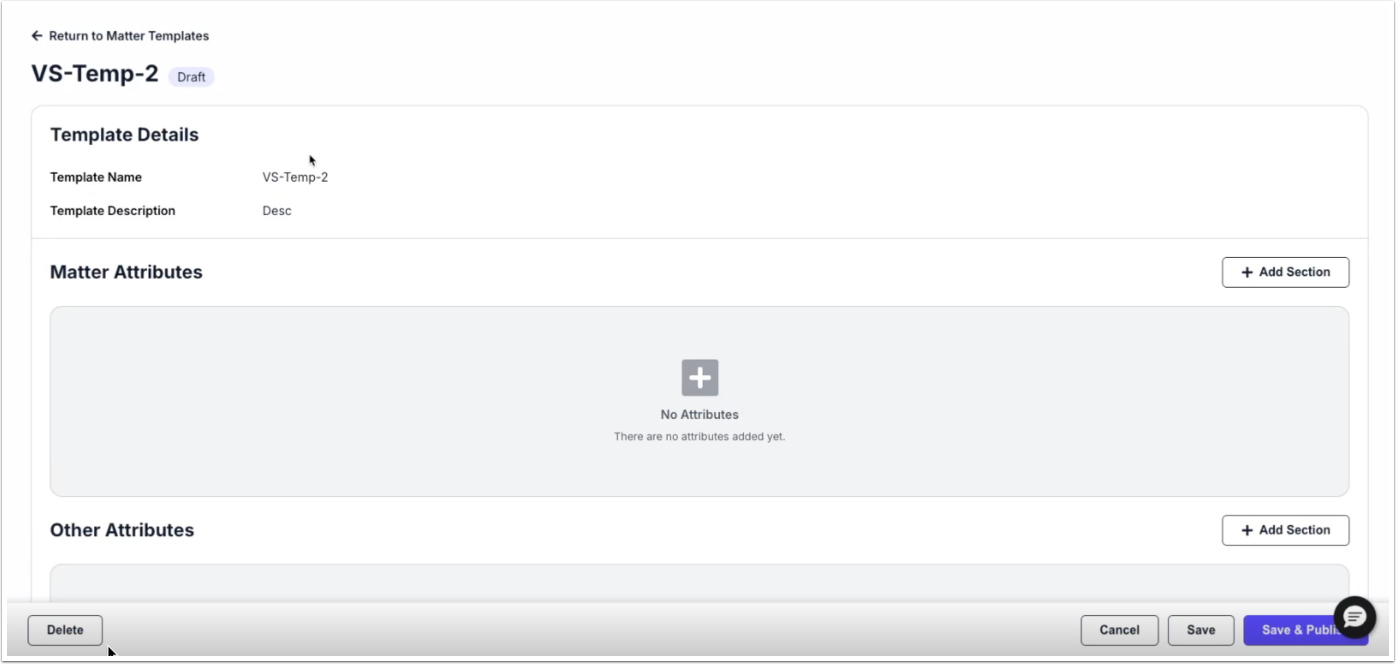
Matter Attributes and Other Attributes
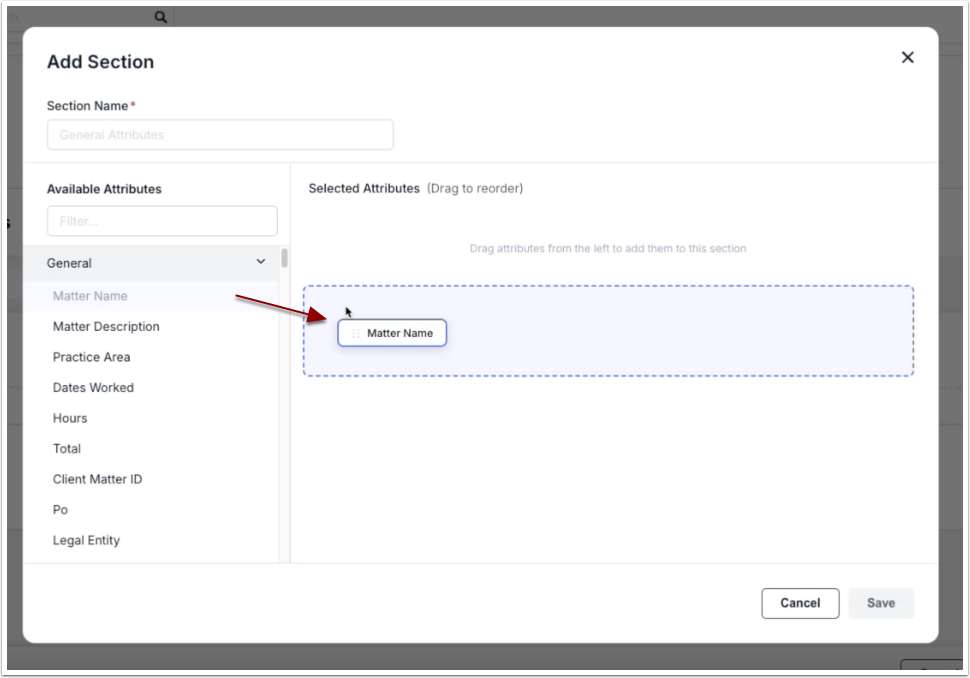
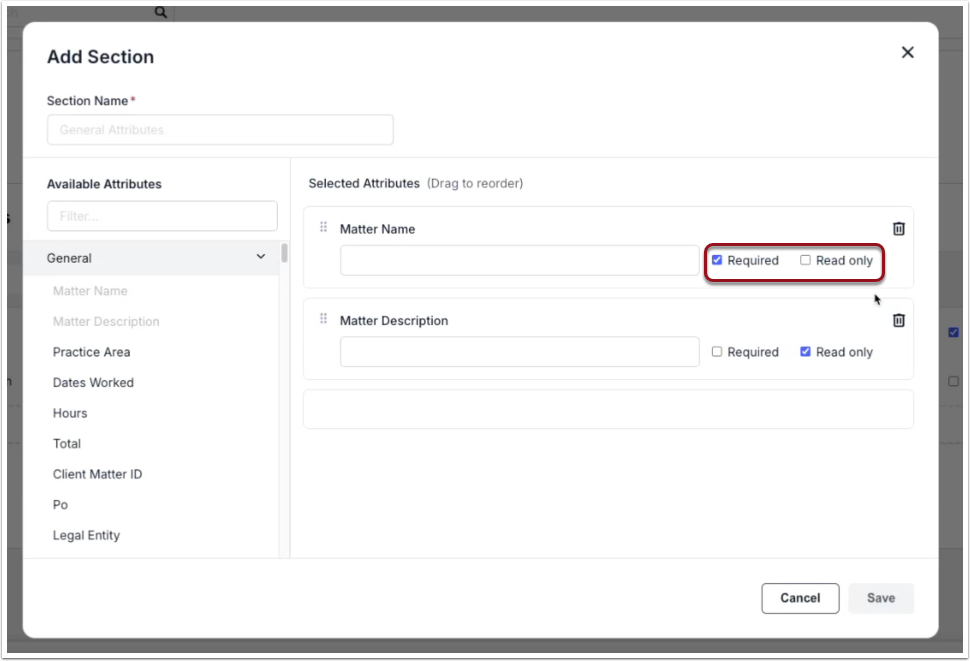
To start adding attributes to the template, you must have at least one section under Matter Attributes and/or Other Attributes. Click + Add Section to get started and enter the name in the Section Name field (required).
Attributes that can be added are listed on the left side of the window. This list includes general attributes (i.e., standard data fields) and custom attributes. Use the search field at the top of the list to narrow attributes or find an attribute by name.
Select and drag an attribute from the left side and drop it under Selected Attributes. For example, the Matter Attributes tile is typically used for general attributes, such as Client Matter ID, Matter Name, Matter Description, Legal Entity, Practice Area, and Dates Worked.
Use the following options to set up the attributes for the section and then click Save in the bottom-right corner:
- Required: Select the required box if users must enter/select a value for this field in all associated matters. For example, you can mark Legal Entity as required if all associated matters need to be linked to a Legal Entity for invoice review rules, spend allocations, and/or general reporting purposes.
- Read-Only: Enter/select a value and click the read only box if the information should be auto-populated in associated matters but restricted/locked for editing by users. This is helpful, for example, if there is a label or tag that you want all matters to inherit. You must enter/select a value if marking a field as read-only.
- Default Value: Enter or select a value for any attribute to set it as a default for all associated matters. This means it will auto-populate but can be changed by users if needed (unless marked as read-only).
You can use the drag-and-drop hands on the left side of each field to change their order under the section or click on the delete icon on the right to remove an attribute.
Repeat the instructions above to add and organize more sections under Matter Attributes and/or Other Attributes. By default, all sections added to a matter template are expanded and visible on new matters. If you want a section to appear as collapsed on associated matters by default, click the caret symbol to the left of the section name.

Allocations
Adding allocations to a matter gives vendors a way to bill to two or more areas on the same invoice (e.g., legal entities, cost codes, or other allocated custom attributes, if applicable). For example, you can allocate 50% to a specific Cost Code and the remaining balance to a different Cost Code. How allocations are set for matters depends on your company's specific needs.
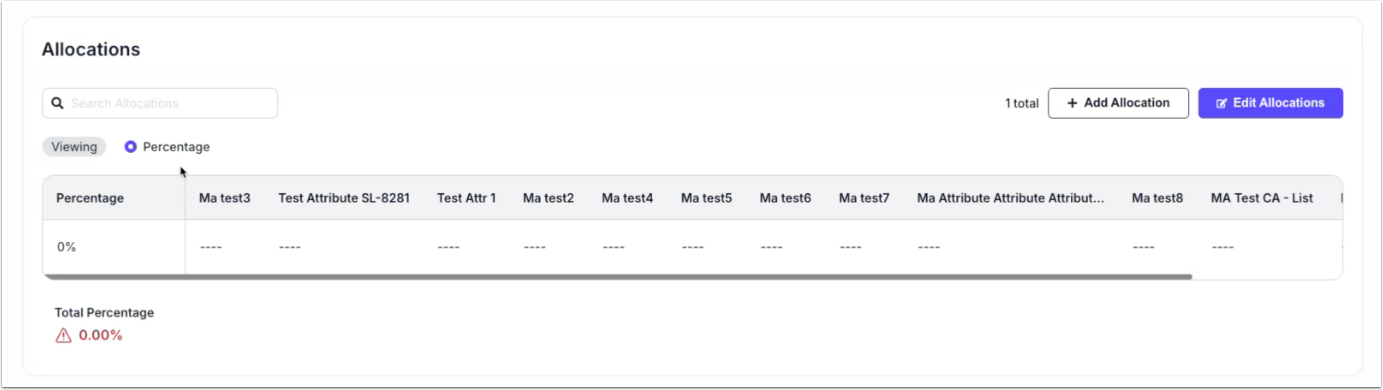
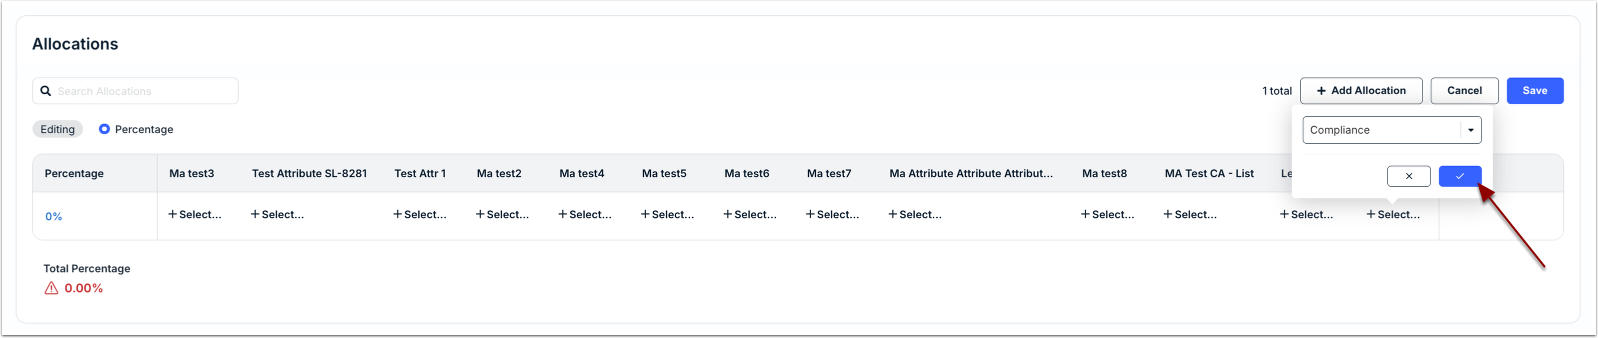
Click Edit Allocations to select values for attributes. You can choose specific values, leave them blank, or set them to None; click the checkmark icon to save your selection. How many attributes are displayed depend on your company's settings and custom attributes.
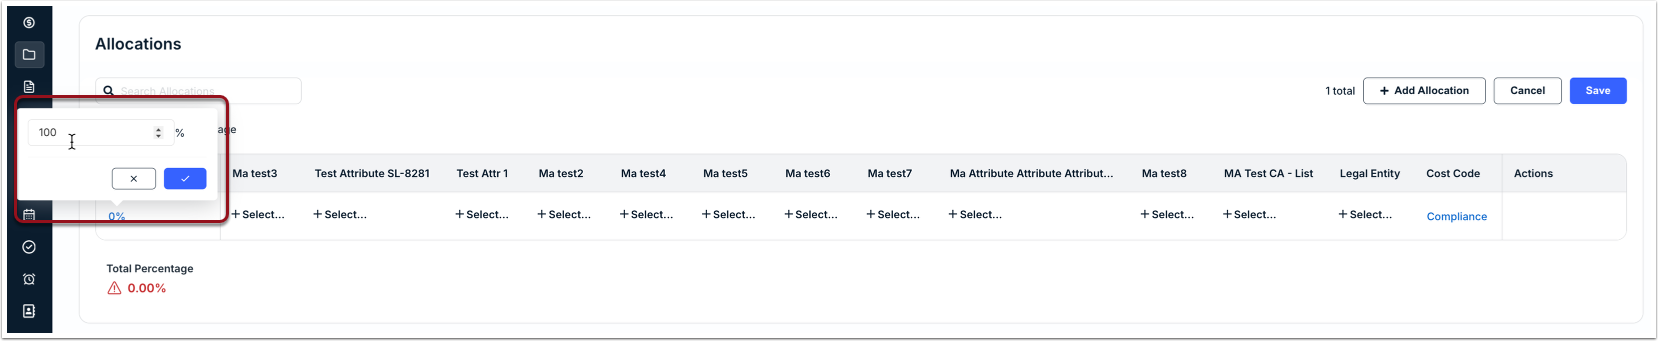
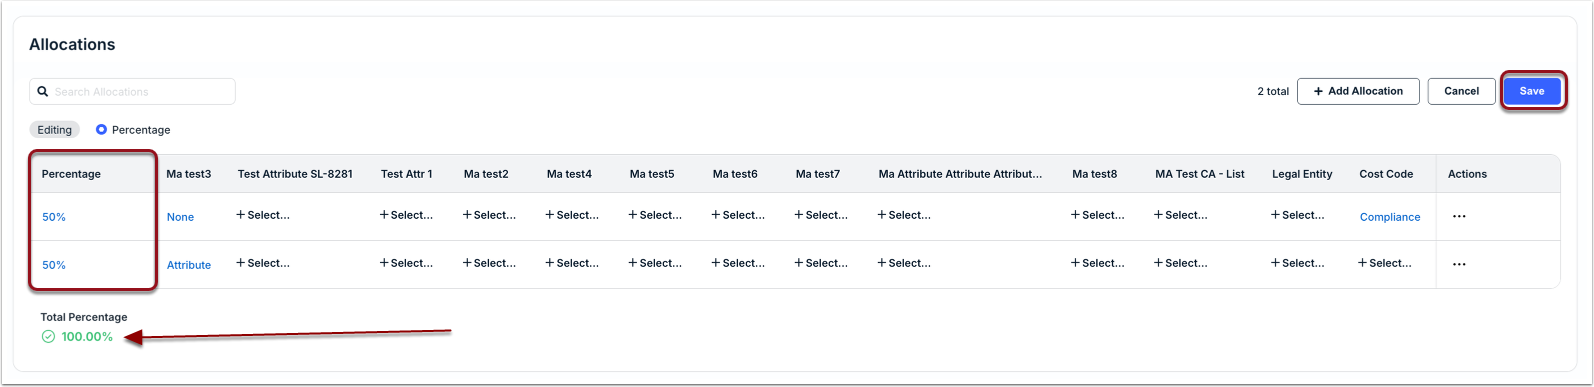
Allocations set in the matter template must equal 100% to move forward with saving. If you are only using one row, click on 0% under Percentage, change it 100, and click the checkmark. Click Save to store your changes on the template.
To split allocations, click + Add Allocation to add a row, make/save your selections for attributes and the percentage value(s), and click Save.
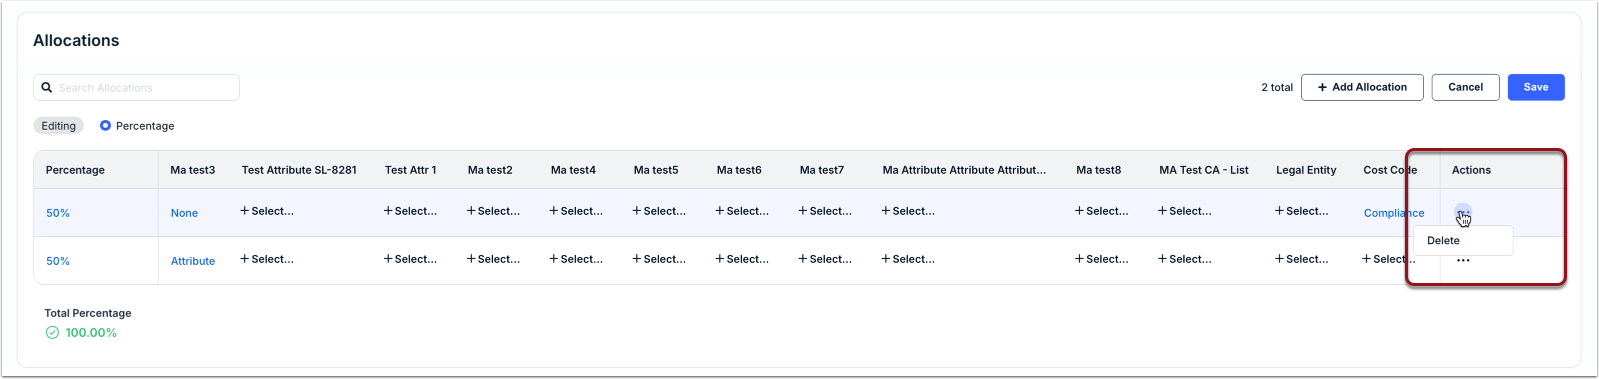
To remove a row from the allocations section, click the ... (more) menu under the Actions column and select Delete. Click Yes when prompted to confirm.
Surveys
If the Vendor Surveys feature is enabled in your environment, you can set default configurations for all associated matters. This includes setting whether Vendor Surveys are hidden for all associated matters and the default roles and people who should be responsible for surveys. These settings can be managed for individual matters by users with access.

Hover over a field and click the Edit icon to change the default settings:
- Status: Choose Hidden (i.e., default; surveys are not available for associated matters); Active (i.e., surveys will be sent), or Inactive (i.e., surveys will not be sent). Configurations can be managed at the matter level when set to active or inactive.
- Role: Set the default roles who should receive survey requests (i.e., called evaluators) for matters associated with the template (default is Matter Lead and Matter Approver).
- People: Choose individual users who should receive survey requests for matters associated with the template (default is set to None).

For additional information about setting up vendor surveys on matter templates, click here.
Folders
For customers with the Document Management System (DMS) feature enabled, admins can create default folder structures on matter templates. When new matters are created using the matter template, they will automatically inherit the folders/sub-folders.
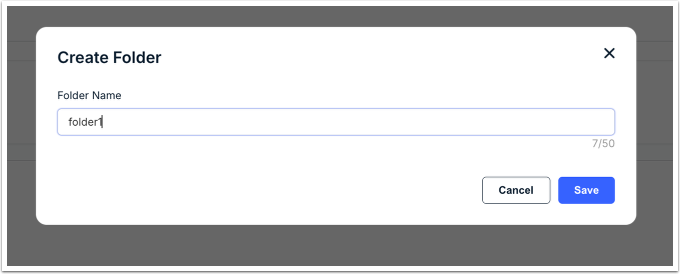
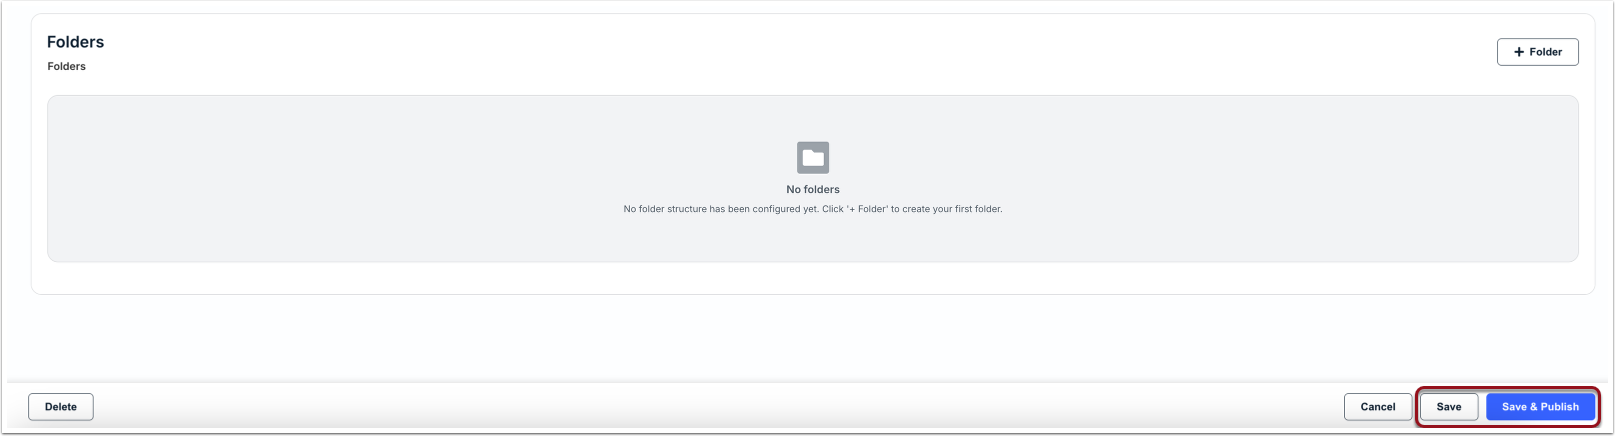
Folders can be created from the last section at the bottom of the template form. Click + Folder to add a primary folder.

Enter the folder name (up to 50 characters) and click Save.
To add sub-folders, click on the folder name to open it and then click + Folder in the top-right corner.

To go back to the list of primary folders, click Folders from the breadcrumb.
Saving or Publishing Templates
When creating a new template, click Save in the bottom-right corner to store it as a draft or click Save & Publish to make it available to users when creating new matters. You must fill in all minimum required fields to move forward with saving the template as a draft (e.g., template name).
Once a template is published, it cannot be reverted to draft. Clicking the Save button on a published template means that the changes will be pushed in real time and may impact active matters. For example, if any new attributes are added and marked as required fields, active matters must be updated before users can continue with other actions on those matters.
Setting a Default Matter Template
If your organization has multiple matter templates, you can tag one as the "default" by following the steps below:
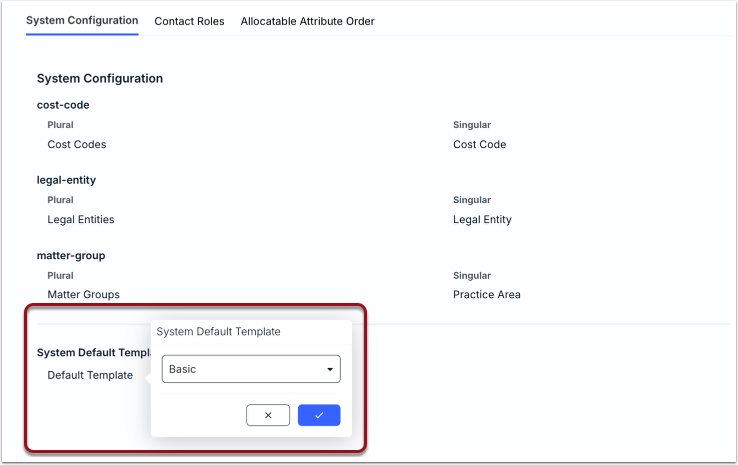
1. Go to Settings > Custom Labels.
2. Click on the option under System Default Template.
3. Choose one of the active templates and click the checkmark icon.
Updating Matters Impacted by a Template Change
When edits are made to a matter template, any associated open matters must be updated if any of the following apply:
- A new custom attribute was added as a required field.
- An existing custom attribute was changed from optional to required.
- The selected value for an existing required field was descoped or removed.
When editing a template, users are alerted if certain changes will impact associated matters and are required to confirm this action to move forward. Manual updates for an associated matter are not needed if fields are removed or if required fields are already populated with valid values.
There are two ways to update matters impacted by a template change:
- Find and manually update each matter from the Matters list (see instructions below).
- Use the Bulk Actions feature to find and update matters in bulk, if applicable. This is only available to admin-level users.
Finding & Manually Updating Impacted Matters
1. Click Matters from the navigation menu on the left.
2. From the All tab, set the Template Update filter to Yes and click Apply.
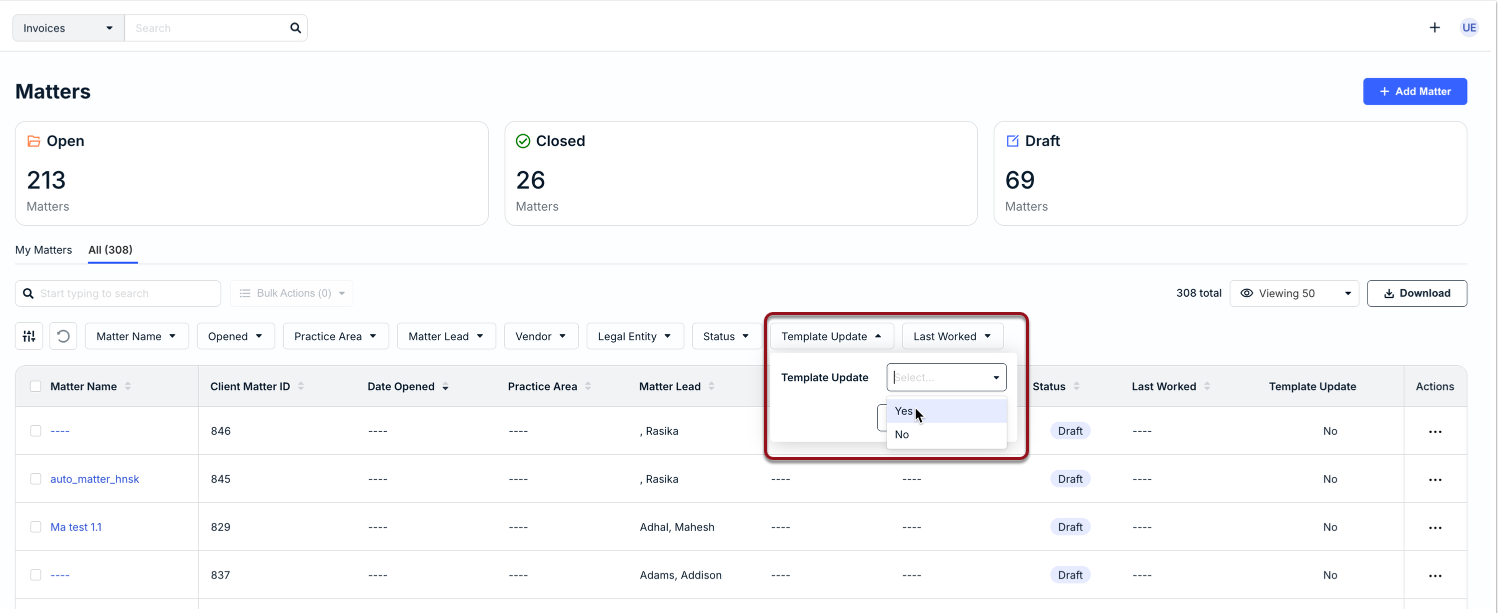
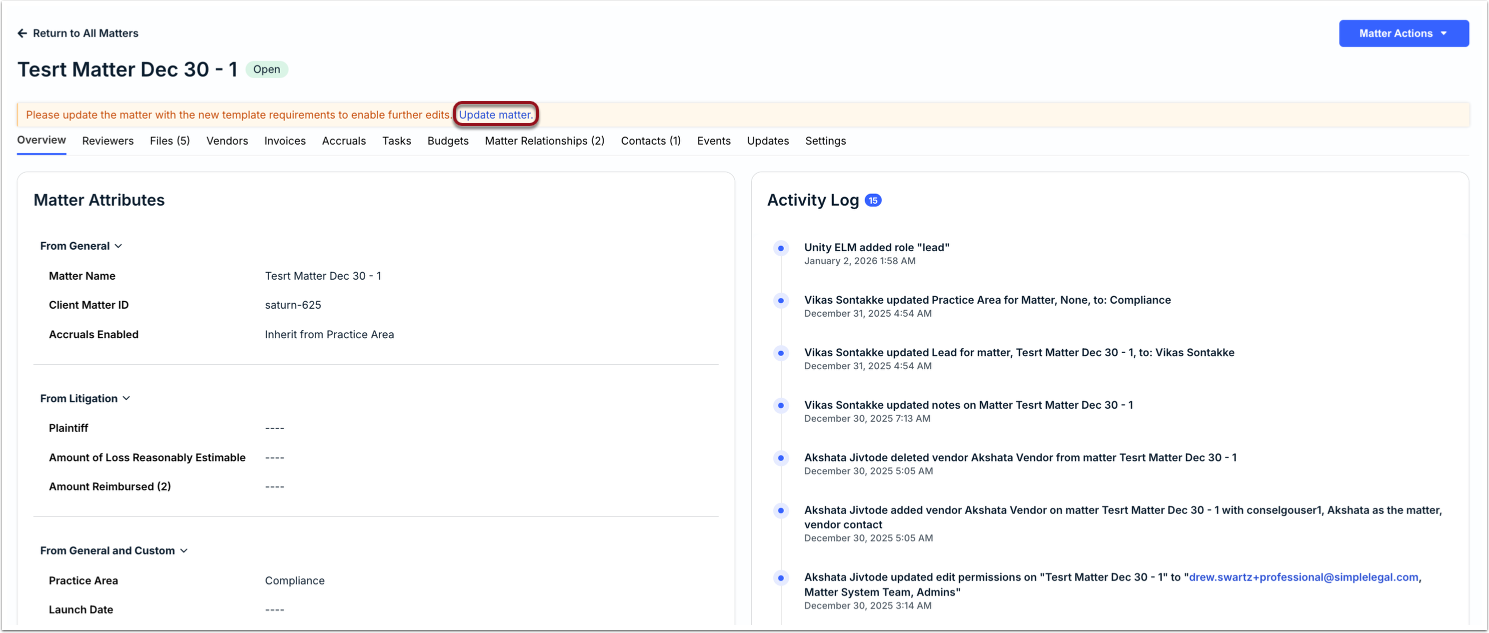
3. Open the impacted matters and click on Update matter in the banner that appears at the top of the page.
Template changes may require some processing time and may not immediately reflect in the system. Please try refreshing the browser or check for the updates during the next login session. Reach out to [email protected] with any issues.
Updating Impacted Matters in Bulk
Admins can use the Bulk Actions Editor to quickly load, filter, and select impacted matters for updates, or use the Bulk Actions CSV import option. The articles listed below provide instructions and more details about updating impacted matters in bulk:
Archiving a Matter Template
If a published matter template is no longer needed, it can be archived by an admin so that it is no longer available for selection on new matters moving forward.
From the template list page:
1. Click on the template name to open it for editing.
2. Click Archive in the bottom-left corner of the page.

Alternatively, you can do this from the template list page by clicking on the ... (more) menu under the Actions column and selecting Archive.