Users can be added, deactivated/reactivated, and updated by going to Settings > User Management. By default, active users are displayed. Use the tabs above the table to see only inactive users or all users.
This article covers the following topics:
- Adding a New User
- Resending Account Activation Links
- Editing a User
- Deactivating a User
- User Role Descriptions
- Invoice Notification Preferences
Adding a New User
New users can be added by admins. Before continuing, confirm the following:
- Which role the new user is being assigned.
- Which invoice notification preferences the new user needs.
- Whether the user will be logging in using a password or Single Sign-On (SSO).
To create a new user:
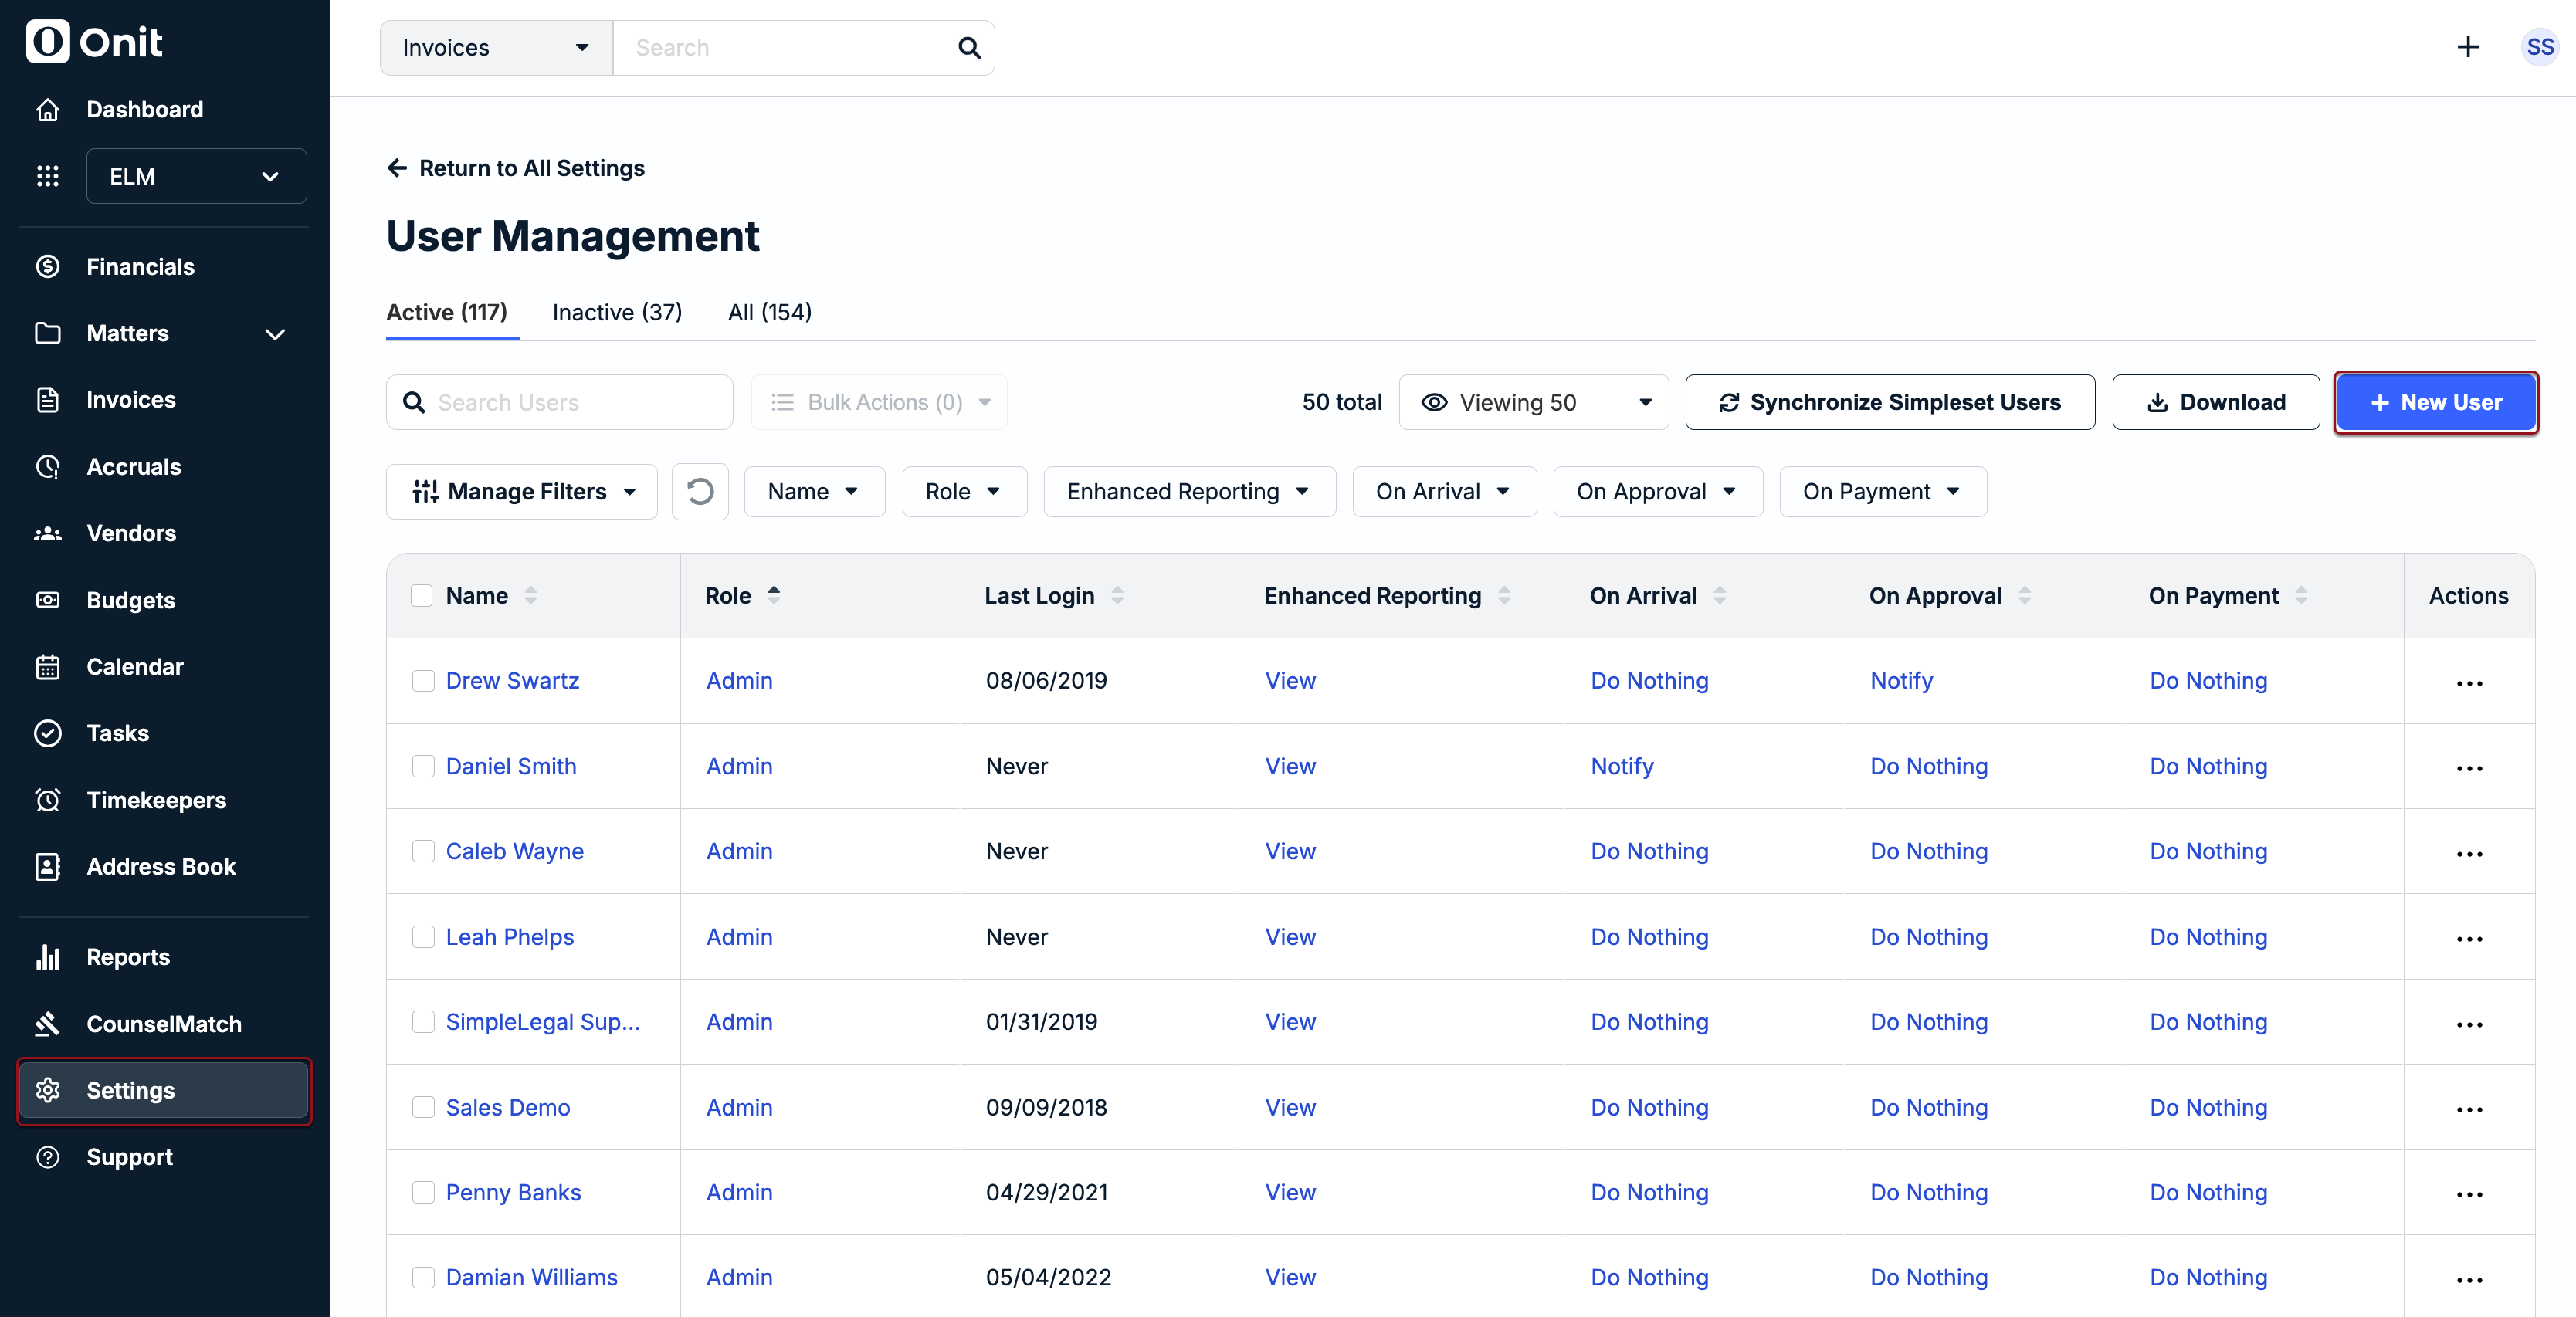
1. Go to Settings > User Management.
2. Click + New User in the top-right corner.
3. Fill in the first name, last name, and email address.
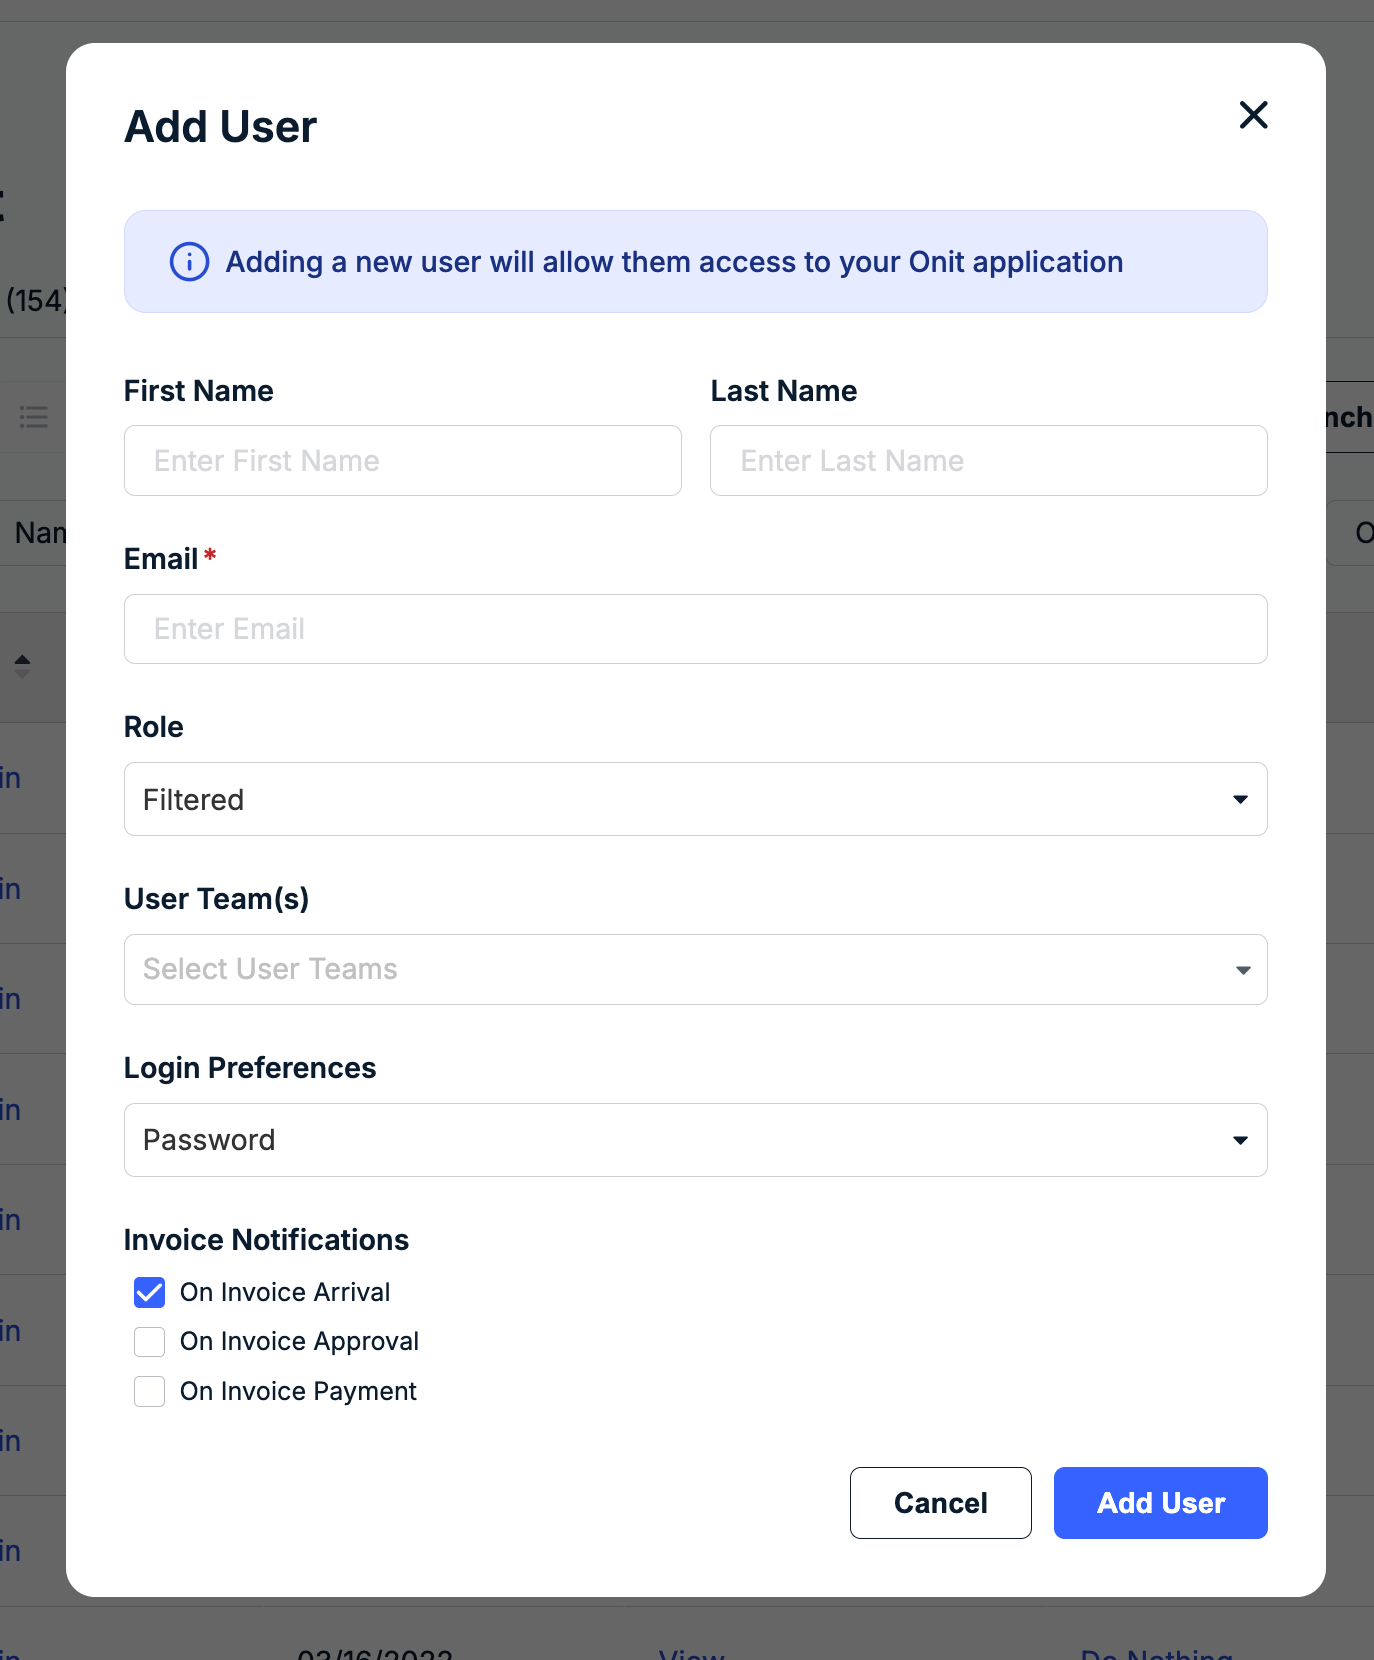
4. Select the role from the dropdown (e.g., Filtered, Email Only, or Email Only Filtered); click here for details on role permissions.
5. Select Password or SSO from the Login Preferences dropdown.
6. Update the invoice notification options; only On Invoice Arrival is selected by default.
7. Click Add User in the bottom-right corner to create the user and send the account activation email.
Resending Account Activation Links
Account activation links expire within three days of receipt. You can resend the email to individual users or multiple users at once from Settings > User Management.
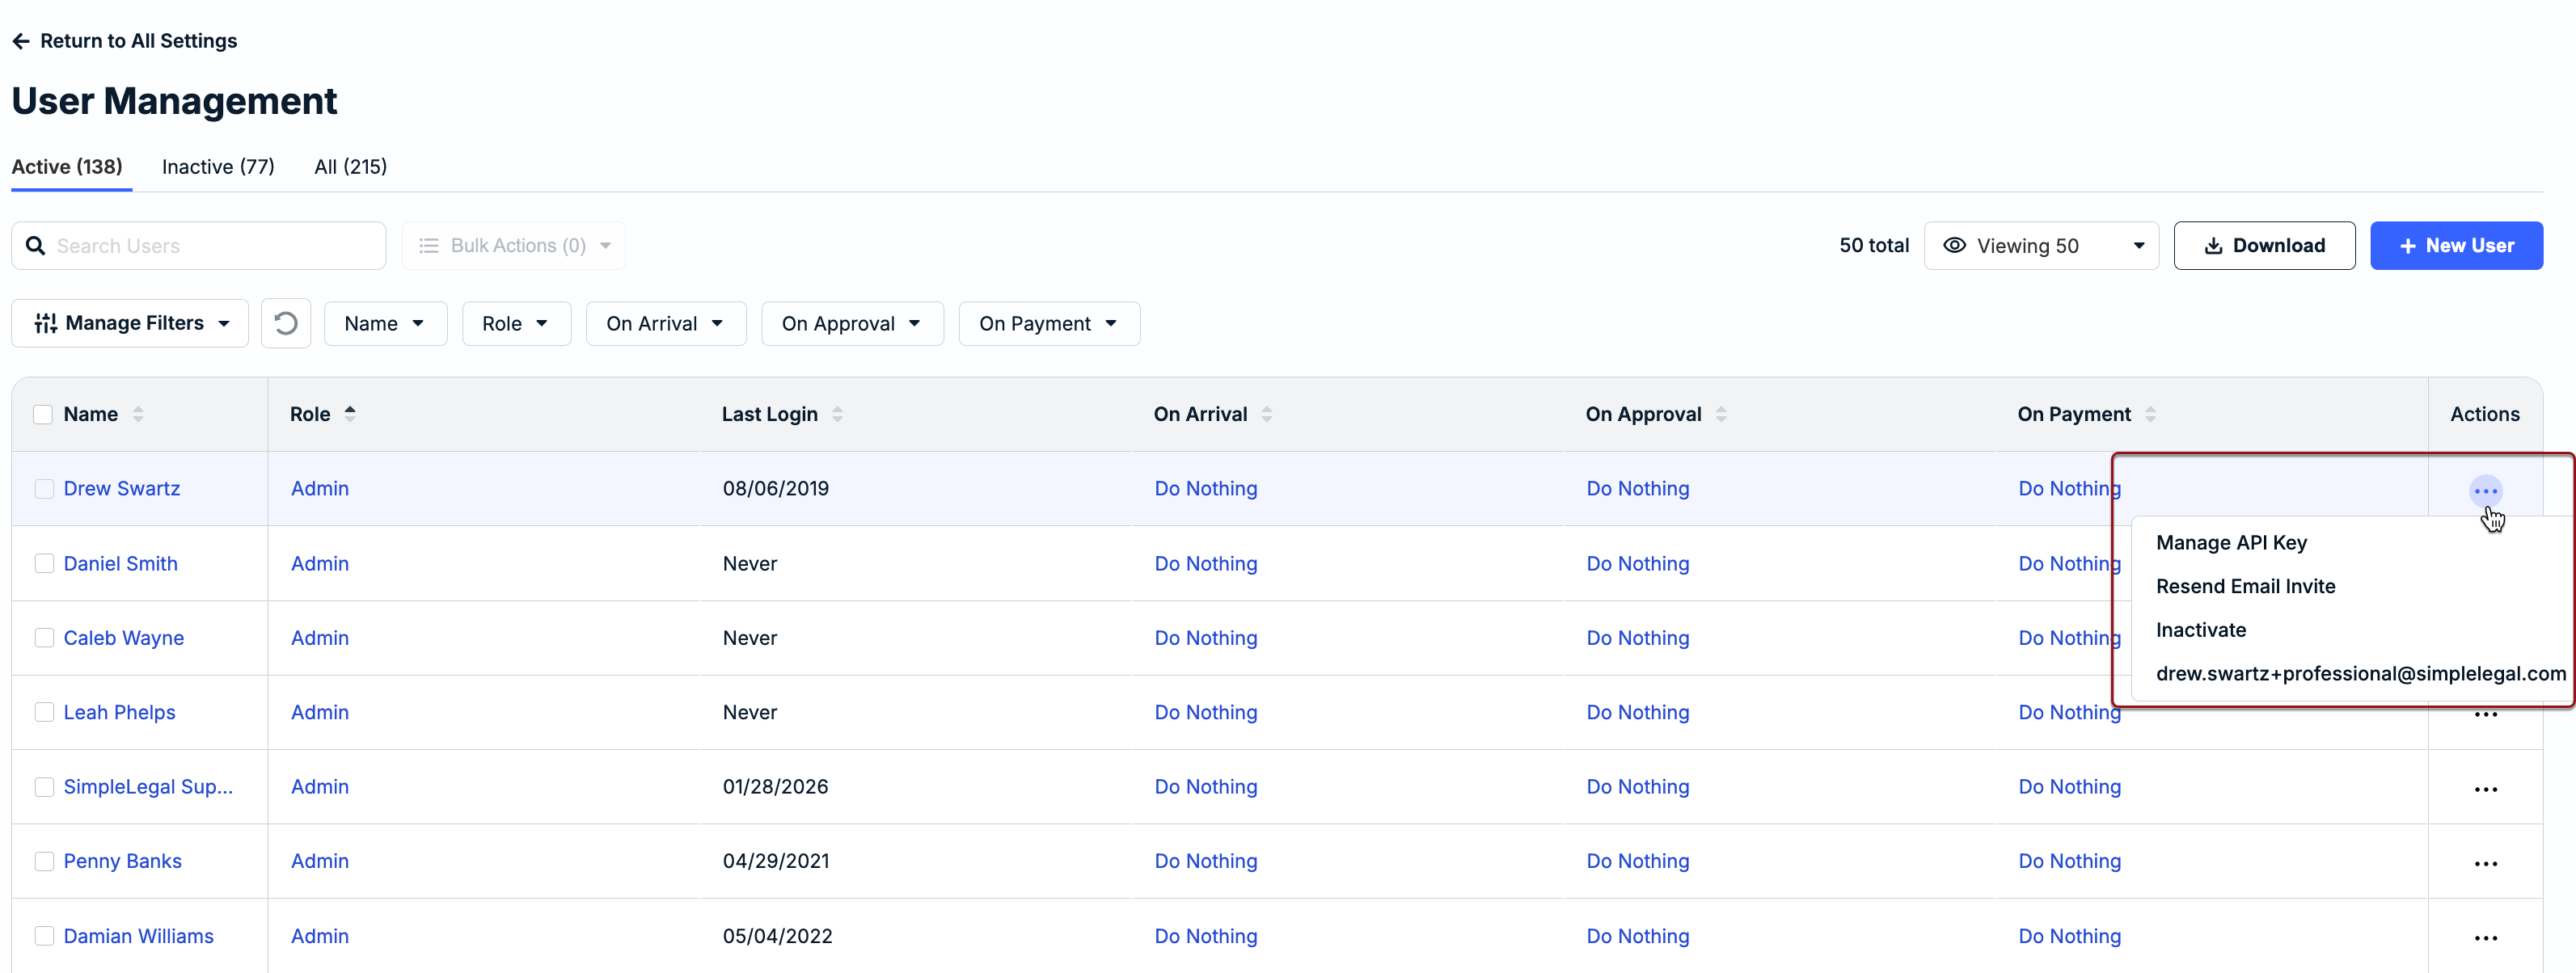
For an individual user, click on the ... (more) option under the Actions column and select Resend Email Invite.
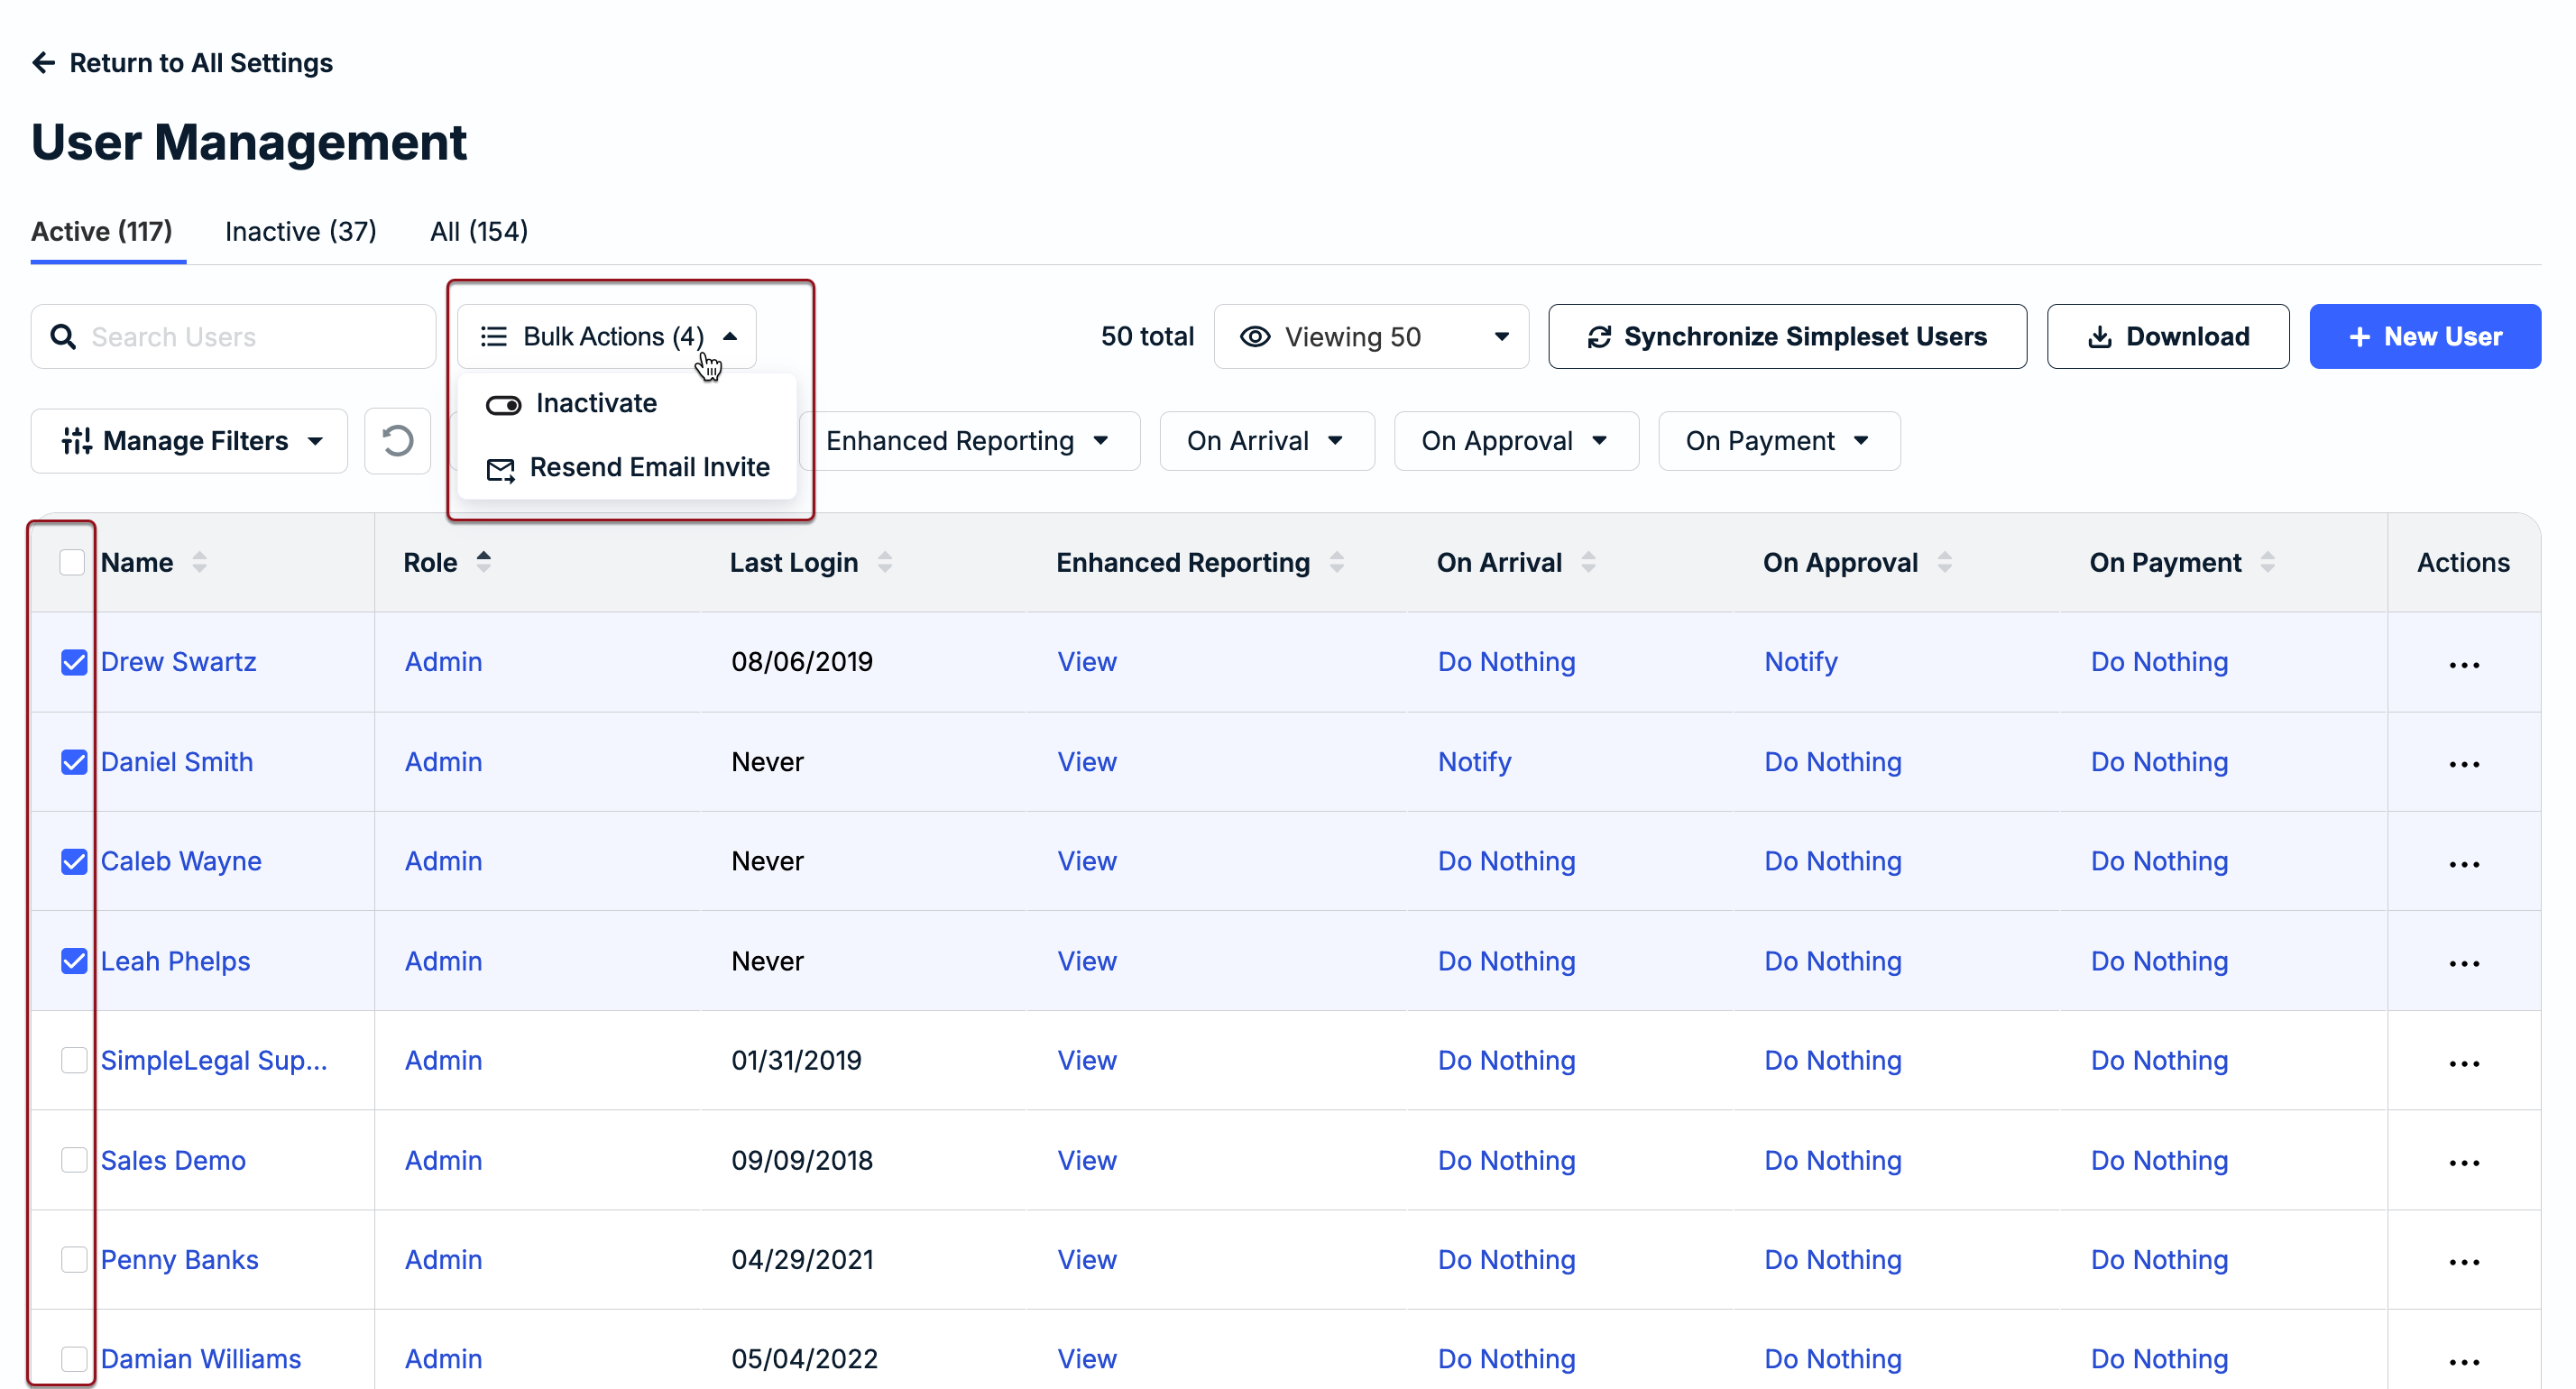
To resend to multiple users at once, select boxes for users from the left side of the table and select Bulk Actions > Resend Email Invite.
Editing a User
From Settings > User Management, click on the user's name to open their profile for editing. Each profile is separated into several tabs: Overview, Pending Invoices, Contact Affiliations, Calendar Management, and Settings.
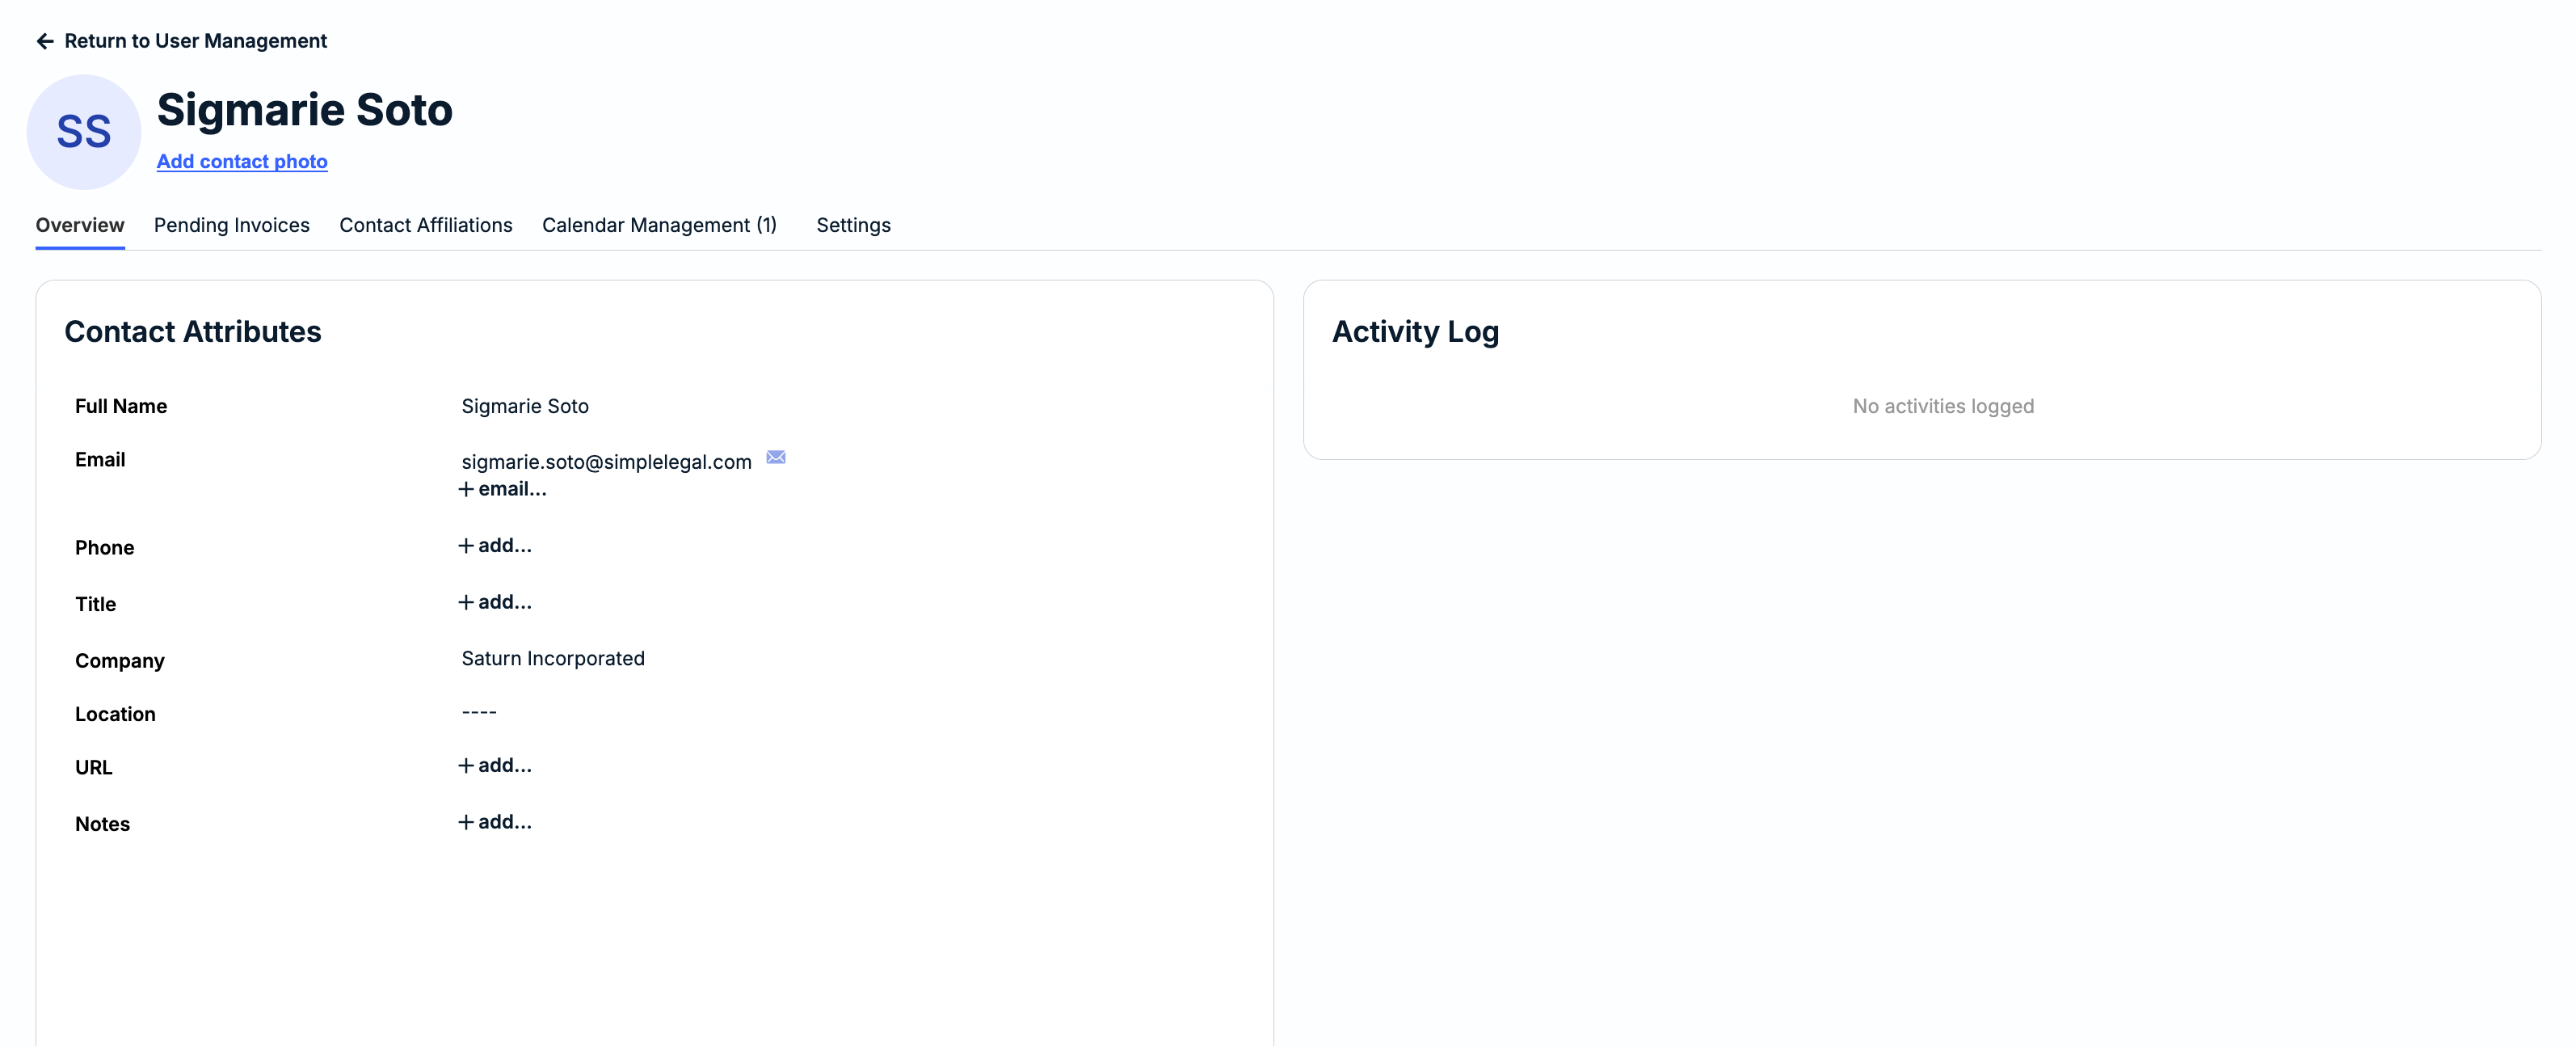
- Overview: View and edit general information, such as the user's name, email address, phone number, and title. The Activity Log displayed on the right side shows a preview of recent updates on the profile and recent actions taken by the user.
- Pending Invoices: Displays any invoices currently pending the user's review.
- Contact Affiliations: Displays records the user is assigned to or associated with (e.g., as Matter Lead, Vendor Manager, Follower, etc.).
- Calendar Management: Displays whether the user has an external calendar synced for events/tasks. This tab only appears if External Calendar Sync is enabled at the system level. To remove a user's external calendar, click Revoke Access and confirm when prompted.
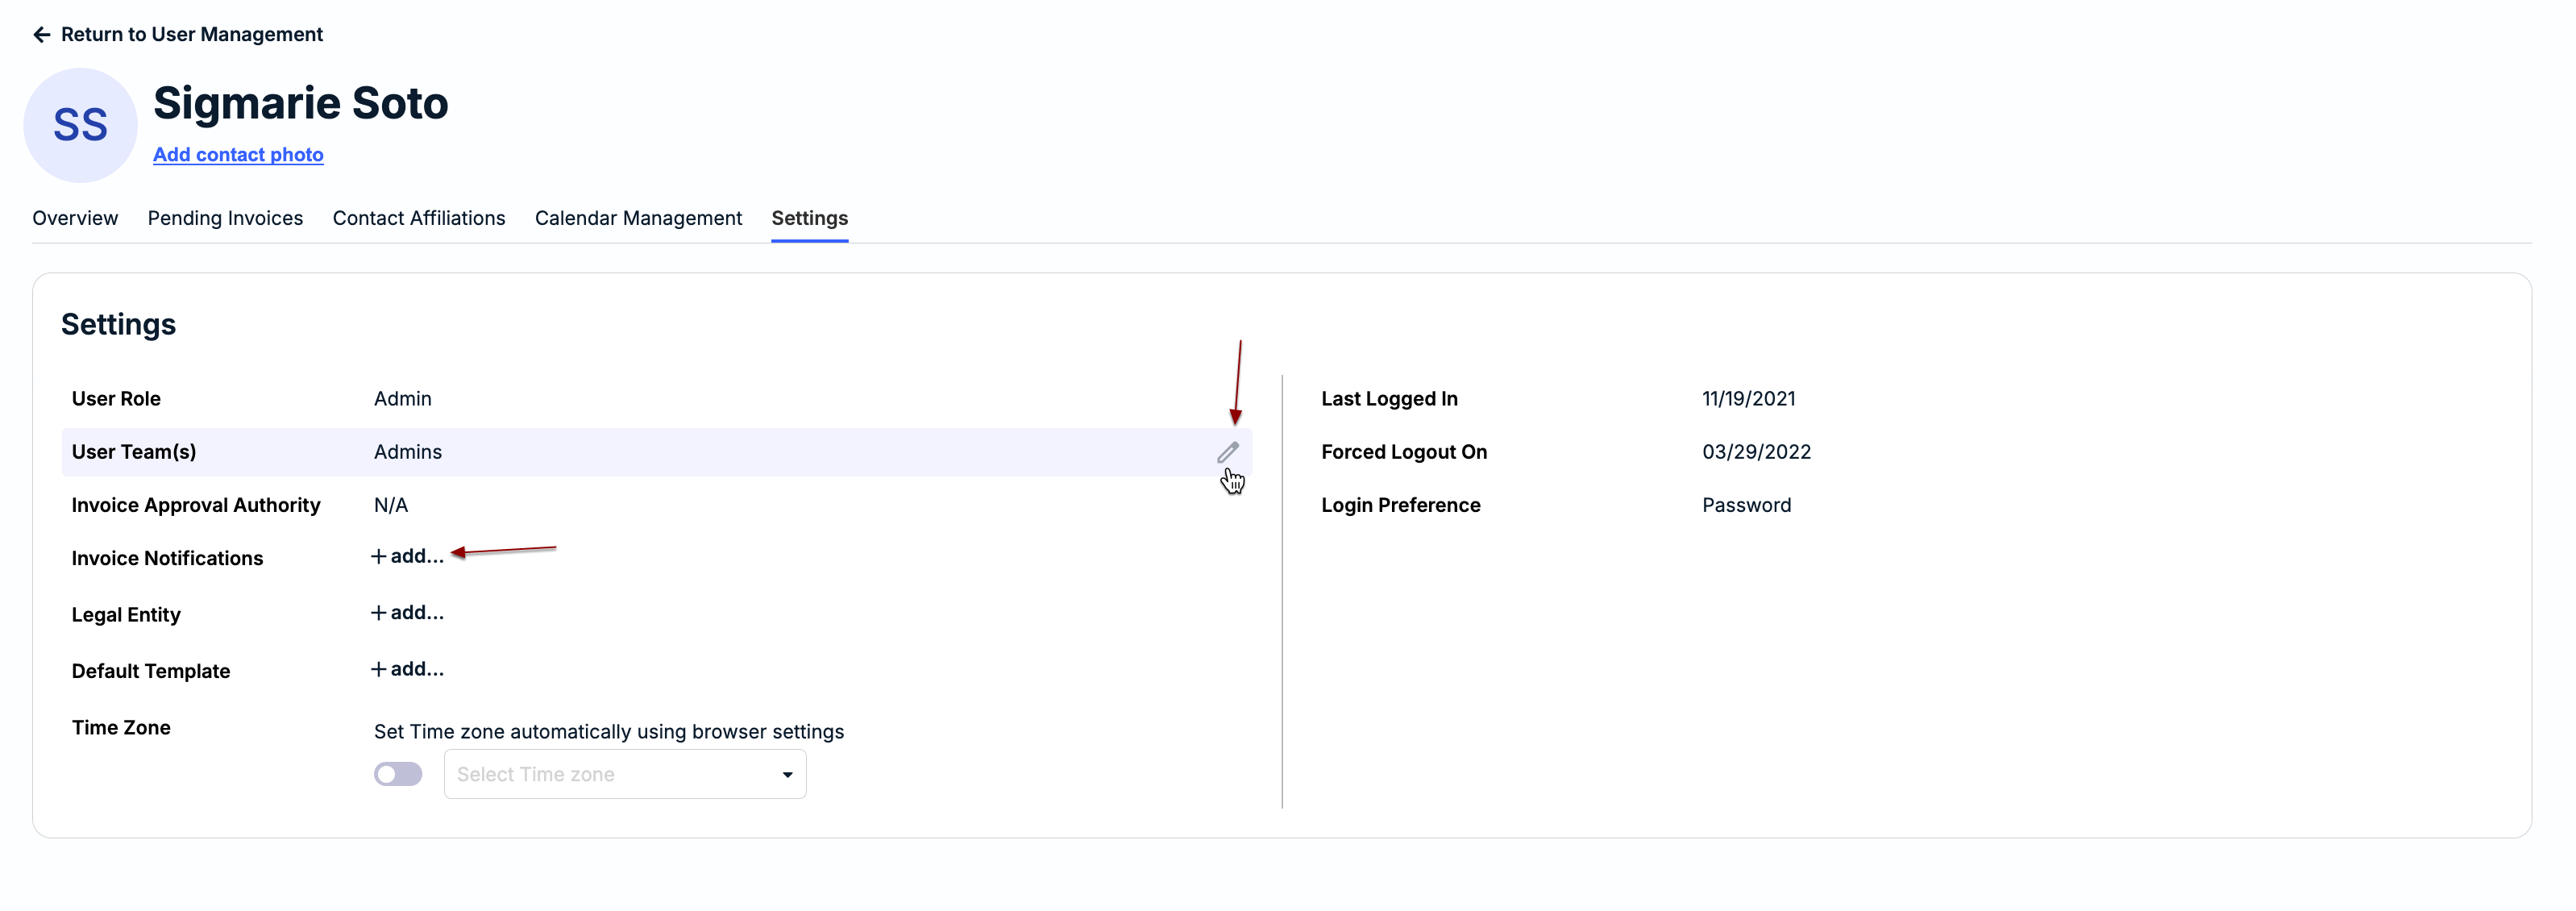
- Settings: To update any of the fields, such as the role or invoice notifications, hover over the field and click on the edit icon or click + add... if blank. Click the checkmark to save your changes.
- User Role: Displays the user's current role (e.g., Filtered, Admin, etc.). For more information, click here.
- User Team(s): Shows any User Teams the user is currently assigned to.
- Invoice Approval Authority: If applicable, set the highest invoice amount the user is authorized to approve and select the escalation contact who will be prompted to approve if the threshold is reached. This can also be set and managed from the Escalation Management page.
- Invoice Notifications: Choose whether the user will receive notifications when associated invoices are received, approved, and/or paid.
- Email Preference: Choose whether the user will receive individual email notifications for each invoice. email notifications per vendor, or combined email notifications.
- Default Template: If applicable, select which default template should be populated when the user creates new matters.
- Time Zone: Only applies to events and matter updates. Turn the toggle on if the time zone should automatically be detected, or turn the toggle off to manually set a time zone for the user.
Deactivating a User
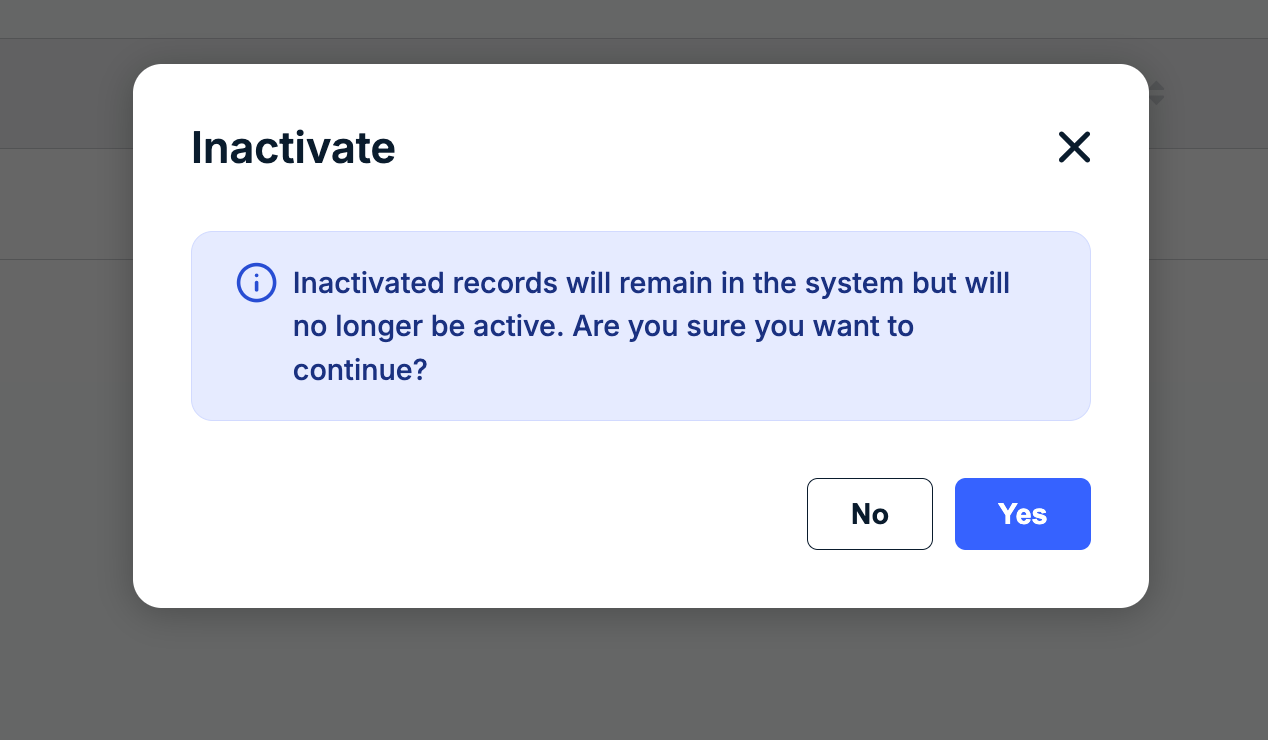
To move forward with disabling a user, click on the ... (more) option under the Actions column and select Inactivate.

Click Yes when prompted to confirm you want to remove the user's access.
If you need to deactivate multiple users at once, select boxes for users on the left side of the table and then select Bulk Actions > Inactivate. Click Yes when prompted.
User Roles
Which role is assigned to a user drives permissions across Unity, including which types of records they can access and whether they have edit/view capabilities. The table below provides descriptions and additional notes/considerations for standard user roles that can be assigned.
| Role | Description |
|---|---|
| Admin | Onit recommends that you have 2-3 admins per account.
|
| Filtered | NOTE: This is the role most commonly assigned to non-admin users.
|
| Finance |
|
| Email Only | NOTE: This role is generally assigned to Accounts Payable (AP) team members.
|
| Email Only Filtered | NOTE: This role can be used to notify a certain list of users when there are multiple AP groups.
|
| Power User |
|
Invoice Notification Preferences
Our goal is to send you email notifications only when action is needed. You are notified via email automatically, for example, if it is your turn to review a submitted invoice. The invoice review notifications are distributed as follows during the review cycle:
- If an invoice is submitted that requires one specific user's approval, only that user is notified.
- If an invoice is submitted that requires approval from two users in a sequence (i.e., one user and then a second user), only the first user is notified.
- If the first user approves the invoice, the next user (or User Team) is notified.
- If an invoice is submitted that requires approval from any of the specified users in a level, all users are notified. Once the invoice is approved by any of the notified users, the invoice moves on to the next level (if applicable).
- If an invoice requires approval from a User Team, all users on that team are notified when it is their turn to review. Once the invoice is approved by anyone from that User Team, the invoice moves on to the next user in that level or to the next level (if applicable).
The following invoice notification options can be managed at the individual user level:
- On Arrival: Whether a user is notified when a new invoice is pending their review.
- On Approval: Whether a user is notified after an invoice has been approved by all required reviewers and is ready for payment.
- On Payment: Whether a user is notified after an invoice status is set to Paid.
These options can be set when creating a new user or when updating an existing user's notifications under Settings > User Management. Review the instructions above for information on how to edit a user.