Counsel Exchange is the next evolution of Onit's BillingPoint and CounselGO services. Counsel Exchange brings CounselGO and BillingPoint together with a responsive UI refresh and modern UX, improving speed, accessibility, and intuitive navigation, reducing vendor training time, and increasing adoption.
This article covers the following topics:
- Adding a New User in Counsel Exchange
- Managing Users in Counsel Exchange
- Adding a Timekeeper in Counsel Exchange
- Using the Counsel Exchange Support Assistant
- Master Settings in Counsel Exchange
- Counsel Exchange for OnitX FAQs
- Manual Invoice Creation in Counsel Exchange for OnitX
- Uploading a LEDES File to Counsel Exchange for OnitX
- Submitting a New Client Timekeeper Rate in Counsel Exchange for OnitX
Adding a New User in Counsel Exchange
Here's how to add a new user (defined as someone who logs into Counsel Exchange to do work) in Counsel Exchange:
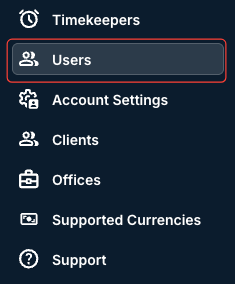
- After logging into Counsel Exchange and navigating to the Master Settings, click on "Users" in the left-hand-side menu.
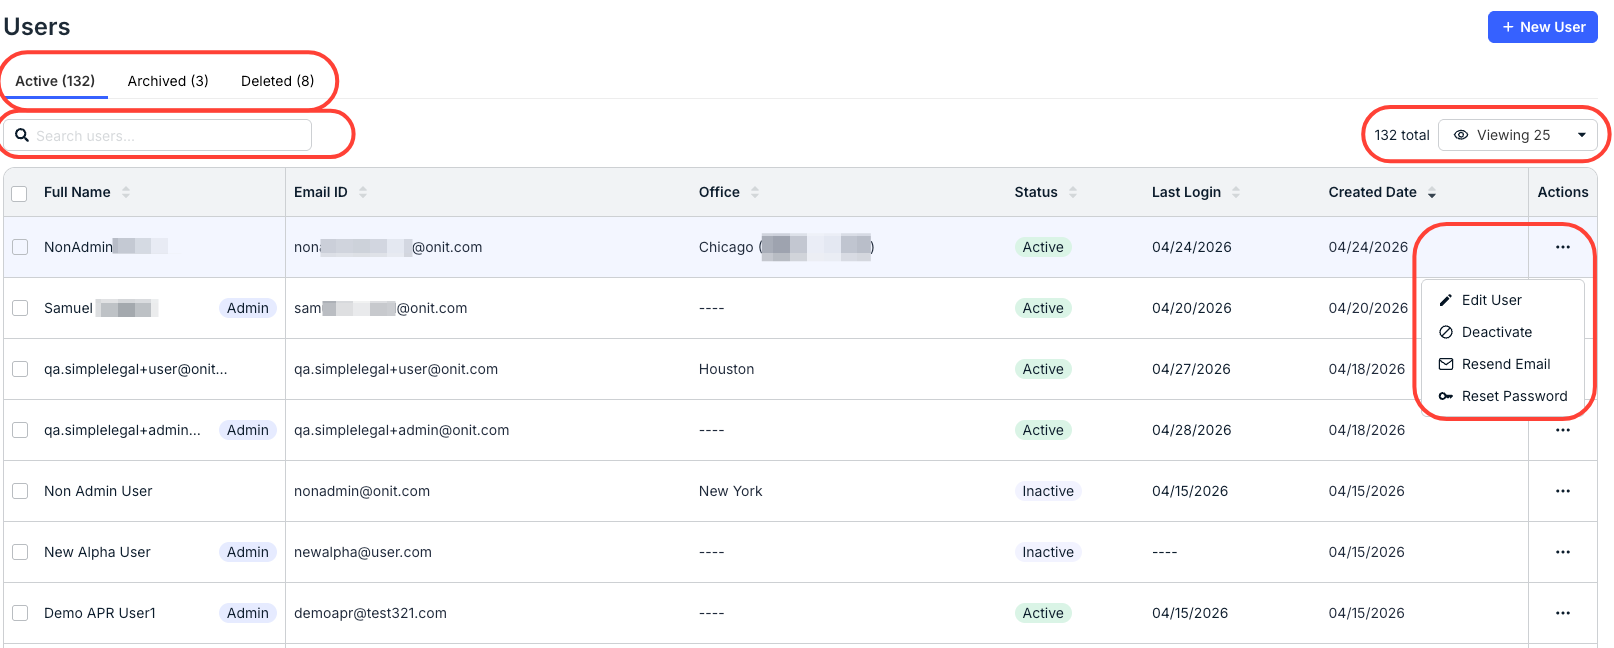
- You'll see all existing users in the Users directory.
Use the top tabs to toggle between Active, Archived, and Deleted users.
The main directory will show the user's Full Name, Email ID, Office, Status, Last Login, and Created date, and an Actions (Edit User, Deactivate, Resend Email, Reset Password) menu. Use the up/down arrows to sort by the column
Use the search bar to search for specific users. Use the Viewing drop-down menu to customize how many users you want to see on the screen.
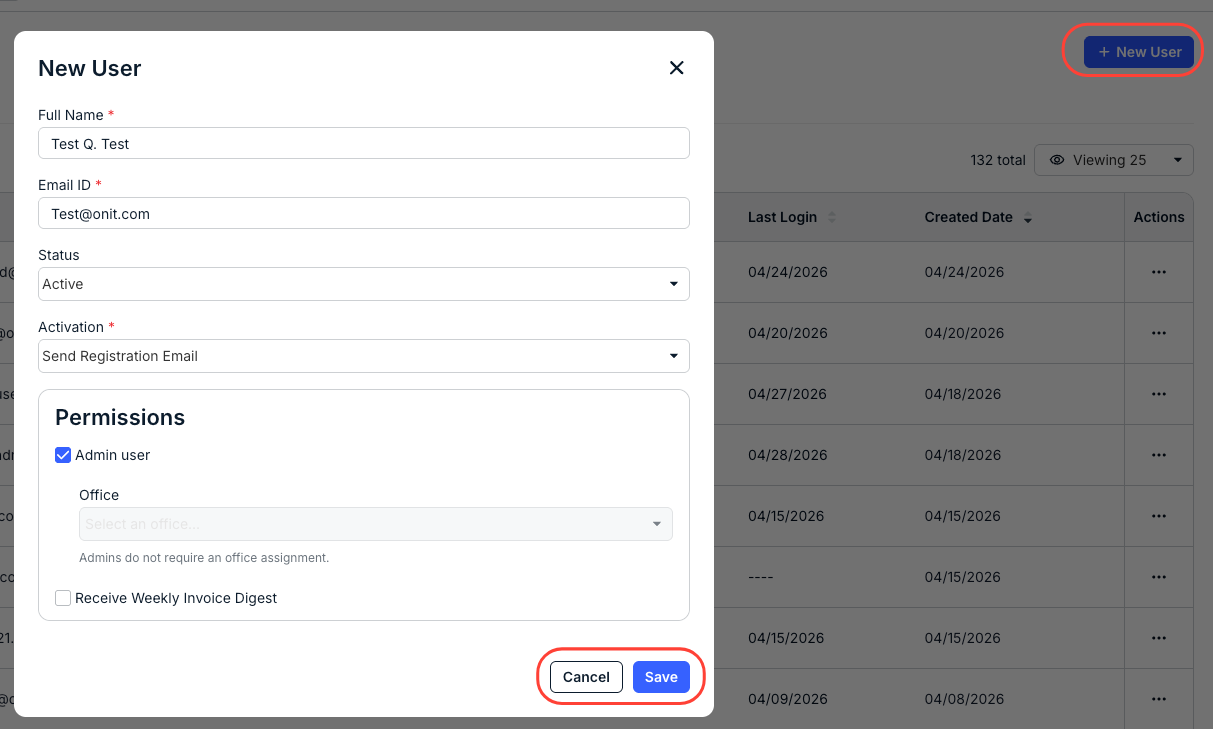
- Click on "New User" to add a new user.
You'll have to fill in:
- The user's Full Name (required)
- The user's Email ID (required)
- Their Status (active or inactive)
- The Activation option (required). You can choose to either Send Registration Email to the new user or Auto Activate the user.
- Under Permissions, you can make the user an Admin User and choose whether they should Receive a Weekly Invoice Digest (a weekly summary of invoice activity). Note that regular users will also require you to select an Office from the drop-down menu.
Click Save to save the new user or Cancel to back out.
The created user will appear in the main directory.
Managing Users in Counsel Exchange
Here's how to manage existing users in Counsel Exchange. Click here to learn how to add a new user in Counsel Exchange.
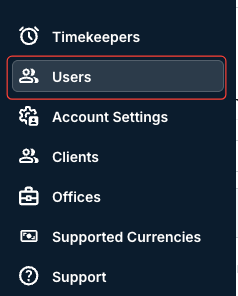
- After logging into Counsel Exchange and navigating to Master Settings, click on "Users" in the left-hand-side menu.
- You'll see all existing users in the Users directory.
Use the top tabs to toggle between Active, Archived, and Deleted users.
The main directory will show the user's Full Name, Email ID, Office, Status, Last Login, and Created date, and an Actions (Edit User, Deactivate, Resend Email, Reset Password) menu. Use the up/down arrows to sort by the column.
Use the search bar to search for specific users. Use the Viewing drop-down menu to customize how many users you want to see on the screen. You'll see whether the user is an Admin or not next to the user's name.
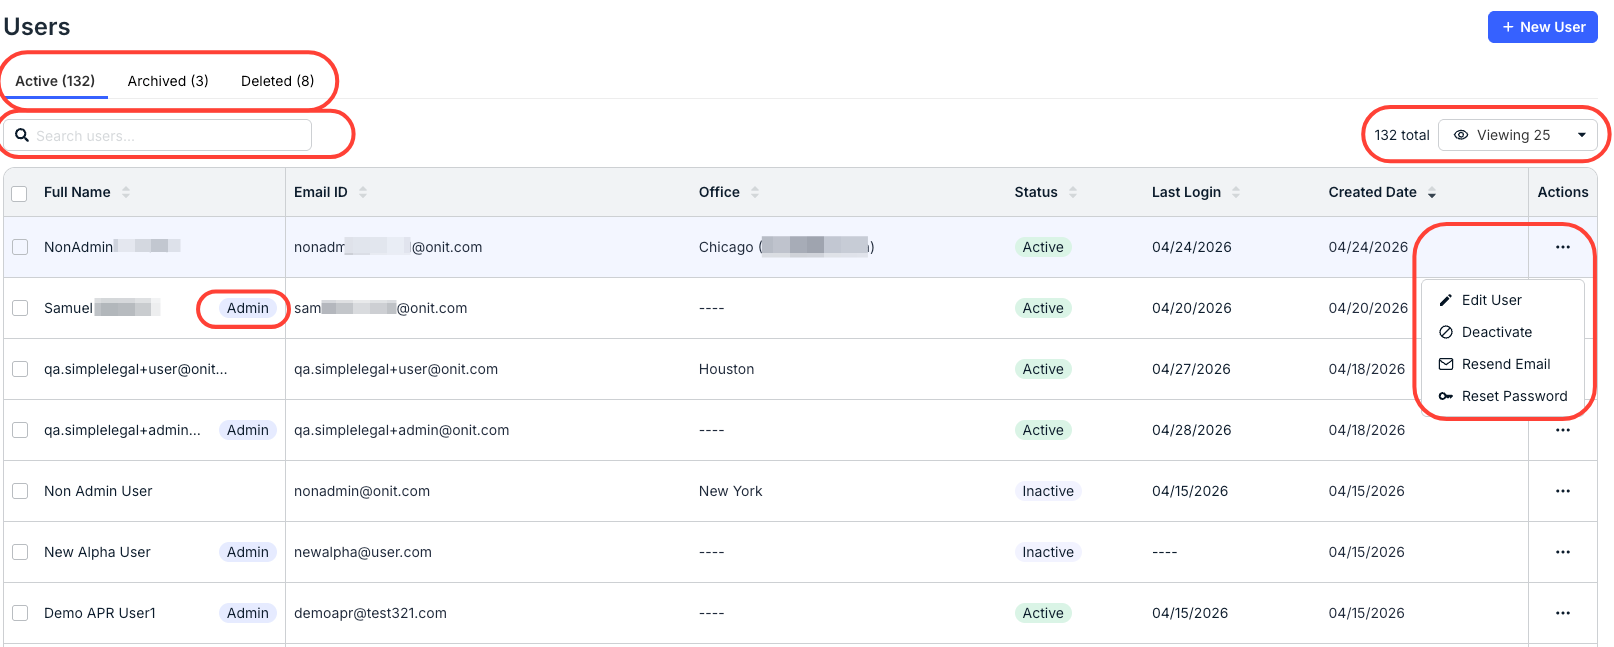
Here's how to use the Actions (Edit User, Deactivate, Resend Email, Reset Password) menu:
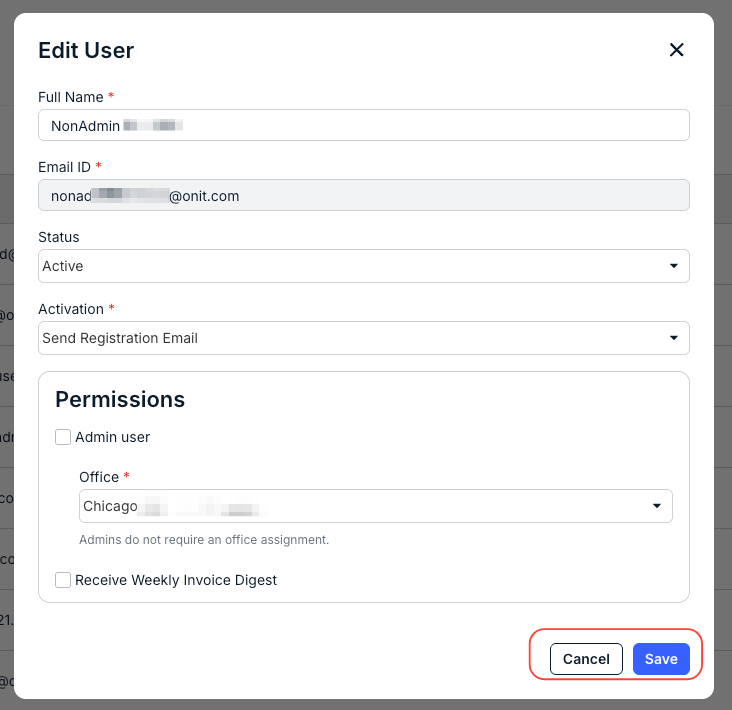
- Click on "Edit User" to edit a user's information.
You can edit their Full Name, Status, Activation method, and Permissions. Learn more about these in the Adding a New a User in Counsel Exchange guide. Click Save to save your changes or Cancel to back out.
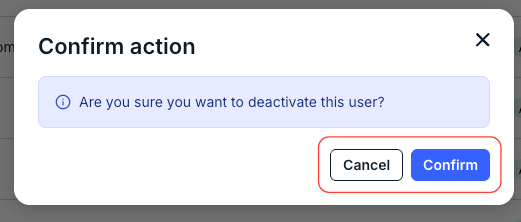
- Click Deactivate to deactivate a user.
Click Confirm to deactivate the user or Cancel to back out.
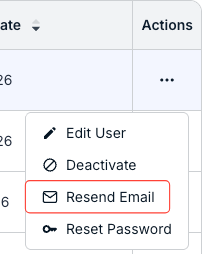
- Click Resend Email to send a set password email to the user.
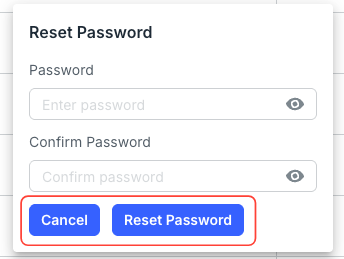
- Click Reset Password to reset the user's password.
Fill in and confirm the password, and click Reset Password to reset the password or Cancel to back out.
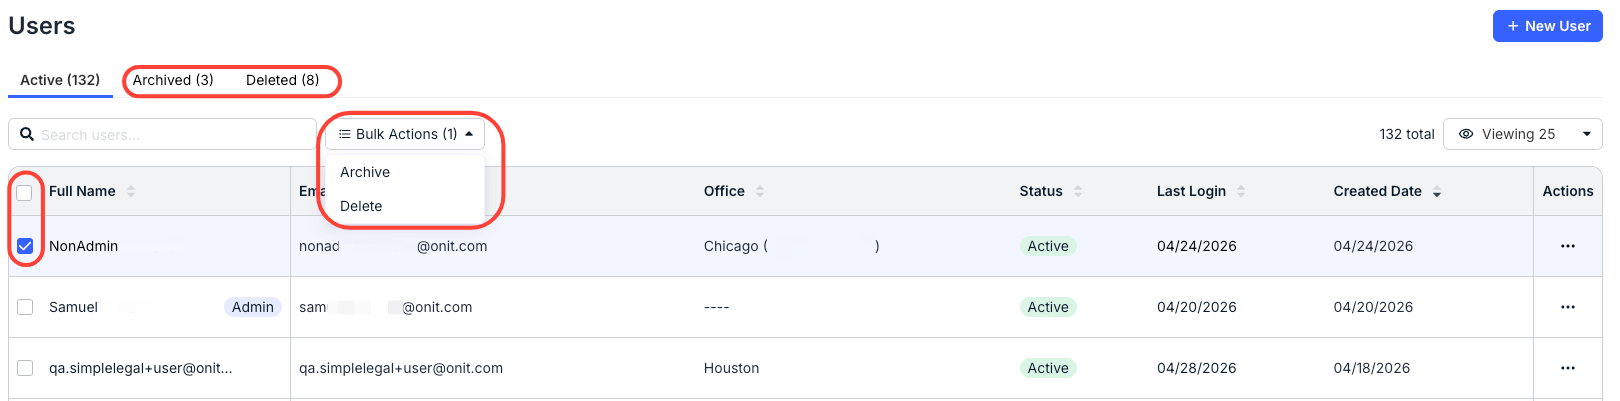
- Use the checkboxes next to each user and the "Bulk Actions" menu to archive or delete users.
You can also use the top-left checkbox to select all users.
You can find these users in the Archived and Deleted tabs at the top of the page.
Adding a Timekeeper in Counsel Exchange
Here's how to add a new timekeeper (defined as people from vendor law firms who bill for work on legal matters using hourly rates or flat/fixed fee arrangements depending on customer billing guidelines or requirements) in Counsel Exchange:
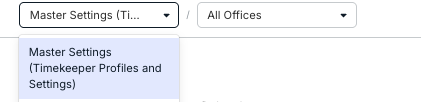
- Switch to the Master Settings option within your Counsel Exchange environment.
Use the drop-down menu at the top of the page to select this option (if you have access)
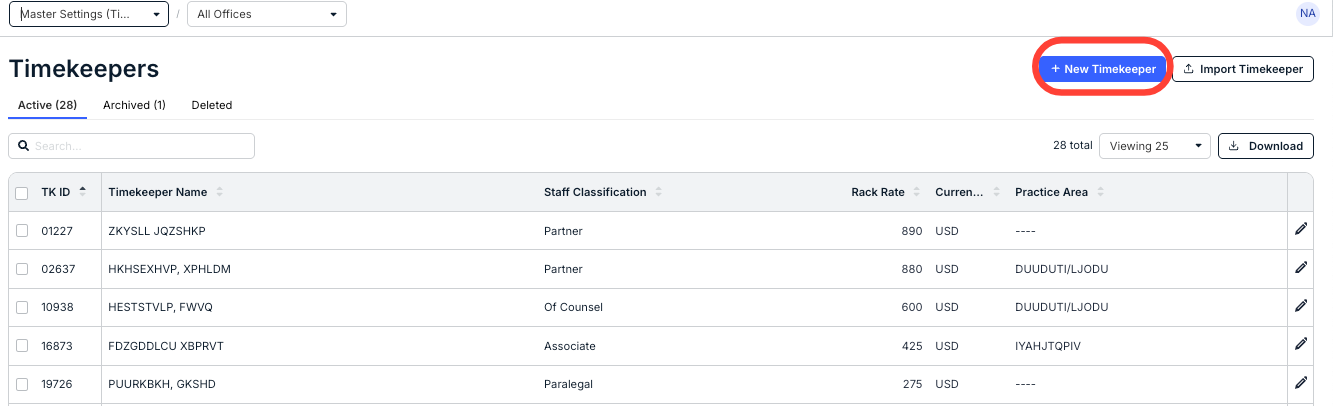
- Click on the New Timekeeper button on the top right of the page.
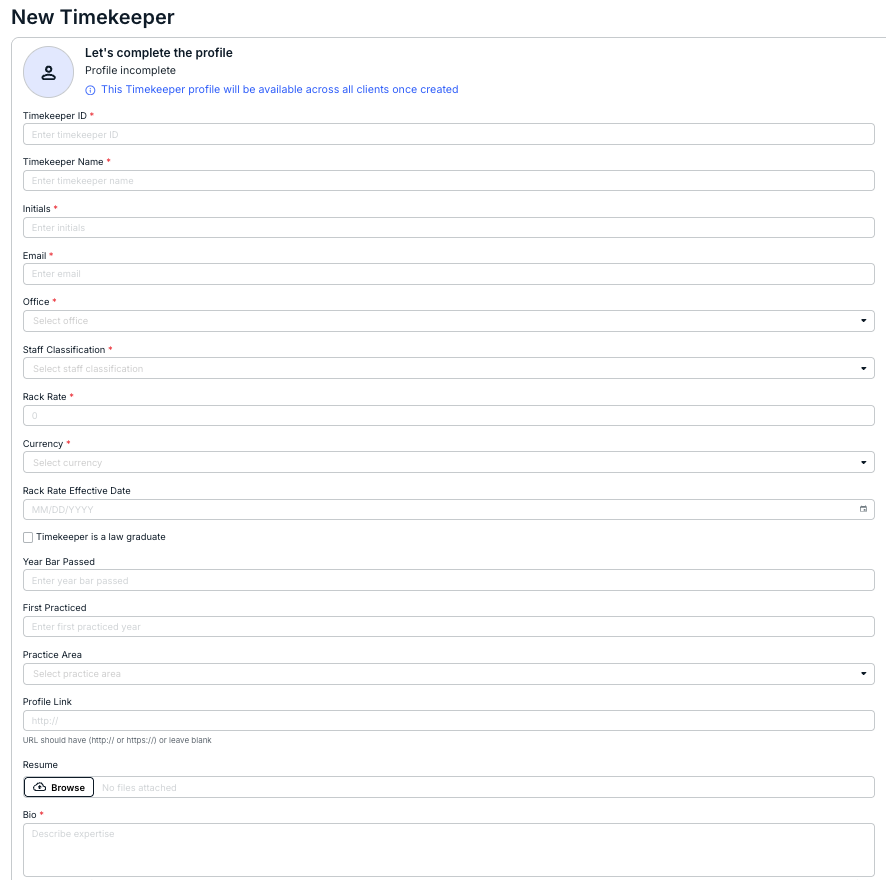
- The New Timekeeper screen will appear.
Note that this timekeeper profile will be available across all clients once created.
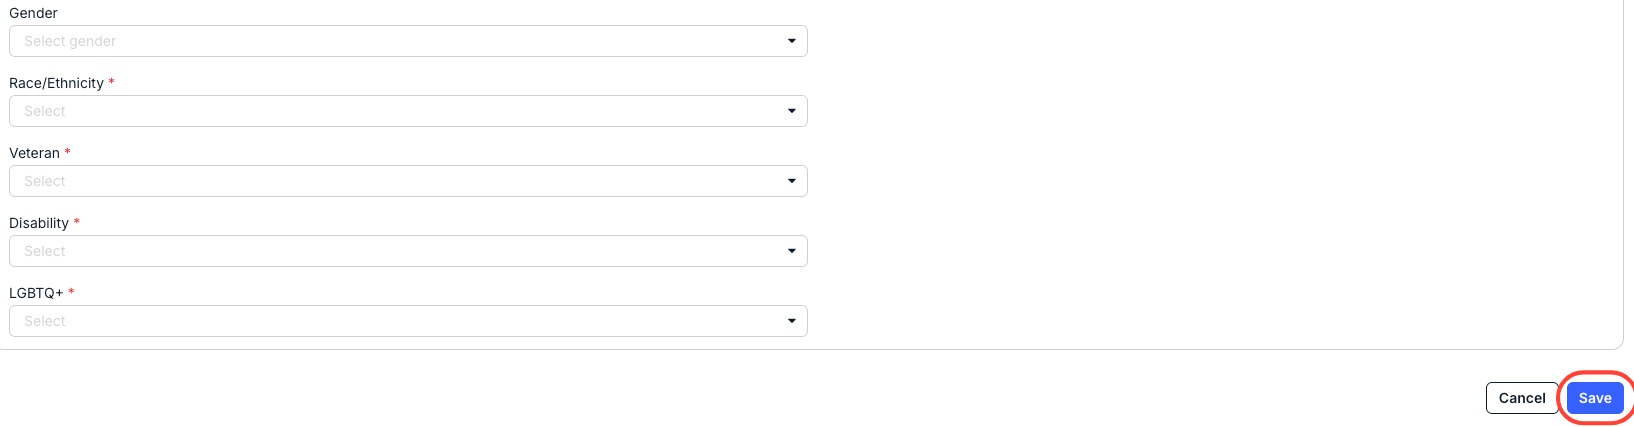
Anything with a red asterisk is required (note: Date Bar Passed and First Practiced Year are only required if the timekeeper is a law graduate). Click the X in selected fields to remove a selection. Click Save once your updates are complete or Cancel to back out.
You'll have to add in:
- The Timekeeper ID
- The Timekeeper Name
- The Initials of the timekeeper
- The timekeeper Email
- The Office (drop-down menu)
- The Staff Classification (drop-down menu)
- The Rack Rate
- The Currency (drop-down menu)
- The Rack Rate Effective Date (calendar)
- Whether the Timekeeper is a law graduate; check or uncheck the Check if this timekeeper is a law graduate box.
- The Year Bar Passed
- The First Practiced date
- The Practice Area (drop-down menu)
- The timekeeper Profile Link
- The timekeeper Resume
- The Bio of the timekeeper (250 character limit)
- The Gender (drop-down menu)
- The Race/Ethnicity (drop-down menu)
- Whether the timekeeper is a Veteran or not (drop-down menu)
- Whether the timekeeper has a Disability or not (drop-down menu)
- Whether the timekeeper is LGBTQ or not(drop-down menu)
Using the Counsel Exchange Support Assistant
Counsel Exchange's Support Assistant provides users with AI-powered chat support. This support chat quickly answers basic how-to questions about Counsel Exchange; it supports multiple languages, allowing users to receive support in their preferred language.
Here, we'll show you how to use the Onit Support Assistant within Counsel Exchange.
Using the Support Assistant
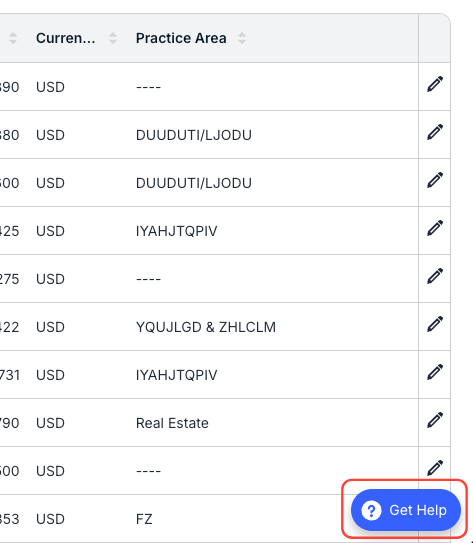
To open the Support Assistant, click on the Get Help button in the bottom right of the Counsel Exchange screen.
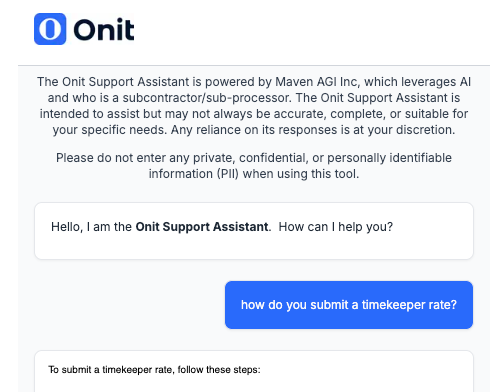
The support agent chat window will appear on the screen. Type in your query in the bottom "Ask a question" field and click the blue "next" button.
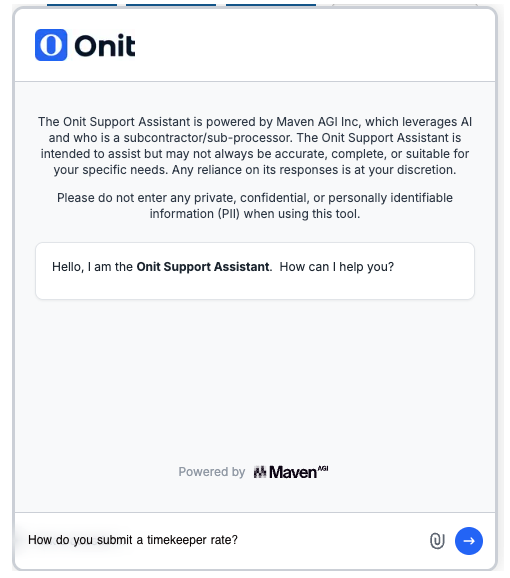
The chatbot will pull an answer from the uploaded knowledge base.
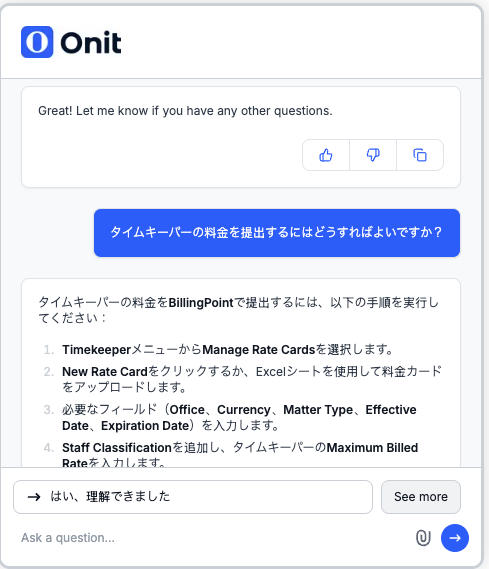
The agent supports multiple languages; ask a question in your preferred language, and you'll get an answer back in that language.
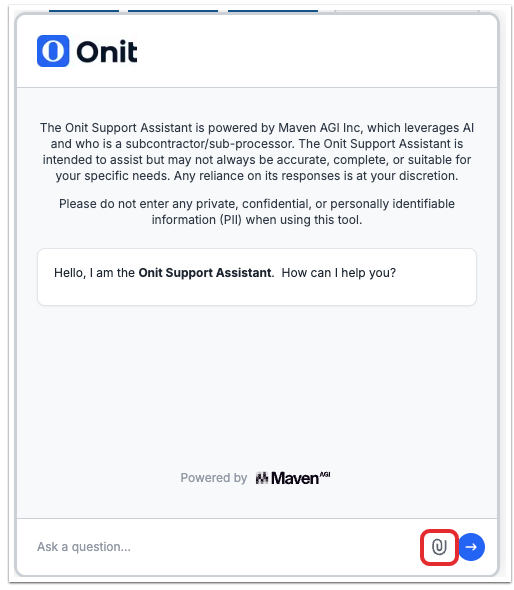
You can also click on the paperclip icon to upload a file to the Support Assistant.
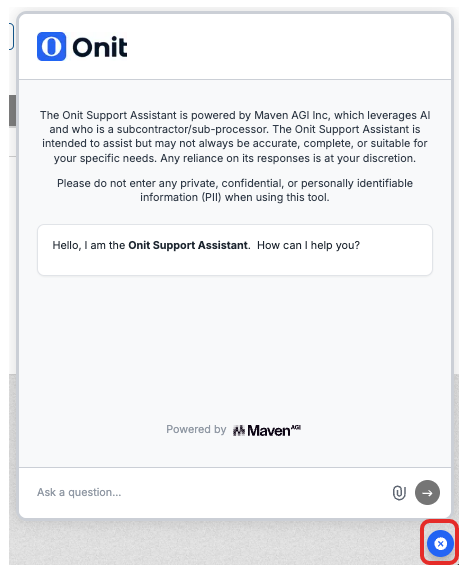
To close the Onit Support Assistant, click on the blue X on the bottom-right of the screen.
Master Settings in Counsel Exchange
In Counsel Exchange, the Client and Master Settings views provide you with different features. This guide explains how to switch between the two and what you can do in each.
Switching Between Client and Master Settings
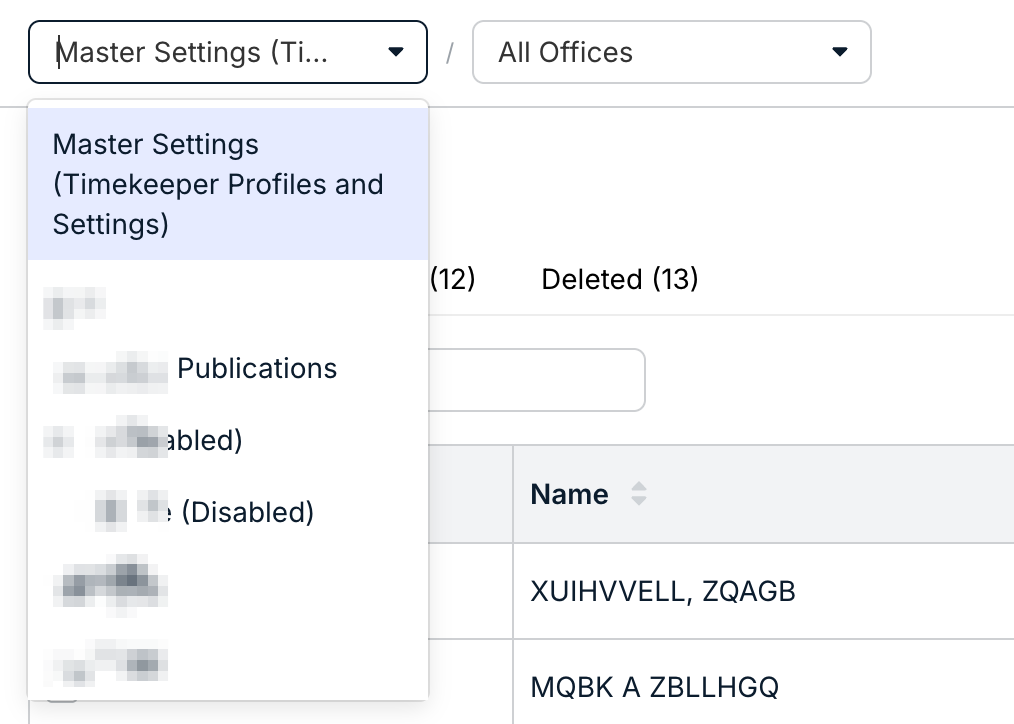
- Use the top drop-down menu to switch between Client settings and Master Settings.
The Master Settings (Timekeeper Profiles and Settings) option will be at the very top of the drop-down menu. Use the Offices drop-down menu to switch between offices.
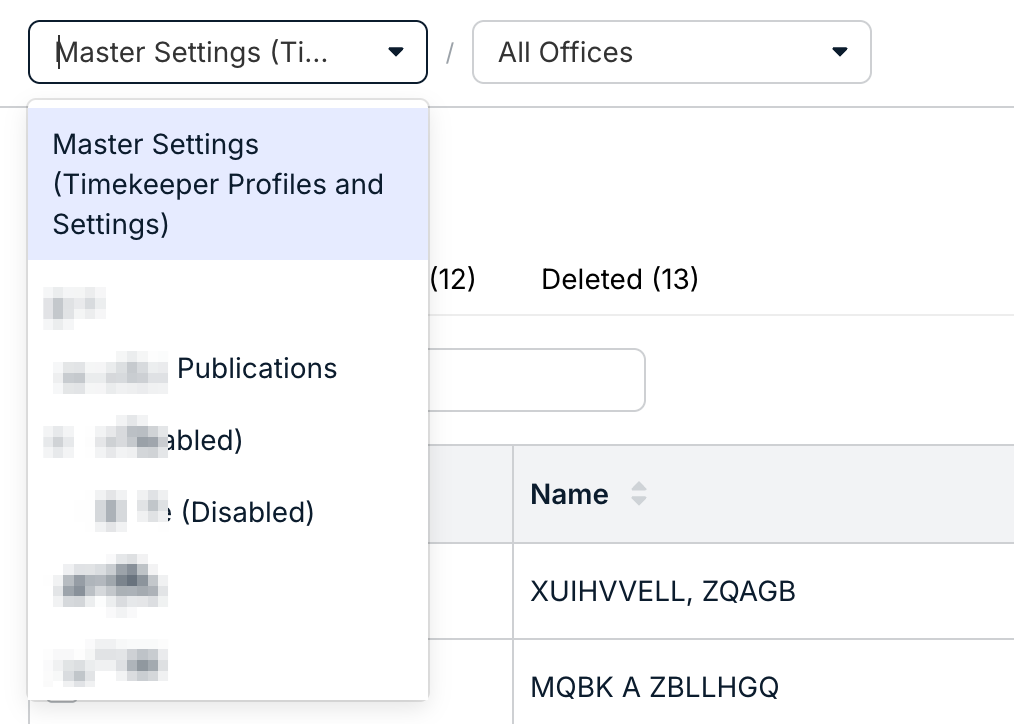
Master Settings
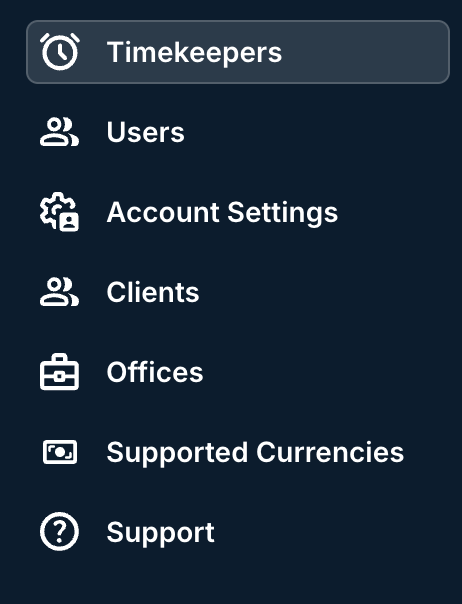
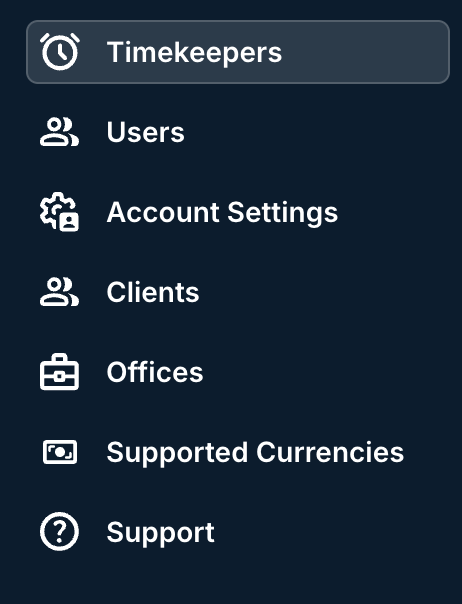
Within Master Settings, you can:
- View, adjust, and add timekeepers
- View, adjust, and add users (admin users only)
- Manage account settings (admin users only)
- View clients
- View and adjust offices (admin users only)
- View, adjust, and add supported currencies
- Access the Support function
Counsel Exchange for OnitX FAQs
FAQ Directory
Does Counsel Exchange have a customer-facing API?
It does not; as a result, we do not have API documentation to share.
How can you change a fee arrangement for a Billing Authorization Request?
Vendors do not update fee arrangements on matters. Fee Arrangements are set by the customer and not the vendor. If a fee arrangement needs to be updated, the vendor must request an update from the customer, and the customer must take the necessary actions.
How can I update the administrators in a Counsel Exchange account?
You can find directions on updating the administrators here.
What is the Counsel Exchange session timeout length?
The Counsel Exchange session timeout length is 120 minutes. After that time, you'll have to log in again.
Do invoices need to be in English?
No. Counsel Exchange also supports German, Portuguese, Spanish, Italian, French, and Japanese.
How can a vendor edit an approved invoice?
Either contact the customer (who will then contact Onit support) or contact Onit Support directly so our team can coordinate with the customer to dispute the invoice in order to make it available for editing.
How can a vendor alter an adjustment on an approved/paid invoice?
Contact the customer directly. They will then (pending the customer's judgment) contact support to request a workaround.
Manual Invoice Creation in Counsel Exchange for OnitX
Here's how to create a manual invoice within Counsel Exchange:
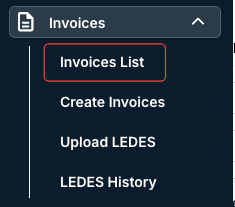
- Go to the Invoices on the left-hand side menu and click on "Invoices List."
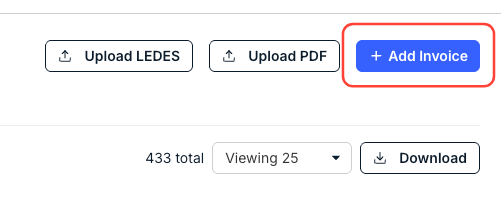
- On the right-hand side of the screen, click on the "+Add Invoice" button.
- Note that you can also click directly on the "Create Invoices" link from the Invoices drop-down menu to create an invoice.
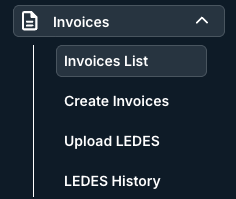
Either option will bring you to the next step.
- Note that you can also click directly on the "Create Invoices" link from the Invoices drop-down menu to create an invoice.
- The Create Invoice screen will appear.
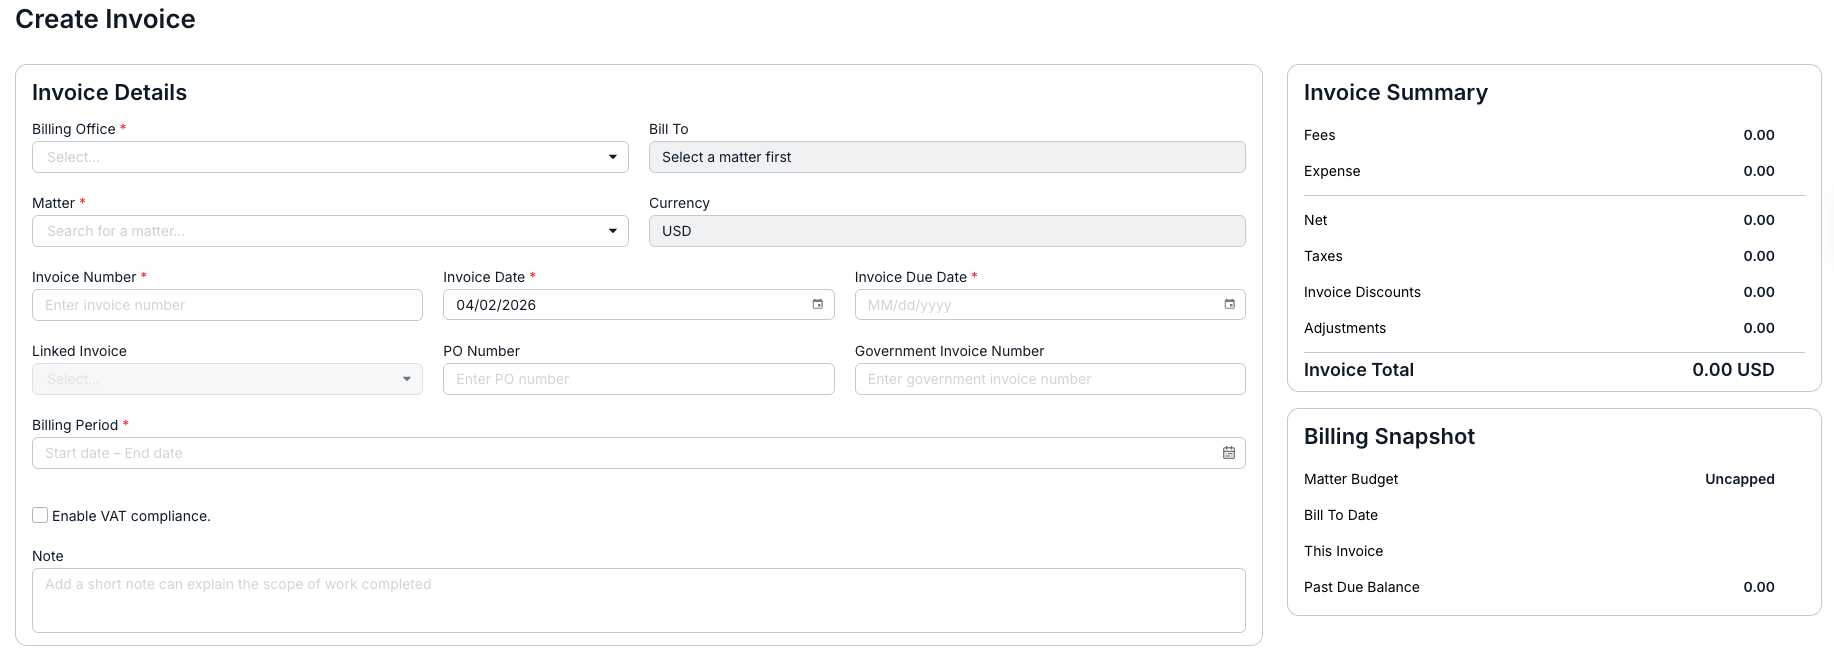
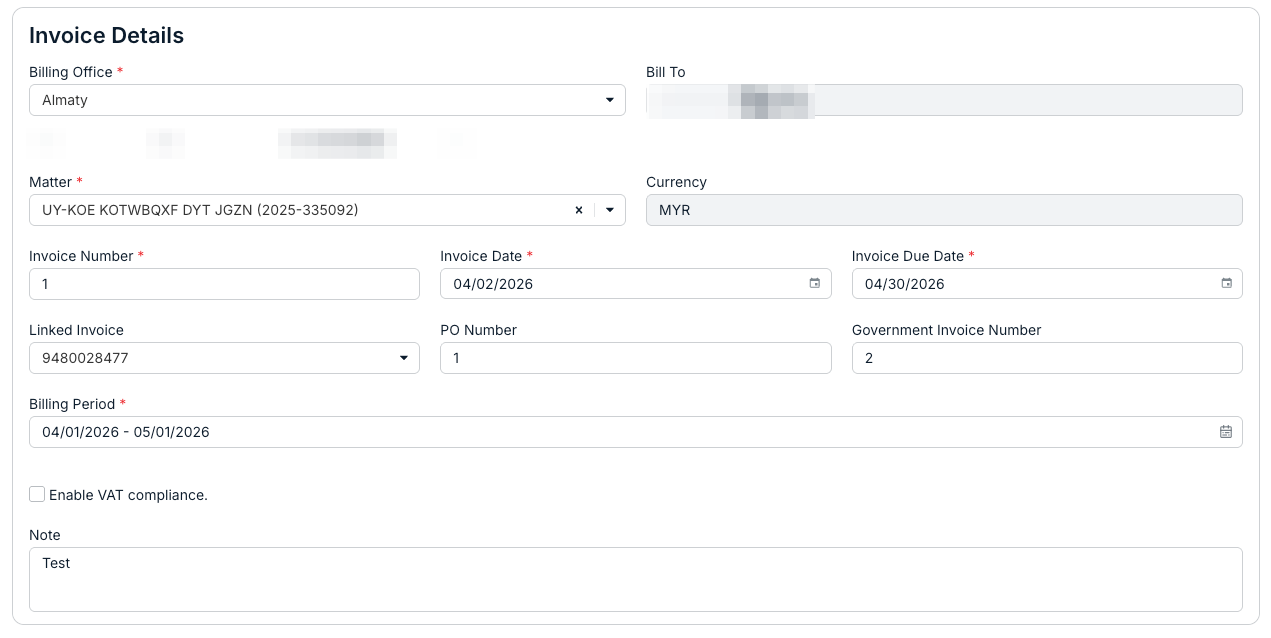
- Fill out the Invoice Details screen.
Sections marked with an asterisk (*) are mandatory; click the X to remove selections. You can fill out these sections:
- Billing Office (drop-down menu)
- Matter (drop-down menu)
- Invoice Number
- Invoice Date (the date when the invoice is created)
- Invoice Due Date
- Linked Invoice (drop-down menu)
- PO Number
- Government Invoice Number
- Billing Period (note that you can only select a date range that is max one year at a time)
- Whether or not you want to Enable VAT Compliance (check box)
- A Note to explain the scope of work completed
- Fill out any Line Items.
Click the up/down arrows next to Line Items to show details of any line items included.


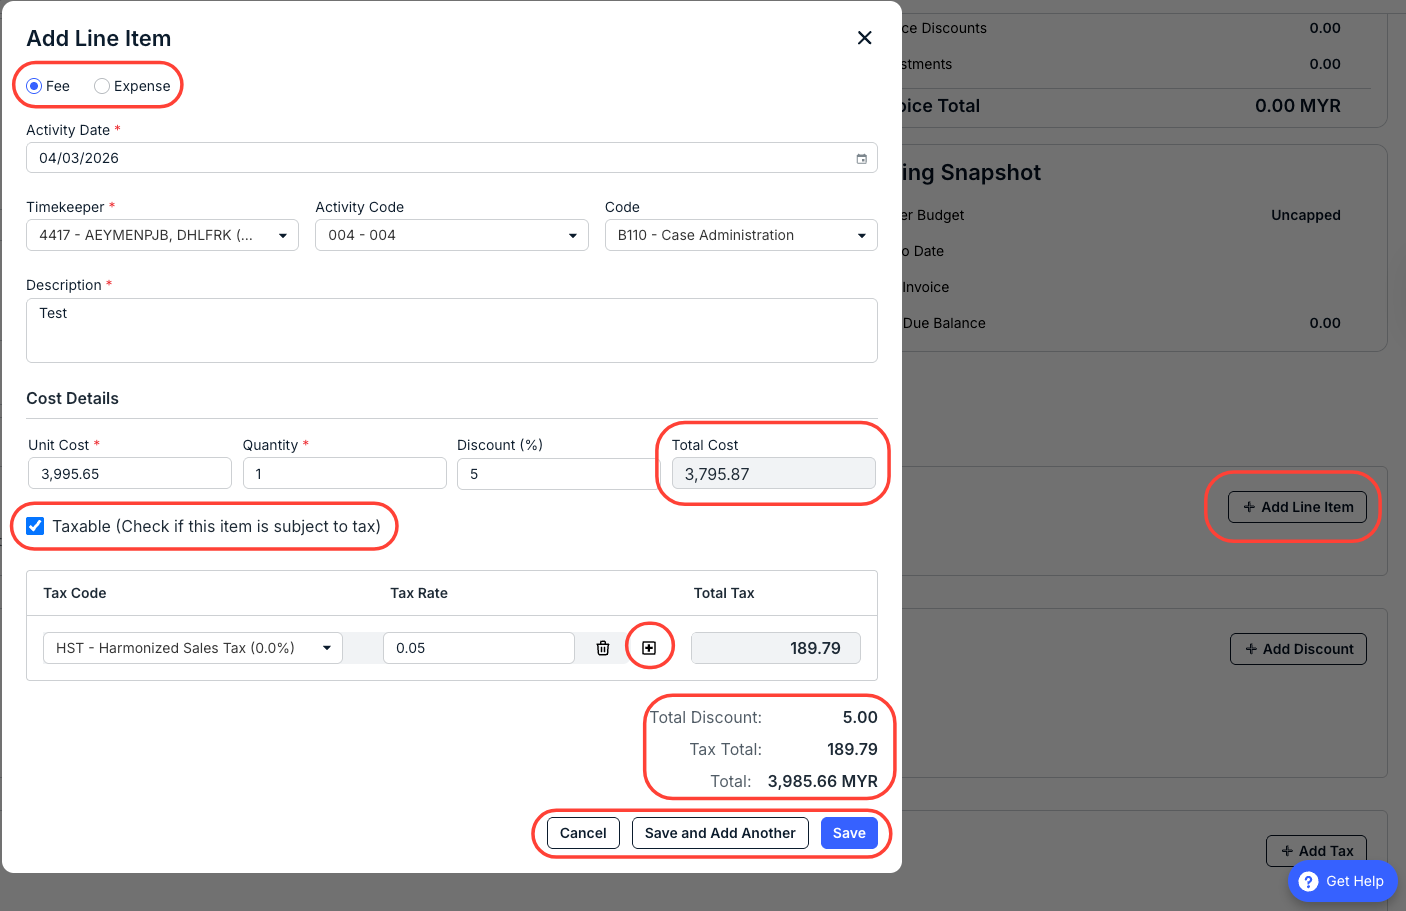
Click Add Line Item to add either a Fee or an Expense. For a Fee, there is:
- Activity Date
- Timekeeper (drop-down menu
- Activity Code (drop-down menu)
- Code (drop-down menu)
- Description
- Cost Details, including Unit Cost, Quantity, and Discount ^%. Note that the Total Cost will continually update.
Fields marked with an asterisk (*) are mandatory.
Click on the Taxable box if the item is subject to tax. If so, you'll have to add in the Tax Code and Tax Rate. Click the +(Plus) button to add another tax row or the Trash button to remove the tax line. The Total Tax box will continually update.
You'll see the Totals calculate at the bottom of the screen. Click on Save to save the Line Item, Save and Add Another to add another line item, or Cancel to back out.
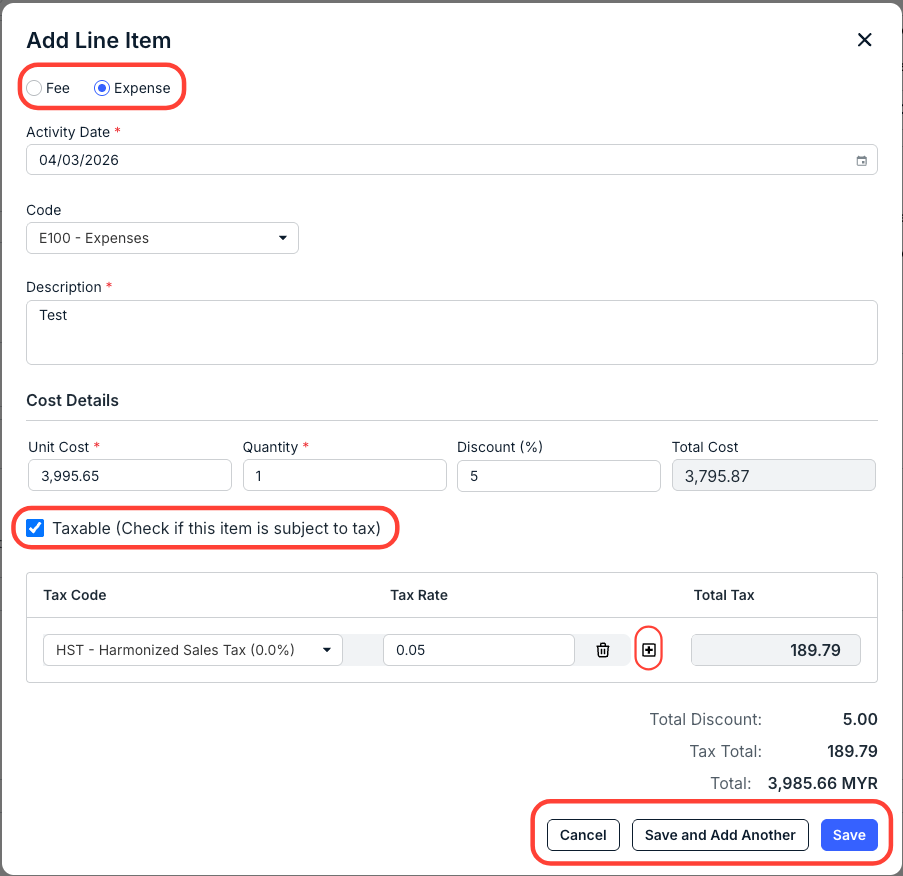
For an Expense, there is:
- Activity Date
- Code (drop-down menu)
- Description
- Cost Details, including Unit Cost, Quantity, and Discount ^%. Note that the Total Cost will continually update.
Fields marked with an asterisk (*) are mandatory.
Click on the Taxable box if the item is subject to tax. If so, you'll have to add the Tax Code and Tax Rate. Click the +(Plus) button to add another tax row or the Trash button to remove the tax line. The Total Tax box will continually update.
You'll see the Totals calculate at the bottom of the screen. Click on Save to save the Line Item, Save and Add Another to add another line item, or Cancel to back out.
Once you've finished adding in your Line Items, note that the totals will update within the panel.

- Fill out any Invoice Discounts.
Click the up/down arrows next to Invoice Discounts to show details of any discounts included.

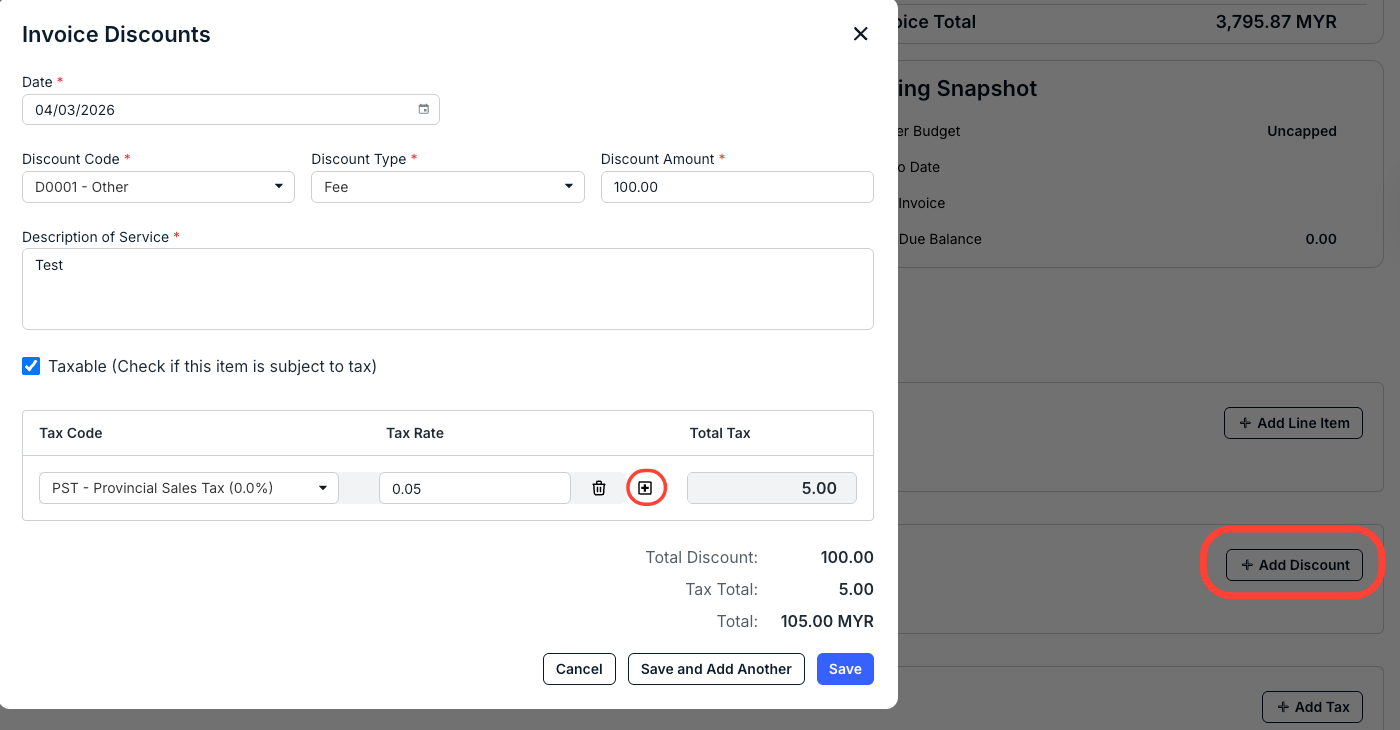
Click Add Discount to add a discount to the invoice. There is:
- Date
- Discount Code (drop-down menu
- Discount Type (drop-down menu)
- Discount Amount
- Description of Service
Fields marked with an asterisk (*) are mandatory.
Click on the Taxable box if the item is subject to tax. If so, you'll have to add the Tax Code and Tax Rate. Click the +(Plus) button to add another tax row or the Trash button to remove the tax line. The Total Tax box will continually update.
You'll see the Totals calculate at the bottom of the screen. Click on Save to save the Line Item, Save and Add Another to add another line item, or Cancel to back out.
Once you've finished adding in your Invoice Discounts, note that the totals will update within the panel.

- Fill out any Invoice Taxes.
Click the up/down arrows next to Invoice Taxes to show details of any taxes included.

Click Add Tax to add a tax to the invoice. There is:
- Date
- Description of Service
- Tax Code
- Quantity
- Amount
Fields marked with an asterisk (*) are mandatory. You'll see the Totals calculate at the bottom of the screen. Click on Save to save the Line Item, Save and Add Another to add another line item, or Cancel to back out.
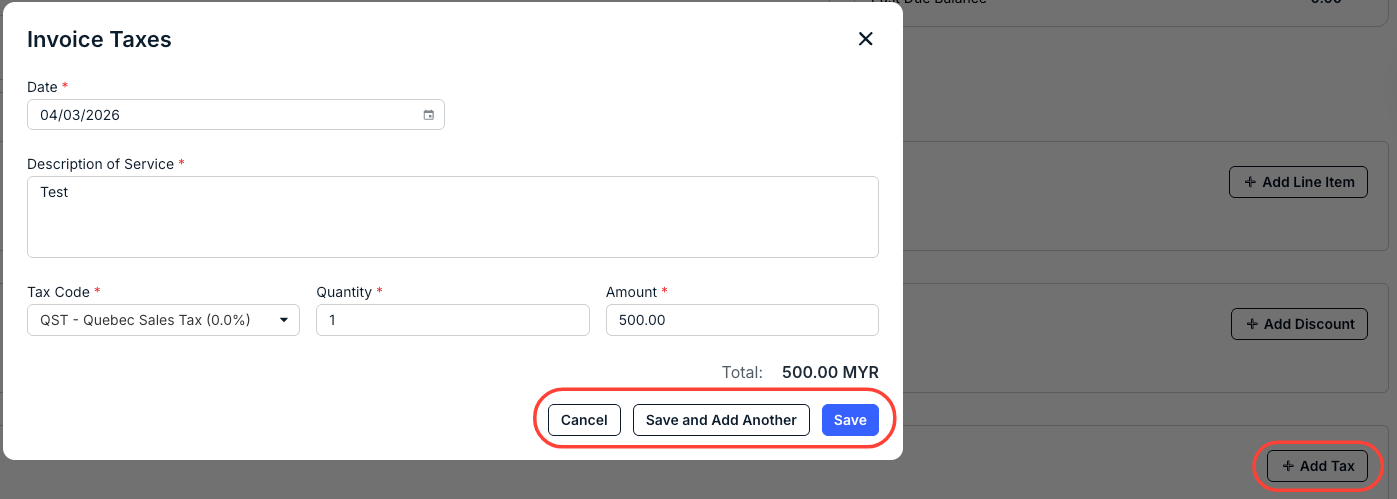
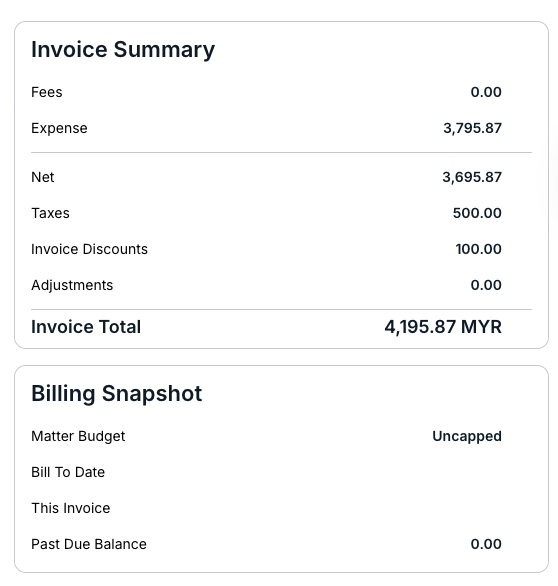
Once you've finished adding in your Taxes, note that the totals will update within the panel.

- Note that the Invoice Summary and Billing Snapshot screens will update with the added information.
- Fill out the Invoice Details screen.
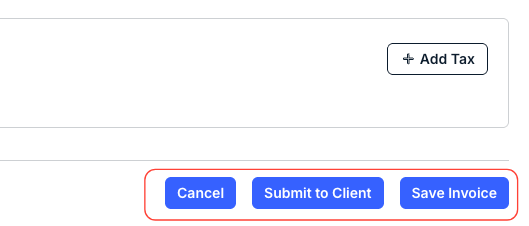
- Hit "Submit to Client" to send the invoice in.
Note that you can also click on Save Invoice to save the invoice for later work, or click Cancel to back out.
When sending the invoice, ensure a status of Pending Approval to confirm successful submission to your client. If the invoice fails, it was not submitted and you will need to correct the errors listed and then reattempt submission.
- You can see the invoice details on the main Invoice List screen.
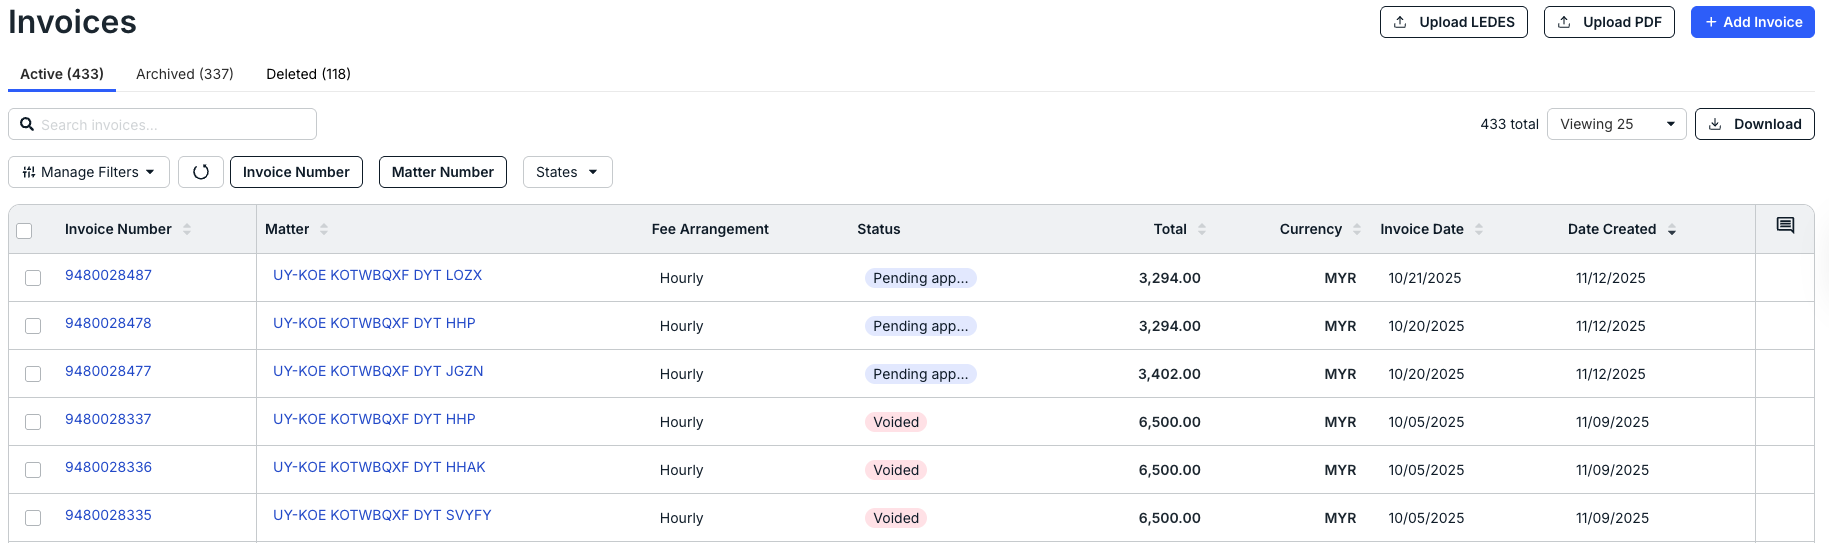
- You can see the invoice details on the main Invoice List screen.
Uploading a LEDES File to Counsel Exchange for OnitX
Here's how to upload a LEDES invoice file in Counsel Exchange:
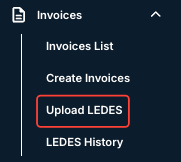
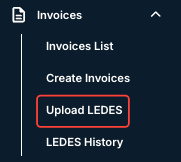
- Go to the Invoices section in the left-hand menu and click Upload Ledes.
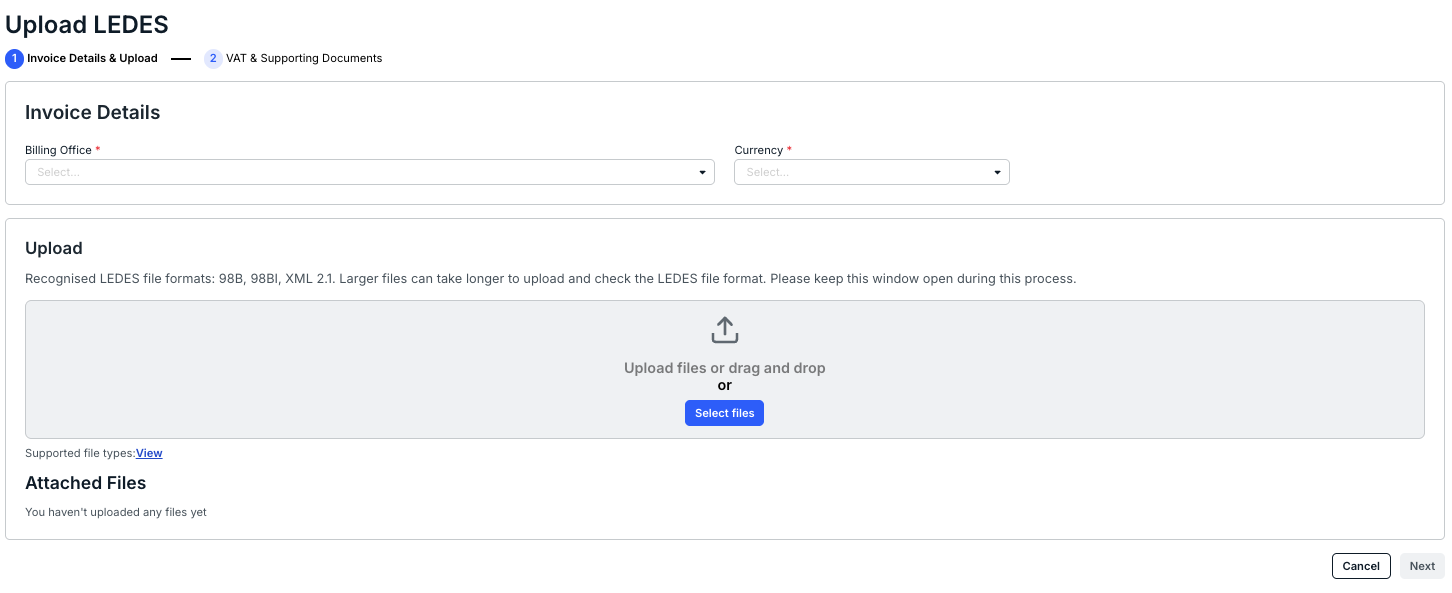
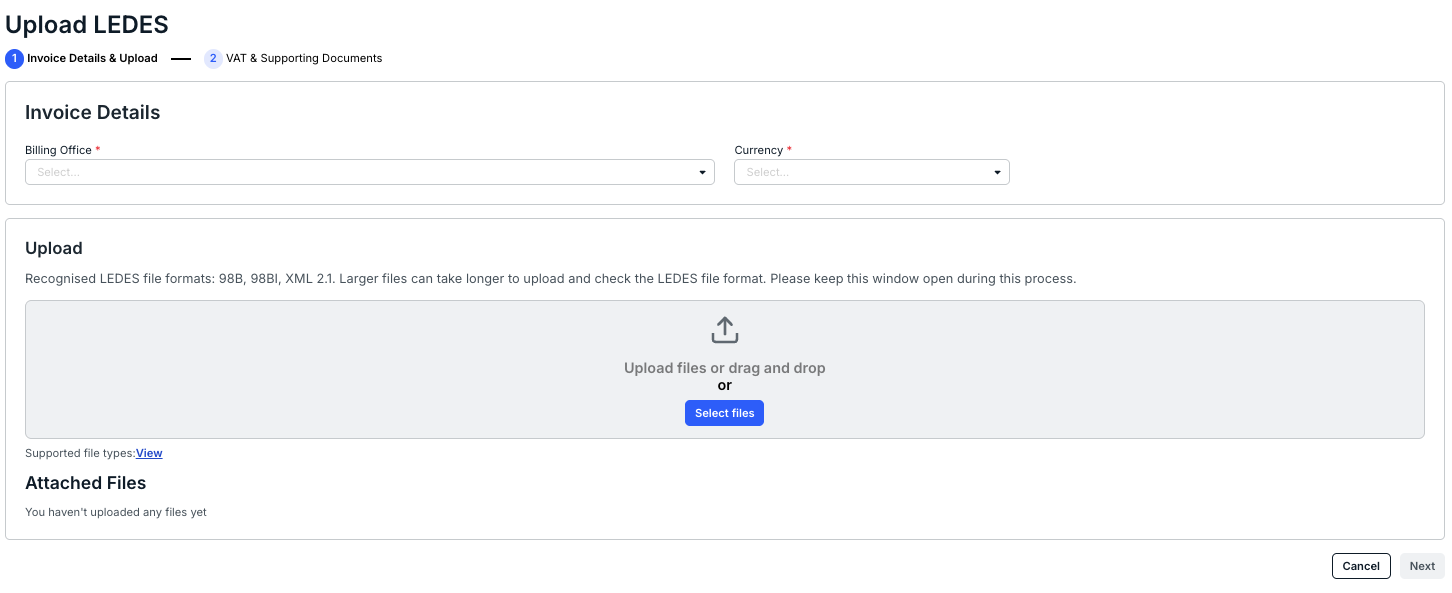
- Fill out the Invoice Details & Upload screen.
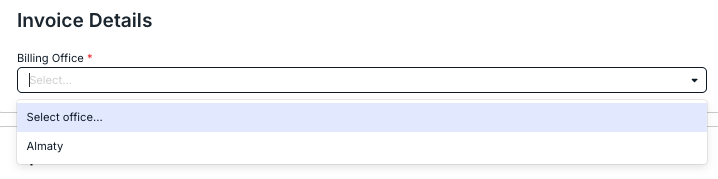
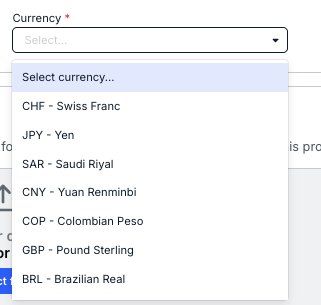
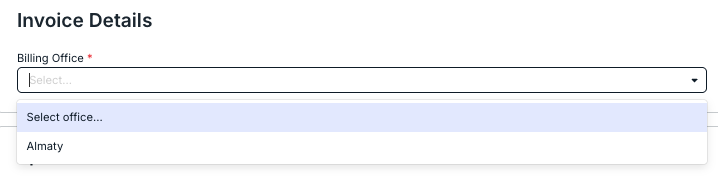
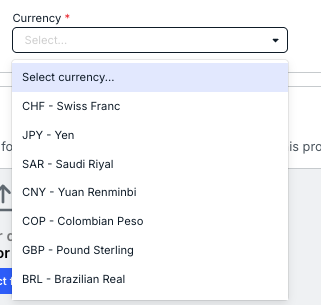
- Select the Billing Office and Currency from the drop-down menu.
- Upload the LEDES file.
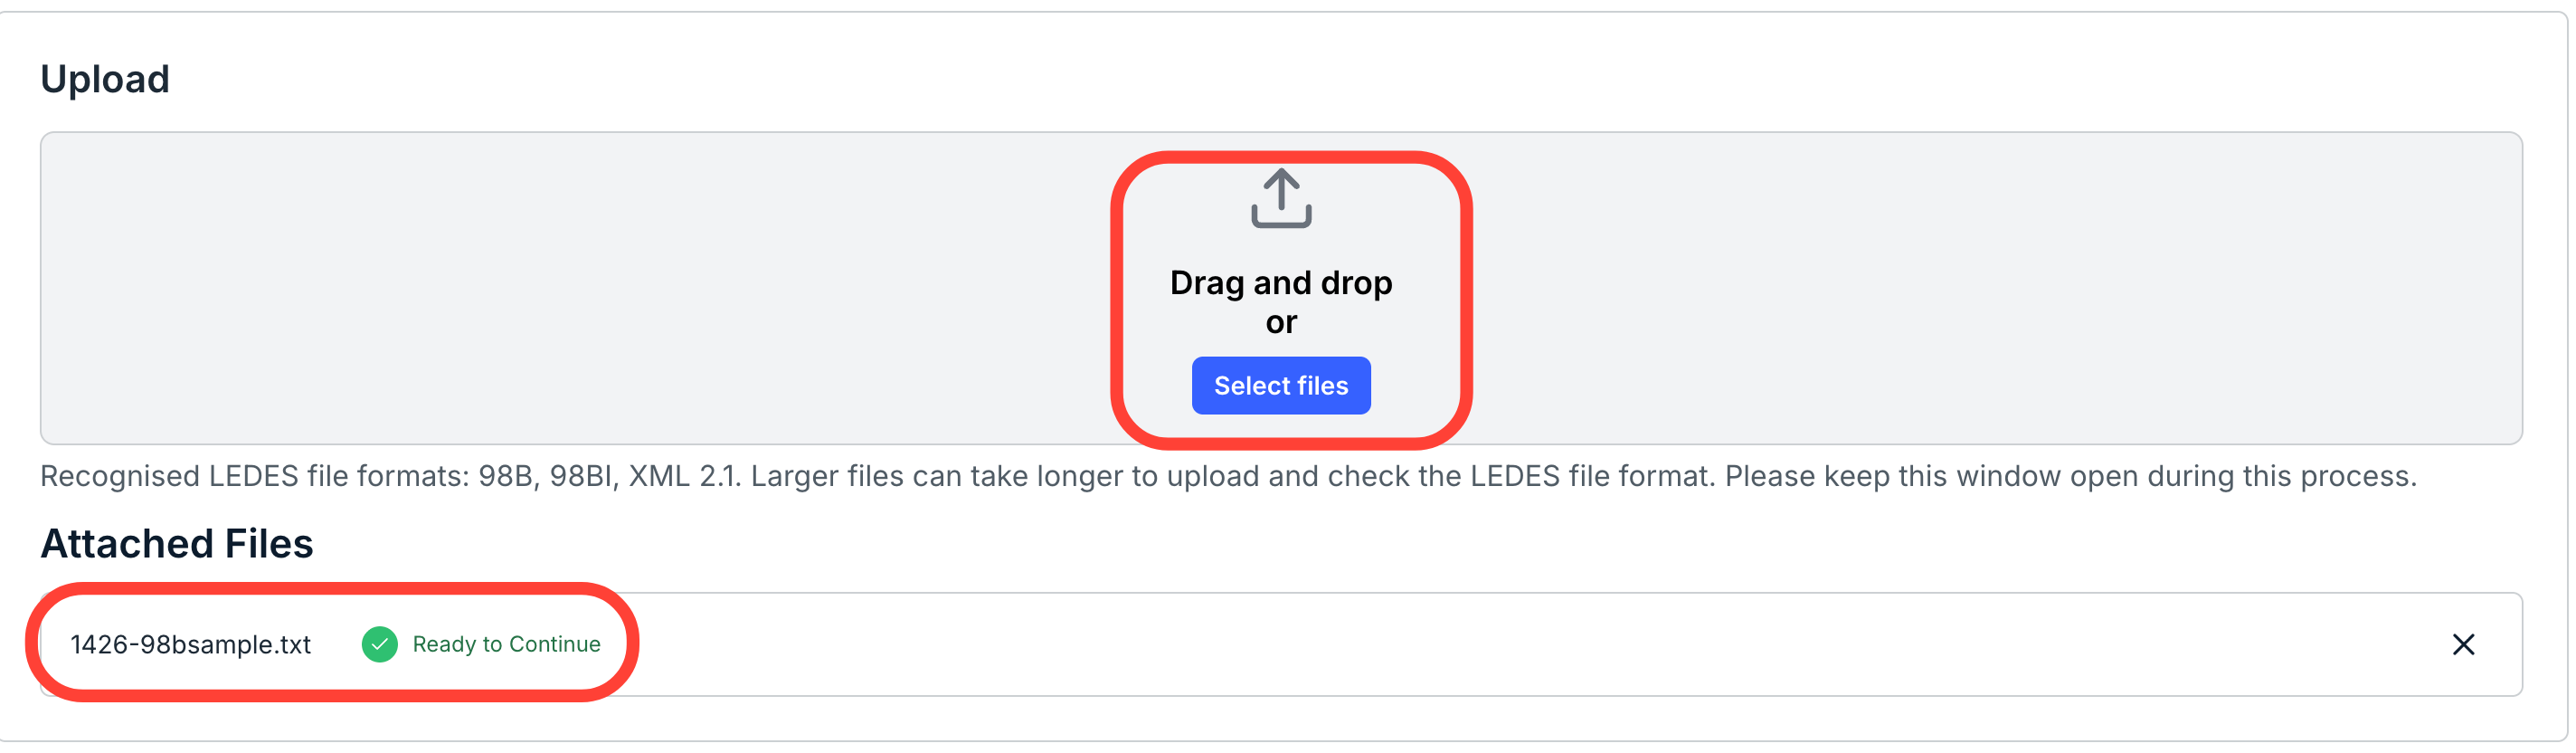
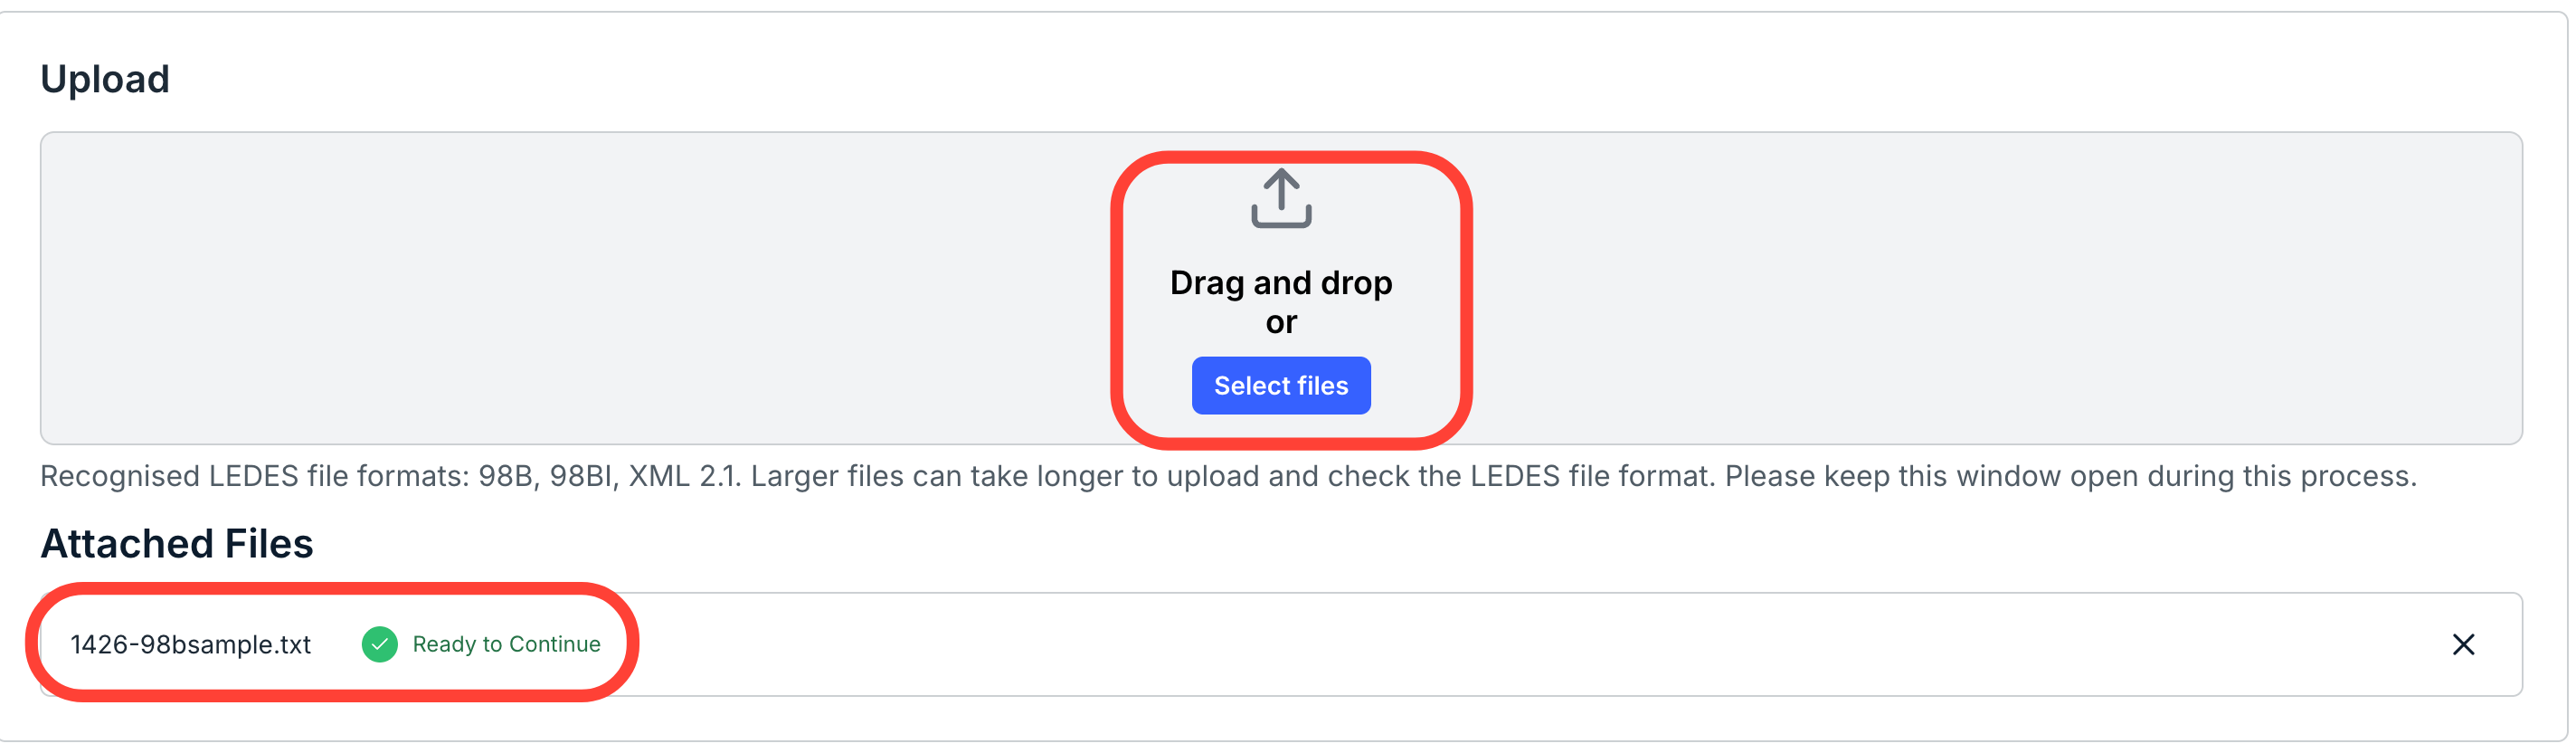
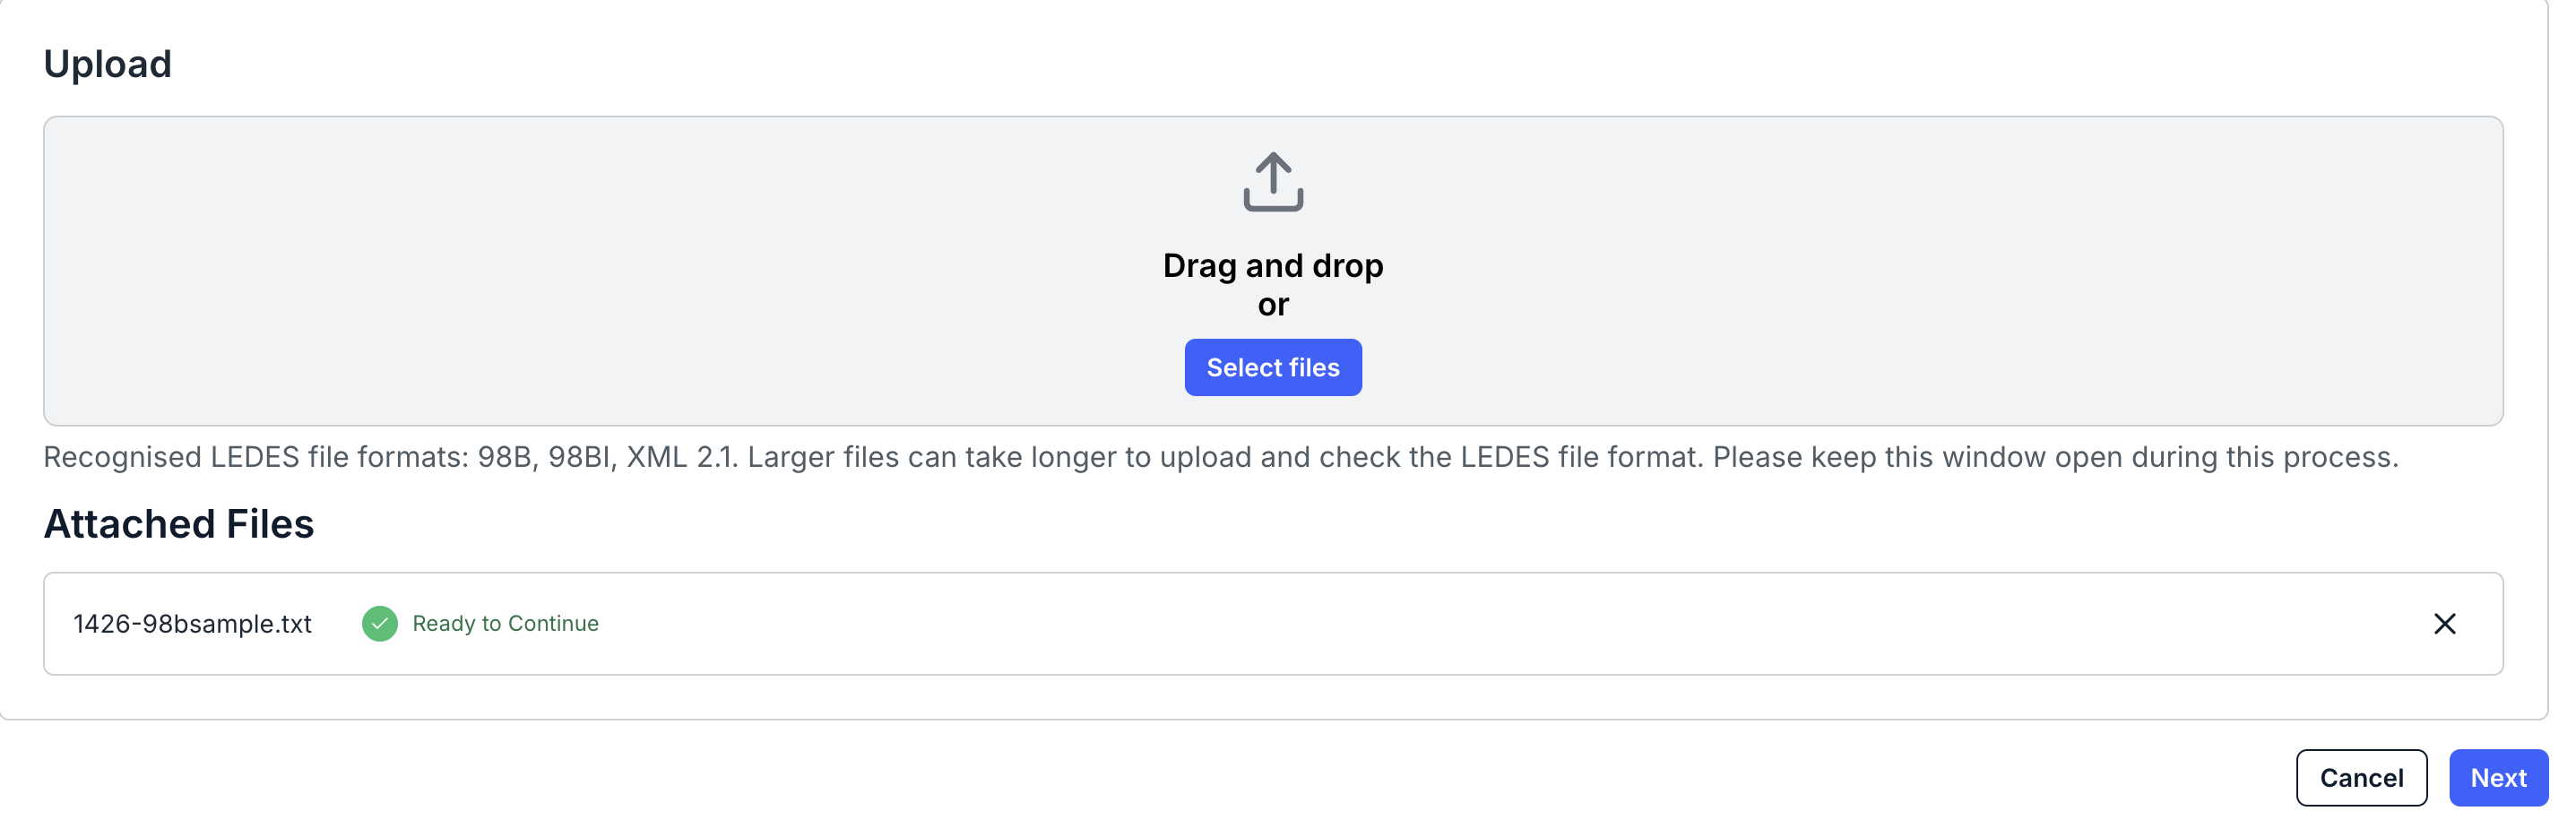
You can either drag-and-drop the LEDES file or click Select Files to find and upload the file. Supported files include: 98B, 98BI, and XML 2.1 (XML coming soon). Larger files can take longer to upload and check the LEDES file format. Please keep this window open during this process.
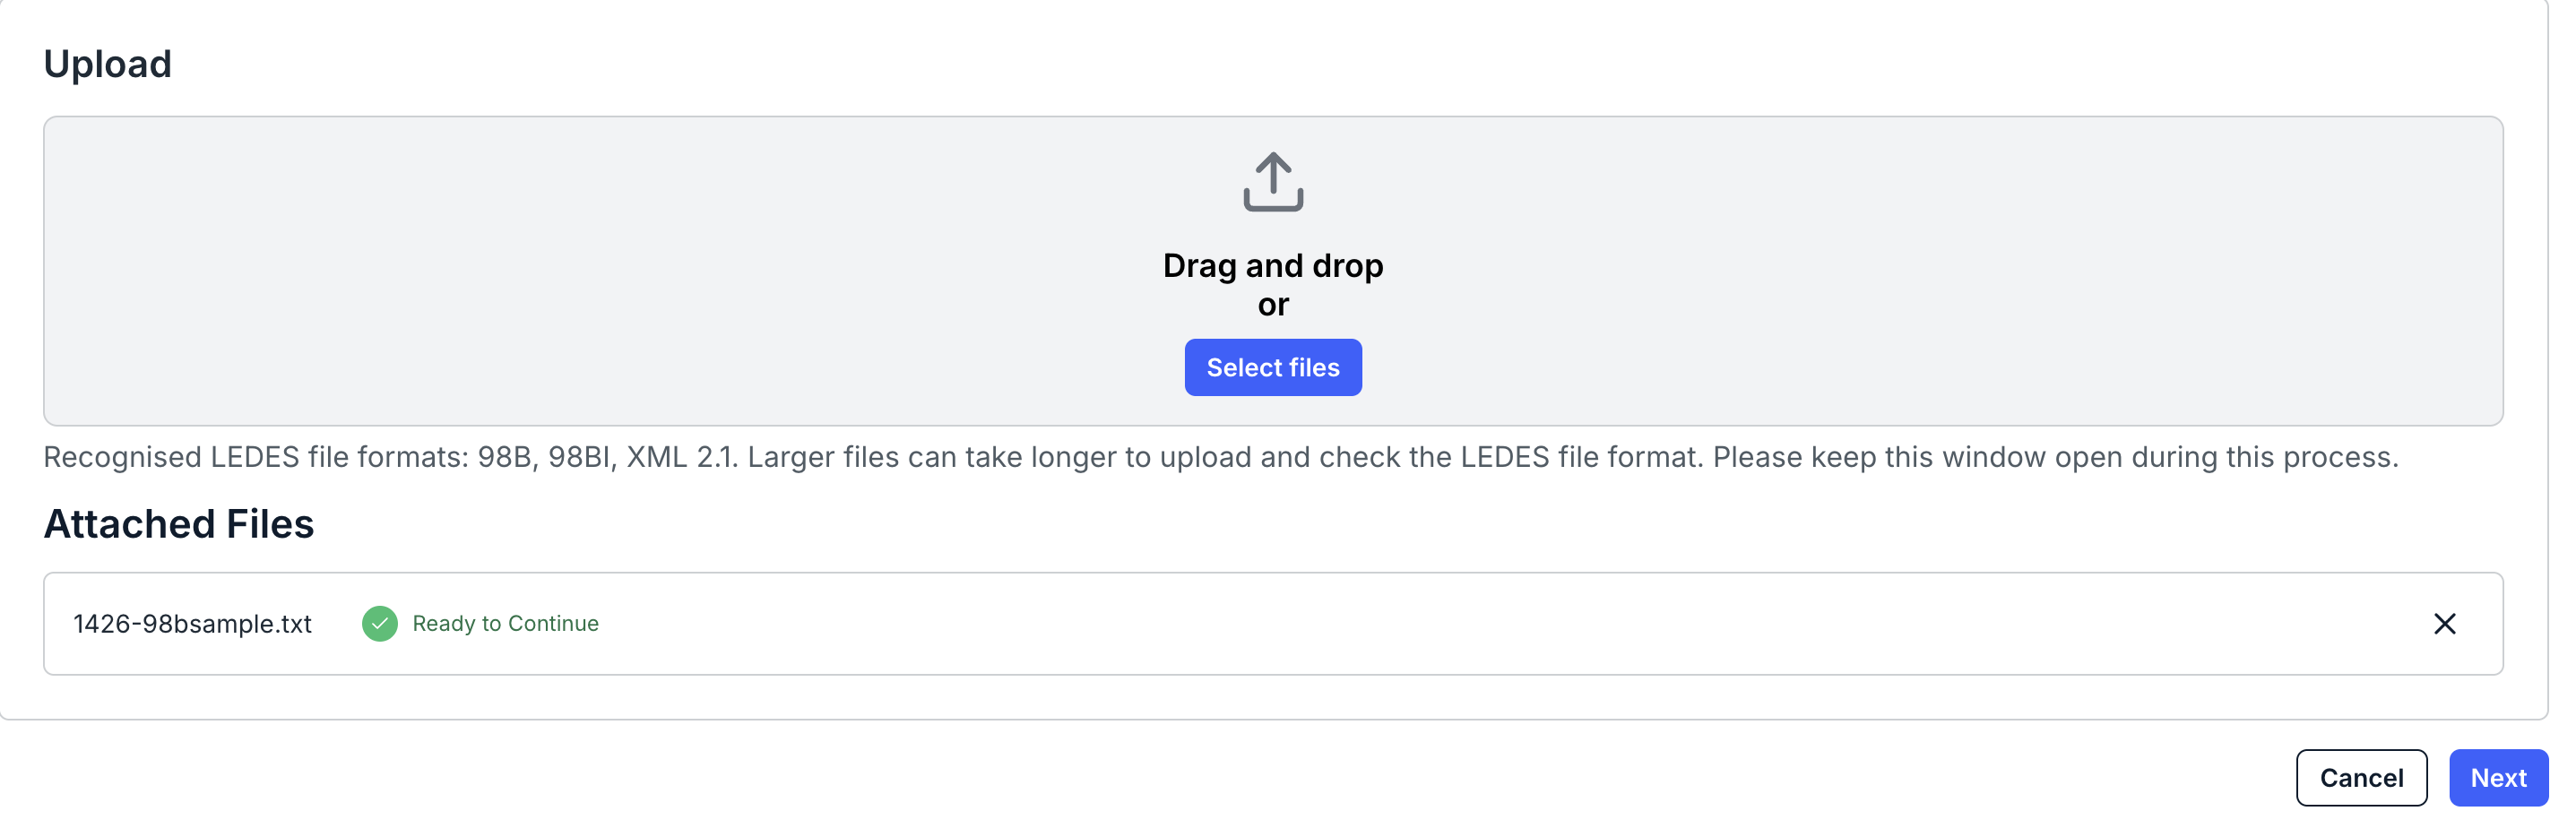
A successful LEDES upload will appear in the Attached Files section with the Ready to Continue message. Click the X to remove the upload.
Unsuccessful LEDES uploads will show a Critical Error message. Toggle Show Details to see the details of the error. Resolve the error and re-upload the file.


- When you're ready to upload the file, click on Next.
You can also click on "Cancel" to back out.
- Select the Billing Office and Currency from the drop-down menu.
- Fill out the VAT & Supporting Documents Screen.
Select the invoices that include VAT and add appropriate attachments.
You can toggle Save/Submit, Link to a Related Invoice from the drop-down menu, and Upload any appropriate attachments.

- Click on Submit to finish uploading the LEDES file.
You can also click on Cancel to back out. Click Previous to go to the prior screen.

The invoice will appear in the main Invoice directory.
- Click on Submit to finish uploading the LEDES file.




Viewing LEDES History
To view the LEDES history, click on the LEDES History link under the Invoices menu.
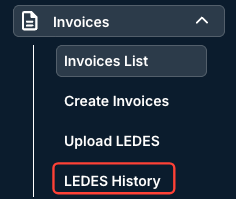
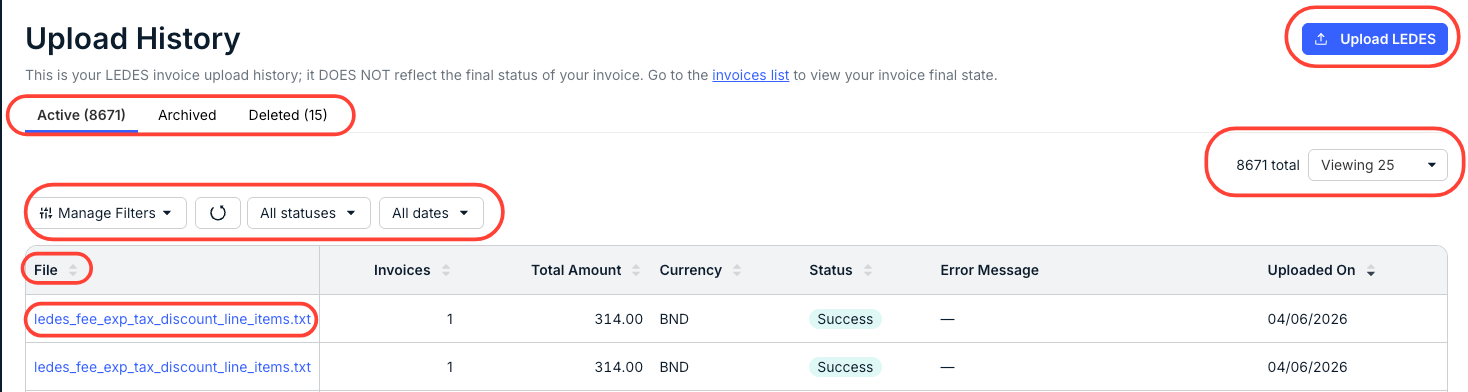
There, you'll see a full Upload History. This shows your LEDES invoice upload history; it doesn't reflect the final status of your invoice. Go to the invoices list to view your invoice's final state.
On this page, you can:
- Toggle between Active, Archived, and Deleted LEDES uploads.
- Use the Manage Filters, All Statuses, All Dates, and Viewing drop-down menus to customize exactly what you'd like to see on the screen. You'll also see a Total of all the LEDES files uploaded.
- View a directory of uploads with key details, including File Name, Invoices amount, Total Amount, Currency, Status, any Error Message (if there is one), and an Uploaded On date.
- Click on any linked LEDES file to download it to your computer.
- Directly Upload LEDES files (view the above directions for more information)
Submitting a New Client Timekeeper Rate in Counsel Exchange for OnitX
Here's how to submit a new timekeeper rate within Counsel Exchange:
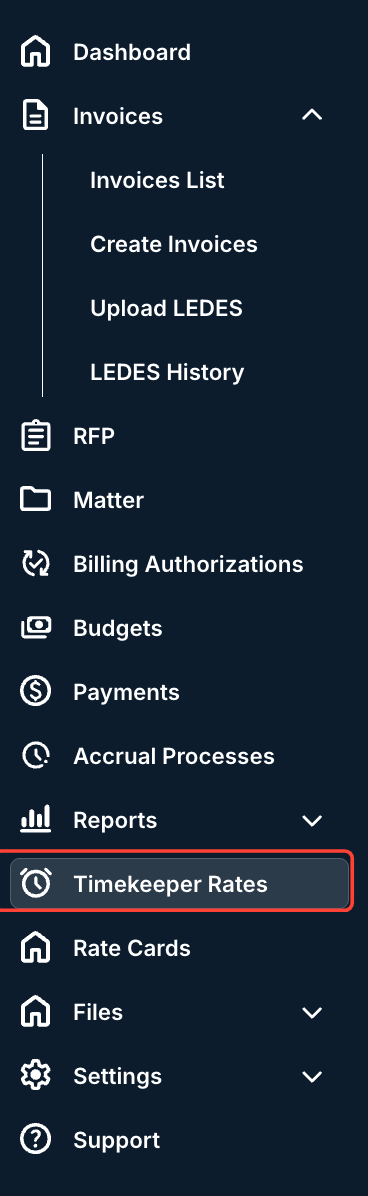
- Navigate to the Timekeeper Rates selection on the left-hand side menu.
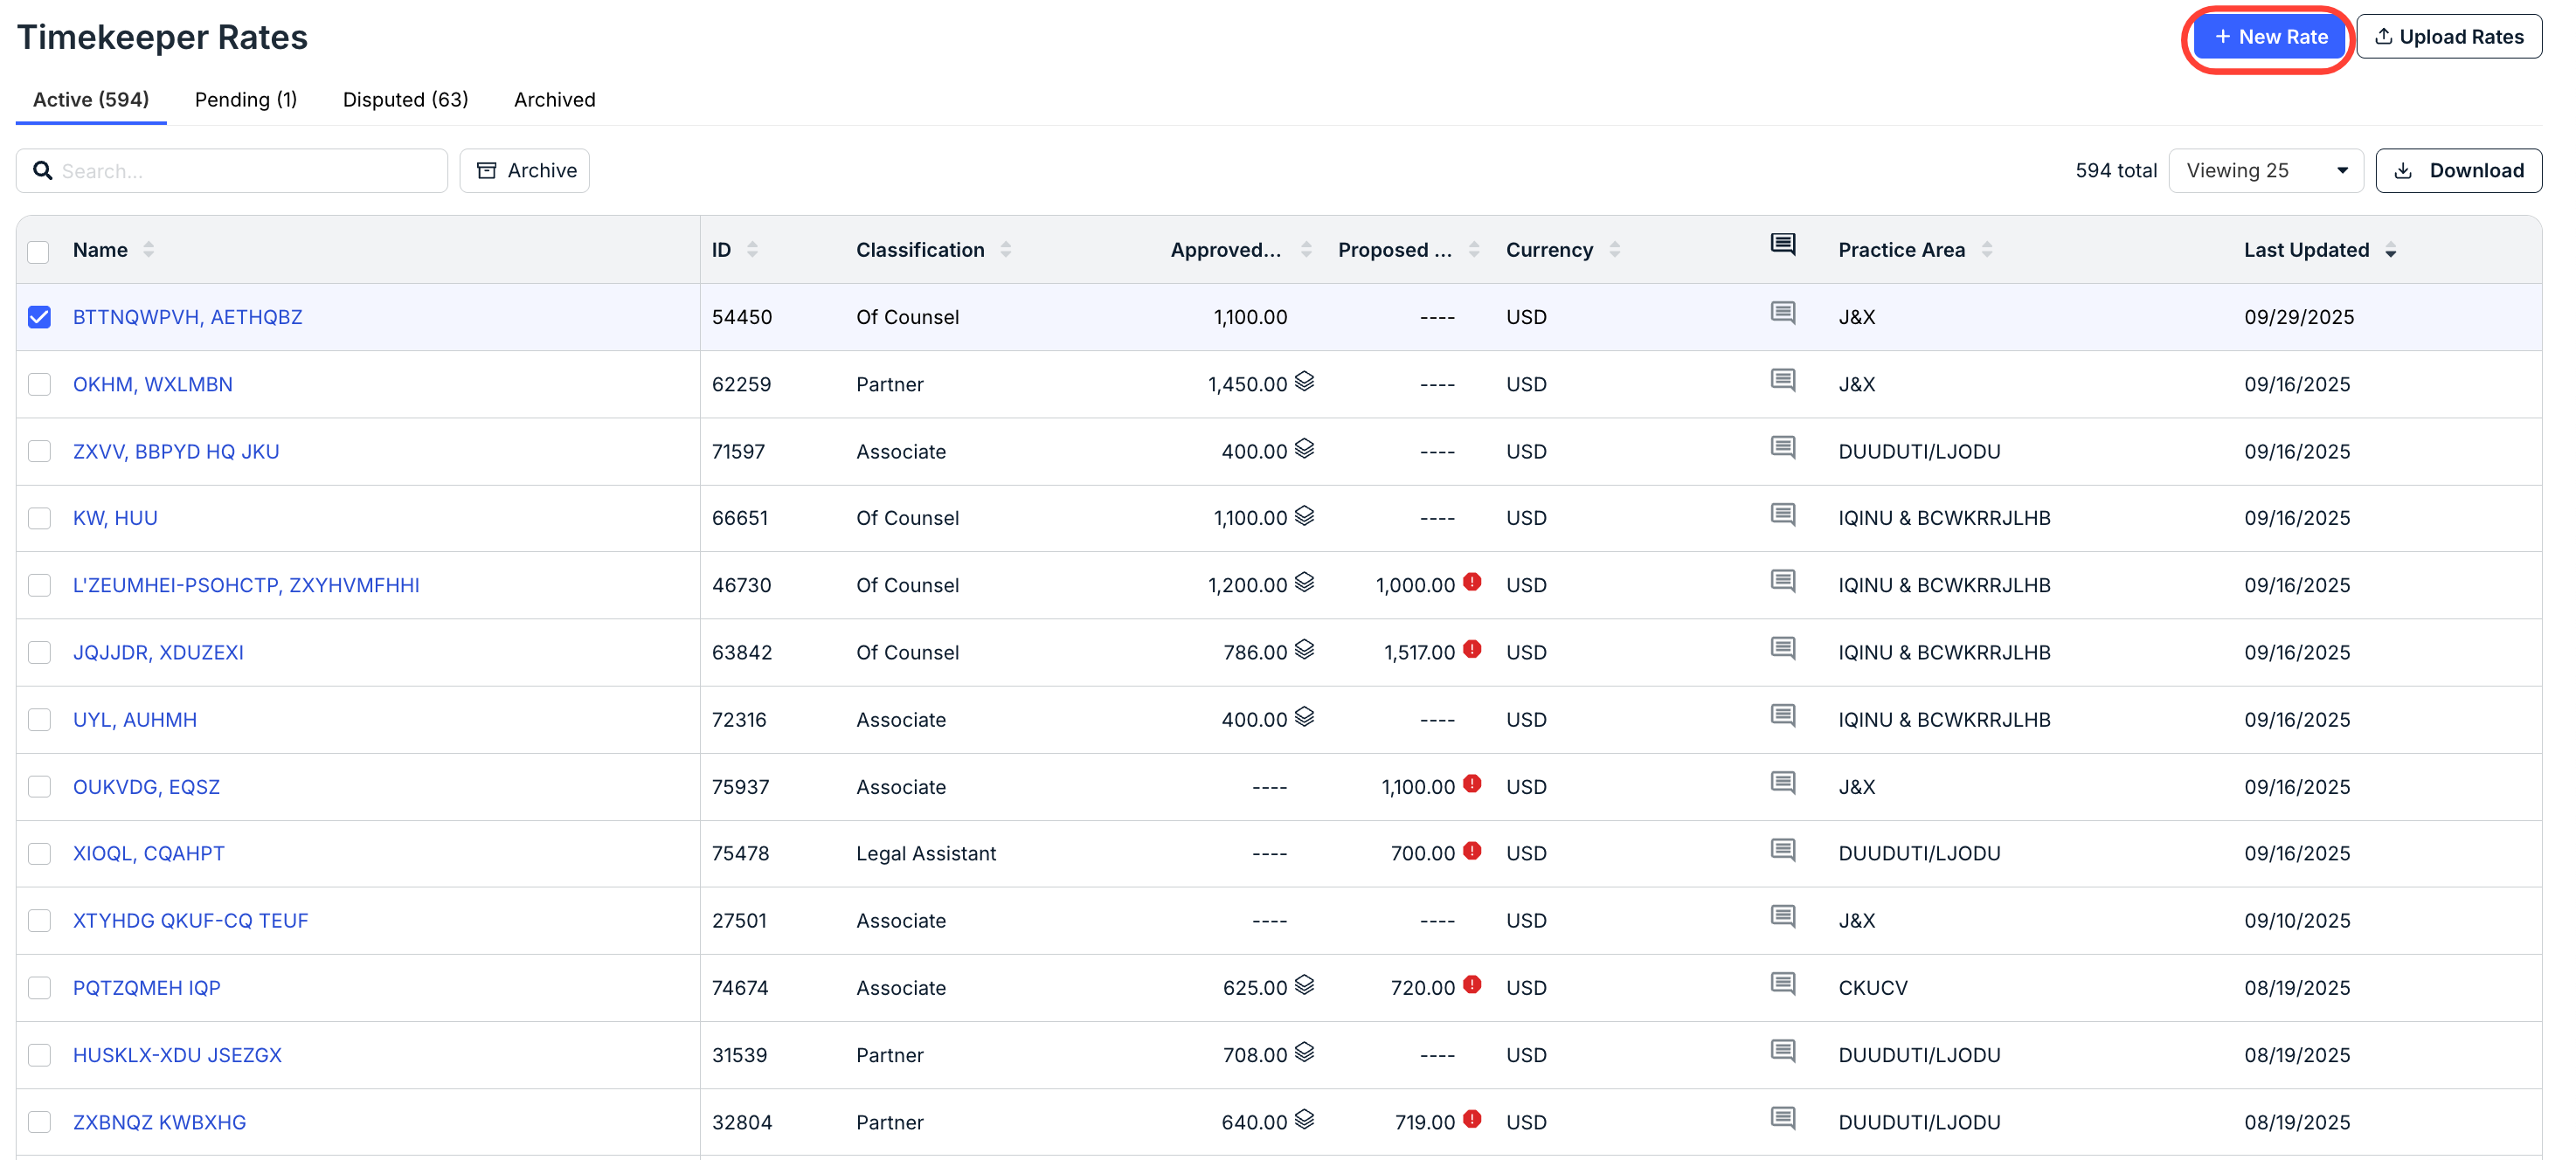
- On the main Timekeeper Rates page, you'll see the directory of all the current timekeeper rates.
Here, you can toggle between Active, Pending, Disputed, and Archived rates.
Here's what these statuses mean:
- Active: Approved by the client.
- Pending: Yet to be approved by the client.
- Disputed: Disputed by the client; you'll have to edit and submit these rates.
- Archived: Archived in master settings.
The directory will show key information about timekeeper rates, including Name, ID, Classification, Approved Rate, Proposed Rate, Currency, any Comments, Practice Area, and the date Last Updated. Use the up/down arrow next to each column to sort by this information. You can also click on the Viewing bar to determine just how many records you want to see on the screen.
Use the Search bar to find timekeeper rates. You can also use the checkbox next to each name (or the top checkbox to select all rates) and click Download to download key information.
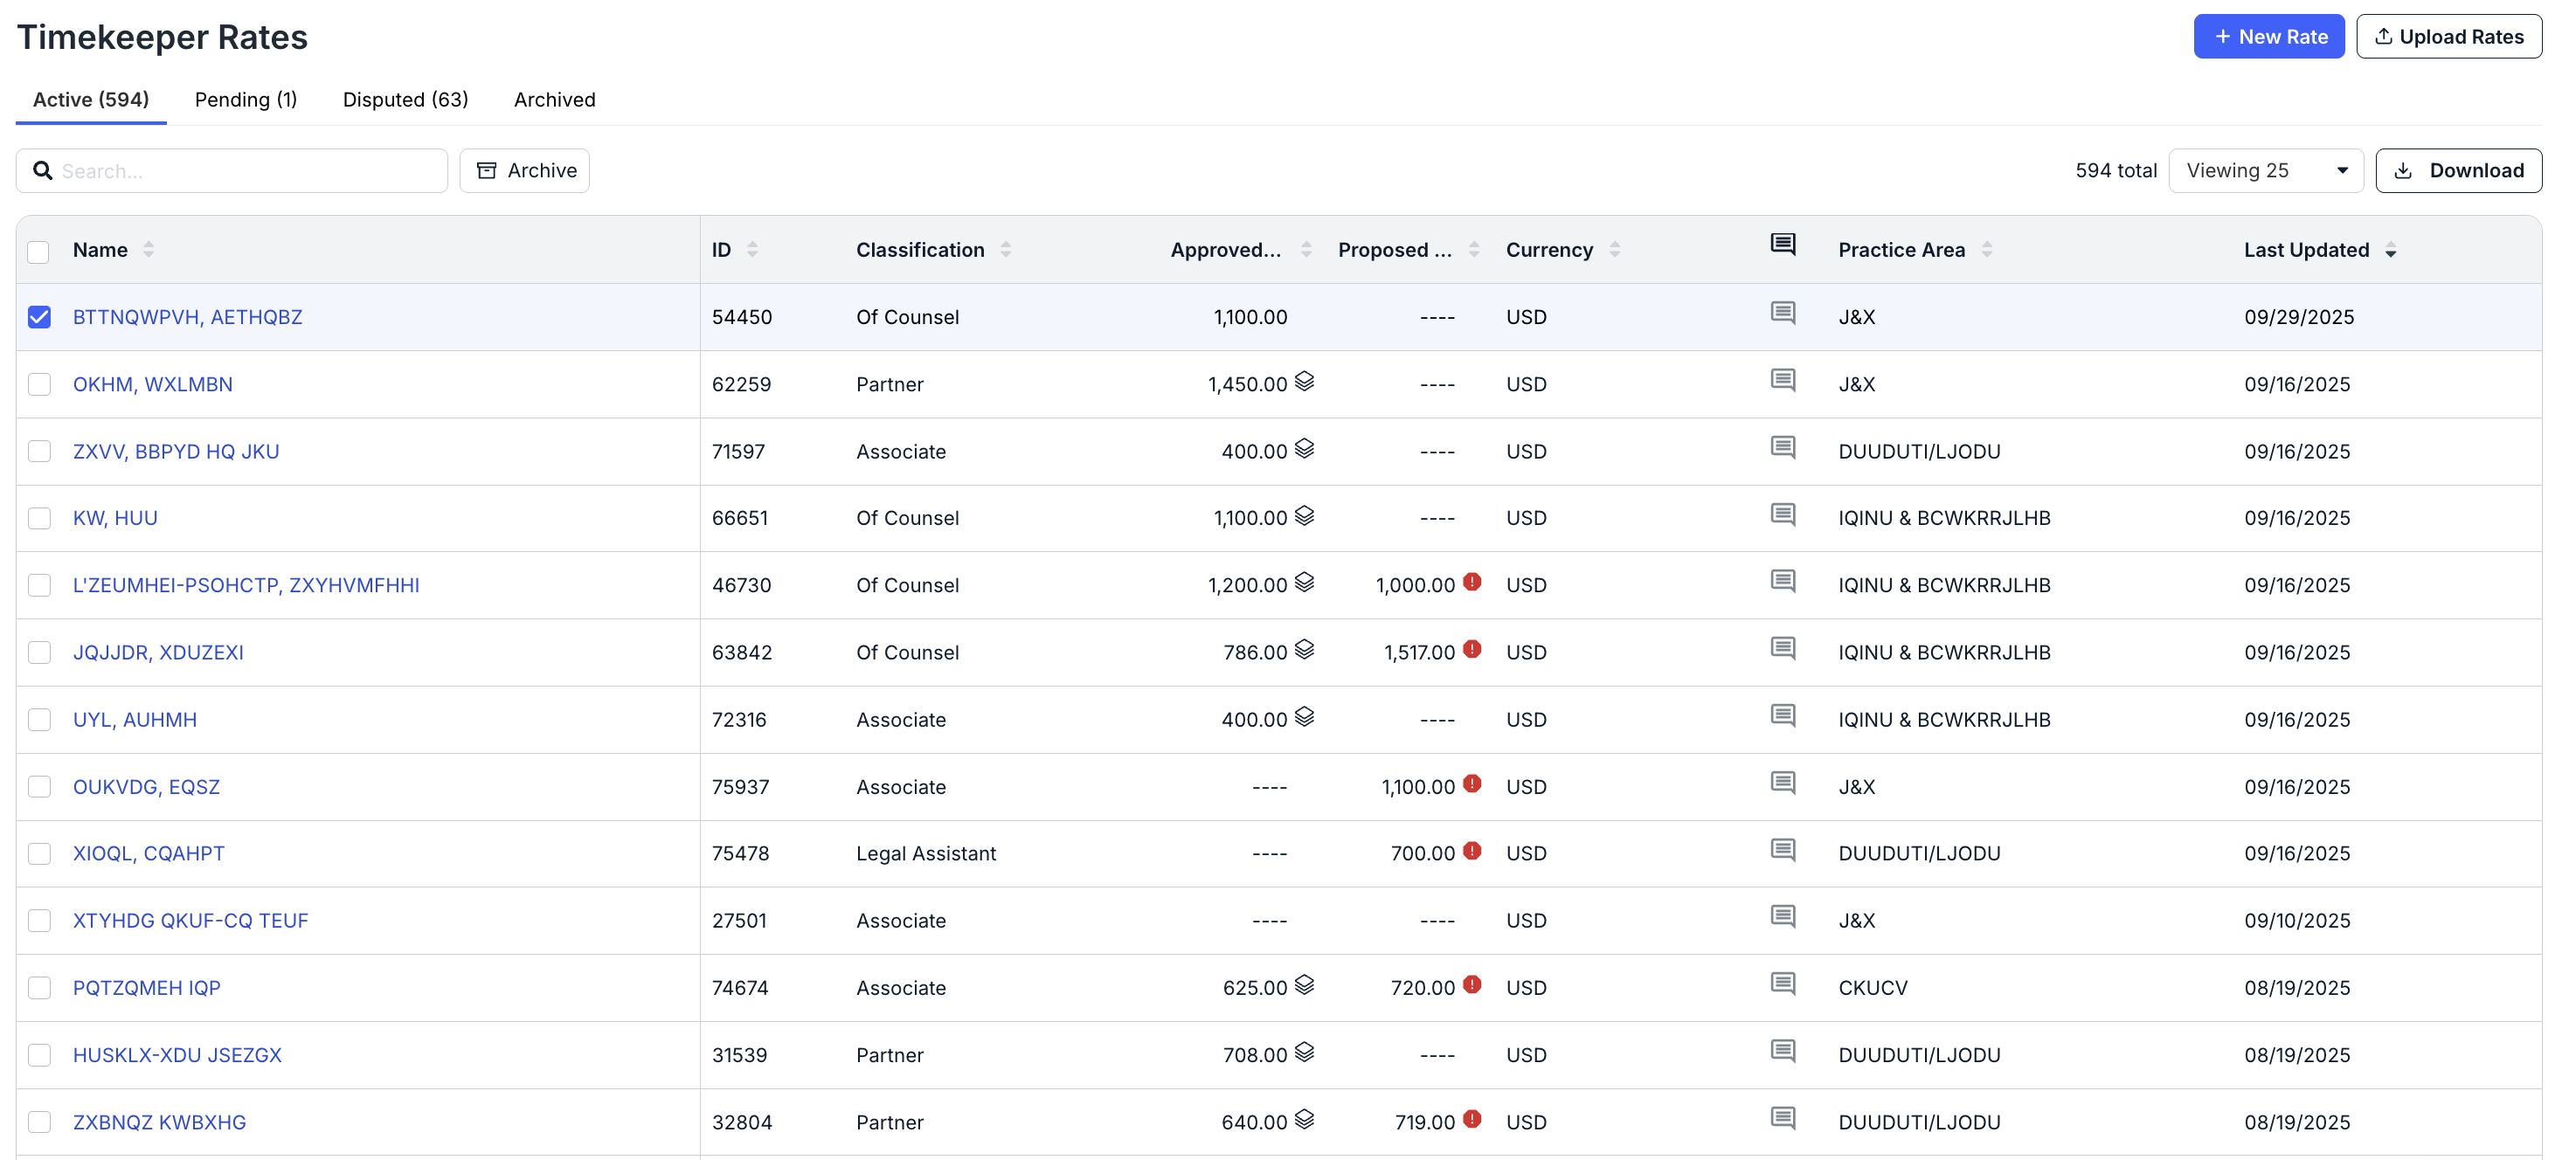
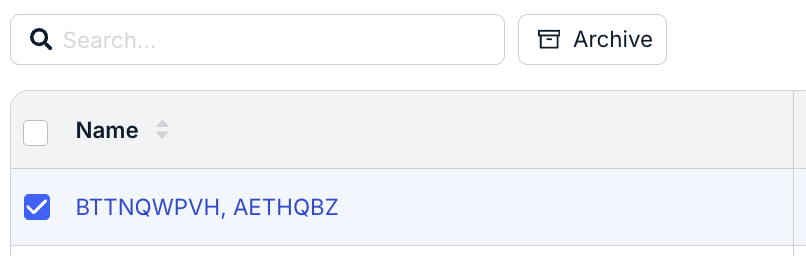
If you'd like to archive a rate or rates,click the check box next to the rate(s), and the Archive button will appear.
- On the main Timekeeper Rates page, you'll see the directory of all the current timekeeper rates.
- Click on New Rate to add a new rate to the system.
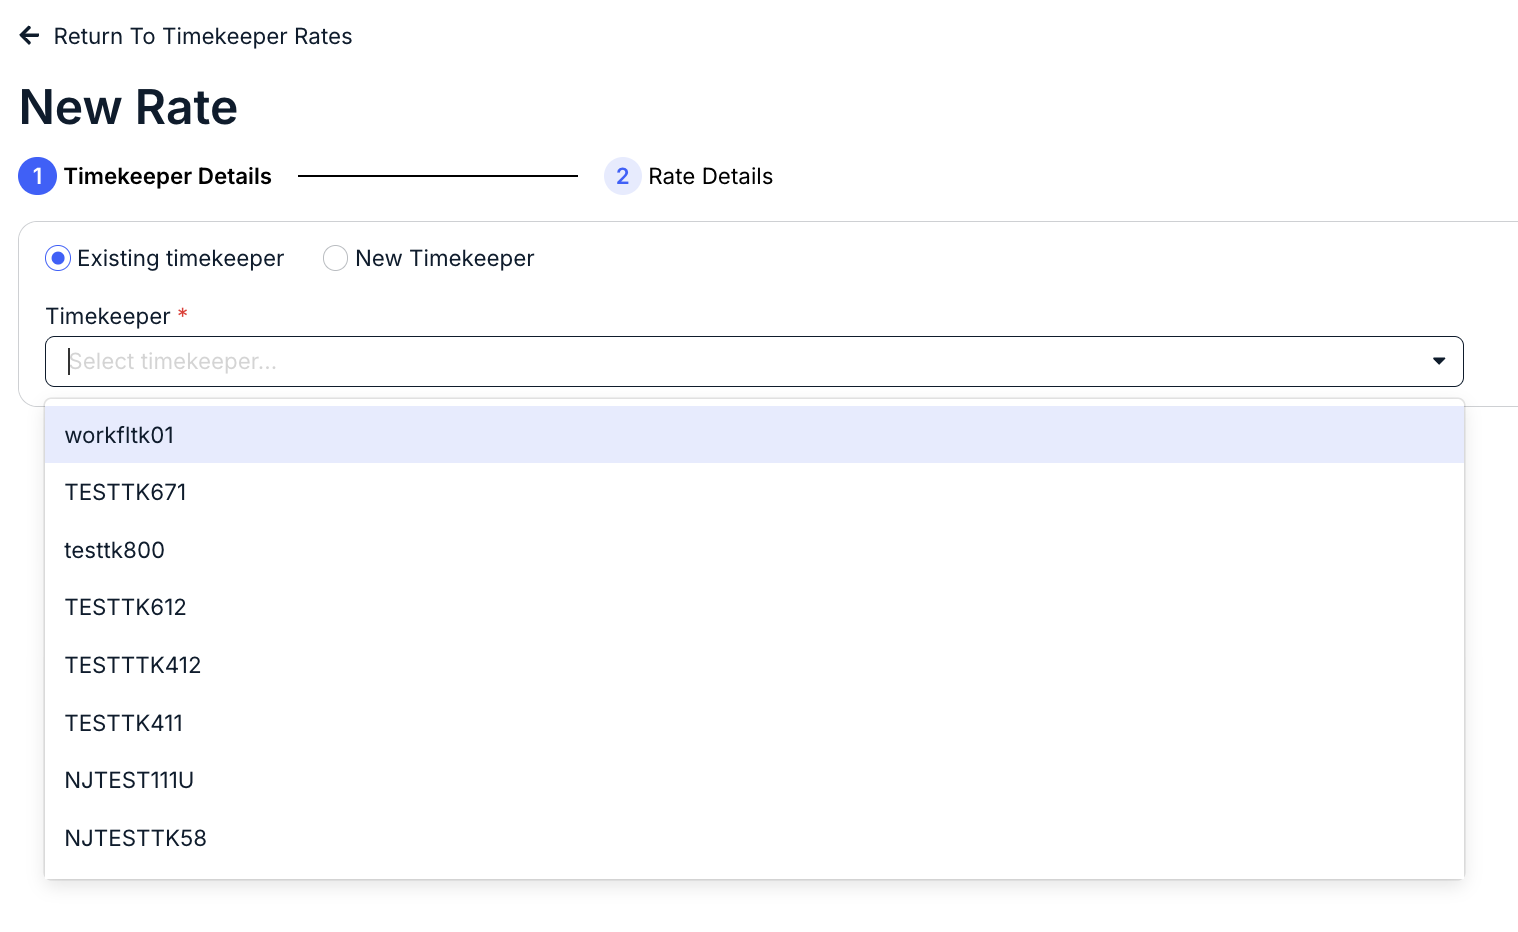
- You'll see the New Rate screen appear.
For an existing timekeeper, select the timekeeper from the drop-down menu.
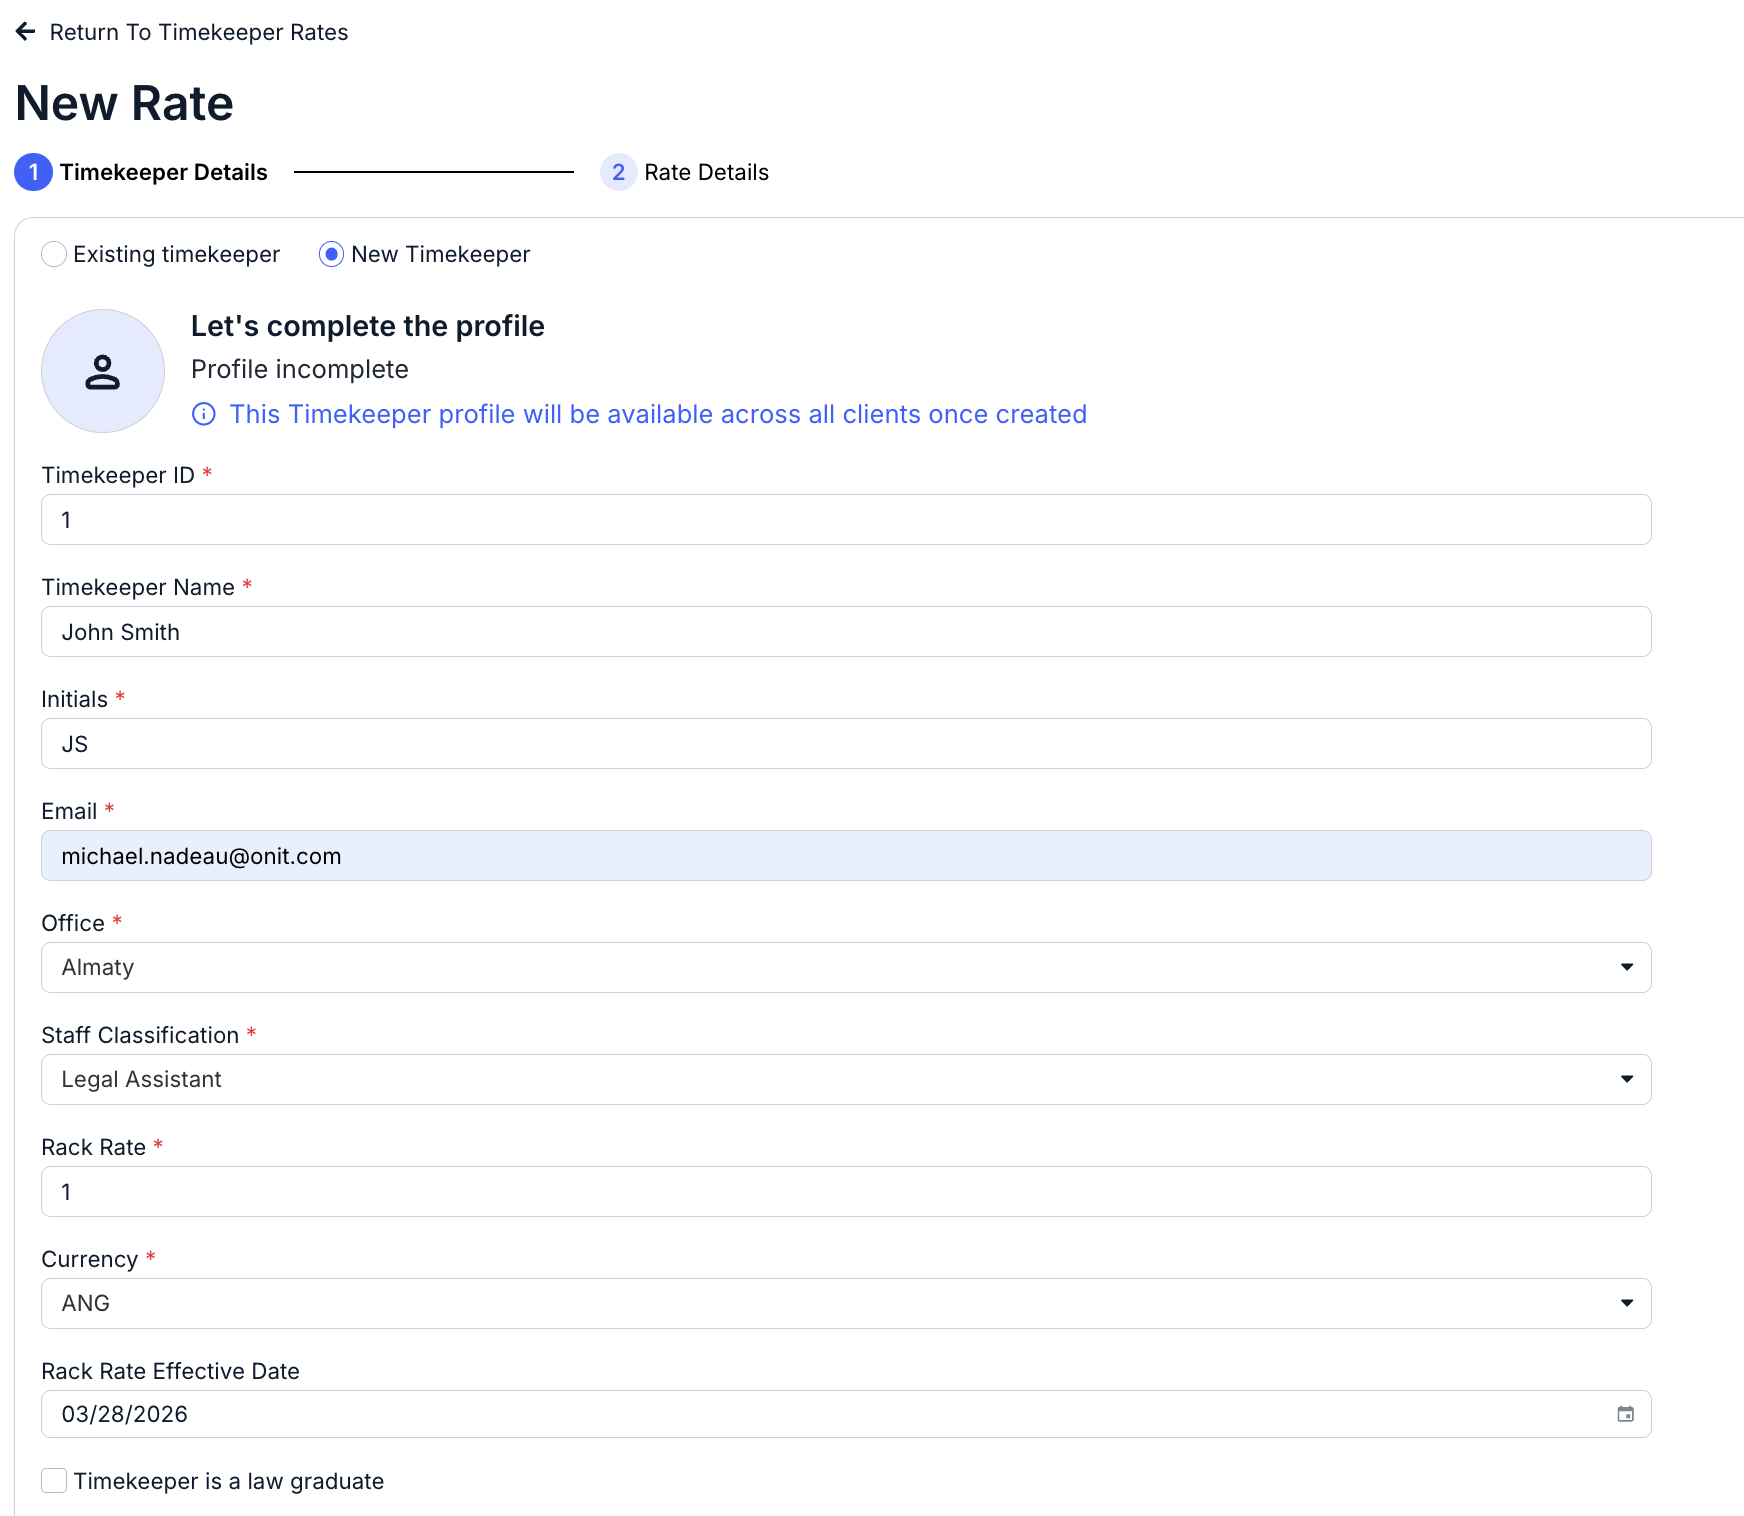
For a New Timekeeper, click on the New Timekeeper button. You'll have to fill out the:
- Timekeeper ID
- Timekeeper Name
- Initials
- Office (drop-down menu)
- Staff Classification (drop-down menu)
- Rack Rate
- Currency (drop-down menu)
- Rack Rate Effective Date
- Whether the Timekeeper is a law graduate or not (check box); note that if you check this box, the Graduation Year box will appear as an option.
- Year Bar Passed date
- First Practiced date
- Practice Area (drop-down menu)
- Profile Link
- Resume (upload)
- Bio
- Gender (drop-down menu)
- Race/Ethnicity (drop-down menu)
- Disability status (drop-down menu)
- LGBTQ+ status (drop-down menu)
Note that fields with an asterisk (*) are mandatory.
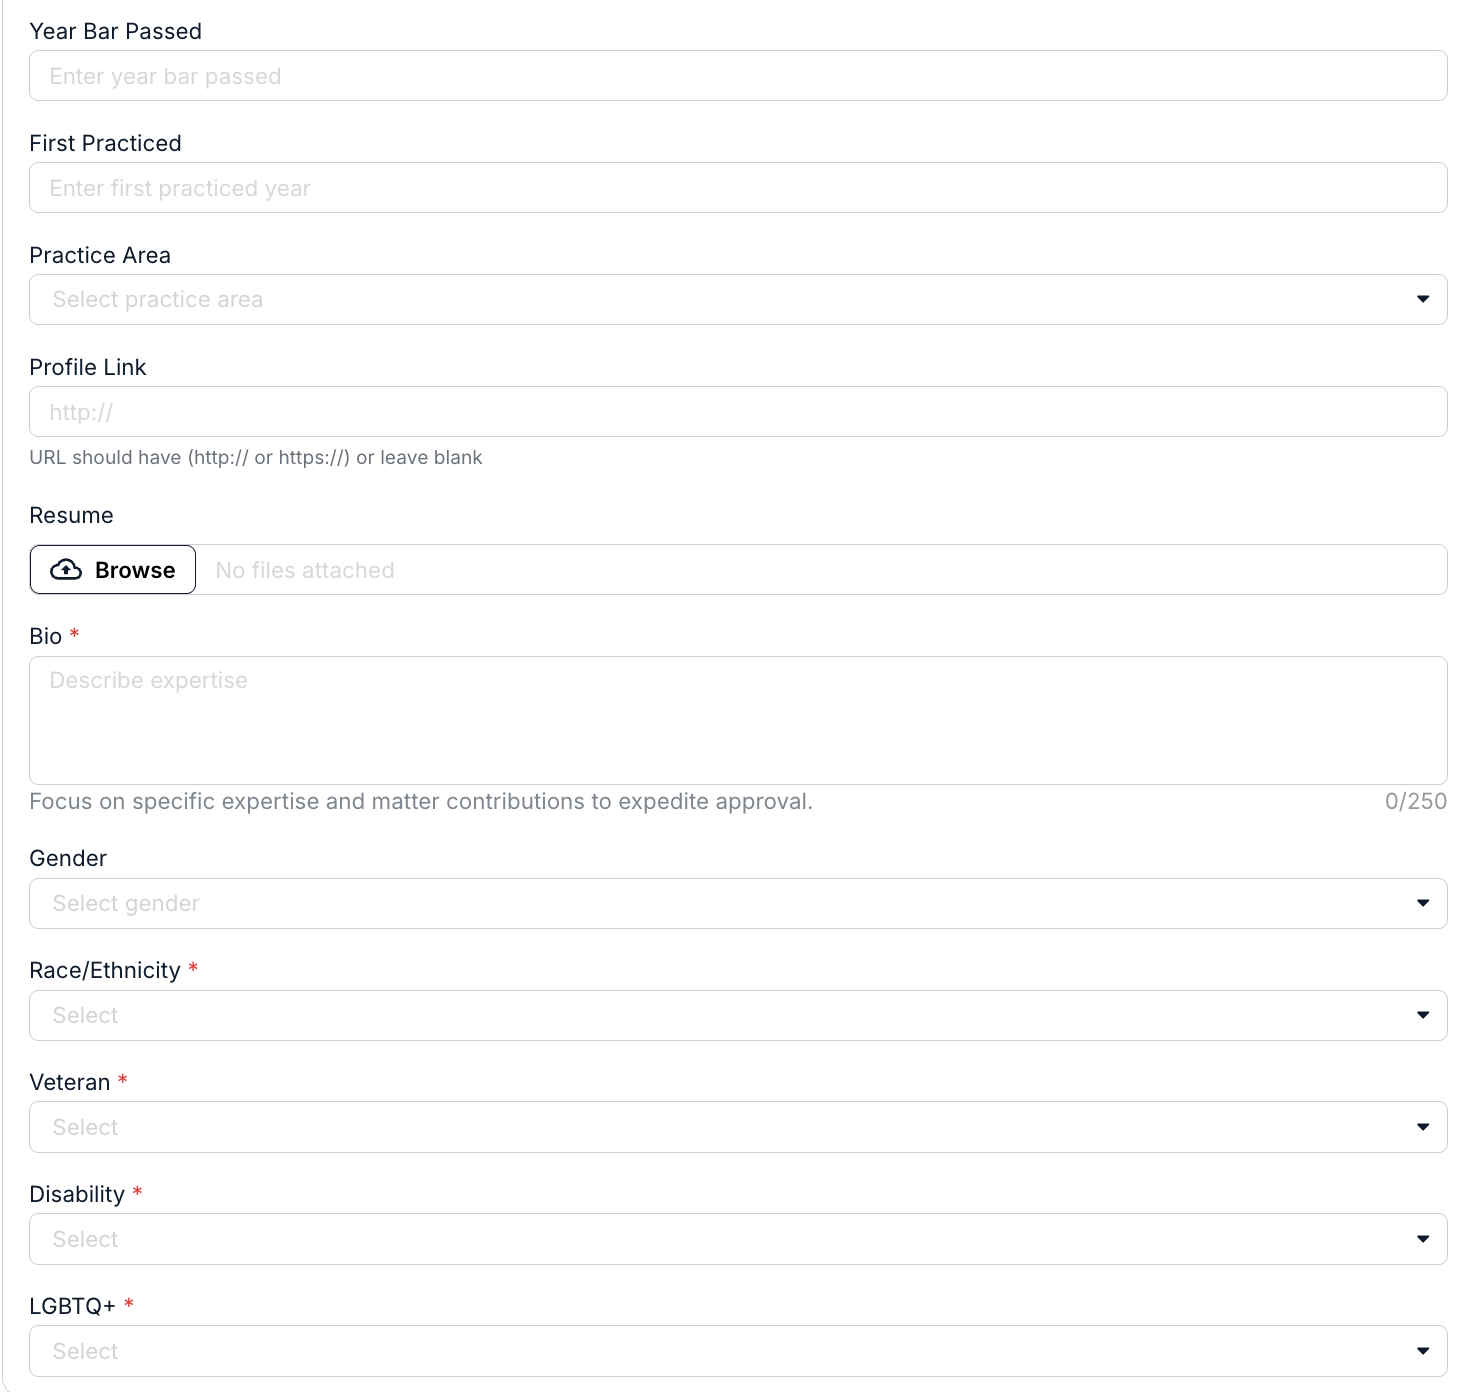
For both existing and new timekeepers, click Save and Next to move to the next screen or Cancel to back out.

- You'll see the New Rate screen appear.
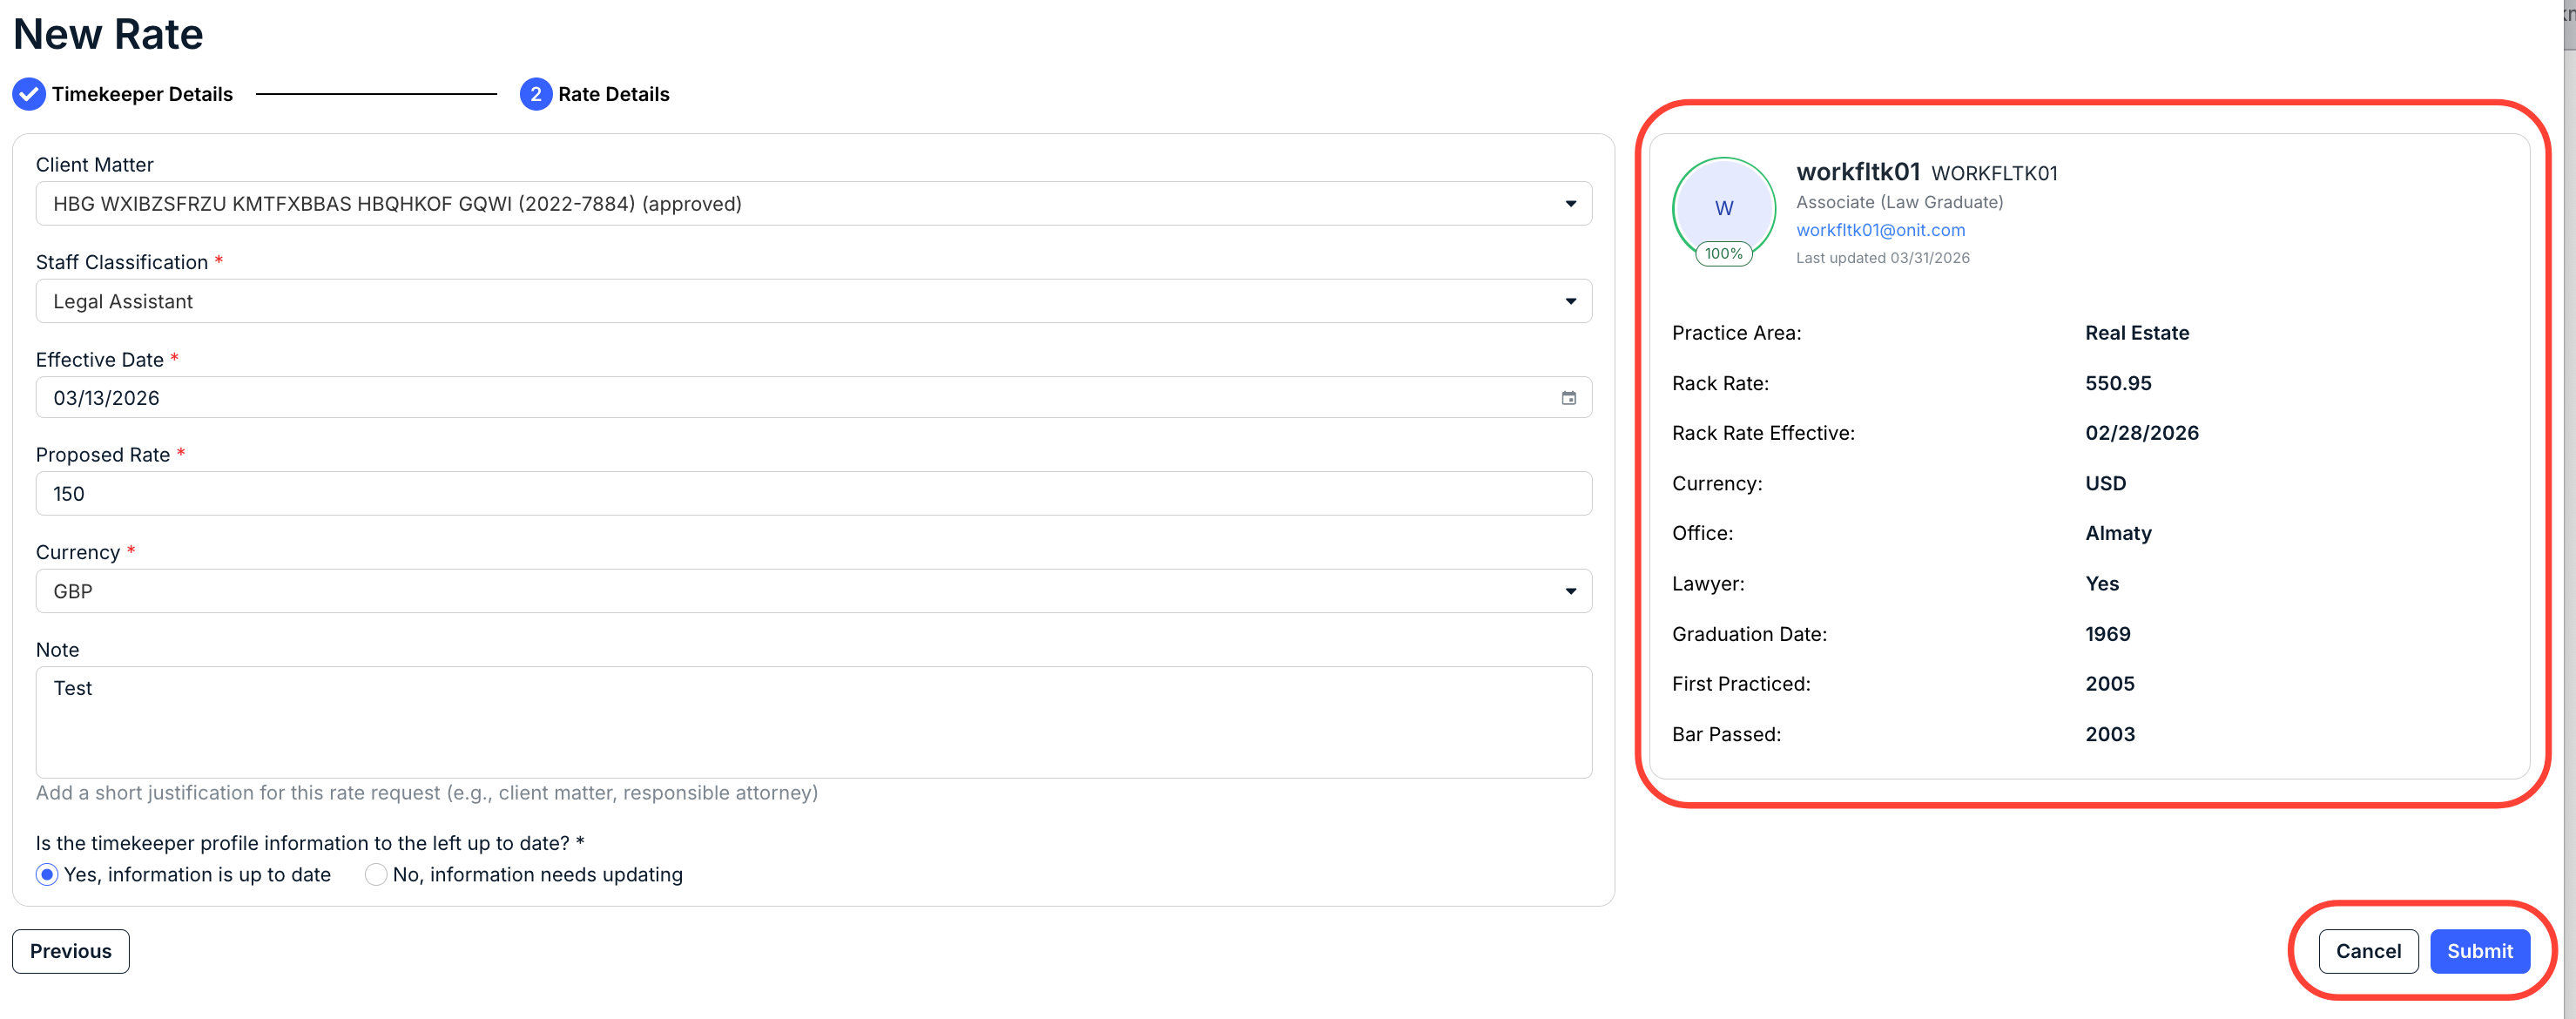
On the right-hand side of the screen, you'll see the key details of the timekeeper.
You'll have to fill out the:
- Client Matter (drop-down menu)
- Staff Classification (drop-down menu)
- Effective Date (date selector)
- Proposed Rate
- Currency (drop-down menu)
- Any Notes (if necessary, 250 character limit)
You'll also have to note whether the timekeeper profile information is up to date. Select Yes, information is up to date, or No, information needs updating.
Click Submit to send the rate in, Cancel to back out, or Previous to go back to the previous screen.
The new rate will appear in the main rate directory.
- You'll see the New Rate screen appear.