Here's how to add a new user in Counsel Exchange
- After logging into Counsel Exchange and navigating to the Master Settings, click on "Users" in the left-hand-side menu.
- You'll see all existing users in the Users directory.
Use the top tabs to toggle between Active, Archived, and Deleted users.
The main directory will show the user's Full Name, Email ID, Office, Status, Last Login, and Created date, and an Actions (Edit User, Deactivate, Resend Email, Reset Password) menu. Use the up/down arrows to sort by the column
Use the search bar to search for specific users. Use the Viewing drop-down menu to customize how many users you want to see on the screen.
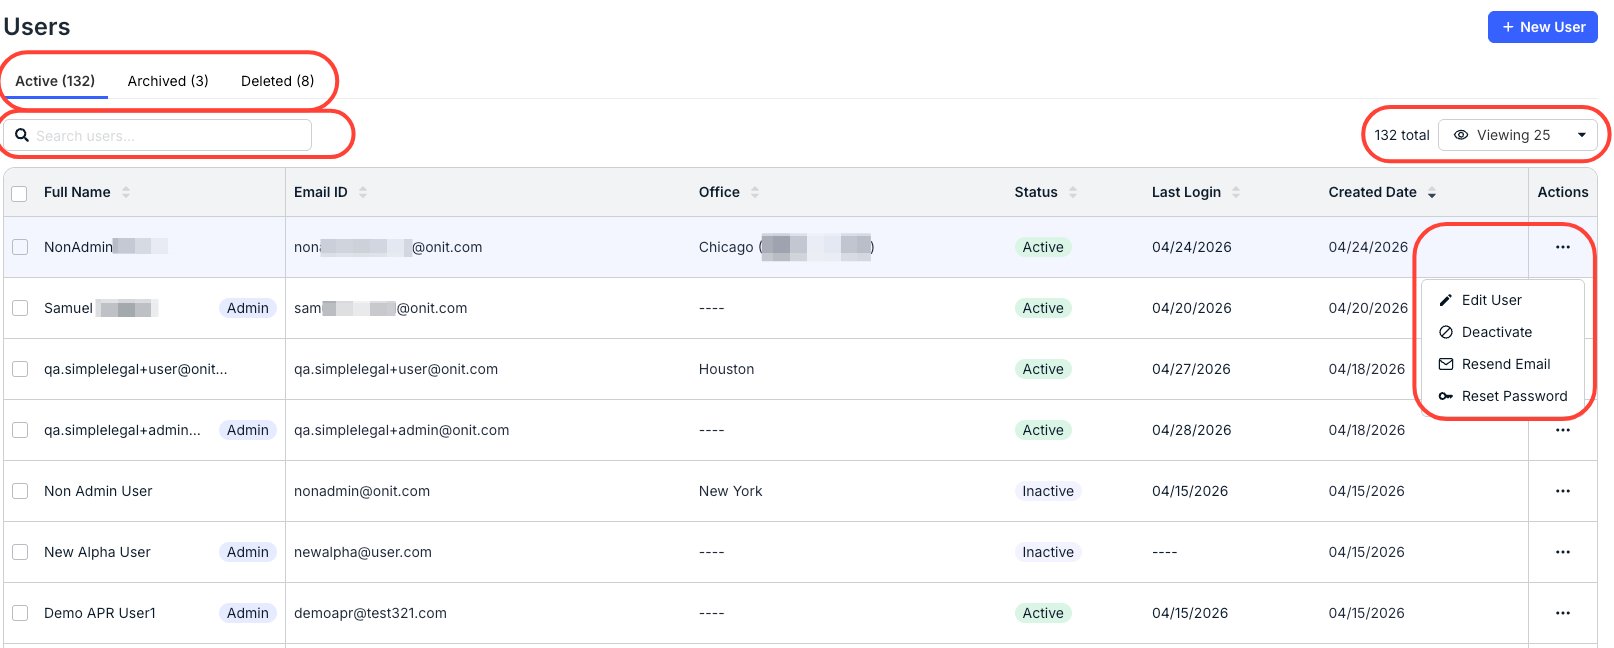
- Click on "New User" to add a new user.
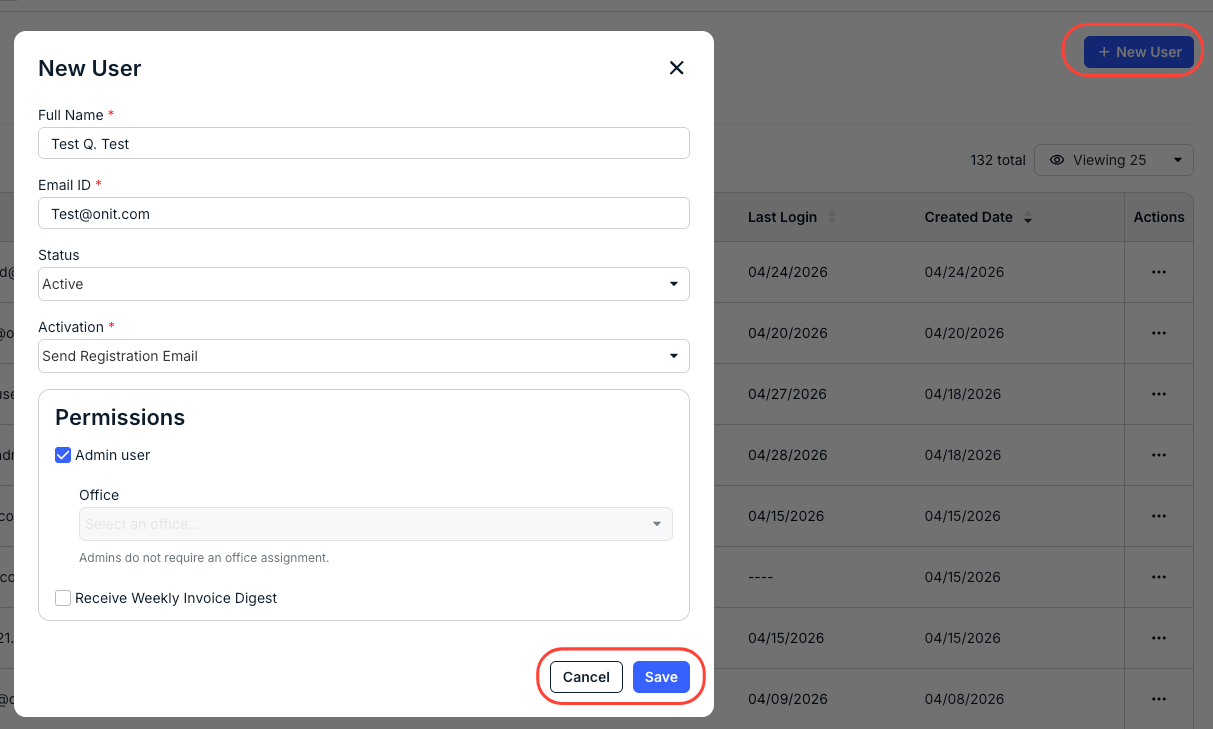
You'll have to fill in:
- The user's Full Name (required)
- The user's Email ID (required)
- Their Status (active or inactive)
- The Activation option (required). You can choose to either Send Registration Email to the new user or Auto Activate the user.
- Under Permissions, you can make the user an Admin User and choose whether they should Receive a Weekly Invoice Digest (a weekly summary of invoice activity). Note that regular users will also require you to select an Office from the drop-down menu.
Click Save to save the new user or Cancel to back out.
The created user will appear in the main directory.