Viewing Matter-Level Timekeepers
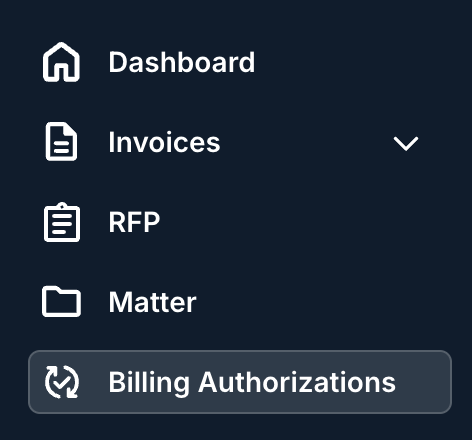
- Within the standard client view in Counsel Exchange, click on the "Billing Authorizations" section of the left-hand-side menu.
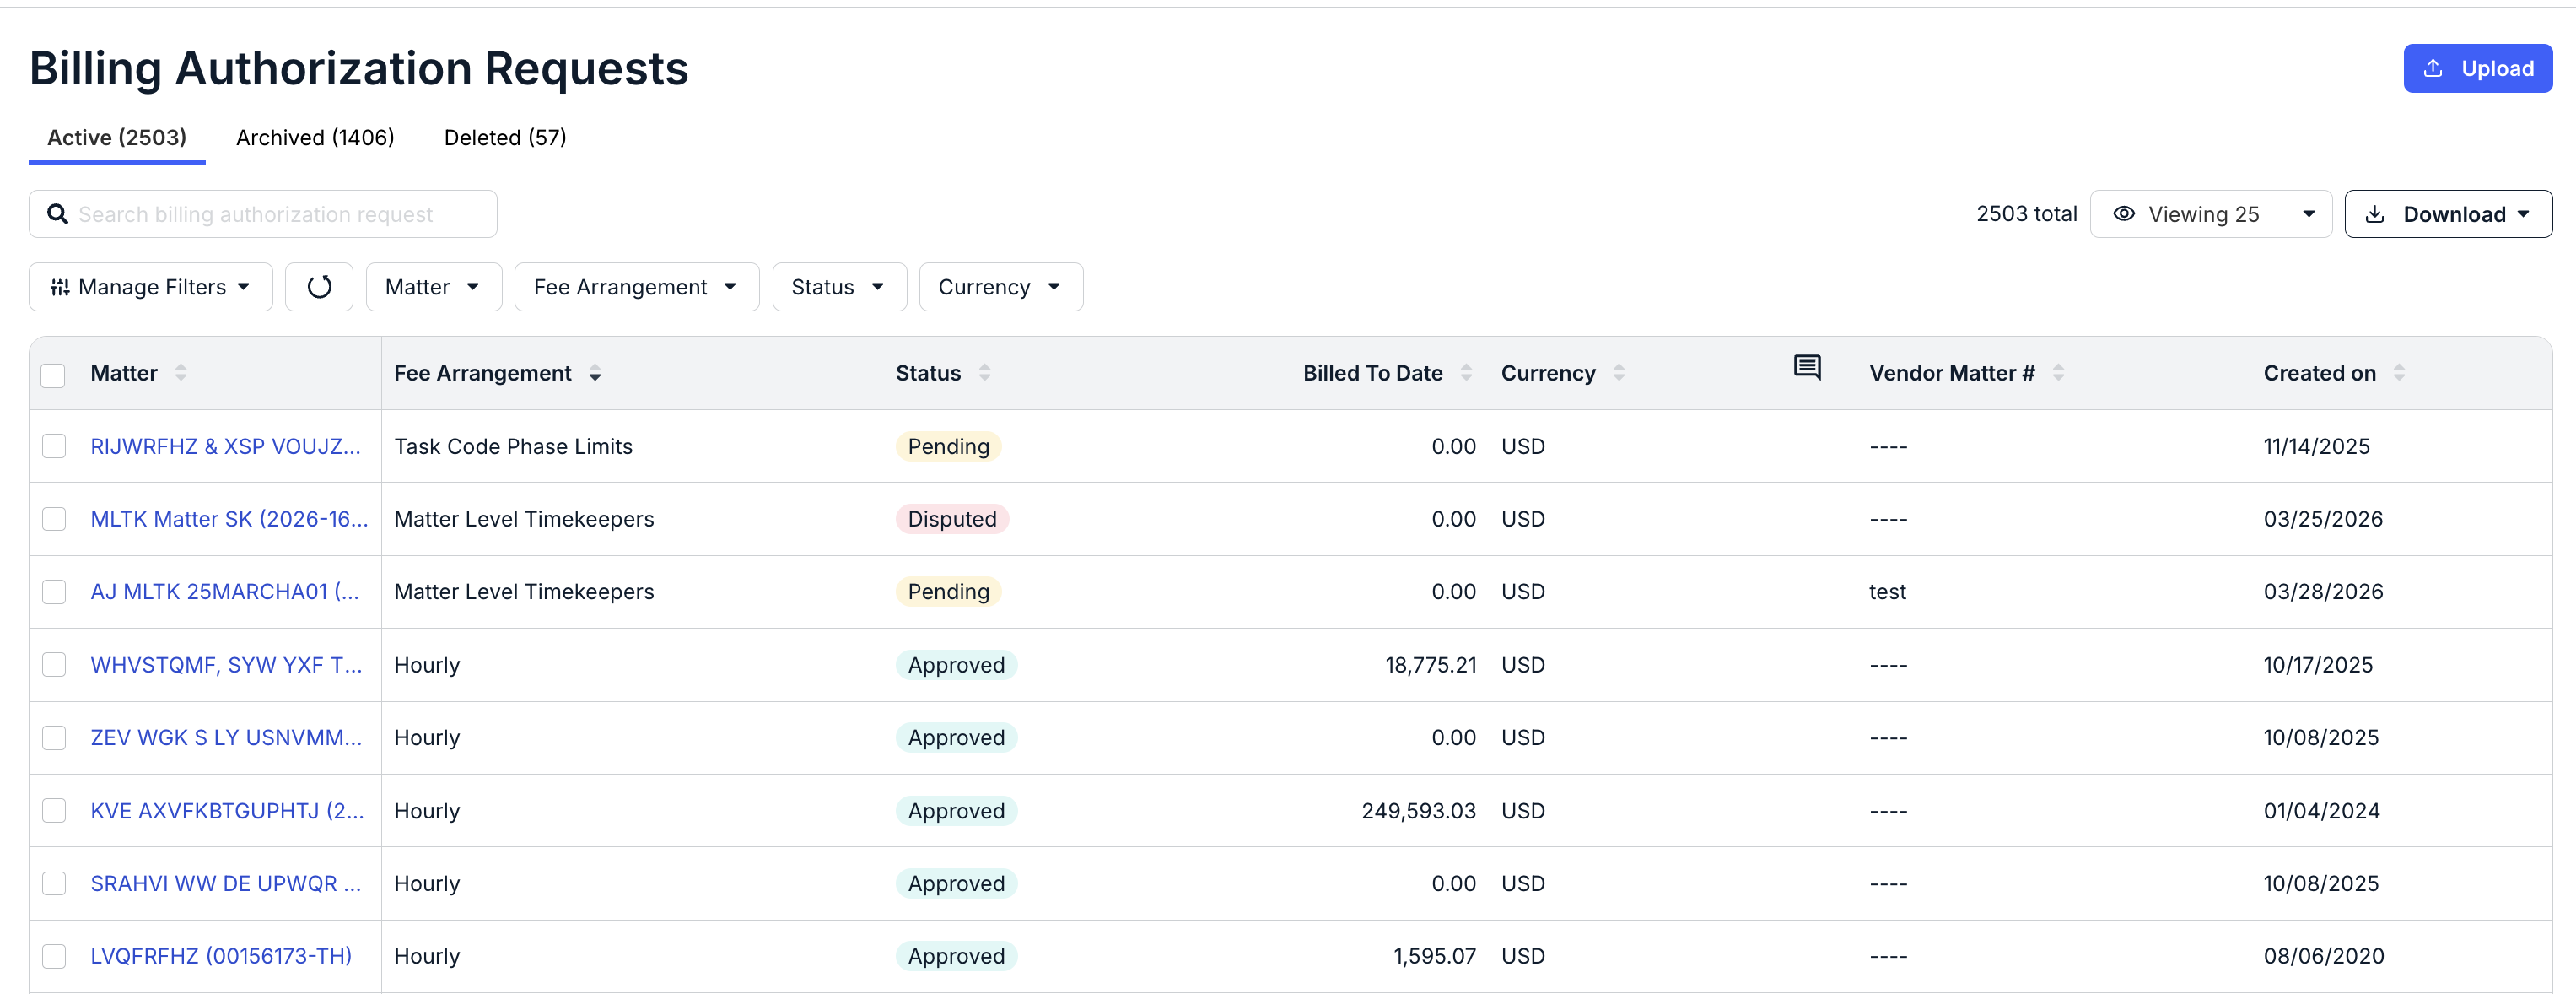
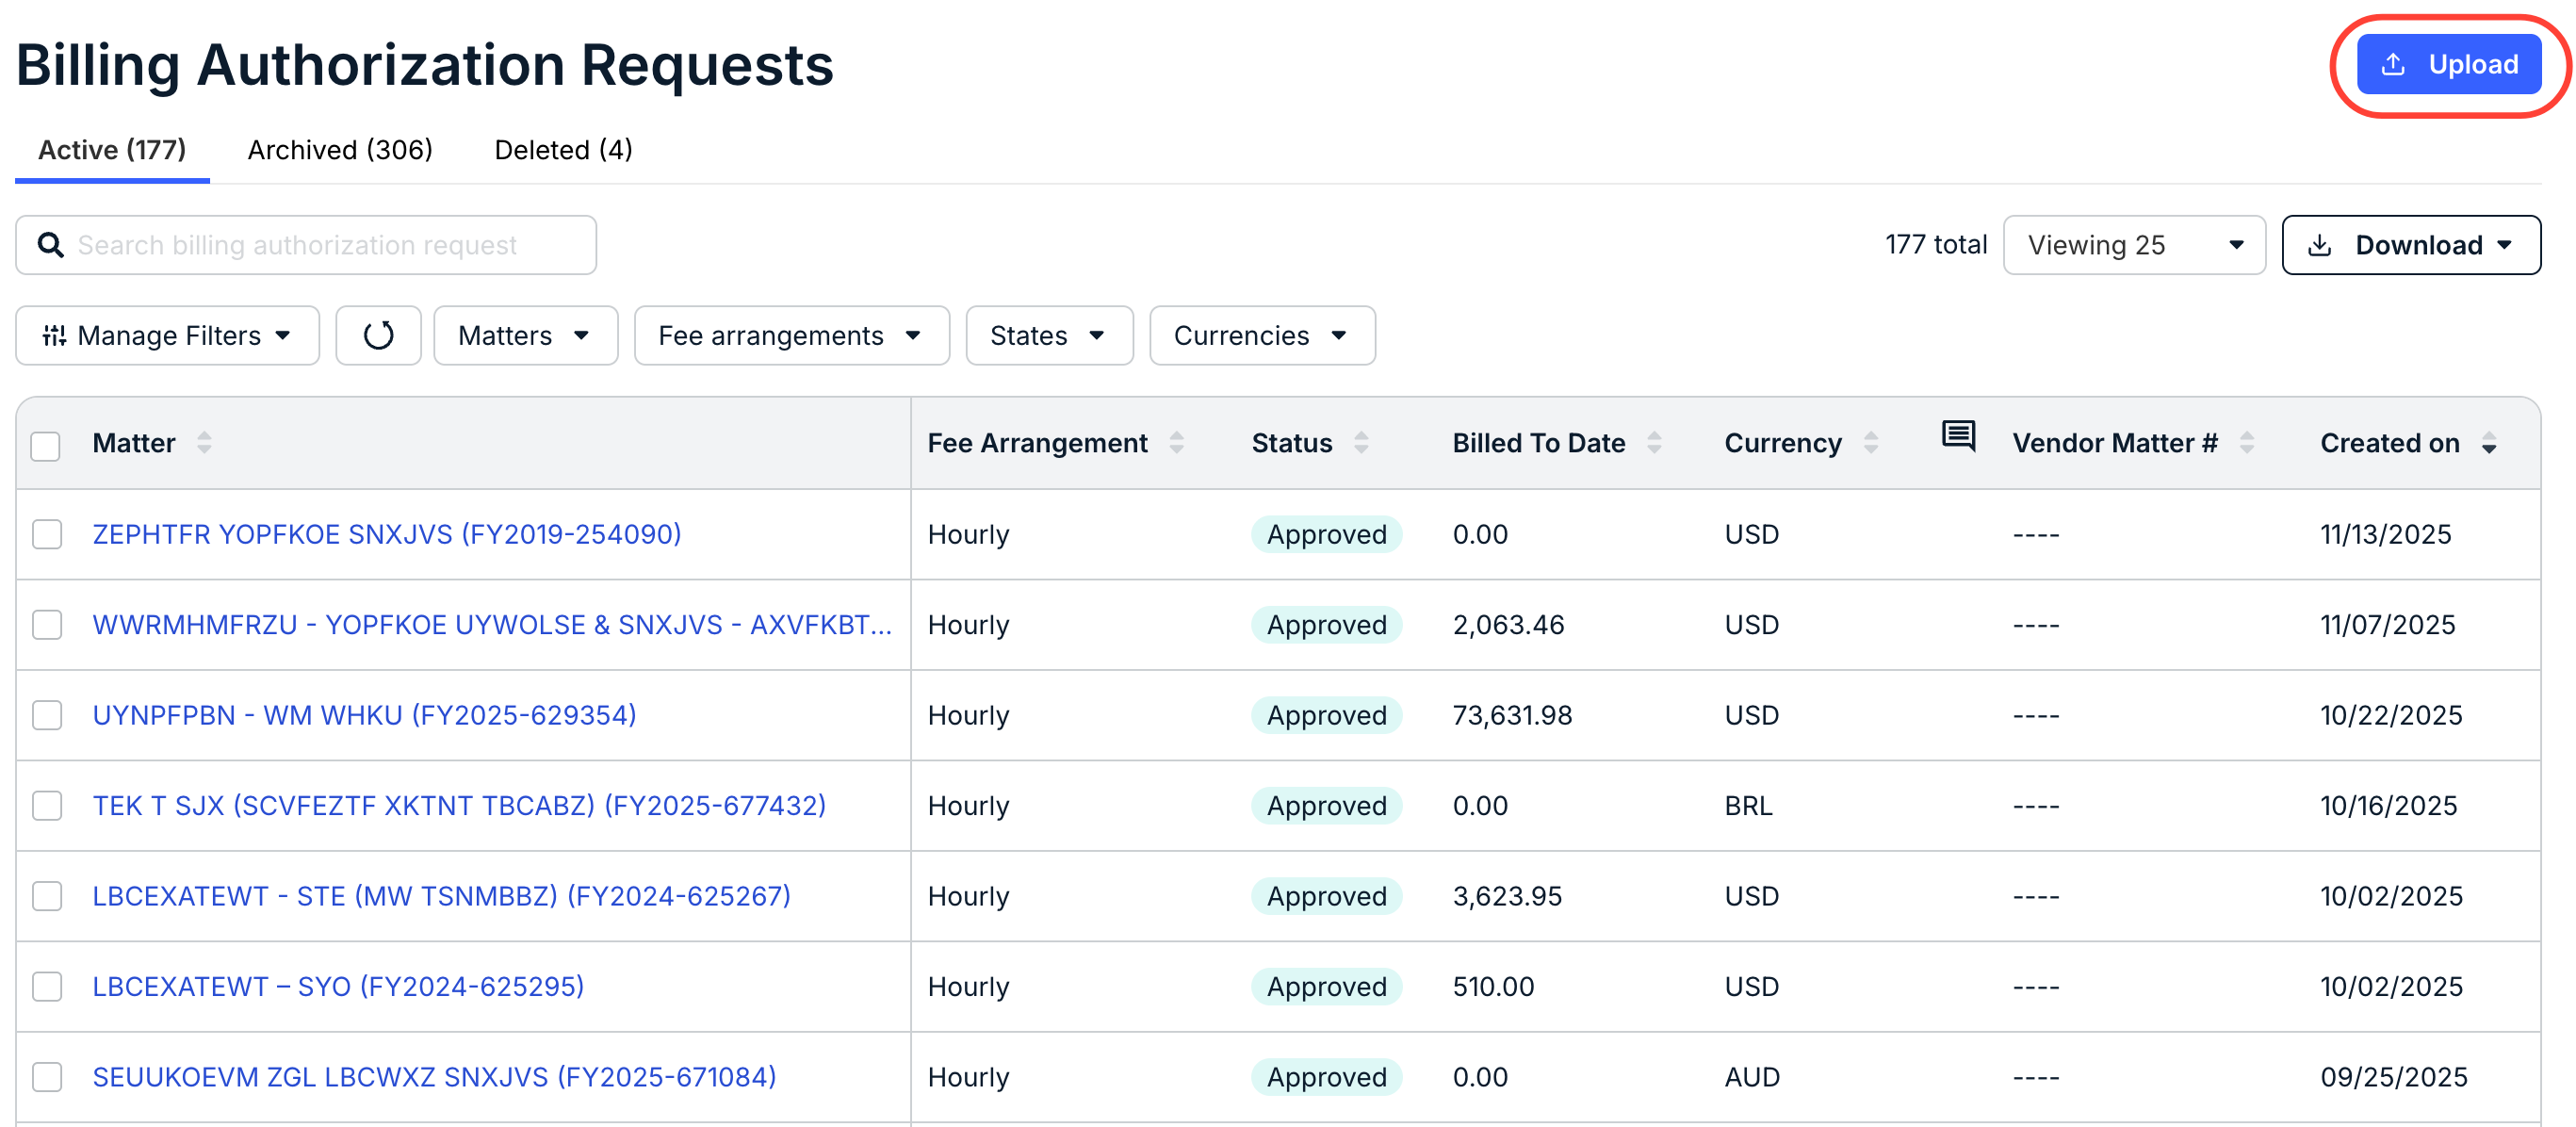
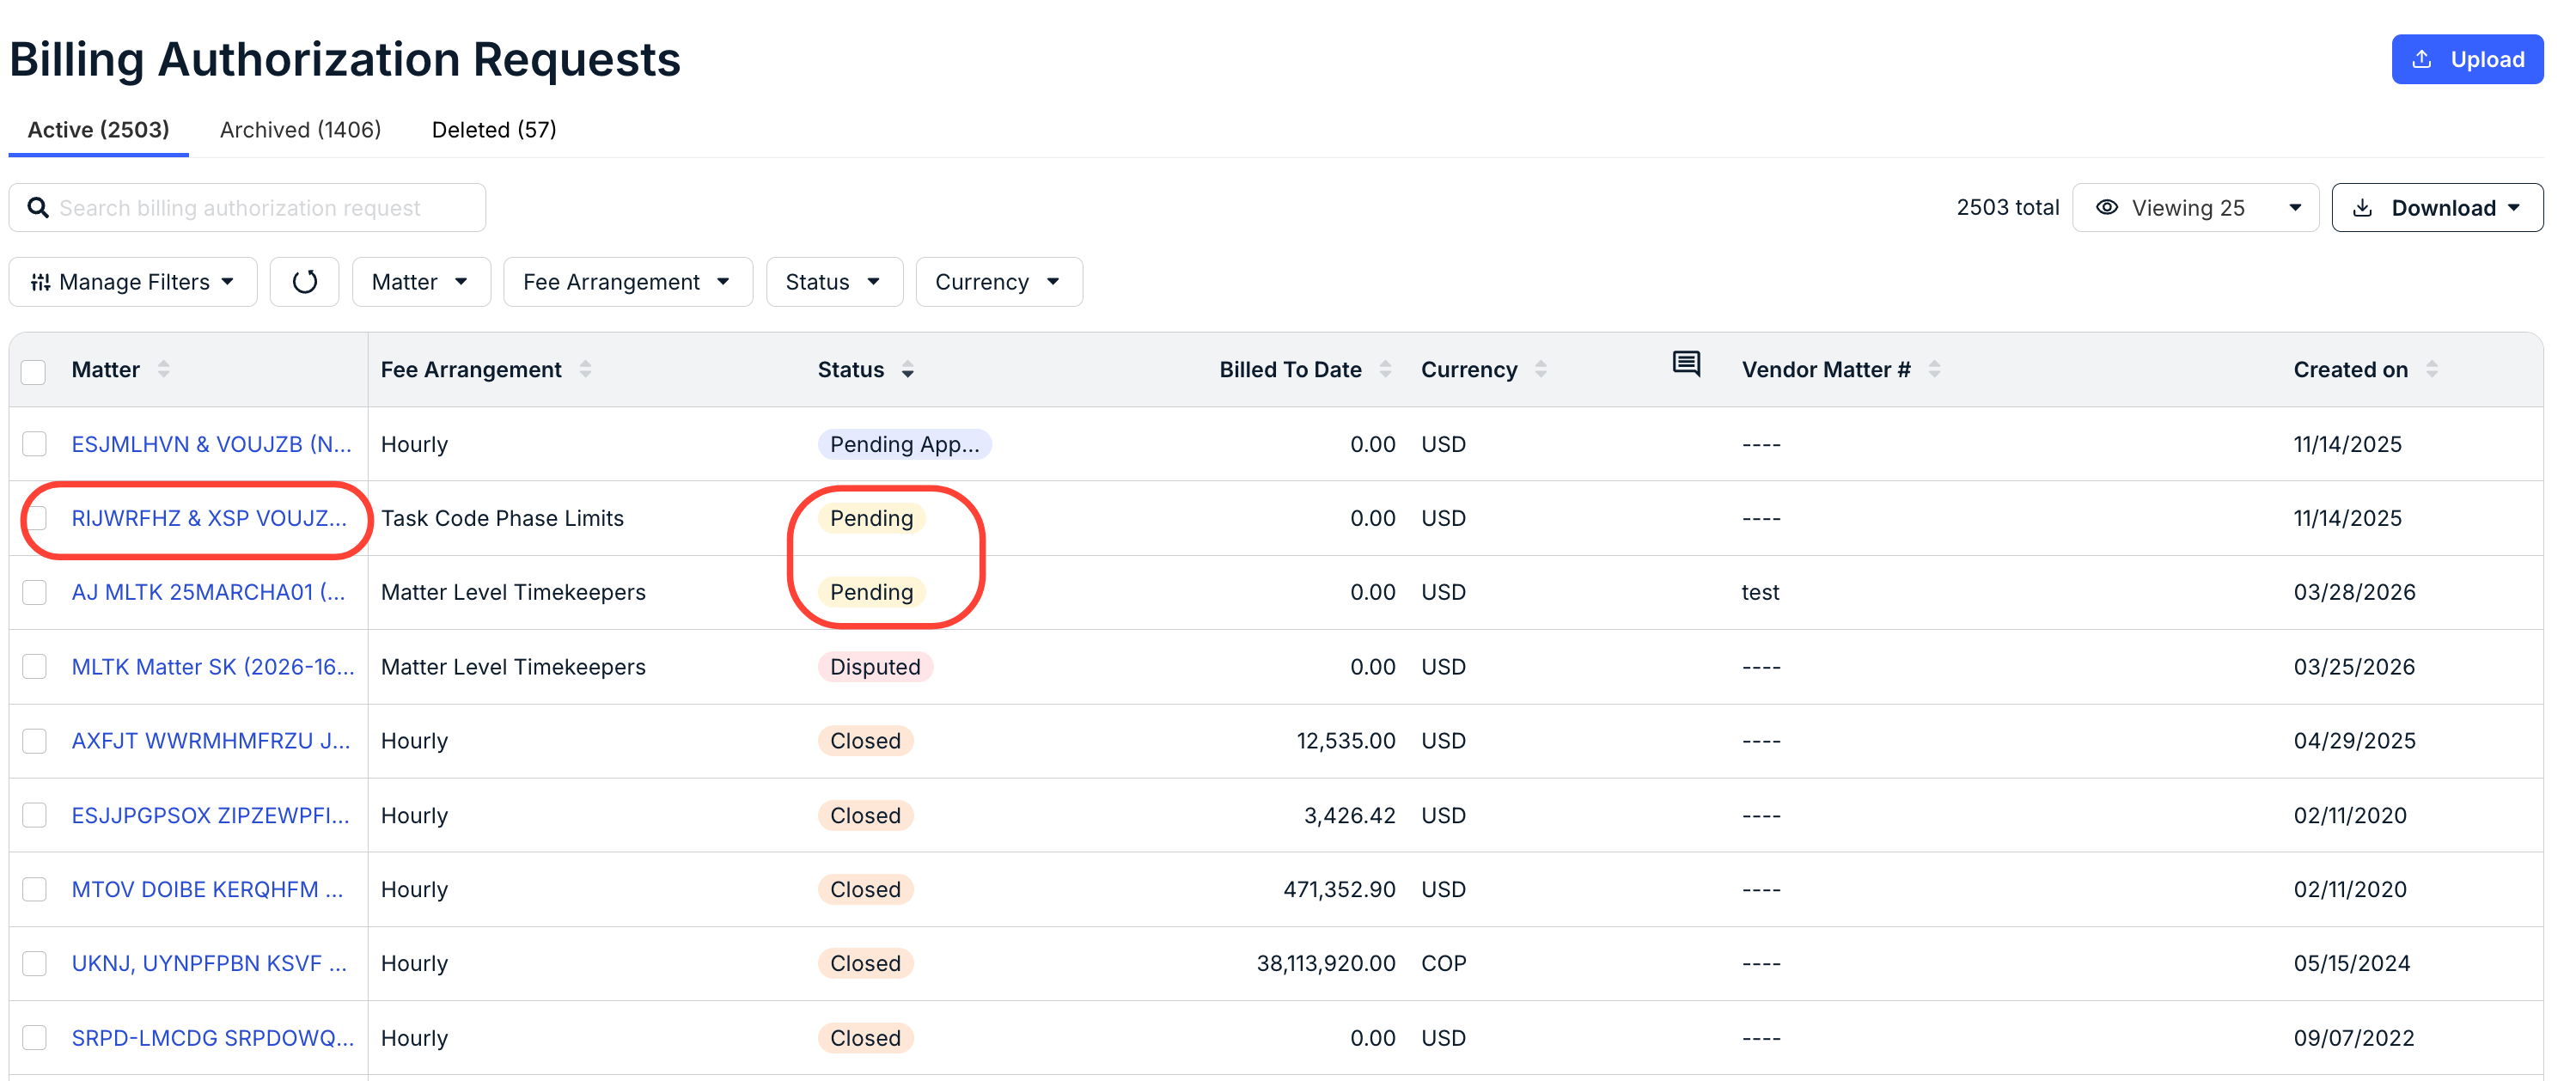
- The Billing Authorization Requests page will appear. This page shows key information about billing authorizations in progress.
For more information on this page, read the Billing Authorization Requests guide.
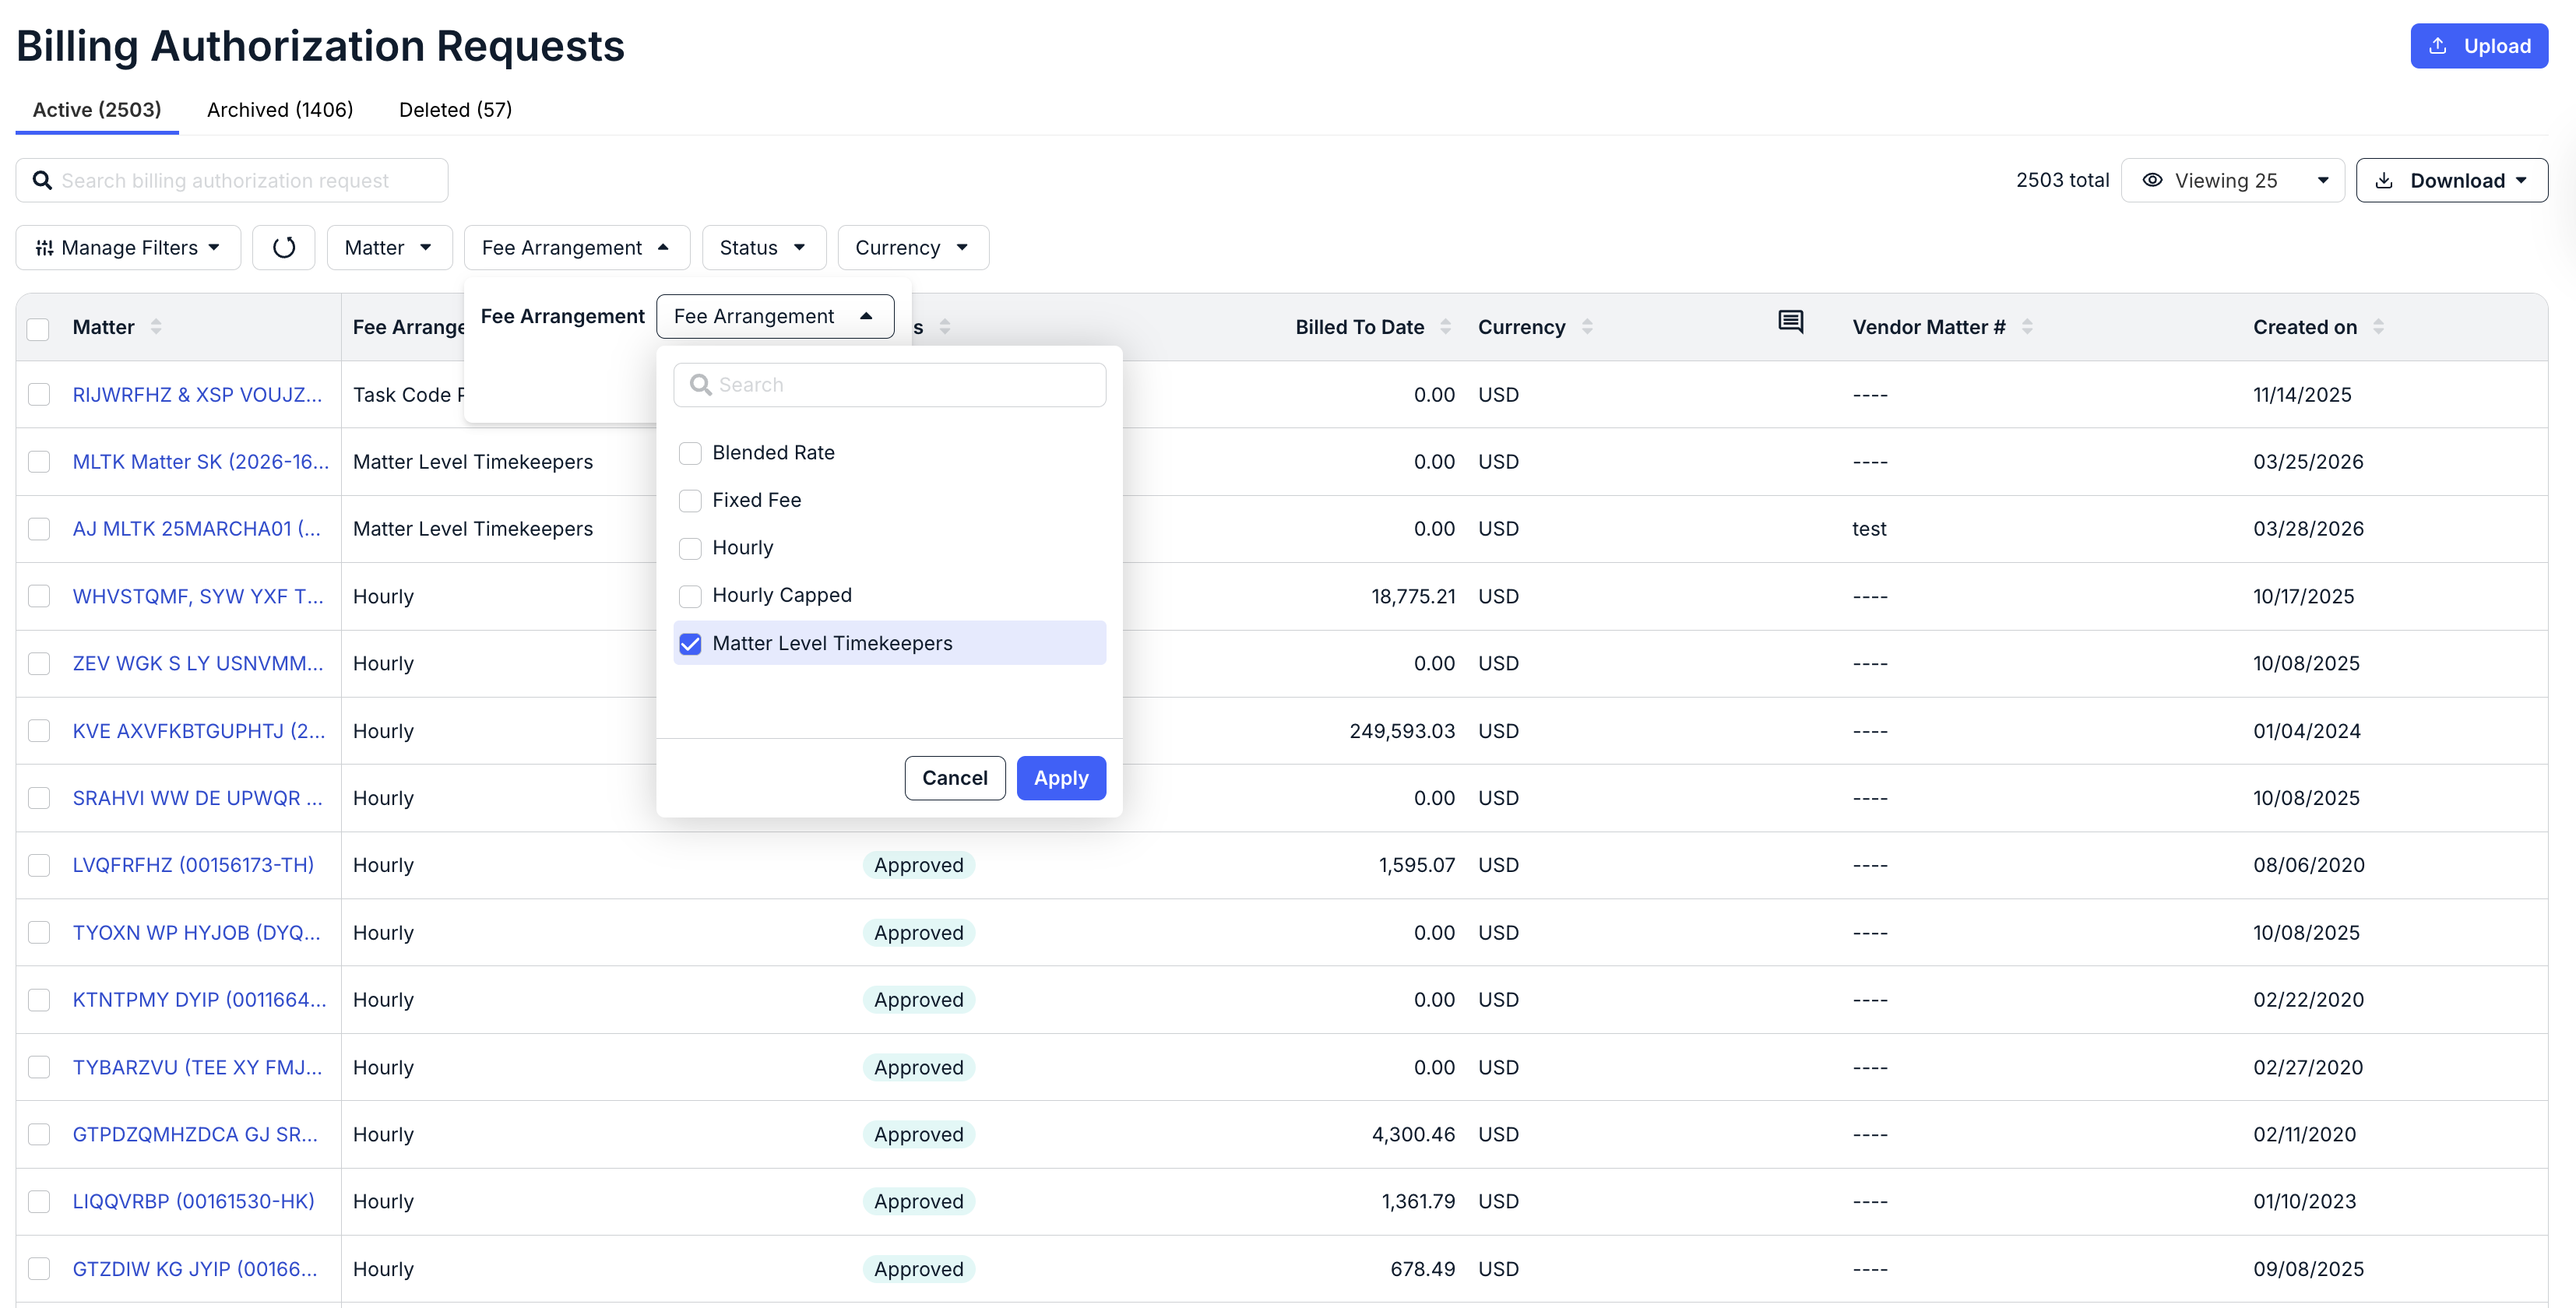
- You can either sort by Fee Arrangements or use the top "Fee Arrangements" filter to display Matter Level Timekeepers.
Bulk-Uploading Matter-Level Timekeepers
Here's how to upload matter-level timekeepers within Counsel Exchange:
- Within the standard client view in Counsel Exchange, click on the "Billing Authorizations" section of the left-hand-side menu.

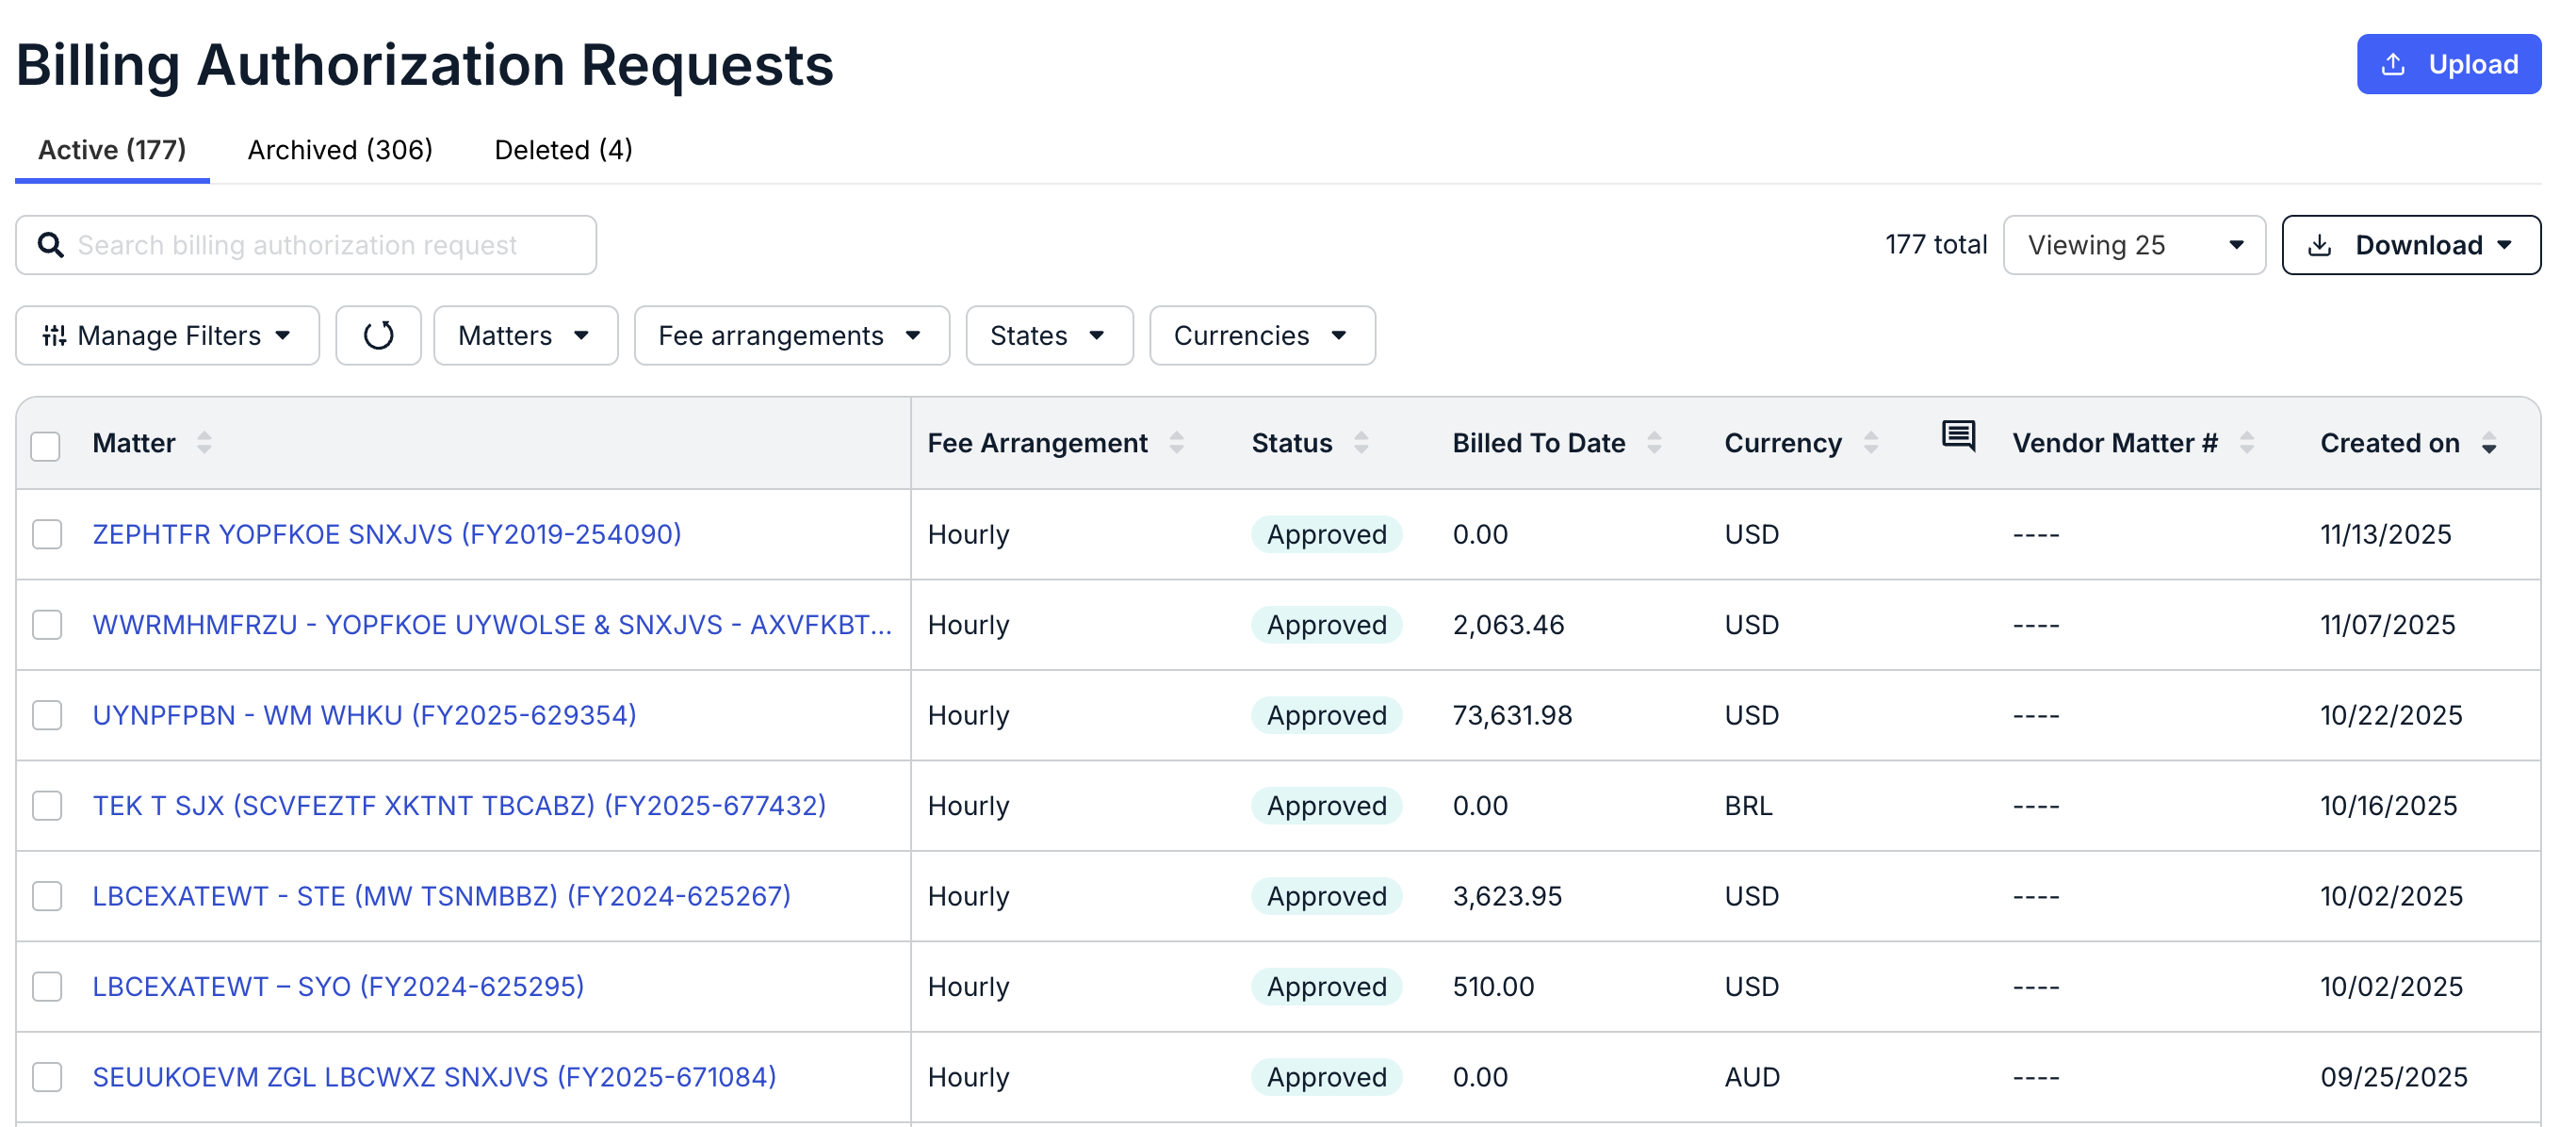
- The Billing Authorization Requests page will appear.
This page shows key information about billing authorizations in progress. For more information on this page, read the Billing Authorization Requests guide.
- Click on the "Upload" button in the upper-right-hand corner.
- The Upload Billing Authorization Request form will appear.
Make sure you select Matter Level TKs under Upload.
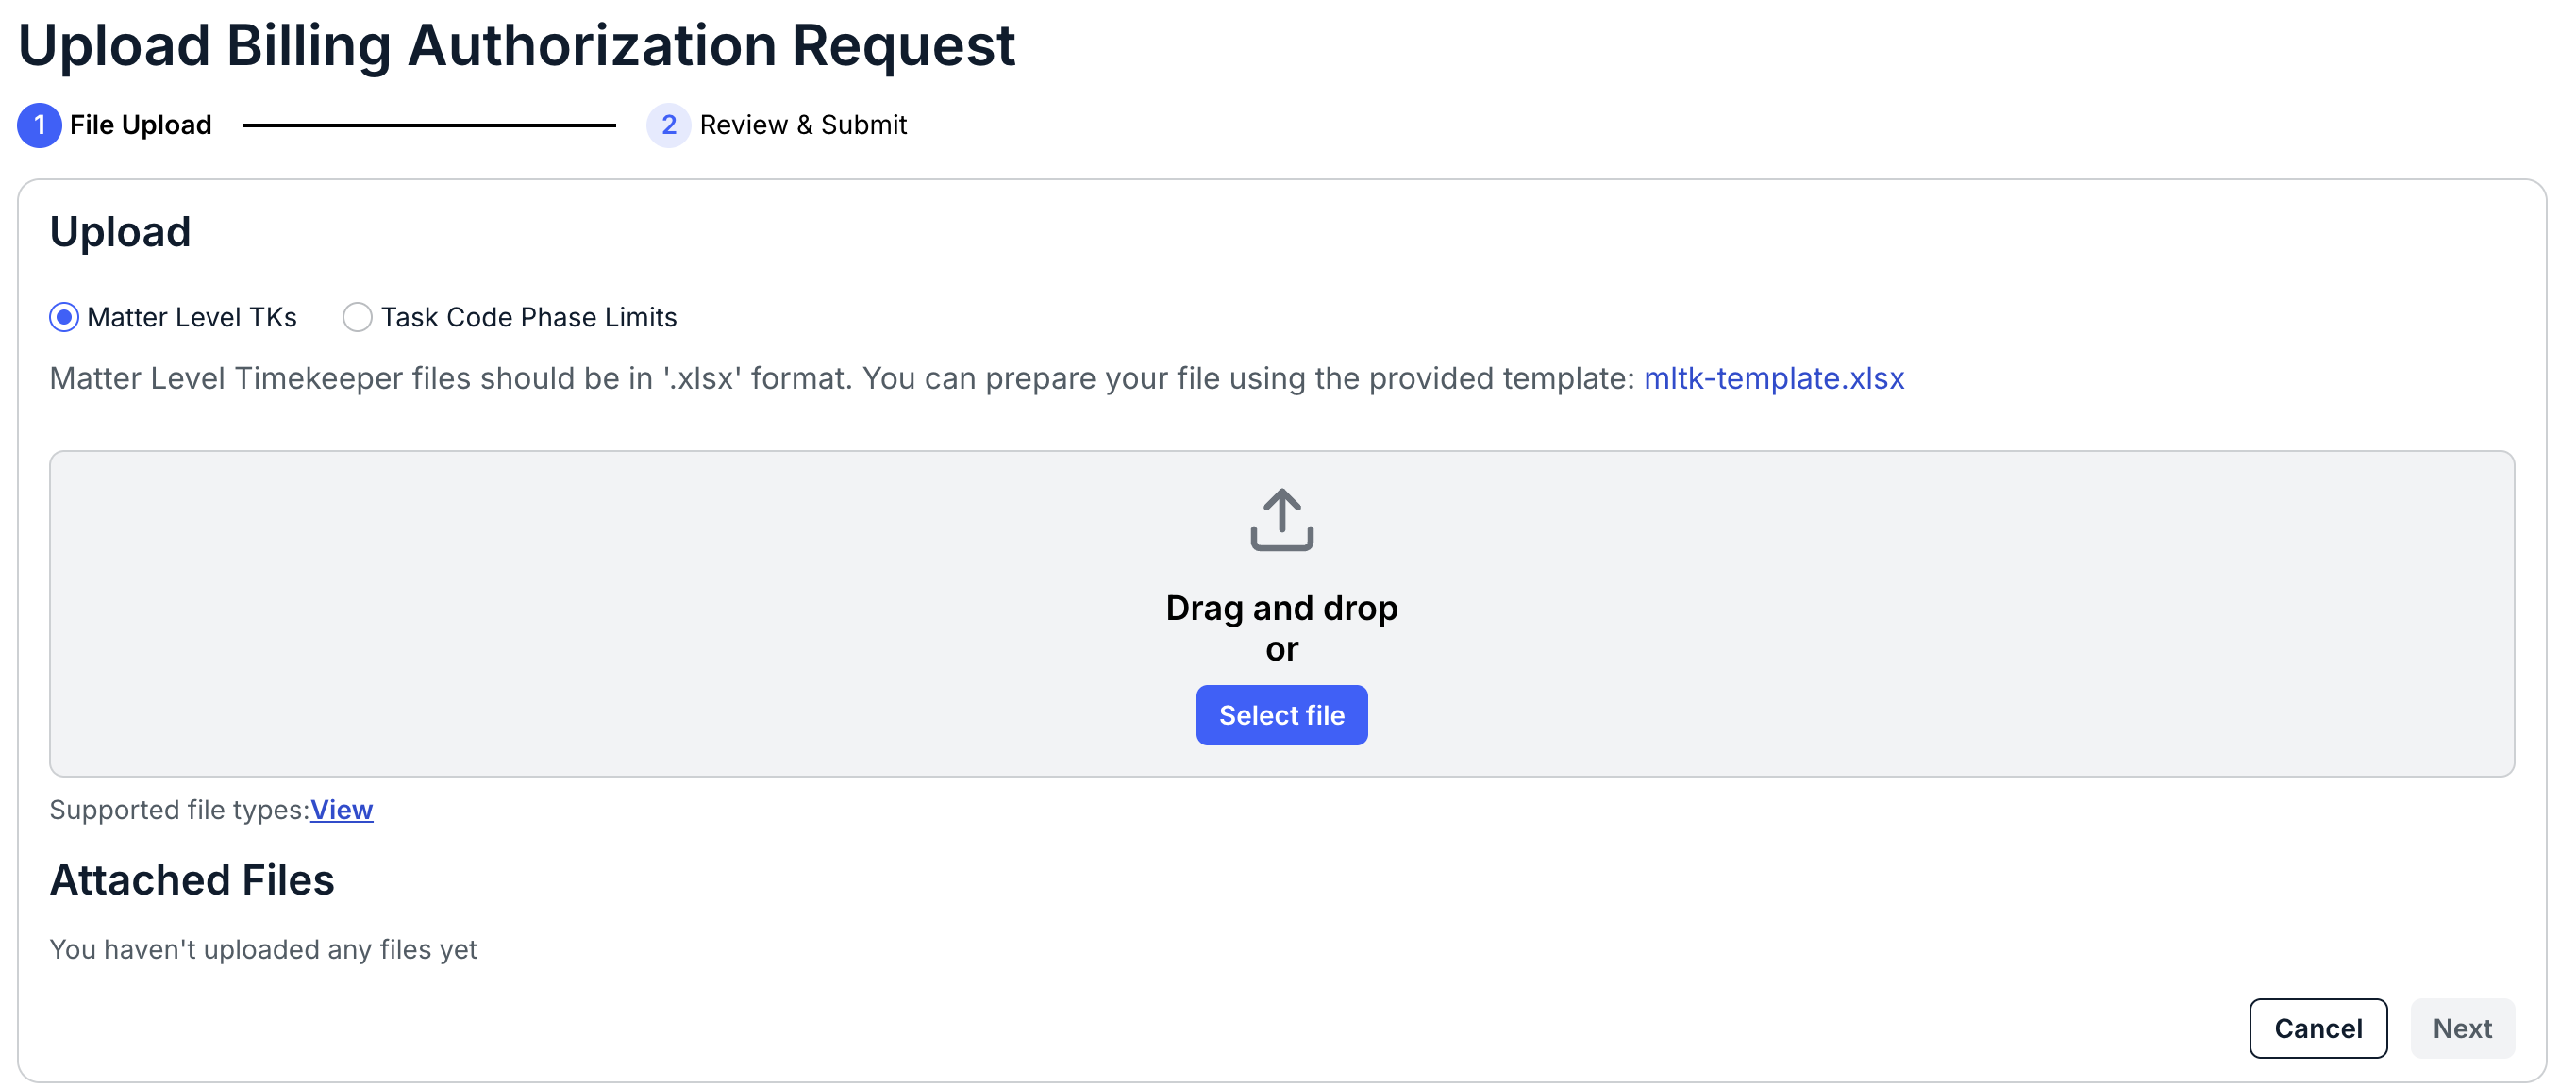
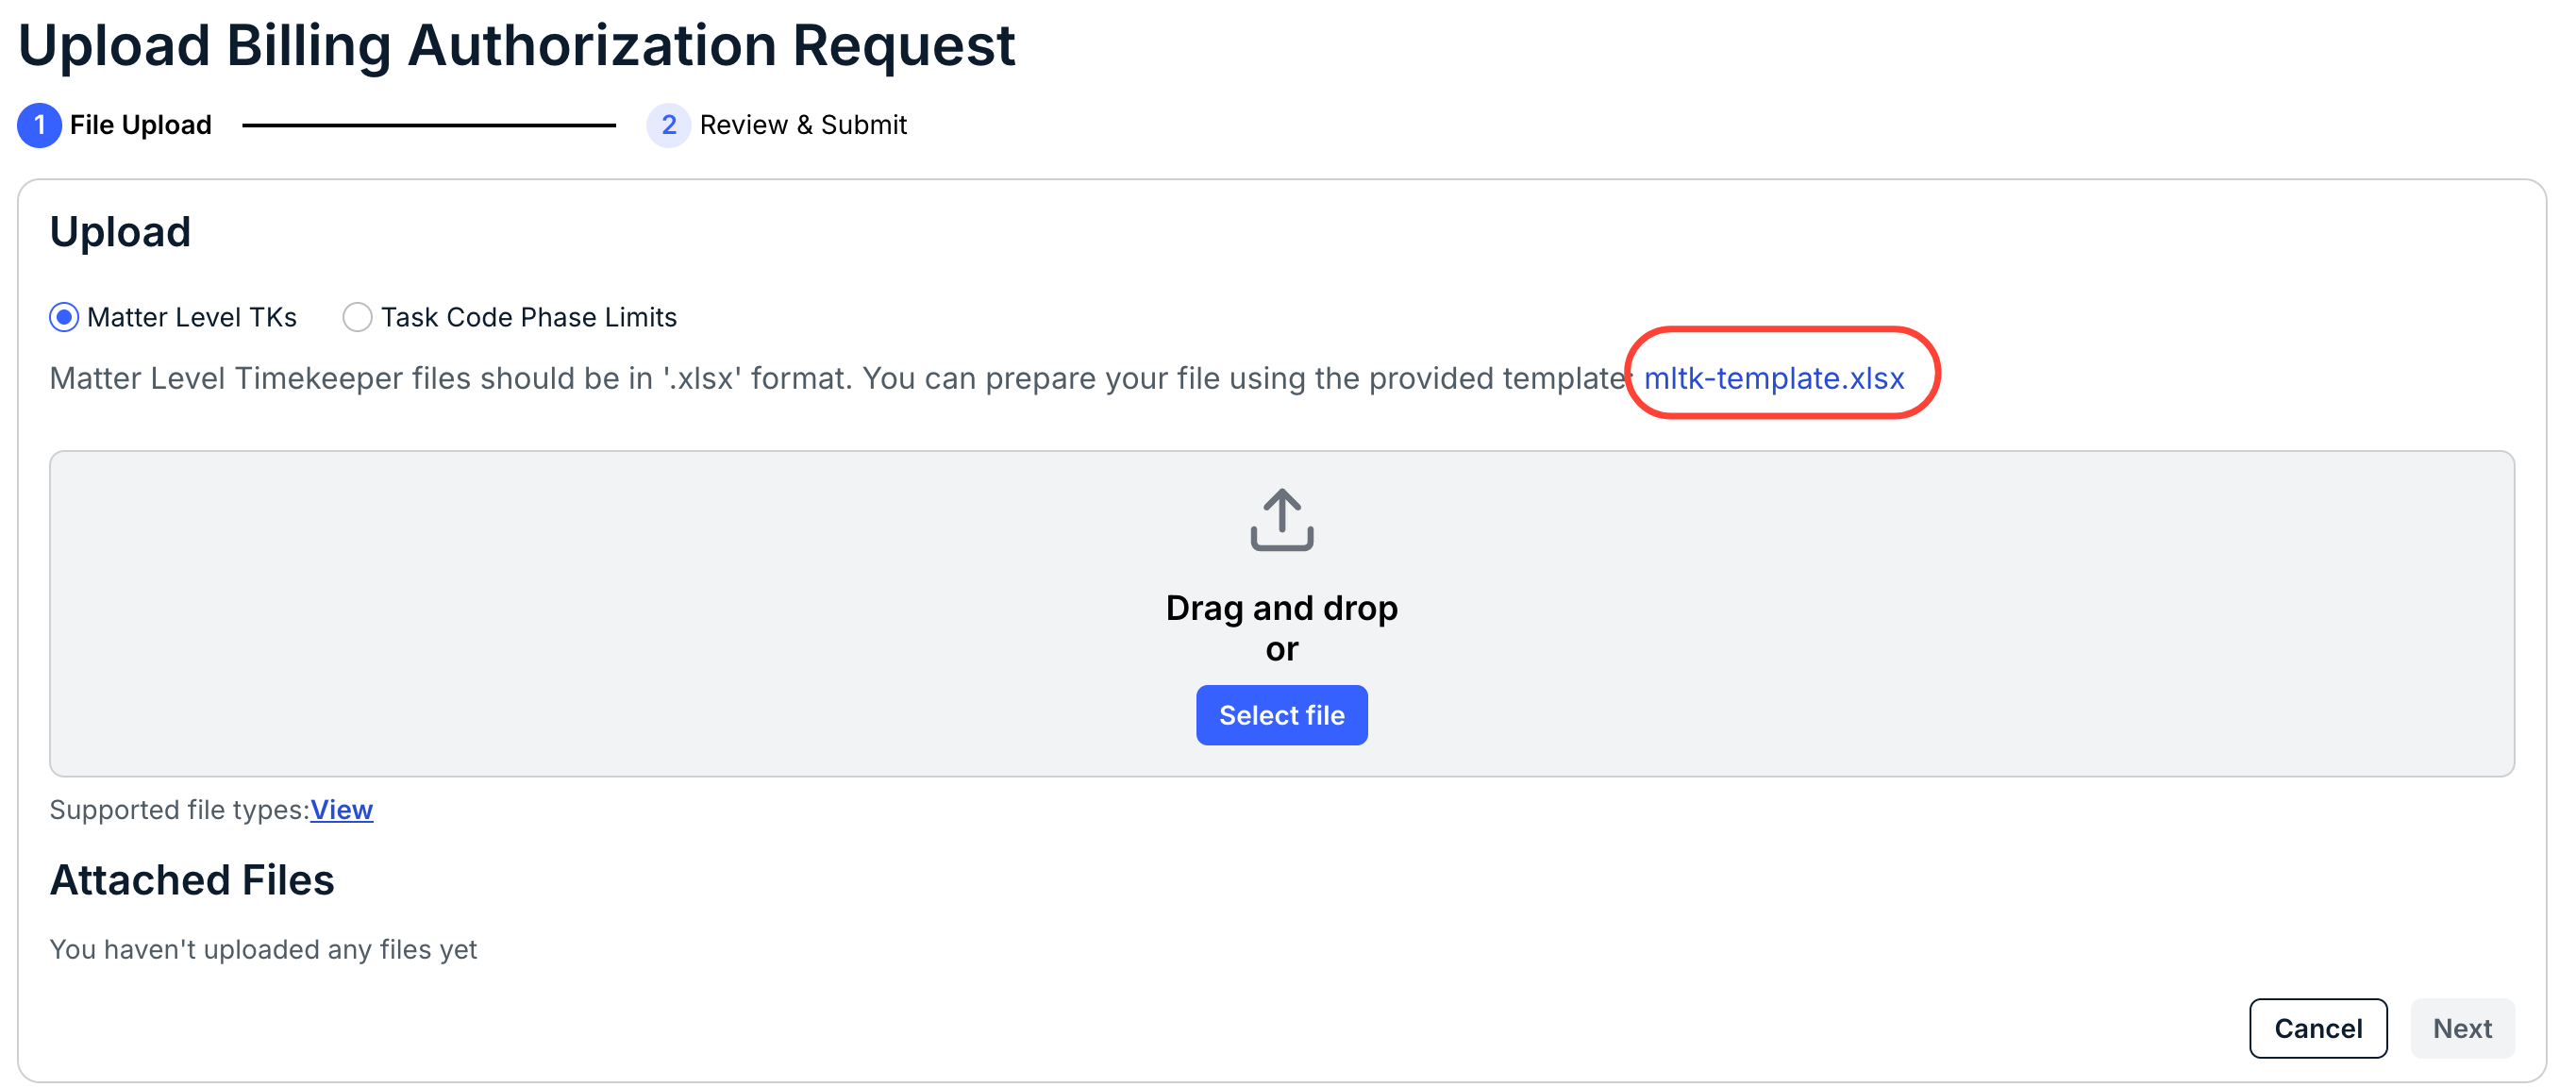
- Download and complete the file from the template.
Note that these files should be in the .XLSX template.
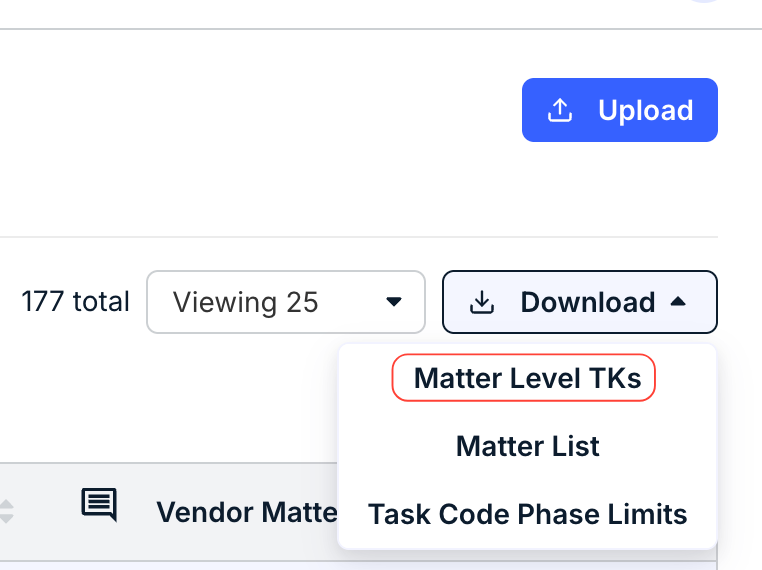
Note that you can also download the template on the prior screen by clicking on Download and then Matter Level TKs.
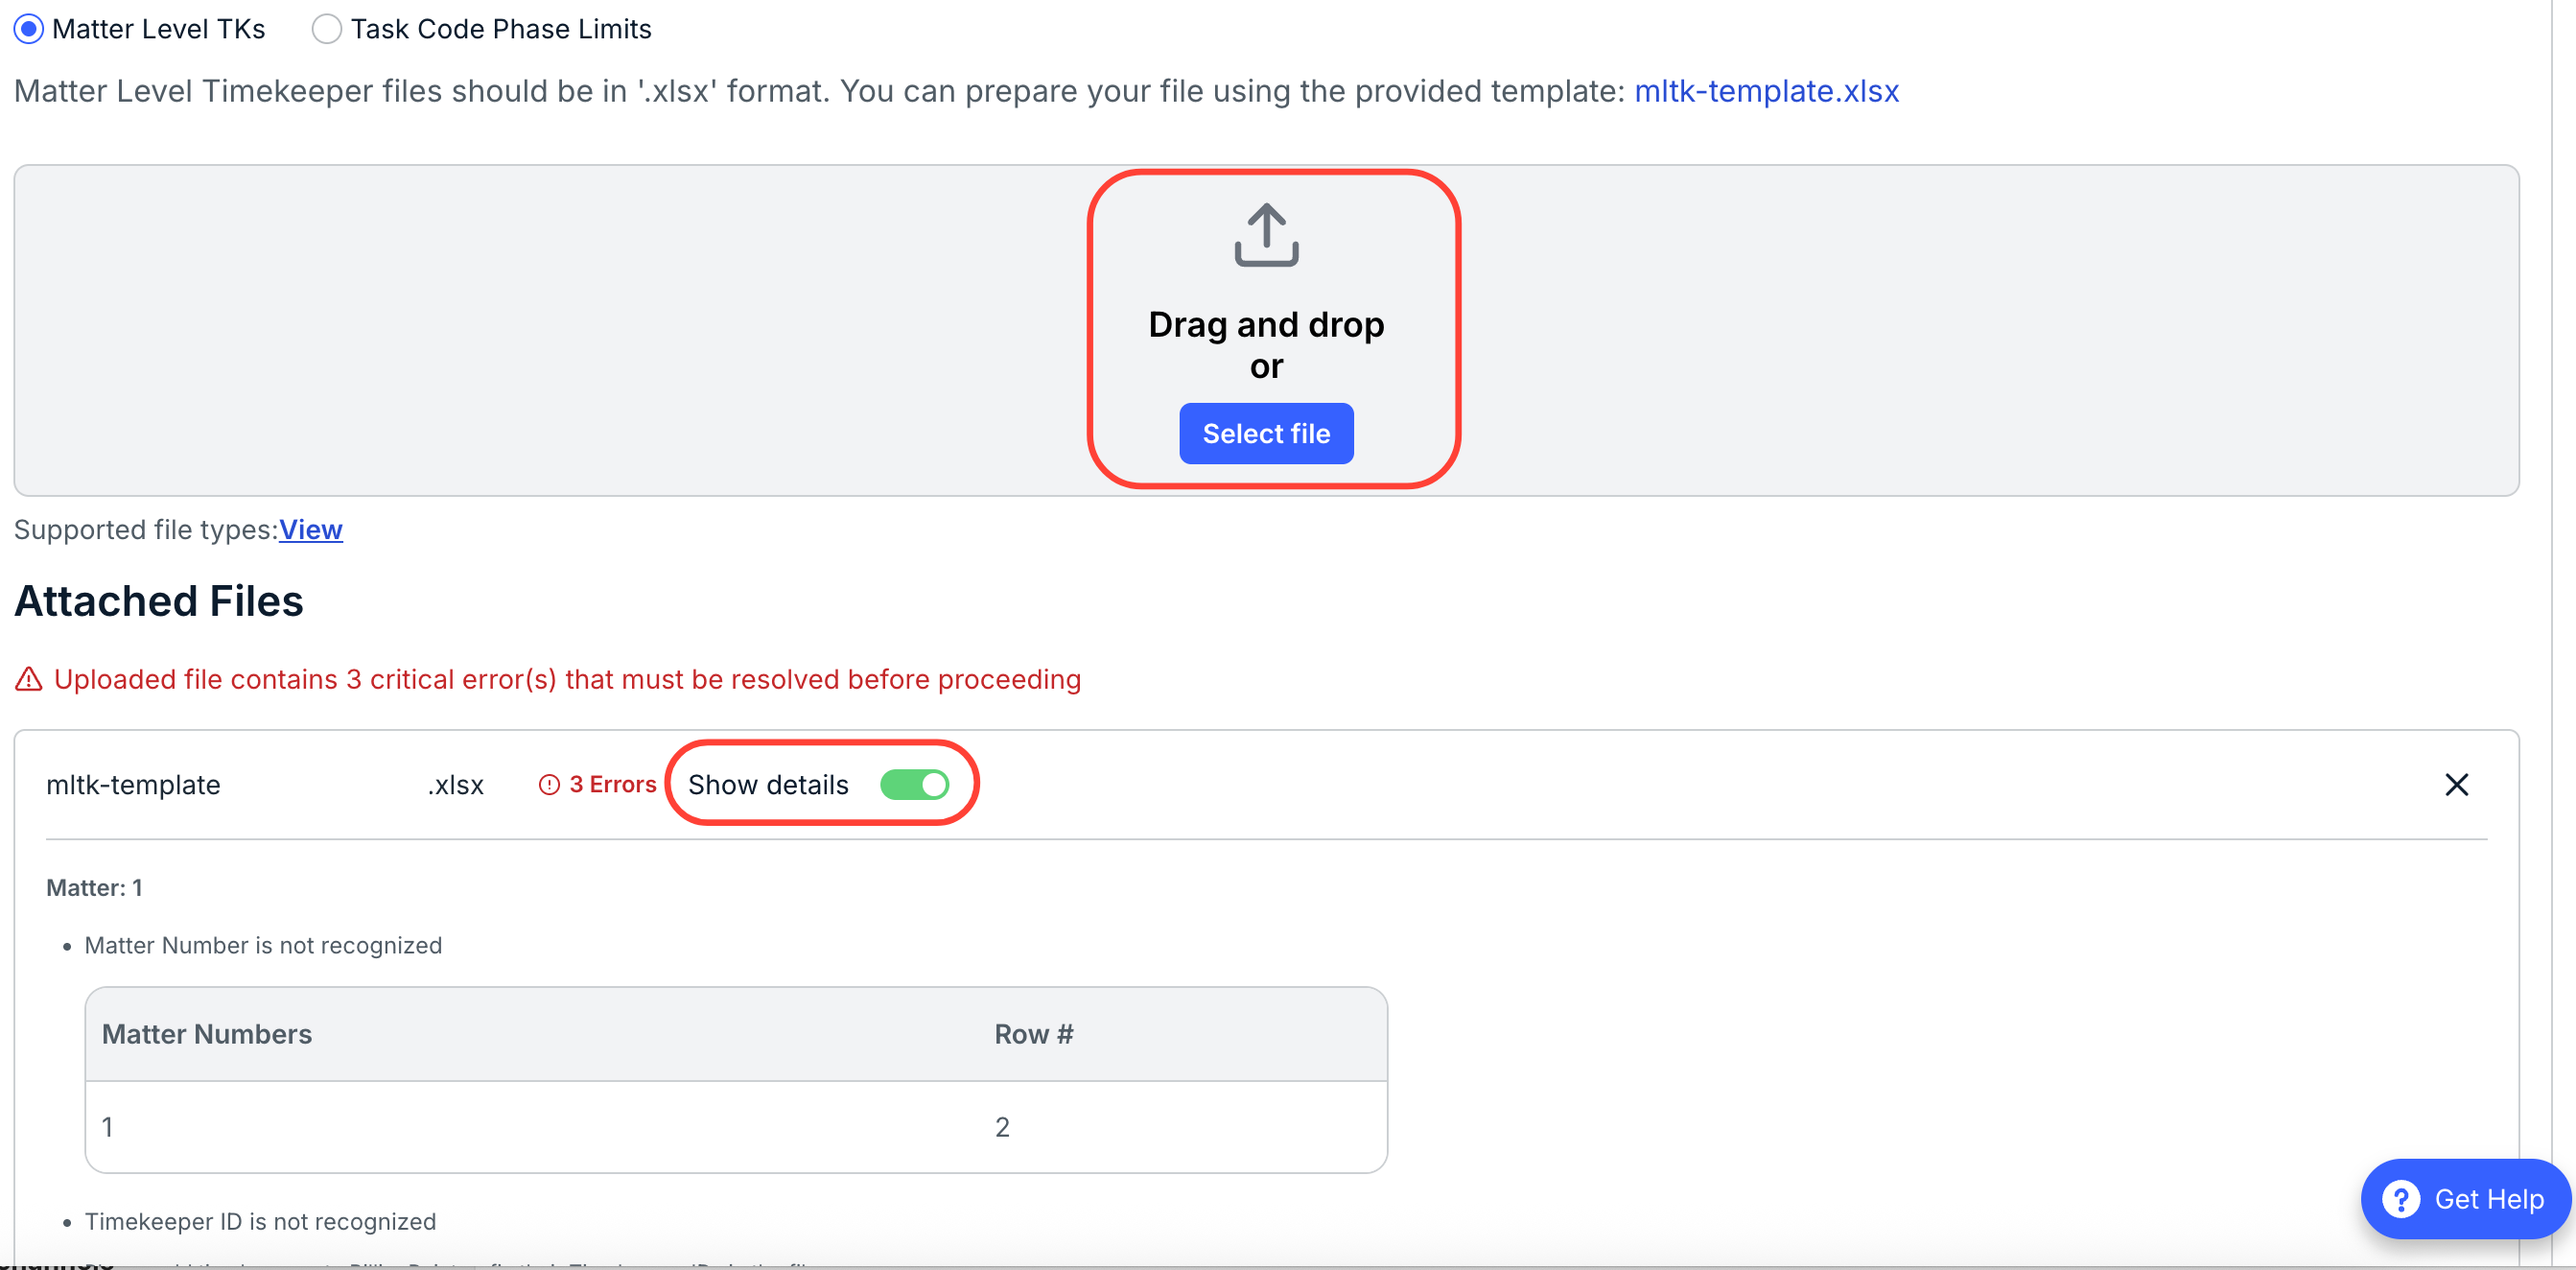
- Upload the file back to Counsel Exchange.
You can either drag-and-drop the file or click Select File to find the updated template. Any errors will appear in the Attached Files section; click the Show Details button to view them. Fix those errors and resubmit; you can click on the black X to remove any files.
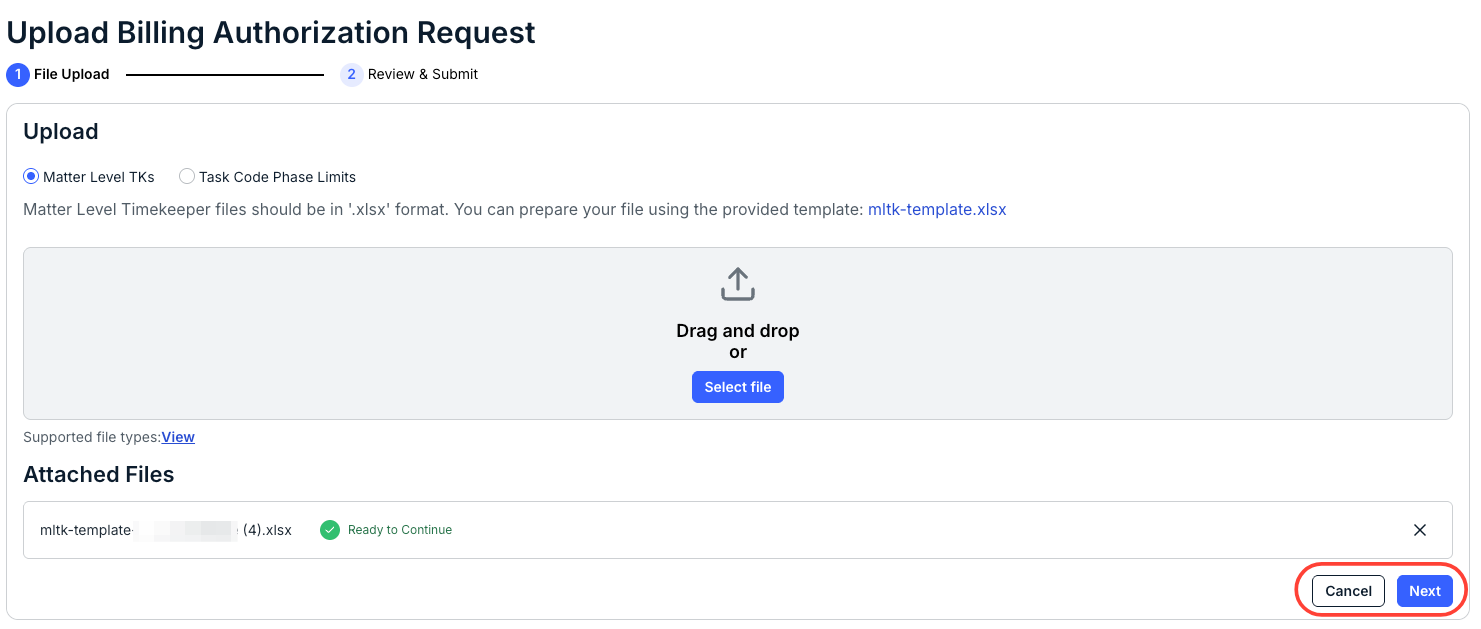
- Once you resolve errors (if any), hit "Next" to review and submit.
You'll see the You can also hit Cancel to return to the previous screen.
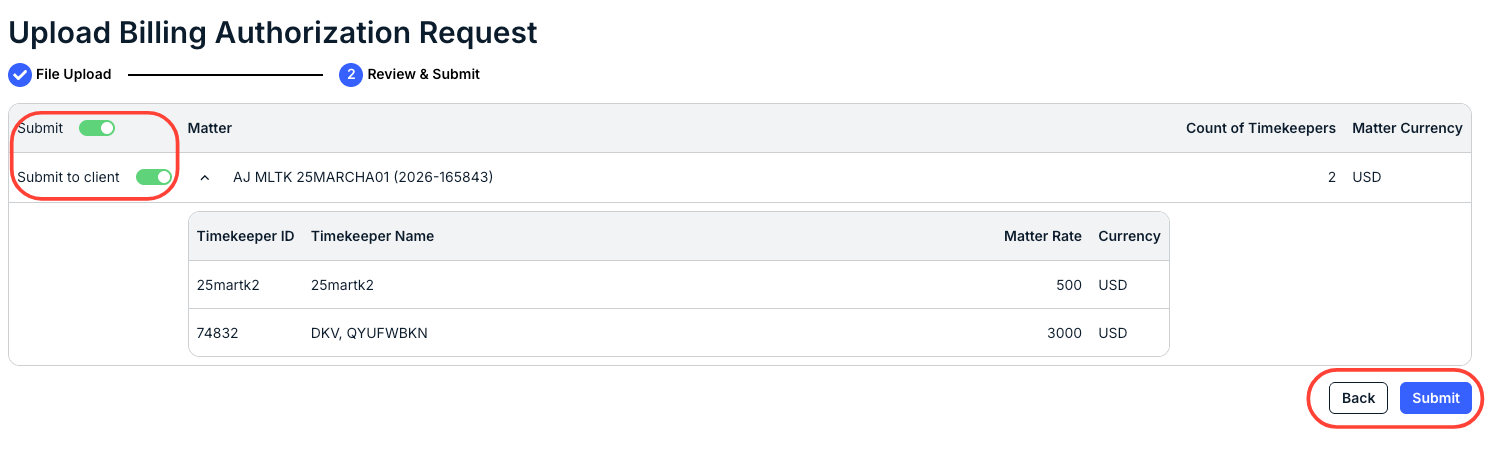
- Review the Authorization and click "Submit" to send it in.
Key information will display on this screen. Use the Submit toggle button to approve the Authorization, and then click Submit to send it in.
- Download and complete the file from the template.
Submitting Individual Matter Level Timekeeper Rates
- The primary Billing Contact will receive an email notification of the new matter.
- Sign in to Counsel Exchange and choose the Billing Authorizations tab, and find the matter assigned.
It will be listed as Pending. Click on the matter number (in blue) to open the submission form.
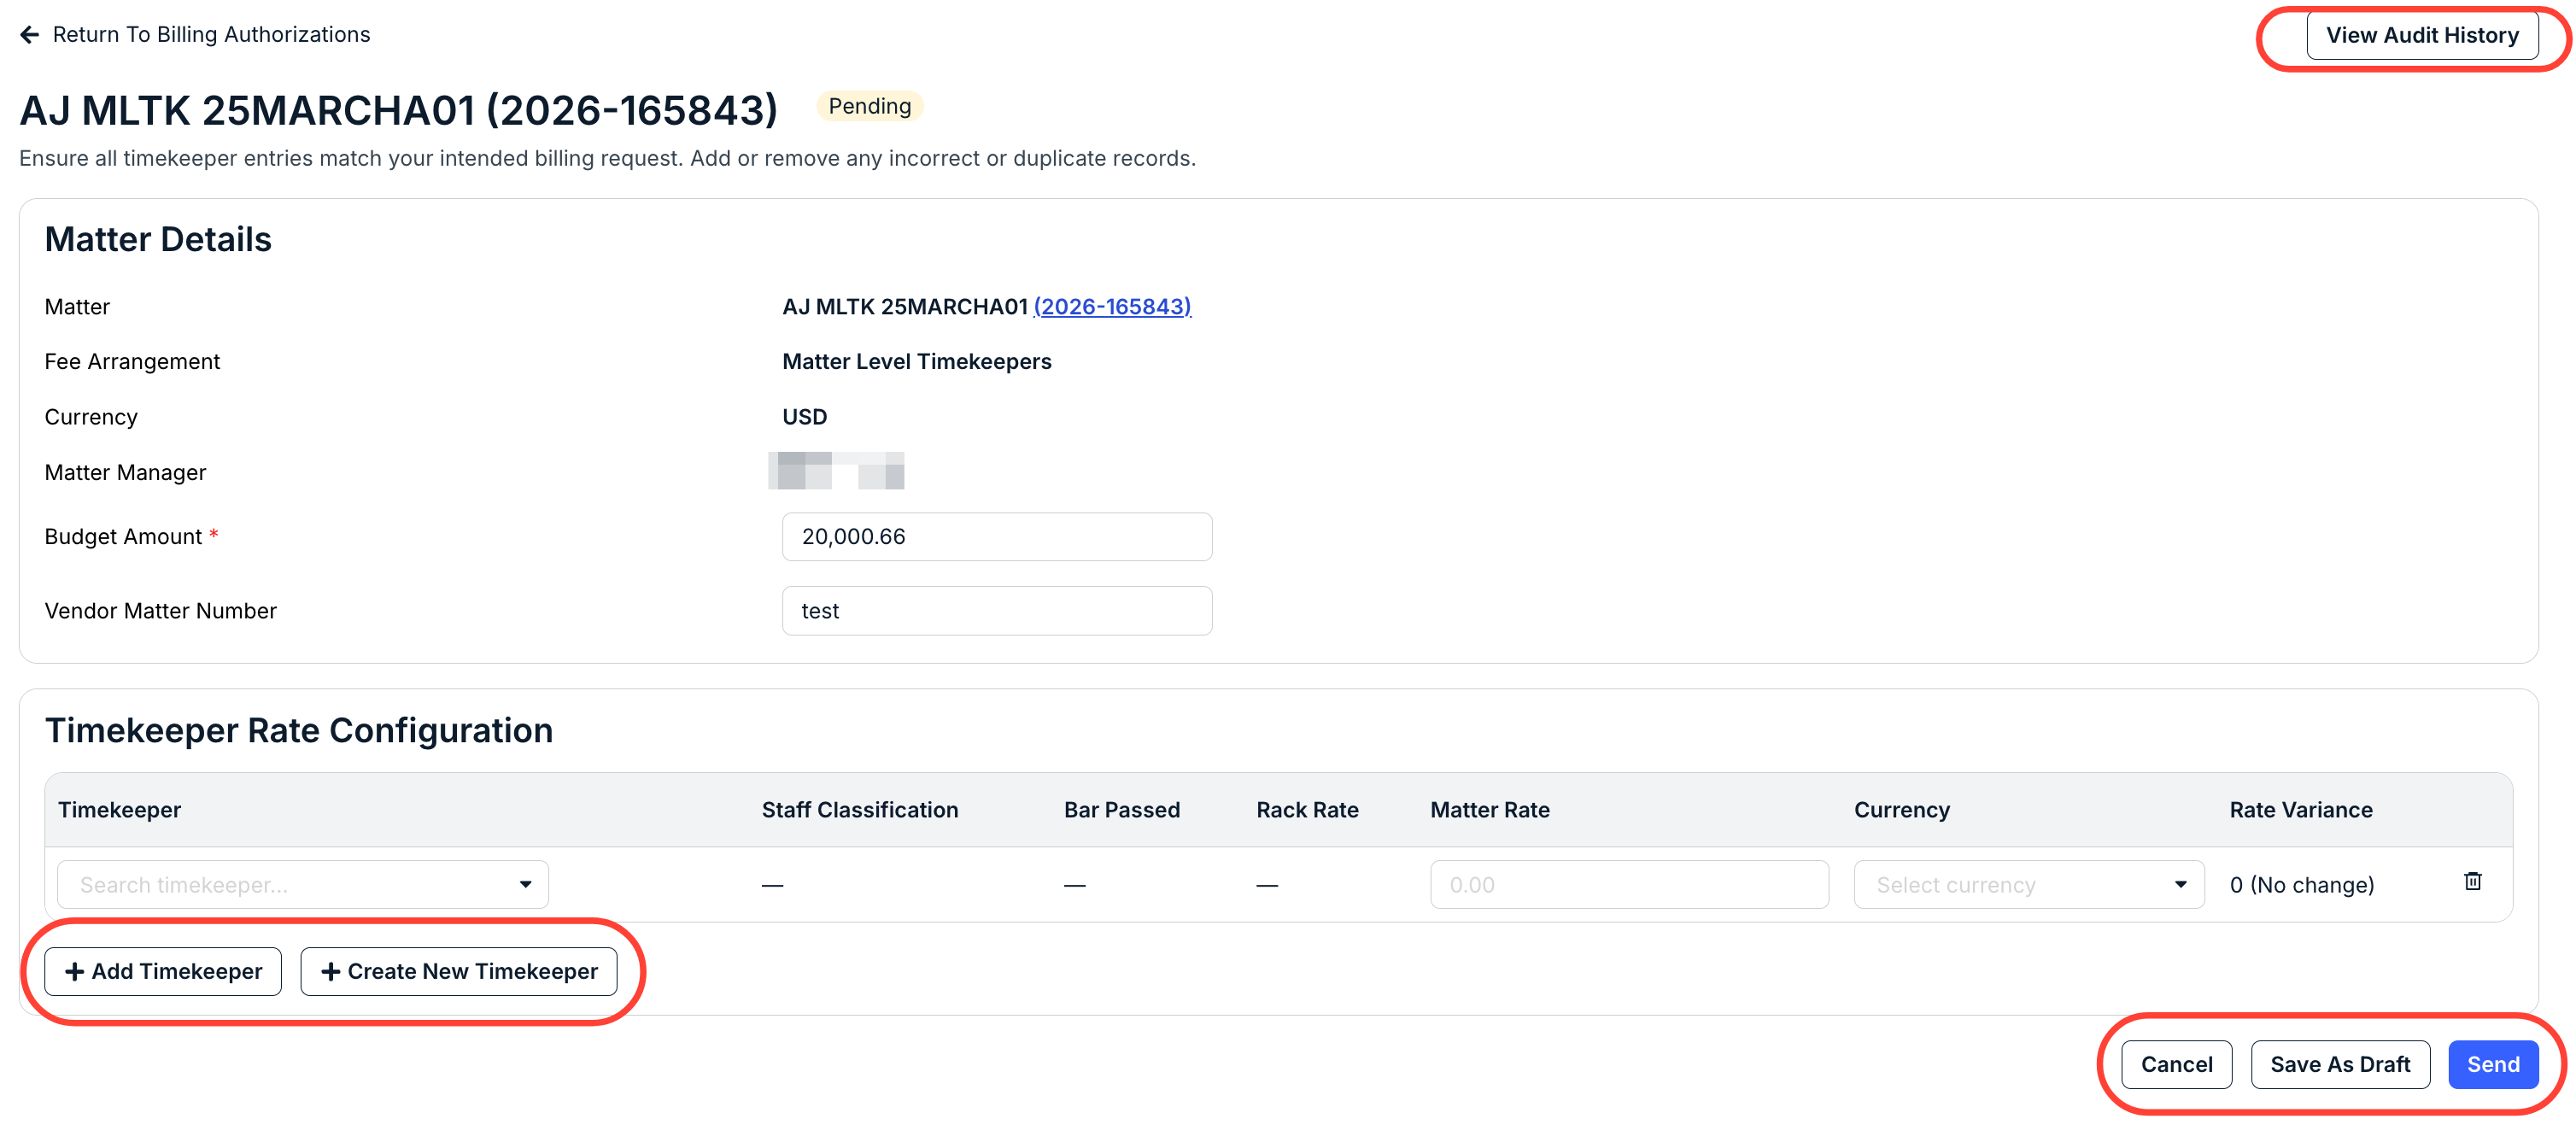
- The Billing Authorization detail screen will appear. Select each timekeeper who will work on the matter and enter their matter-specific rate and the currency.
Add as many timekeepers as needed using the Add Timekeeper button. Use the Delete (trash can) icon to delete the rate. You can also click on View Audit History to view a full audit history of the matter.
Click Send to submit to the client (or Save As Draft if you are not ready to submit, or Cancel if you want to back out).
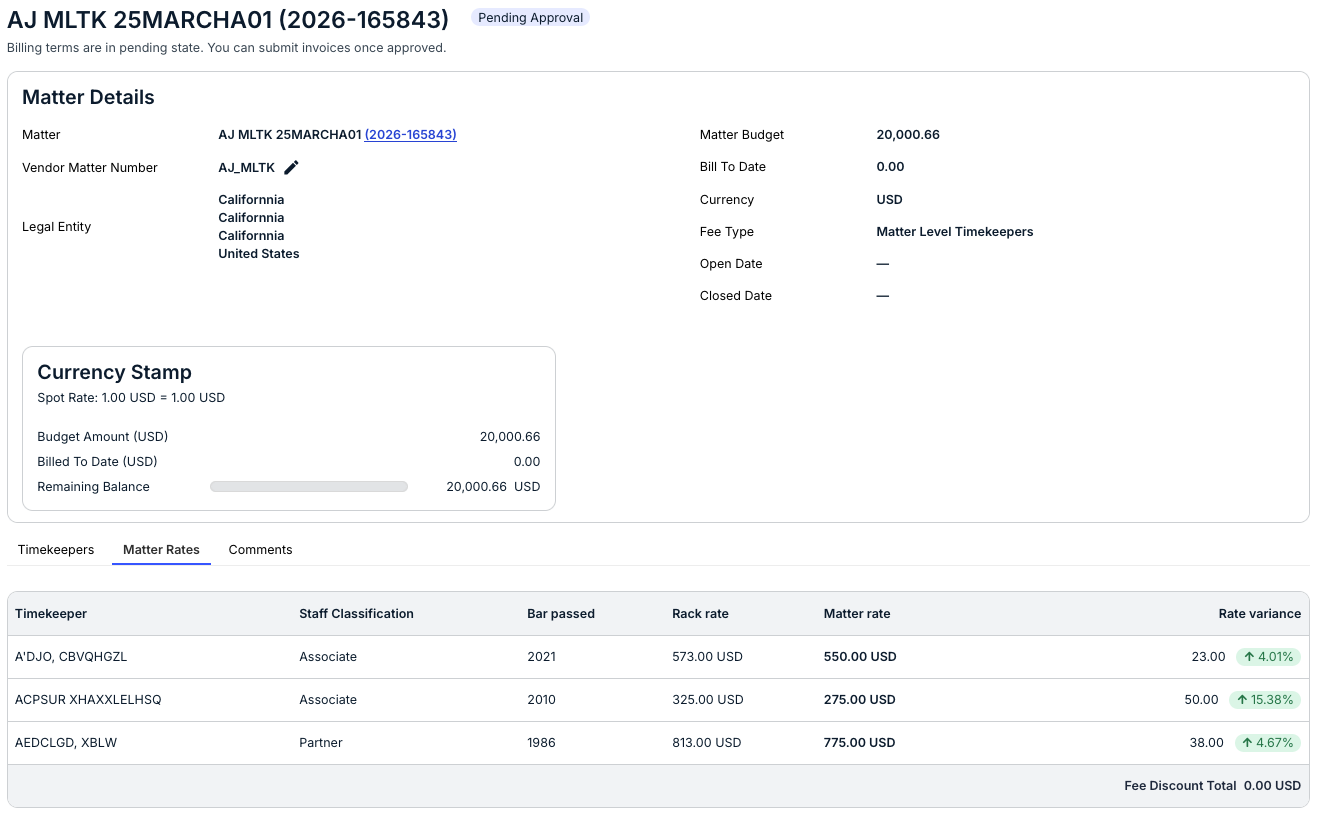
- The status will show Pending Approval after it has been submitted.
The client approver will receive notification of the submission. Once approved, the firm billing contact will receive an email notification indicating that their matter is available for invoice submission. The matter will also display with the status Approved.
- The Billing Authorization detail screen will appear. Select each timekeeper who will work on the matter and enter their matter-specific rate and the currency.
Resubmitting Disputed Matter-Level Timekeeper Rates
- The primary Billing Contact will receive an email notification for the disputed matter level timekeeper rates.
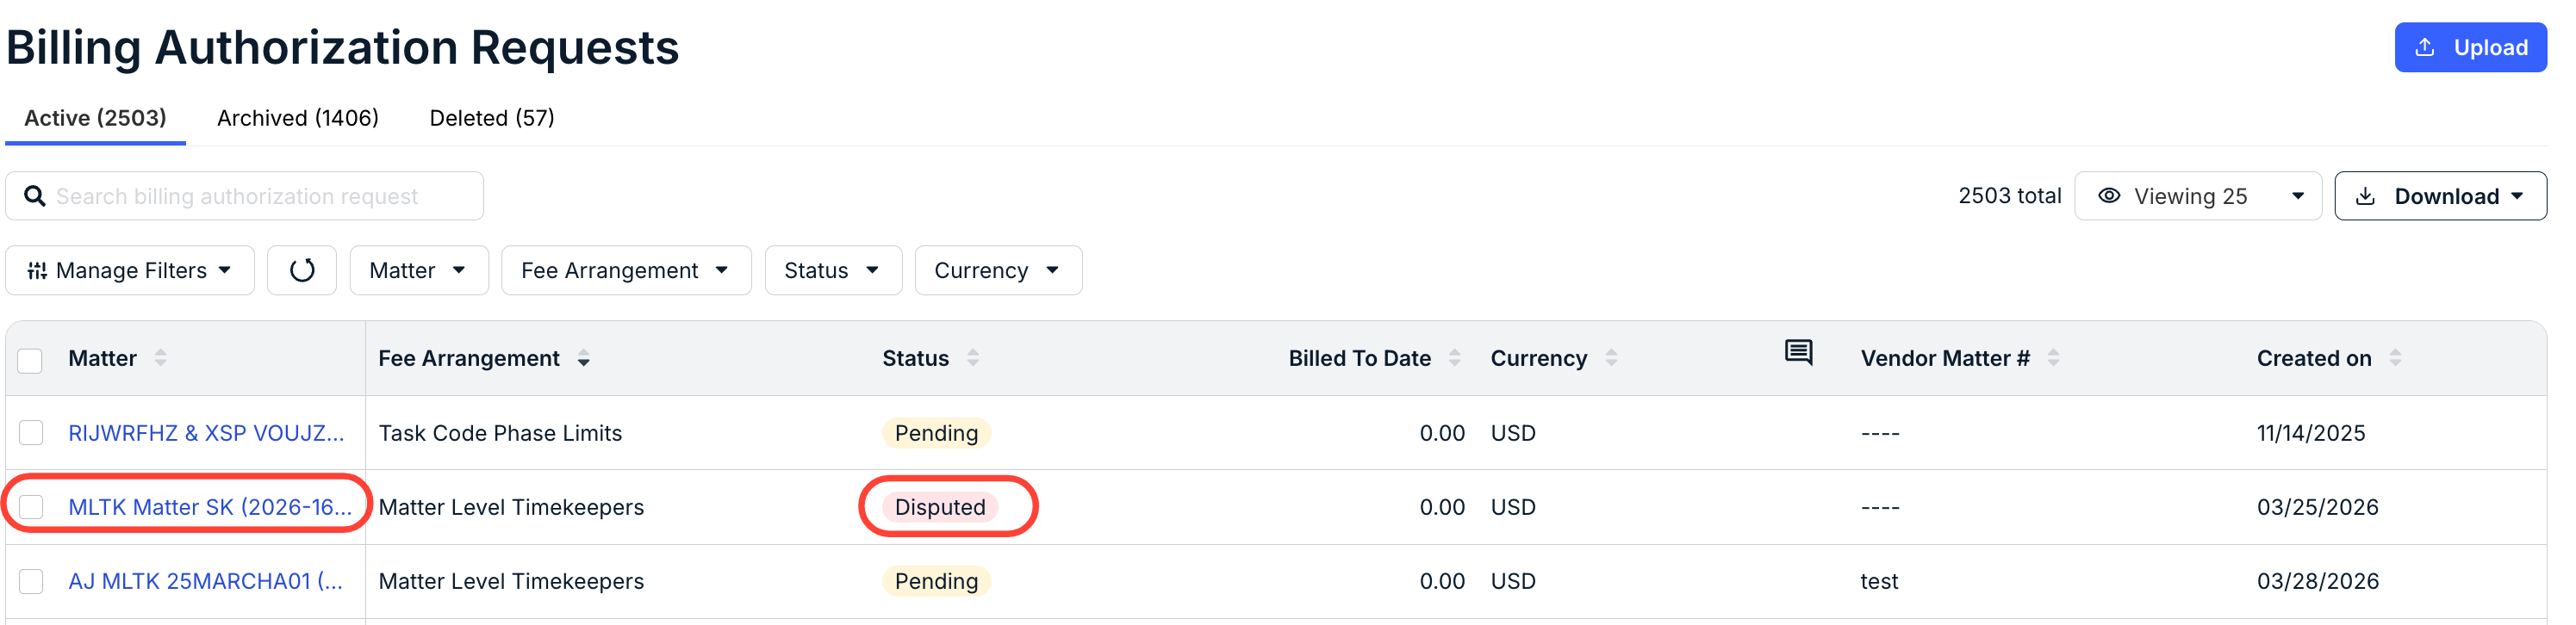
- Sign into Counsel Exchange and choose the Billing Authorizations tab. The assigned matter will be listed with a status of Disputed.
Click on the matter number (in blue) to open the submission form.
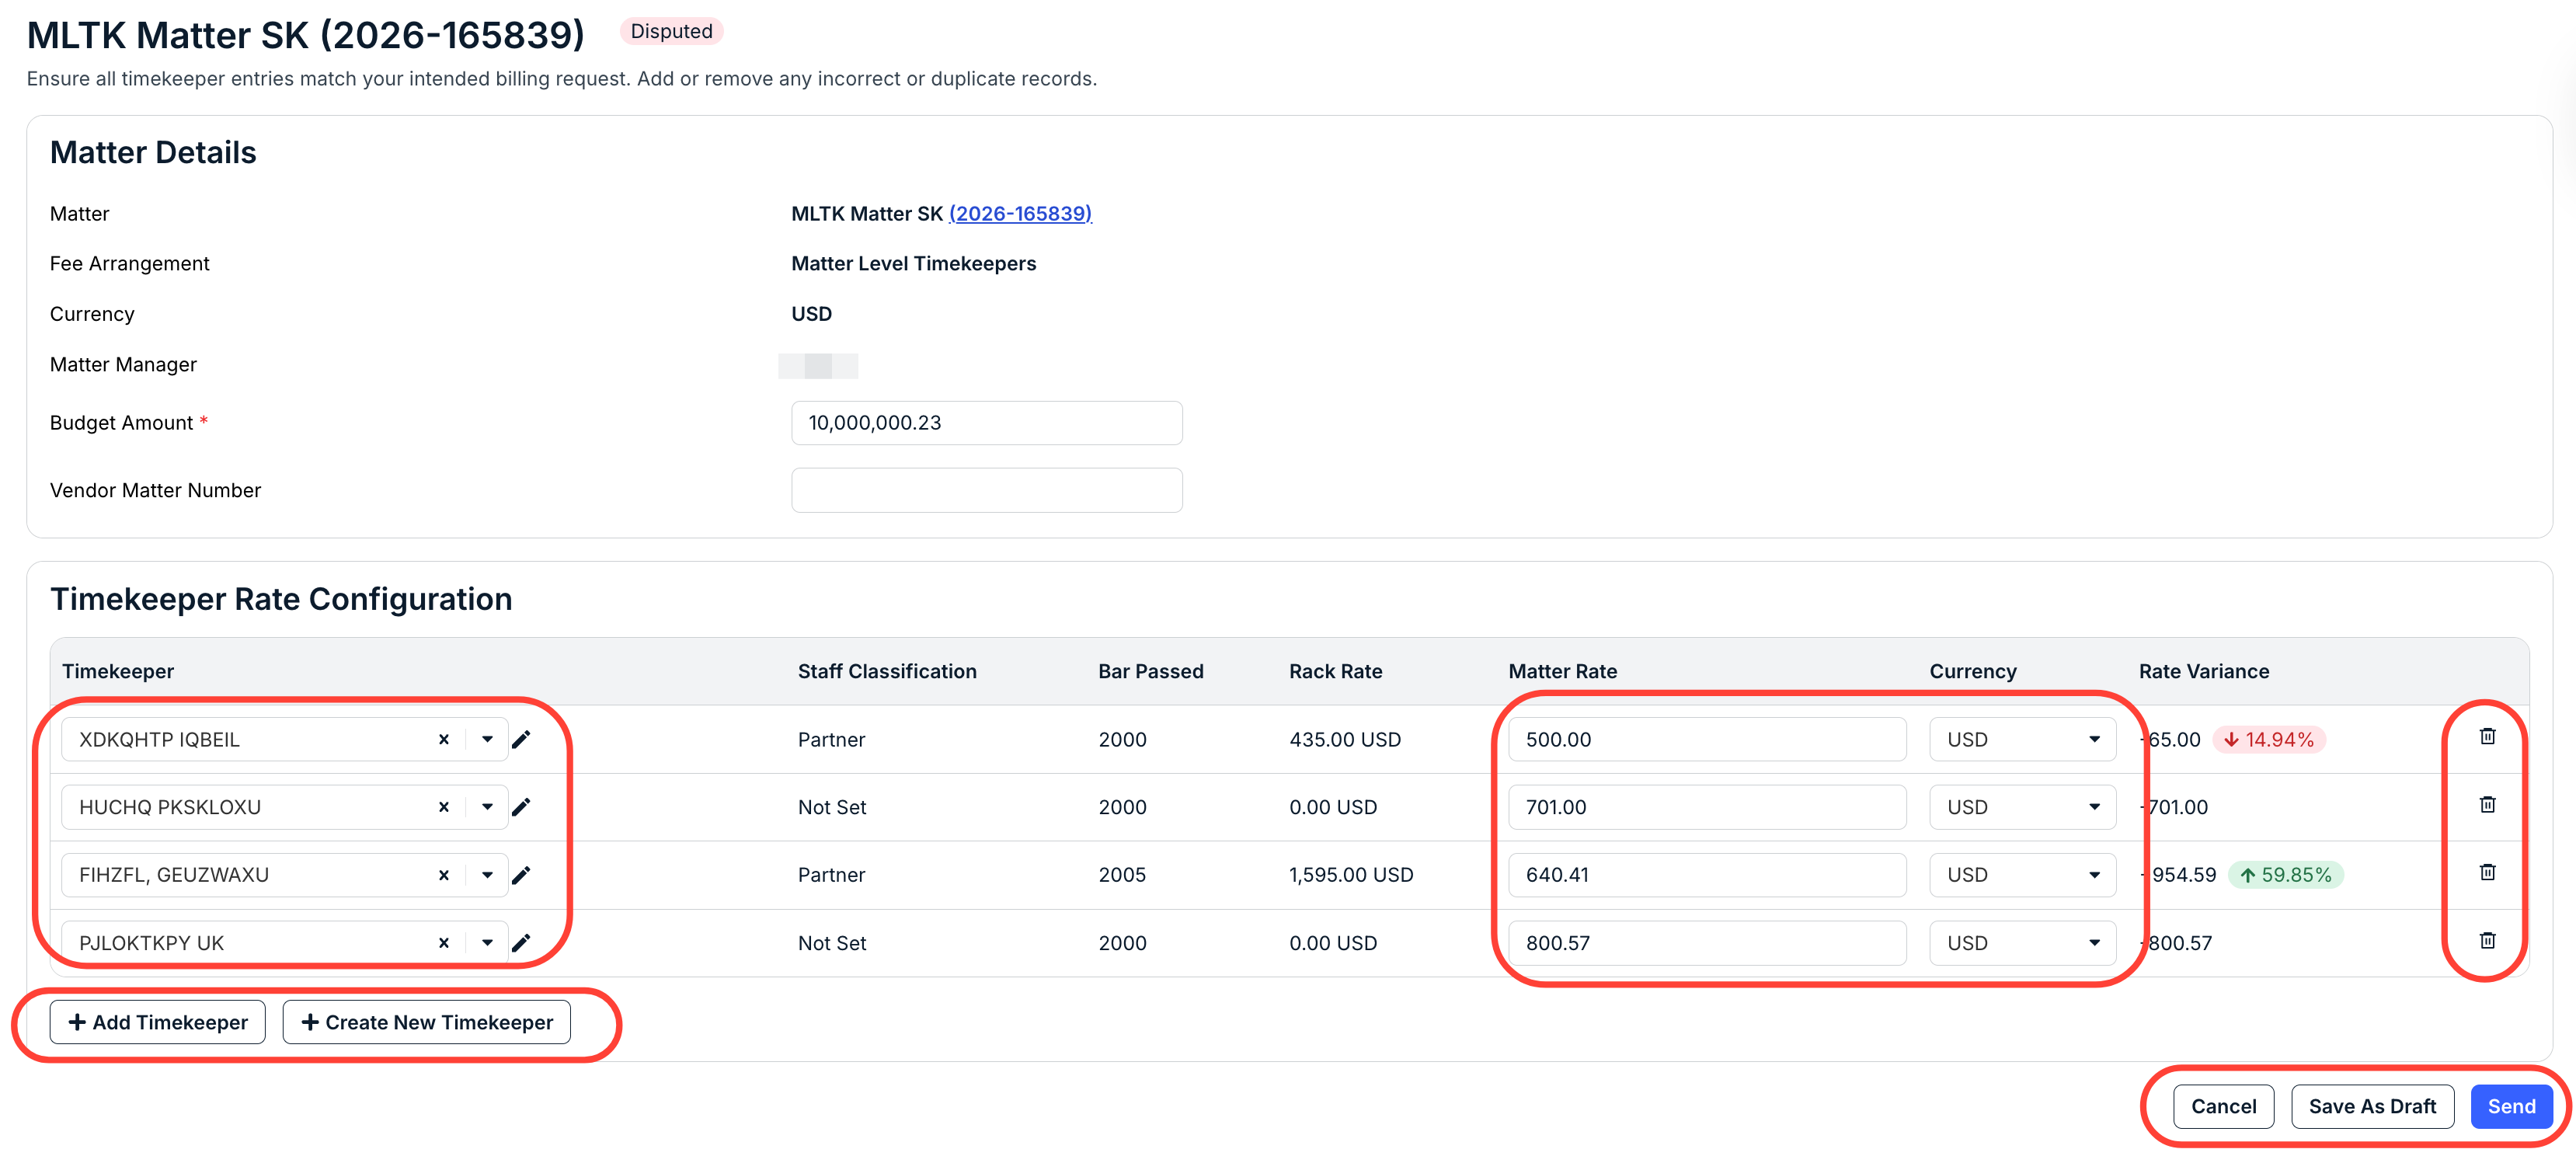
- The Matter details screen will appear. Make any changes needed to the selected timekeepers' matter rates/currencies and add or remove timekeepers as needed.
Click Send to submit to the client (or Save As Draft if you are not ready to submit, or Cancel if you want to back out altogether).
- The status will show Pending Approval after it has been submitted. The client approver will receive notification of the submission.
Once approved, the firm billing contact will receive an email notification letting them know their matter is available for invoice submission. The matter will also display with the status Approved.
