Here's how to add an attachment to an invoice in Counsel Exchange:
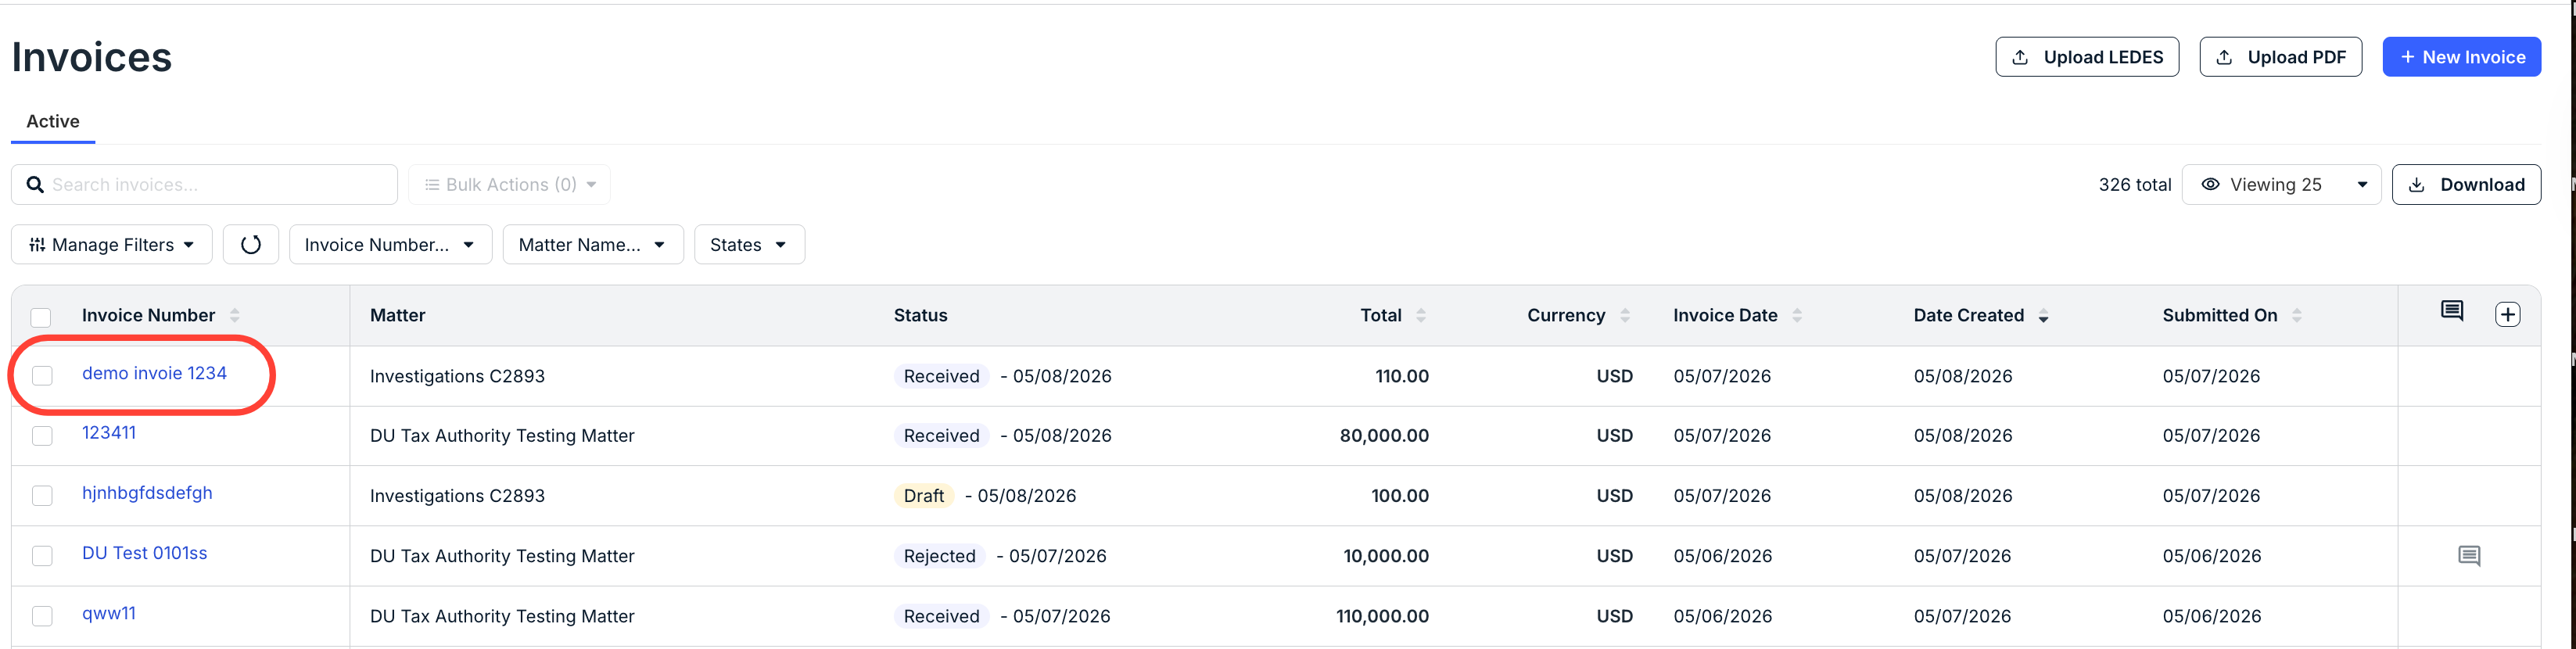
- After selecting your client in the client view of Counsel Exchange, navigate to the "Invoices" menu and then to "Invoices List."

- The Invoices list will appear. Click on the Invoice you want to add the file to.
- On the Invoice Details screen, scroll down and click on the "Files" tab.

- The "Files" tab will display any files already uploaded that are associated with the invoice.
Click the tab at top to switch between the files you've uploaded ("Shared by Us") and those the client has uploaded ("Shared with me"). Learn more about this process here.
This tab displays key file information, including Type, File Name, Description, Category, Label, Date Uploaded, Uploaded By, Size, and any Actions. Click on the up/down arrow at the start of every column to sort by that column. Click on the file name to download that file. Use the Viewing drop-down menu to adjust how many files you want to see on the screen.
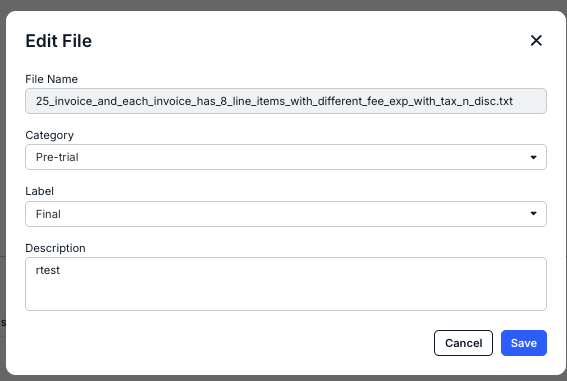
'You can use the Action column to Edit the file, Replace the file with a new version, or Delete the file entirely for files you previously uploaded. Note that you can edit the Category, Label, and Description.

- To upload a file, click on Upload.

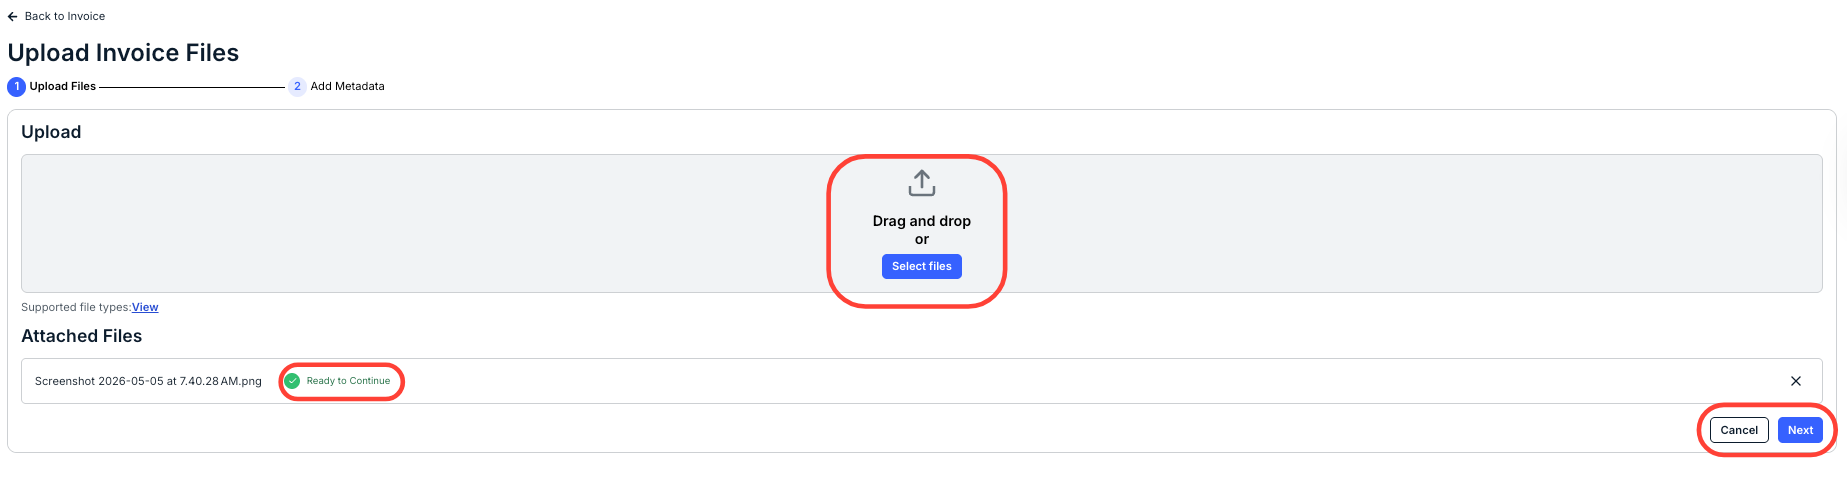
- The Upload File screen will appear.
Select the file you'd like to upload, or drag-and-drop it onto the screen. Supported file types include: .bmp, .doc, .docx, .gif, .jpeg, .jpg, .pdf, .png, .rtf, .tif, .tiff, .txt, .xls, .xlsx, and .xml.
Once attached, you'll see the green Ready to Continue message at the bottom of the screen. Click Next to move on or Cancel to back out.
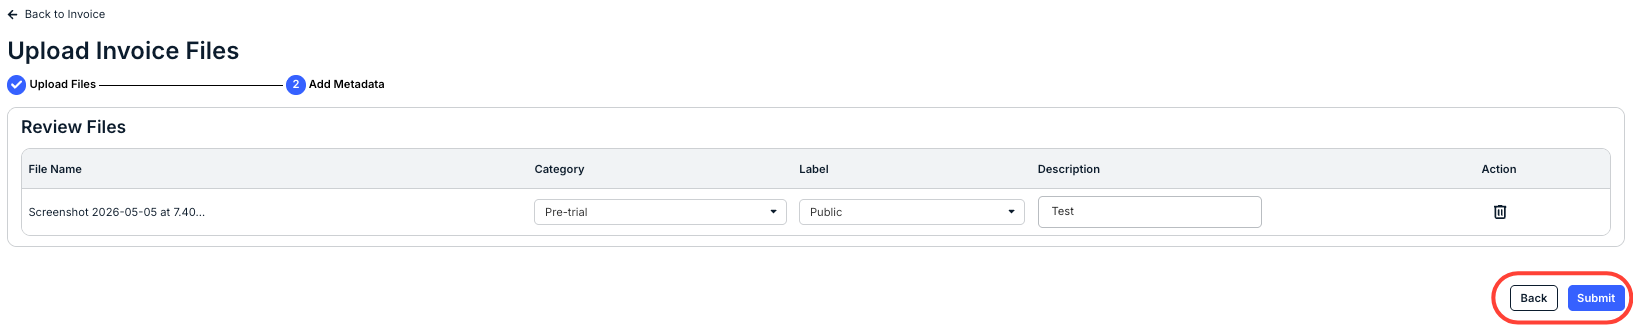
- Review your file upload and submit.
Click the drop-down menus to fill in the Category and Label, and enter a description (if necessary). You can click the Delete (trash can) icon to delete the file.
Click Submit to send in the file or Back to back out.
- The Upload File screen will appear.
- The uploaded file will appear in the main Files directory.
