Here's how to create a manual invoice within Counsel Exchange:
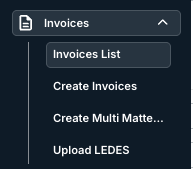
- Go to the Invoices on the left-hand side menu and click on "Invoices List."
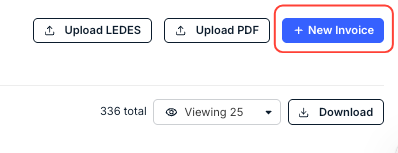
- On the right-hand side of the screen, click on the "New Invoice" button.
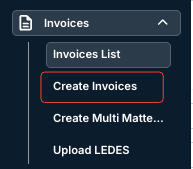
- Note that you can also click directly on the "Create Invoices" link from the Invoices drop-down menu to create an invoice.
Either option will bring you to the next step.
- Note that you can also click directly on the "Create Invoices" link from the Invoices drop-down menu to create an invoice.
- The Create Invoice screen will appear.
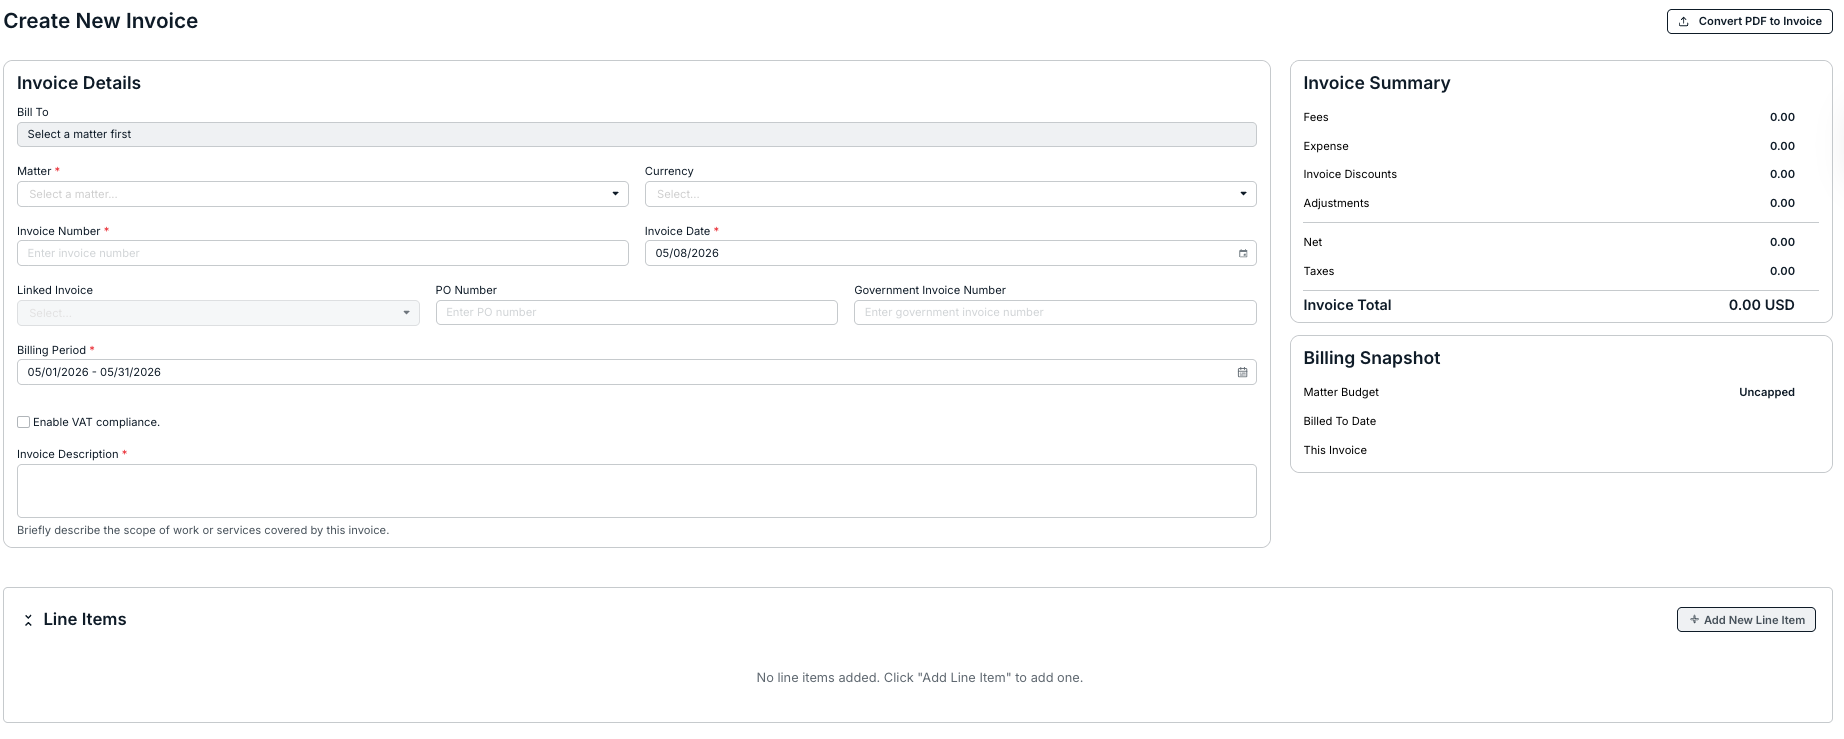
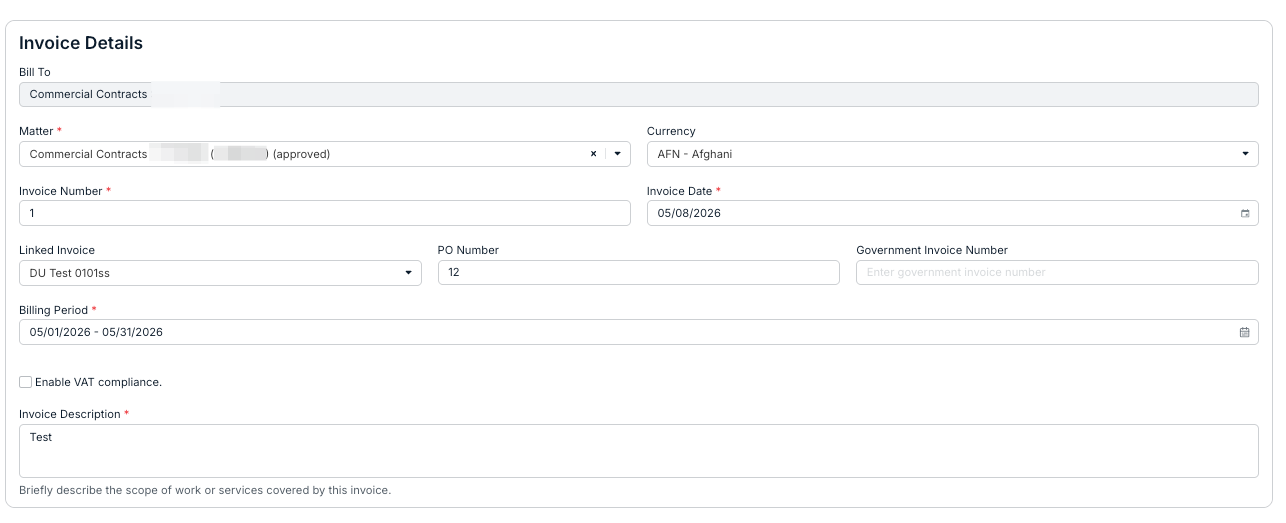
- Fill out the Invoice Details screen.
Sections marked with an asterisk (*) are mandatory; click the X to remove selections. You can fill out these sections:
- Billing Office (drop-down menu)
- Matter (drop-down menu)
- Currency
- Invoice Number
- Invoice Date (the date when the invoice is created)
- Linked Invoice (drop-down menu)
- PO Number
- Government Invoice Number
- Billing Period (note that you can only select a date range that is max one year at a time)
- Whether or not you want to Enable VAT Compliance (check box)
- The Invoice Description. Here you can briefly describe the scope of work or services covered by this invoice.
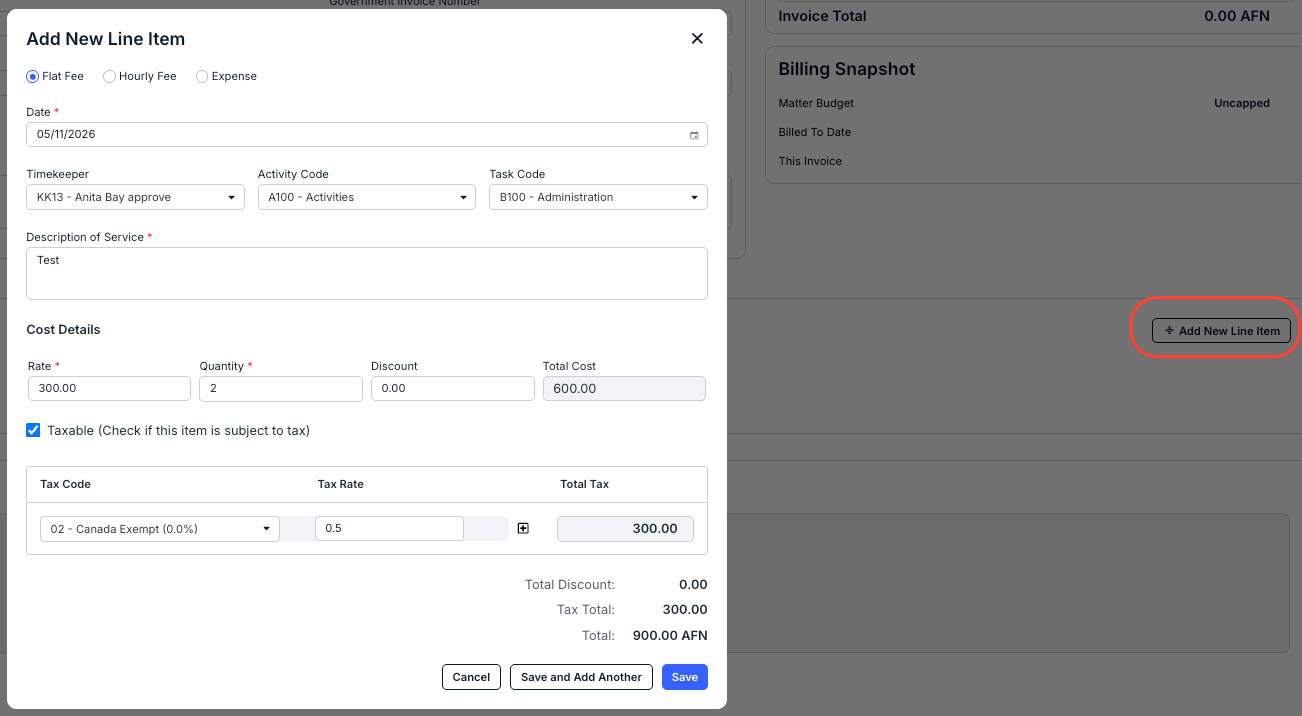
- Fill out any Line Items.
Click the up/down arrows next to Line Items to show details of any line items included.


Click Add Line Item to add either a Flat Fee, Hourly Fee, or Expense.
For Flat Fees and Hourly Fees, you can fill out the:
- Date
- Timekeeper (drop-down menu
- Activity Code (drop-down menu)
- Task Code (drop-down menu)
- Description of Service
- Cost Details, including Rate, Quantity, and Discount ^%. Note that the Total Cost will continually update.
Fields marked with an asterisk (*) are mandatory.
Click on the Taxable box if the item is subject to tax. If so, you'll have to add in the Tax Code and Tax Rate. Click the Plus button to add another tax row or the Trash button to remove the tax line. The Total Tax box will continually update.
You'll see the Totals calculate at the bottom of the screen. Click on Save to save the Line Item, Save and Add Another to add another line item, or Cancel to back out.
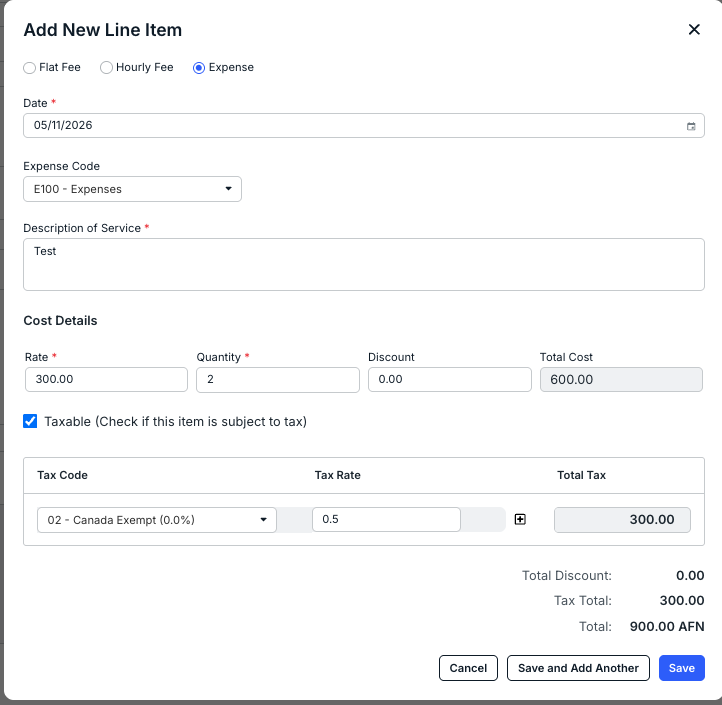
For an Expense, there is:
- Date
- Expense Code (drop-down menu)
- Description of Service
- Cost Details, including Unity Cost, Quantity, and Discount ^%. Note that the Total Cost will continually update.
Fields marked with an asterisk (*) are mandatory.
Click on the Taxable box if the item is subject to tax. If so, you'll have to add the Tax Code and Tax Rate. Click the Plus button to add another tax row or the Trash button to remove the tax line. The Total Tax box will continually update.
You'll see the Totals calculate at the bottom of the screen. Click on Save to save the Line Item, Save and Add Another to add another line item, or Cancel to back out.
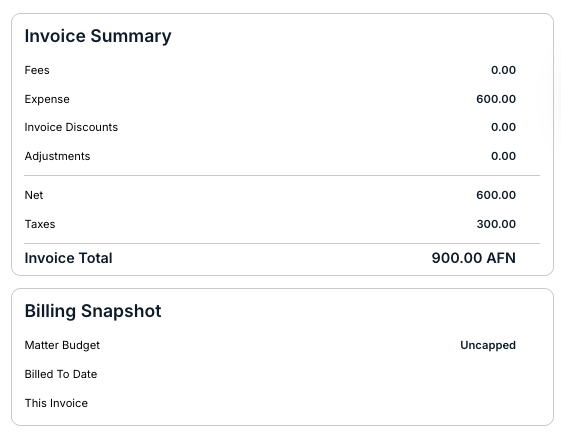
Once you've finished adding in your Line Items, note that the totals will update within the panel.

- Note that the Invoice Summary and Billing Snapshot screens will update with the added information.
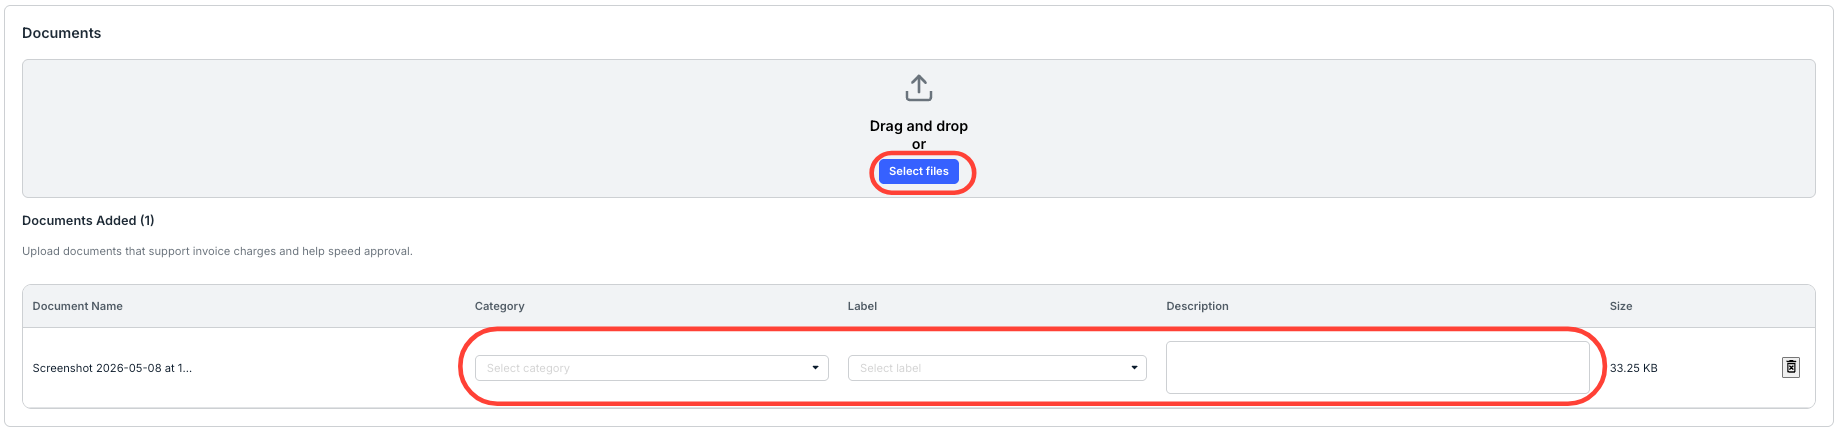
- Use the Documents section to upload a document to the invoice.
Use the drag and drop option or Select Files to choose the document to upload.
After the document is uploaded, you can choose the Category and Label from the drop-down menus and fill in a Description (if necessary); click on the Delete (trash can) option to remove the file.
- Fill out the Invoice Details screen.
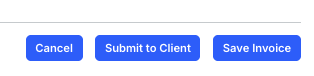
- Hit "Submit to Client" to send the invoice in.
Note that you can also click on Save Invoice to save the invoice for later work, or click Cancel to back out.
When sending the invoice, ensure a status of Pending Approval to confirm successful submission to your client. If the invoice fails, it was not submitted and you will need to correct the errors listed and then reattempt submission.
- You can see the invoice details on the main Invoice List screen.

- You can see the invoice details on the main Invoice List screen.