Use the LSR Settings feature in Unity to configure key LSR settings.
Here are an overview of the LSR settings:
Accessing LSR Settings
To access the LSR settings, open the Settings menu on the left-hand side of the screen and click on LSR.
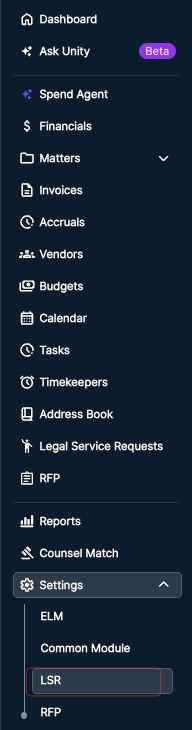
You'll see the LSR Settings screen appear. There are six different options:
- Activity Logs
- Knowledge Base
- Knowledge Base Settings
- Picklist Value Management
- Matter Field Mappings
- Request Type Management
- Request Type Rounting
We'll go over all these settings here.
Activity Logs
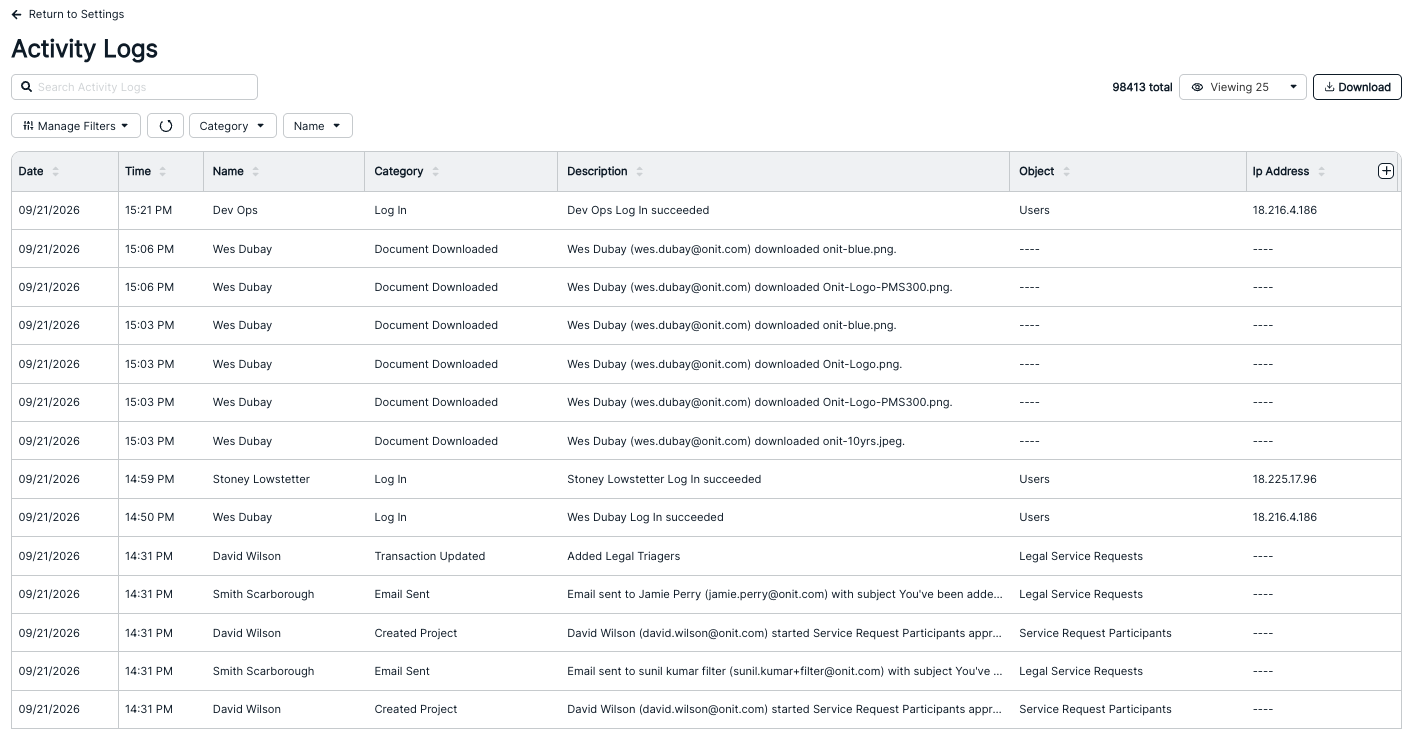
This section allows you to view, search, and audit activity logbooks of user activities.
On the Activity Logs directory you'll see the activity Date, Time, Name, Category, Description, Object, and IP Address. Use the up/down arrows on each category to sort by that category. Use the Search Activity Logs bar to search for specific activities. Use the Manage Filters and other drop-downs to modify what you see on the screen. Use the Viewing drop-down to manage how many records you see on the screen. Click Download to download the activity logs.
Knowledge Base
This section allows you to view or edit Knowledge Base documents.
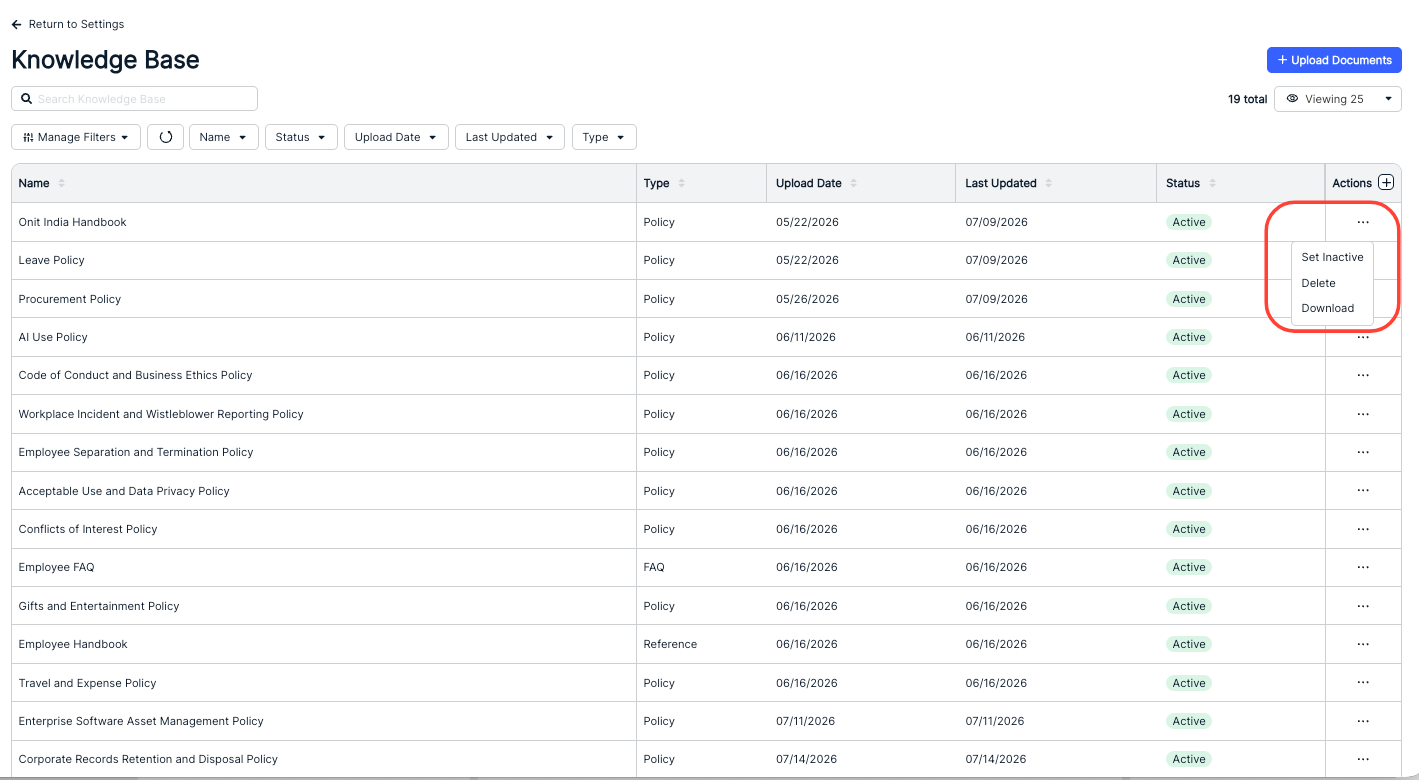
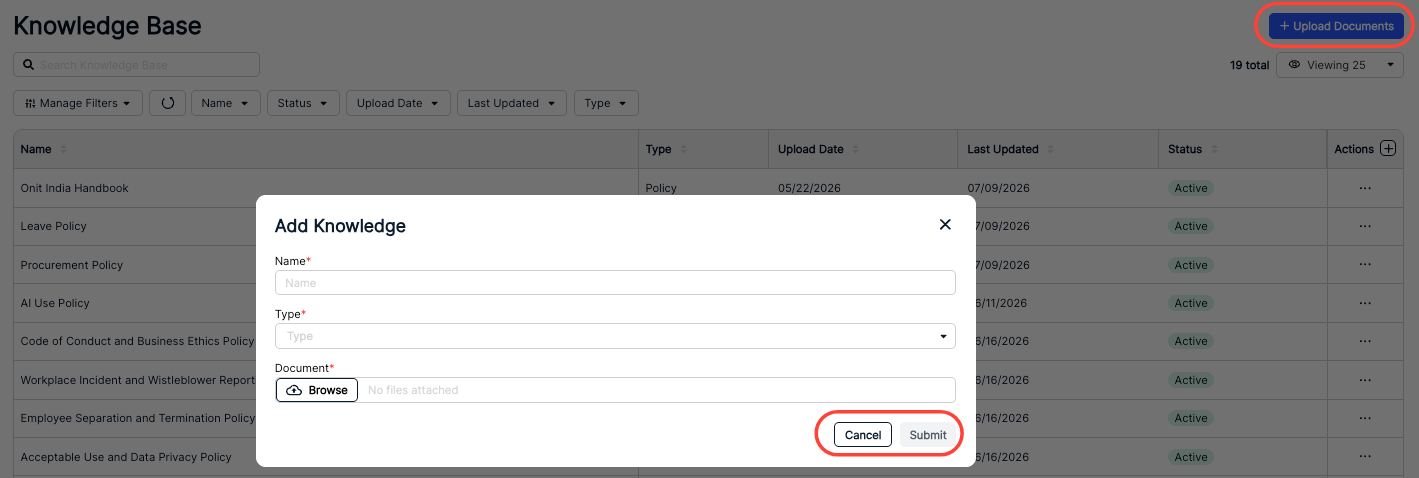
On the Knowledge Base directory you'll see the knowledge base Name, Type, Upload Date, Last Updated, and Status columns. Use the up/down arrows on each category to sort by that category. Use the Search Knowledge Base bar to search for specific documents. Use the Manage Filters and other drop-downs to modify what you see on the screen. Use the Viewing drop-down to manage how many records you see on the screen.
Use the Actions three-dot menu to Set the document Inactive, Delete the document, or Download the document.
Click Upload Documents to add documents to the knowledge base. You'll have to fill out the Name, Type, and find the Document to upload. Click Submit to send in the file or Cancel to back out.
Learn more about the Knowledge Base in the Knowledge Agent user guide.
Knowledge Base Settings
This section allows you to view or edit Knowledge Base settings.
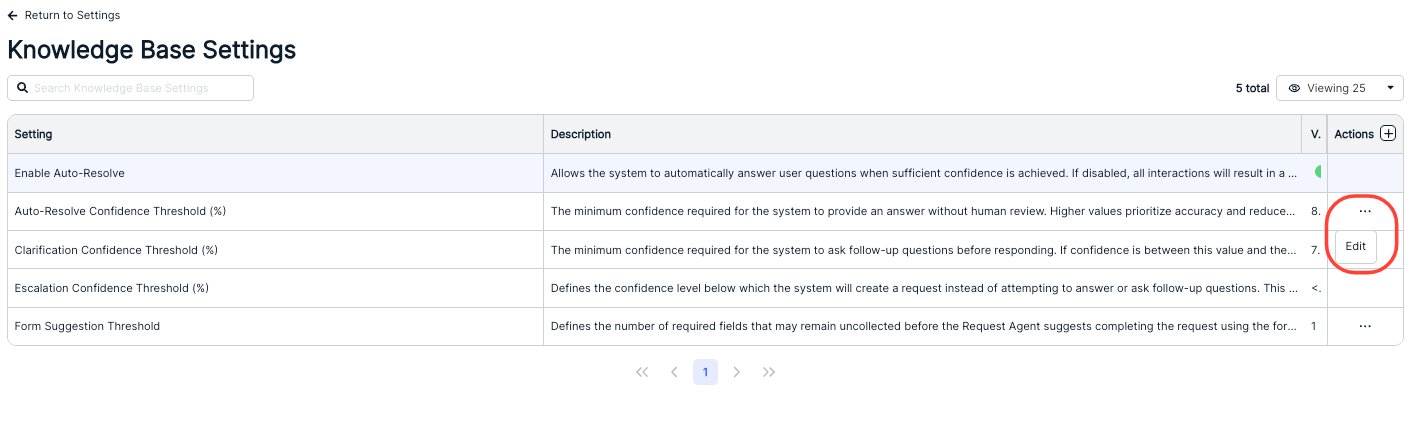
On the Knowledge Base Settings directory you'll see the knowledge base Setting, Description, and Value. Use the Search Knowledge Base bar to search for specific documents. Use the Manage Filters and other drop-downs to modify what you see on the screen. Use the Viewing drop-down to manage how many records you see on the screen. Click on the three-button Actions menu to Edit the Setting.
Learn more about the Knowledge Base in the Knowledge Agent user guide.
Picklist Value Management
This section allows you to configure the available values for picklist fields used throughout Legal Service Requests.
Use the top tabs to switch between categories; click All to see all picklist values. Click the right arrow option to see other categories.
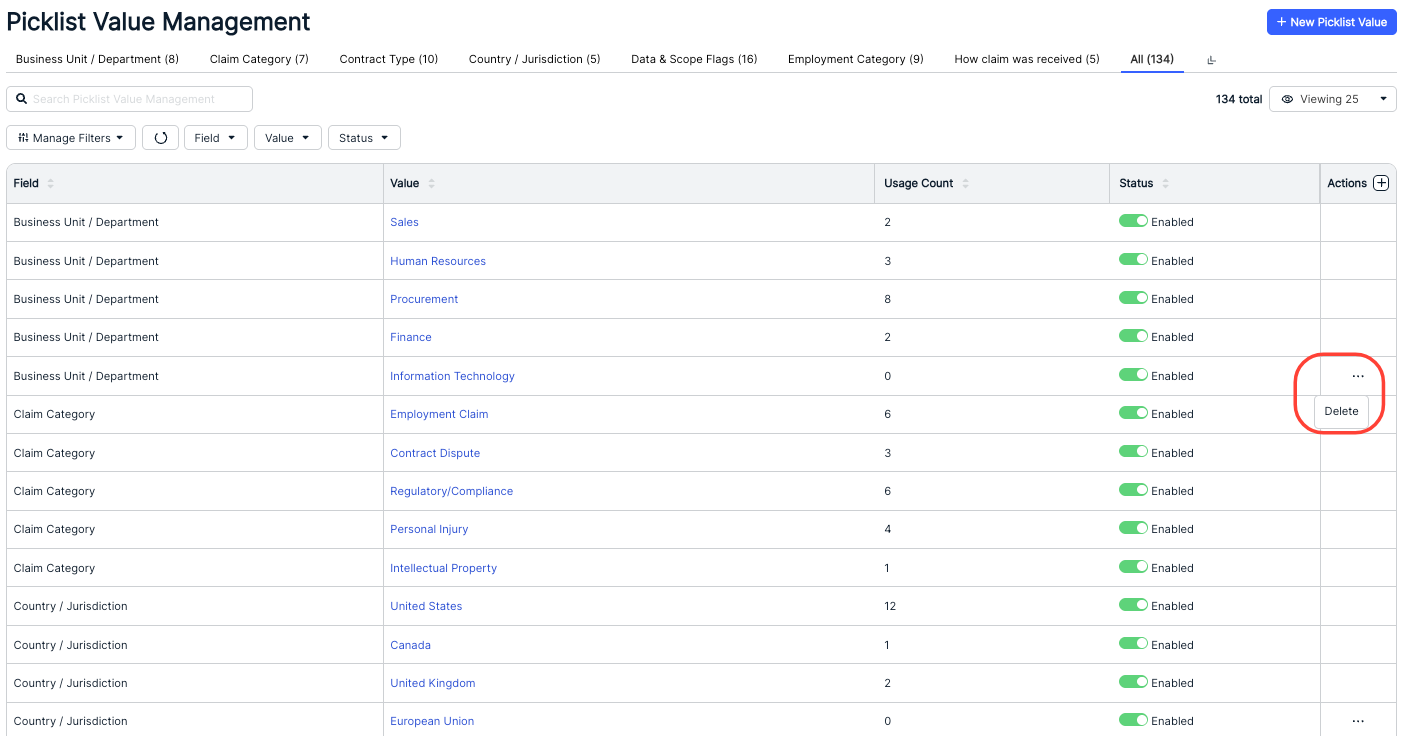
On the Picklist directory you'll see the picklist Field, Value, Usage Count, and Status (Enabled/Disabled). Use the Search Picklist Value Management bar to search for specific values. Use the Manage Filters and other drop-downs to modify what you see on the screen. Use the Viewing drop-down to manage how many records you see on the screen. Click on the three-button Actions menu to Delete the value (if applicable).
Click the Status toggle to switch the values from Enabled to Disabled.
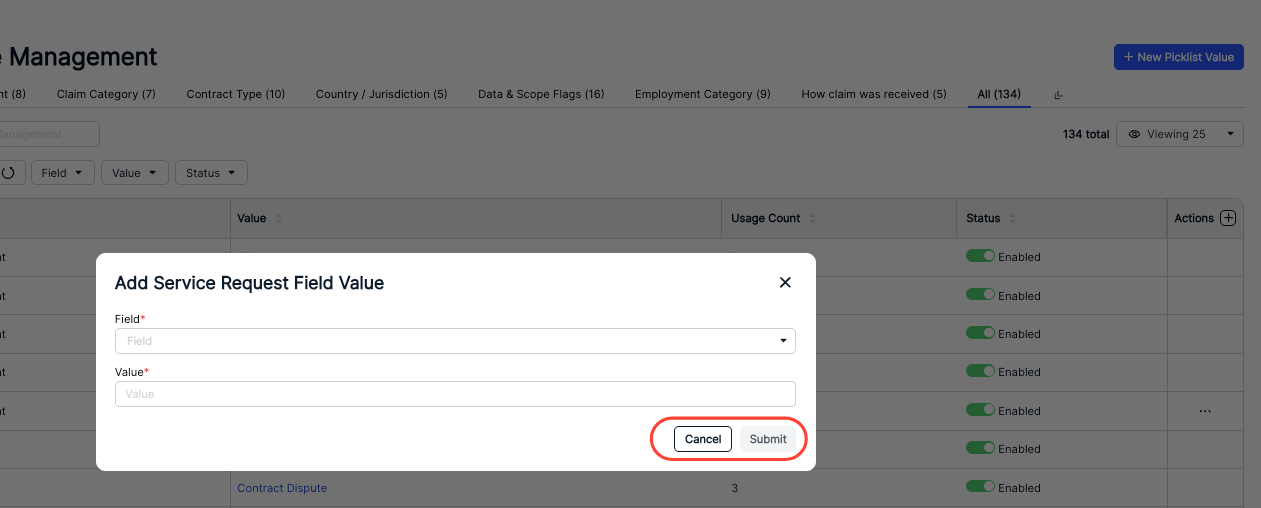
Click on New Picklist Value to create a new value. Select the Field and Value from the drop-down menu and click Submit to send the value in or Cancel to back out.
Request Type Management
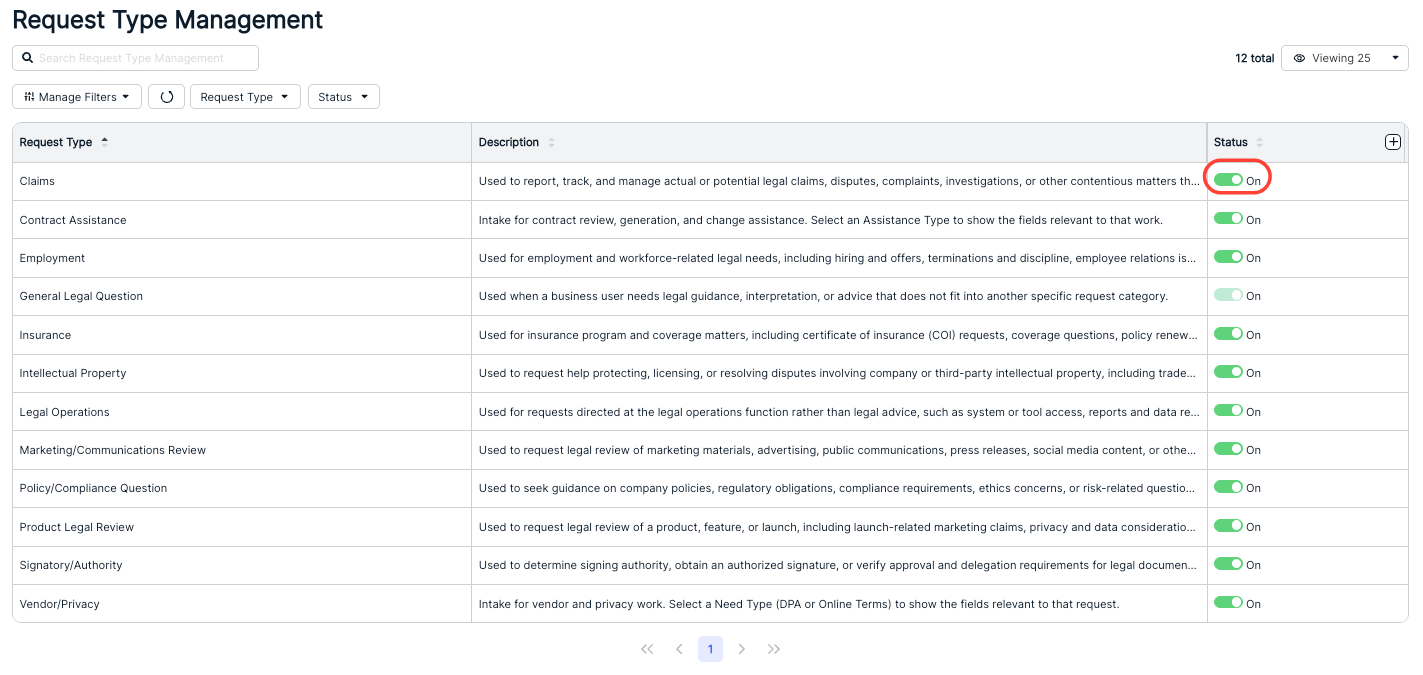
This section allows you to enable or disable available request types for Legal Service Requests. Disabled request types will no longer be available for selection by users or AI-driven intake. At least one request type must remain enabled.
On the Request Type Management directory you'll see the Request Type, Description, and Status (On/Off). Click the up/down arrows to sort by that category. Use the Search Request Type Management bar to search for specific types. Use the Manage Filters and other drop-downs to modify what you see on the screen. Use the Viewing drop-down to manage how many records you see on the screen.
Use the On/Off Status toggle to turn the request types on or off.
Request Type Routing
This section allows you to configure the users responsible for handling each request type. Requests are automatically assigned.
On the Request Type Routing directory you'll see the Request Type, Assigned User(s), and Actions menu. Click the up/down arrows to sort by that category. Use the Search Request Type Routing bar to search for specific types. Use the Manage Filters and other drop-downs to modify what you see on the screen. Use the Viewing drop-down to manage how many records you see on the screen.
Click the three-button Actions menu to Edit the request type routing.
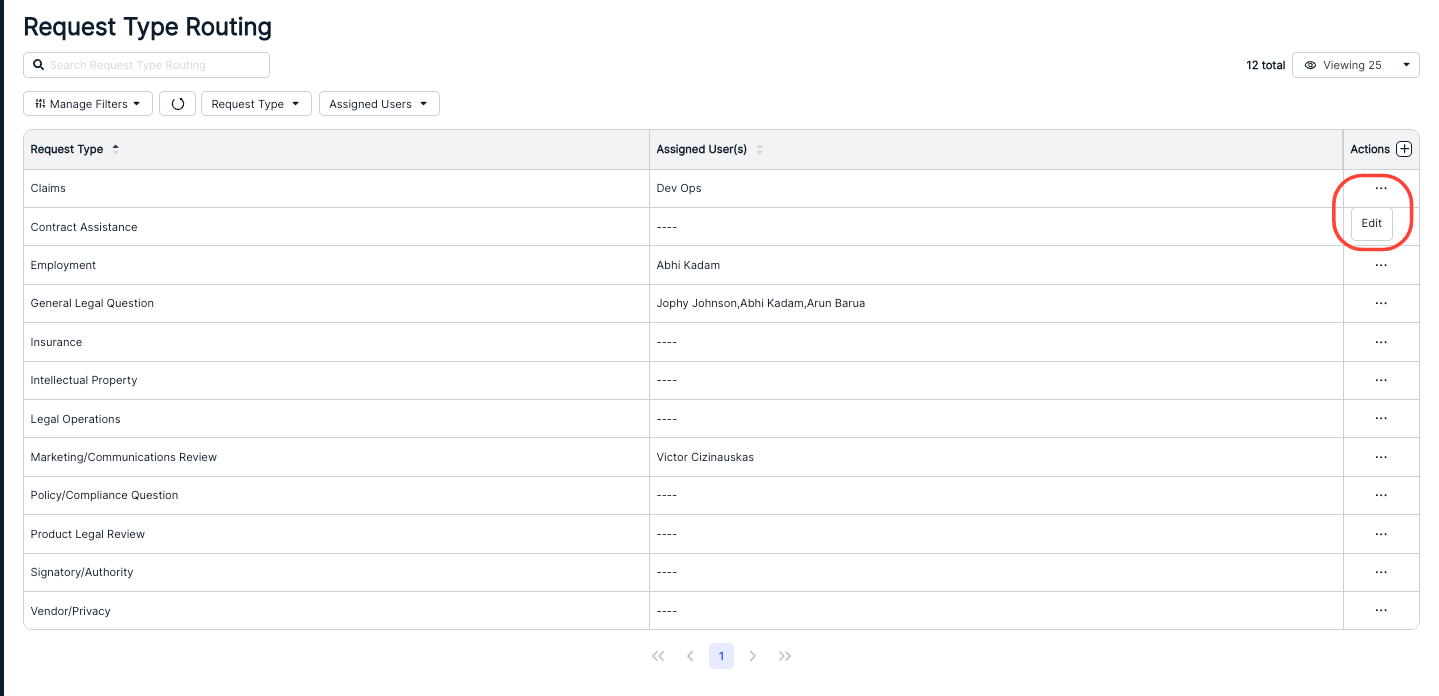
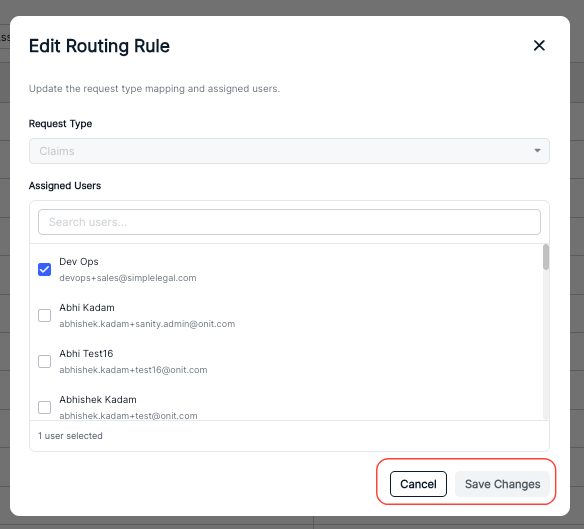
After clicking Edit the Edit Routing Route screen wlll appear. Select the users you'd like to see assigned to the Request Type and select their names using the check box; you can scroll for the user or use the Search users box to find a specific user. Click Save Changes to save the changes or Cancel to back out.