Here's how to work with and create new legal holds within Legal Holds:
Legal Holds Dashboard
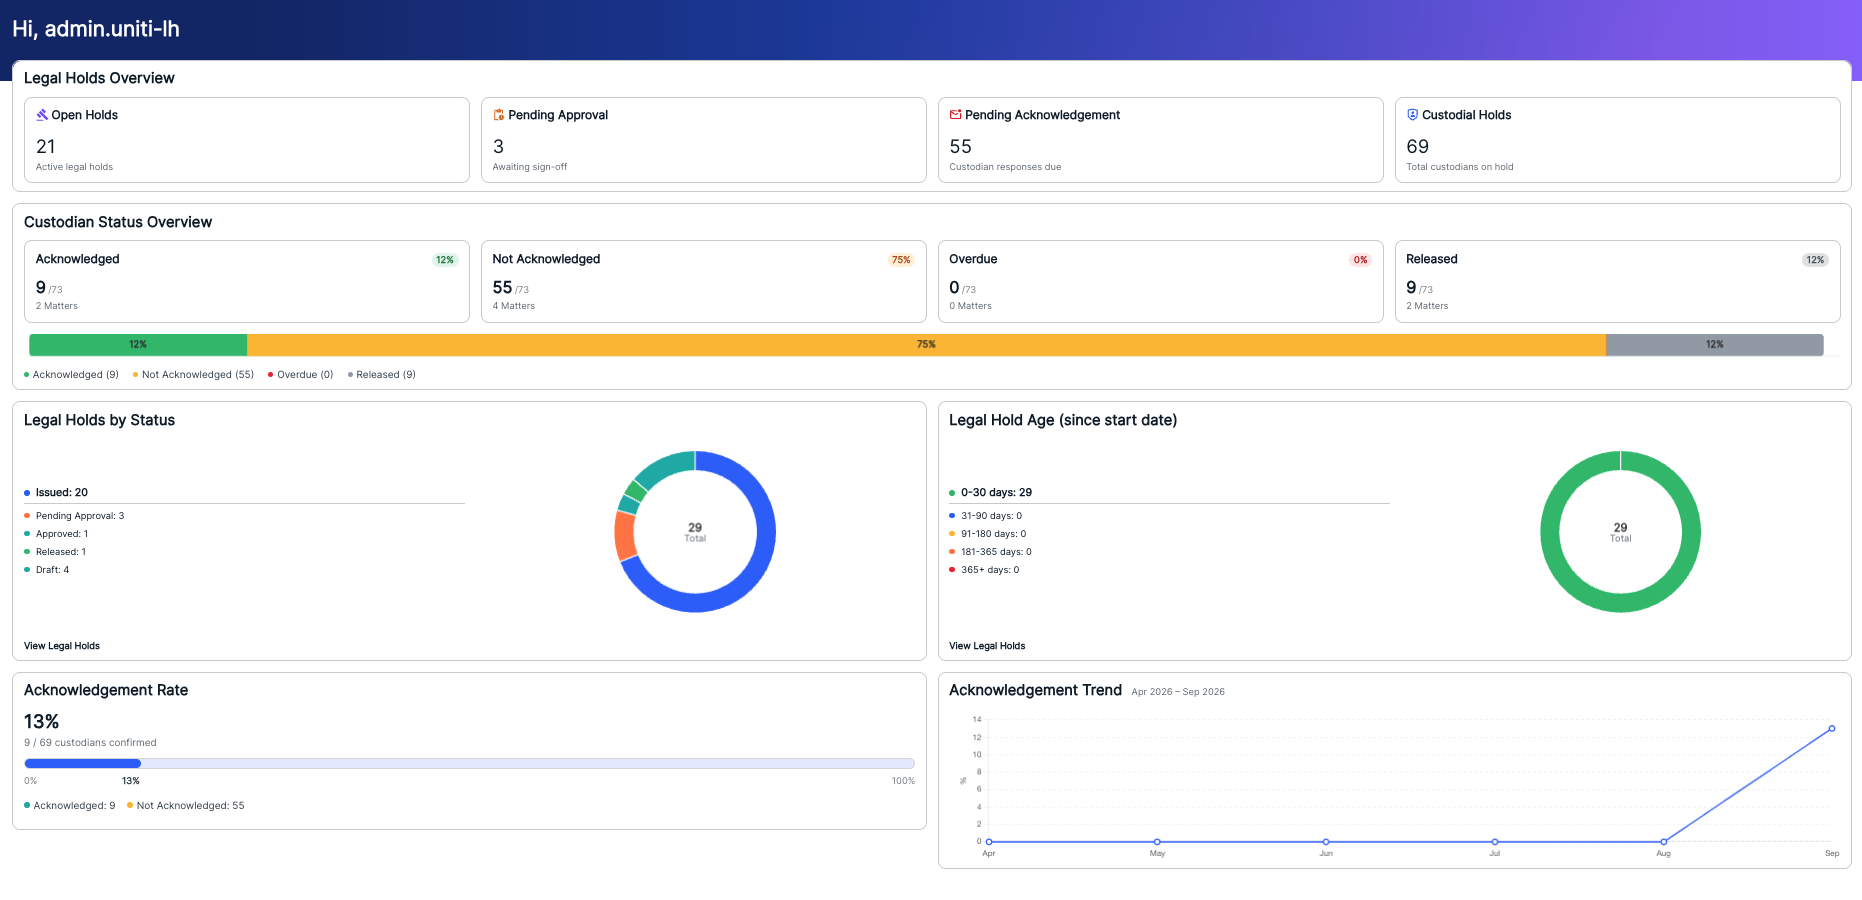
The Legal Holds Dashboard shows key Legal Holds metrics. Click on the Dashboard link to access the dashboard.
Metrics include:
- A Legal Holds Overview, showing Open Holds, holds Pending Approval, custodial holds Pending Acknowledgement, and Custodial Holds
- A Custodian Status Overview, showing Acknowledged holds, Not Acknowledged holds, Overdue acknowledgements, and custodians Released from holds.
- A Legal Holds by Status chart, broken down by status; click into the components for more information
- A Legal Hold age (since start date) chart, broken down by date; click into the components for more information
- The Acknowledgment Rate, with more metrics
- The Acknowledgement Trend, shown over six months
Creating and Working with Legal Holds
To open Legal Holds, click on the Legal Holds button on the left-hand menu.

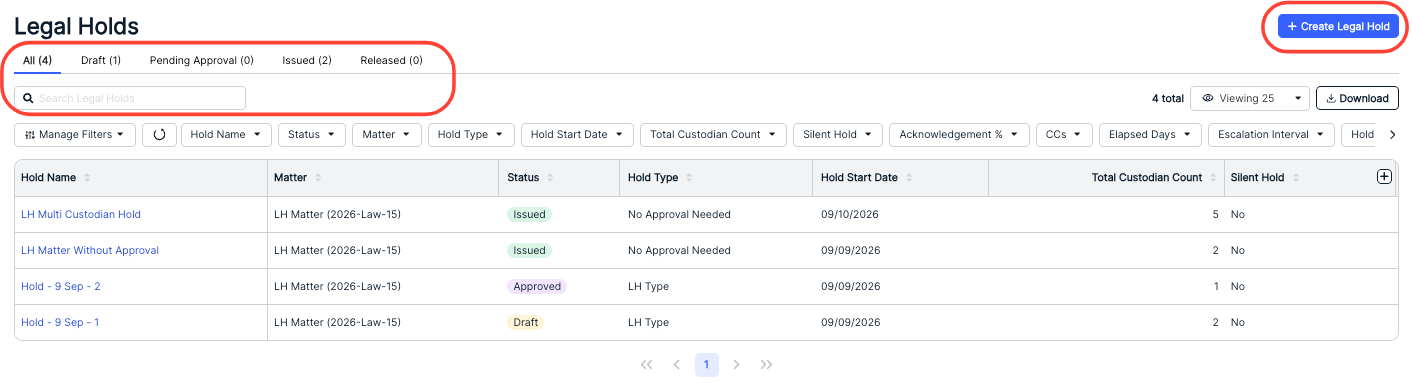
The main Legal Holds directory will appear. Here, you'll see the existing legal holds. Use the top tabs to switch between All, Draft, Pending Approval, Issued, and Released categories.
Here, you'll see the existing Legal Holds with several key details, including Hold Name, Matter, Status, Hold Type, Hold Start Date, Total Custodian Count, and Silent Hold (Yes/No). Click the up/down arrow next to each column to sort by that column. Use the Search Legal Holds field to search through the hold and matter names. Use the Manage Filters and other filter drop-down menus to customize your views. Use the Viewing drop-down menu to choose how many holds you want to see on the screen. Use the + button at the end of the column to adjust the columns included in your view.
Hold name details
Click in to a Hold Name to see the hold details.
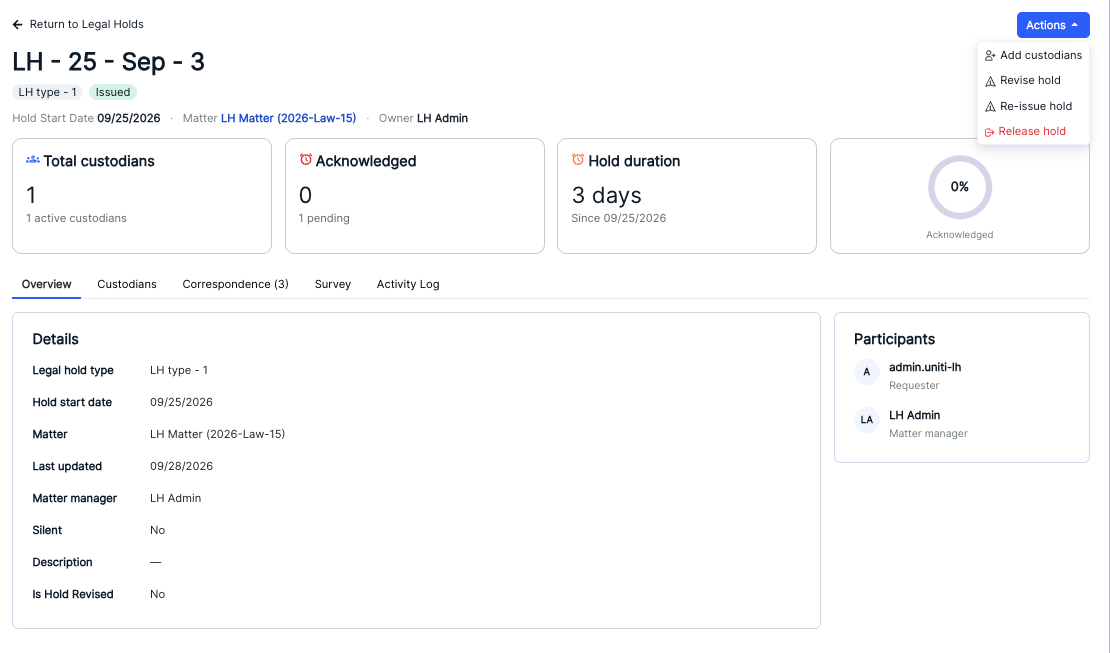
The top section of the details page will show key hold details and the Total Custodians, Acknowledged number, Hold duration, and Acknowledged percentage.

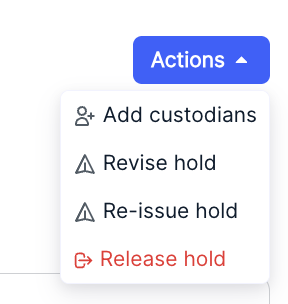
Use the Actions button to Add Custodians, Revise the hold, Re-issue hold, or Release hold. Note that these Actions may change due to the status of the hold. Learn more on the Actions button here.
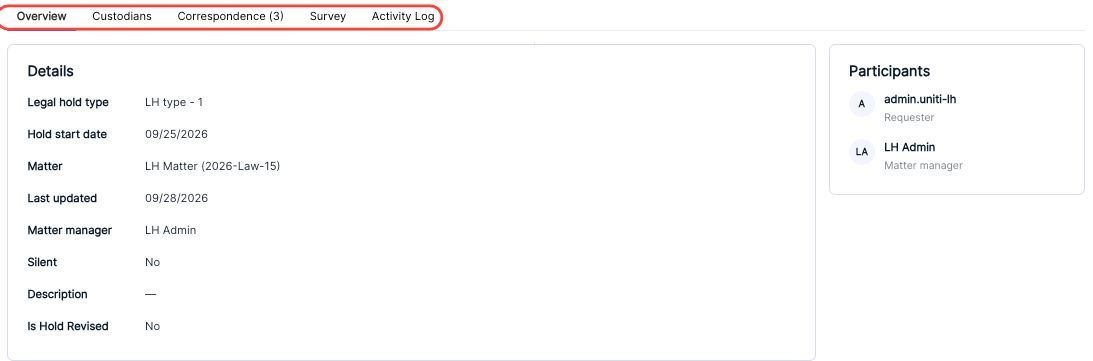
Use the tabs on the bottom of the screen to switch between Overview, Custodians, Correspondence, Survey, and the Activity Log. To the right of the screen will show the Participants.
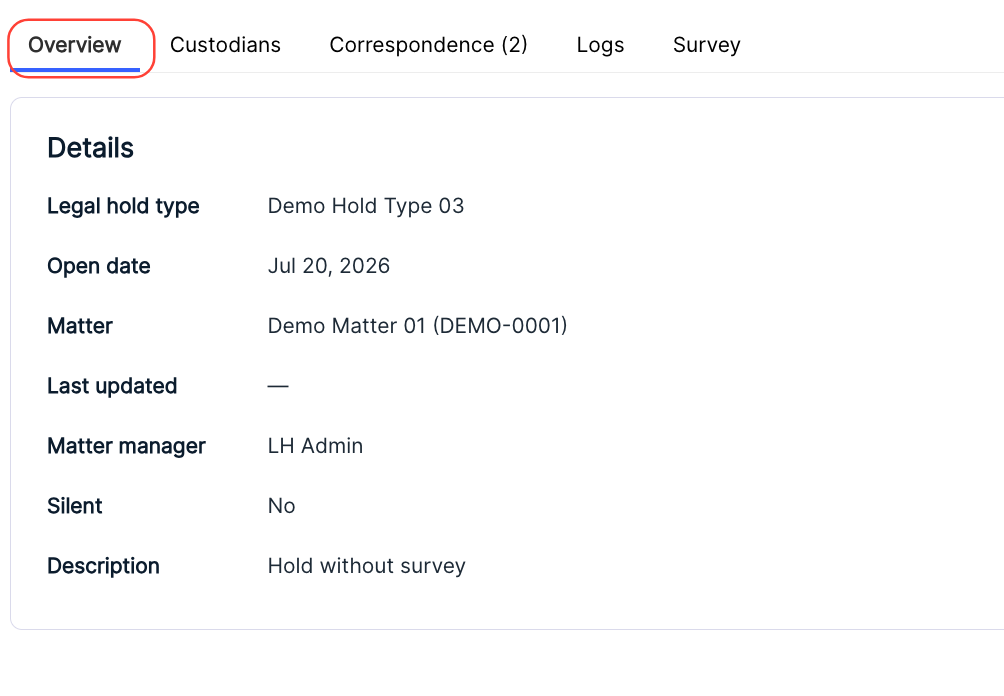
Under Overview you'll see the key Legal Hold details (Legal hold type, Open date, Matter, Last updated, Matter manager, Silent status, and Description).
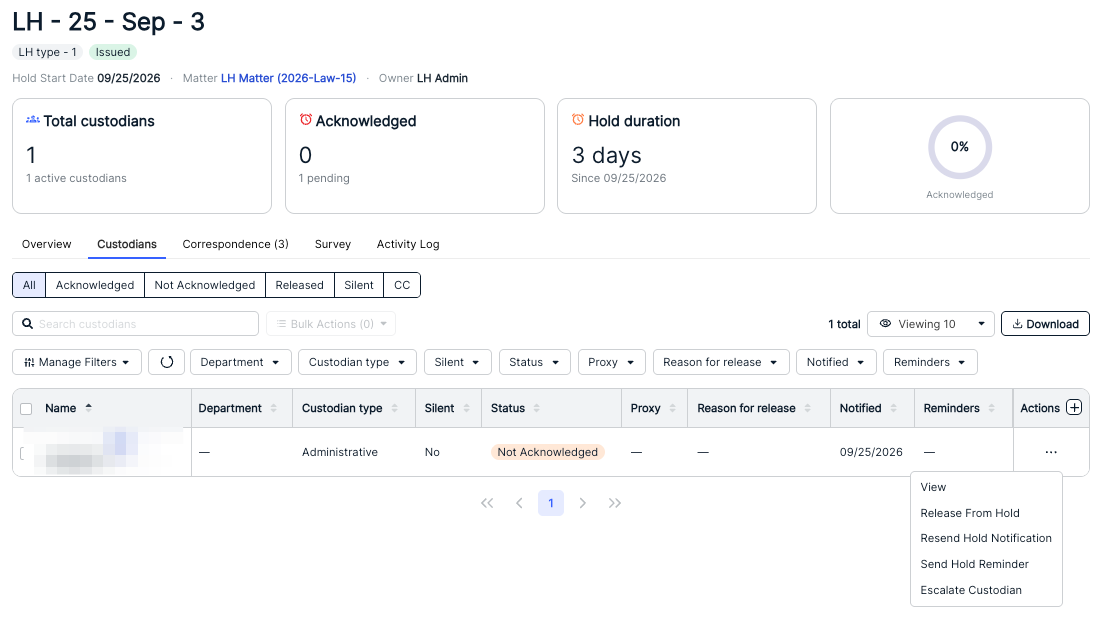
Under Custodians you'll see the full list of custodians. You can switch between All, Acknowledged, Not Acknowledged, Released, Silent, and CC. Under the main Custodians directory, you'll see the existing custodian Name, custodian's Department, the Status, the Notified date, any Reminder dates, and an Actions menu. Use the Manage Filters and other drop-down menus to adjust the custodians you want to see. Use the + button at the end of the column to adjust the columns included in your view. Use the Viewing drop-down menu to customized how many custodians you want to see; click Download to download a list of the custodians as an Excel file.
Use the Actions menu to View the custodian details (more on the Custodian page here), Release from Hold, Resend Hold Notification, Send a Reminder, or Escalate Custodian. Note that these options will change depending on the status of the hold (for example, you cannot send a reminder on an Acknowledged hold). If you choose to Send a Hold Reminder, you'll see this message appear.Use the Search custodians search bar to search through existing custodians. Use the Manage Filters and other drop-down menus to filter what you see on the screen.
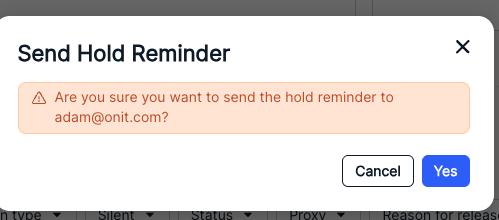
Note that if you choose to Send Hold Reminder, you'll get this message.
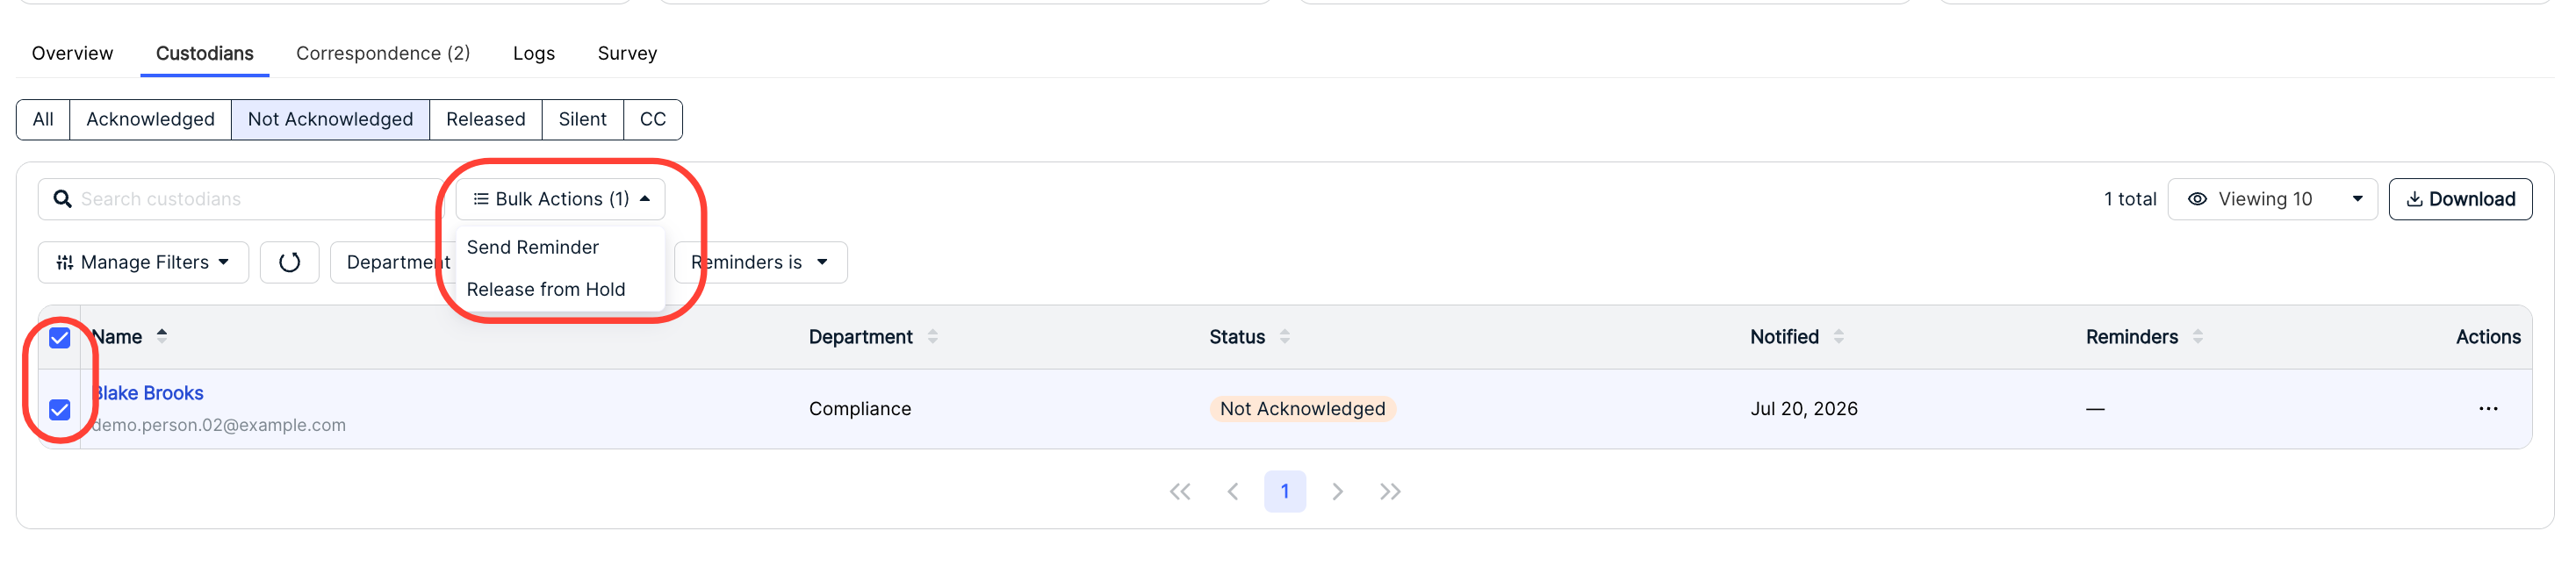
- Use the check boxes on the left-hand side of the menu (or the top check box to select all) and the Bulk Actions menu to bulk Send Reminder or Release from Hold.
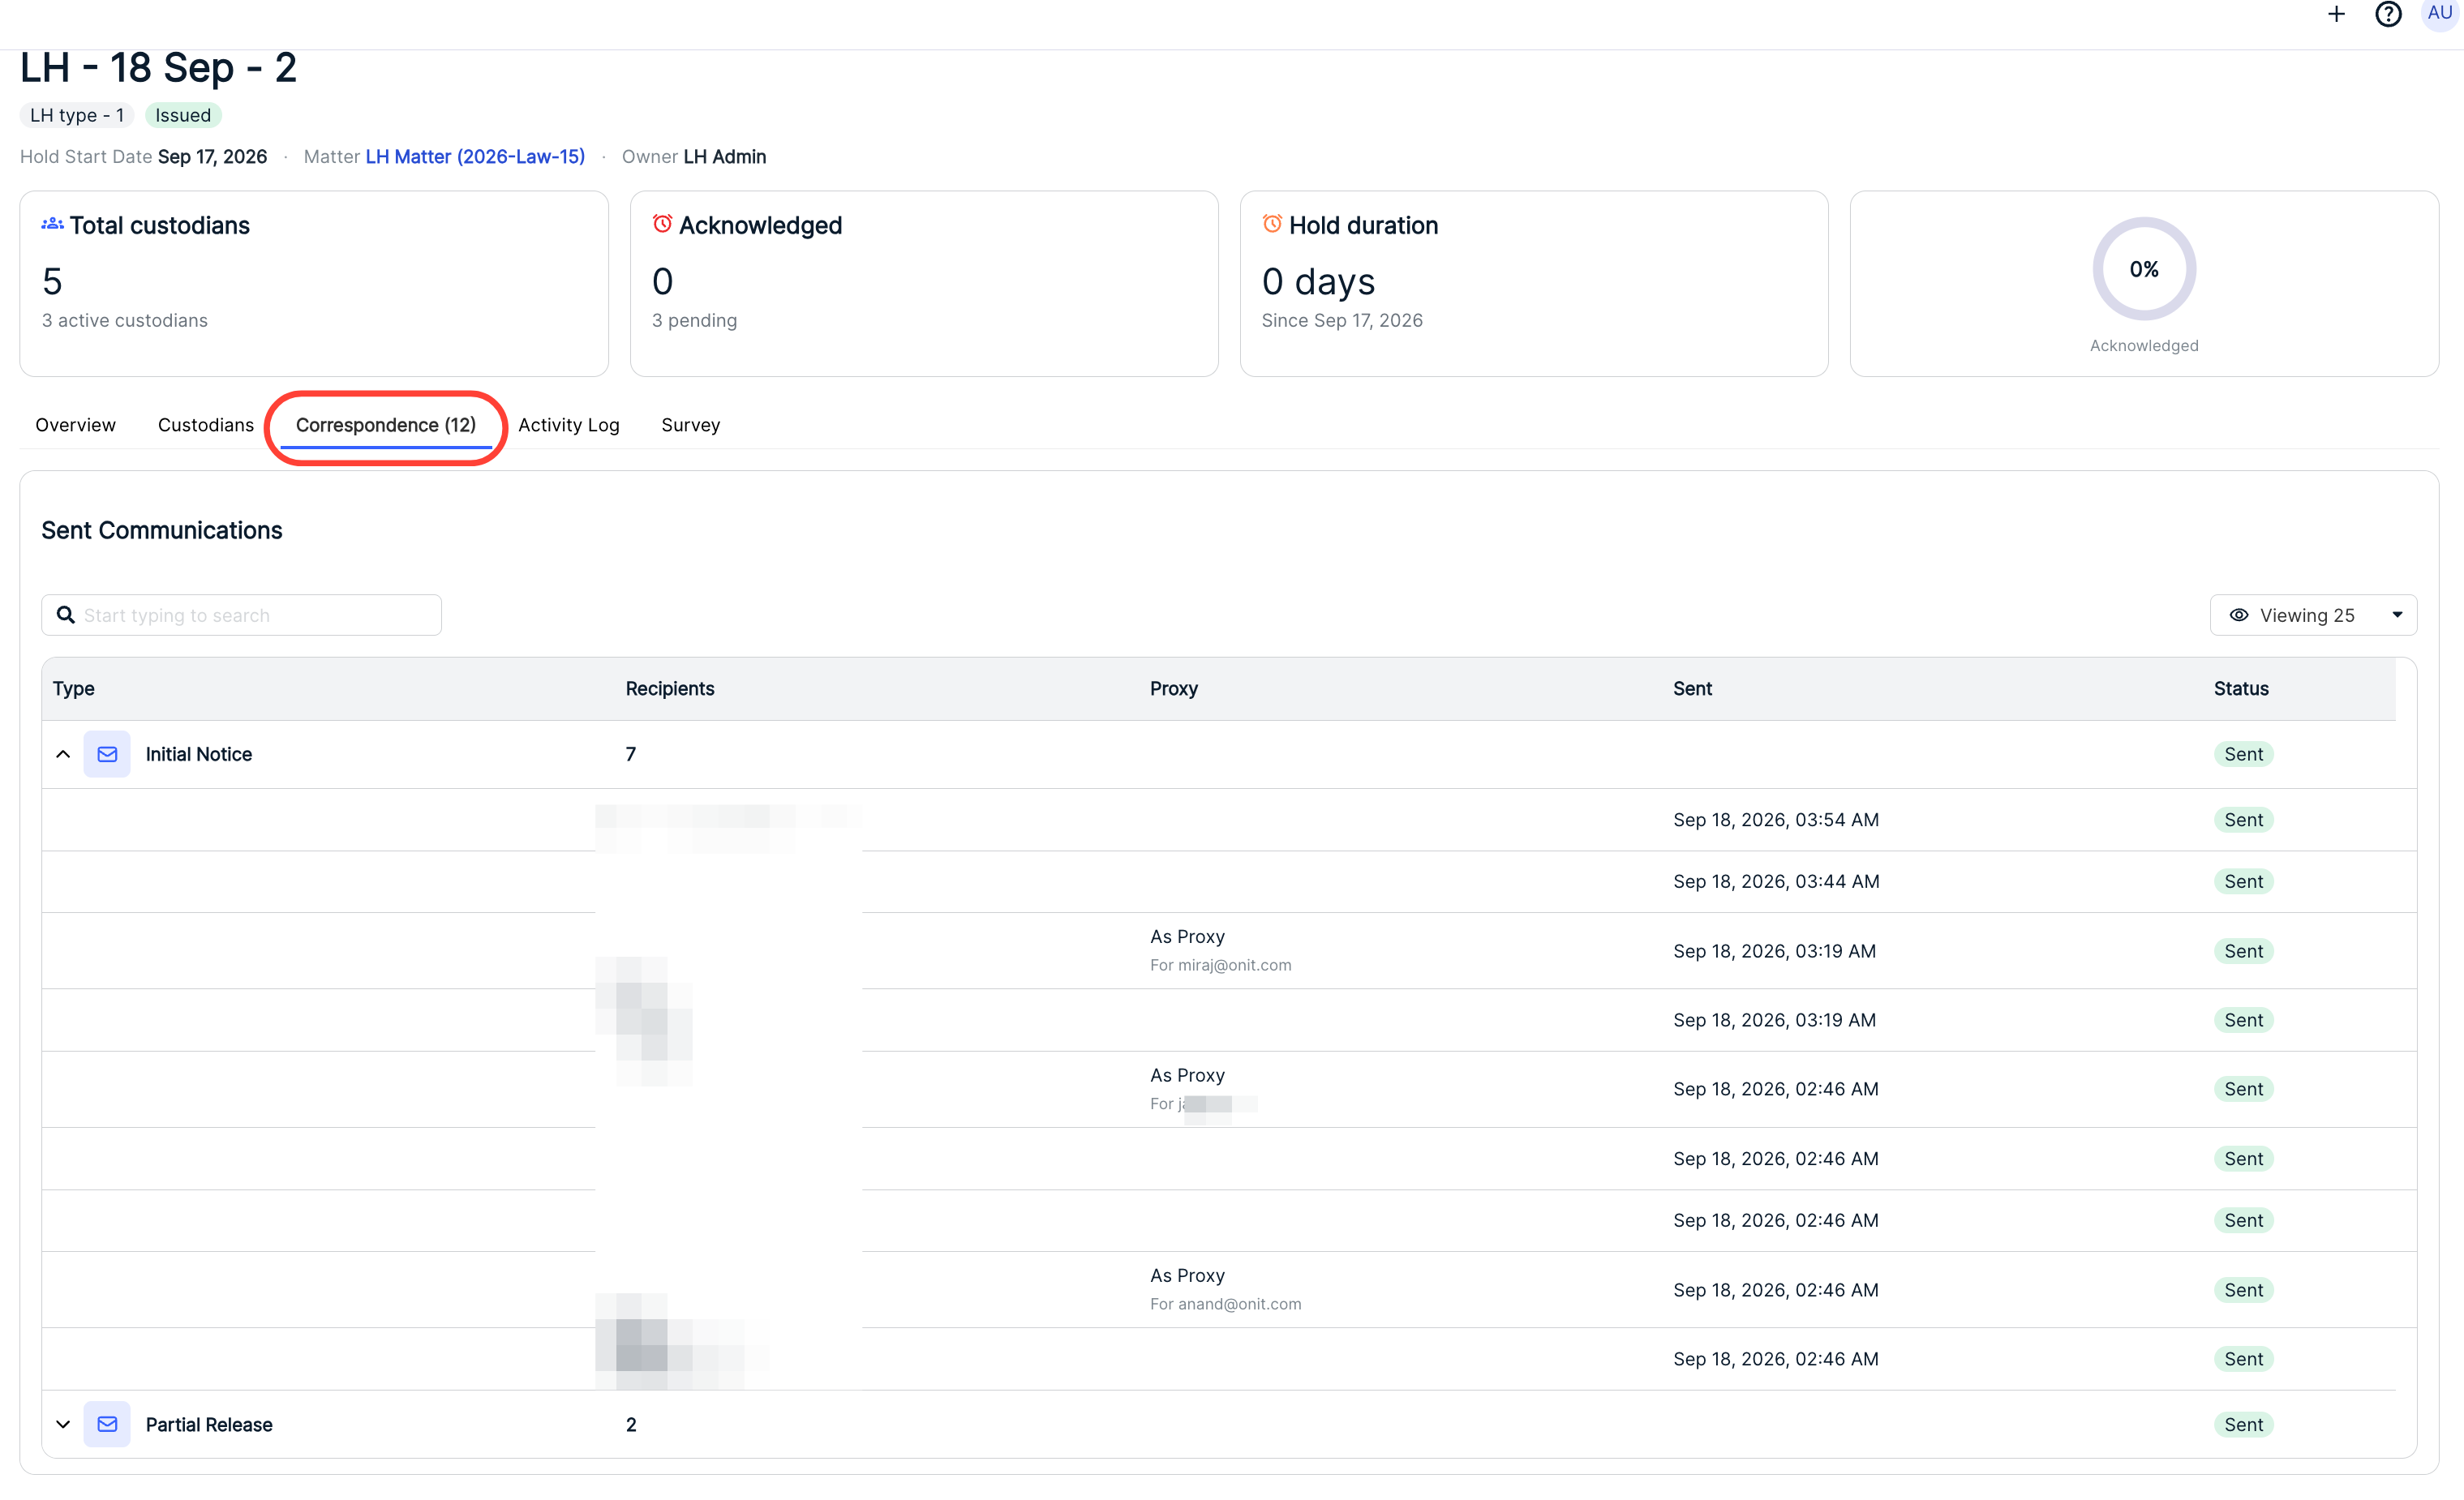
Under Correspondence you can see the Sent Communications on the hold. When expanding each Type you'll see the communications Type, Recipients number, Proxy, Sent date, and Status. Use the Viewing drop-down menu to customize how many communications you want to see on the screen. Use the Search bar to search through the communications.
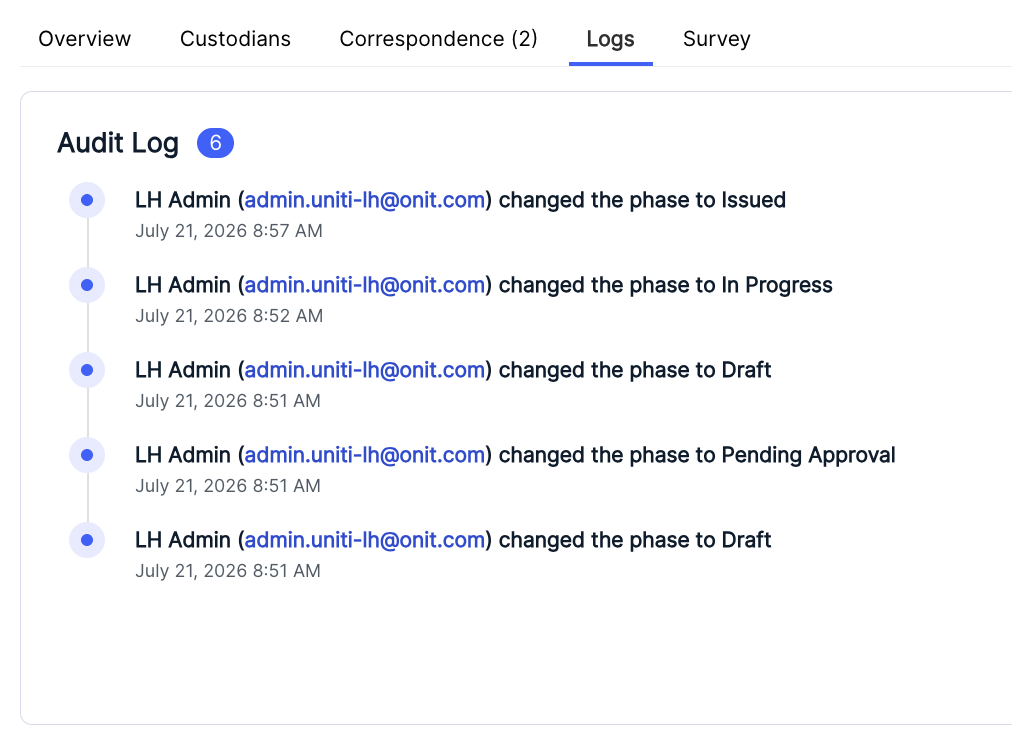
Under Logs you'll see the activity log for the hold.
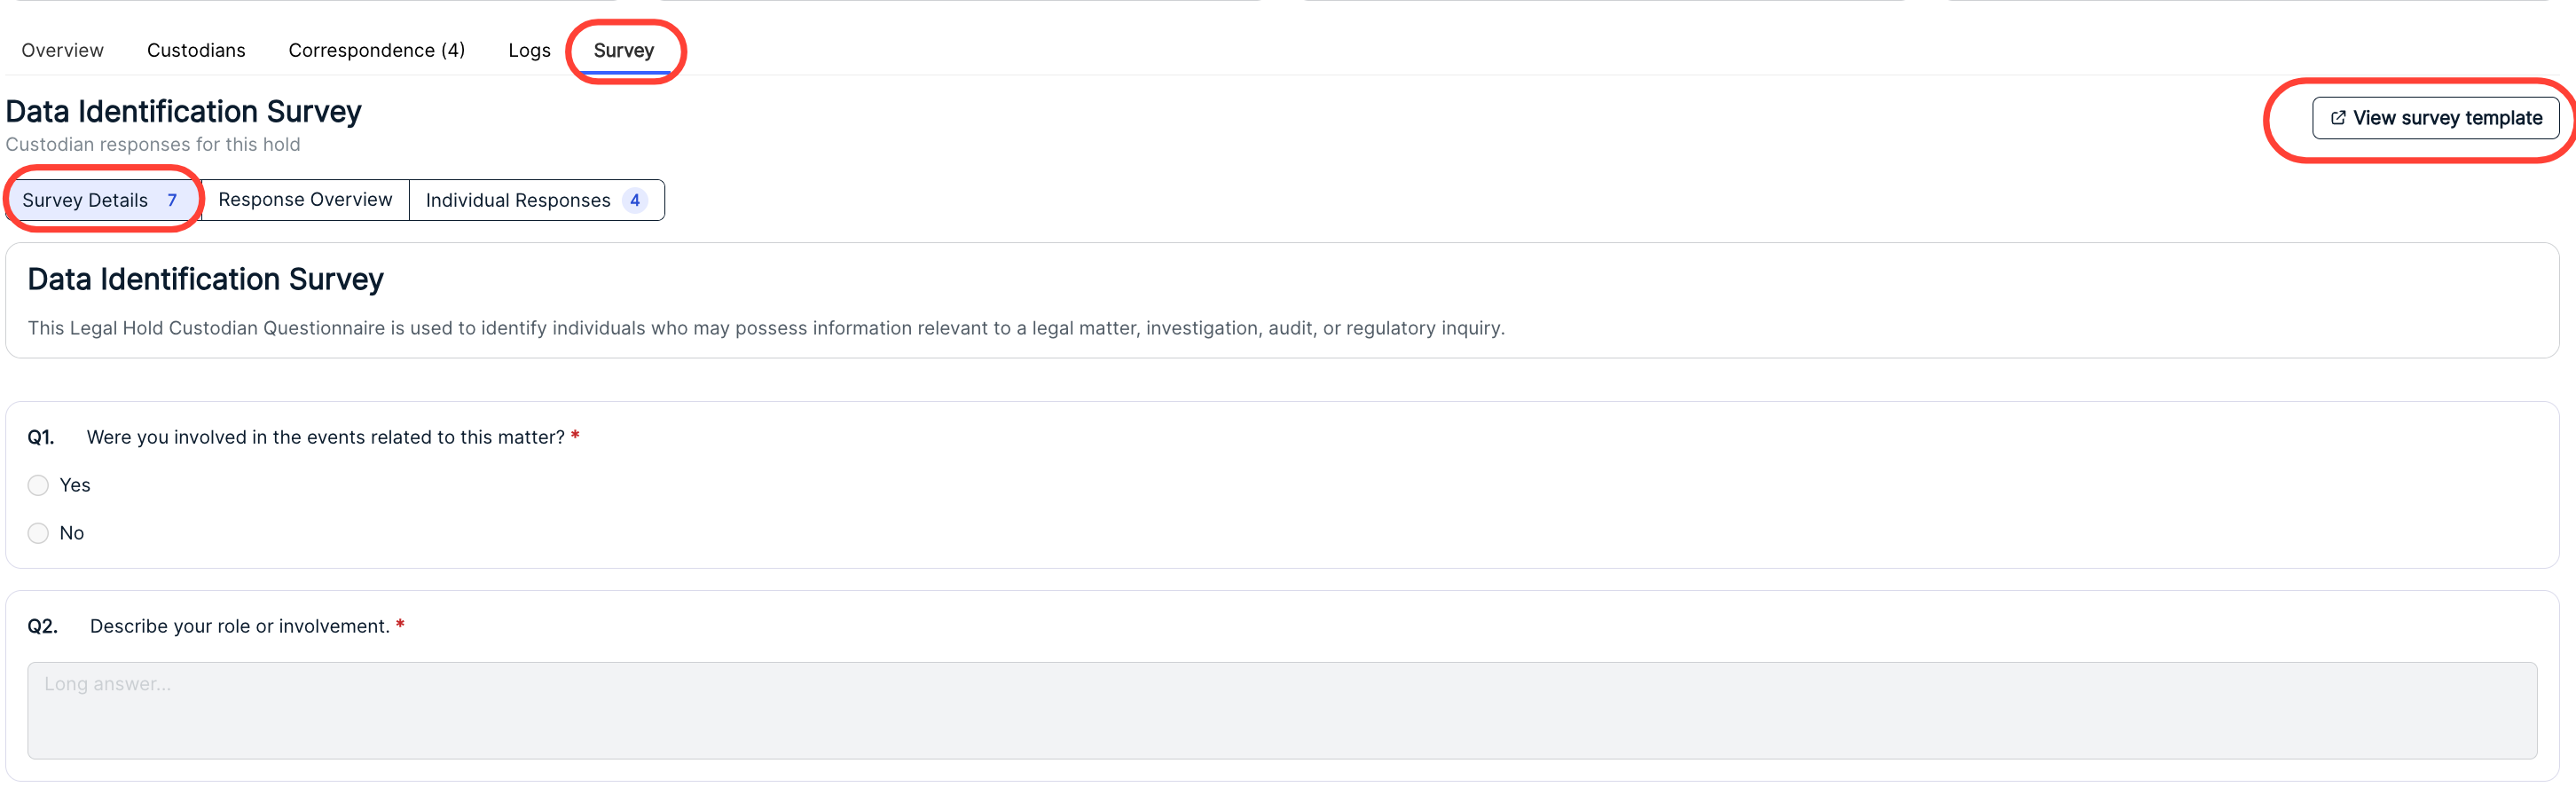
Under Survey you'll see any survey information (if one is in the hold).
You can use the top tabs to switch between Survey Details, a Response Overview, and Individual Responses. Click View survey templateto view the individual survey templates.
The Survey Details will show the survey name and questions.
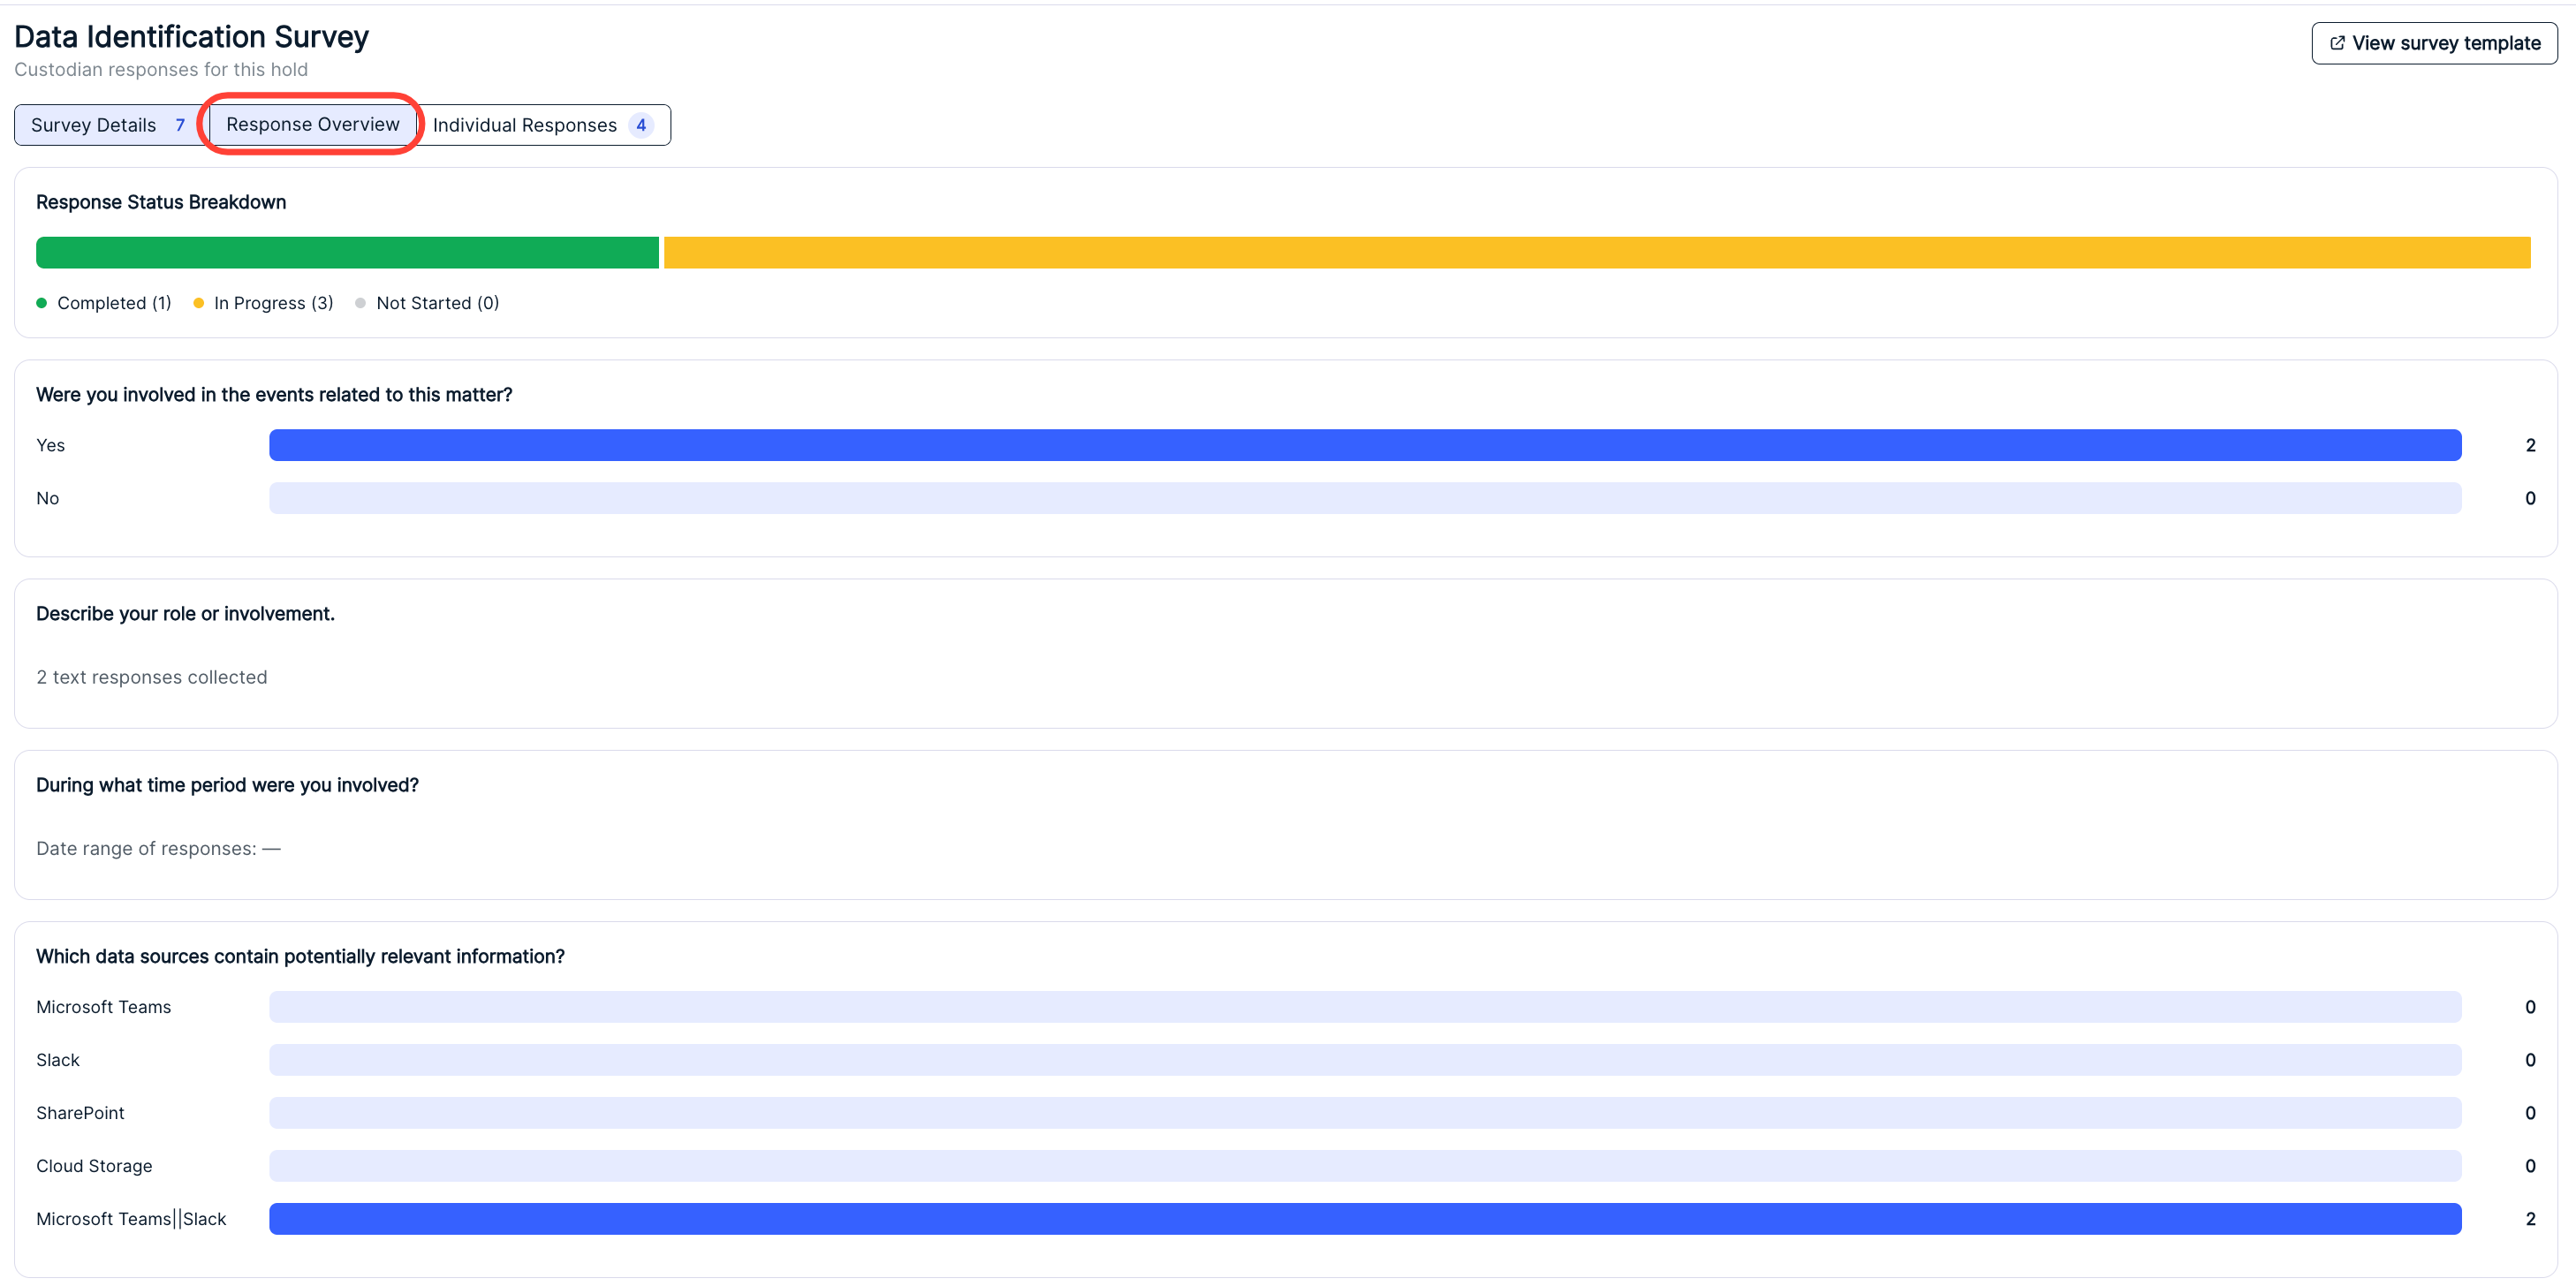
- Under Response Overview you'll get a full breakdown of the current responses.
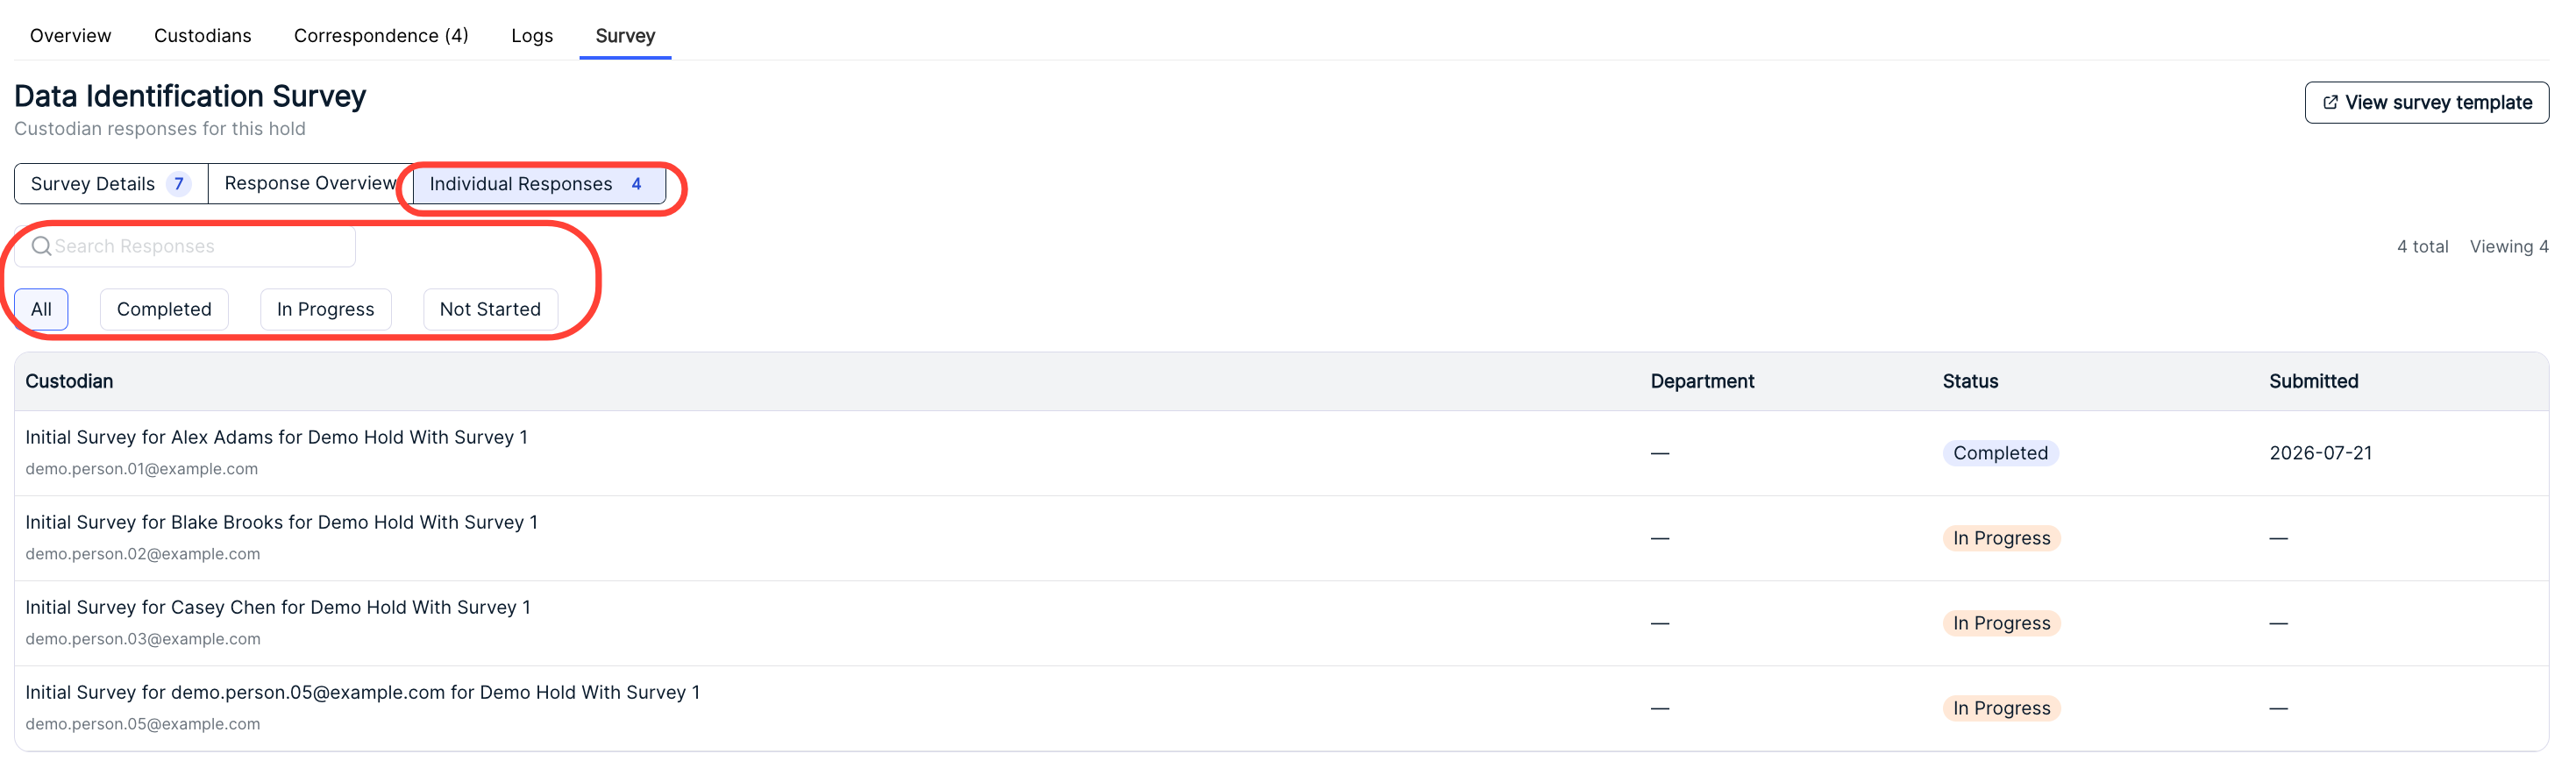
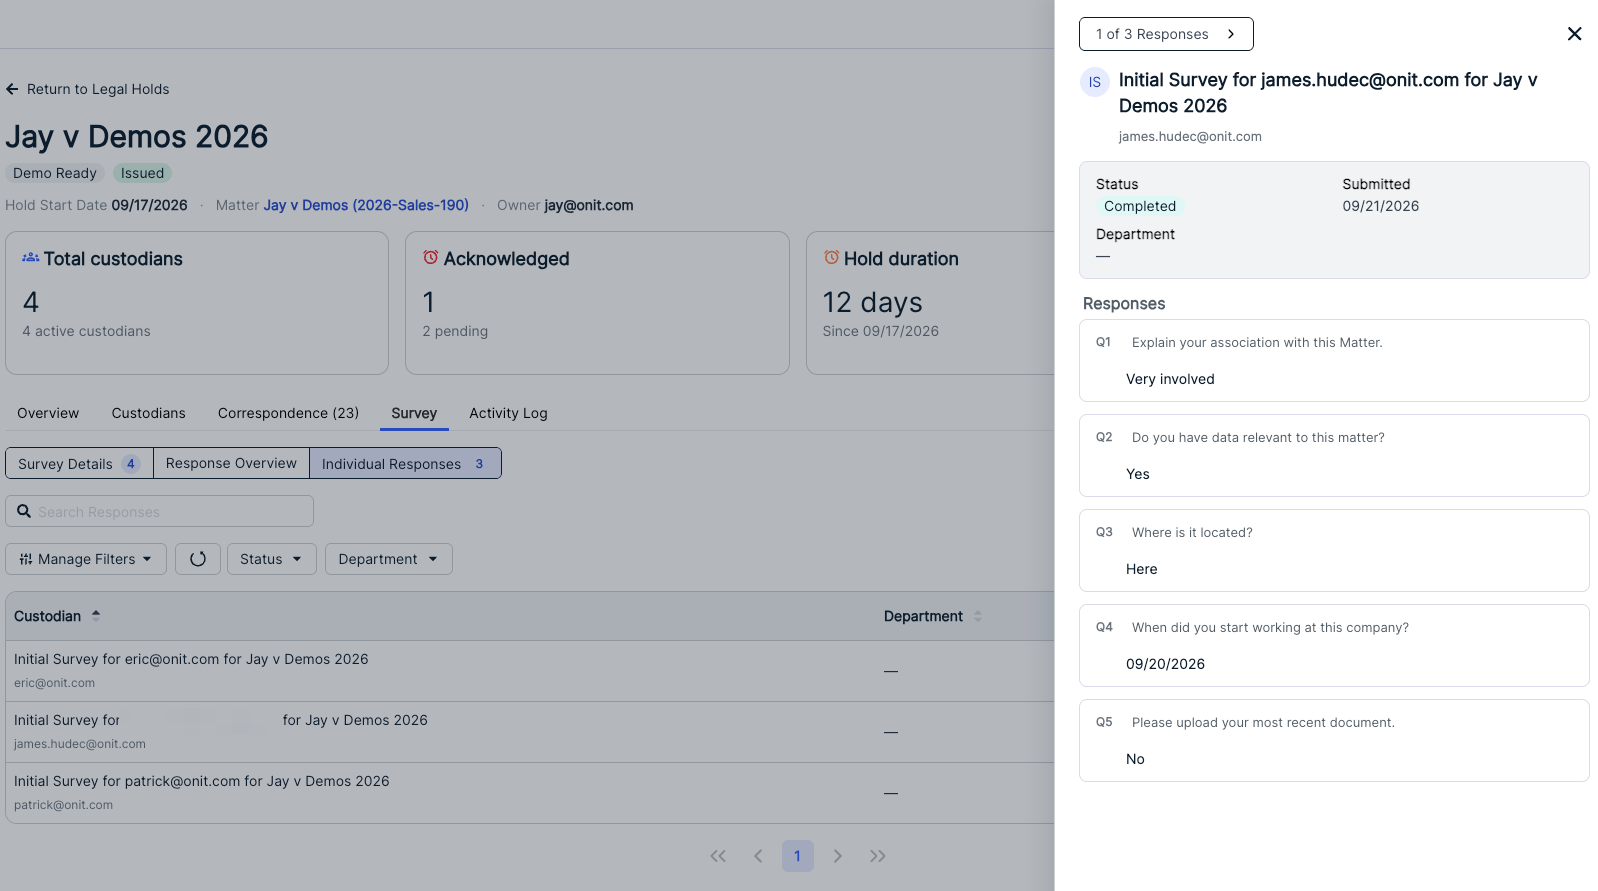
- Under Individual Responses you'll see all the individual responses for the survey. Use the Search responses search bar to search through the responses. Use the tabs to switch between All, Completed, In Progress, and Not Started surveys.
Click on any line to open the response on the screen. Response details will appear at the right of the screen. Use the top navigation option to move through the responses.
Creating a New Legal Hold
Click Create Legal Hold to start a new legal hold.
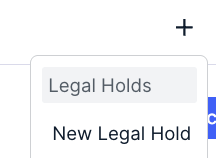
You can also create a New Legal Hold from the main quick start menu.
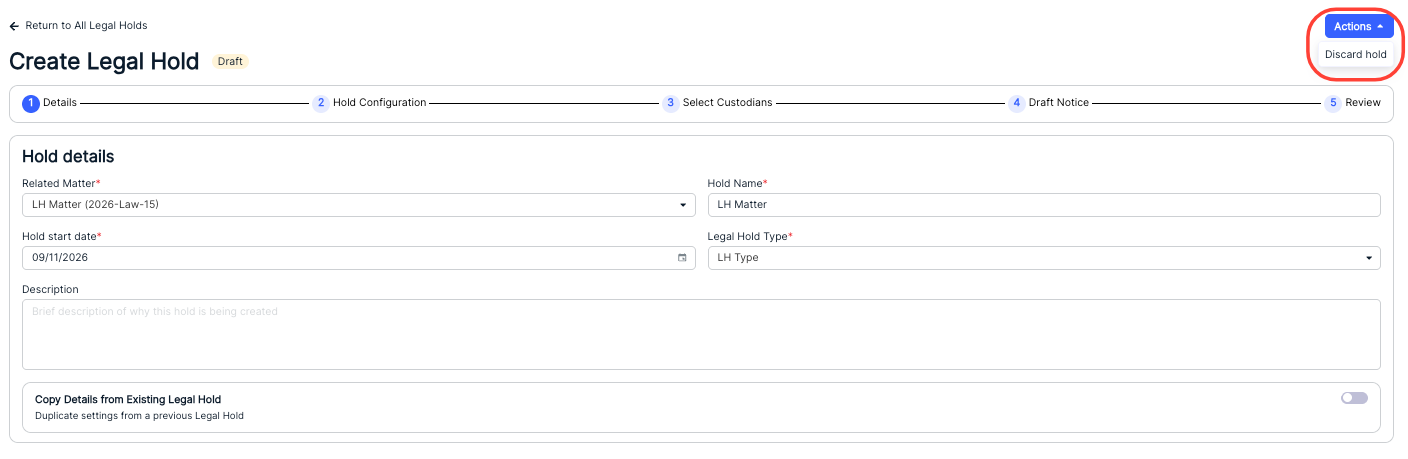
- The "Create Legal Hold" screen will appear. Start by filling out the key details.
Here, you'll have to:
- Select the Related Matter (required). This is populated with values from the Matters table.
- Fill out the Hold Name (required). This is automatically pre-populated to include the Matte name which can then be replaced or appended for the Hold Name.
- Fill out the Hold Start Date (required). This is required and is populated with today's date by default.
- Pick out the Legal hold type from the drop-down menu (required). The Legal Hold Type drop-down will be populated with values assigned in the Legal Hold Type settings.
- Fill out a Description.
Note that you can click the Discard Hold button under Actions at any time to get rid of the hold in progress.
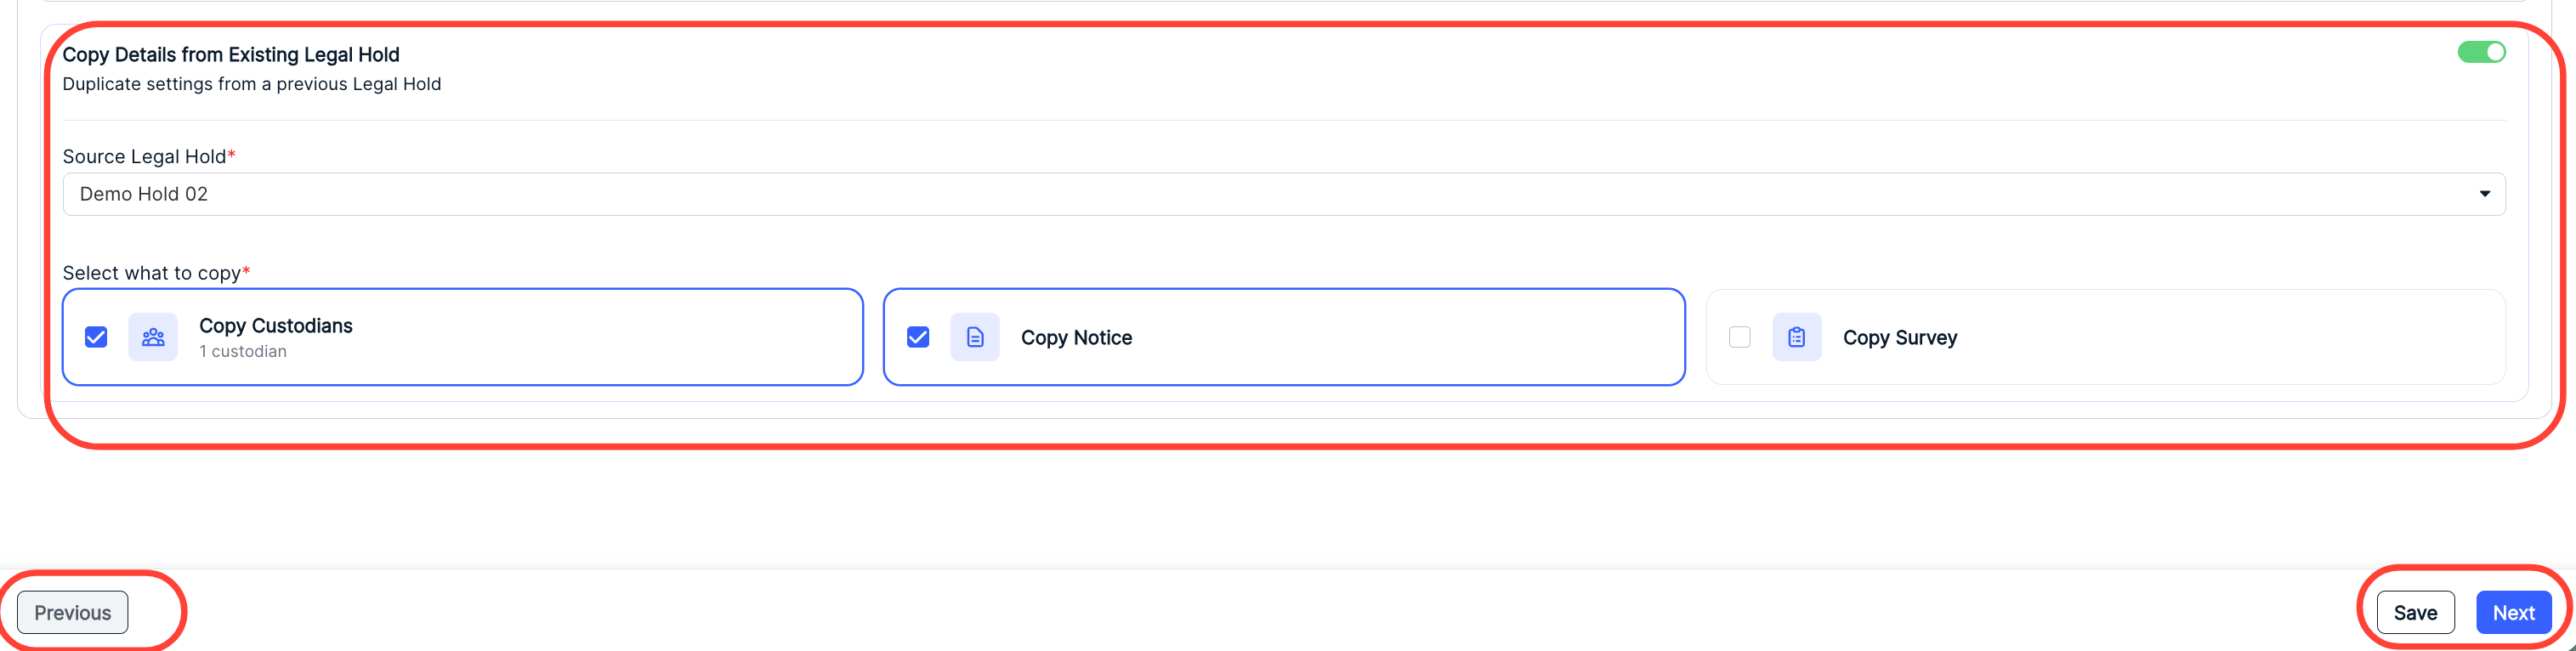
You can also Copy from existing hold. This allows you to duplicate settings from a previous hold.
If this is selected, you'll have to select the Source Legal Hold from the drop-down menu and Select what to copy (Copy custodians, Copy notice, Copy survey). Use the check box to select / deselect the copy options.
Click Next once you're done to move on to the next screen or click Save to save your work and finish later. Click Previous to go back to the prior screen.
- Move on to the "Hold Configuration" screen.
Here, you can choose if you want to:
Include a Custodian survey. Choose the survey name from the drop-down menu or click Create Survey to create a new survey; you can find more information on surveys in the Settings section of Legal Holds.
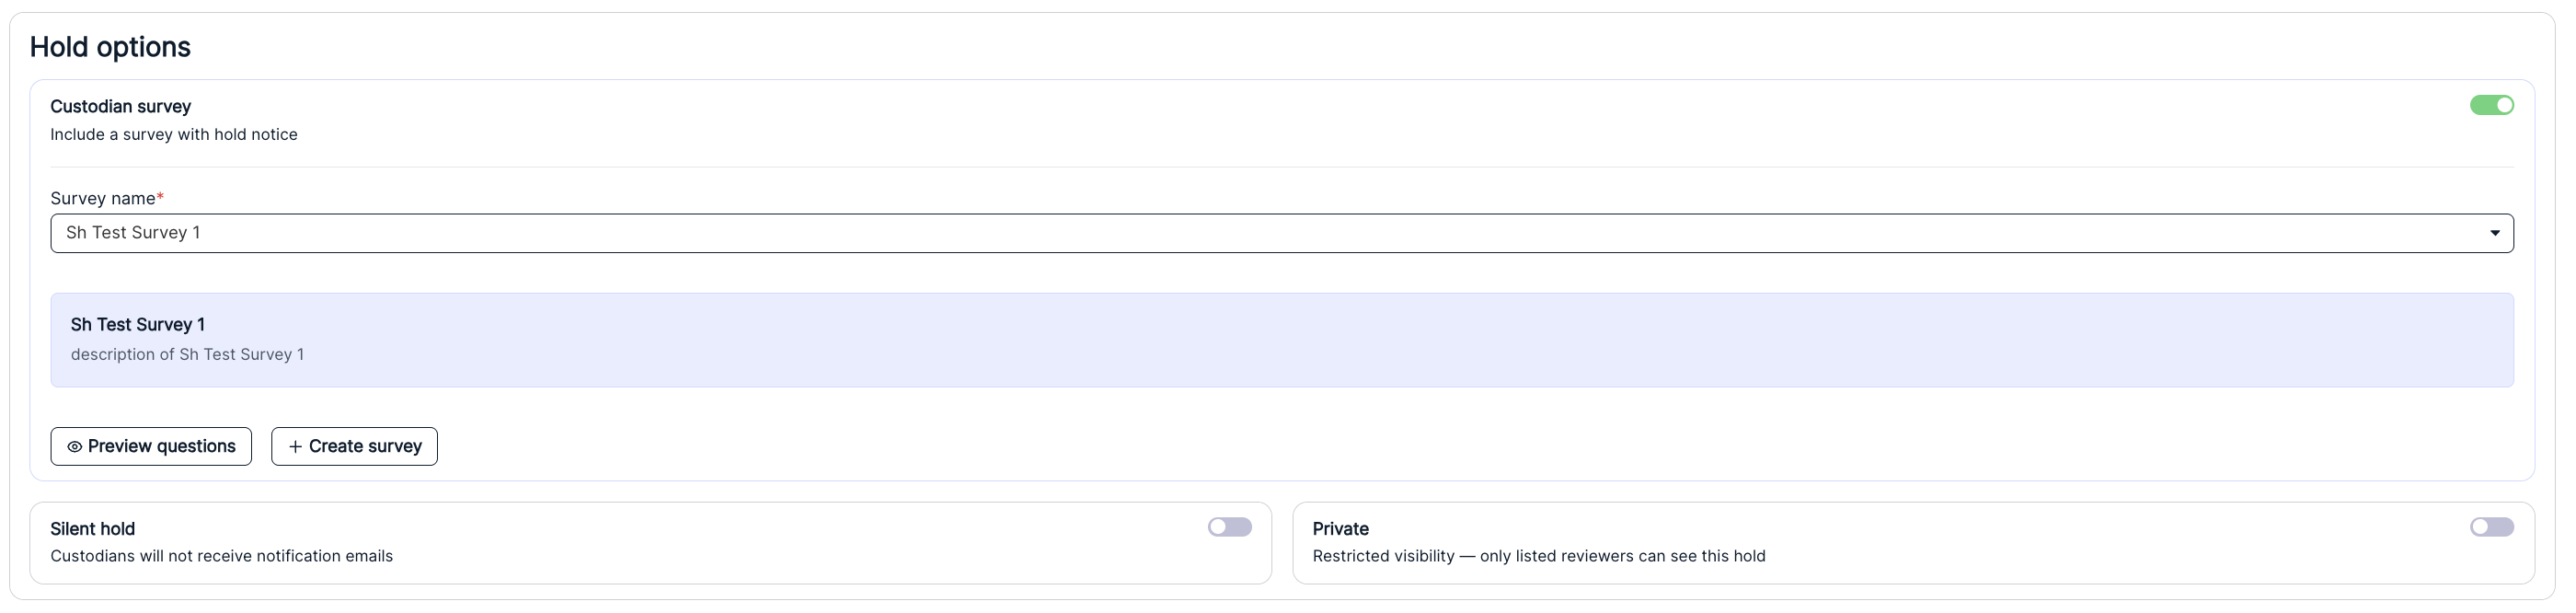
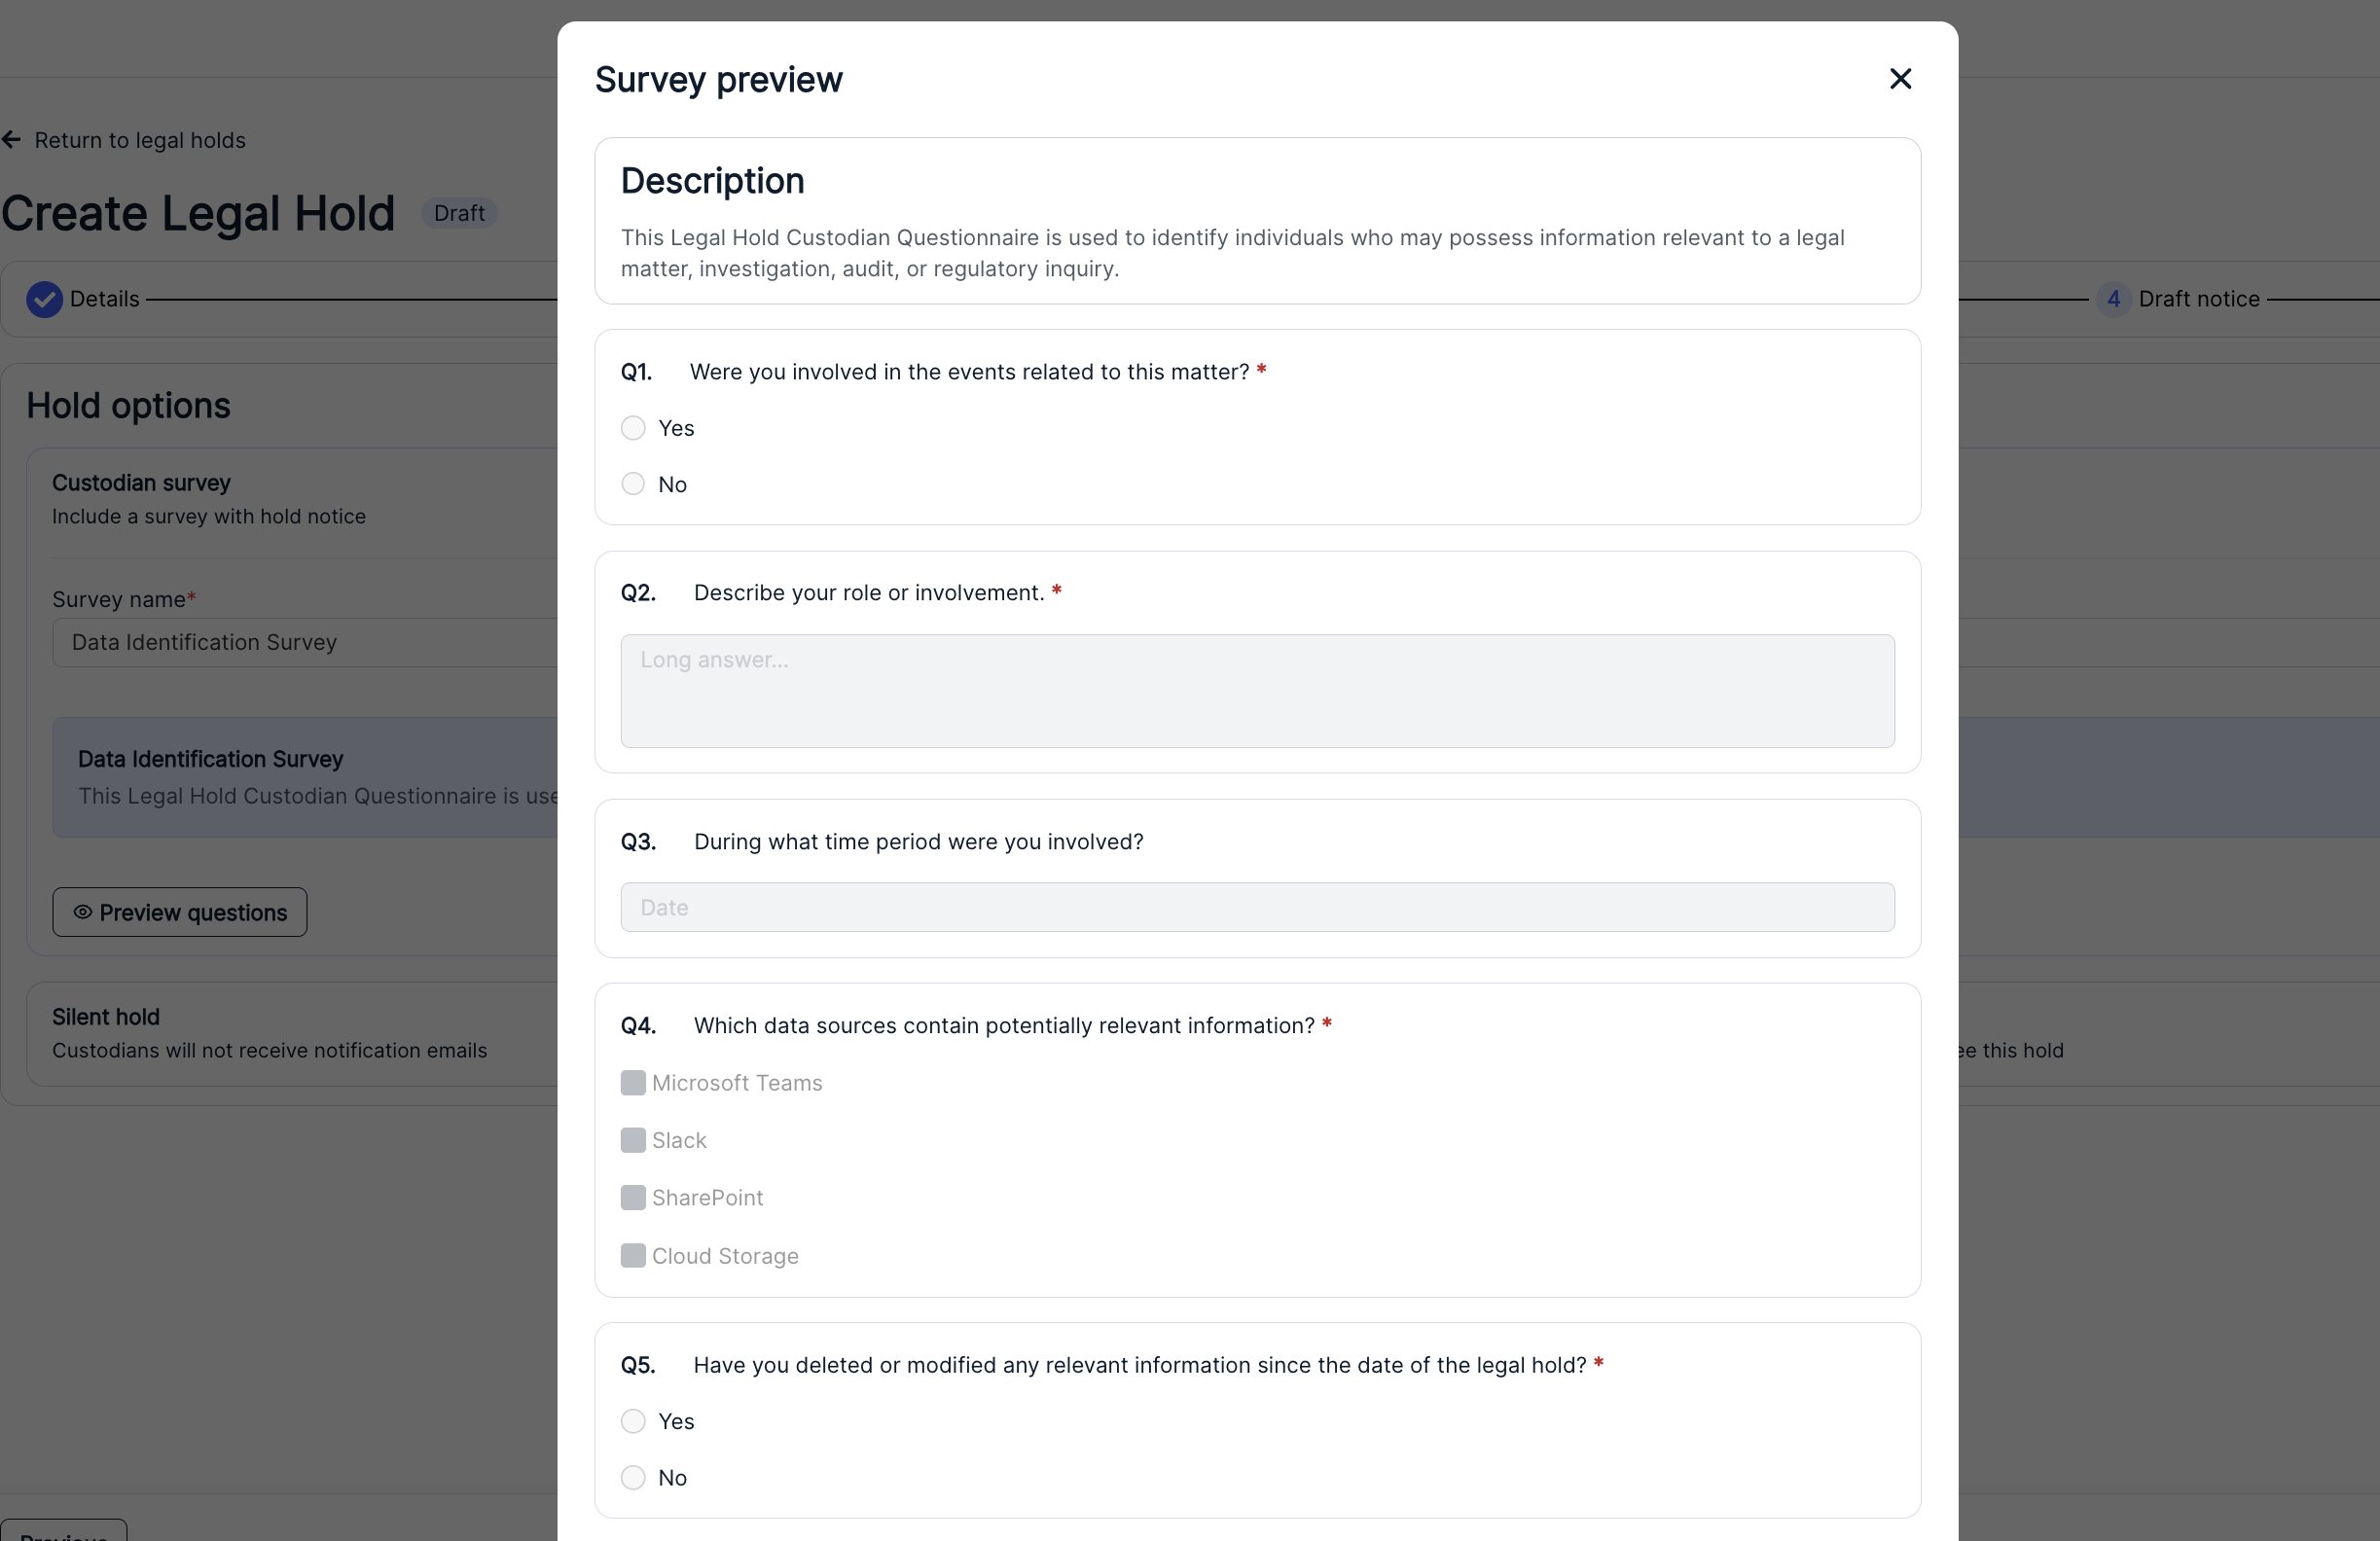
Click on Preview questions to get a preview of the survey questions.
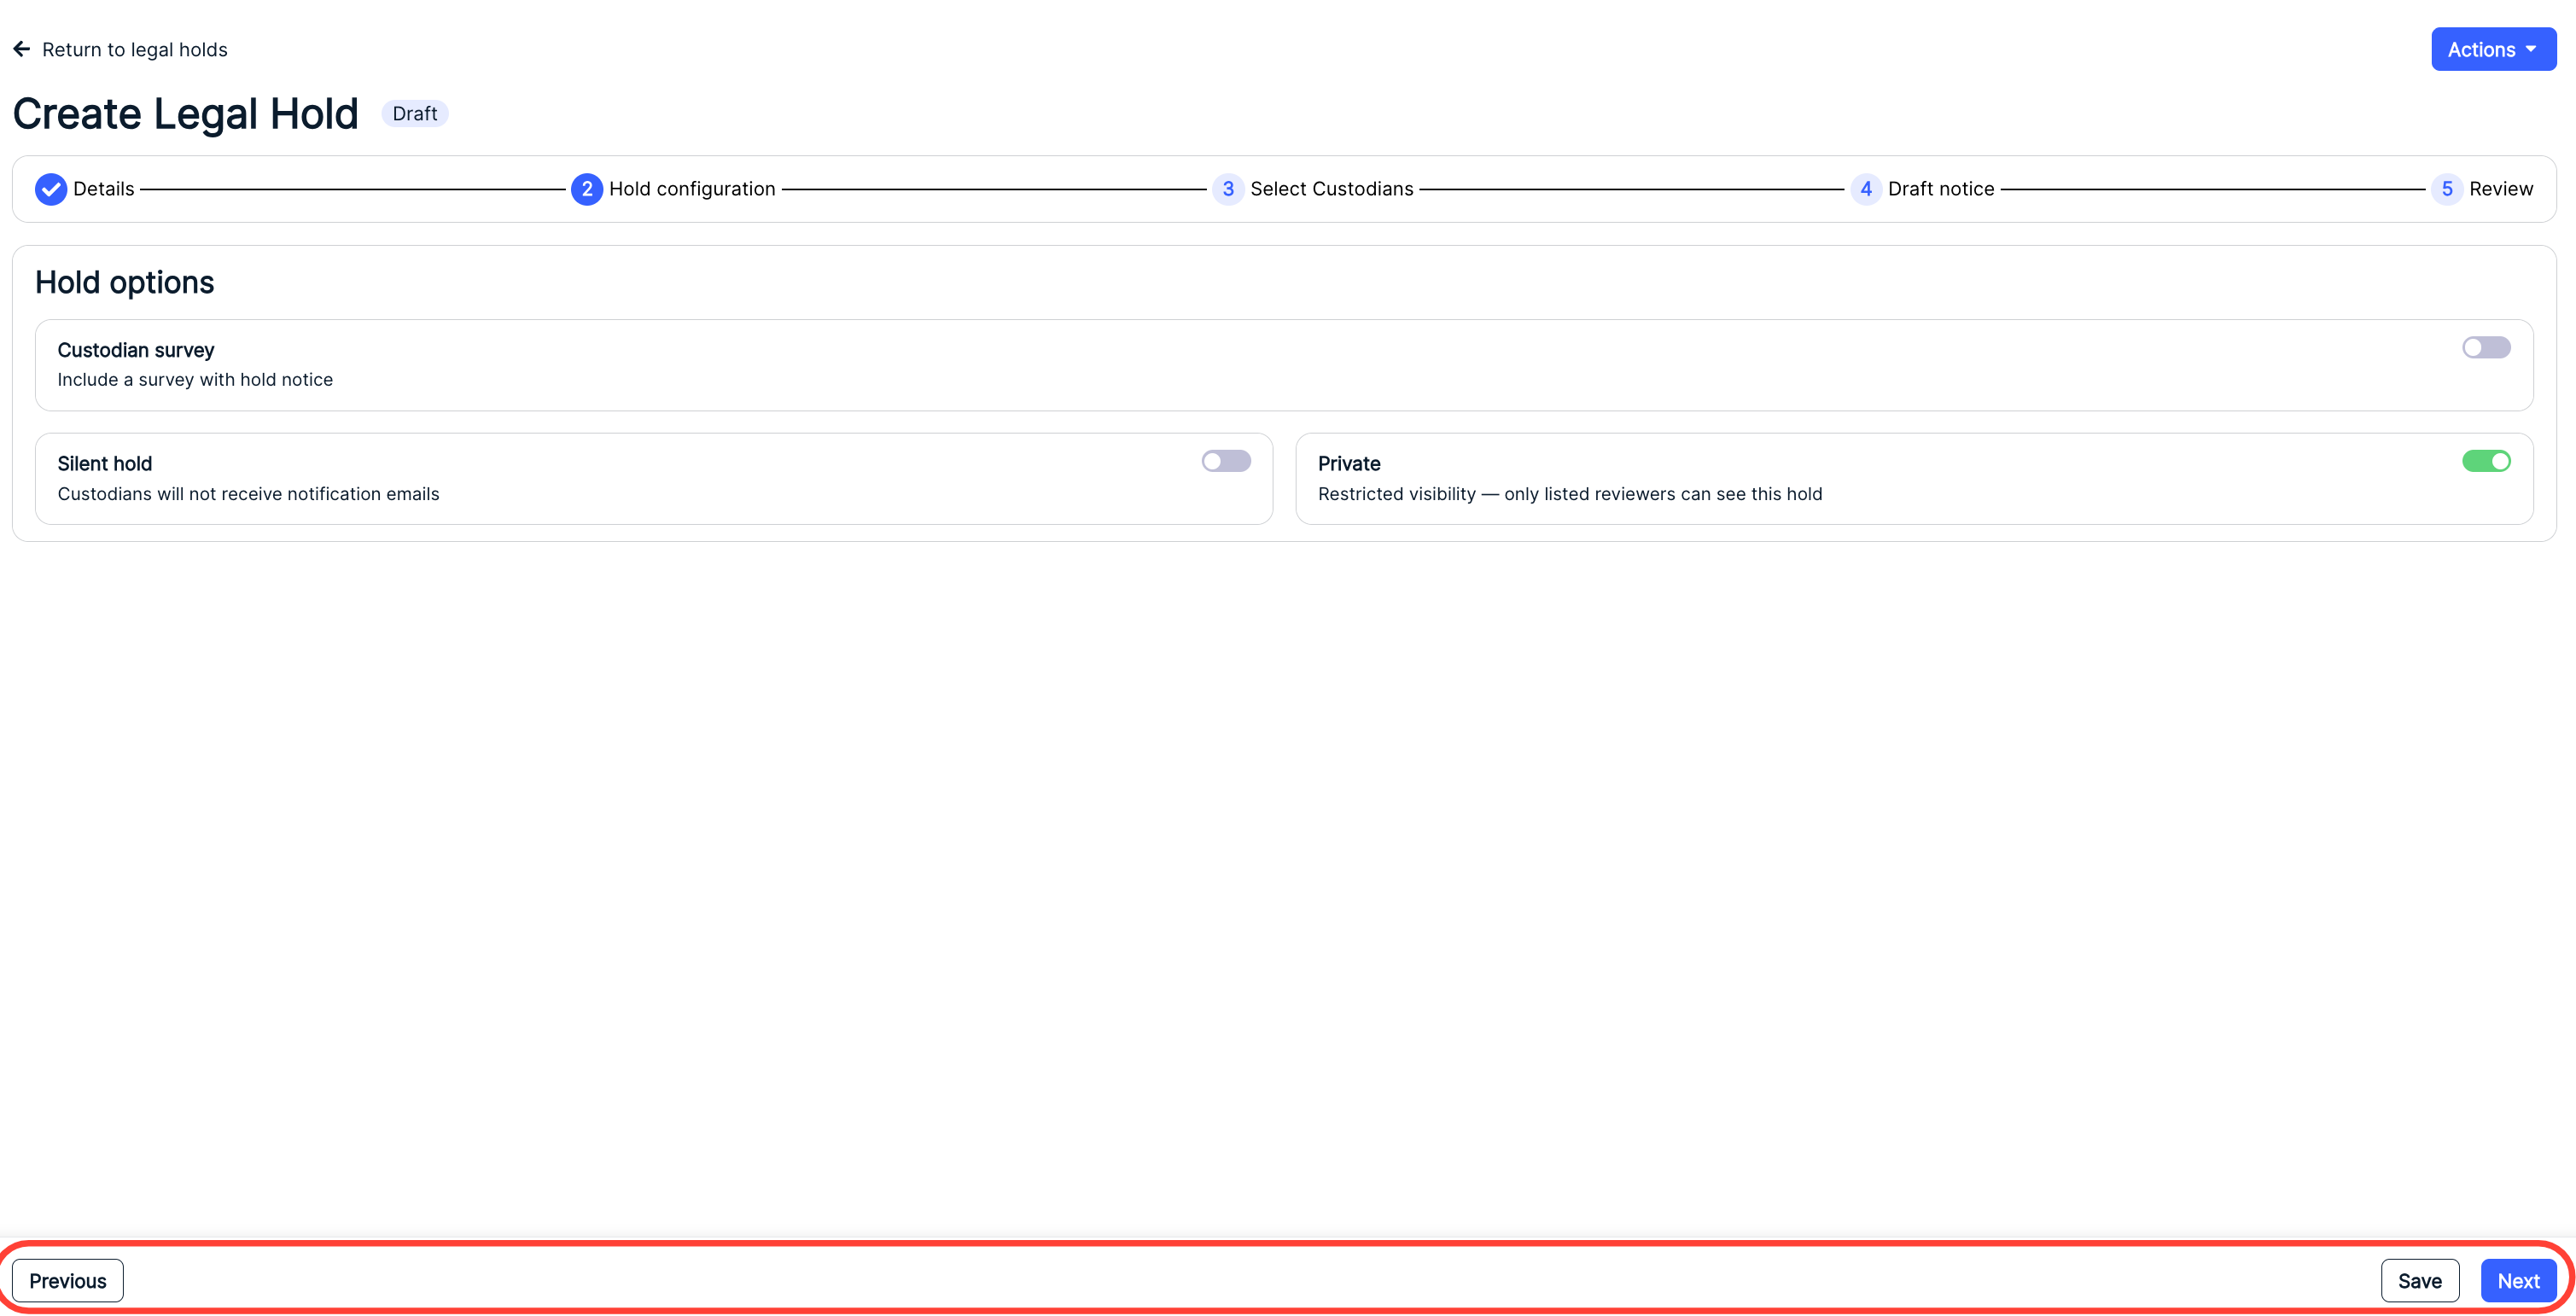
Make the hold a Silent hold. In a silent hold, custodians will NOT receive notification emails. Note that if you choose this option, the Survey option will not be available.

Make the hold Private. Private holds have restricted visibility; only listed reviewers can see this hold. Note that you can make Silent holds private.

Click Next when you're done to move on to the next step or click Save to save your work and finish later; click Previous to go to the prior screen.
- Select your custodians.
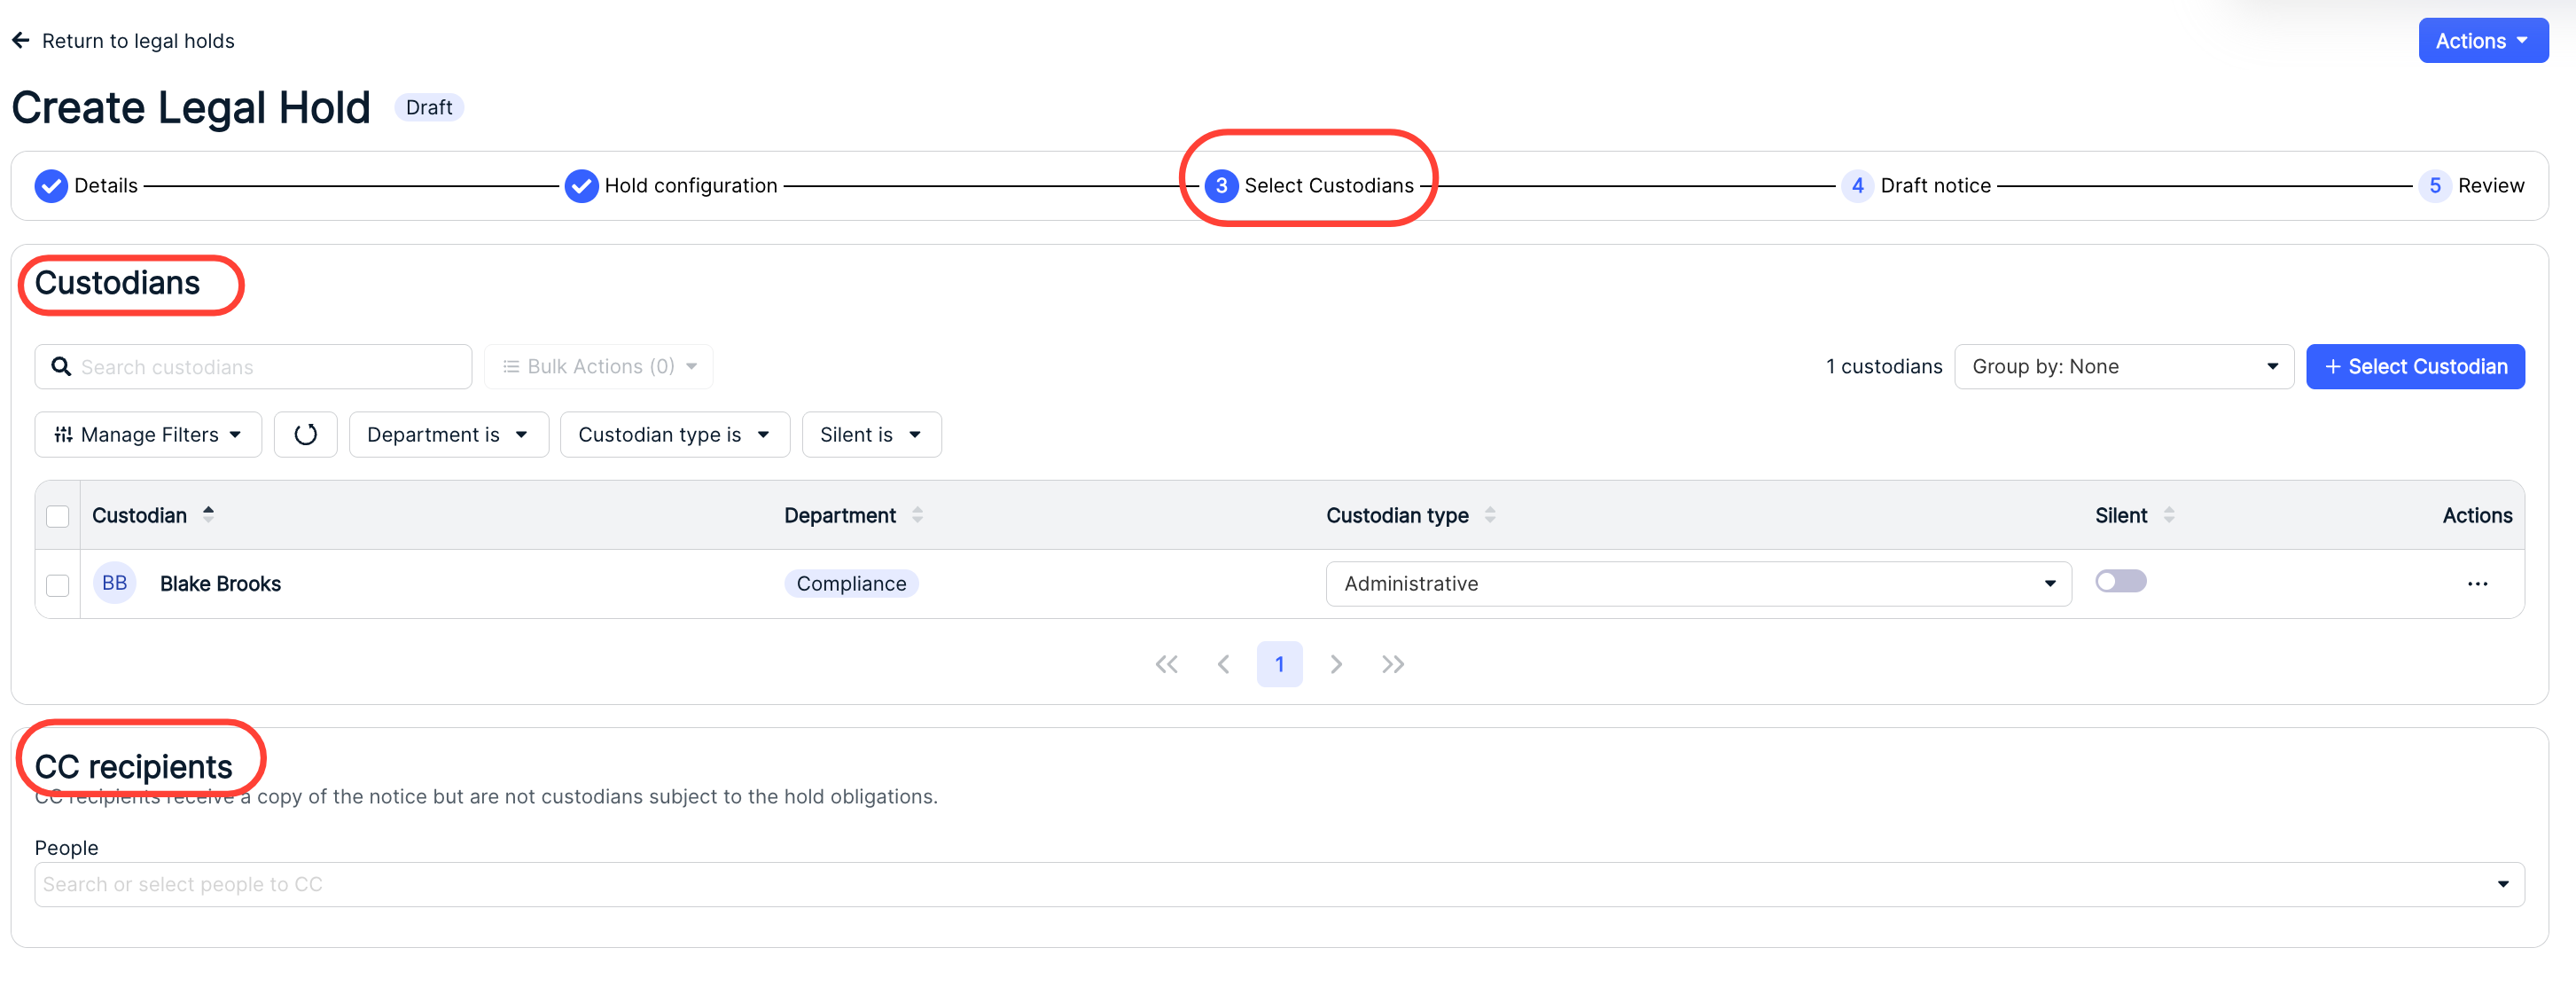
On the Select Custodians screen, you'll see the existing Custodians and the CC recipients.
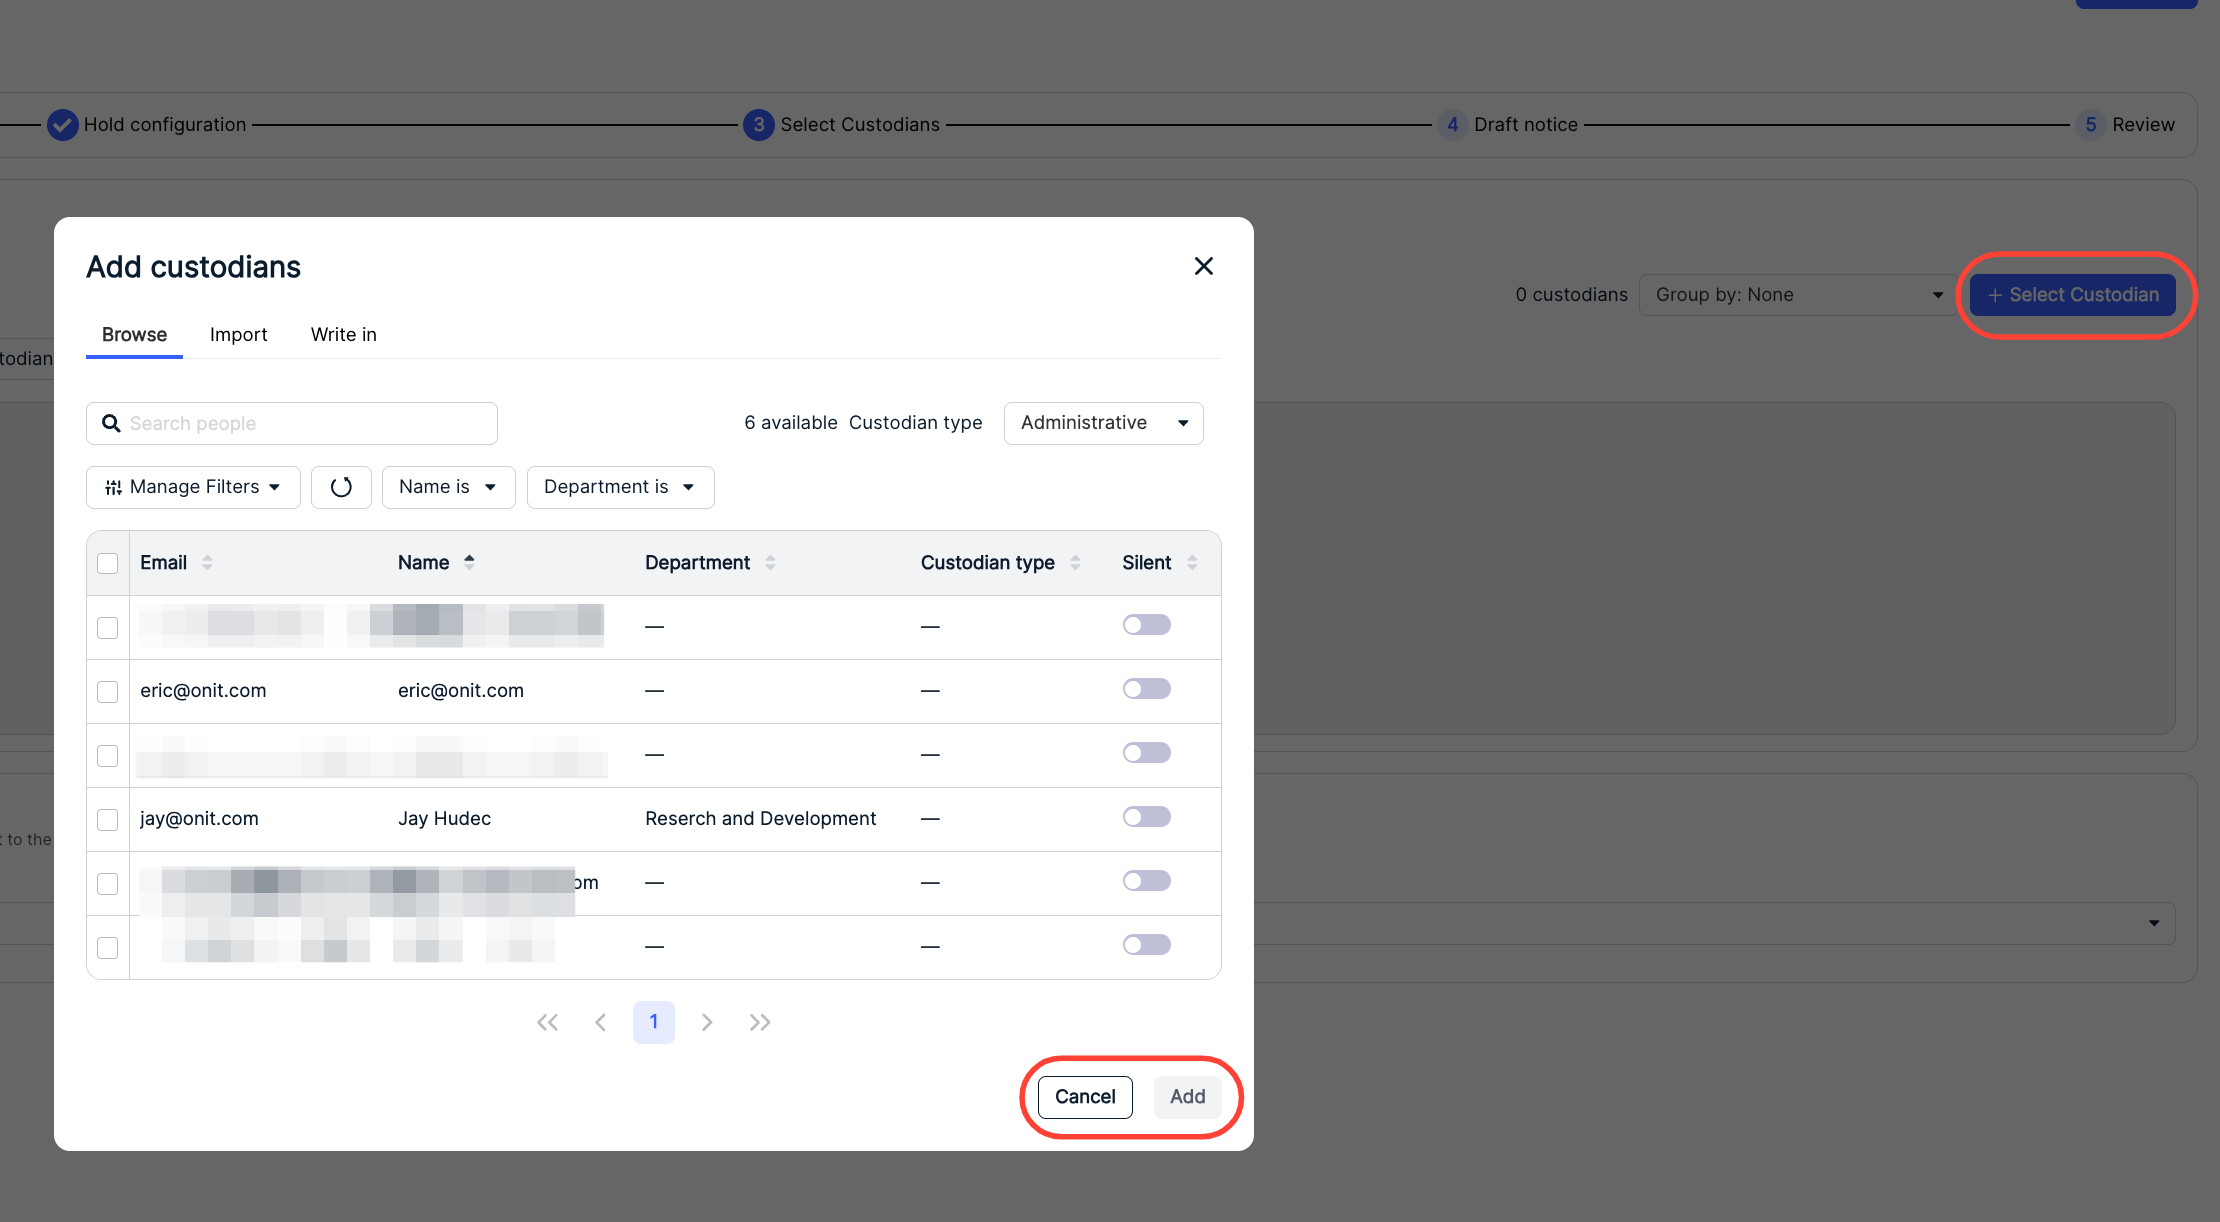
Click Select Custodian to add custodians to the list. The Add Custodians screen will appear. Here, you can view and sort by Email, Name, Department, Custodian Type, and Silent (yes/no). Click the up-down arrow to sort by the column. Use the Search People search bar to search through custodians. You can use the Manage Filters and Custodian type drop-down menus, along with the other filter menus, to customize what you want to see on the screen. Click the Silent toggle to mark the custodians as Silent or not.
Once you select your custodians to add, click Add to add them in or Cancel to back out.
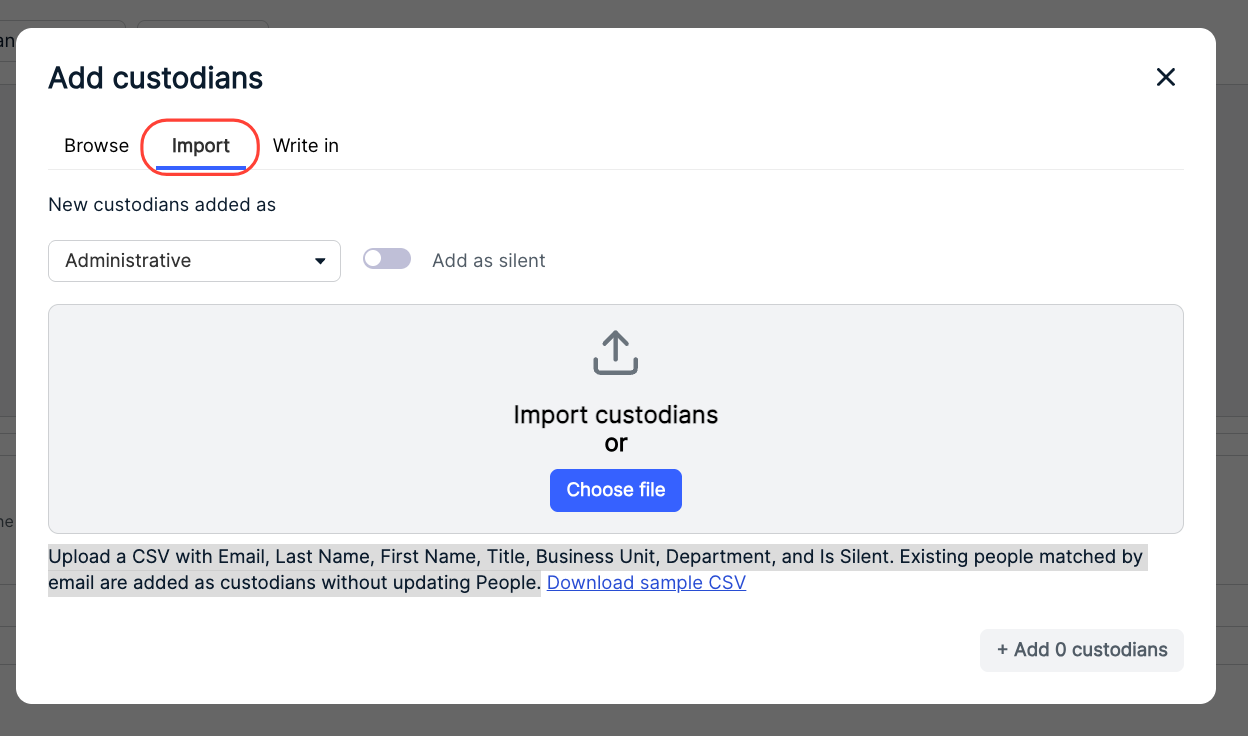
Click Import to bulk upload contacts. You can upload a CSV with Email, Last Name, First Name, Title, Business Unit, Department, and Is Silent columns. Existing people matched by email are added as custodians without updating People. Use the drop-down menu to choose what Custodian Type you want the New custodians added as, and toggle to if you want to Add as silent.
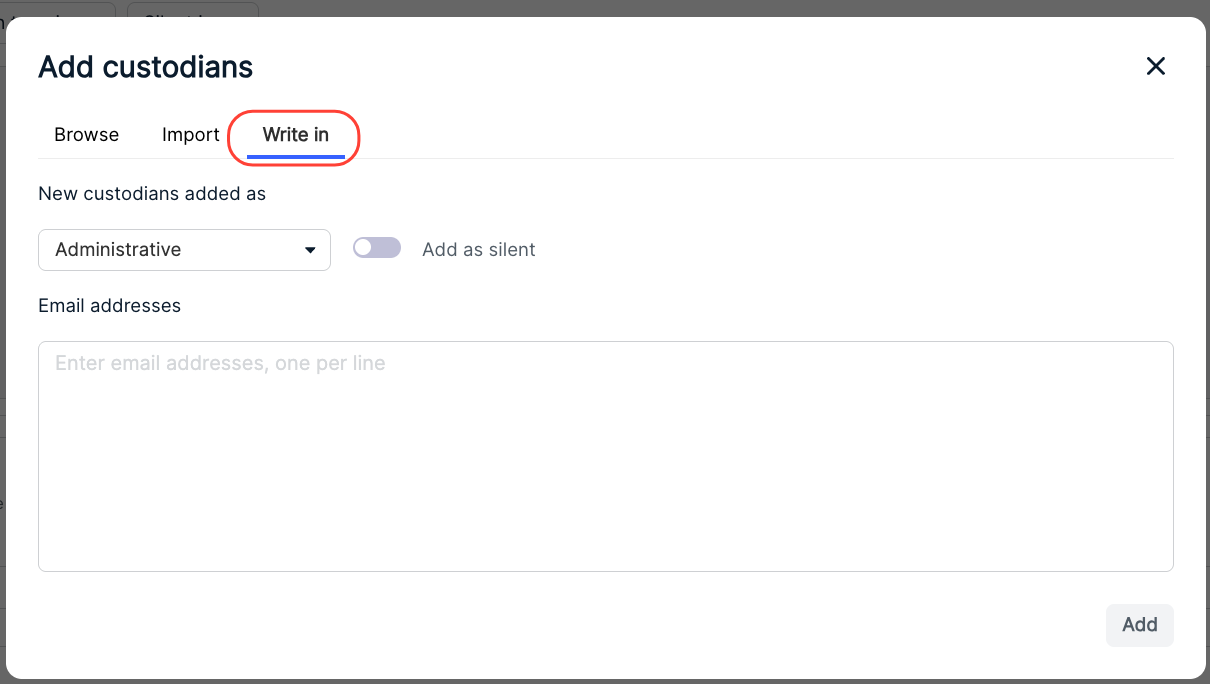
Click Write in to write in your own custodian. Enter email addresses (one per line) and select what Custodian Type you want the New custodians added as from the drop down menu and if you want to Add as silent.
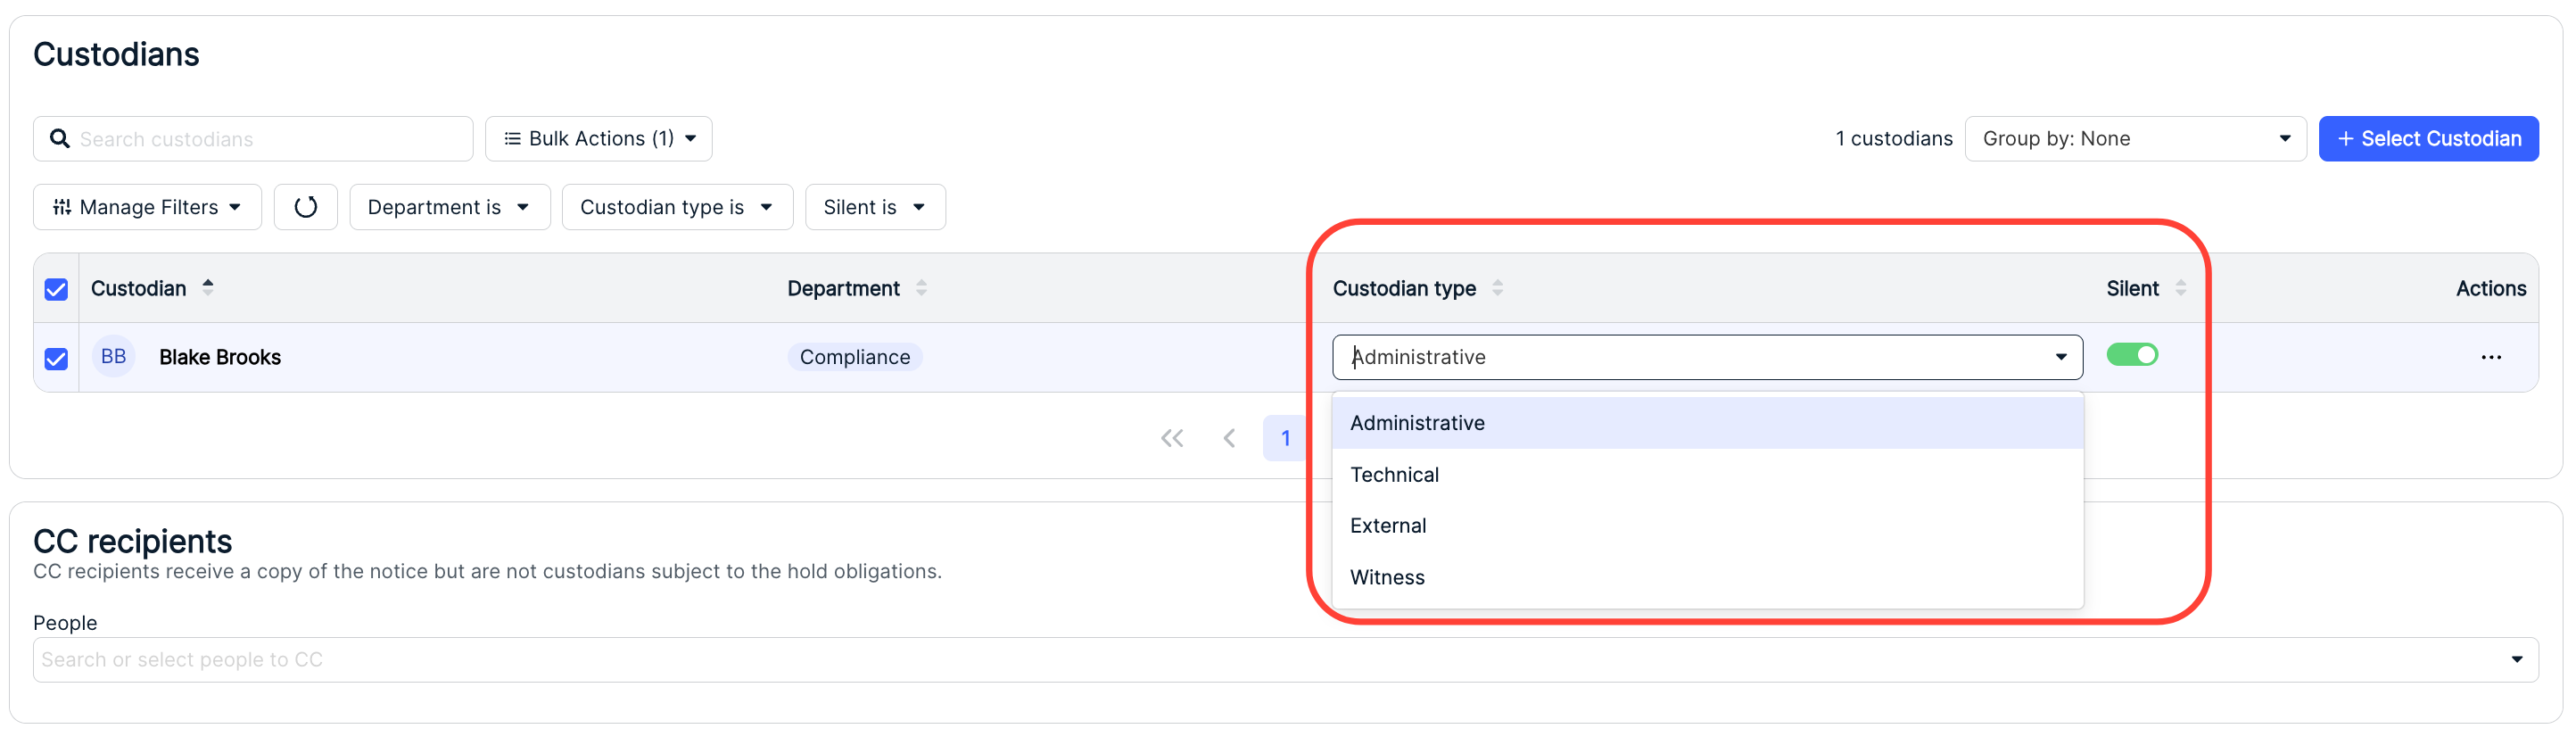
Under Custodians, you'll see the existing Custodian, custodian's Department, Custodian Type, Silent toggle button, and Actions menu. Use the Search custodians search bar to search through existing custodians. Use the Manage Filters and other drop-down menus to filter what you see on the screen. Use the Group By drop-down menu to group by None, Department, Custodian type, and Silent (Yes/No). Use the up/down arrows on the top of each column to sort by that column.

Use the Bulk Actions drop-down menu to bulk Change custodian type or Remove custodians.

Use the Custodian type drop-down menu to change the custodian type; use the Silent toggle button to toggle the silent hold on or off.
Use the Actions menu to Remove the custodian.

Use the CC Recipients section to include CC'd recipients; CC recipients receive a copy of the notice but are not custodians subject to the hold obligations. Use the drop-down menu to add people to the list. Click the X on the selected people to remove the person.
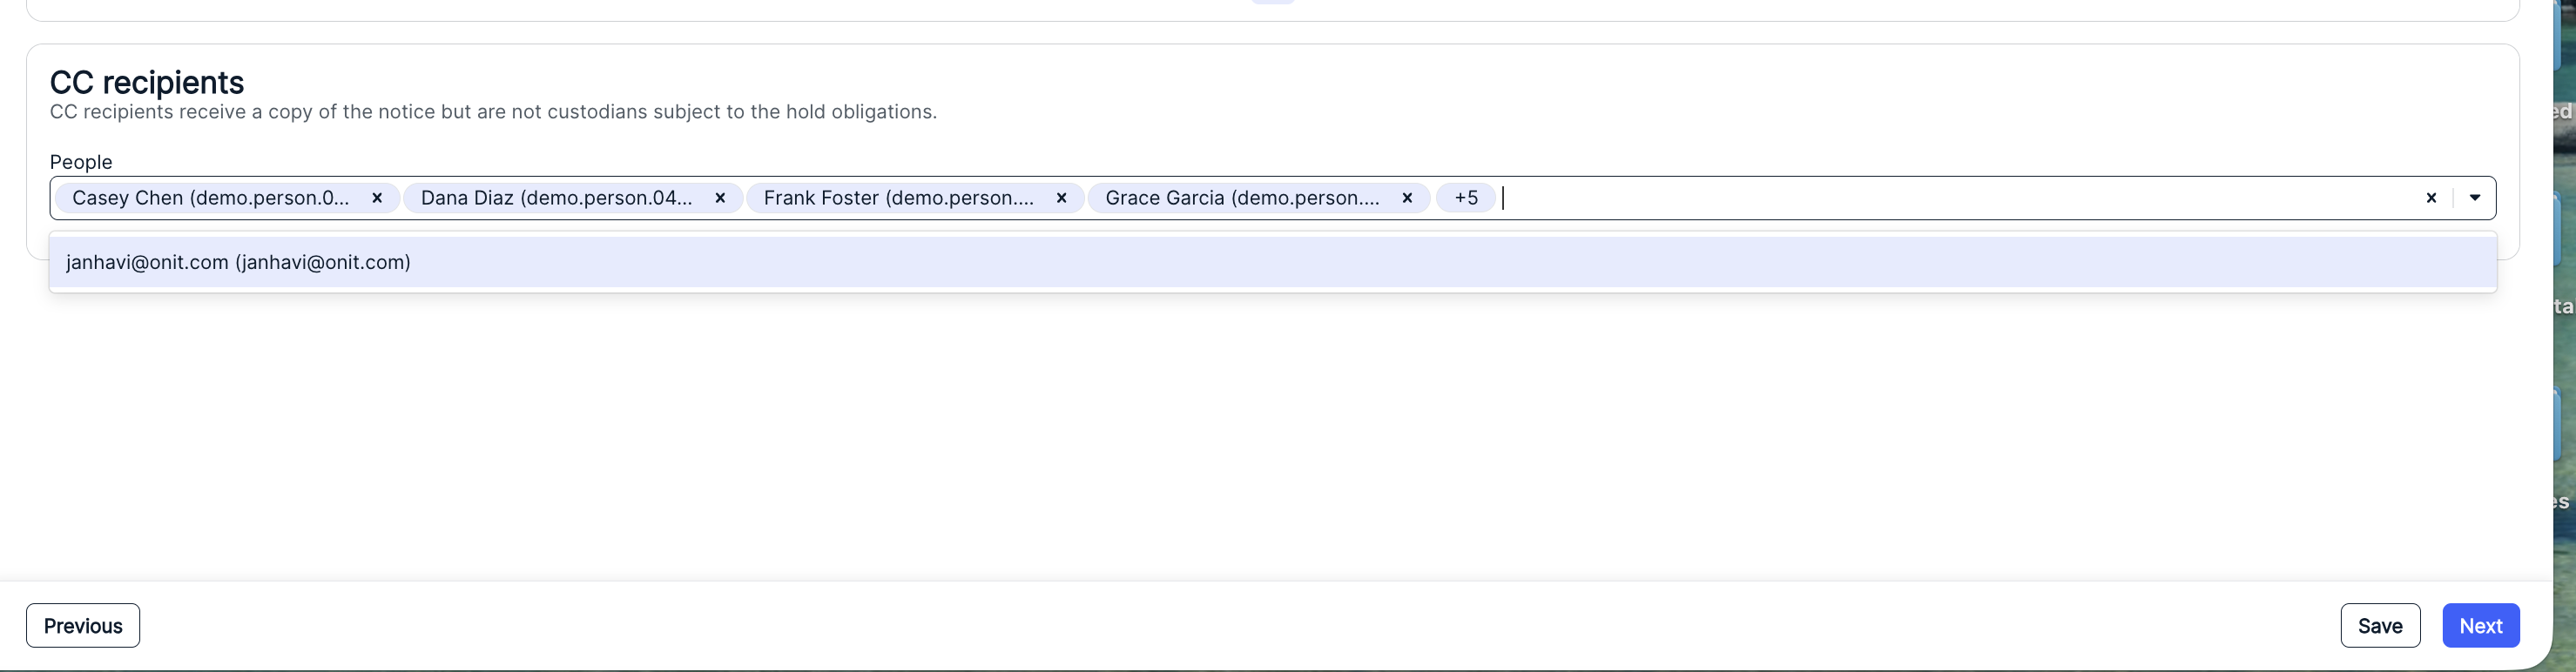
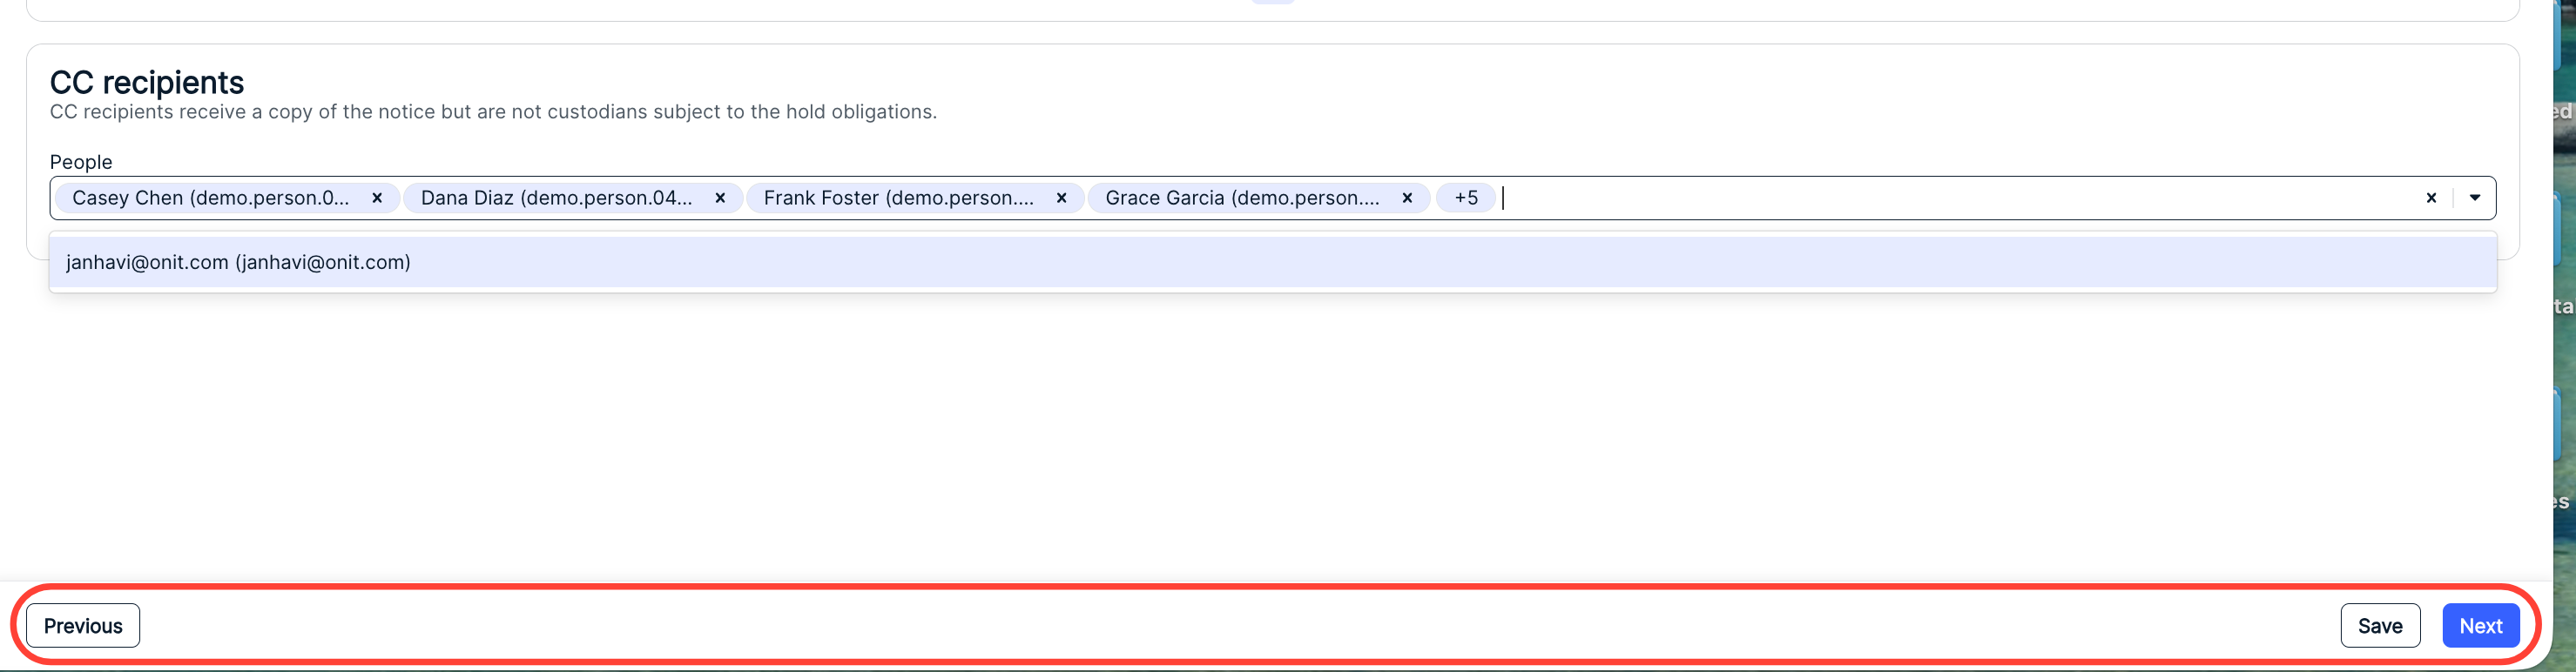
Click Next to move on to the next screen, Save to save your progress and finish later, or Previous to move back to the prior screen.
- Draft your Legal Hold notice.
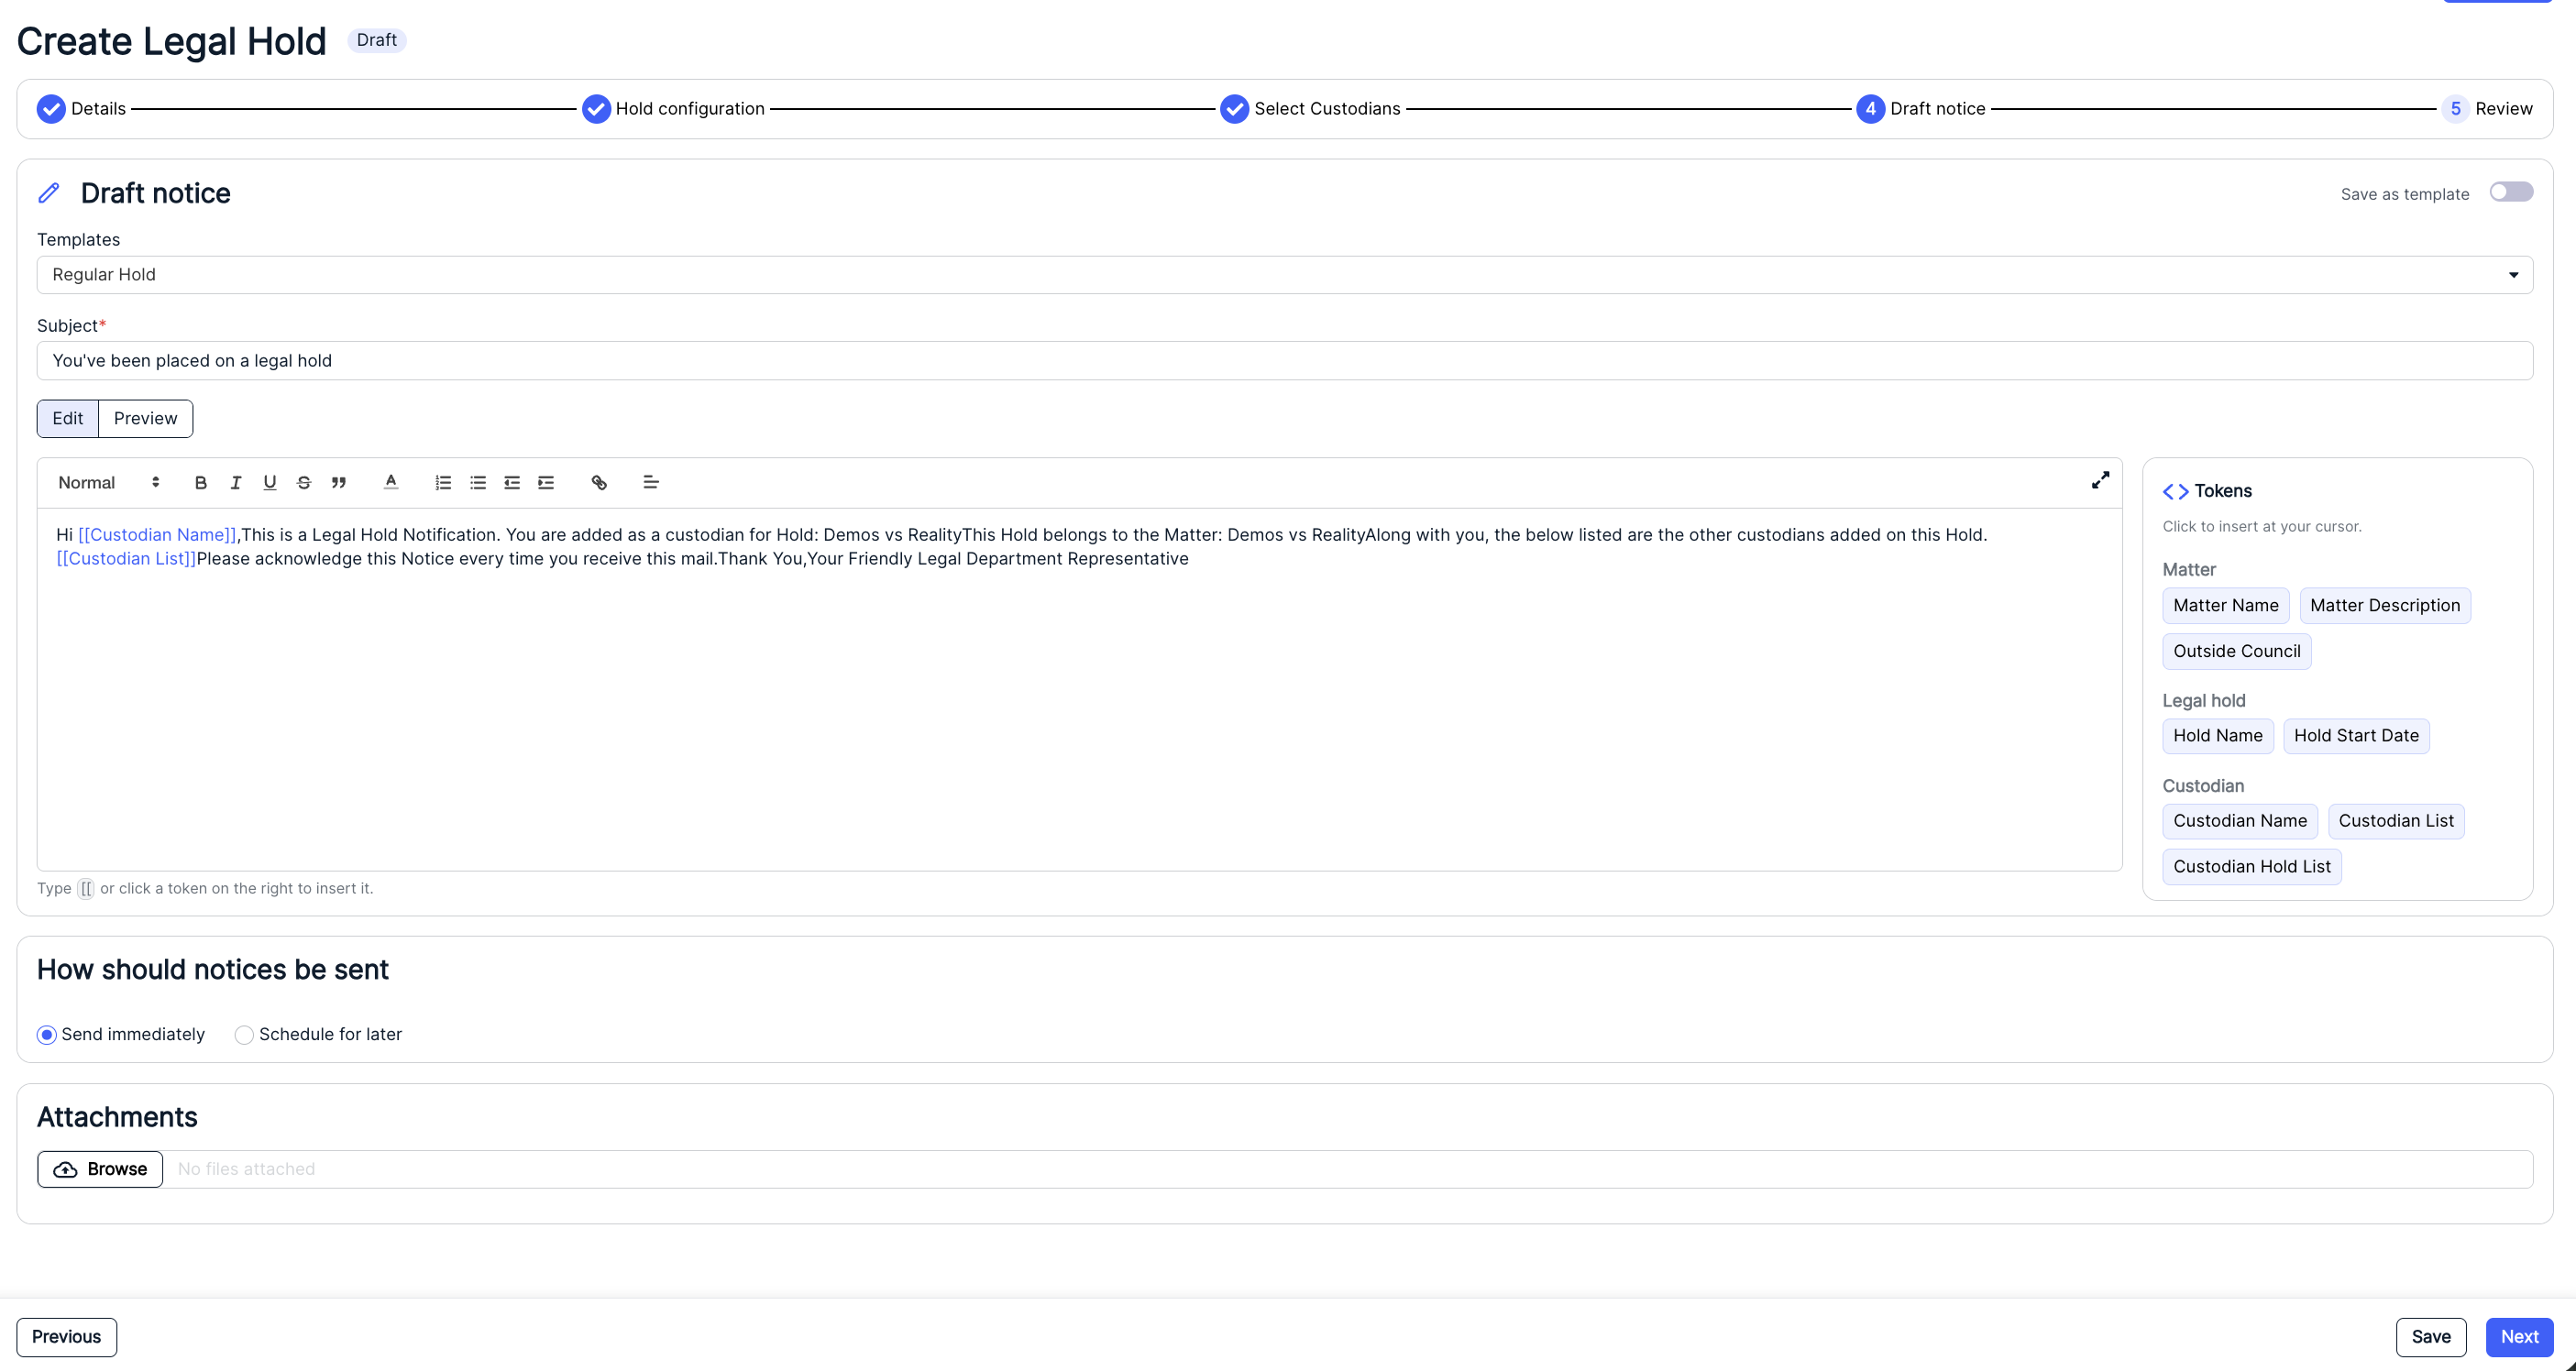
You'll have to fill out the:
- Templates (from the drop-down menu)
- Subject (Required)
- Notice Text; use the formatting bar to format the text and use the "[[" option to insert a token ("Custodian Name," etc.) to use specific Legal Hold or Matter information; the list of tokens will appear once you type "[[". You can also click on the tokens on the right of the pane to include those fields. Use the Edit or Preview button to switch between the editing text field and a preview of the notice.
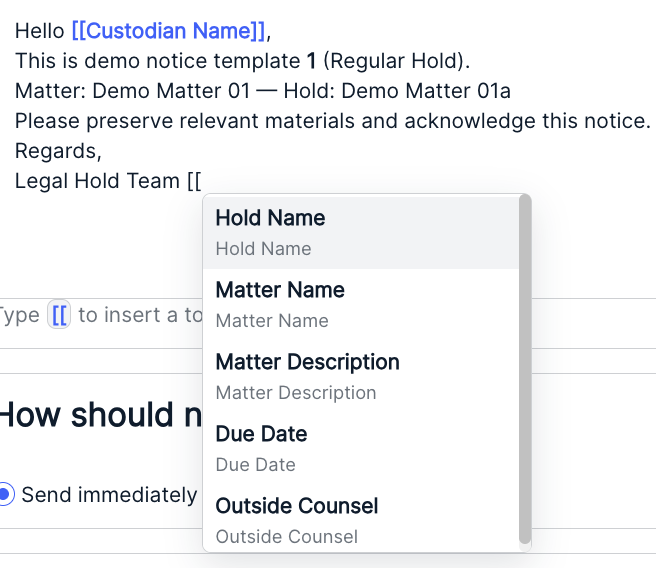
How should notices be sent option (Choose either Send immediately or Schedule for later; if you pick Schedule for later you can add in the date in time in a field below

Under Attachments you can upload files to add to the legal hold. You'll see the existing attachments in the display field.
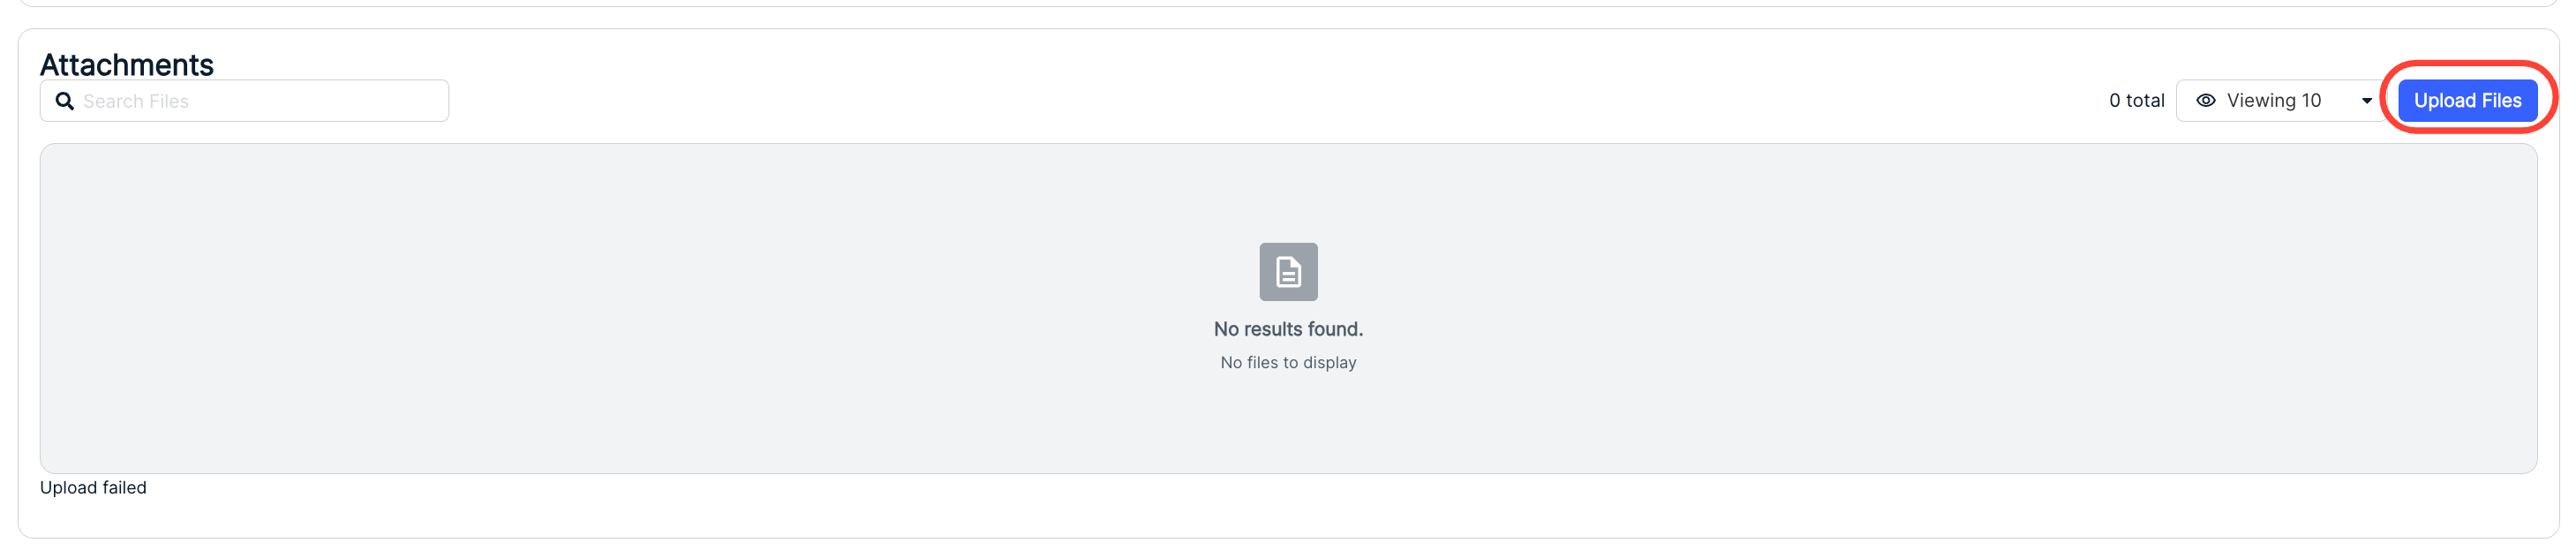
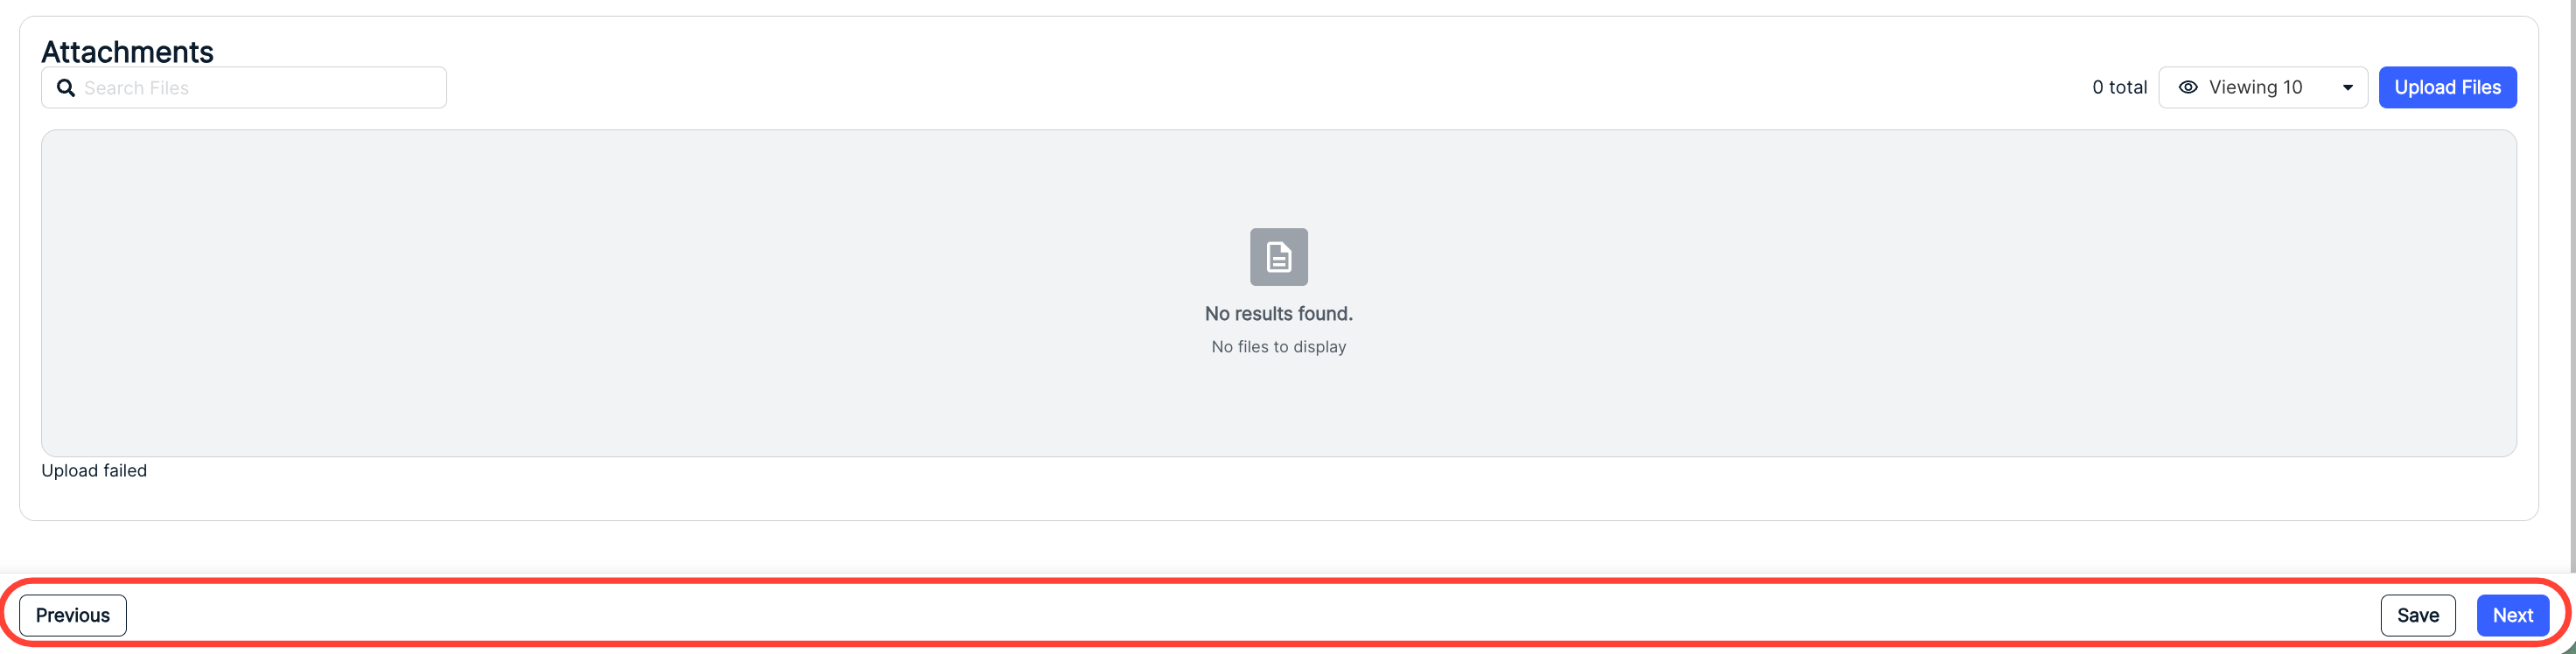
Click Next to move on to the next screen, Save to save your progress and finish later, or Previous to go back to the prior screen.
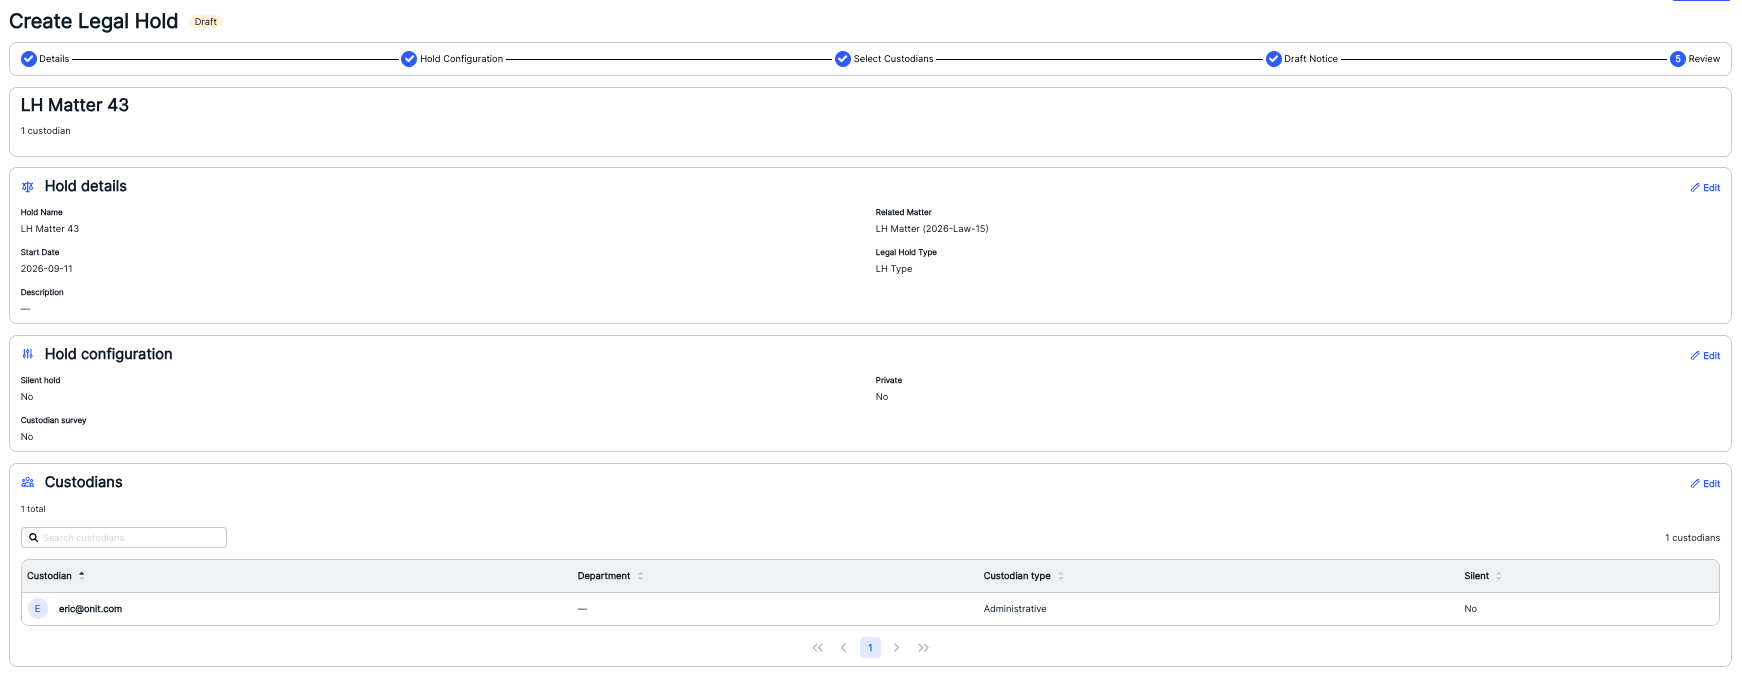
- Review the Legal Hold and send.
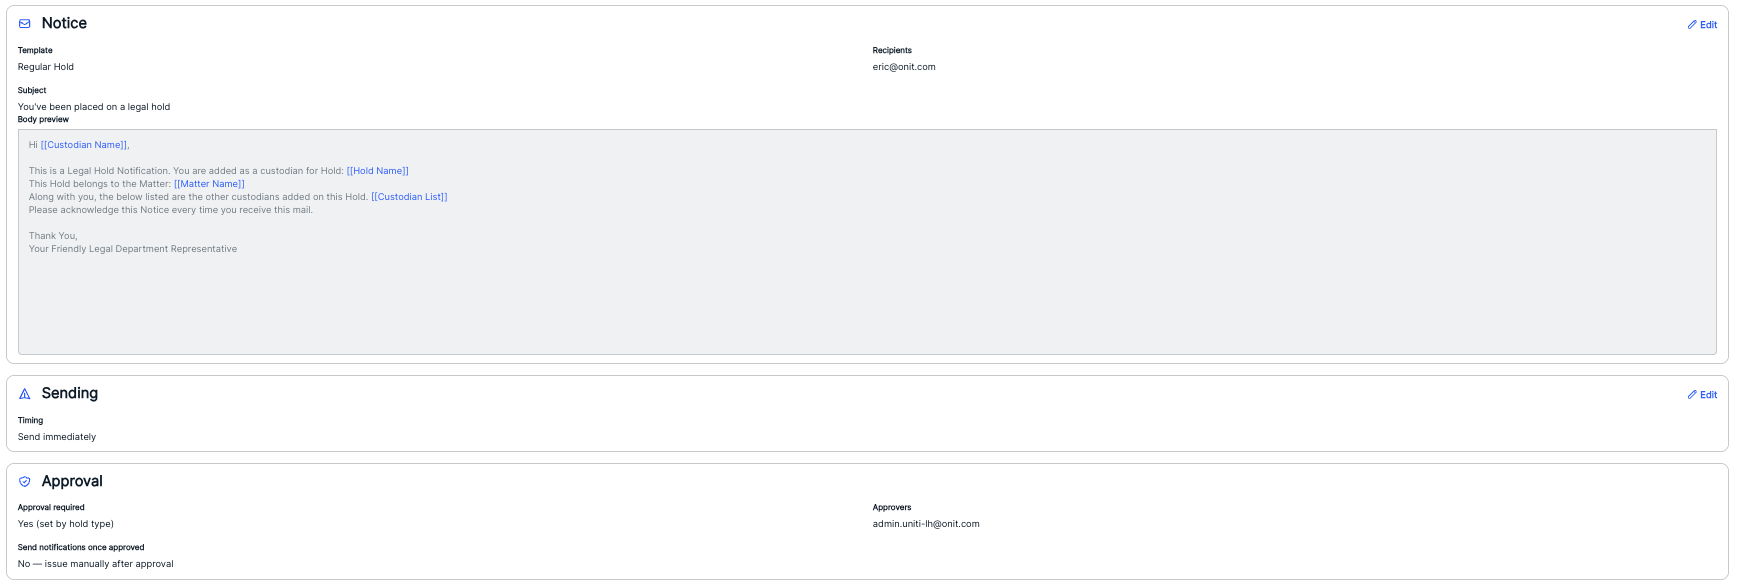
You can see the Legal Hold Name, Hold details, Custodians, Hold configuration, Notice, Sending, and Approval status. Click Edit to edit any of these categories.
Click Issue Hold to send the hold, Save to save your progress and finish later, or Previous to go back to the prior screen.
Legal Hold Actions
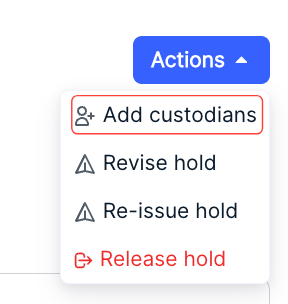
Use the Actions button after clicking on a Legal Hold to:
- Add custodians
- Revise hold
- Re-issue hold
- Release hold
Add Custodians
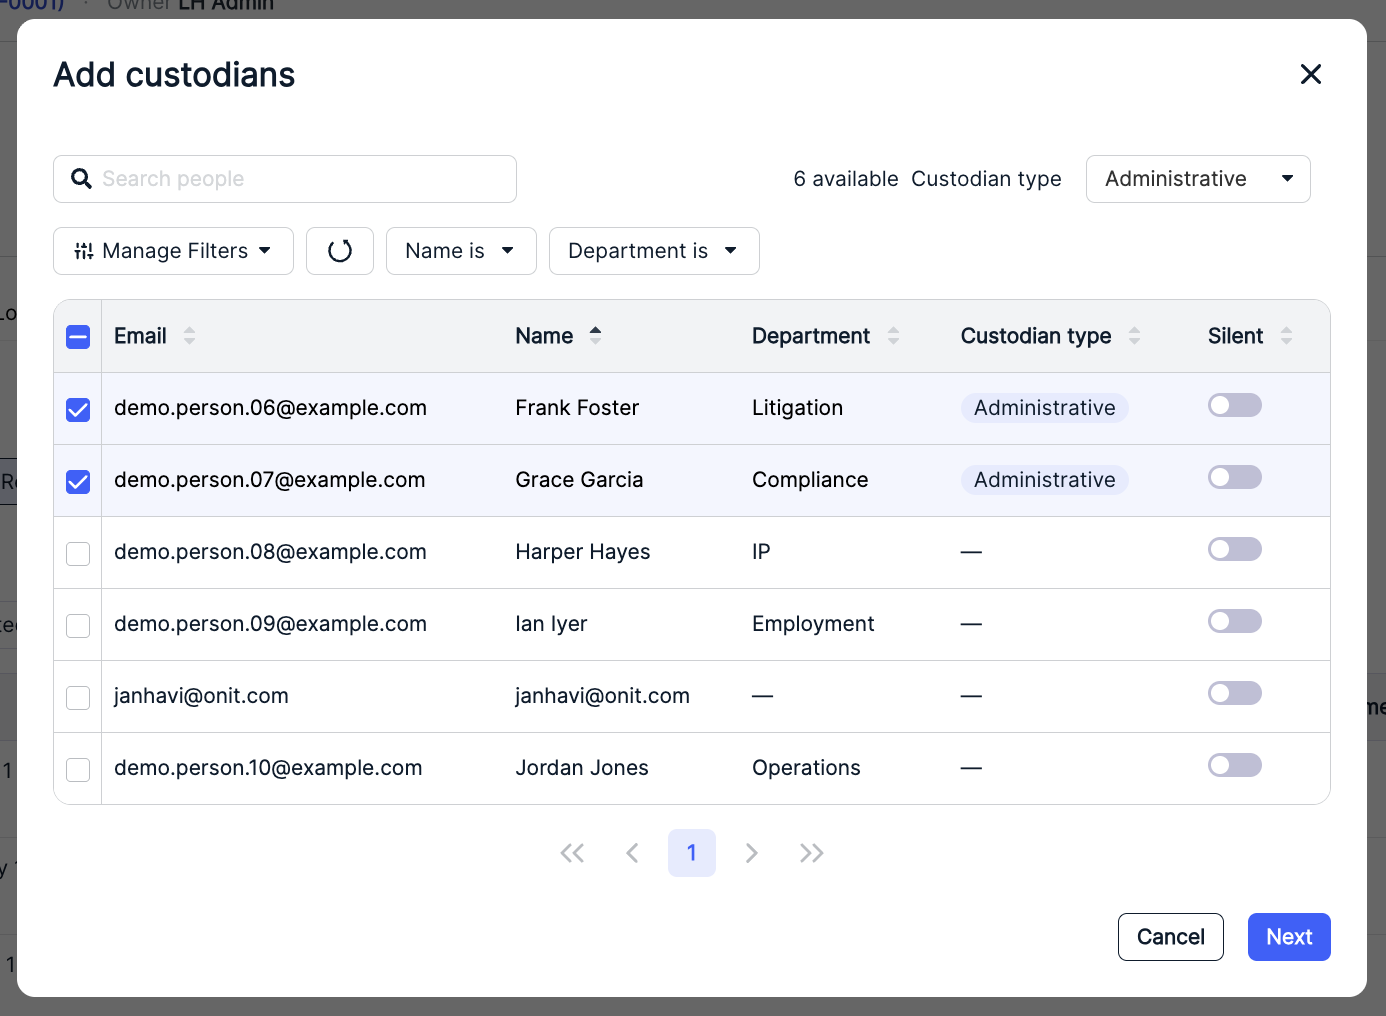
If you pick Add Custodians, the Add Custodians screen will appear. Use the Search people to search through the custodians. Use the Custodian type drop-down menu to choose the Custodian type. The main Add custodians screen will show you the custodian Email, Name, Department, Custodian Type, and Silent status/toggle. Use the up/down button at the top of the column to sort by that column. Use the Manage Filters and other drop-down menus to customize what you want to see on the screen.
Click the check boxes next to the custodians you want to add and click Next to invite the custodians or Cancel to back out. Use the Silent toggle to choose whether the hold should be silent or not.
Revise Hold
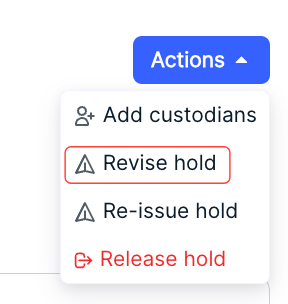
Click on Revise Hold to edit the hold by adding custodians or revising the notice.
Re-issue Hold
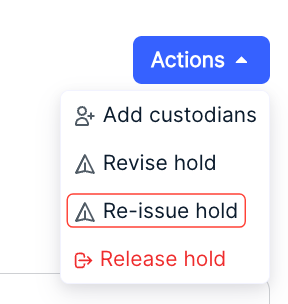
Click on Re-issue Hold to resend the same hold notification to all the custodians.
Release Hold
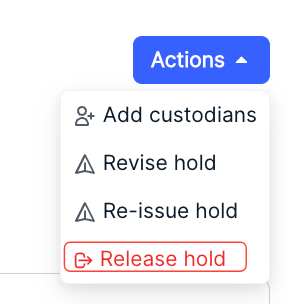
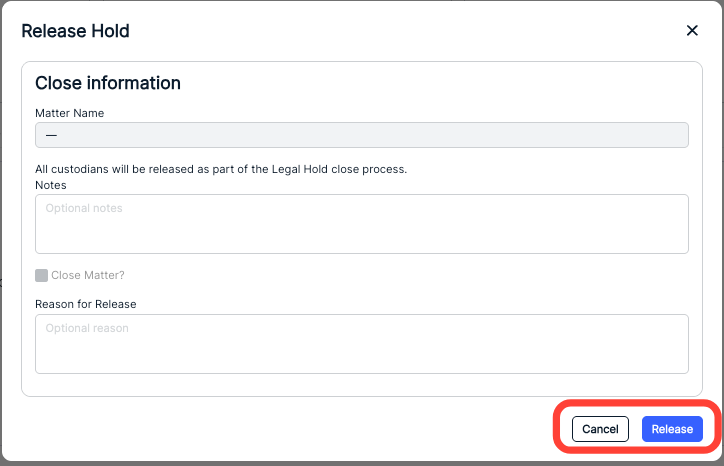
Click on Release Hold to release the custodian from the hold. The Release Hold screen will appear.
Fill out any Notes and the Reason for Release, if necessary. You can also opt to Close Matter, if applicable. Click Release to send the release or Cancel to back out.