Here's how to work with administrative settings within Legal Holds:
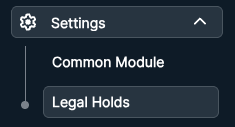
- To access Legal Holds settings, select "Legal Holds" under the "Settings" tab.
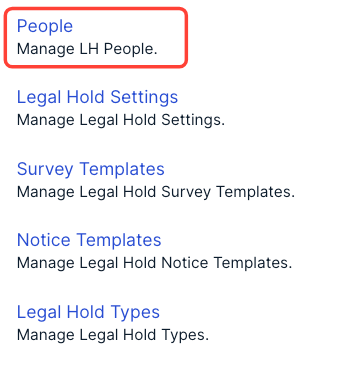
- You'll see five different settings options:
- People
- Legal Hold Settings
- Survey Templates
- Notice Templates
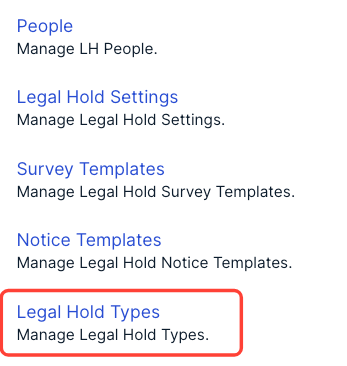
- Legal Hold Types
- People Upload (Onit support only)
- Data Mappings (admin only)
- Field Mappings (admin only)
- Job Logs (admin only)
People
Click on People to manage the different people that can be added as custodians in Legal Holds.
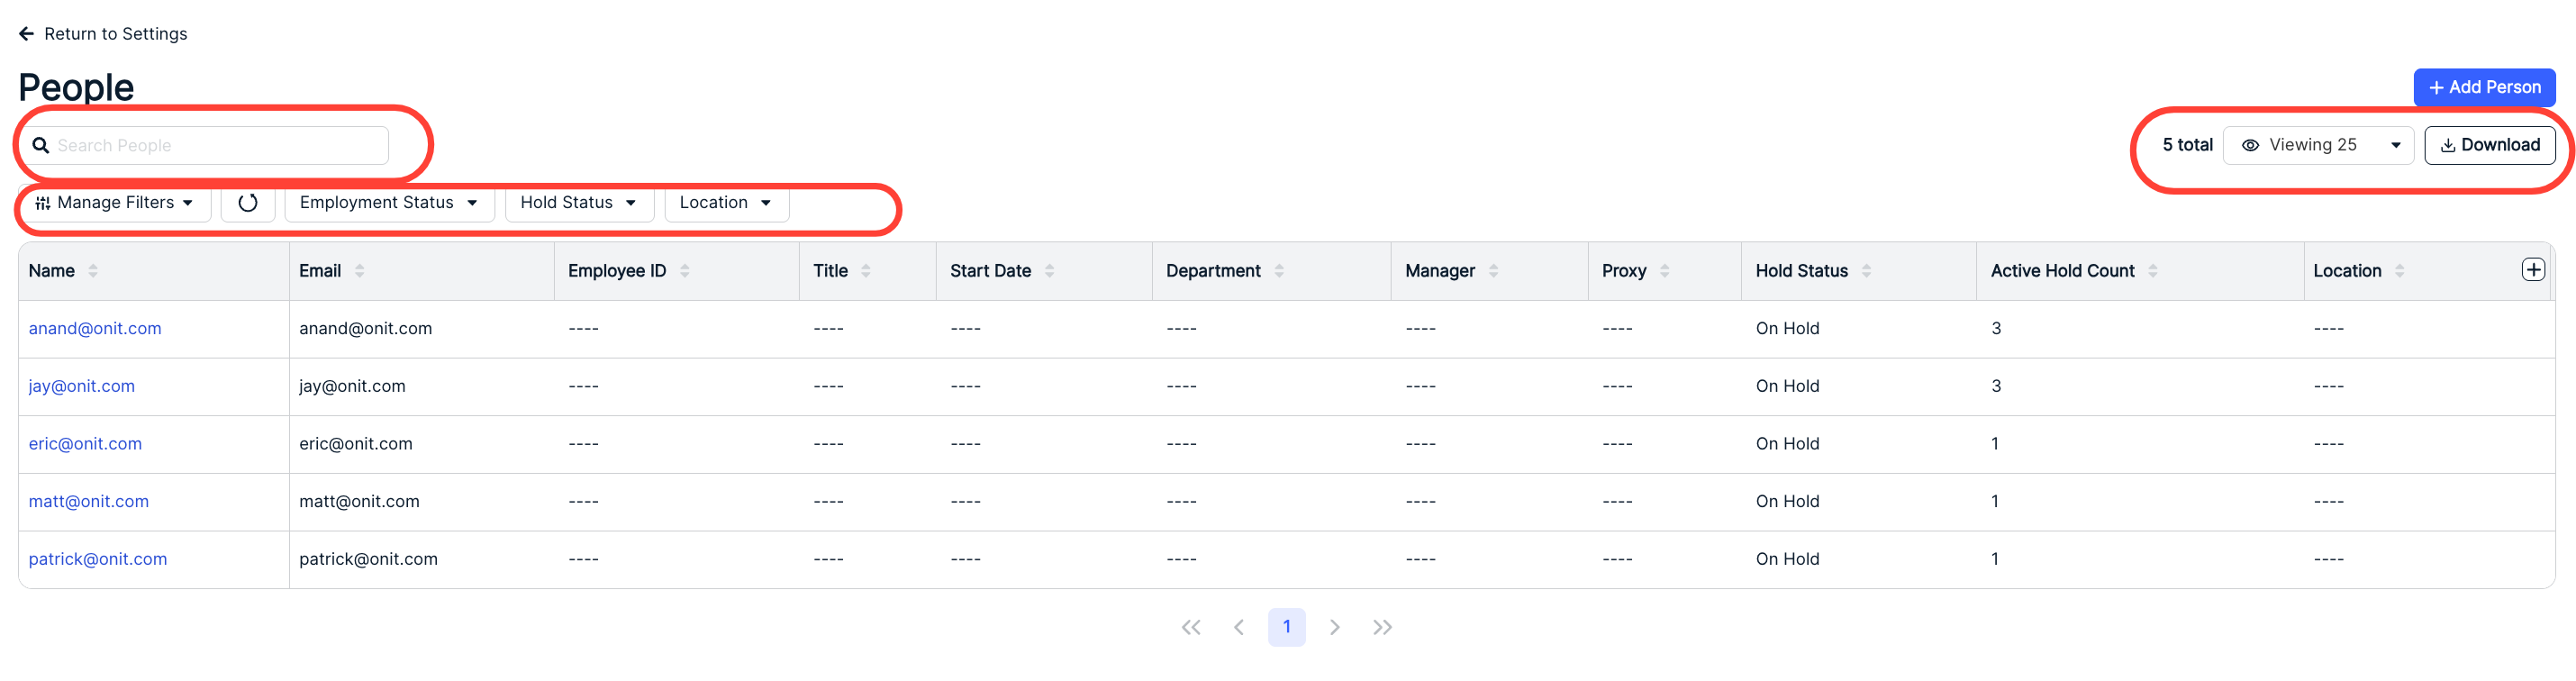
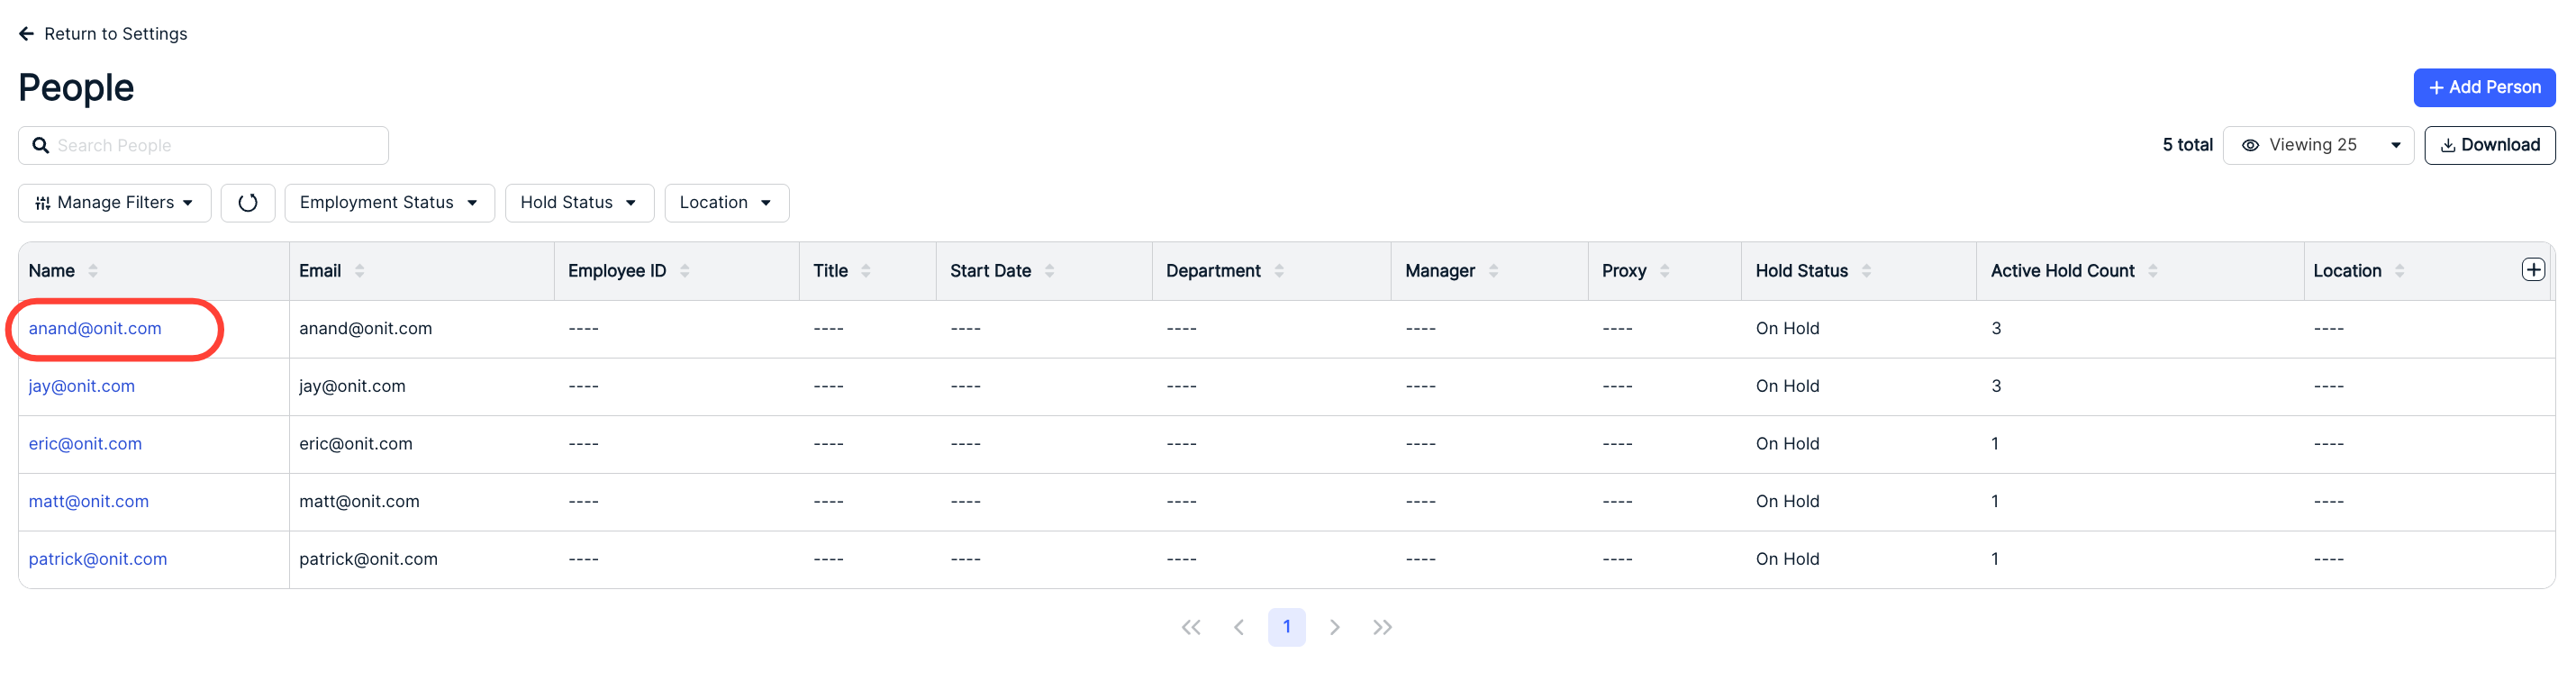
After opening up the People setting, the main directory will open. There you can see the person's Name, Email, Employee ID, Title, Start Date, Department, Manager, Proxy, Hold Status, Active Hold Count, and Location. Use the Search People bar to search through the people. Click on the up/down arrow to sort by that field. Click the drop-down Manage Filter menu and other menus to filter what you see on the screen.
Use the Viewing drop-down menu to change the Viewing specifications. Use the Plus (+) button to customize the table columns. Use the Download button to download the people information as an Excel file.
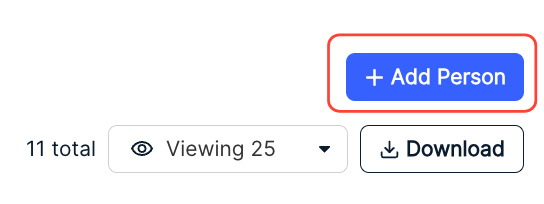
Click on Add Person to add a new person for Legal Holds.
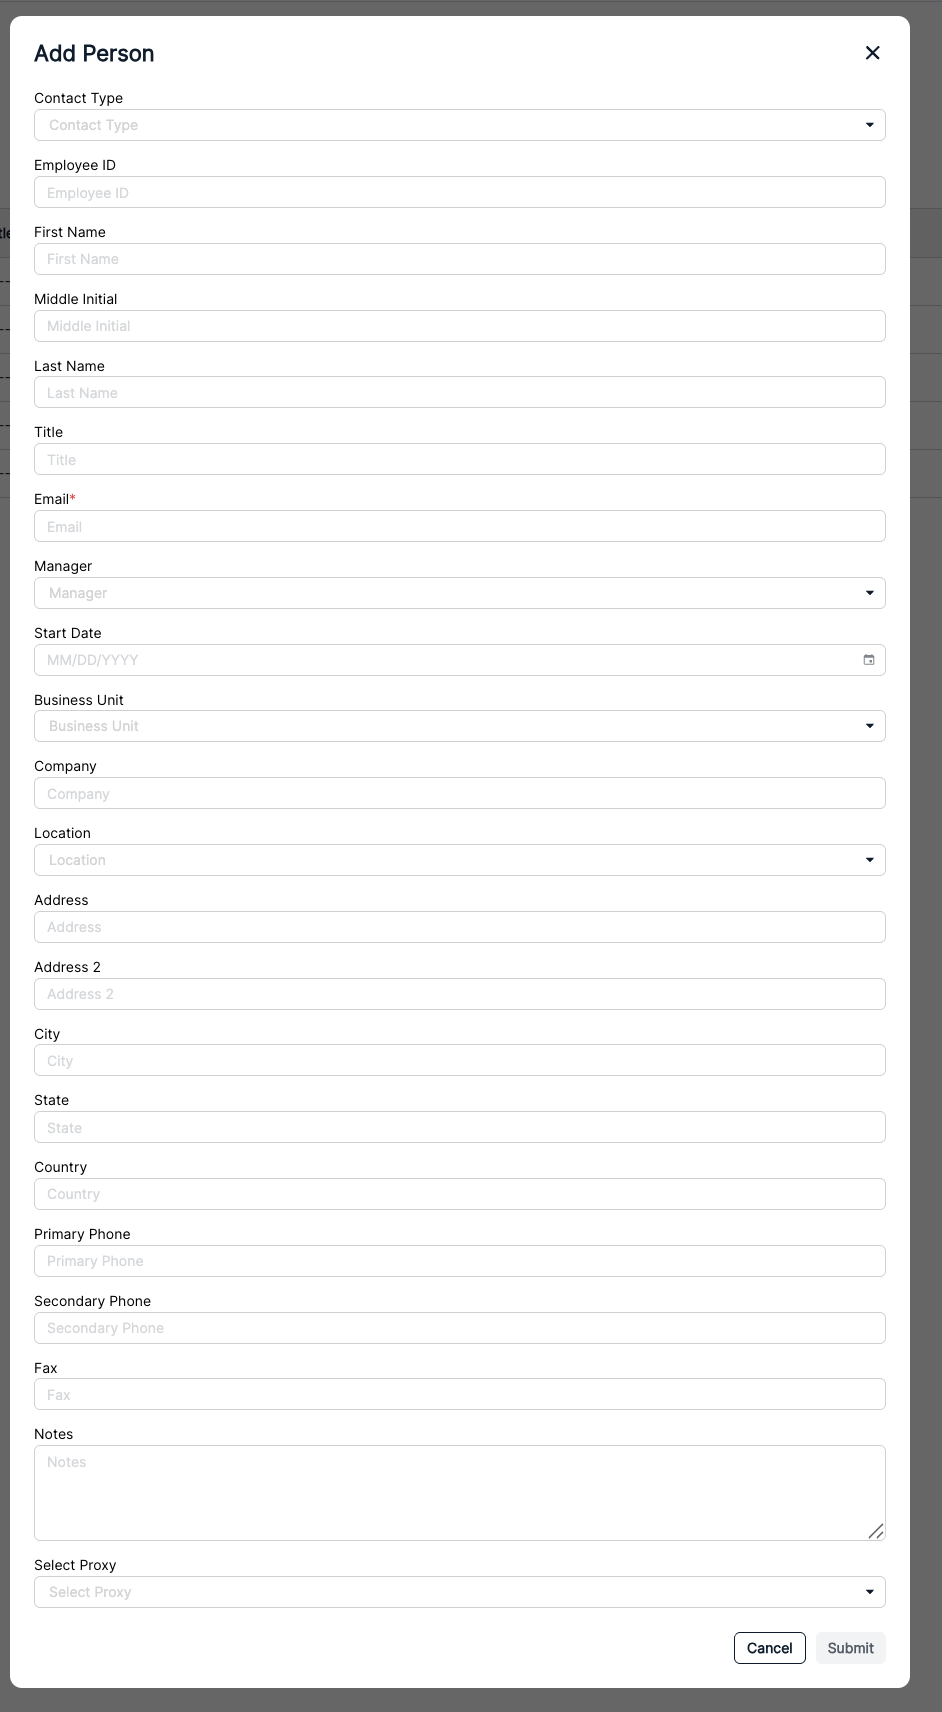
You'll have to fill out the:
Contact Type (drop-down menu); you can choose from Employee or External
Employee ID
First Name
Middle Initial
Last Name
Title
Email* (required)
Manager (drop-down menu)
Start Date
Business Unit (drop-down menu)
Company (if External is selected)
Location (drop-down menu)
Address
Address 2
City
State
Country
Primary Phone
Secondary Phone
Employment Status (if Employee is selected)
Fax
Any Notes
- Select Proxy (drop-down menu); the proxy is someone designated to receive and acknowledge legal holds on behalf of someone else. You can pick the proxy for this contact from a drop-down menu. If you have a proxy selected, a Notify me when proxy approves on my behalf check box appears. This should be checked if the Custodian wants to know when the Proxy has approved their legal hold.
Click Submit to submit or Cancel to back out.
The new person will appear in the People directory.
Click into any person to see and edit their Legal Hold attributes.
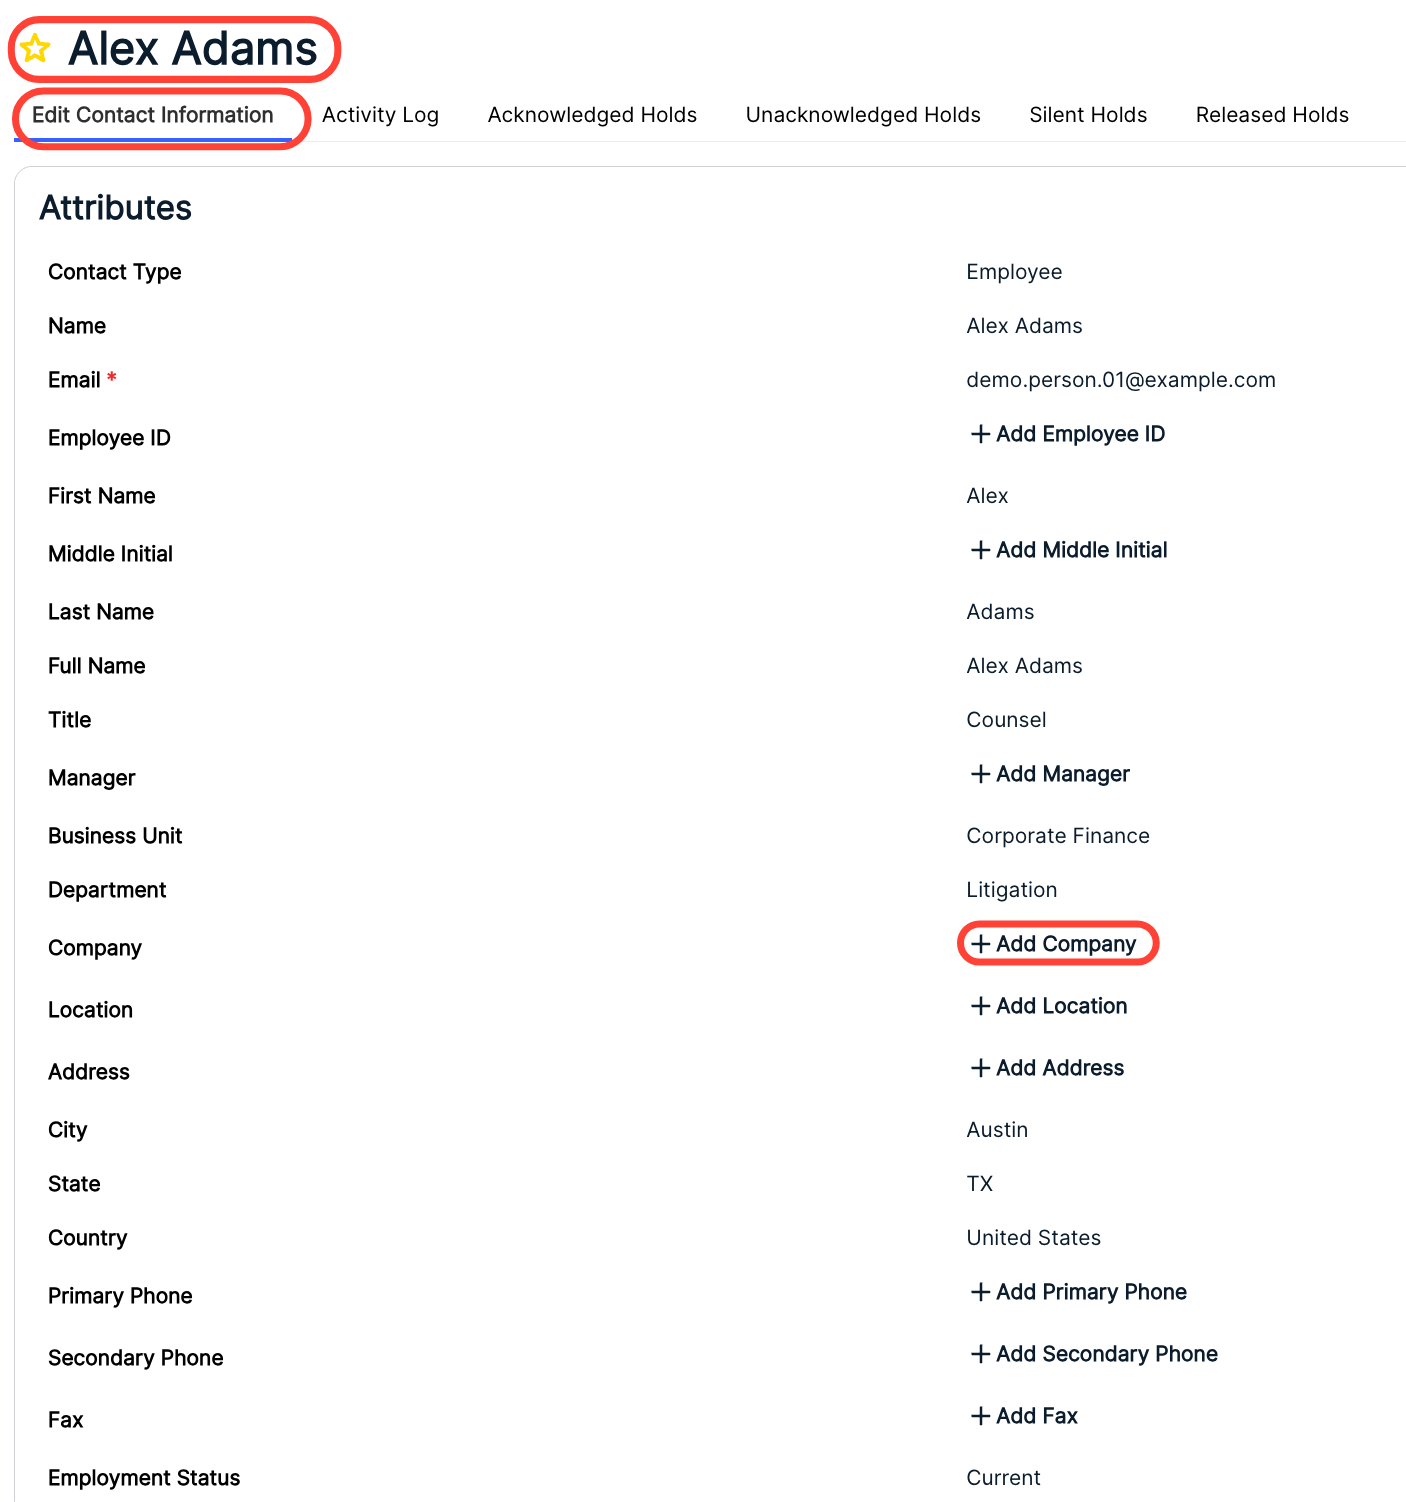
Use the main people screen to switch between the Edit Contact Information, Activity Log, Acknowledged Holds, Unacknowledged Holds, Silent Holds, and Released Holds tabs.
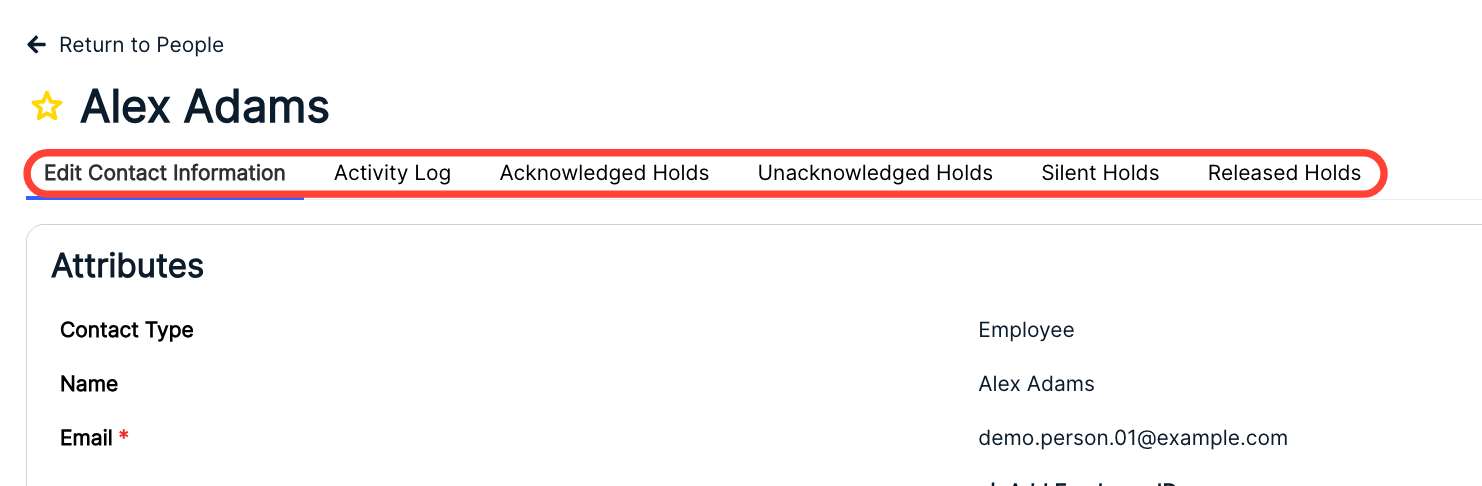
You'll start on the Edit Contact Information screen. There, you can view and edit key attributes.
You can click on either the Edit (pencil) symbol or the +Add links to edit or add in information. Click on the Star next to the person's name to favorite them.
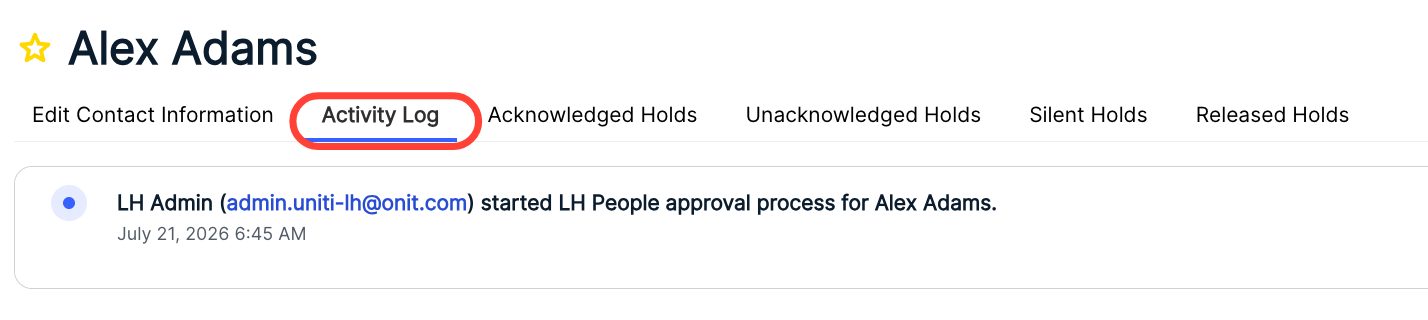
The Activity Log screen allows you to see any updates that have been made to the person.
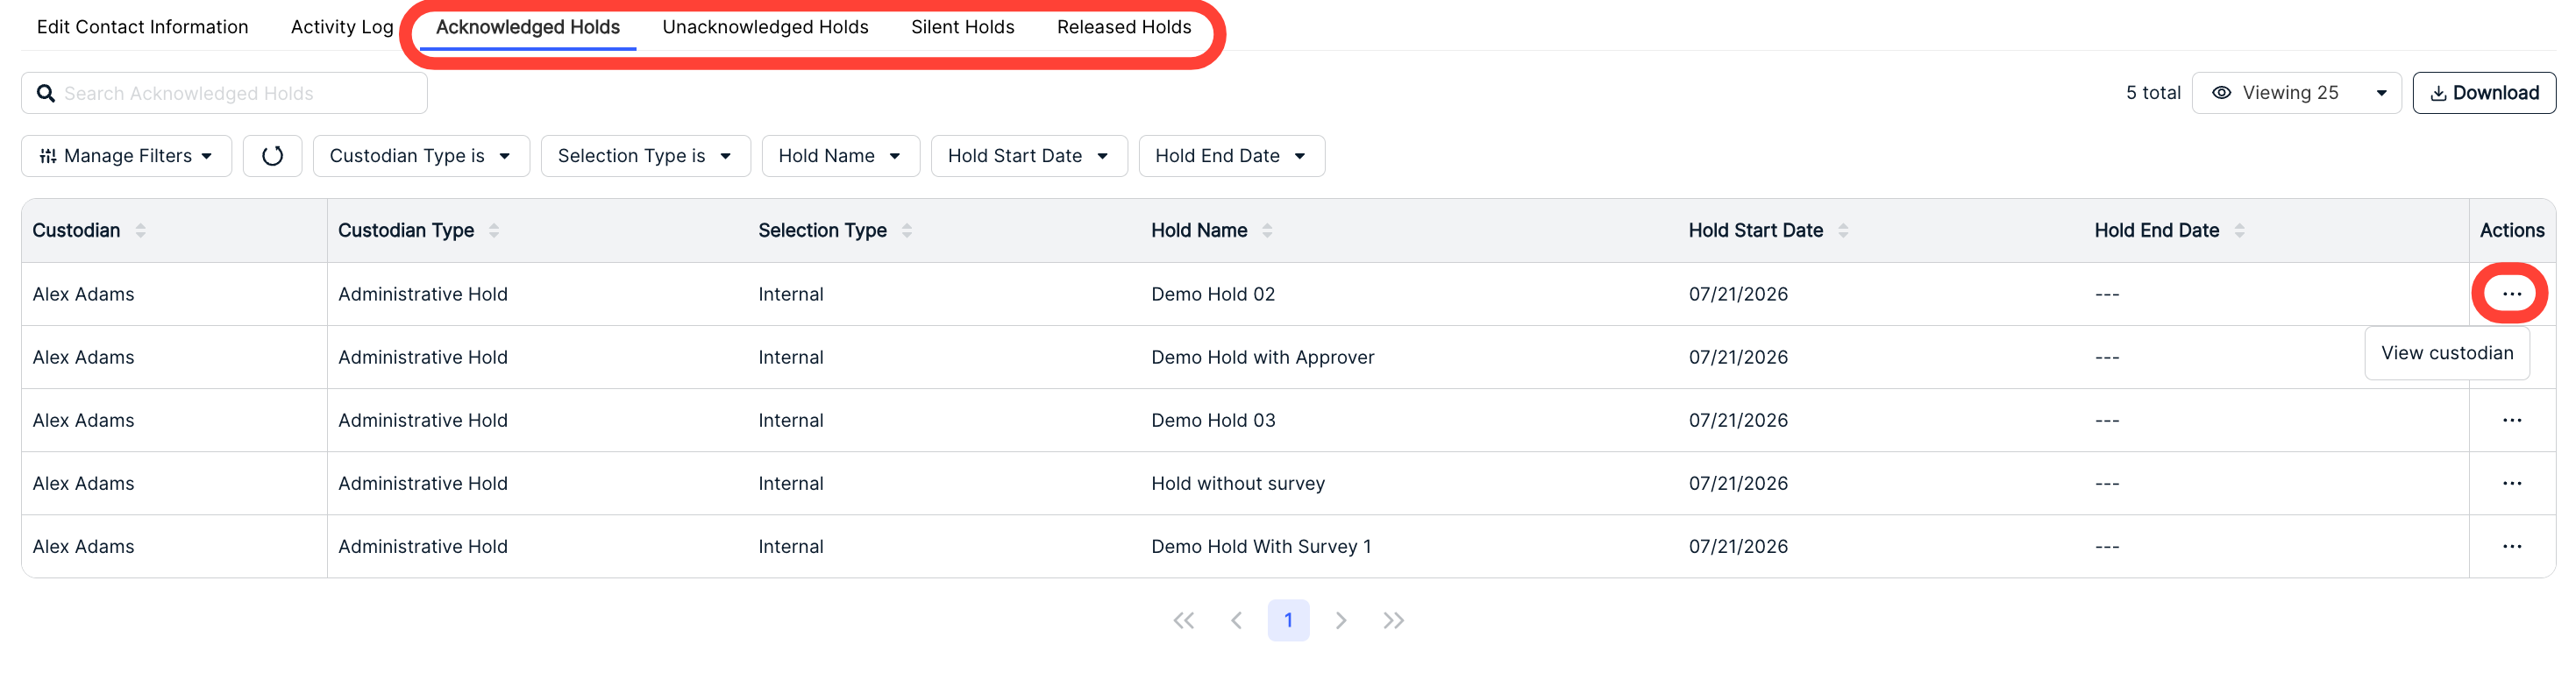
Use the Acknowledged Holds, Unacknowledged Holds, Silent Holds, and Released Holds tabs to view the different holds assigned to the person. On each one of these fields, you'll see the Custodian name, Custodian Type, Selection Type, Hold Name, Hold Start and End Date, and an Actions menu (use this to View custodian details). Use the Search bar to search through the people. Click on the up/down arrow to sort by that field. Click the drop-down Manage Filter menu and other menus to filter what you see on the screen.
Use the Viewing drop-down menu to change the Viewing specifications. Use the Download button to download the people information as an Excel file.
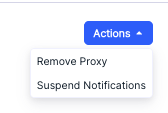
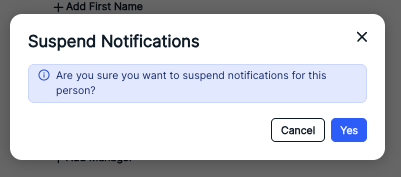
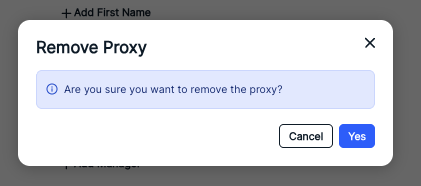
Use the Actions button on a person's details page to Remove Proxy or Suspend Notifications.
For either option, you'll receive confirmation pop-ups. Click Yes to continue or Cancel to back out.
Legal Hold Settings
Click on Legal Hold Settings to manage the main settings associated with your Legal Holds feature.
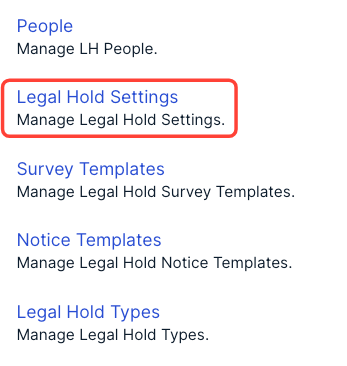
Within the Legal Hold Settings overview, there are several different settings:

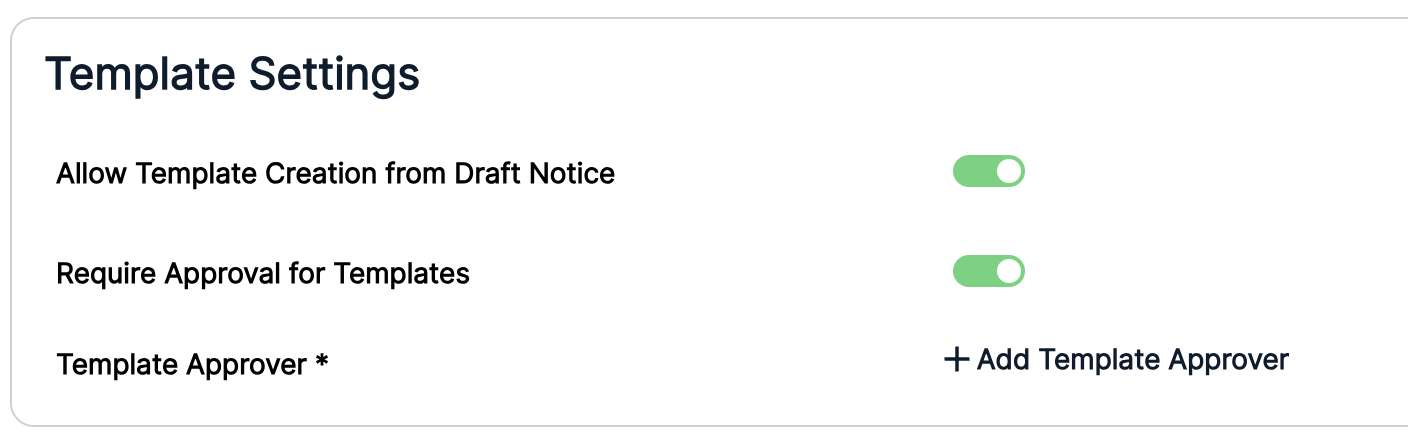
Template Settings
Here, you can toggle if you want to Allow Template Creation from Draft Notice and Require Approval for Templates.
If you click the Require Approval for Templates button, click the +Add Template Approver button to add an approver for the template.
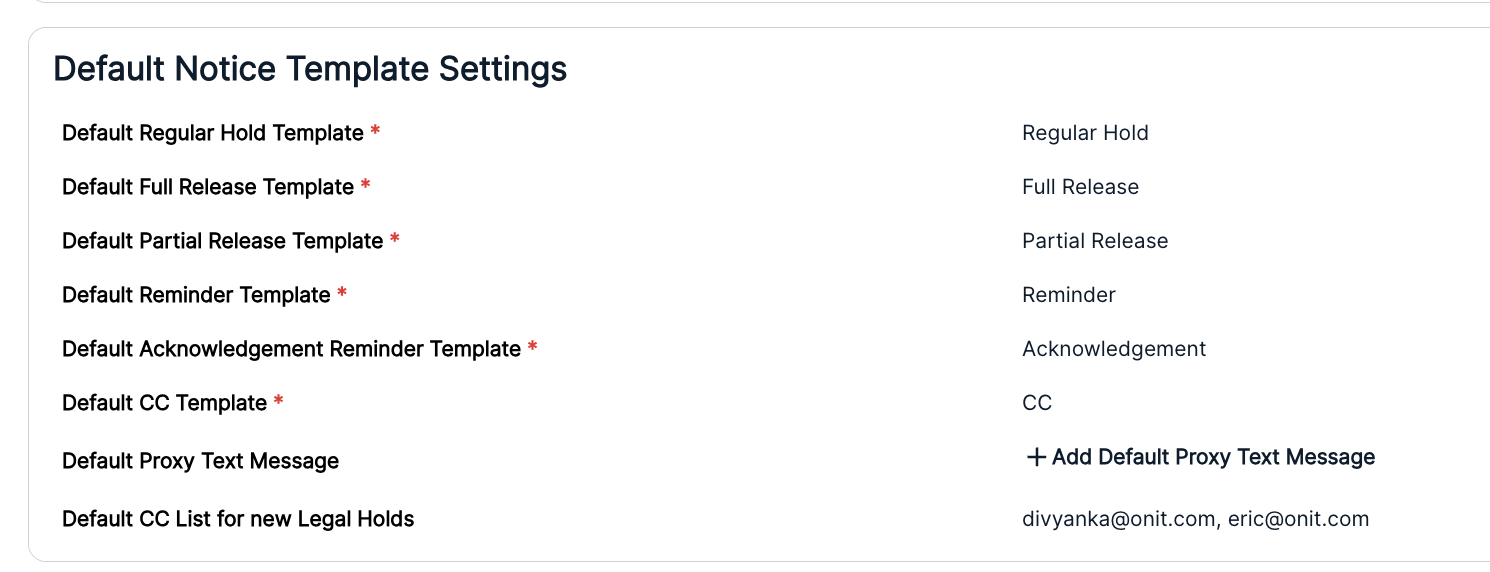
Default Notice Template Settings
Here, you can choose the:
- Default Regular Hold Template
- Default Full Release Template
- Default Partial Release Template
- Default Reminder Template
- Default Acknowledgement Reminder Template
- Default CC Template
- Default Proxy Text Message - The default message that should be sent notifying the Proxy that they are designated to receive and acknowledge legal holds on behalf of someone else.
Default CC List for new Legal Holds
Defaults with an asterisk are required.
Click the +Add button next to each of these to add in the default template or list.
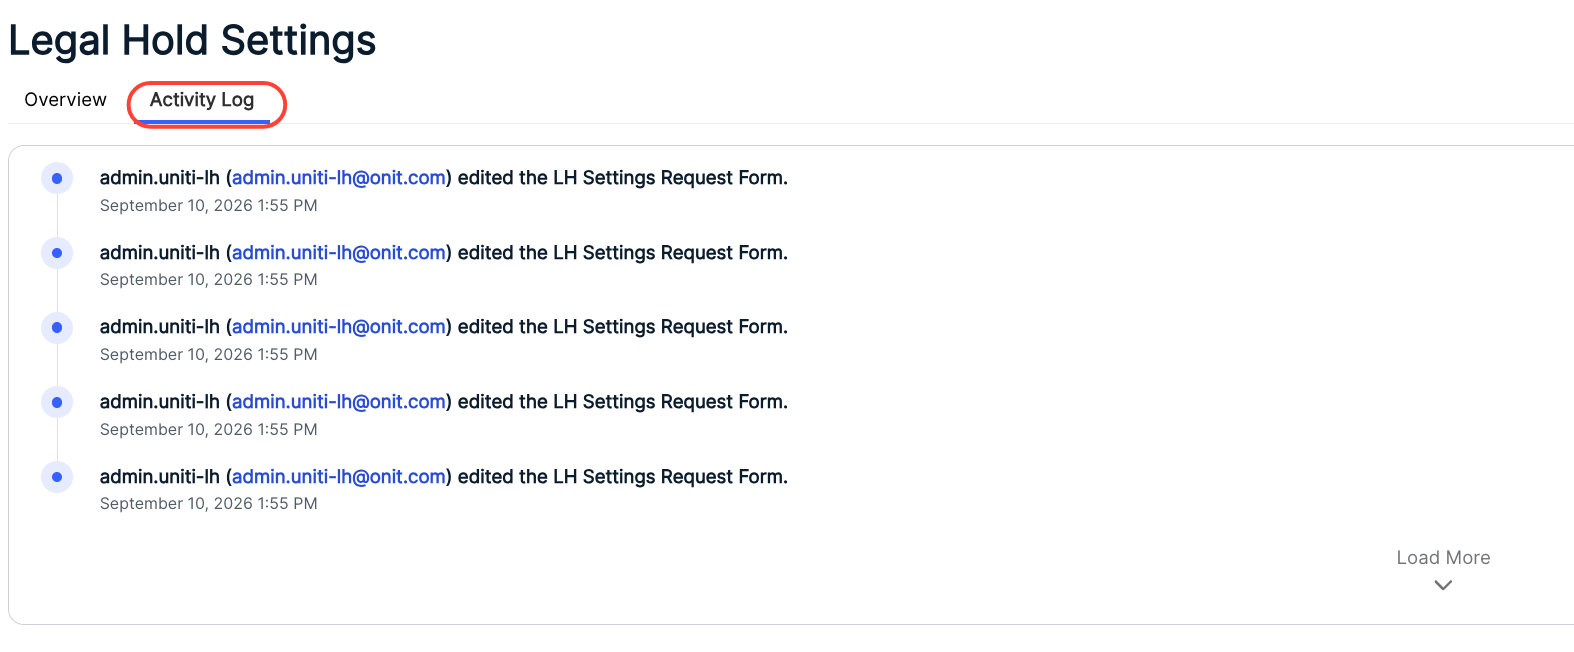
Click the Activity Log tab to see recent activity on the Legal Hold Settings.
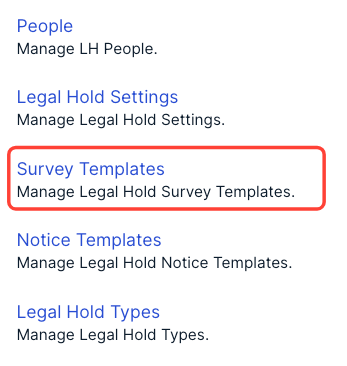
Survey Templates
Click on Survey Templates to manage the survey templates for your Legal Holds feature.
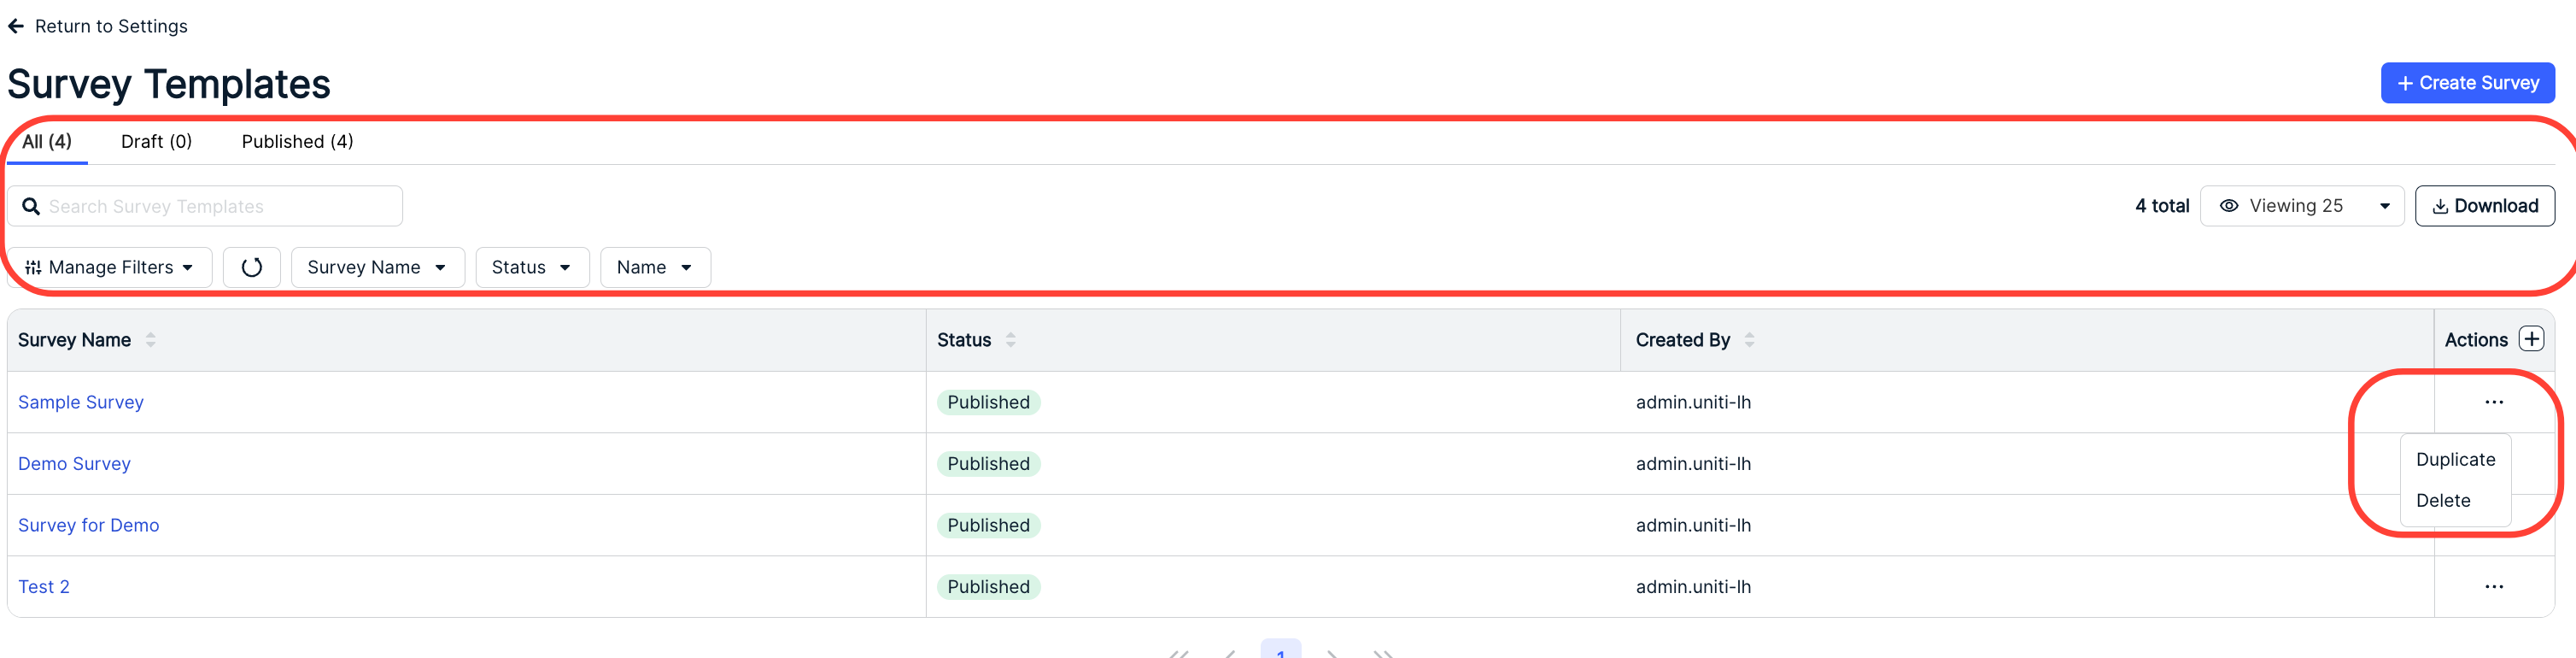
After opening up the Survey Templates setting, the main survey templates directory will open. There you can see the Survey Name, Hold Name, Phase, Is Template? (yes/no), Published Template? (yes/no), Last Activity, Last Action, Start, Status, Updated At, Name, and Legal Hold ID details. Use the Search Survey Templates bar to search through the templates. Click on the up/down arrow to sort by that field. Click the drop-down menu to change the Viewing specifications. Use the Plus (+) button to customize the table columns. Click the Manage Filters or other drop-down menus to choose what you want to see on the screen.
Use the tabs at the top of the directory to switch between All, Draft, and Published surveys.
You can click on the three-button Actions menu next to each survey name to either Clone or Delete the template.
Creating a Survey
- Click on "Create Survey" to create a survey.
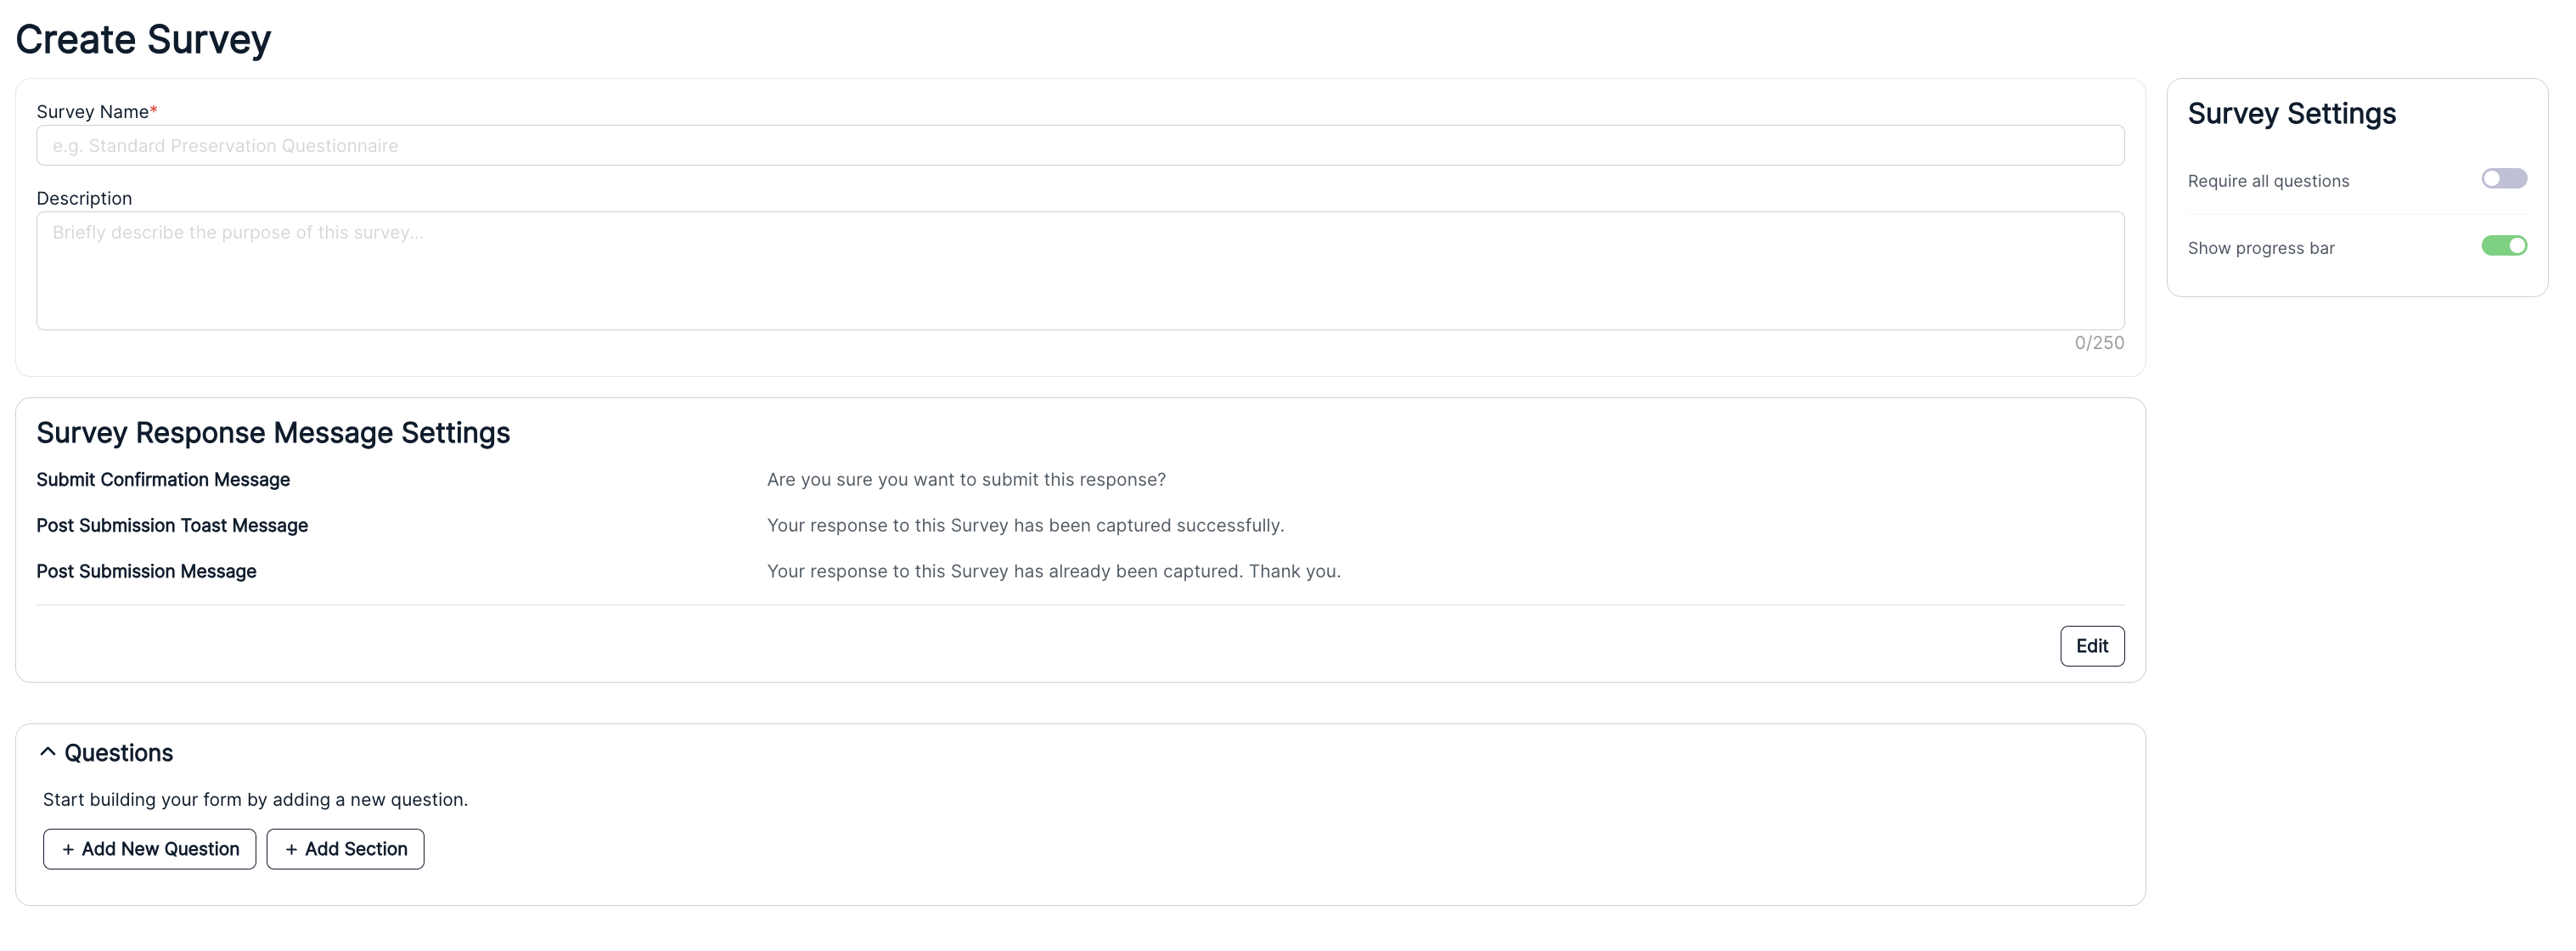
- Fill out the "Create Survey" screen.
You'll have to fill out the Survey Name (required) and Description.
Under Survey Settings, you'll have to choose if you want to:
- Require all questions to be answered
- Show progress bar (the default is On)
Under Survey Response Message Settings, you can view and edit the:
The Save and Close Message*, which a custodian will see if they use the Save & Close button on their survey to save their progress before finishing the whole survey.
Submit Confirmation Message*, which a custodian will see when they click Submit at the end of the survey.
Post Submission Toast Message*, which a custodian will see after they confirm their submission at the end of the survey.
Post Submission Message*, which appears when someone accesses a survey they have already finished.
Click on Edit to update any of these messages.
- Use the "Questions" section to start building your survey form.
Start by selecting the question type you would like to add. You have several different options here:
- Text requires a written response.
- Upload File allows the custodian to upload a file with their response.
- Single/Multiple Choice allows the custodian to select one or multiple pre-written options.
- Numeric/Percentage allows the custodian to provide a number or percentage answer.
- Date allows the custodian to insert a specific date within a field into their response; this makes it easier to export for Excel spreadsheets (note that this date value is restricted between 1900 - 2099 for responses).
Here's what these different types of questions look like:
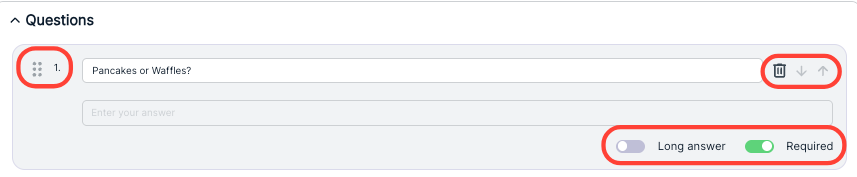
Text: Fill out the Question that you'd like the custodian to answer. Use the Delete (trash can) option to remove the question, or the up/down arrows and selector next to the question number to move the question up and down in the list. Toggle the Long Answer button to provide the person with a more expanded answer field. Toggle the Required button to make the question required.
Upload File: Fill out instructions for the person in the main field. Use the Delete (trash can) option to remove the question, or the up/down arrows and selector next to the question number to move the question up and down in the list. Toggle the Required button to make the question required.

Single/Multiple Choice: Fill out your instructions in the main field. You can add many different options the custodian can choose from by clicking on Add Option. Click on the arrows next to each option to move the choice up or down. Click on the trash can on the far right to remove the choice entirely. On the bottom, you can toggle the Multiple Choice to allow custodians to select multiple options. Toggle the Required button to make the question required.
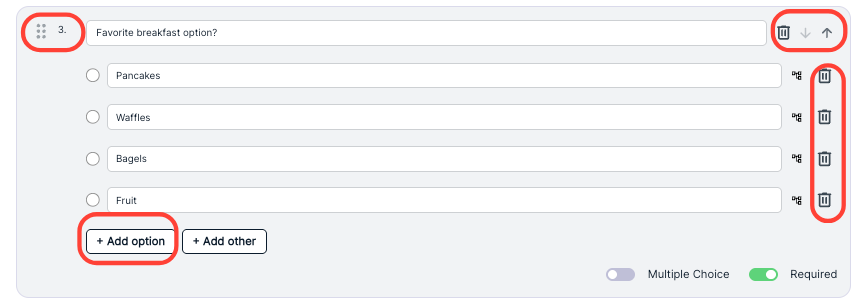
You can also click on Add Other to give the custodian an option to fill in their own answer to the question.
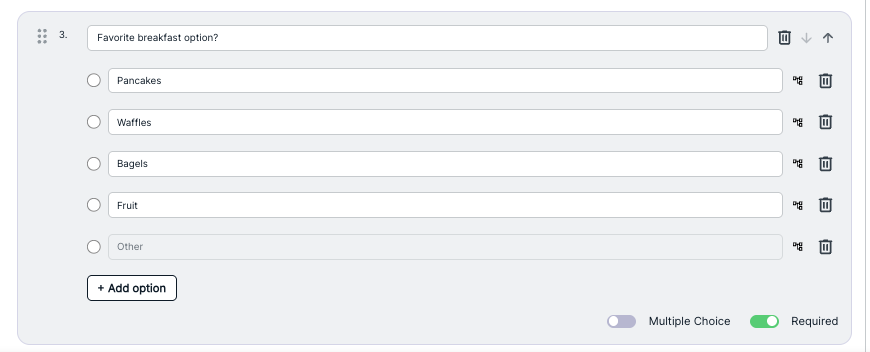
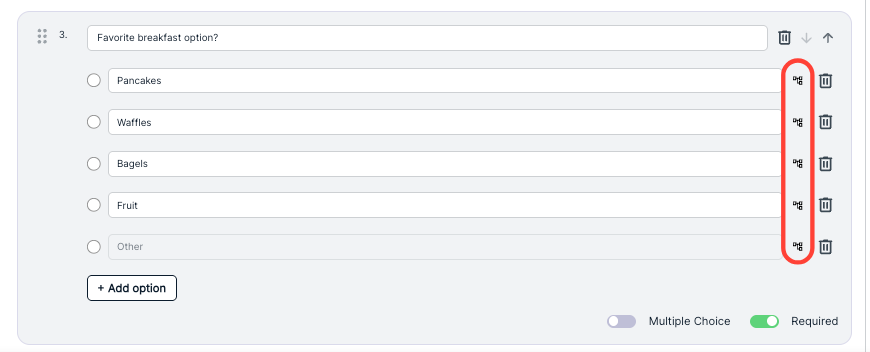
You can add Conditional Questions to any or all of your choices by clicking on the three-box icon next to the choice fields.
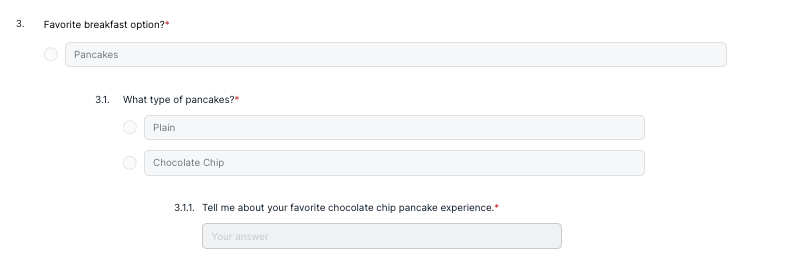
Think of these as "If...then..." questions. For example, for the first response, if the custodian answered "Pancakes," you could prompt the survey to then ask, "What type of pancakes? "
NOTE: You have the same menu of question options (Text, Single/Multiple Choice, etc.) for these conditional questions.
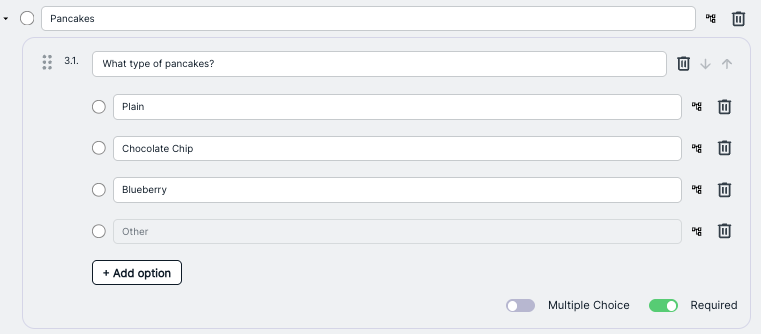
You can add up to three levels for these questions. Keeping the example going, if the custodian answered "Chocolate Chip" for the 2nd-level question, you could then prompt the survey to ask a "Tell me about your favorite chocolate chip pancake experience" text question to the custodian.
Numeric/Percentage: Fill out instructions for the person in the main field. Use the Delete (trash can) option to remove the question, or the up/down arrows and selector next to the question number to move the question up and down in the list. Toggle the Percentage button to require a percentage answer. Toggle the Required button to make the question required.


Date: Fill out instructions for the person in the main field. Use the Delete (trash can) option to remove the question, or the up/down arrows and selector next to the question number to move the question up and down in the list. Toggle the Date Range button to require a date range answer. Toggle the Required button to make the question required.


- Continue to add questions until you are done with the survey or the section.
- Click on Add Section to add a new section to the survey.
Fill in a name for your section.

Repeat step until finished adding sections. Click on the arrows next to each section or use the icon next to the section name to move the section up and down in the Survey Builder. Use the Delete (trash can) option to remove the section entirely.

- Once you are done with the survey, click on Publish to finalize.
You can also click on Save Draft to save the survey as a draft and finalize later, or click on Cancel to back out.
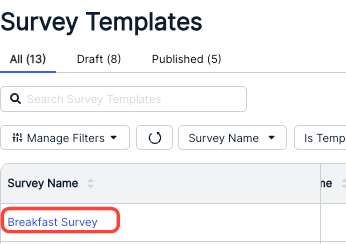
- Once published, you'll see the survey in the main "Survey Templates" screen.
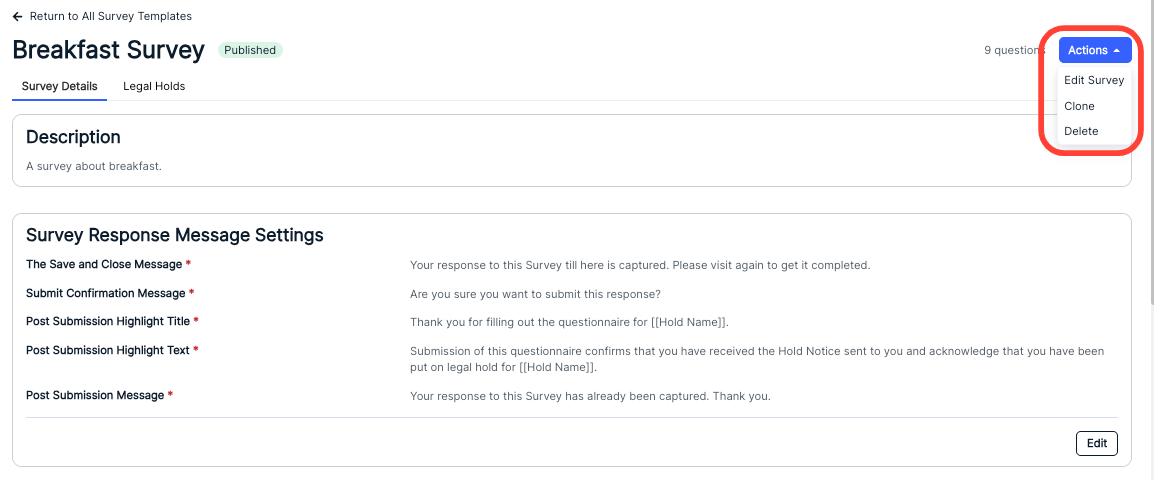
Click into the survey to see the details; from the main survey screen, you can use the Actions drop-down menu to Edit Survey, Clone the survey, or Delete the survey.
Notice Templates
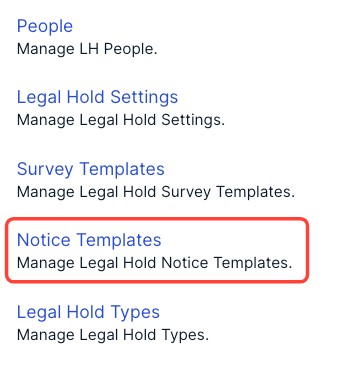
Click on Notice Templates to manage the notices within Legal Holds.
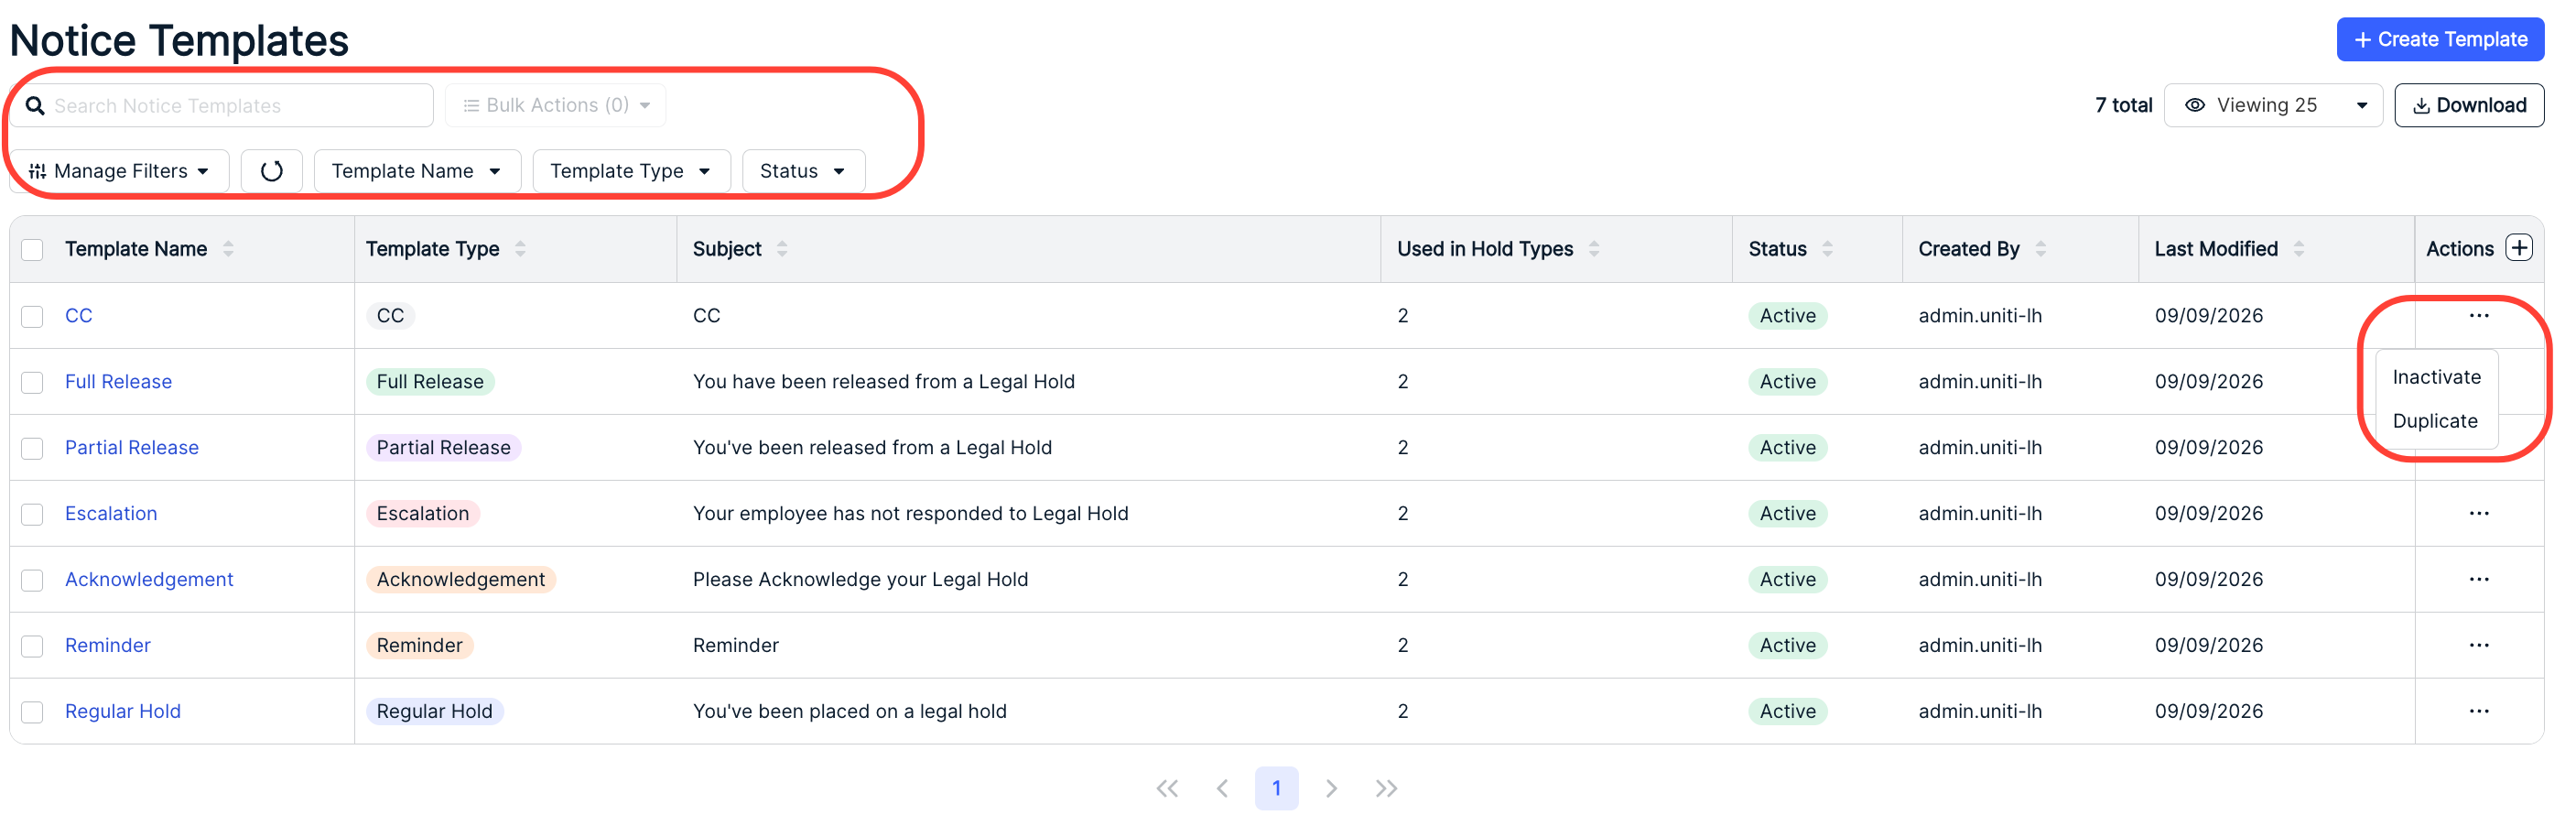
On the main Notice Templates page, you'll see a list of the existing Notices. There you can see the Template Name, Template Type, Subject, Used in Hold Types number, Status, Created By name, and Last Modified details. Use the Search Notice Templates bar to search through the templates. Click on the up/down arrow to sort by that field. Click the drop-down menu to change the Viewing specifications. Use the Plus (+) button to customize the table columns. Click Download to download Notice Template information.
Under Actions you can Activate, Inactivate or Duplicate a notice template.
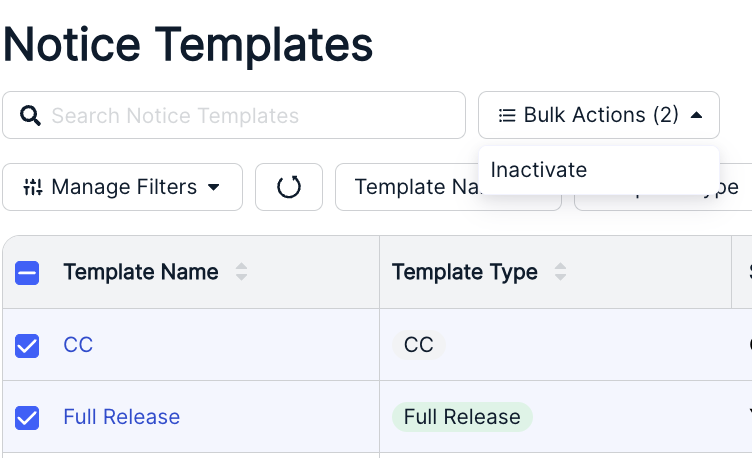
Use the check boxes next to each notice template and the Bulk Actions menu to inactivate templates.
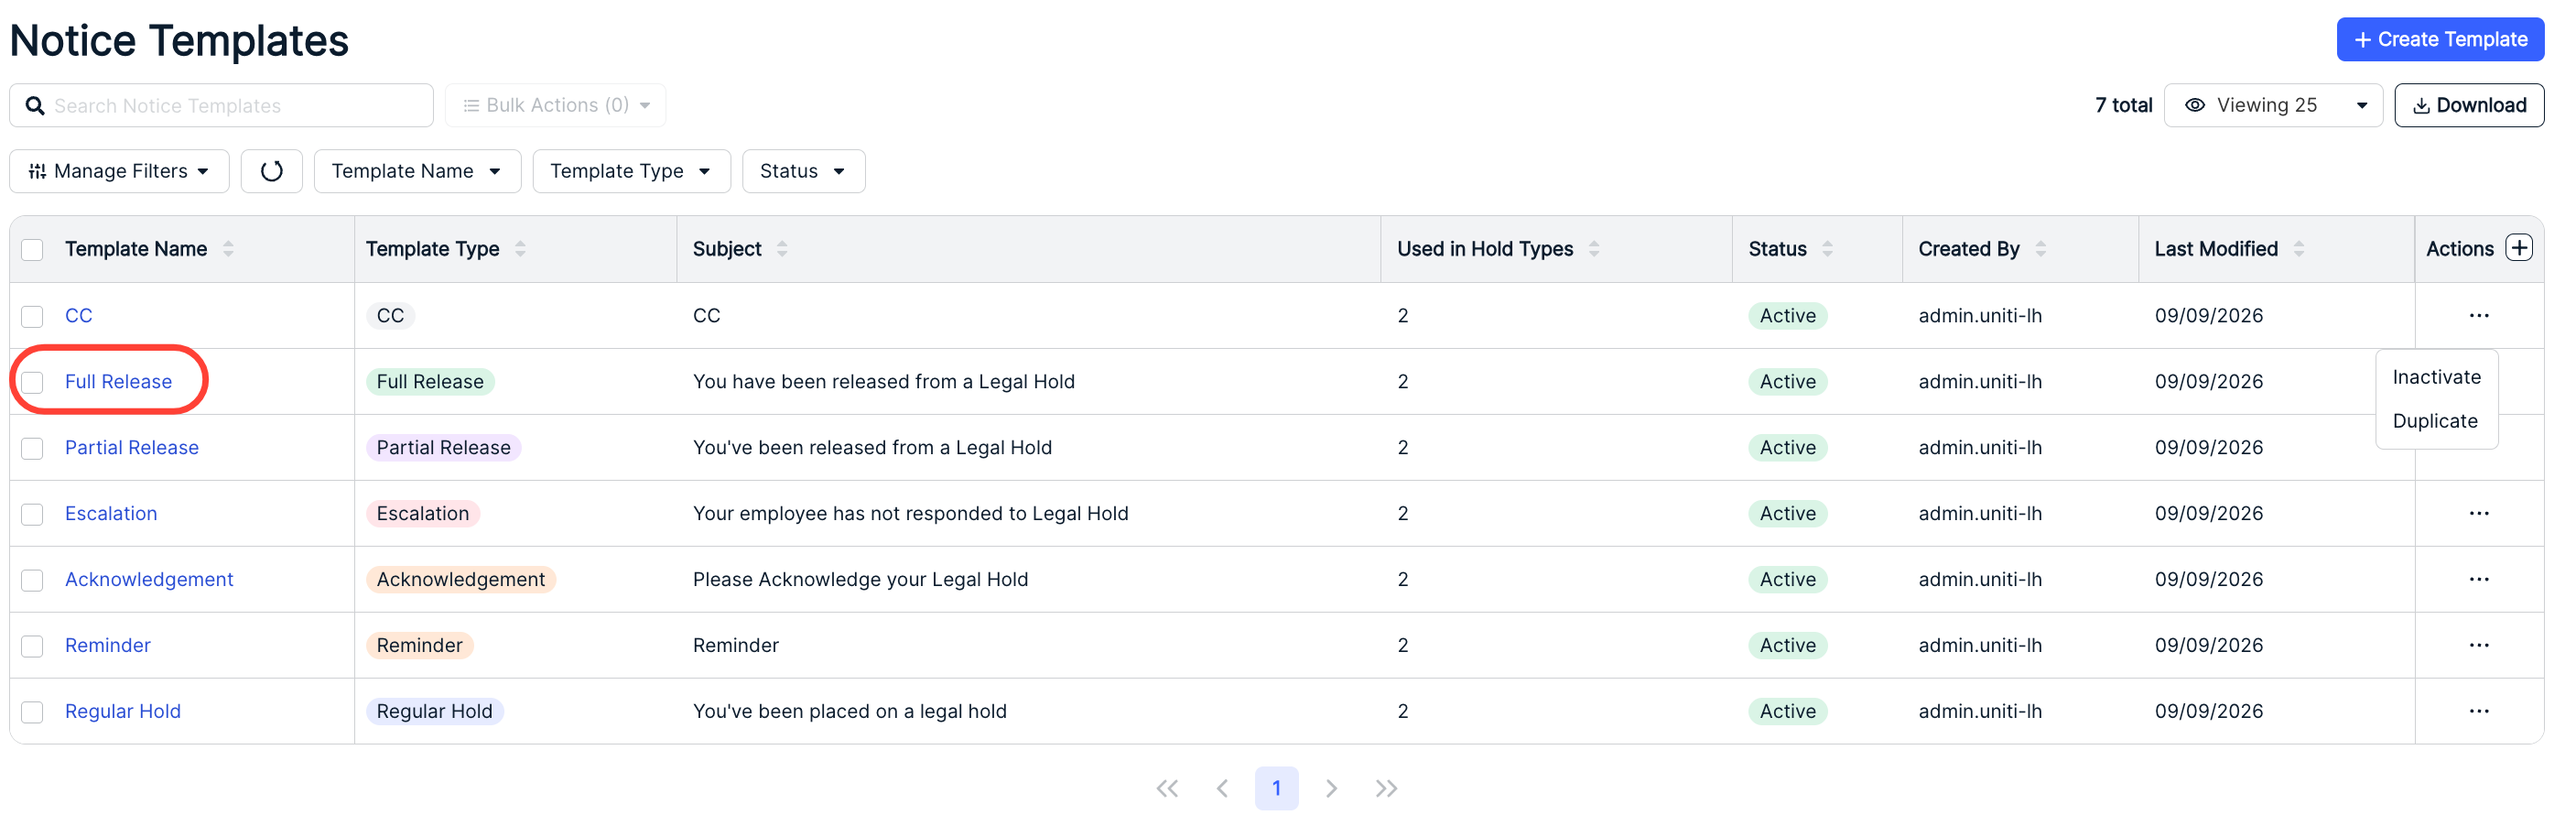
Click into any of the templates to see or edit them.
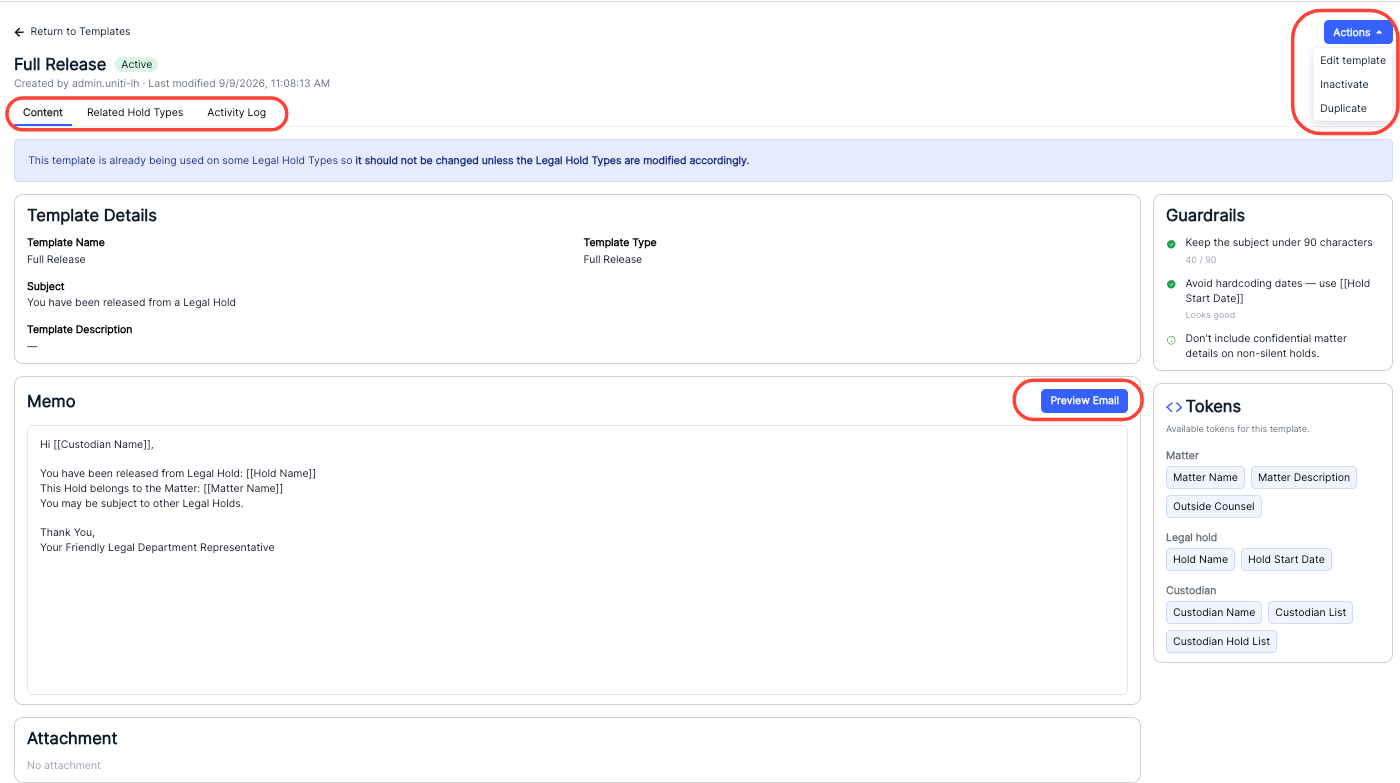
Use the Actions menu in the upper-right-hand corner of the screen to Edit Template (click into the Creating a New Template section for more information), Activate or Inactivate (depending on the template status), or Duplicate the template.
Click on the top tabs to switch between the template Content, Related Hold Types, or Activity Log. Click into the Preview email to get a preview of your template.
Creating a New Template
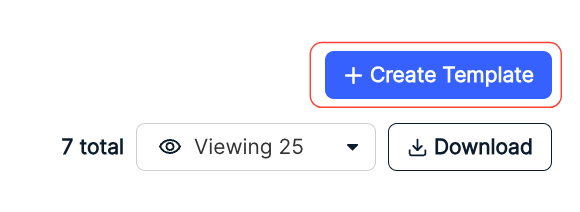
Click on Create Template to start a new notice template.
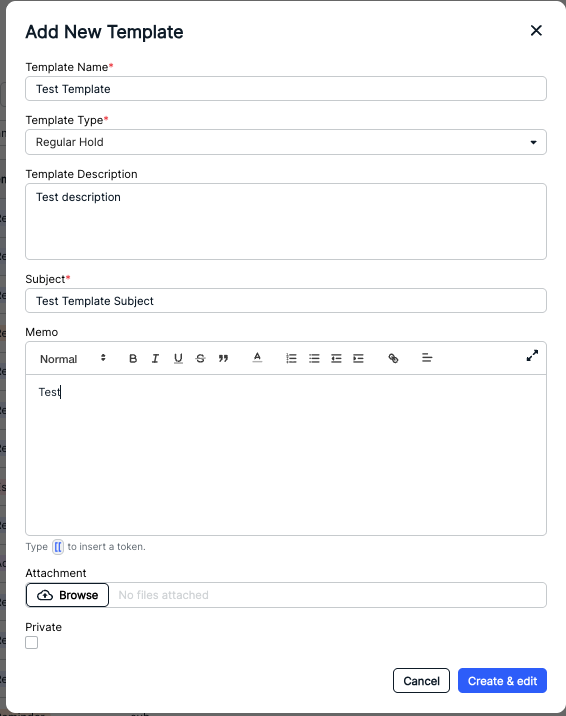
On the Add New Template screen, you'll have to fill out the:
- Template Name (required)
- Template Type (required, from a drop-down menu). Options are:
- Regular Hold – Lets the recipient know they are on standard Legal Hold as a custodian. The first notification custodians would get on a Legal Hold.
- Administrative Hold – Designed for the organization’s administrative staff – IT, system admins, etc. – to alert them about a Legal Hold and provide instructions about what parts of the system (a server or Dropbox, for example) should be put on hold.
- Reminder – Reminds custodians that they are still on a Legal Hold. This is generally set up quarterly or yearly.
- Acknowledgement – Reminds custodians that they are on a Legal Hold AND they have not acknowledged the Hold yet.
- Escalation – An email that goes to the Legal Hold custodian’s manager if the custodian has not acknowledged the Legal Hold.
- Partial Release – A notification that the custodian has been released from a specific Legal Hold.
- Full Release – A notification that the custodian has been released from ALL their Legal Holds.
- CC – A way to let other participants that are NOT Custodians on the Legal Hold see what is going on with the Hold process.
- Template Description
- Subject (required)
- Memo (use [[ to insert a token into the field); additionally, the bar above the Memo field provides several different formatting options for how text should appear in the email (bold, italic, underline, insert image, etc.)
- Any Attachment to the template
The Private checkbox
Once finished, click Create and Edit to create and edit the template or Cancel to back out.
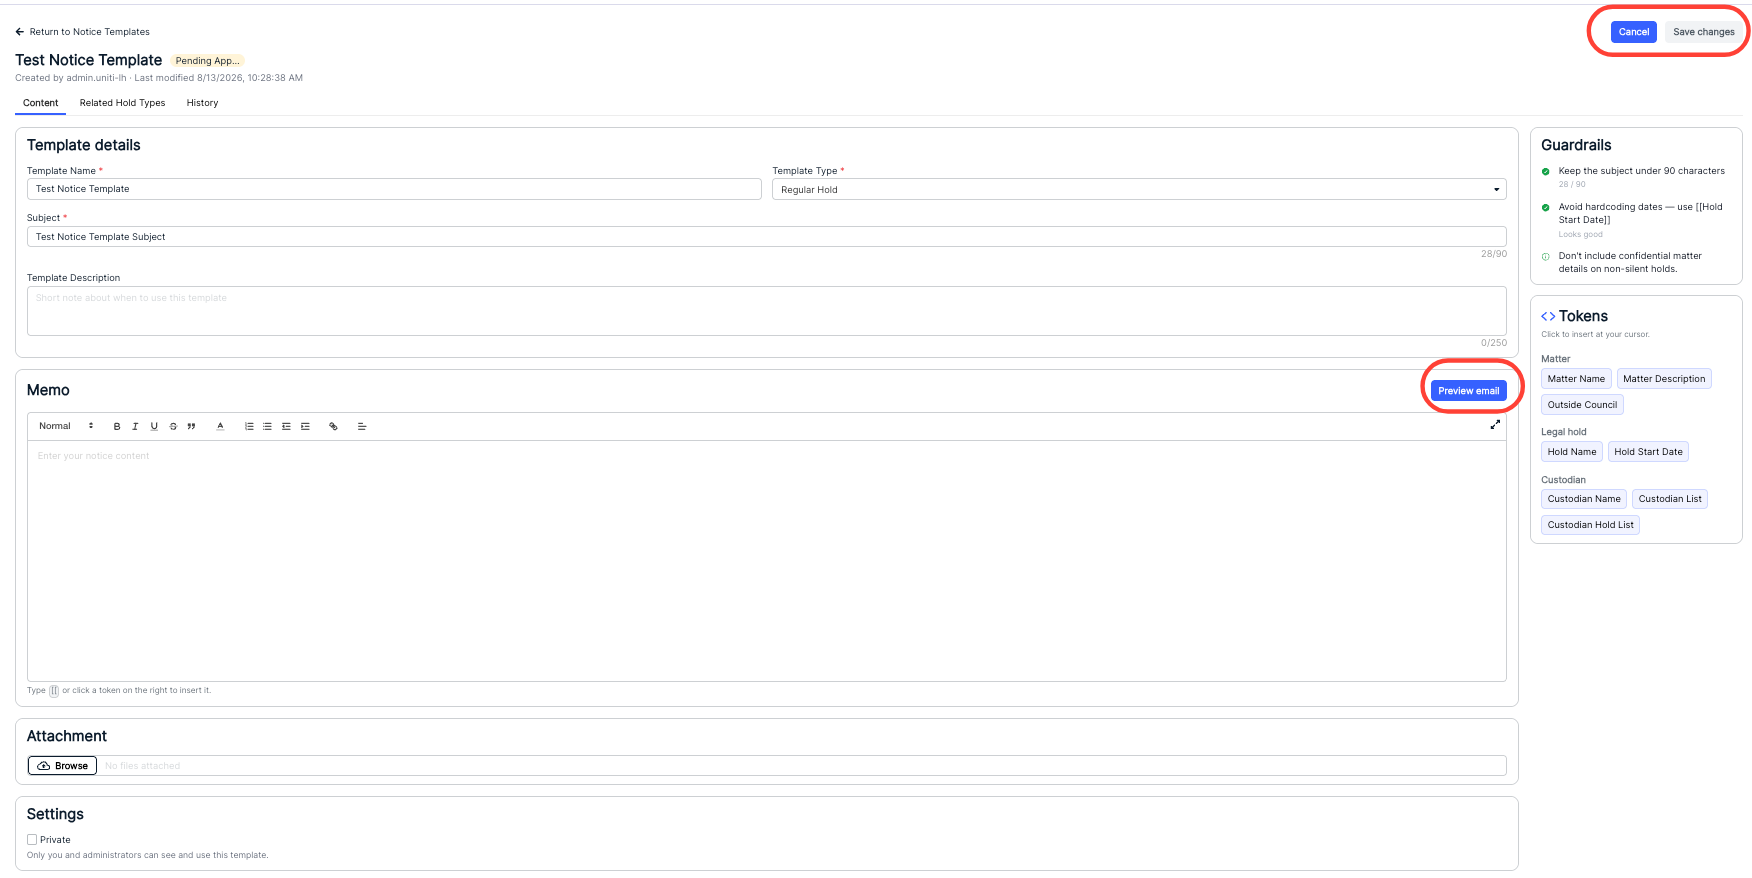
The template's details screen will appear. There, you can adjust any of the necessary details. Use the Guardrails guide on the side to help create an effective message; use the Tokens screen to create custom messaging for any text field (click to enter a variable that will automatically enter necessary information, like [[Custodian Name]] or [[Hold Name]]; start typing [[ to bring up that list of variables/tokens within the document, or click the token icons to insert them into the document). Click Save Changes to save your changes or Cancel to back out.
Additionally, the bar above the Memo field provides several different formatting options for how text should appear in the email (bold, italic, underline, insert image, etc.).
You can click on Preview email at any time to get an email preview of the template which should show some of the Variables captured.
After a template is saved, it has to be Activated in order to be used in a Legal Hold.
Legal Hold Types
Click on Legal Hold Types to manage the different legal hold types in your Legal Holds feature.
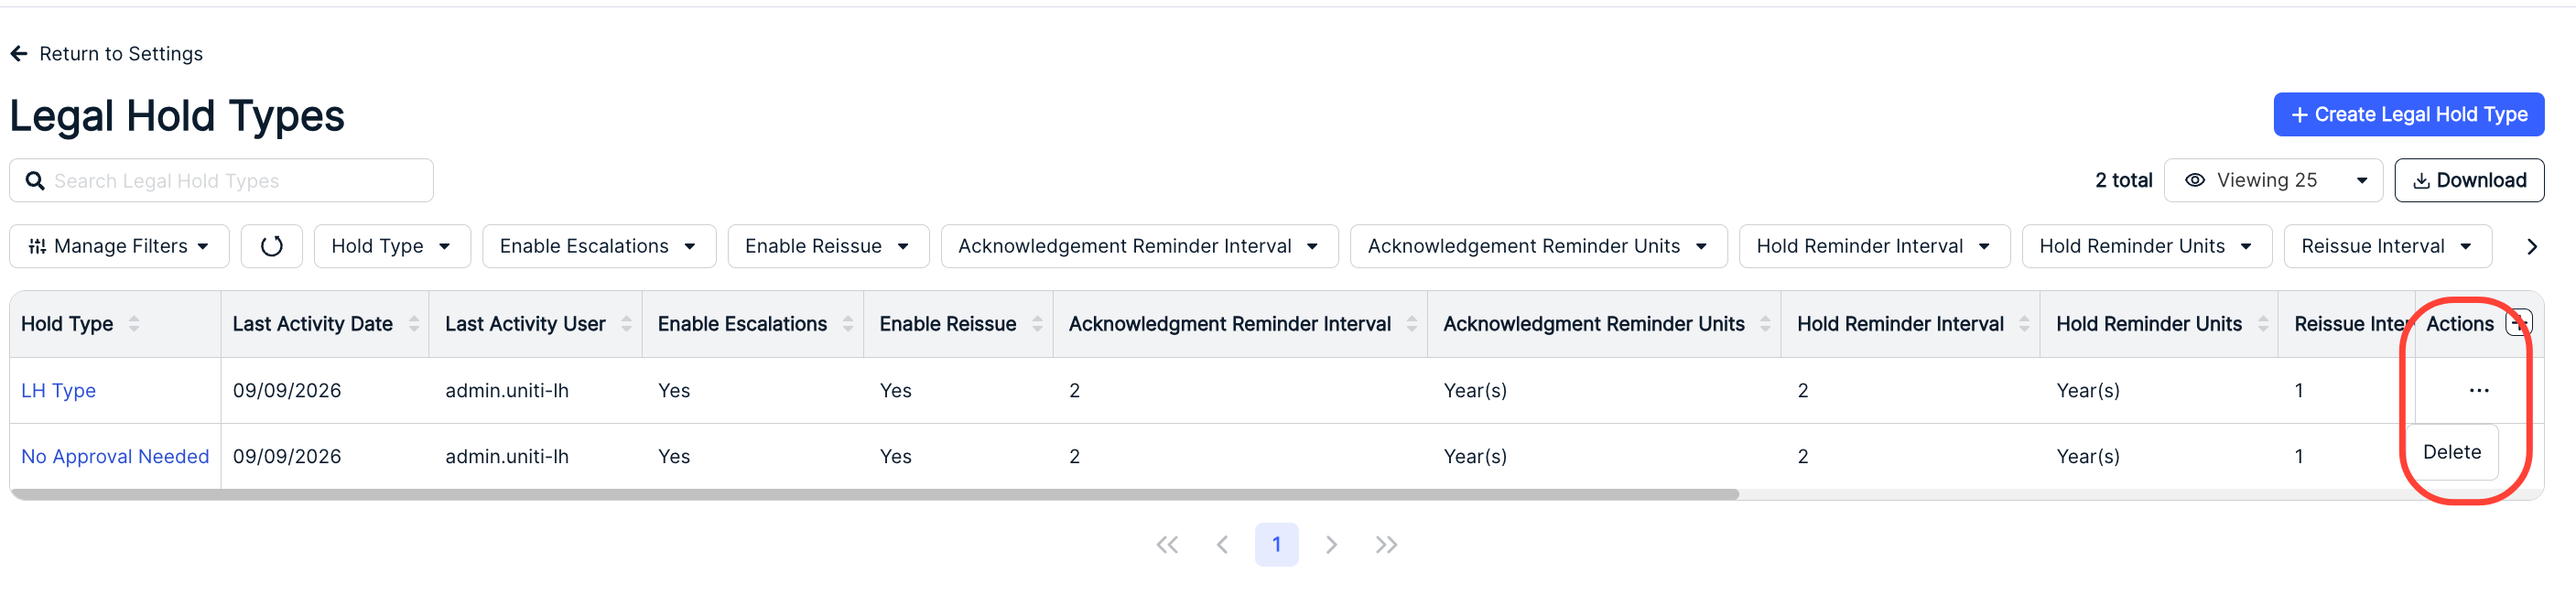
On the main Legal Hold Types page, you'll see a list of the existing Types. There you can see the:
- Hold Type
- Last Activity Date
- Last Activity User
- Enable Escalations (Yes/No)
- Enable Reissue (Yes/No)
- Acknowledgment Reminder Interval
- Acknowledgment Reminder Units
- Hold Reminder Interval
- Hold Reminder Units
- Reissue Interval
- Reissue Units
- Escalation Interval
- Escalation Units
- Escalation Point
- Require Approval For Notices (Yes/No)
Use the Search Legal Hold Types bar to search through the types. Use the Manage Filters and other drop-down menus to filter what you can see on the screen. Click on the up/down arrow to sort by that field. Click the Viewing drop-down menu to change the Viewing specifications. Use the Plus (+) button to customize the table columns. Use the Download button to download the Legal Hold Types information as an Excel document.
Under Actions you can Delete a legal hold type.
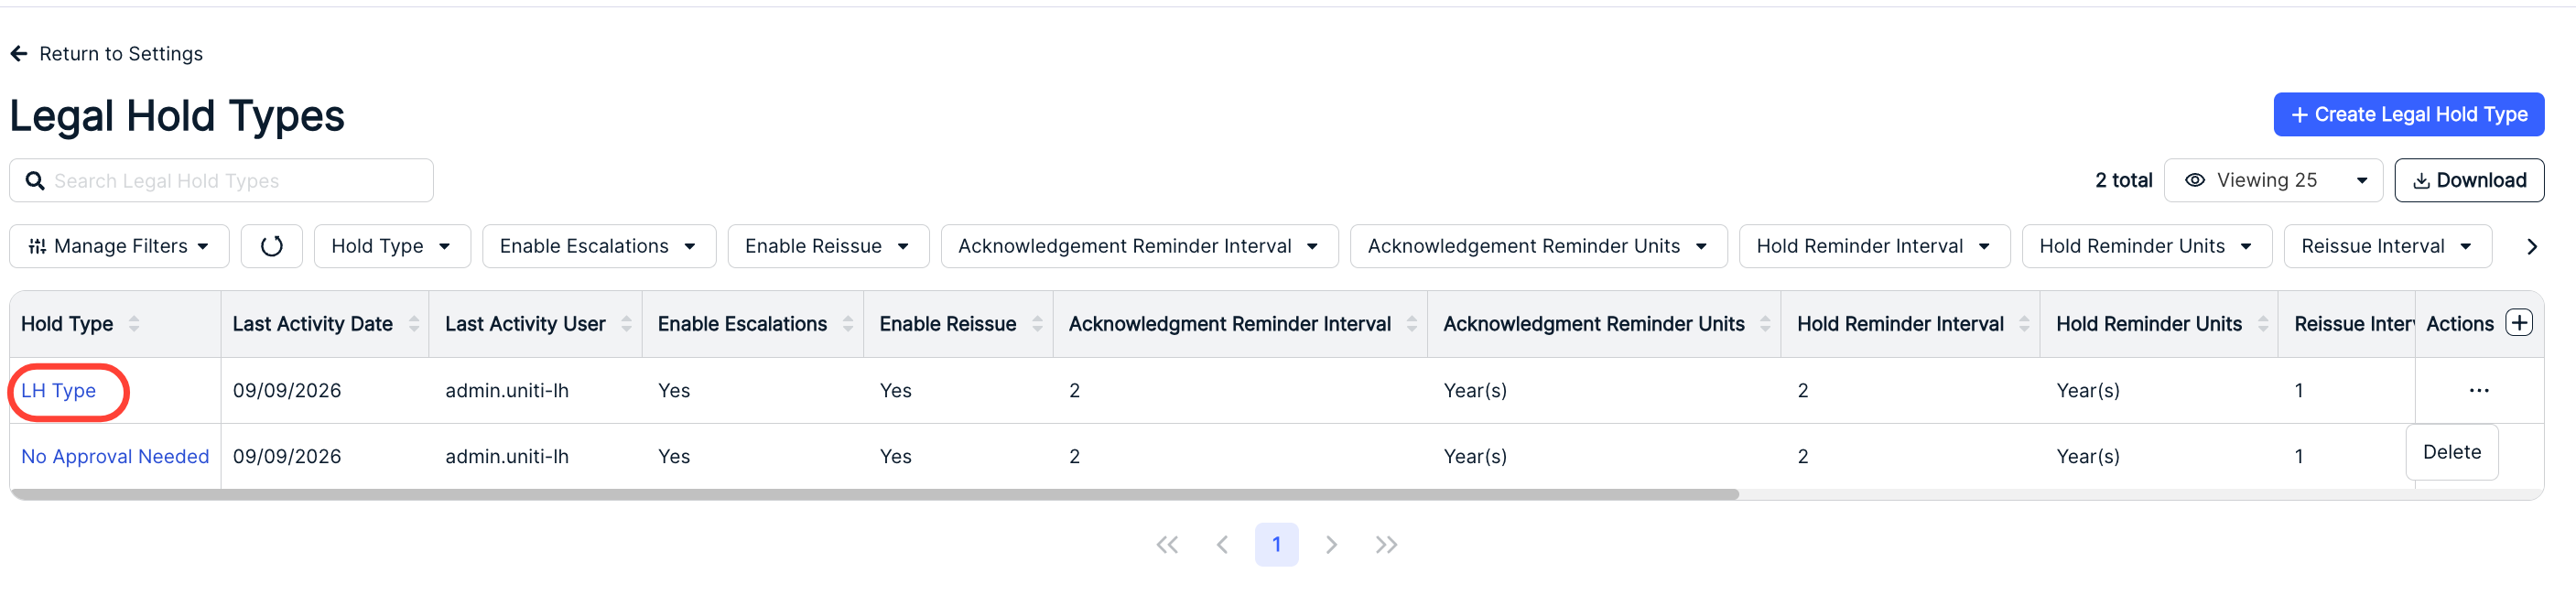
Click into any Legal Hold Type to view type details and settings.
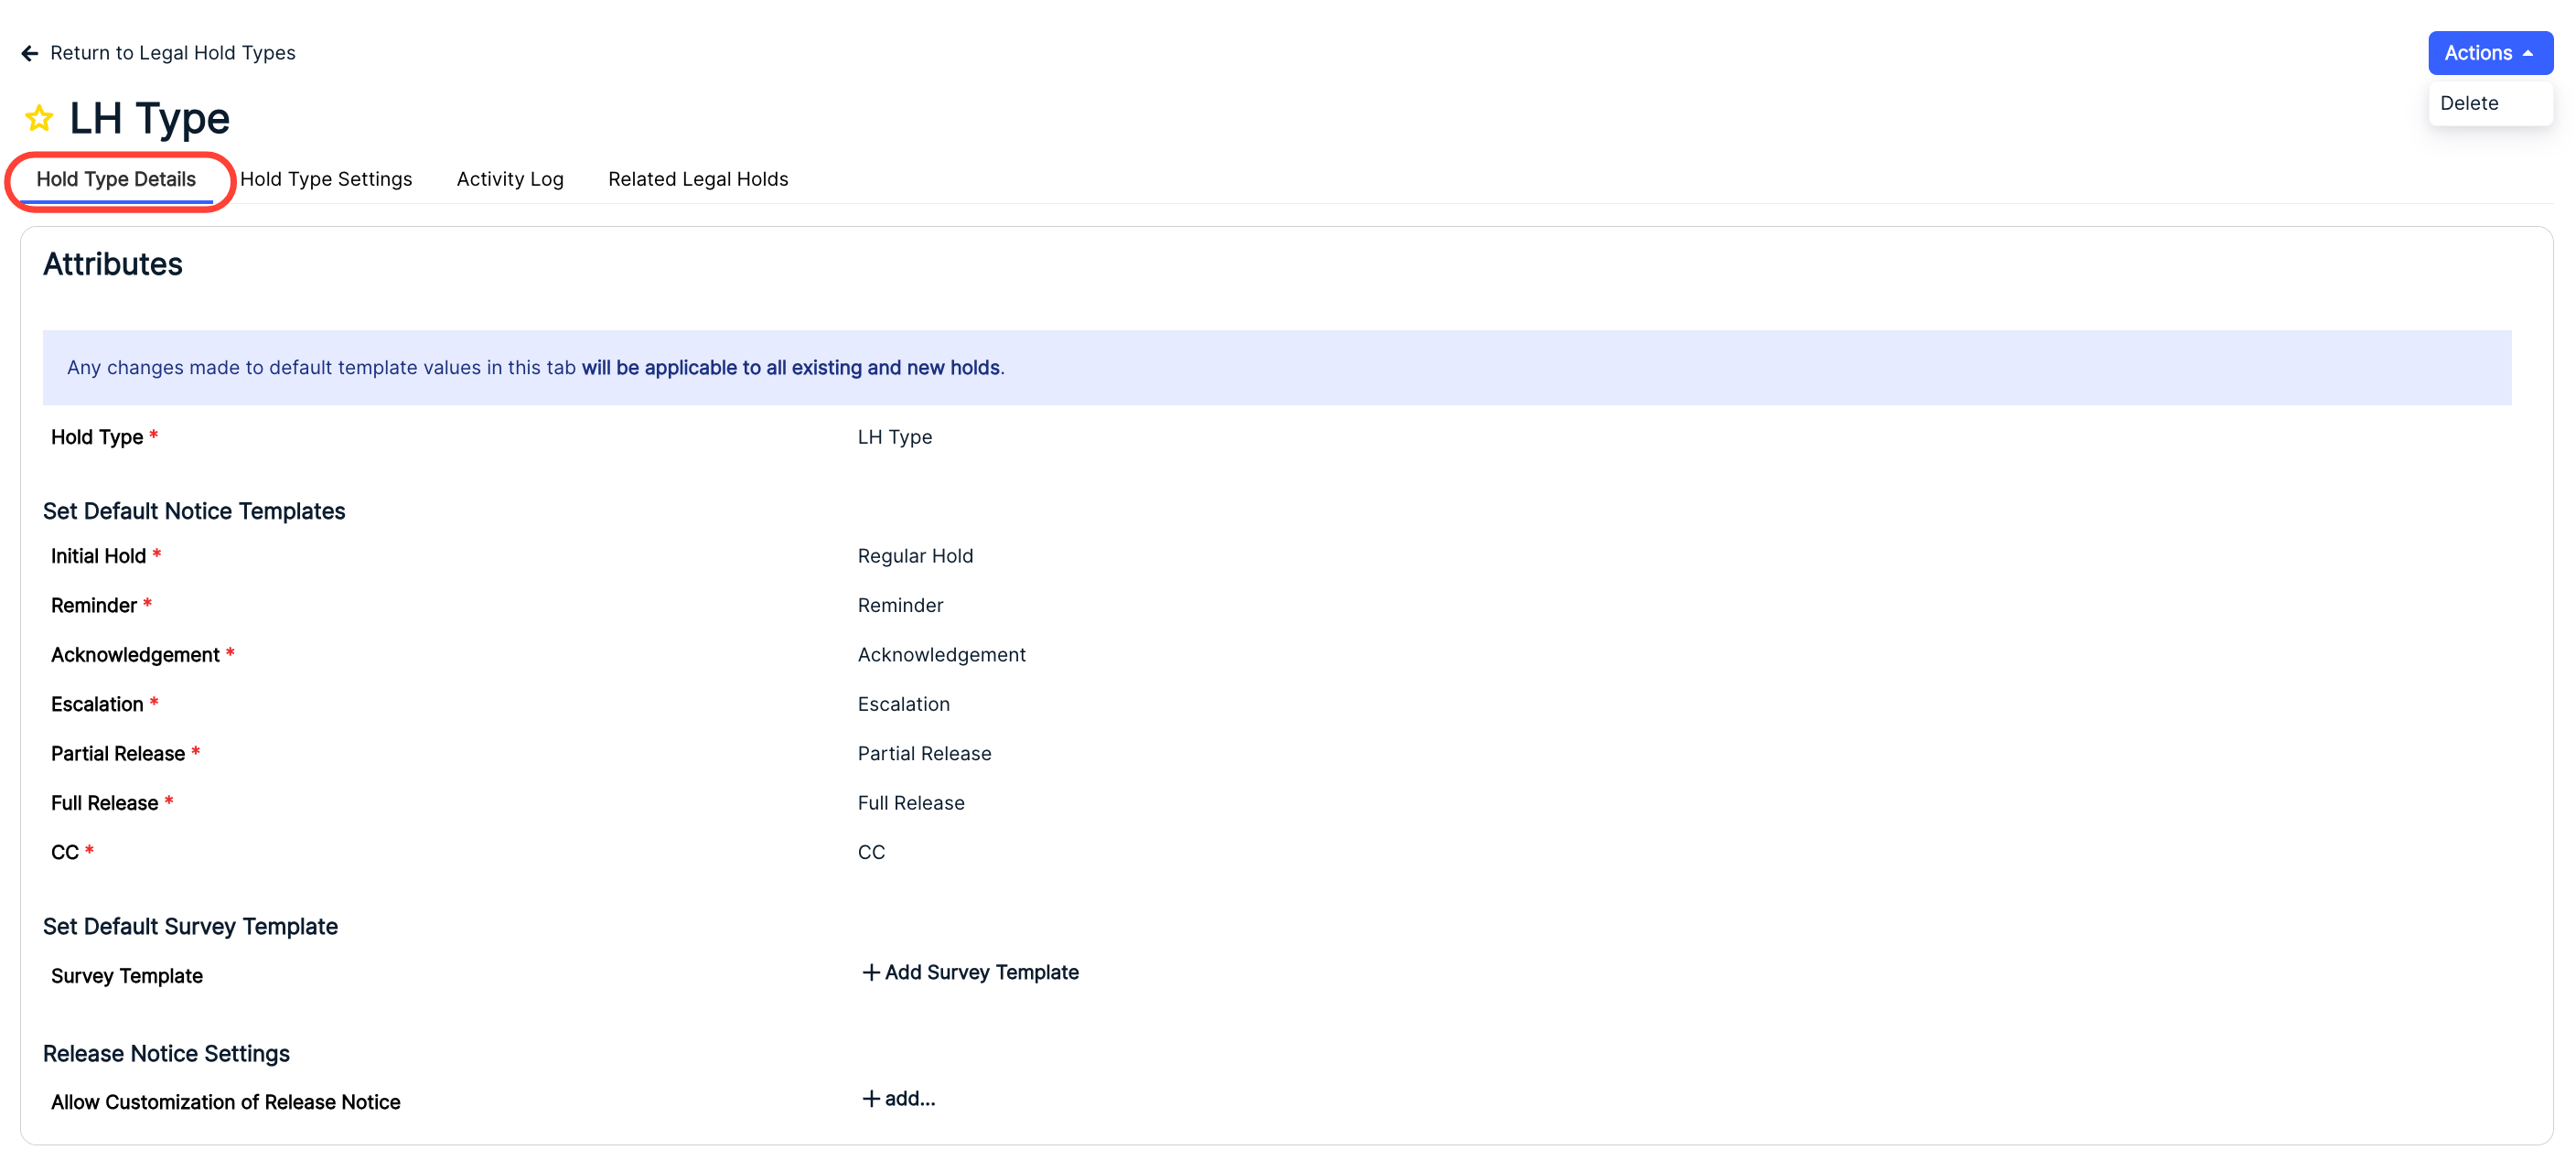
On the Legal Hold Type page, you can switch between Hold Type Details, Hold Type Settings, the Activity Log, and Related Legal Holds.
The Hold Type Details tab will show key attributes of the Hold Type. Click on the Actions menu in the top right to Delete the hold type.
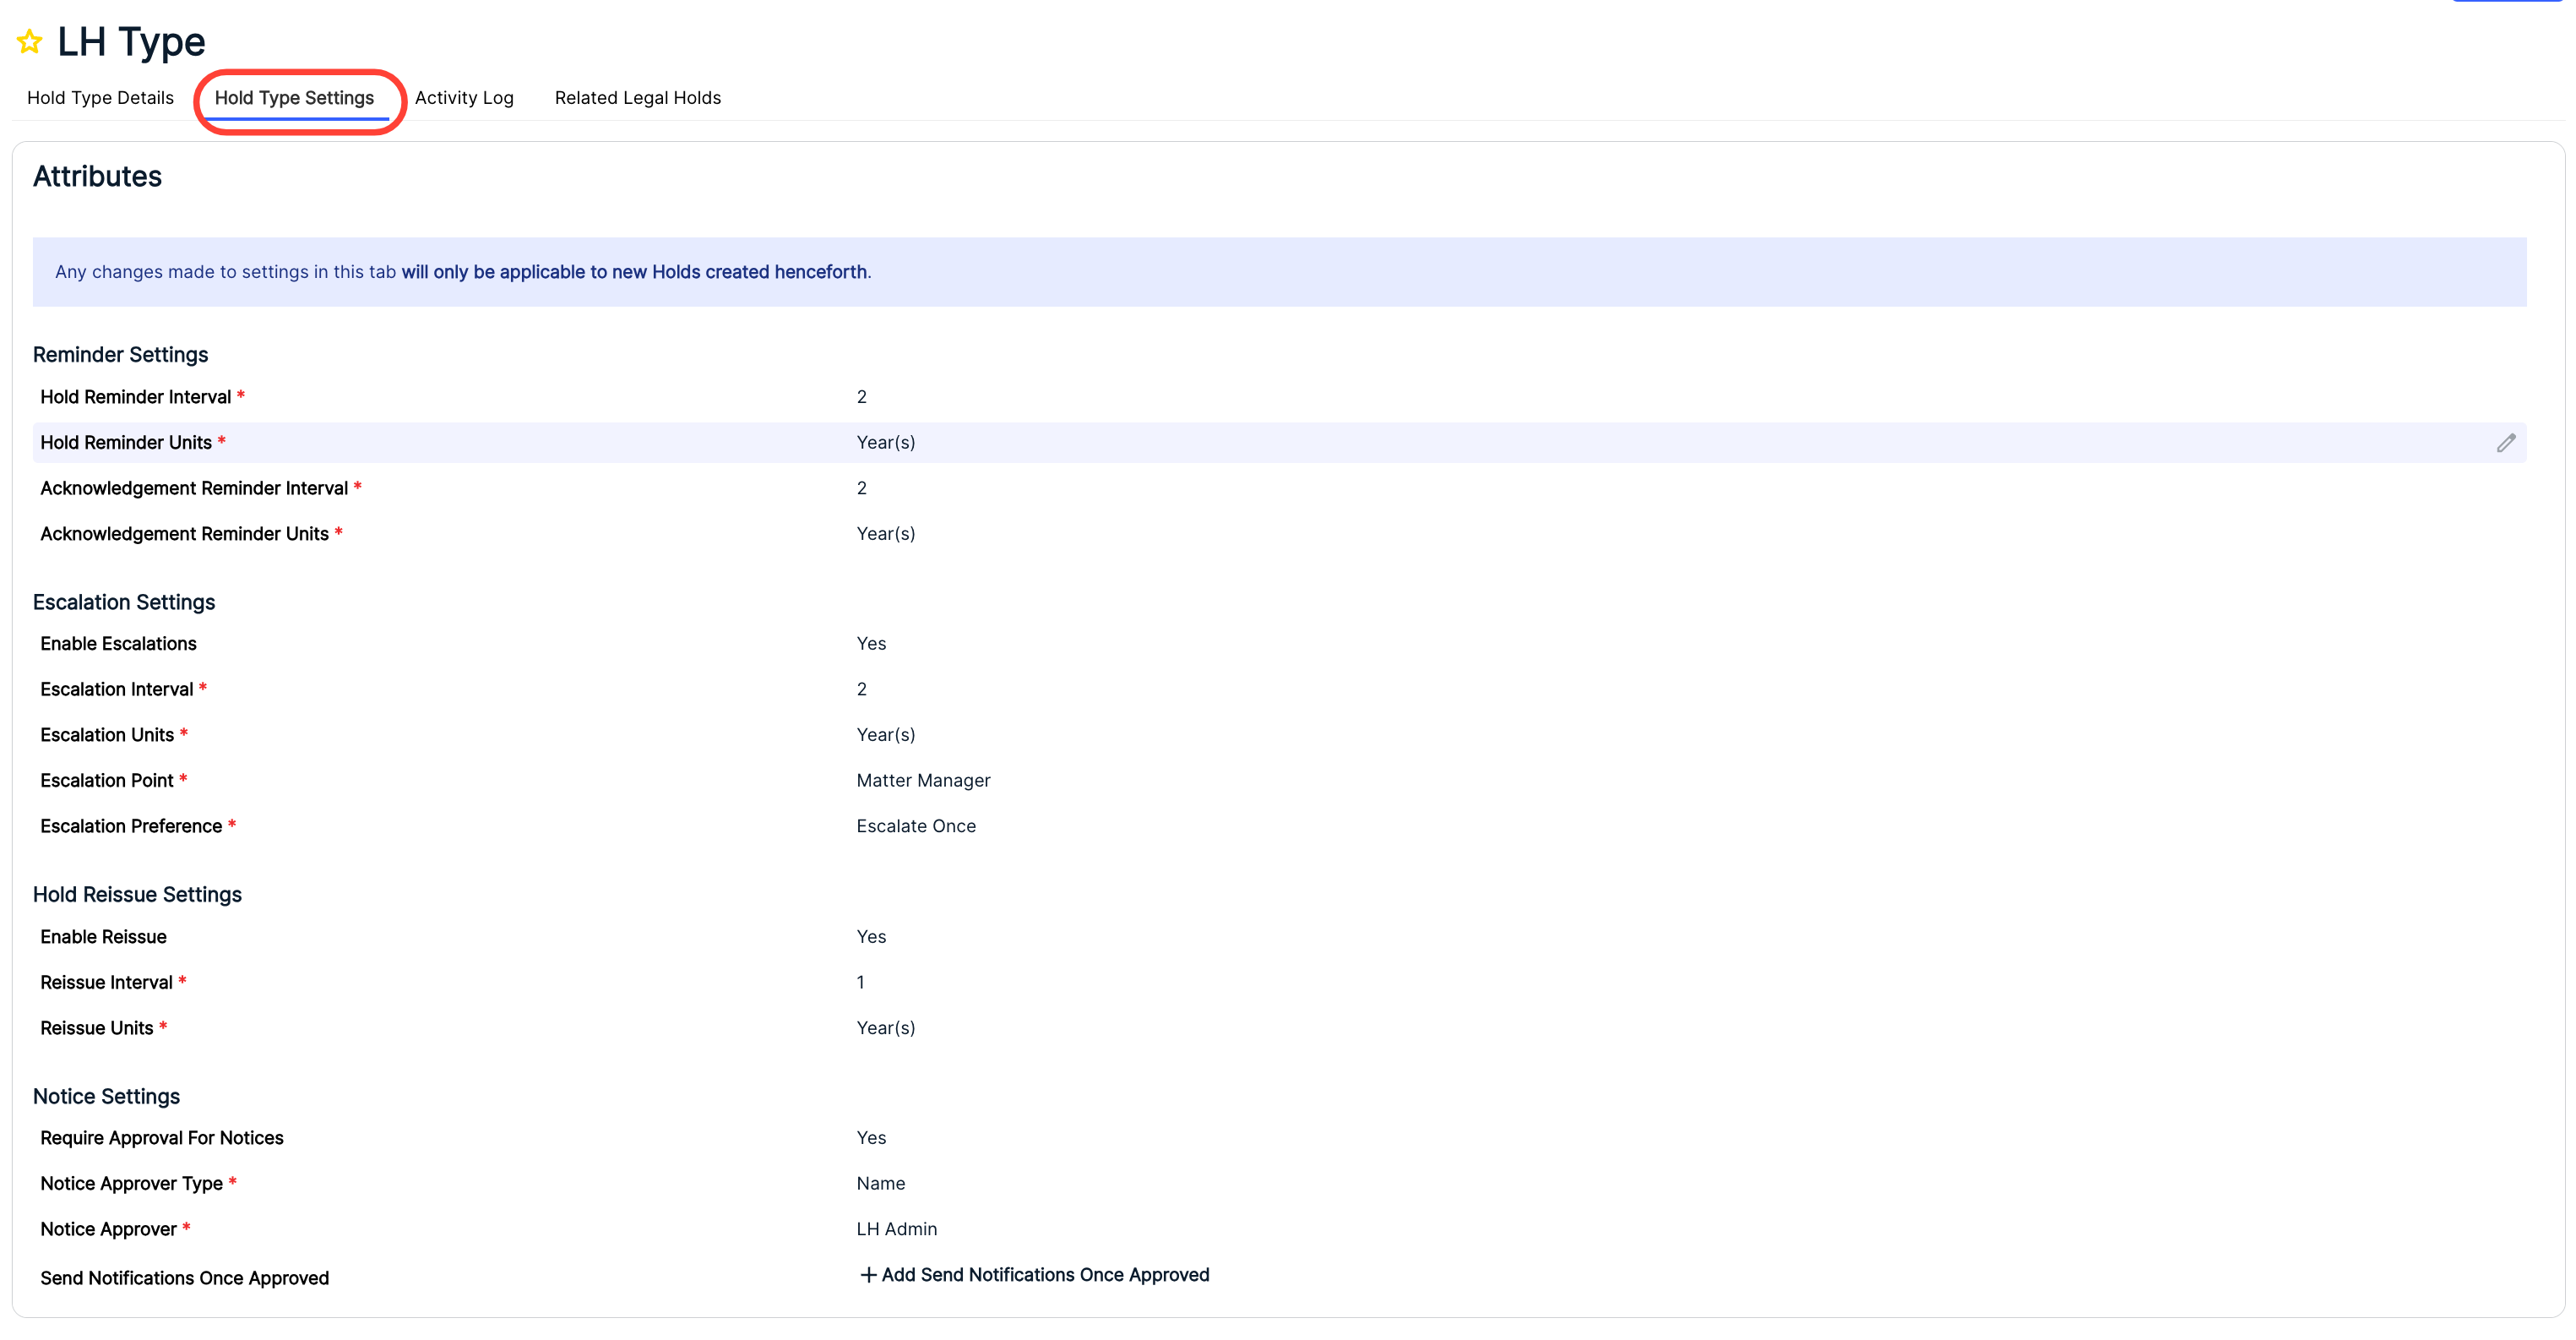
Under Hold Type Settings you can adjust any of the key attributes. Click the Edit (pencil) button to adjust any of the attributes.
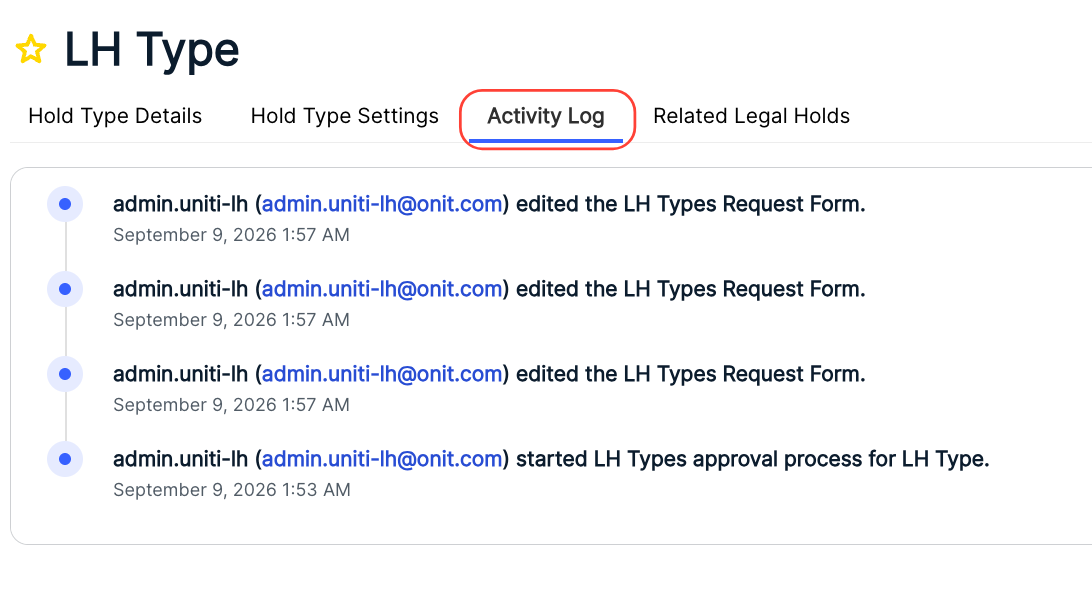
The Activity Log will show a chronological list of activity on the settings.
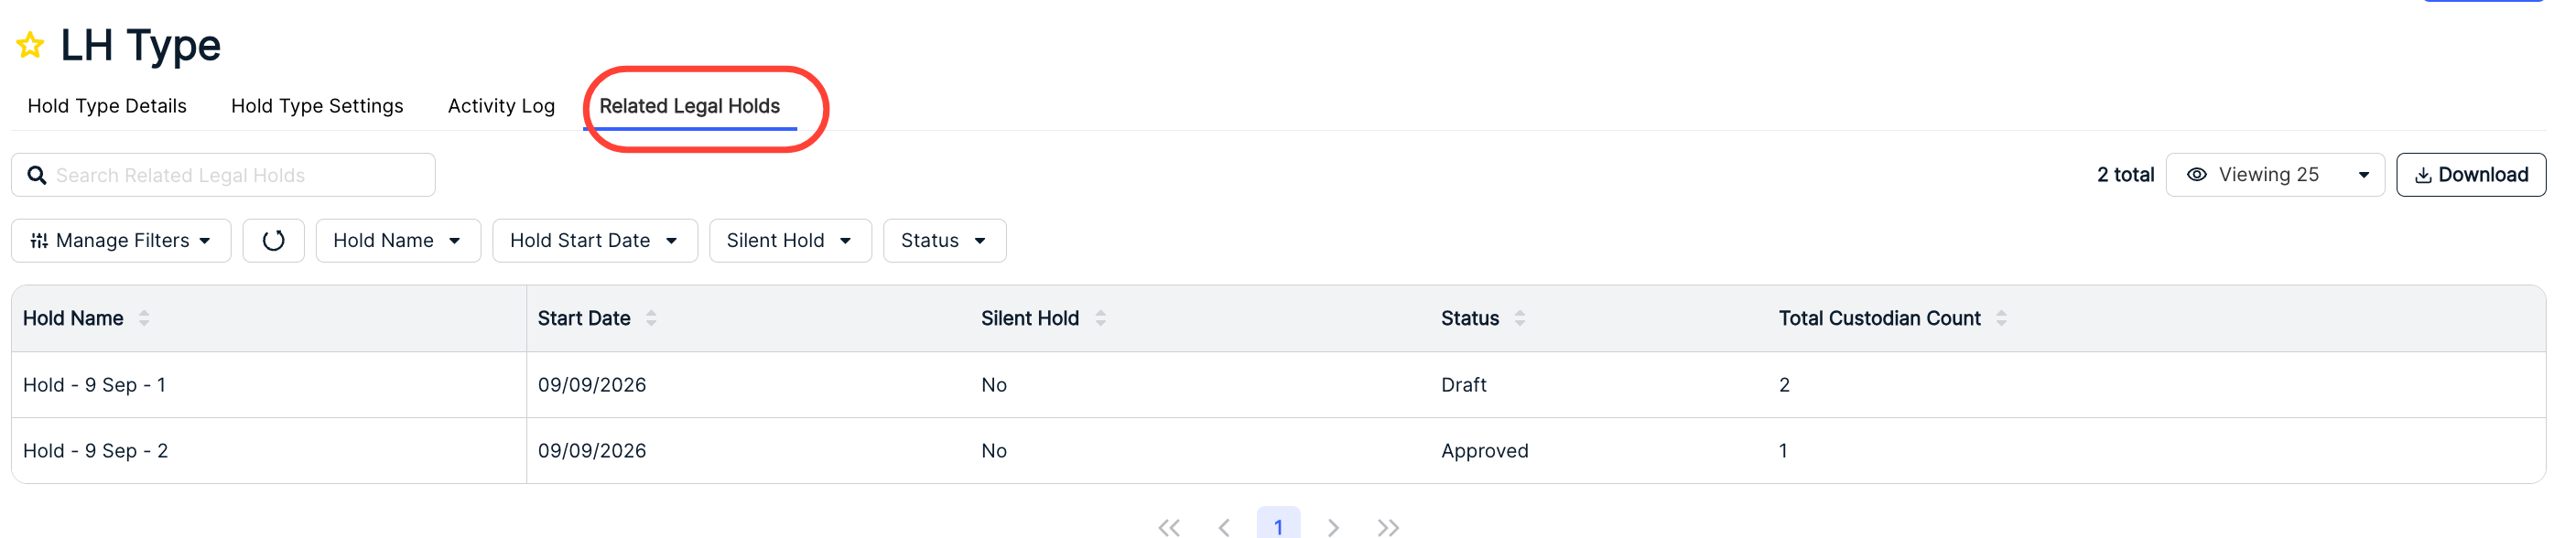
Related Legal Holds shows any related legal holds. In this directory, you'll see the Hold Name, Start Date, Silent Hold (Yes/No), Status, and Total Custodian Count. Use the up/down arrows to sort by any section. Use the top filters and the Viewing drop-down menu to customize what you want to see on the screen. Use the Search Related Legal Holds to search through the directory. Use the Download button to download the related legal holds information.
Creating a New Legal Hold Type
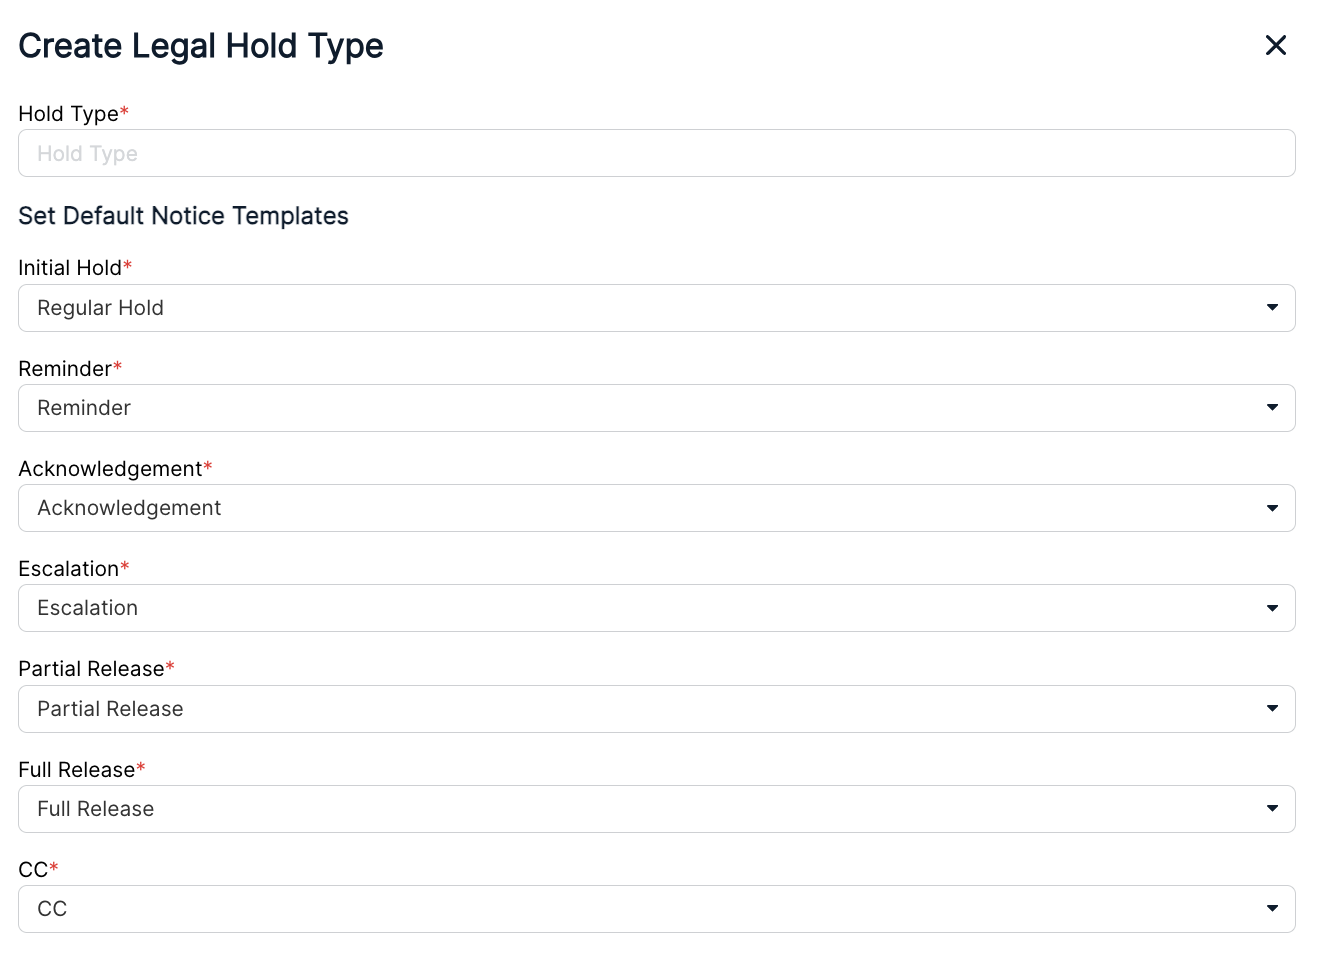
Click on Create Legal Hold Type to start a new Legal Hold Type.
The Create Hold Type screen will appear. You'll have to fill out the Hold Type (required) and the Initial Hold, Hold Reminder, Acknowledgement Reminder, Escalation, Partial Release, Full Release, and CC information from drop-down menus under the Set Default Notice Templates section.
- Initial Hold - Lets the recipient know they are on standard Legal Hold as a custodian. The first notification custodians would get on a Legal Hold.
- Reminder - Reminds custodians that they are still on a Legal Hold.
- Acknowledgement - Reminds custodians that they are on a Legal Hold AND they have not acknowledged the Legal Hold yet.
- Escalation - An email that goes to the Legal Hold custodian’s manager if the custodian has not responded to the Legal Hold.
- Partial Release - A notification that the custodian has been released from a specific Legal Hold.
- Full Release - A notification that the custodian has been released from ALL of their Legal Holds.
- CC - The default CC notification
If necessary, choose the Survey Template from the drop-down menu.

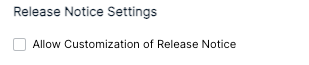
Under Release Notice Settings, choose if you want to Allow Customization of Release Notice.
People Upload
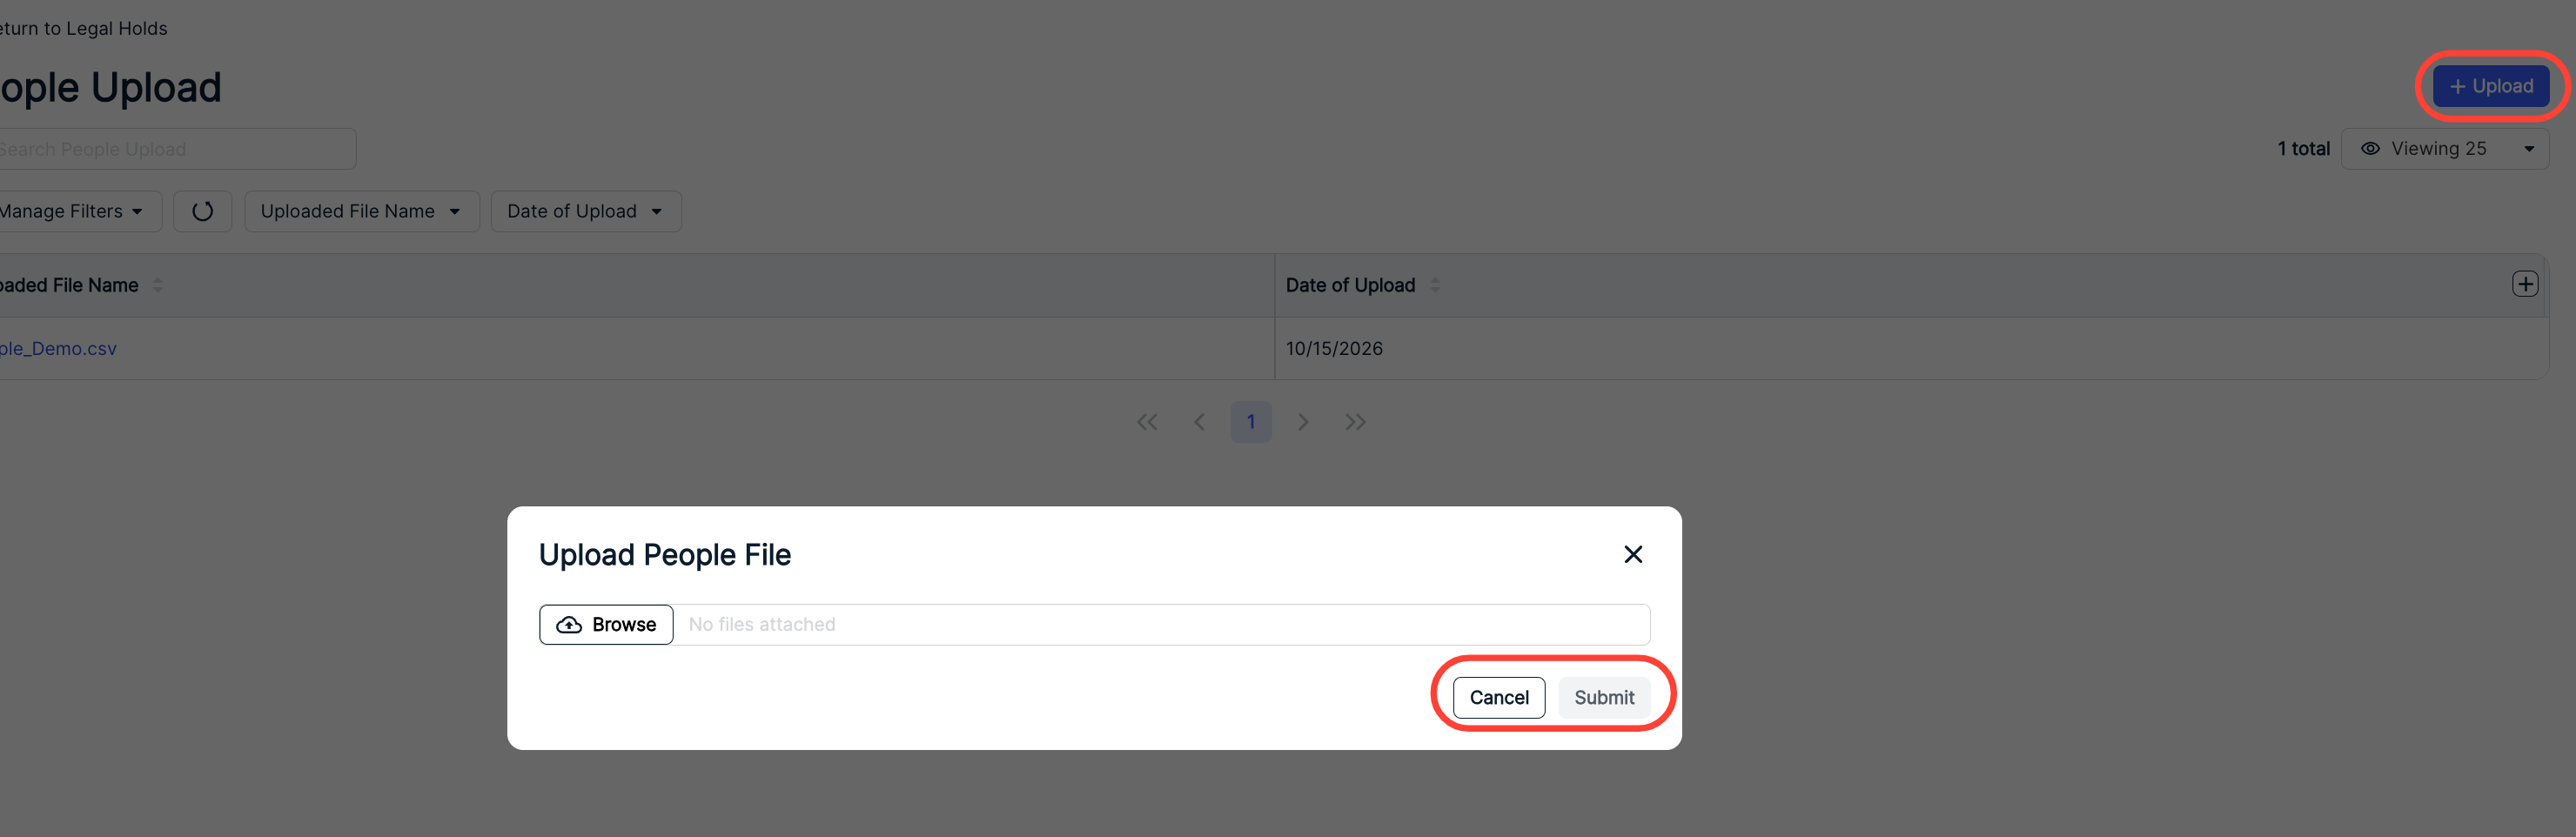
Use the People Upload section to bulk upload people data.
The main directory will show the Uploaded File Name and Date of Upload. Click on the up/down arrow at the top of each column to sort by that column. Click on the file name to download the file. Click on the Manage Filters and other drop-down menus to customize what you want to see on the screen. Use the Viewing drop-down menu to customize how many files you want to see on the screen. Use the Search People Upload search bar to search through the files.

Click Upload to upload a new people file (in CSV). Click Submit to submit the file or Cancel to back out.
Data Mappings
Use the Data Mappings section to manage and create data mappings within Unity Legal Holds. Click on the up/down arrow at the top of each column to sort by that column. Click on the Manage Filters and other drop-down menus to customize what you want to see on the screen. Use the Viewing drop-down menu to customize how many files you want to see on the screen. Use the Search Data Mappings search bar to search through the files.

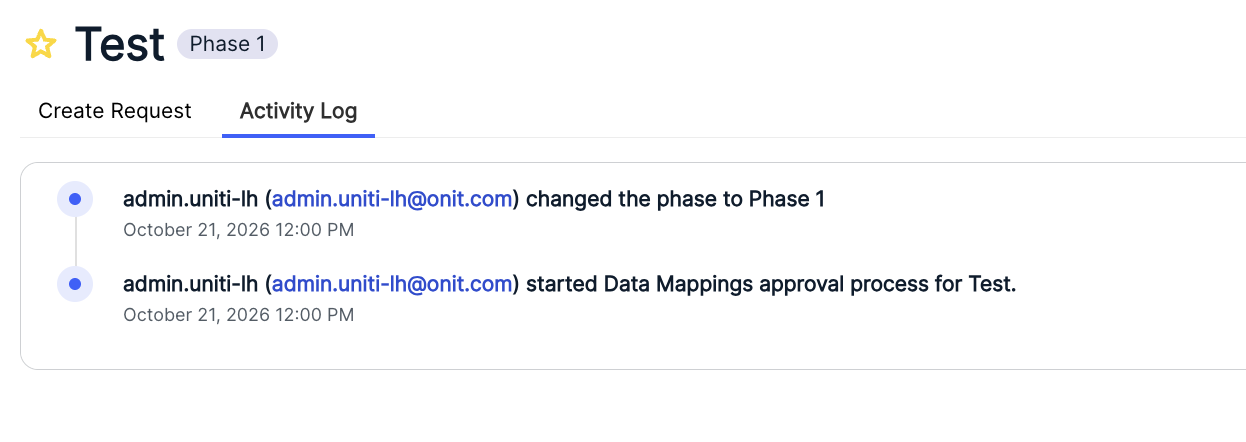
Click on each Project Name to open that project. Within the Create Request section, you can see and edit key attributes; the Activity Log will show all the activity on the project.
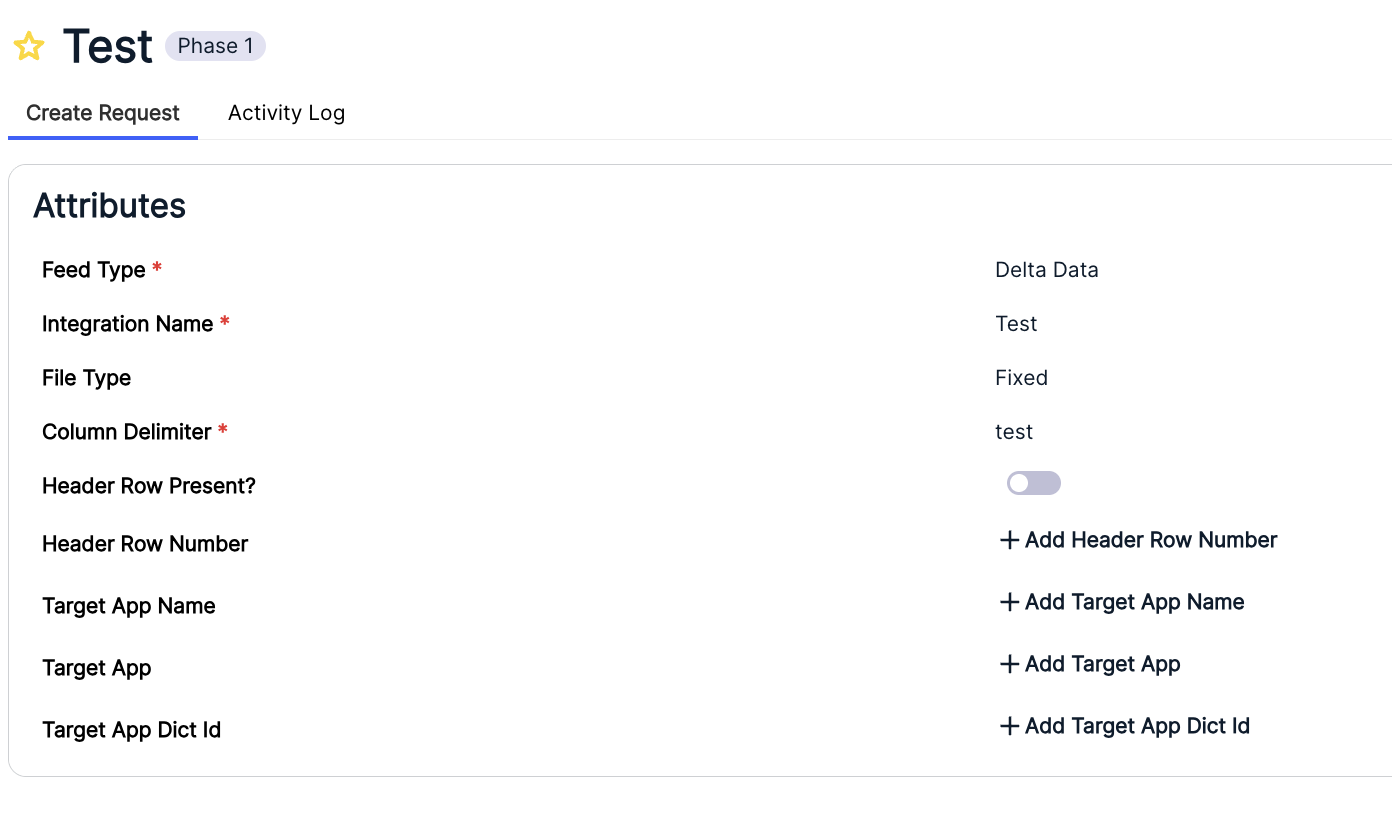
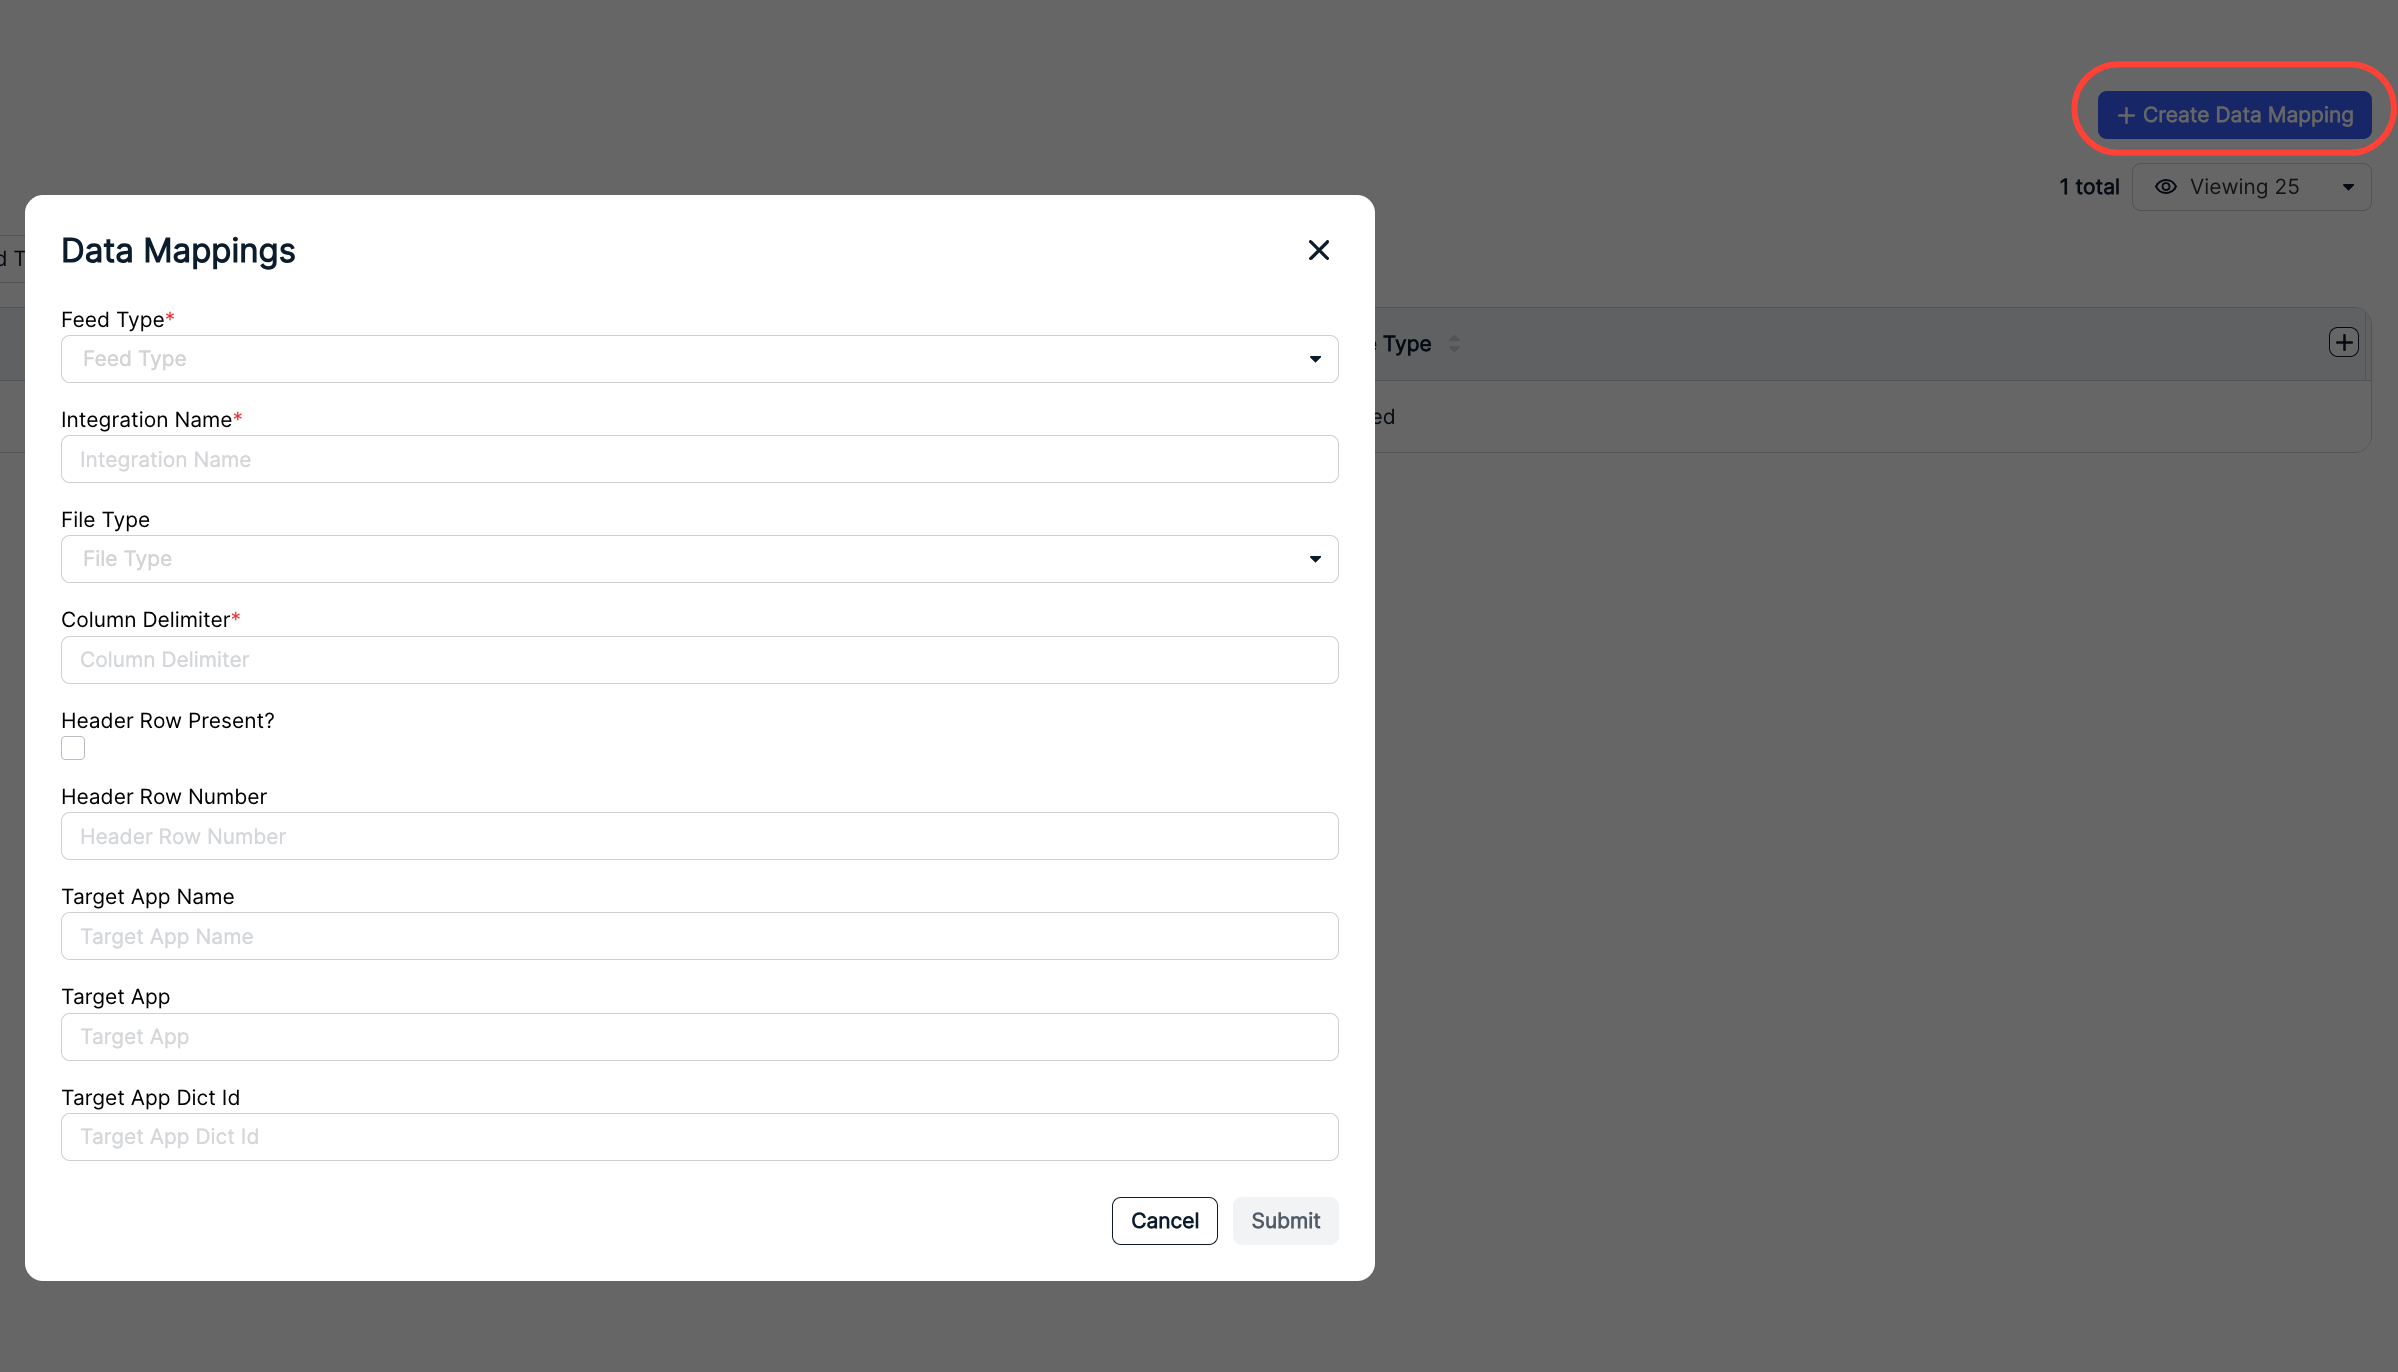
Click on Create Data Mapping to create a data mapping. You need to fill in the:
- Feed Type (Required)
- Integration Name (Required)
- File Type
- Column Delimiter (Required)
- Header Row Present (checkbox)
- Header Row Number
- Target App Name
- Target App
- Target App Dict ID
Click Submit to send in the data mapping or Cancel to back out.
Field Mappings
Use the Field Mappings section to manage and create field mappings within Unity Legal Holds. Click on the up/down arrow at the top of each column to sort by that column. Click on the Manage Filters and other drop-down menus to customize what you want to see on the screen. Use the Viewing drop-down menu to customize how many files you want to see on the screen. Use the Search Field Mappings search bar to search through the files. May want to revise this to note that this is for mapping fields for data uploads into Legal Holds like the People Upload.

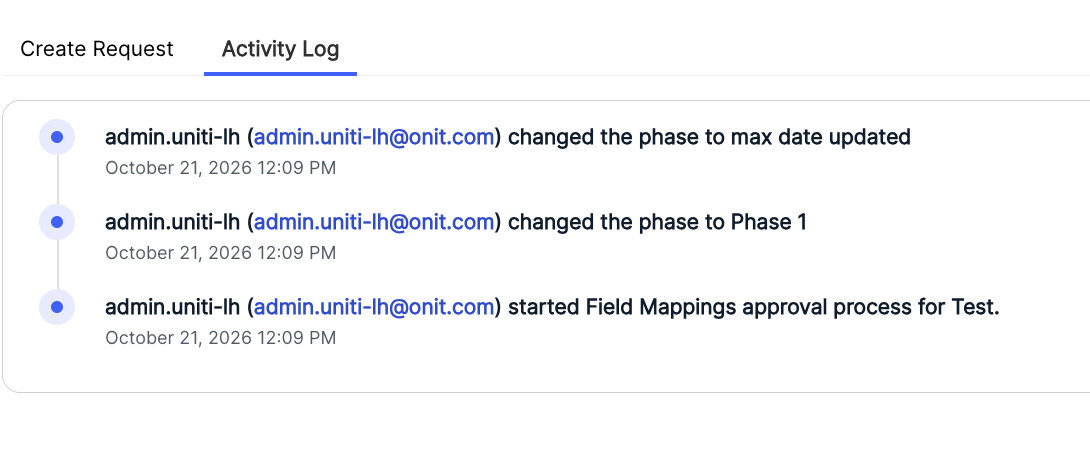
Click on each Mapping Name to open that project. Within the Create Request section, you can see and edit key attributes; the Activity Log will show all the activity on the project.
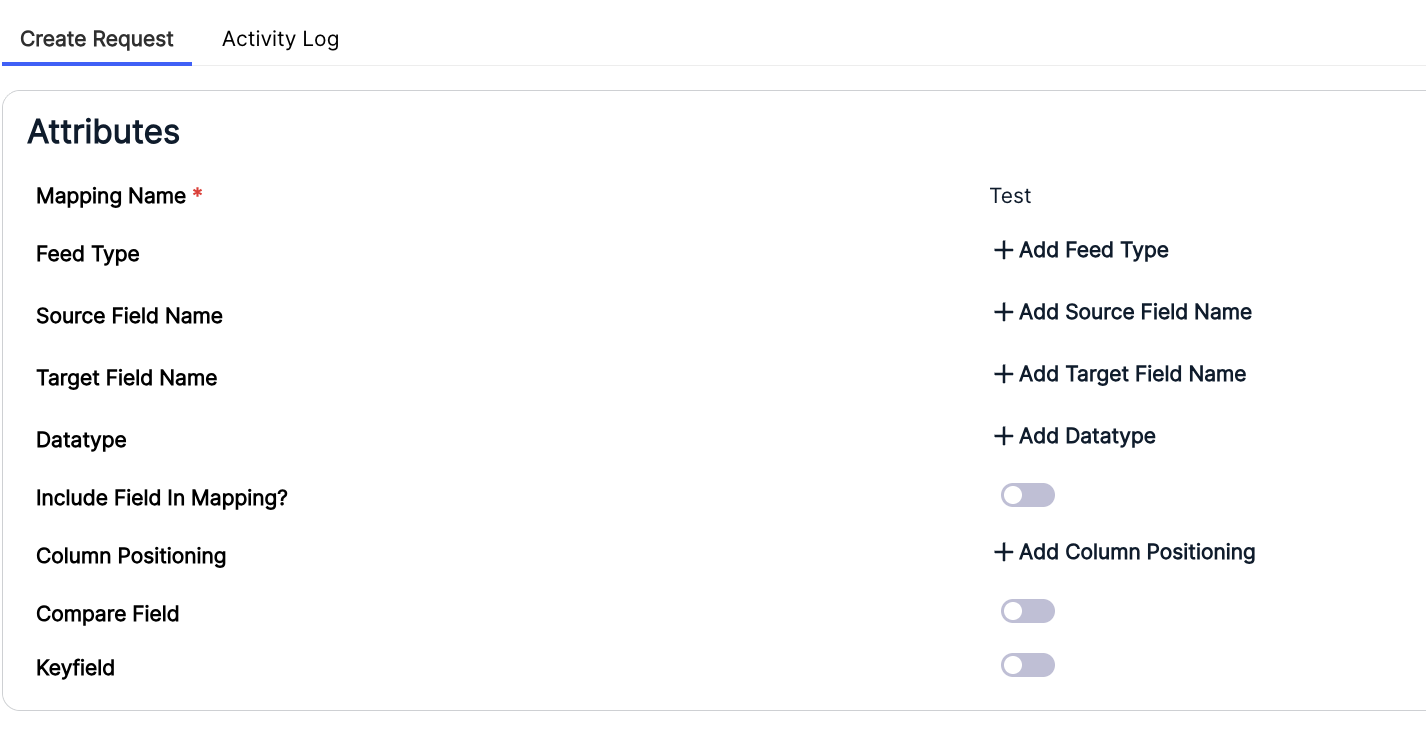
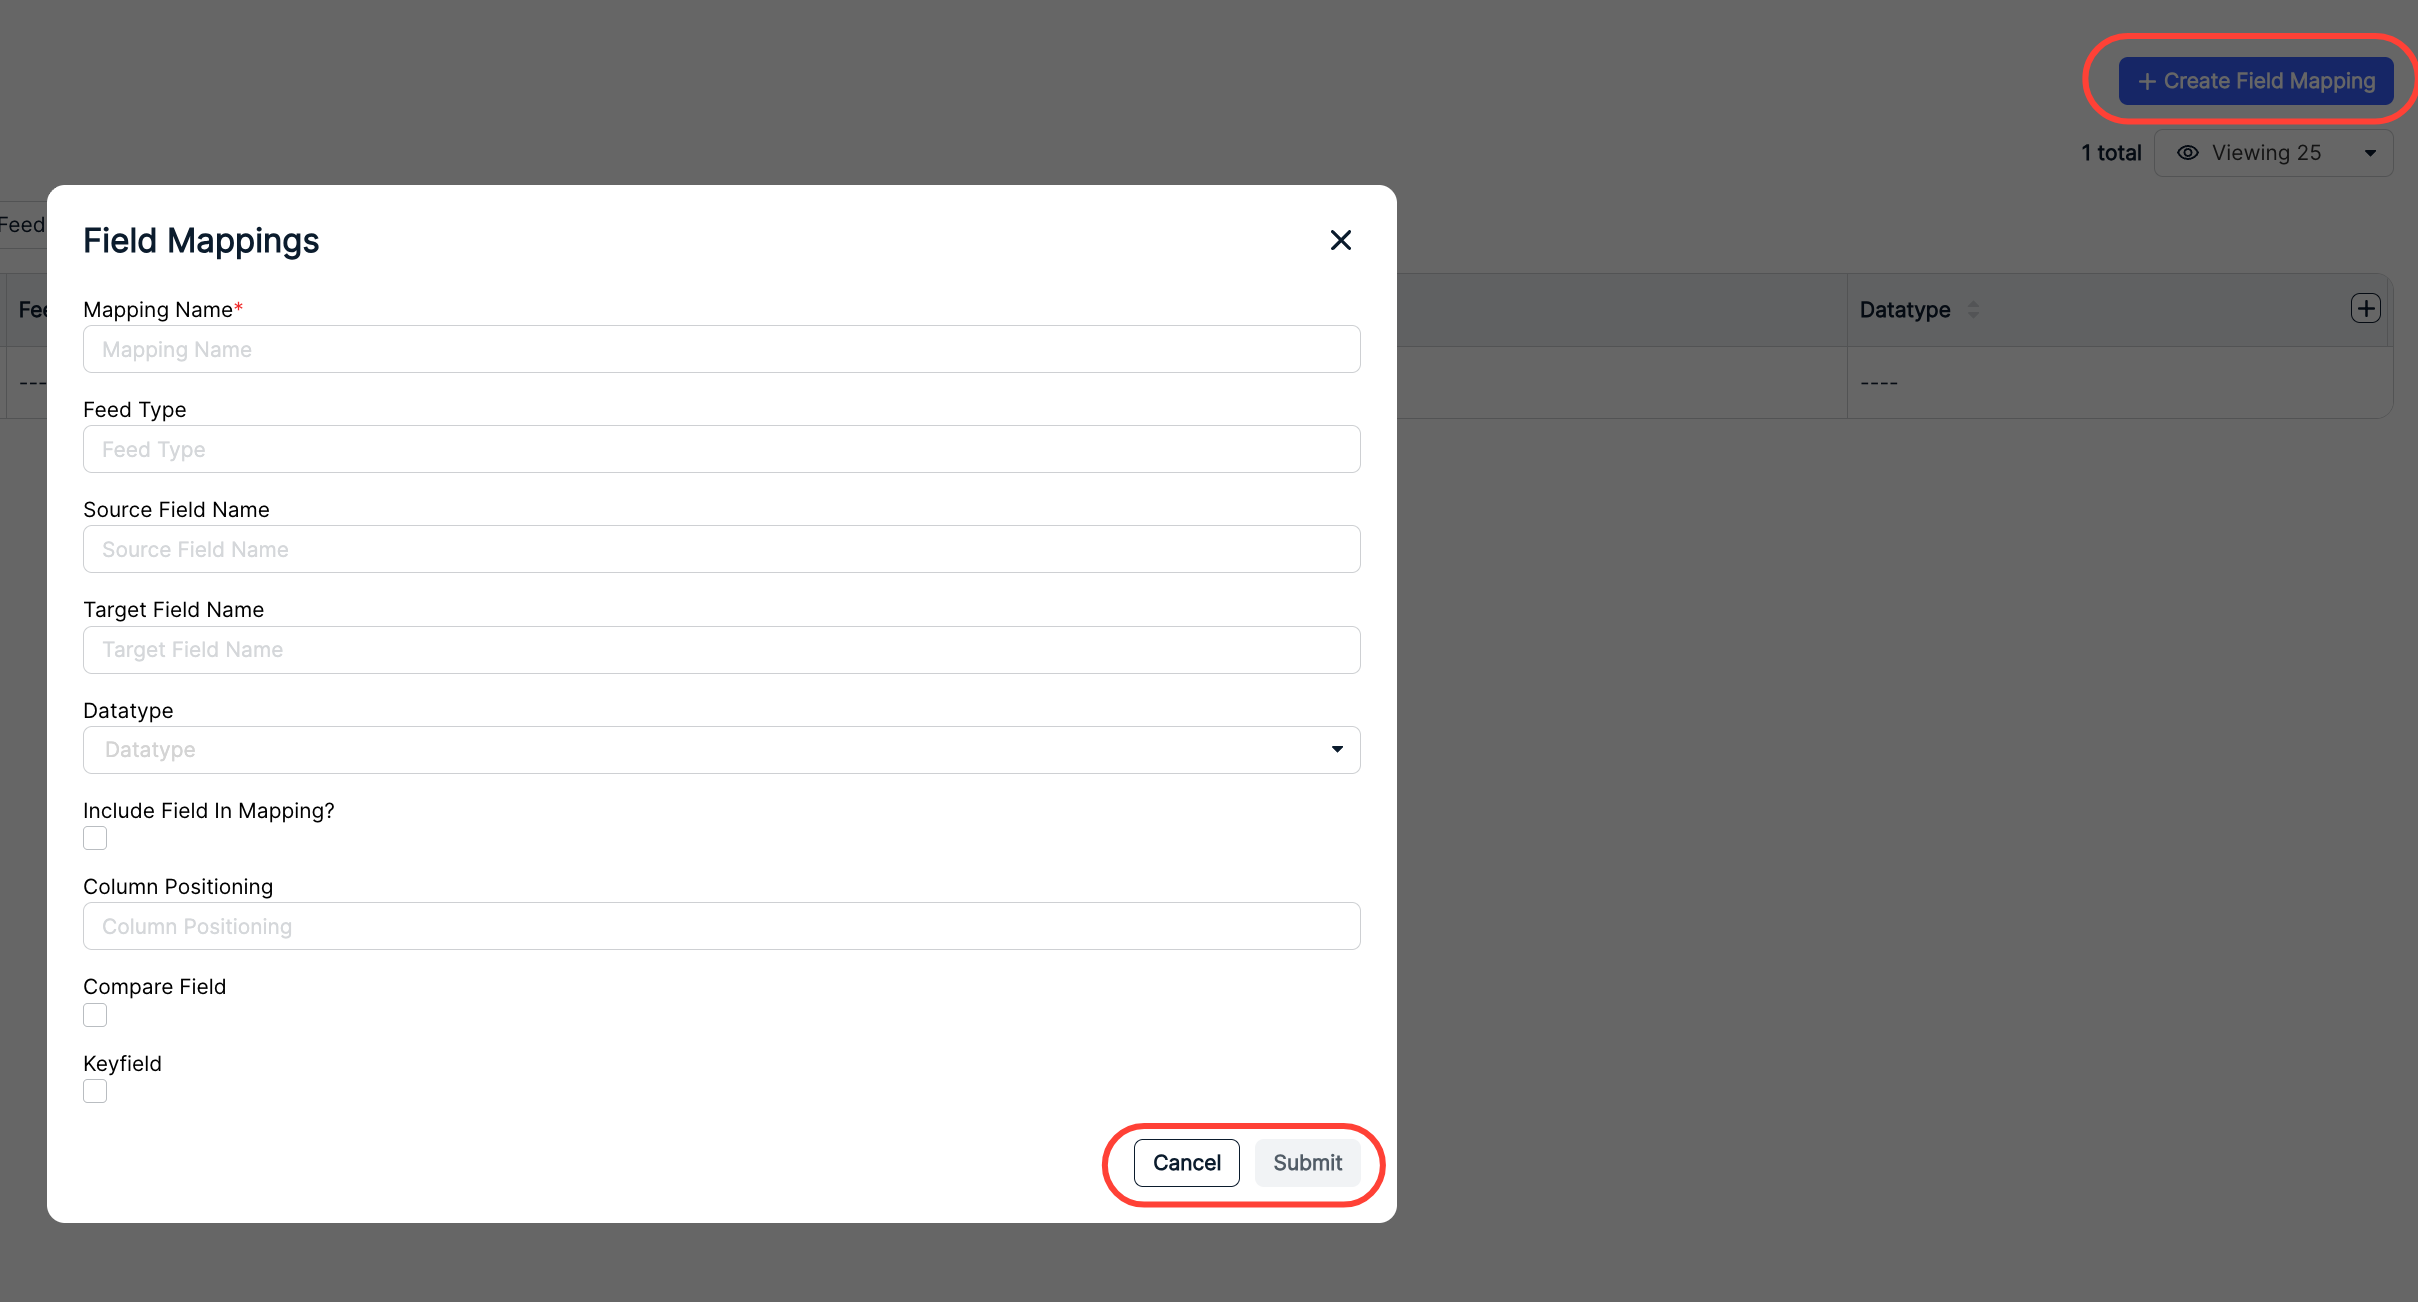
Click on Create Field Mapping to create a data mapping. You need to fill in the:
- Mapping Name
- Feed Type (Required)
- Source Field Name
- Target Field Name
- Datatype
- Include Field in Mapping check box
- Column Positioning
- Compare field check box
- Keyfield check box
Click Submit to send in the data mapping or Cancel to back out.
Job Logs
The Job Logs section will show job logs from integration jobs.
Managing Languages in Legal Holds
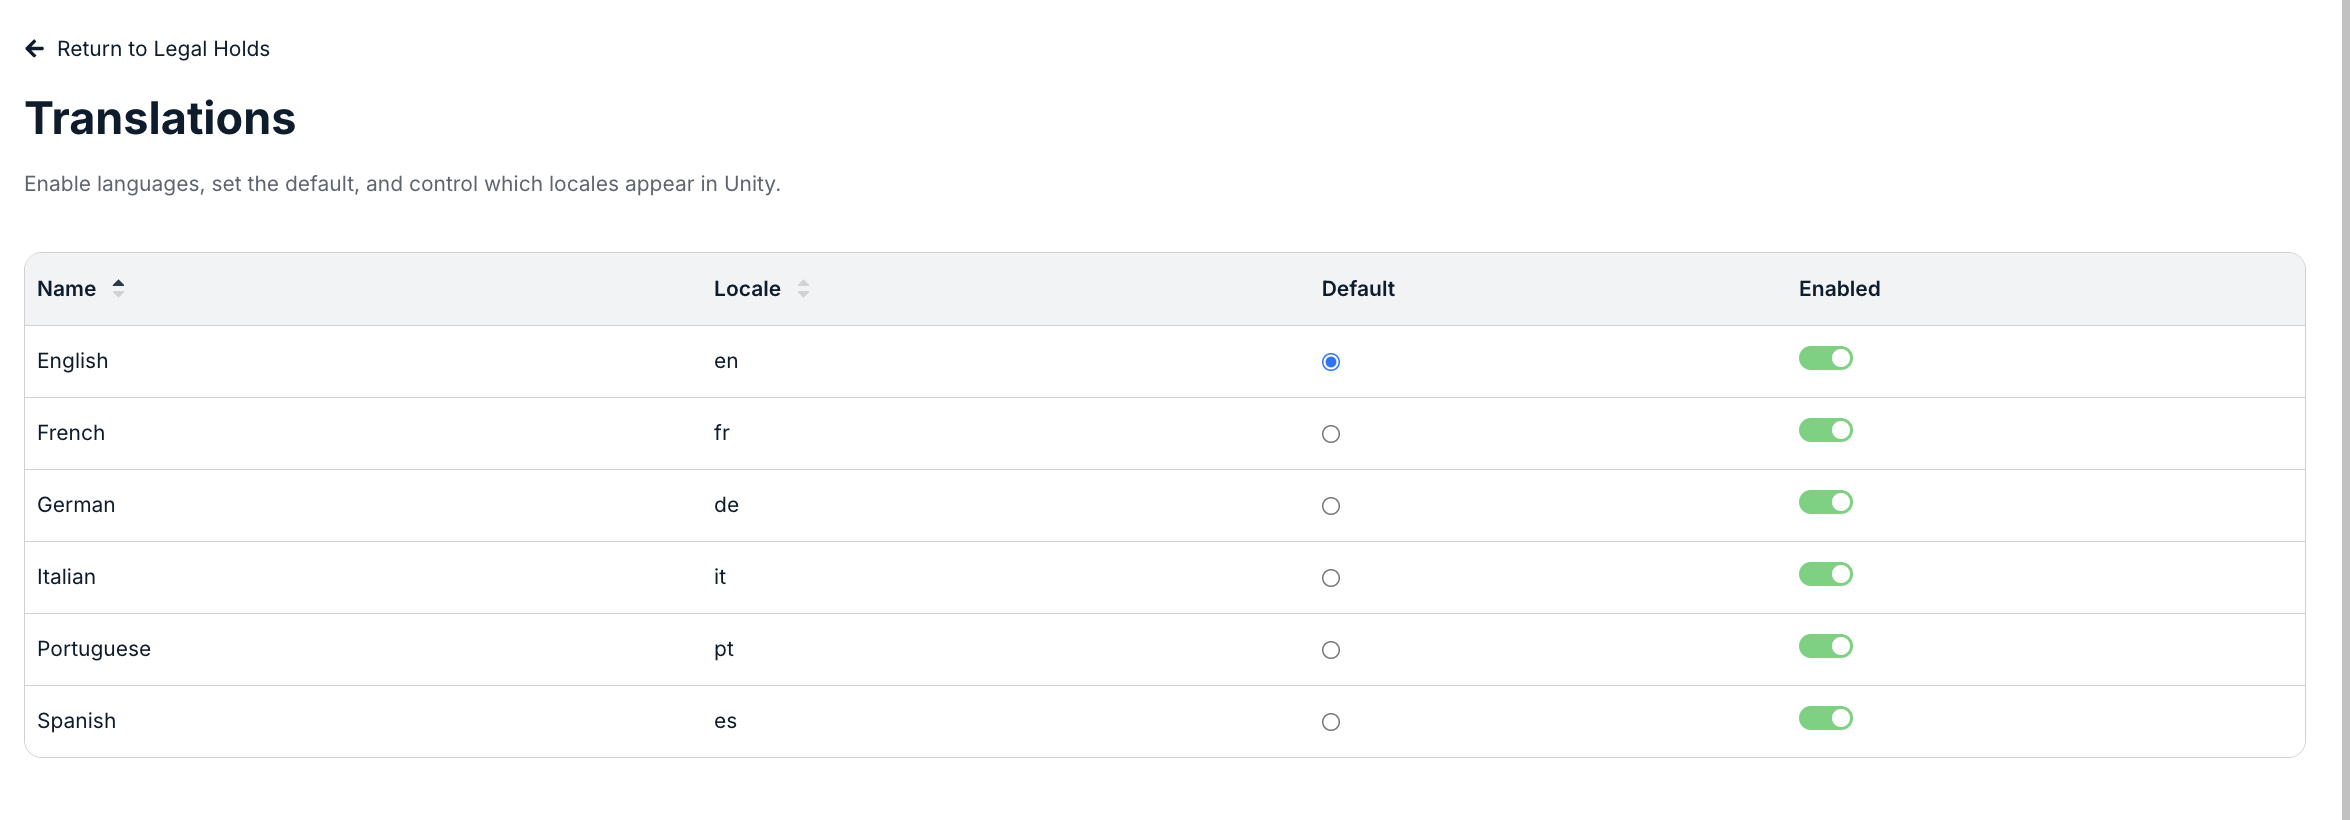
To work in your preferred language within LSR, go into Settings and then into Common Module; click on Translations to manage languages throughout Unity.
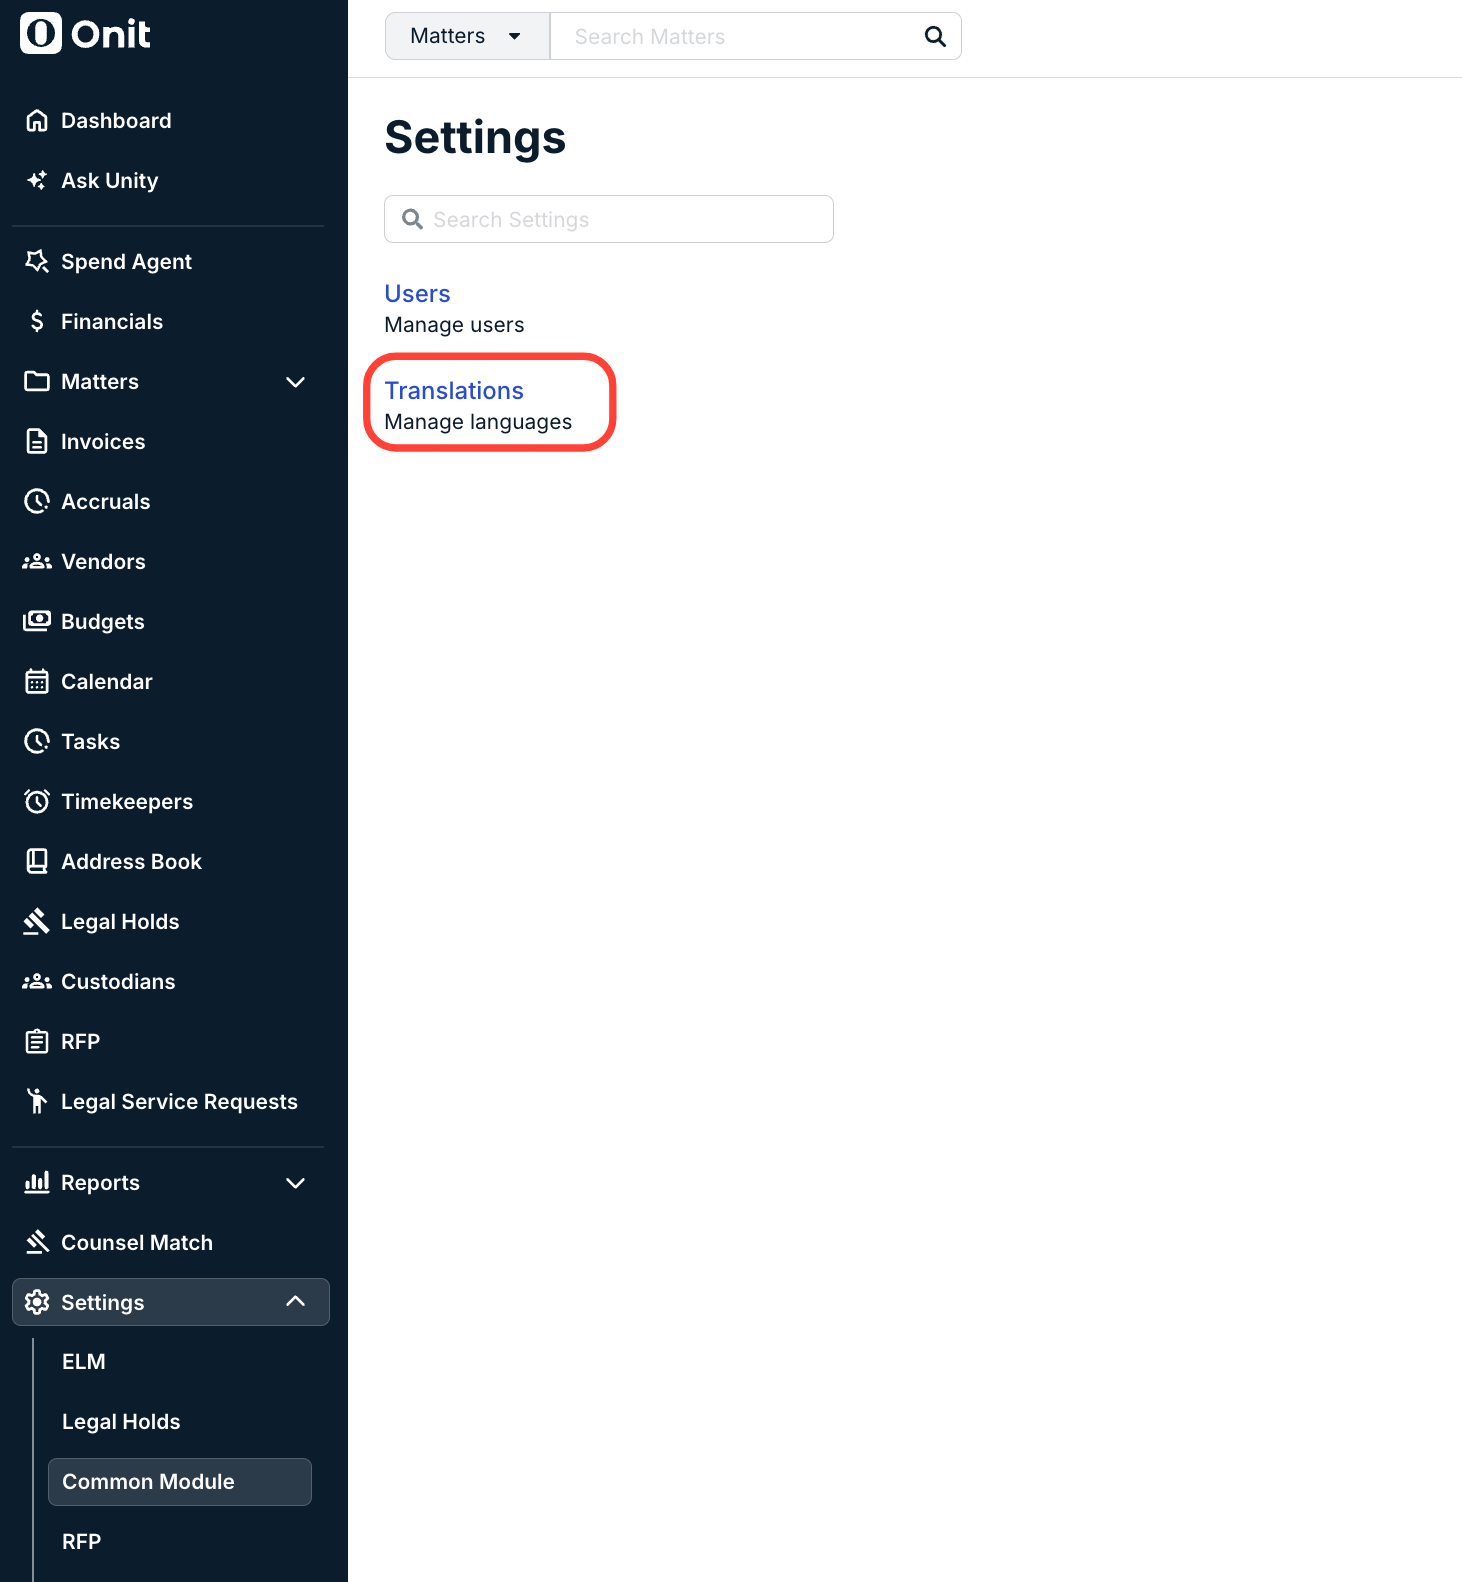
The Translations menu will appear; use the up/down arrows next to each heading to sort by that column. Use the Default button to choose the default language and the Enabled toggle to enable/disable the language.