Onit RFP offers teams the ability to create detailed Requests for Proposal to law firms and provides a simple way to ingest and analyze the results, including Rate Proposal Analysis capabilities.
Using Onit RFP
Click on the RFP option on the left-hand-side dashboard menu.
On the main screen, you'll see a database of proposals; you can switch between the In Progress, Approved, Published, and All RFPs tabs to view specific RFPs.
- In Progress proposals are still in the draft stage or are those going through the review or approval process.
- Approved proposals are the ones that have gone through the internal review process and are approved to go to the vendors.
- Published proposals are the ones sent to the vendors.
- All RFPs proposals will show proposals in any of these stages as well as those that are withdrawn or inactive.
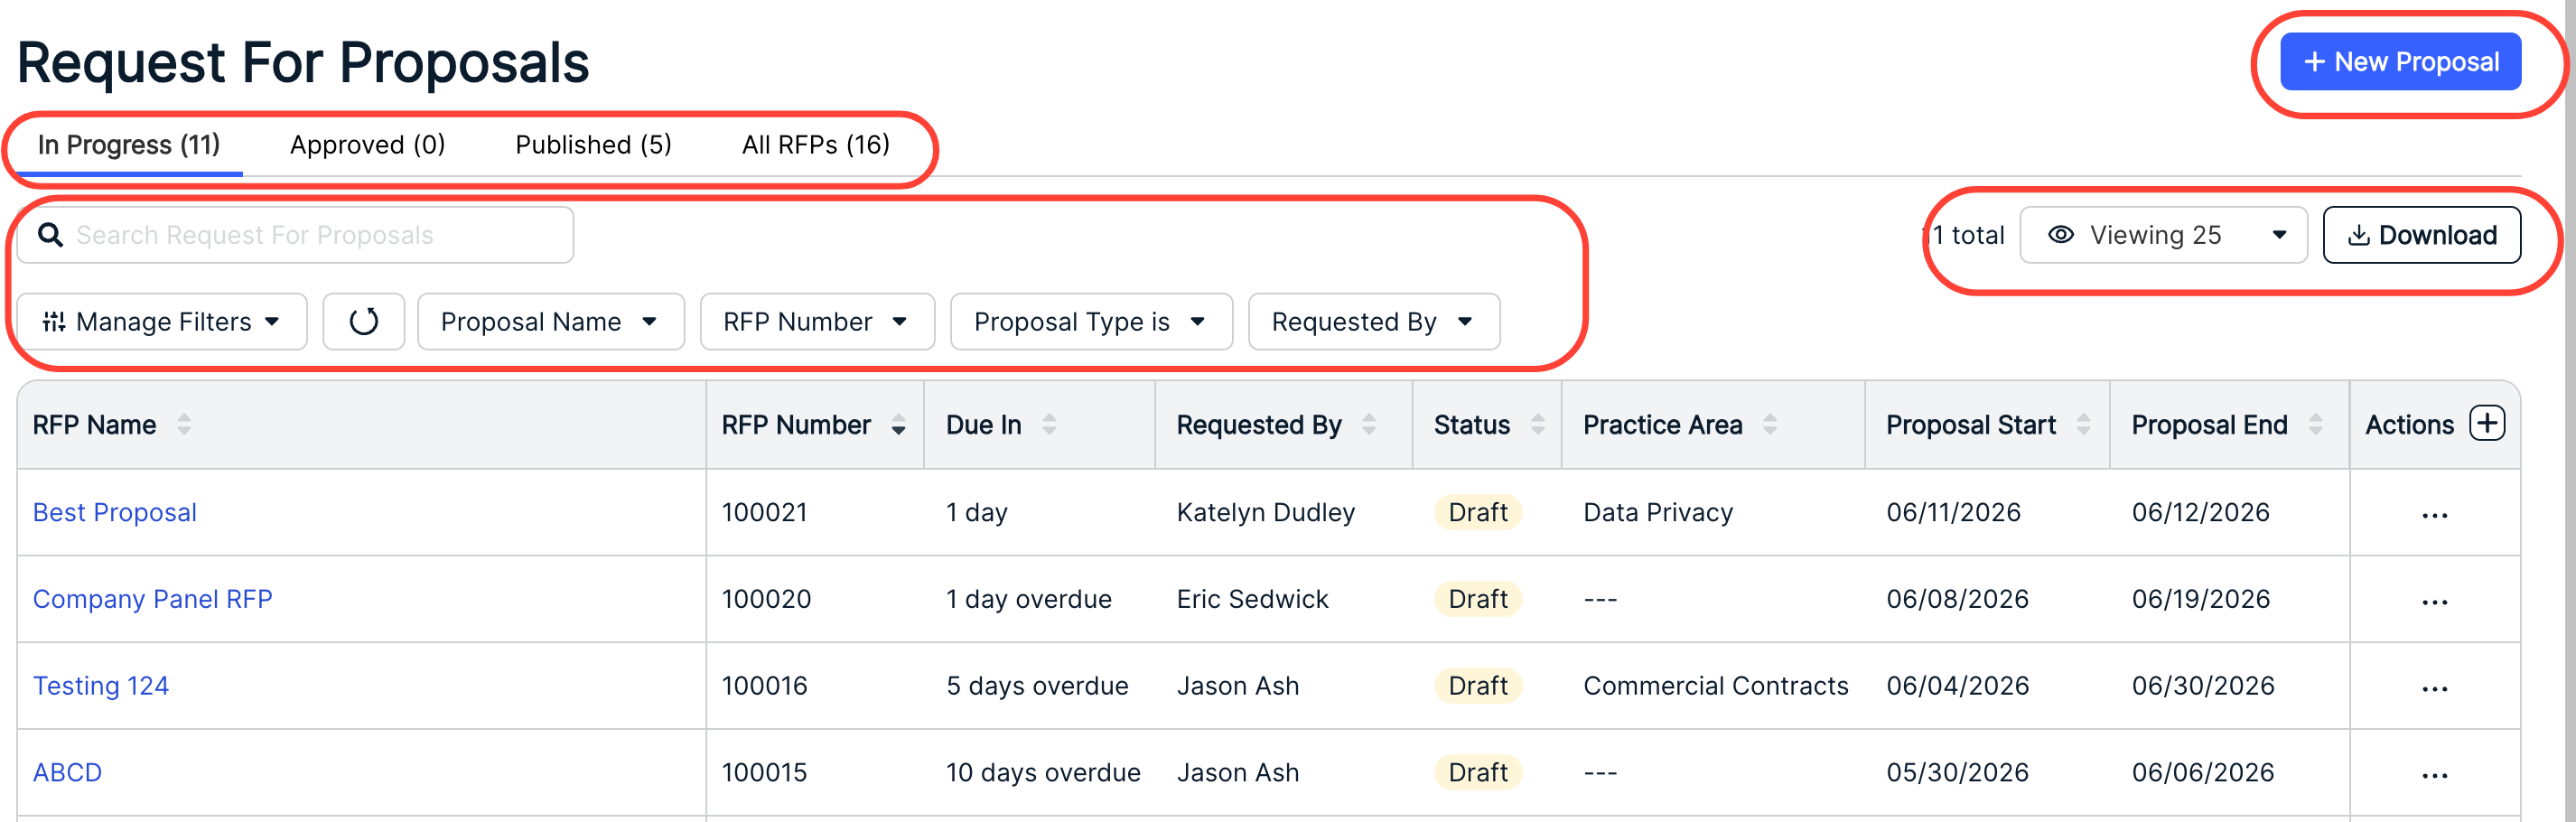
The RFP directory will show key details of the RFPs (note these categories will change per the tab selected). Use the up/down arrows next to each column to sort by that detail.
Click on Manage Filters to apply available filters or reorder selected filters; you can also Reset to Default. Click Apply to adjust or Cancel to back out. Use the Search bar to search for a specific proposal. Note that additional columns can also be added by using the + button.
You can also use the top buttons next to the filter to search within those specific columns; click Apply to search, Cancel to back out, or Clear to clear the text you submit.
Use the right-hand-side drop-down menu to choose how many records you want to display on the screen. You can also click on Download to download selected record information.
Starting a New Proposal
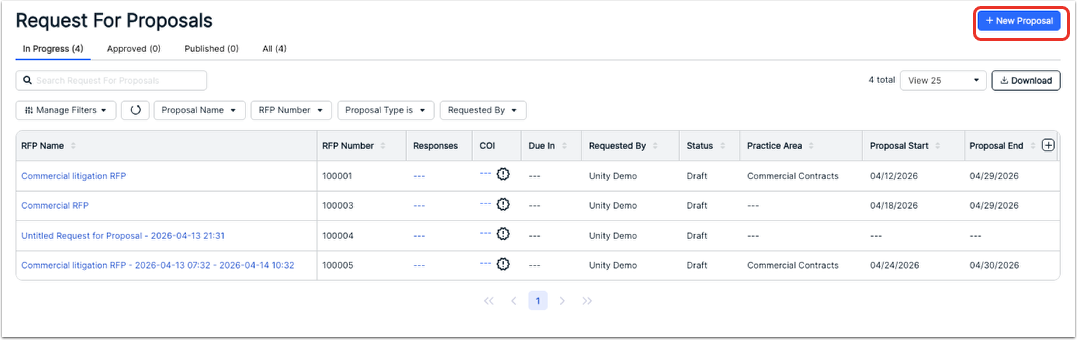
- Click on New Proposal to begin a new proposal.
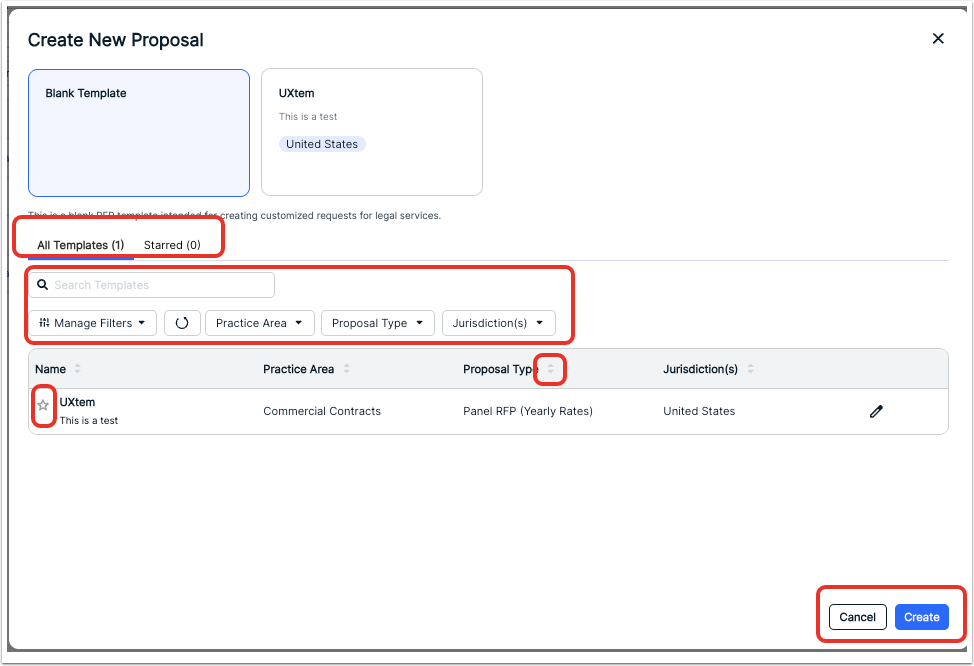
You have different paths for creating a new proposal: from an existing Template, from a Blank Template, or by duplicating an existing proposal. The Create New Proposal screen shows you existing templates; you can click the Edit (Pencil) button to edit them or click the Star icon to favorite one.
This screen will also show you key template details, including Name, Practice Area, Proposal Type, and Jurisdiction. Use the up/down arrows next to each column to sort by that detail, or use the Manage Filters or other drop-down menus to filter by specific information. You can also use the Search Bar to find specific templates, or the drop-down menu to sort by Proposal Type. Use the tabs above to filter by All Templates and Starred templates.
- Click the Create button to use either a Blank Template or an Existing Template for the new proposal.
- New Proposal Settings
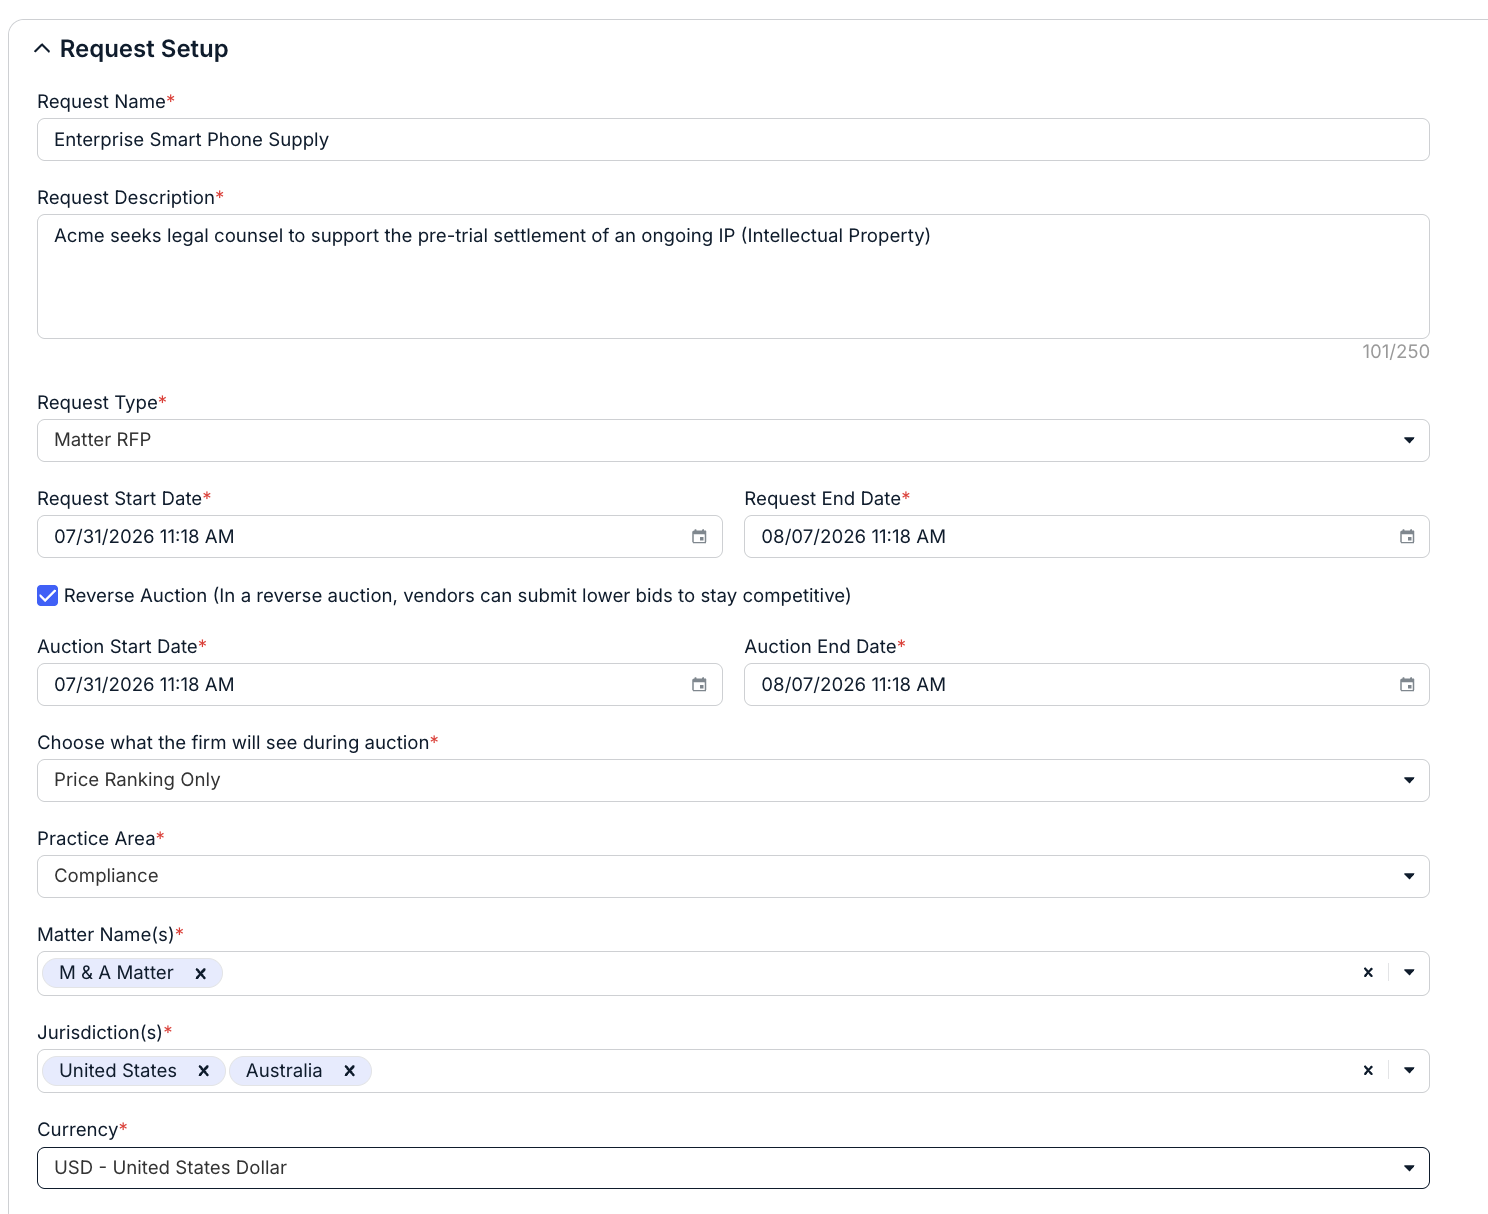
For the first step, you'll have to fill out some basic information, including the:
- Request Name
- Request Description. Note that this is automatically filled in from the template, but you can edit the text.
- Request Type. From the drop-down menu, users can choose from either a Matter RFP for a standard RFP for a Matter(s), or a Panel RFP (Yearly Rates) if firms would like to start determining their panel firms for the year.
- Request Start and End Date (calendar selection). This is the period during which vendors must respond to the RFP.
- Reverse Auction option (check box). In a Reverse Auction, vendors can resubmit lower bids to stay competitive.
- Auction Start and End Date (calendar selection). If the Reverse Auction button is checked, this is the period during which vendors can update their bids.
- Choose what the firm will see during auction. If the Reverse Auction button is checked, users can choose Price Ranking Only or Price Ranking and Lowest Bid Amount of the proposal from a drop-down menu.
- Practice Area. This information is pulled in from Unity. Select from a drop-down menu.
- Matter Name(s). This information is also pulled in from Unity. Users can select one or multiple matter names; click on the X next to an added matter to remove it from the selection.
- Jurisdiction. Select the country from a drop-down menu.
- Currency. Select the currency from a drop-down menu.
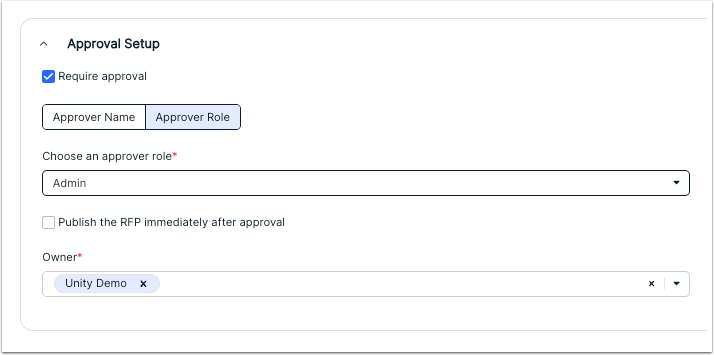
- Under Approval Setup, if you need approval for the RFP, select the Require Approval checkbox.
If checked, you can select the Approver Name and Approver Role (Admin, Owner, or Manager) from the drop-down menu.
You can also click the Publish the RFP immediately after approval check box to send the RFP straight to a published state after approval.
Users can also select multiple owners; click the X button to remove them. Click on Clear All to remove all owners. There must be at least one Owner to Save the RFP.
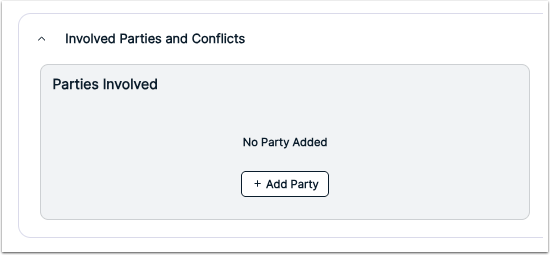
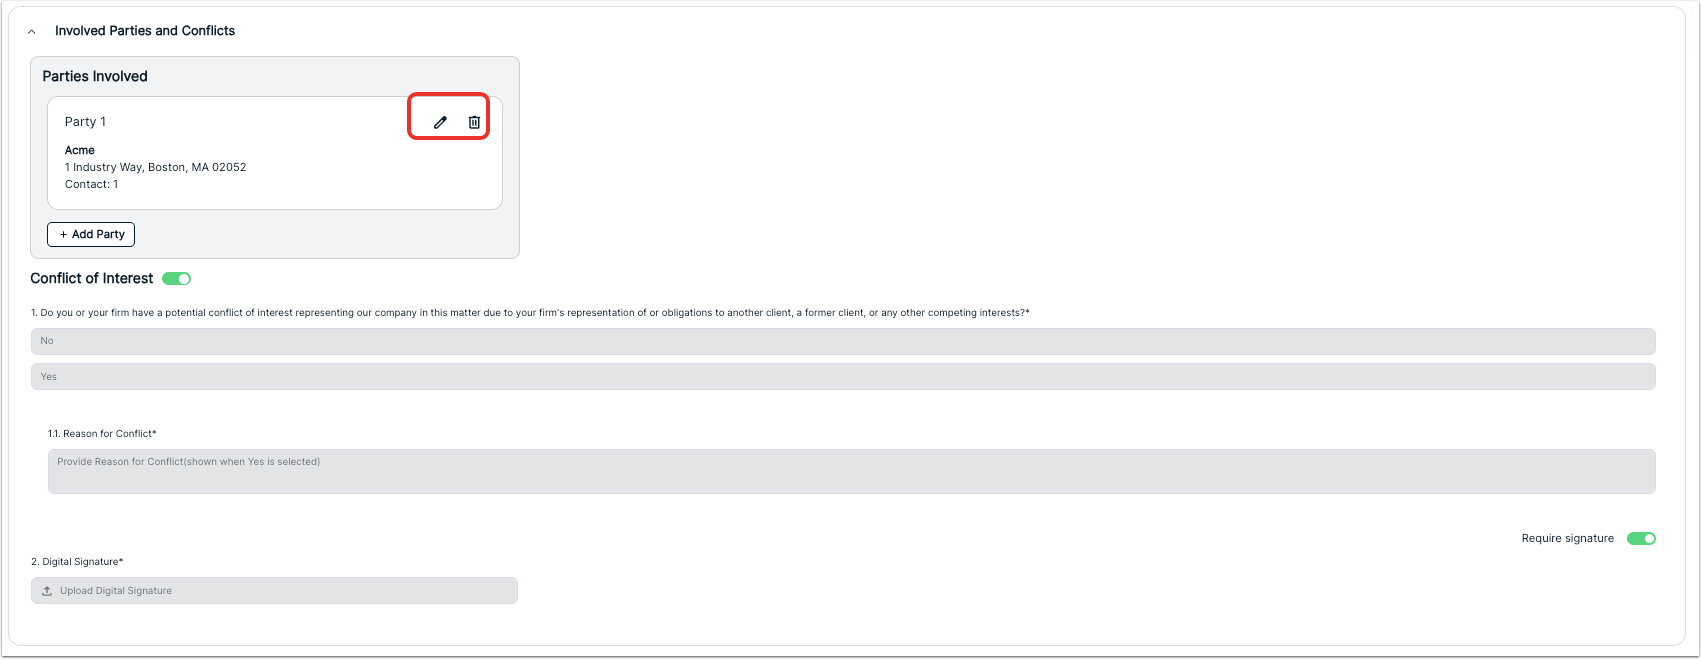
- Under Involved Parties and Conflicts, users can select the parties involved in the matter.
Click on Add Party to provide the details of the parties to include them in the RFP for resolution.
Fill out the Full Name, Address, and Contact number of the party (Full Name is required); click Add to add the party to the conflict list or Cancel to back out.
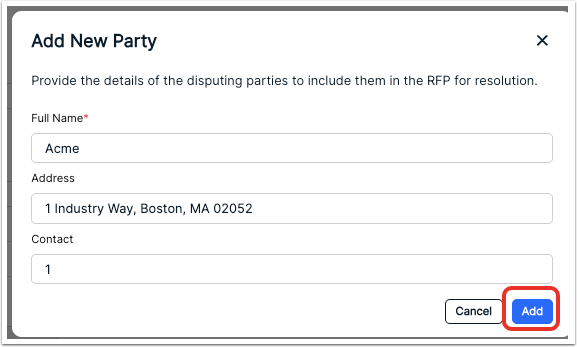
The Party will appear under Involved Parties and Conflicts. Users can also Edit (pencil symbol) the party involved or Delete the party involved (trash can).
After a party is designated, a Conflict of Interest question is automatically generated and added to the proposal (note that this question is generated from your settings; an admin can adjust as necessary). Click the toggle button next to Conflict of Interest to toggle the question on and off.
You can also hit the Require Signature button to toggle whether the digital signature requirement.
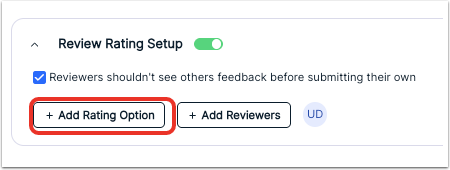
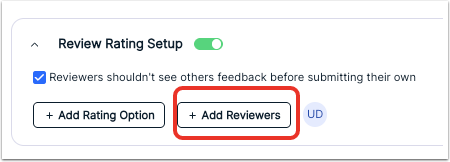
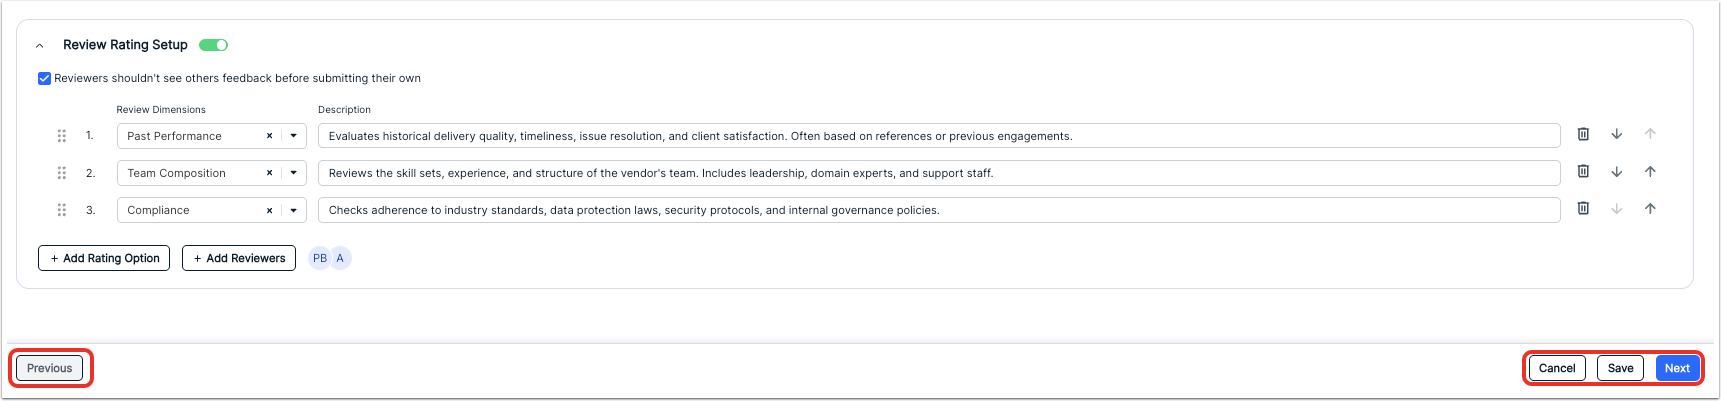
- Use the Review Rating Setup to add internal ratings to "score" the RFP.
Click the On button to toggle the rating system. From there, you can click Add Rating Option and Add Reviewers. You can also click on the Reviewers shouldn't see others feedback before submitting their own check box.
When you add a rating option, you can choose the Review Dimension from a drop-down menu. The dimension Description is automatically filled in for you from your RFP settings; you can edit the Description. Click the Delete (trash can) icon to remove a dimension or use the up/down arrows or dot pattern icon to adjust the order.

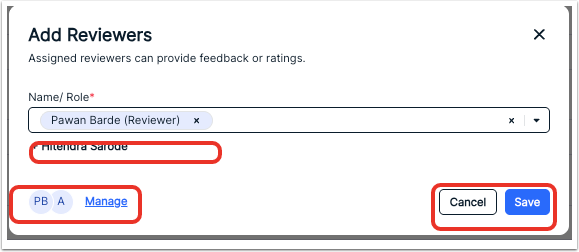
If you click on Add Reviewers, you can add assigned reviewers to provide feedback or ratings. Note that every owner is added as a reviewer. To add additional reviewers, click the plus (+) sign next to their name or select from the drop down. Click the Manage button to manage the reviewers. Click the X next to a reviewer to remove them.
Hit Save to finalize the reviewers or Cancel to back out.
Click Next to move on to the next step. You can also click Save to save the RFP as a draft, Previous to go to the prior screen or Cancel to back out entirely.
Creating a Proposal Template
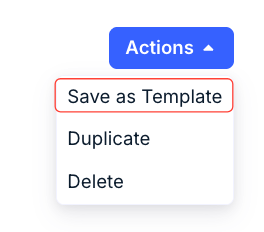
Note that you can save a proposal as a template at any time by selecting Save as Template from the Actions drop-down menu.
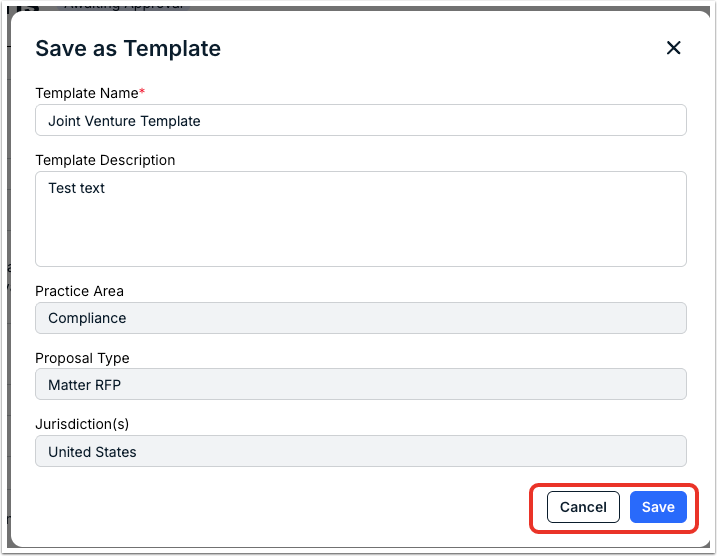
After clicking Save as Template, you'll have to fill in the Template Name and Template Description; Practice Area, Proposal Type, and Jurisdiction(s) are automatically populated. Click Save to save the template or Cancel to back out.
The new template will appear as an option after you start a new proposal. Note that MOST of the information will pre-populate from the template into the new RFP; however, you'll still have to fill in:
- Proposal Start and End Date
- The Reverse Auction option
- The Matter Name(s)
- Involved Parties and Conflicts
- The Scope and Vendors
You can manage templates in the Settings section.
- Defining Scope
In the next step, you can add:
A summary of the RFP case for the recipients.

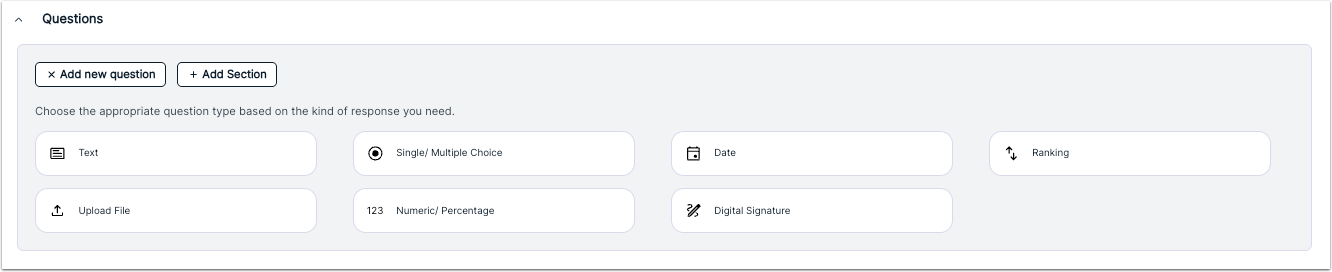
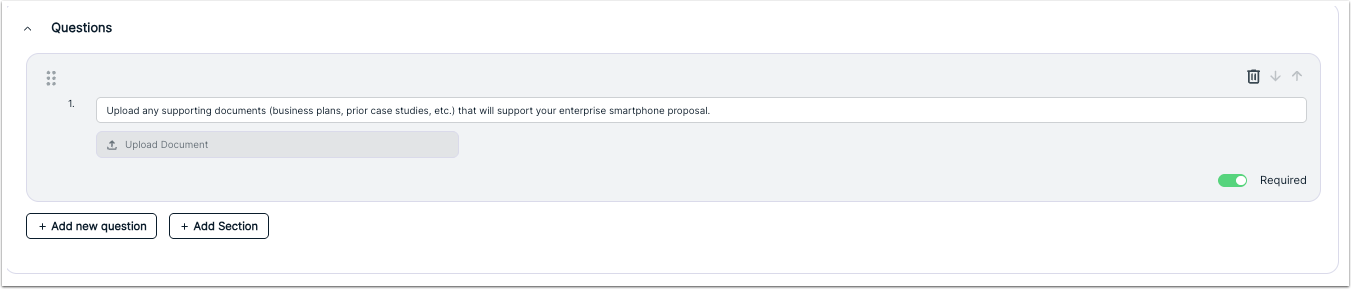
- Questions for the recipients. You can select from several different types of questions - including Text, Single/Multiple Choice, Date, and Ranking; you can also choose the Upload File, Numeric/Percentage, and Digital Signature options. Click Add new question to add a question or Add Section to add a full section.
Question Types
Question types include:
Text: Needing a written text response. Fill out the text field with your question. You can toggle whether to make this question Required, and, if you want, provide a Long Answer field option to increase the number of characters allowed. You can click the up/down arrows to move the question or click the Delete (trash can) to remove the question.

Upload File: An option for the responder to provide written responses, supporting materials, or other uploads. Fill in the text field with any instructions. You can toggle whether to make this ask Required. You can click the up/down arrows to move the question or click the Delete (trash can) to remove the question.
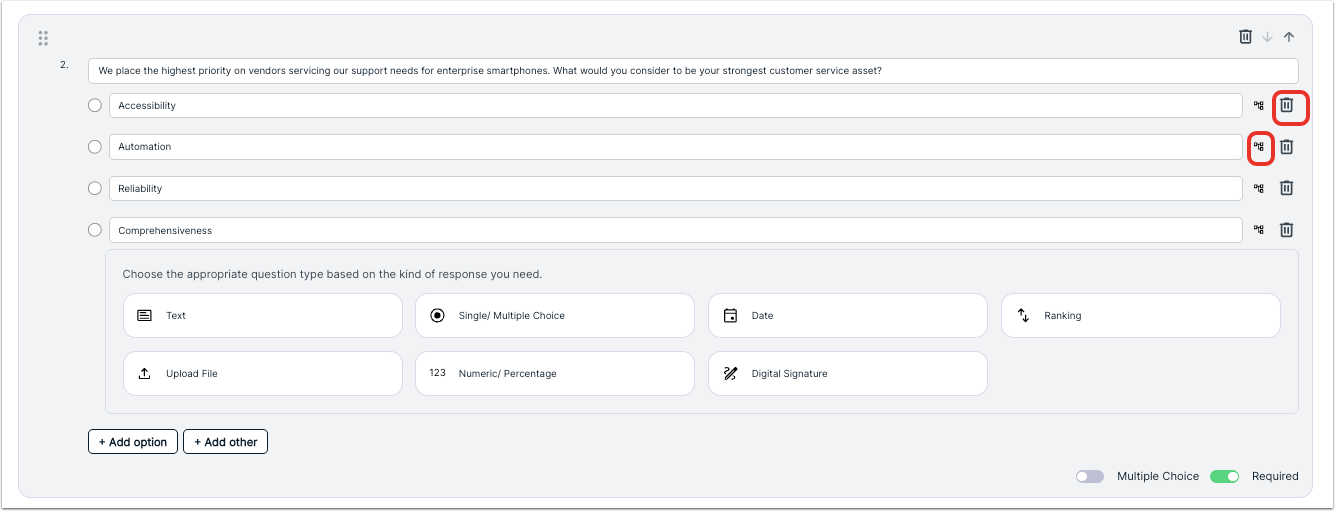
Single/Multiple Choice: Needing a single or multiple choice response. Fill out the text field with your question and then Add Option(s) or Add Other to the possible responses. You can toggle whether to make this question Required and if you want to provide a Multiple Choice option. You can click the up/down arrows to move the question or click the Delete (trash can) to remove the question.
Note that you can also click on the Branch icon next to the Delete icon to add other sub-questions based upon the respondent's choice.
Numeric/Percentage: Add a question that requires a number or percentage format in the answer. Fill out the text field with your question. You can toggle whether to make this question Required and/or a Percentage. You can click the up/down arrows to move the question or click the Delete (trash can) to remove the question.

Date: Add a question that requires a date or date range in the answer. Fill out the text field with your question. You can toggle whether to make this question Required and/or a Date Range instead of a single date. You can click the up/down arrows to move the question or click the Delete (trash can) to remove the question.


Digital Signature: Add a place to upload a digital signature (which will restrict uploads to image file types). Fill out the text field with any instructions. You can toggle whether to make this signature Required. You can click the up/down arrows to move the question or click the Delete (trash can) to remove the question.

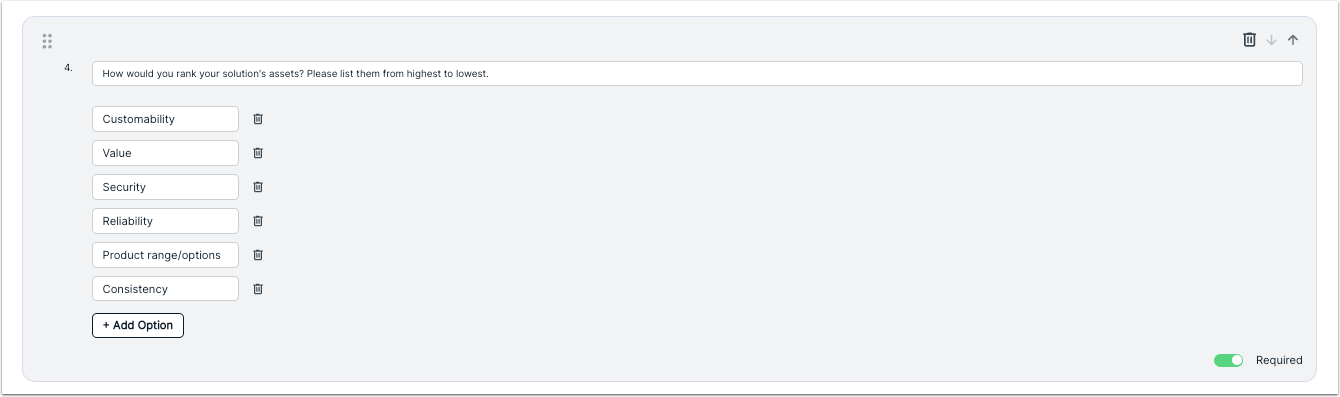
Ranking: Add a question that requires ranking of answers. Fill out the text field with your question and click Add Option to add options for ranking; click the Delete (trash can) to remove an option. You can toggle whether to make this question Required. You can click the up/down arrows to move the question or click the Delete (trash can) to remove the question.
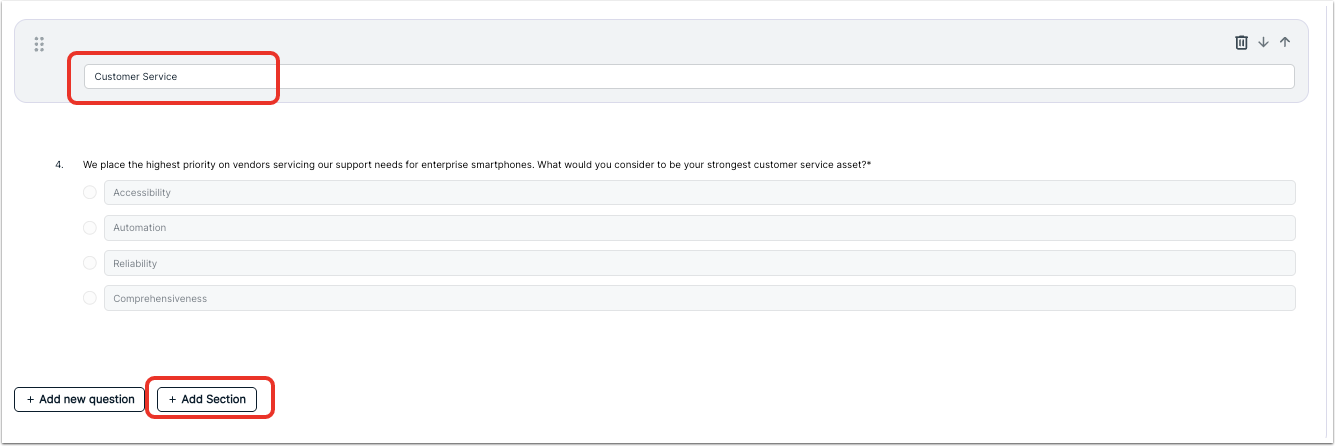
You can also click Add Section to add a new section to your questions. You'll have to fill in a section title; once you do, you can drag-and-drop questions underneath it or move the entire section.
You can click the up/down arrows to move the section or click the Delete (trash can) to remove the section
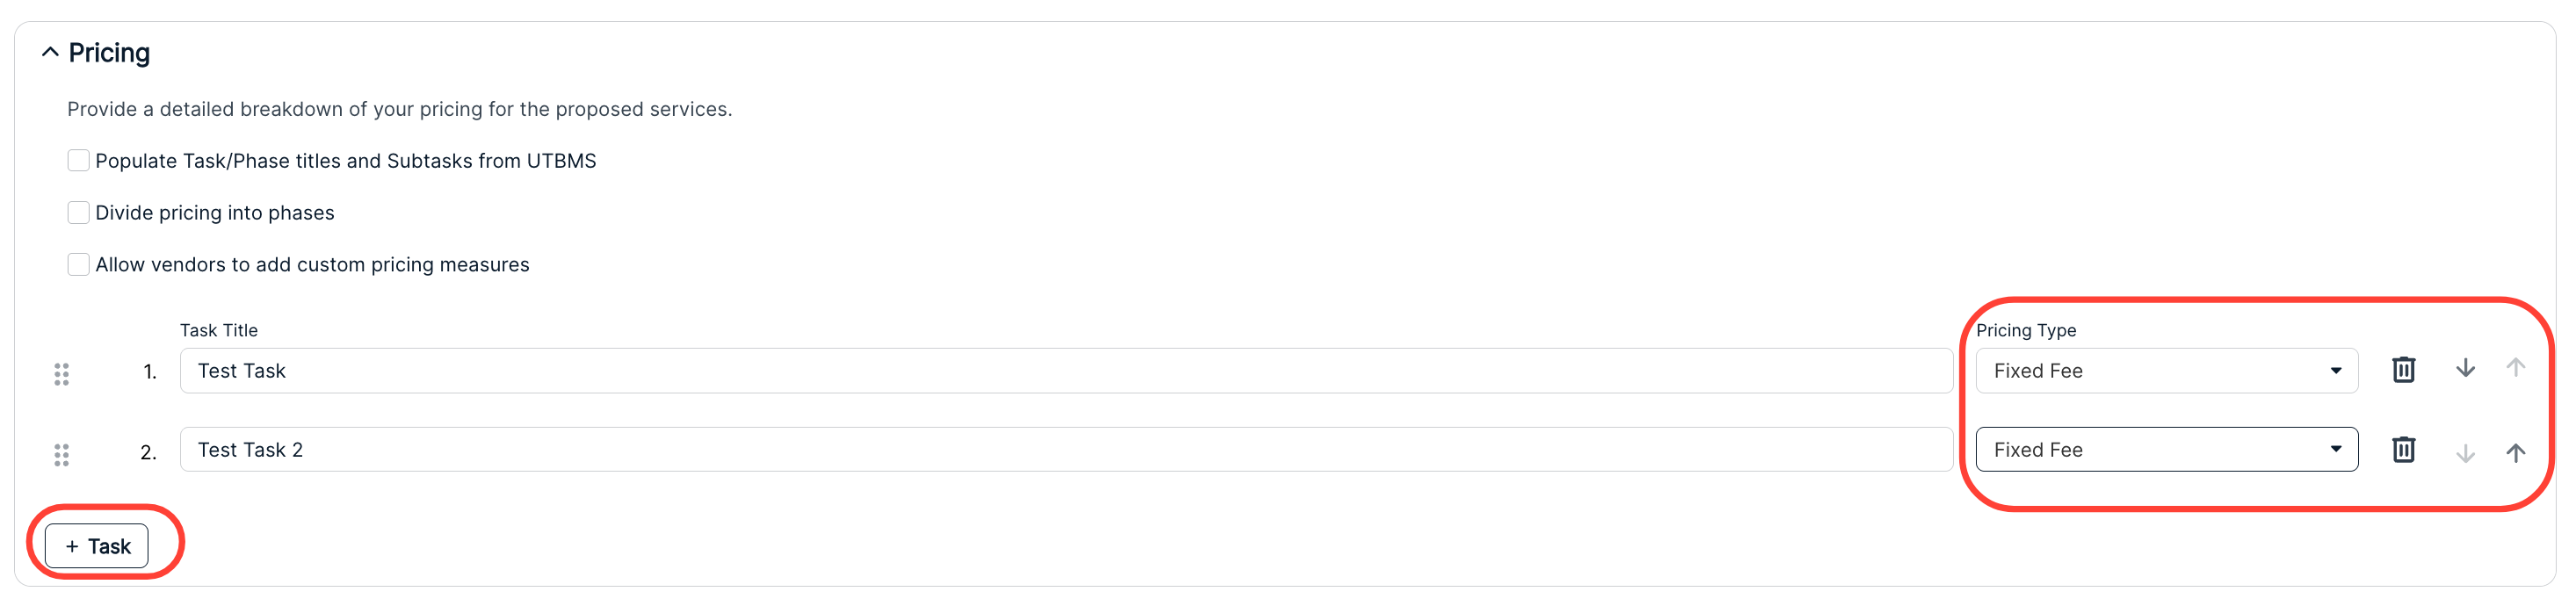
- The Pricing section, where you can provide a detailed breakdown of your pricing for the proposed services. Here, you can choose to:
- Populate Task/Phase titles and Subtasks from UTBMS
- Divide pricing into phases
Allow vendors to add custom pricing measures

Click on Task to add a task to the pricing; you'll have to add the Task Title and choose the Pricing Type (Fixed Fee or Hourly Fee)from the drop-down menu. Click the Delete (trash can) option to remove a task and use the arrows / dot symbols to move the tasks up or down on the list.
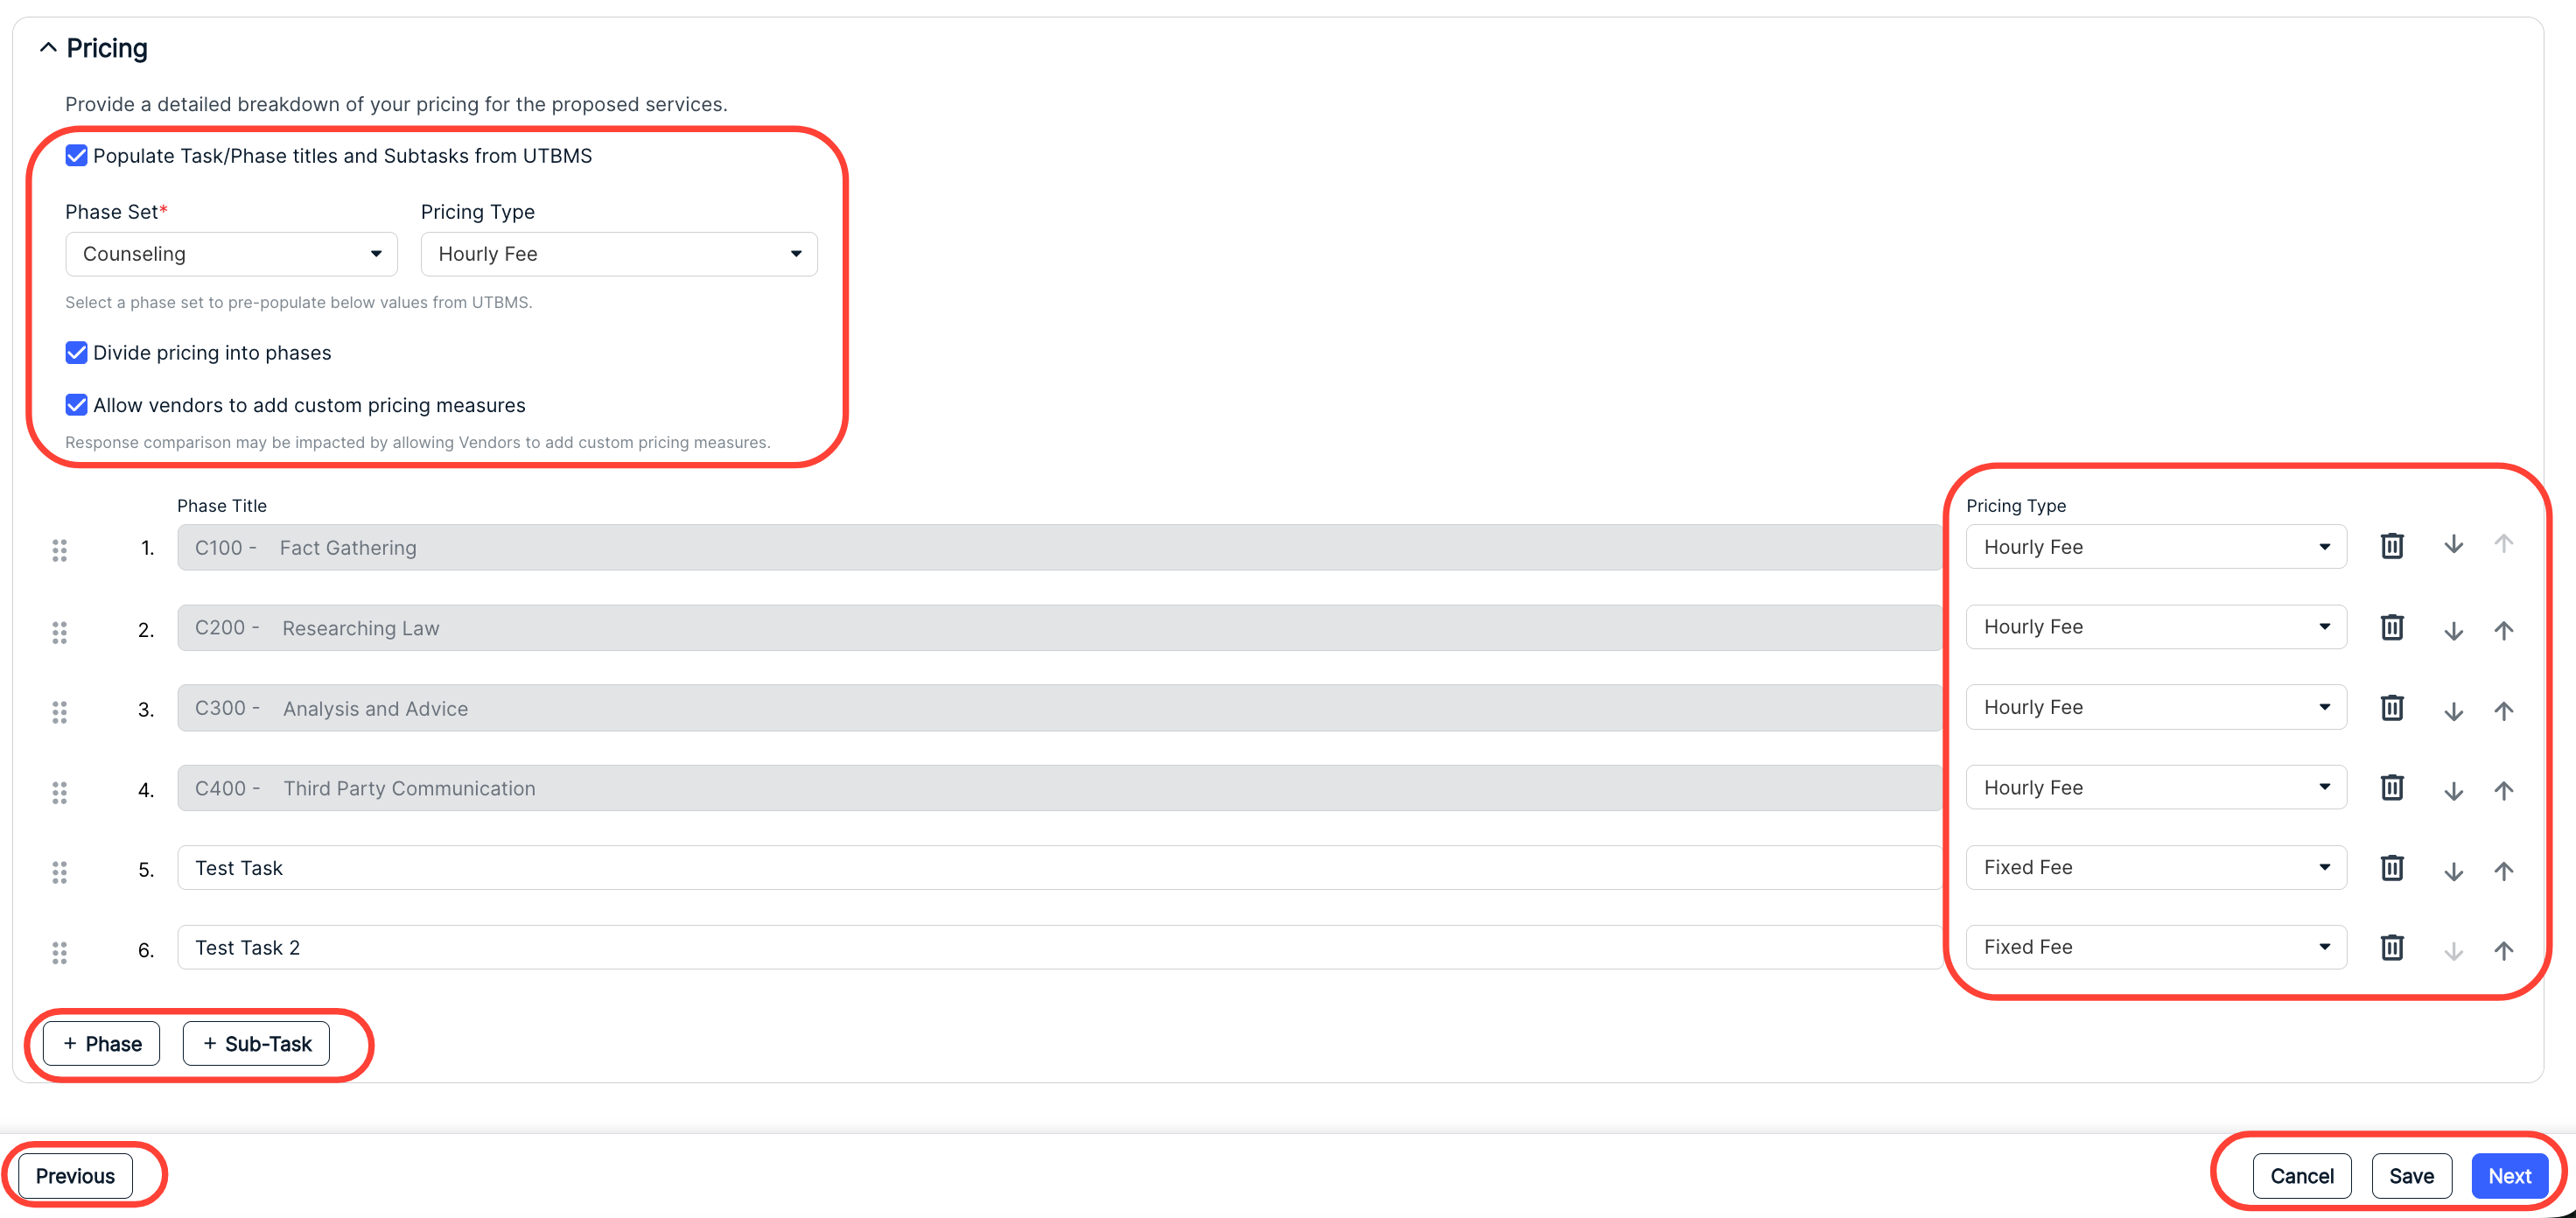
If selected, users can choose the Phase Set and Pricing Type from drop-down menus; phase information will automatically populate. Users can specify the Pricing Type (either Hourly Fee or Fixed Fee, with more options coming soon), use the Delete (trash can) icon to delete a phase or sub task, or use the up/down arrows or dot pattern icon to adjust the order.
Users can also click on the Phase or Sub-Task buttons to add custom phases or subtasks.
Click on Next to move to the next stage or click on Save to save the in-progress RFP. You can also click Cancel to end your work, or click Previous to return to the previous screen.
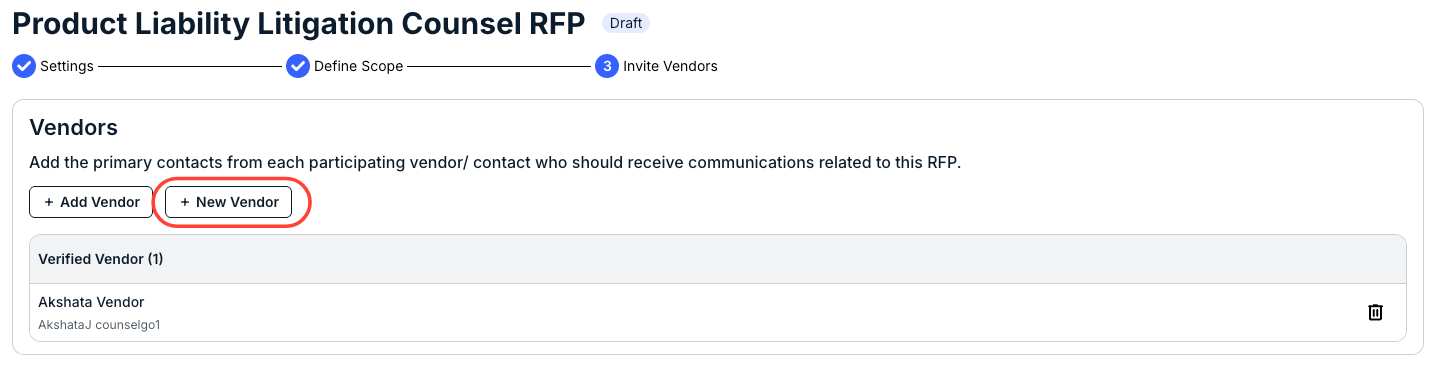
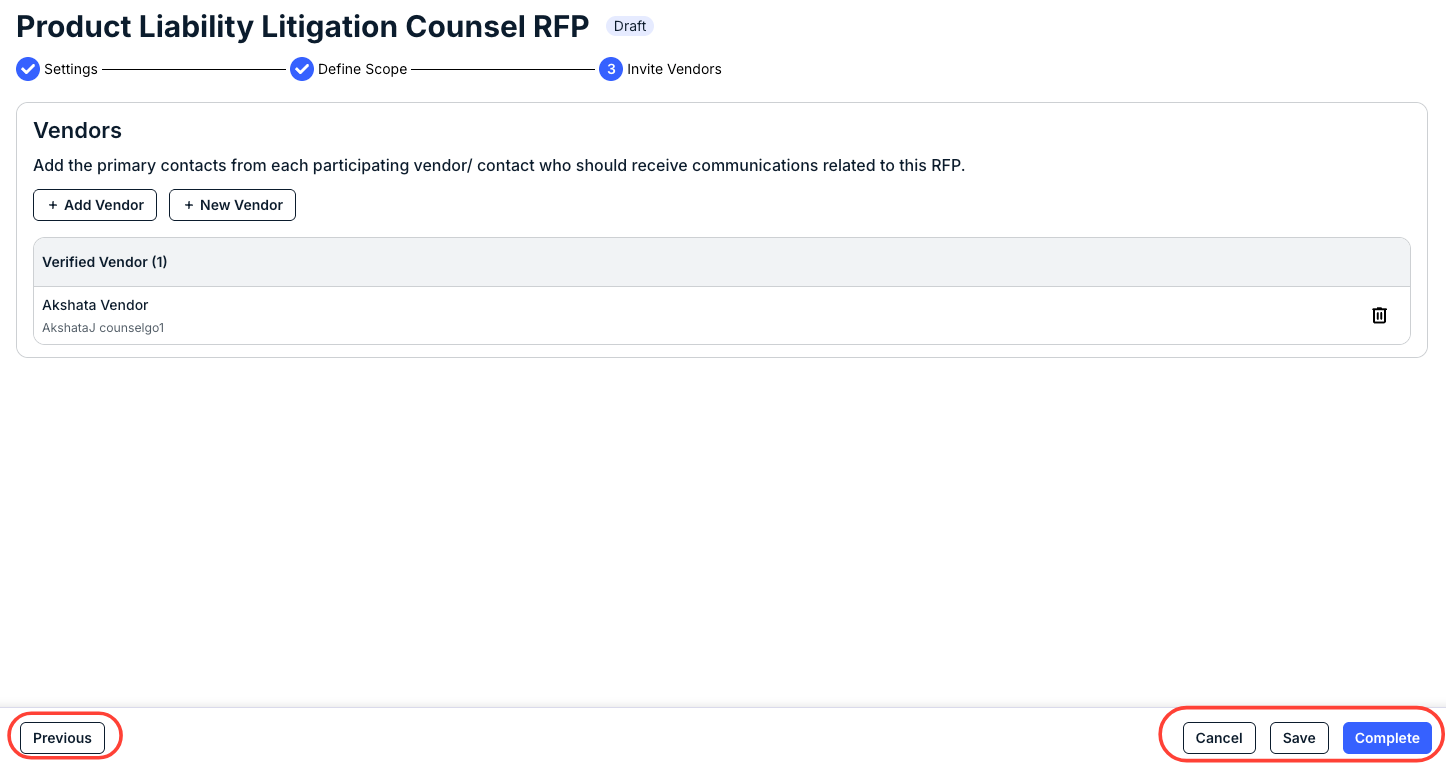
- Inviting Vendors
Finally, you'll move to the Invite Vendors/Contacts screen. There, you can invite vendors and contacts to receive the RFP. Click Add Vendor to add an existing vendor, or New Vendor to add a new vendor.

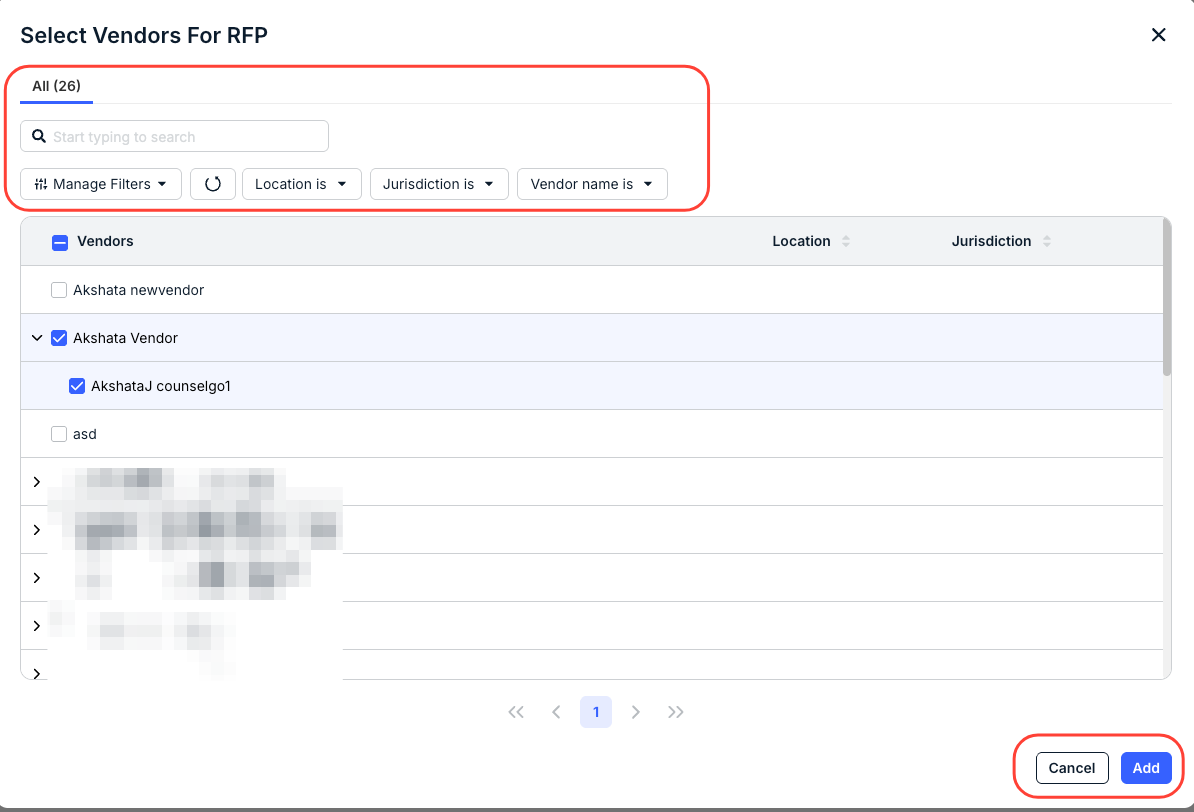
- Click Add Vendor to add an existing vendor.
You can use the Manager Filters or the top drop-down menus to customize which vendors you see on the screen, or use the search bar to find a specific vendor. The screen will display the name of the Vendors, their Location, and their Jurisdiction. Click the up/down button at the top of every column to sort by that column. Click the up/down arrow next to a specific vendor to select individual vendor contacts, or use the main check box to message all the vendor contacts.
Click the check boxes next to the vendor contacts you want to add (or click the top check box to add all of them for the vendor) and then click Add to add the vendor(s) or Cancel to back out.
- The vendor will display on the main screen as a "Verified Vendor."
Click the Delete (trash can) button to remove the vendor.

- Click New Vendor to add an entirely new vendor.
You'll have to fill out the:
- Vendor Name
- Currency
- Contact Person Name
- Contact Person Email ID
- Contact Number (Optional)
Fields with an asterisk (*) are required.
Click the +Contact Details to add another contact person. You can click the Delete (trash can) icon to delete the contact person.
Click Add to add the contact or Cancel to back out.

The New Vendor will show up as an Unverified Vendor in the system.

- Once you've added all your vendors, click on Complete to send out the RFP, Save to save your progress, Cancel to back out entirely, or Previous to go to the prior page.
Creating a Proposal from an Existing Proposal
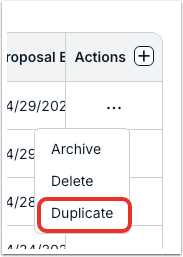
Note that you also have the option to create a proposal from an existing proposal by using the Duplicate action. You can do this one of two ways:
1) From the Actions menu on the main RFP directory
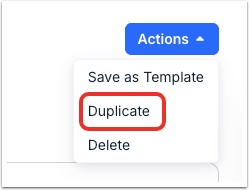
2) Or, from the Actions menu on the upper-right-hand corner of the screen after opening up a proposal detail page.
Either one will create a direct copy of the RFP in Draft stage, copying over all of the details for Settings, Scope, and Invite Vendors. You can find the copy in the main RFP directory.

- Click Add Vendor to add an existing vendor.
- Viewing Proposal Details
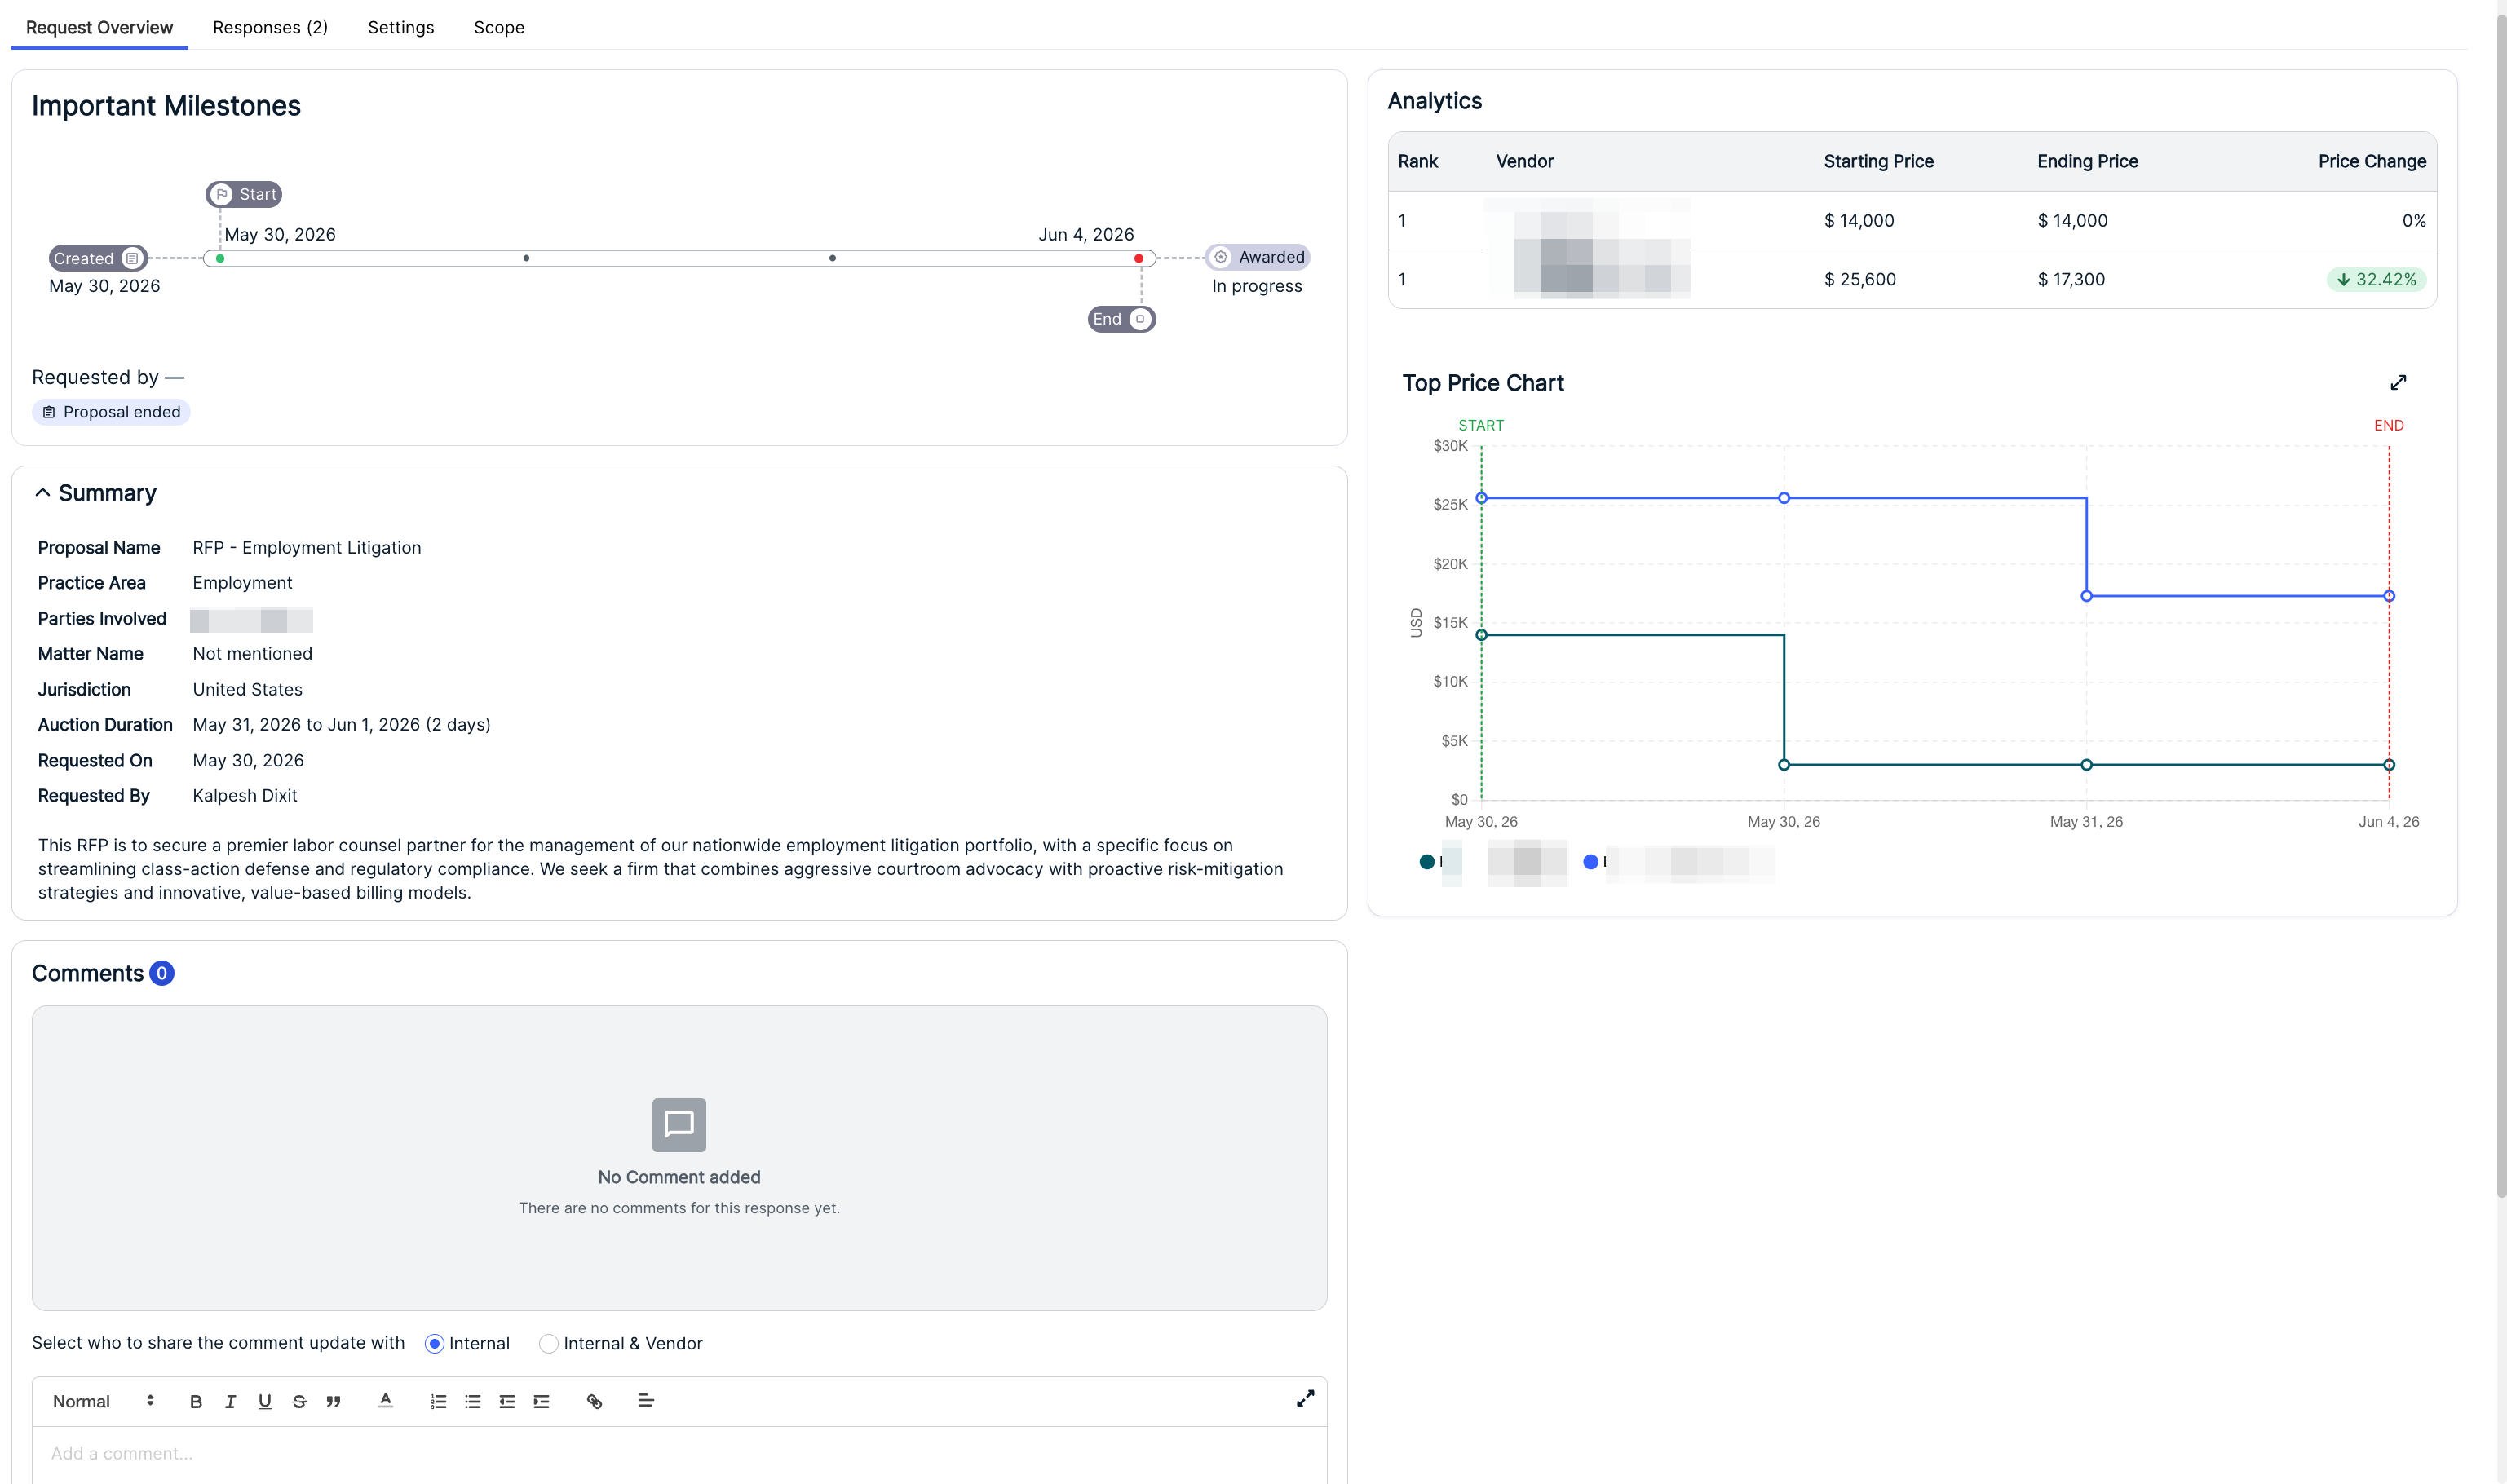
When you click on an individual proposal, you'll see the RFP details page. Use the top tabs to switch between the Request Overview, the Responses, RFP Settings, and the Scope.
The Request Overview delivers:
- Important Milestones for the proposal; this will show key dates (creation, awarded, RFP deliveries)
- Analytics about the proposal, including a Top Price Chart and comparison of bids in the Reverse Auction.
- A Summary of the proposal, with key information
- Any Questions included in the proposal and a place to provide Comments
- Click into Responses to view the RFP responses.
Here, you can see the response details, including Rank, Score, Total Pricing, COI Status and Total Hours. Click the up/down arrow on top of each column to sort by that column. Use the search bar to search for vendors. Graphs on the side of this screen will allow you to Compare Total Price, Compare Total Hours, and other important metrics.
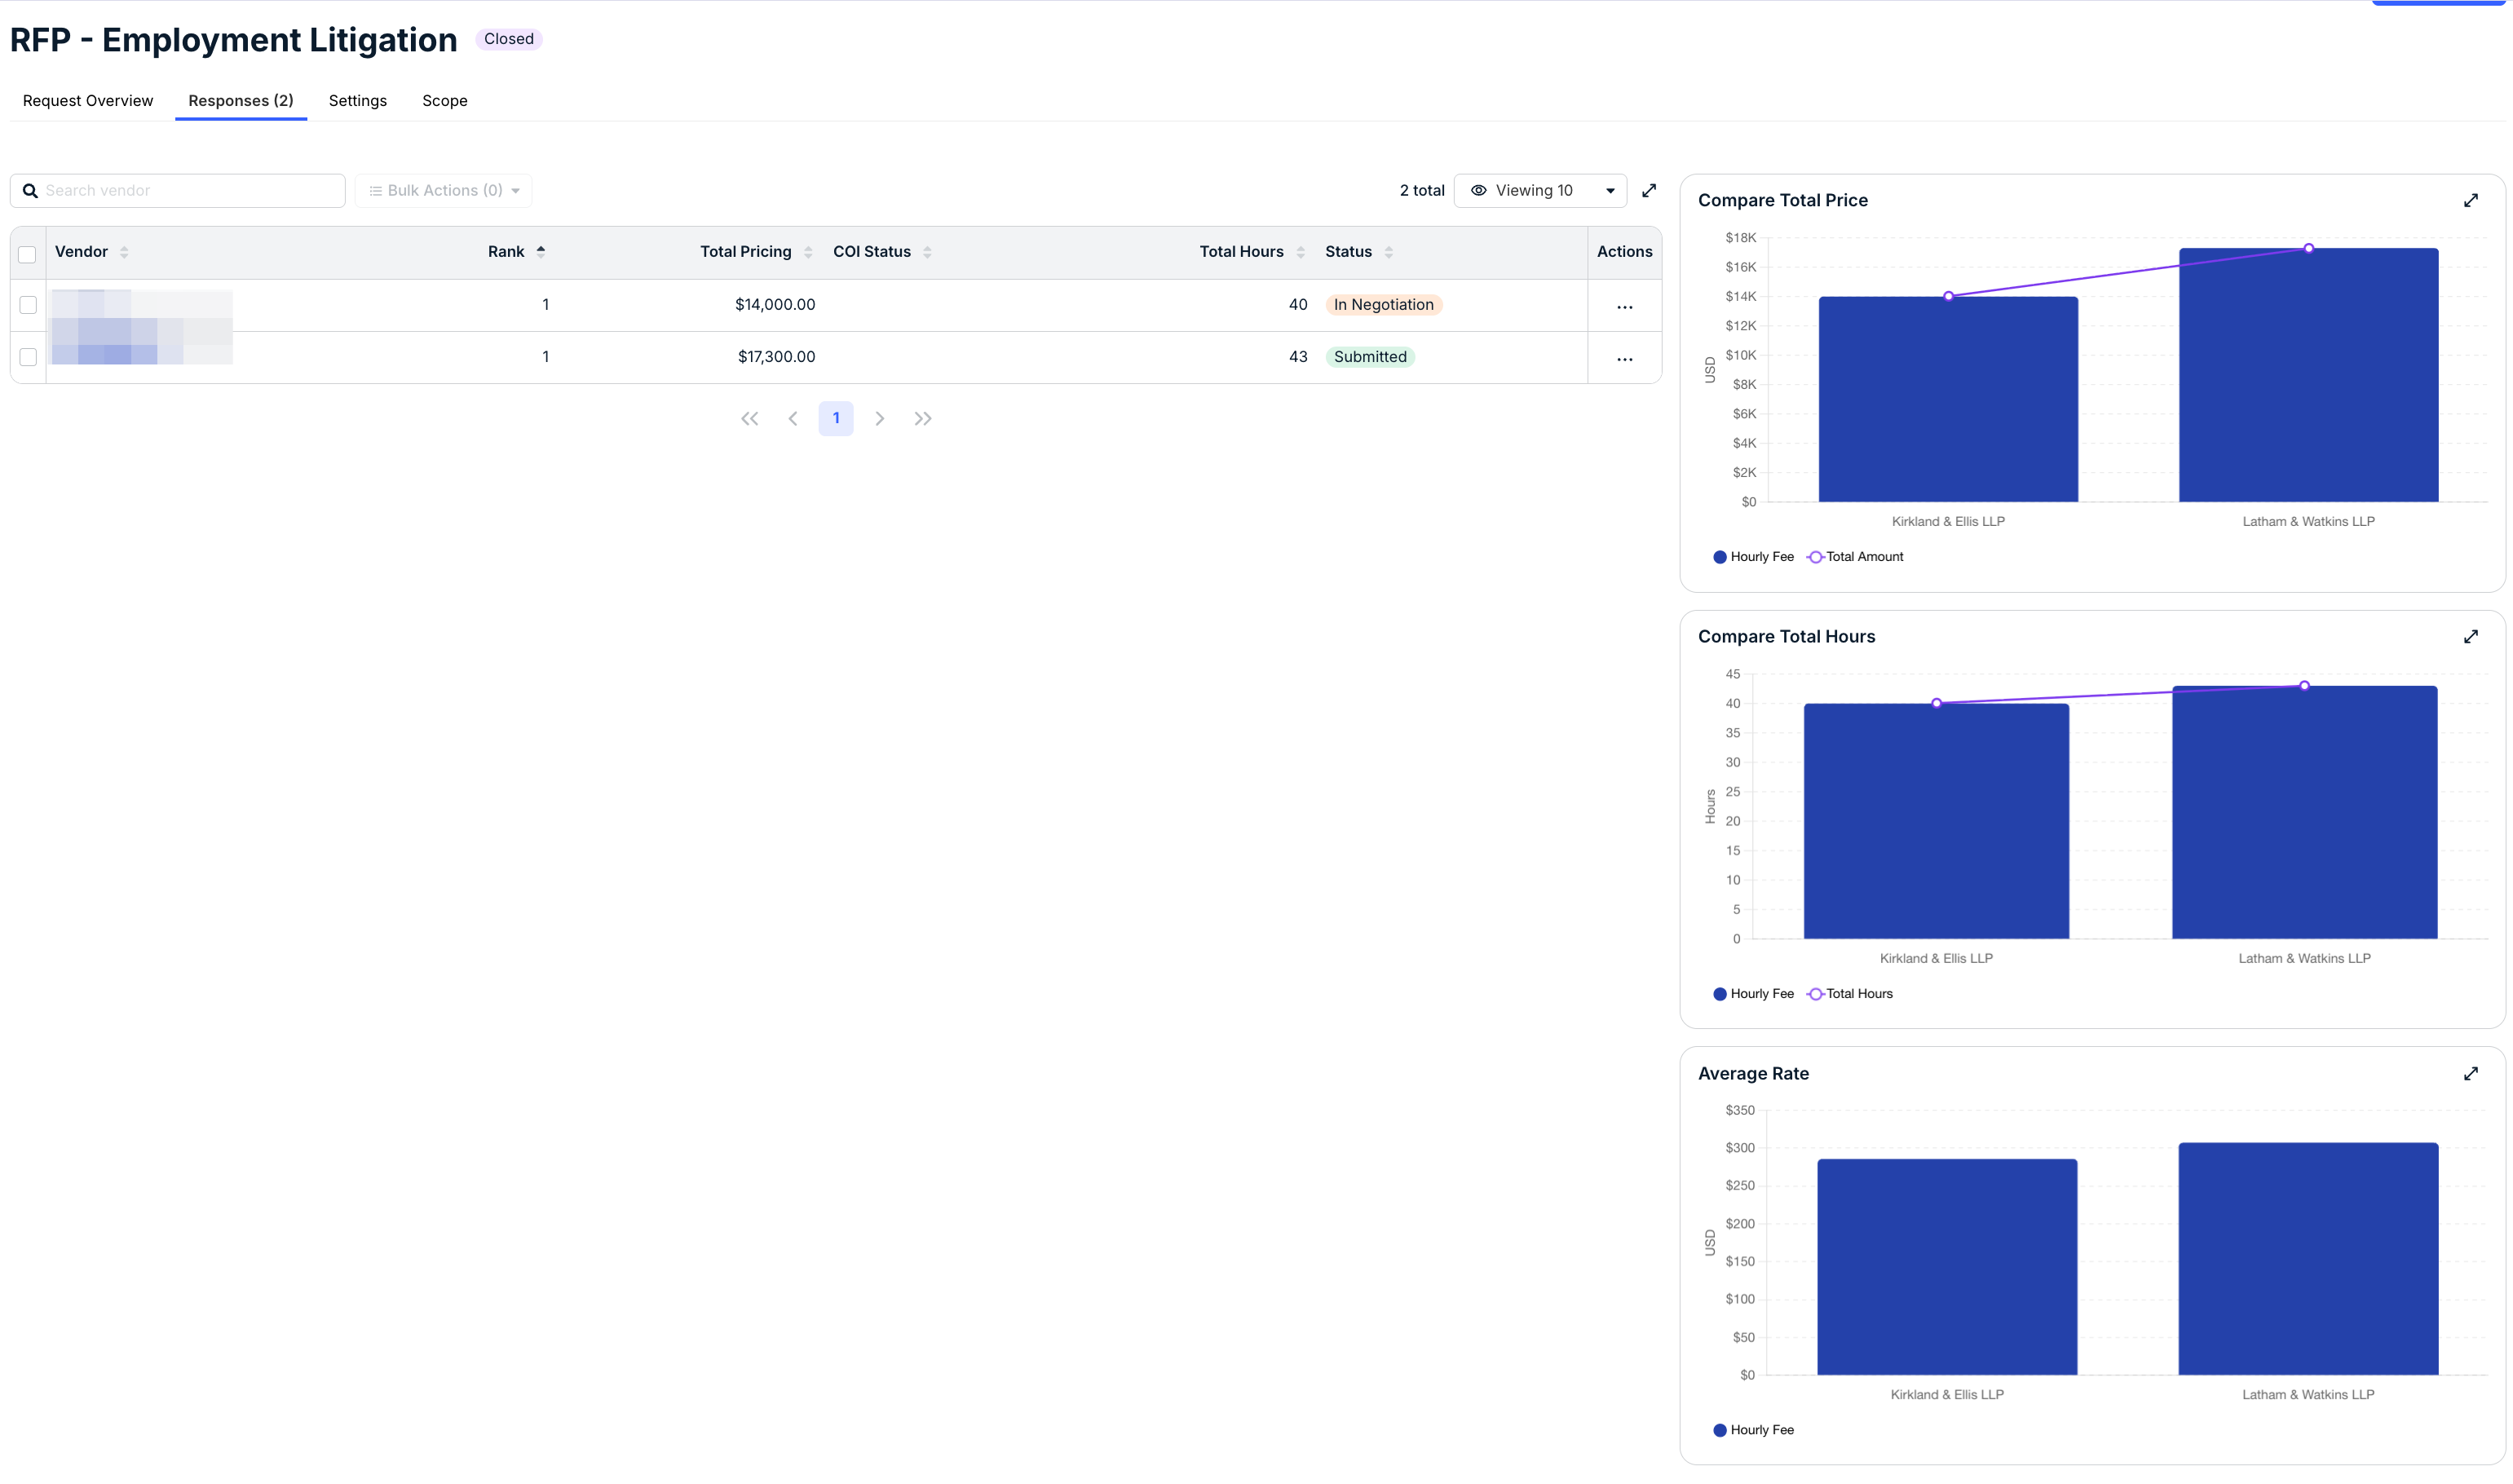
- Use the check boxes and the "Compare" option under "Bulk Actions" for a quick comparison between proposals.
You can also click the Download PDF to download the proposals in PDF versions.

The Compare Proposals screen will allow you to get a quick comparison breakdown of the proposals sent in. Click the up/down arrows next to each left-hand heading to display or minimize the information.

Note that you can also download the responses as individual PDFs by clicking the three-button Actions menu and then Download PDF.

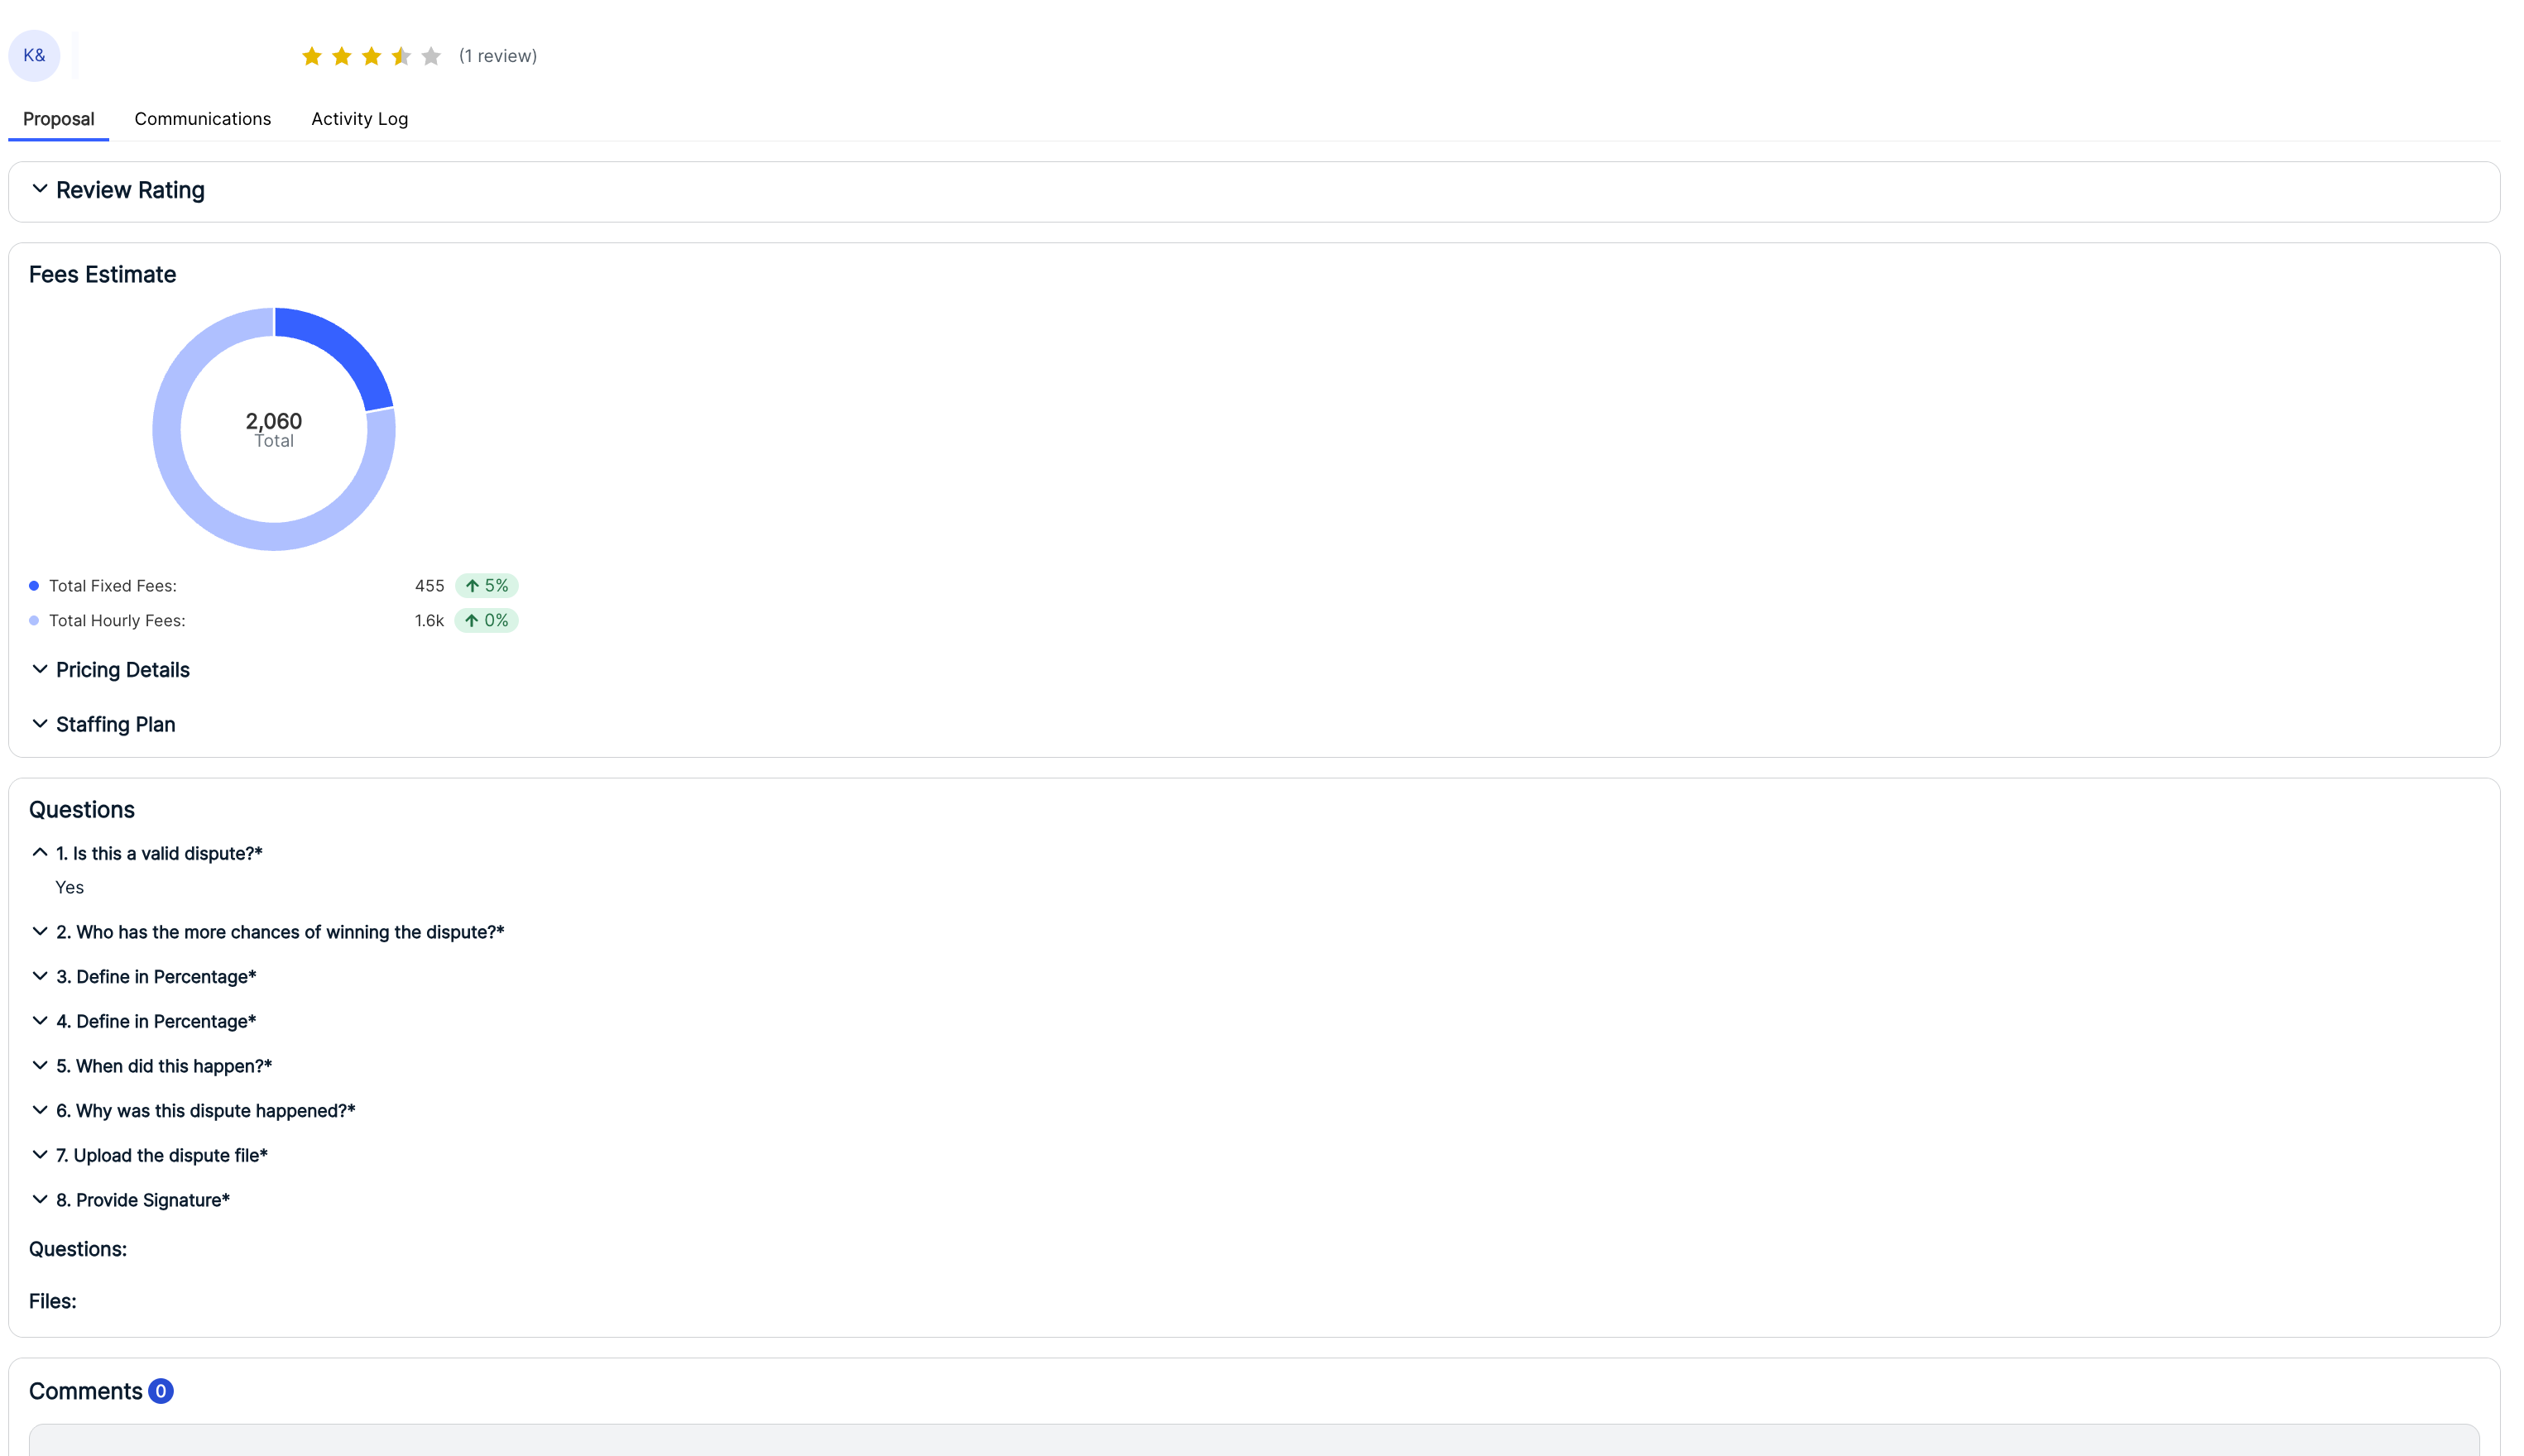
- Click into the proposal to view the response details and evaluate it.
Users will be able to provide a Review Rating, view the responses to the Questions, the Fee Estimates, and can use the Comments section to communicate back and forth with the vendor.
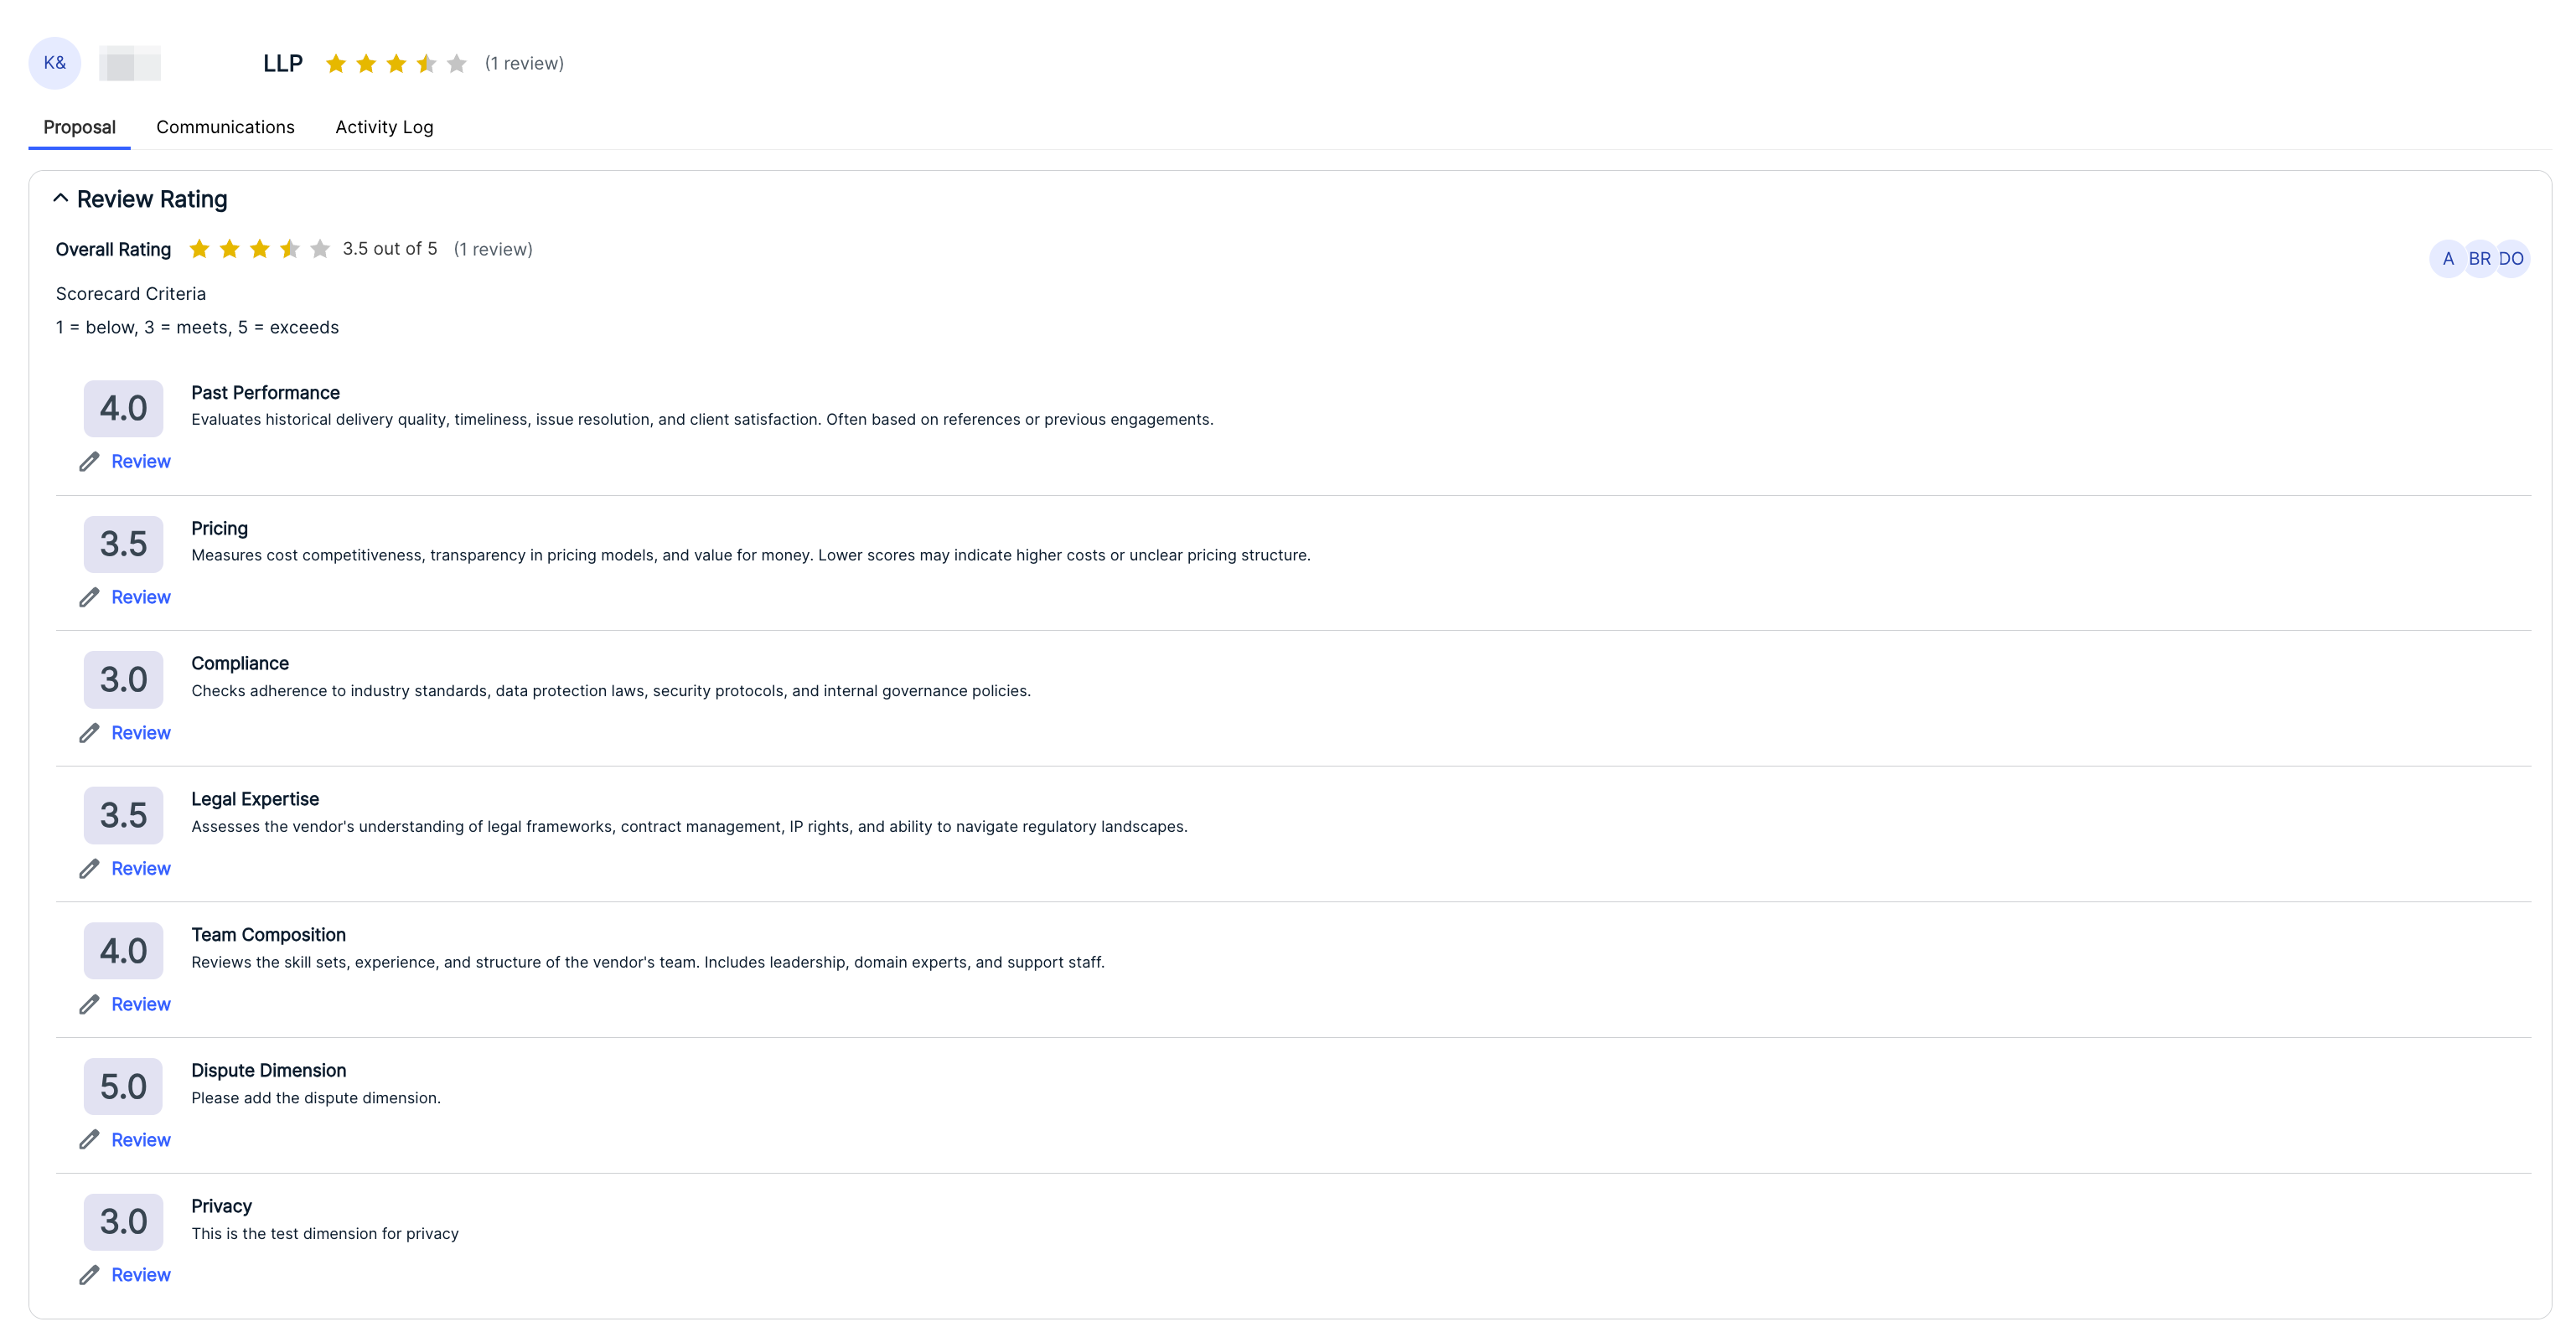
- Users can click on the Review button on the Scorecard Criteria to evaluate the different parts of the proposal.
Users can rate on a scale of 1-5 stars, add comments, and view existing reviews. Click Submit to send in the review or Cancel to back out.
- Click the "Negotiation" option to continue negotiating with the client.
If the pricing after the reverse auction is not satisfactory, but you still want to work with the firm, you can use this tool to continue negotiating.
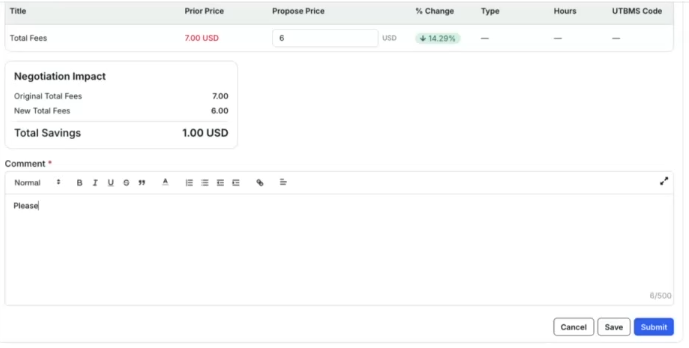
Here, you can update the Total Fees and Sub-Task Fees. The Negotiation Impact screen will display updated numbers to reflect the impact.
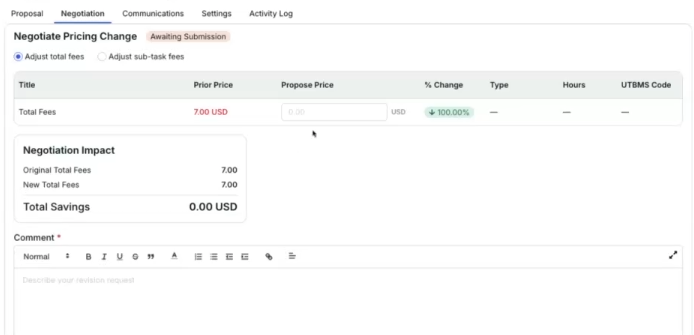
You can add any Comments to the negotiation on this screen. Hit Submit to send the negotiation in, Save to save your work and come back later, or Cancel to back out.
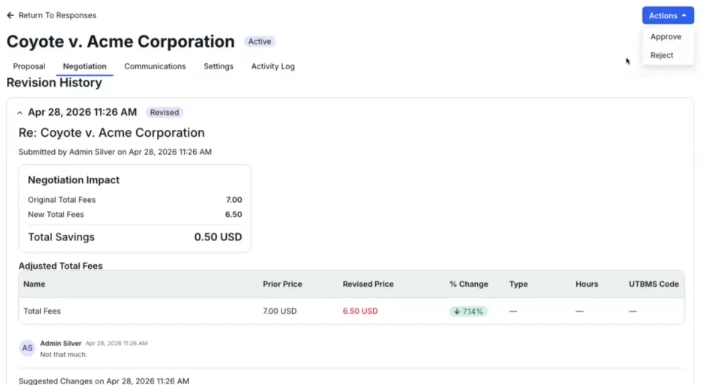
The vendor will send back their negotiated rate. From there, you can Approve or Reject their submission.
- The Settings tab lets you adjust key settings for the proposal.
You can adjust the Proposal Setup, Approval Setup, Involved Parties and Conflicts, and Review Rating Setup.
See the Starting a New Proposal section for details on editing these proposal elements. Note that these can only be adjusted if not published.
Click Save to finalize any changes or Cancel to back out.

RFP Vendors
Go to RFP Vendors to view and edit your RFP vendors.
Users
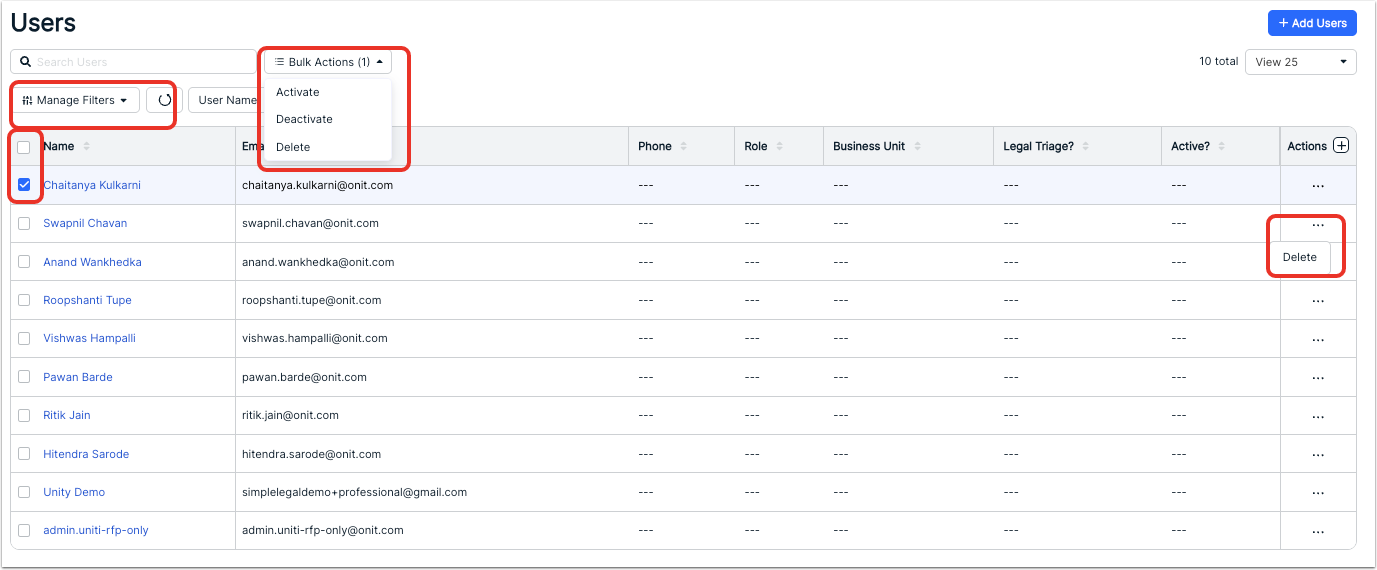
Go to Users to view, edit, and add RFP users. On the main page, you'll see the user Name, Email, Business Unit, Legal Triage status, Active status, and Actions (Delete a user). Click on an individual user to find more information on that user.
Click the up/down arrow next to each column to sort by that column. Use the search bar to search through existing users.
You can use the Manager Filters or top drop-down menus to customize what users you want to see on the screen, or use the search bar to search for a specific user. Click the View drop-down menu to customize how many users you want to see on the screen.
Click on the check box next to an individual user (or click the top check box to select all users) and use the Bulk Actions menu to Activate, Deactivate, or Delete users.
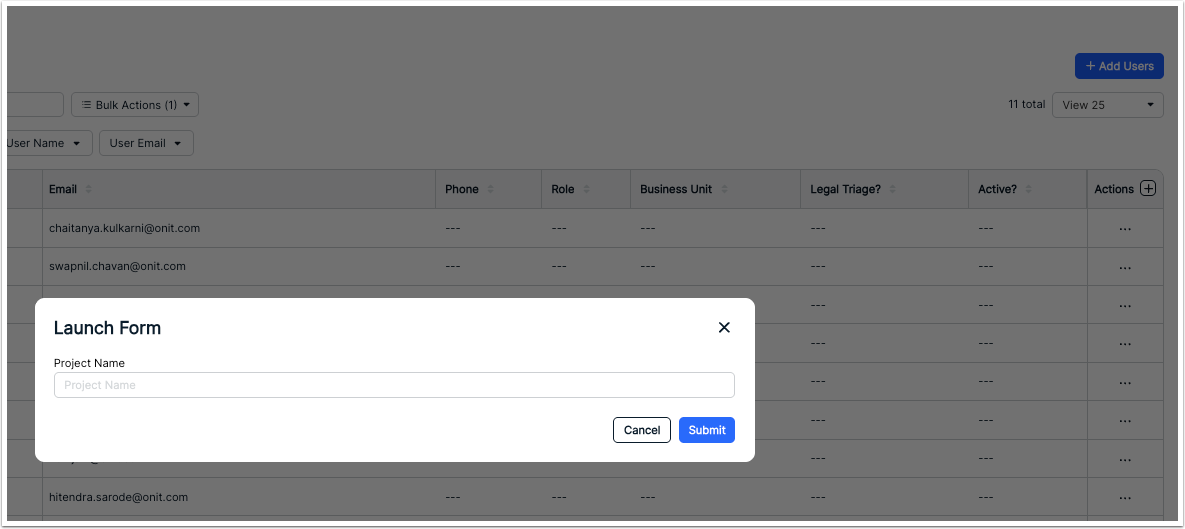
Click on Add Users to add a new user. Fill out the user information and click Submit to add the user.
Granting a Unity User Access to Unity RFP
Here's how to add a Unity user access to RFP:
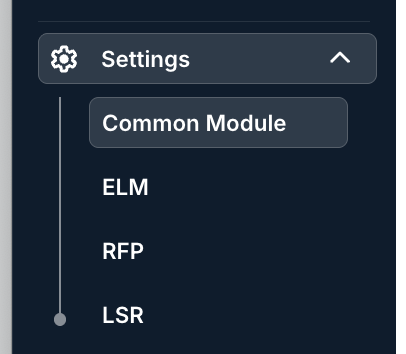
- Navigate to the "Settings" menu on the left-hand side menu within Unity and click on "Common Module."
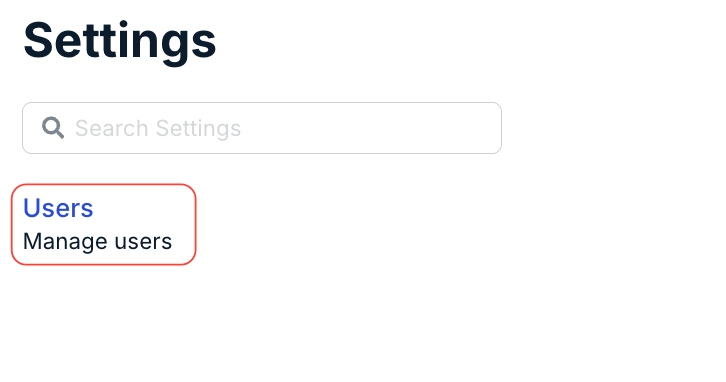
- Click on the "Users" link.
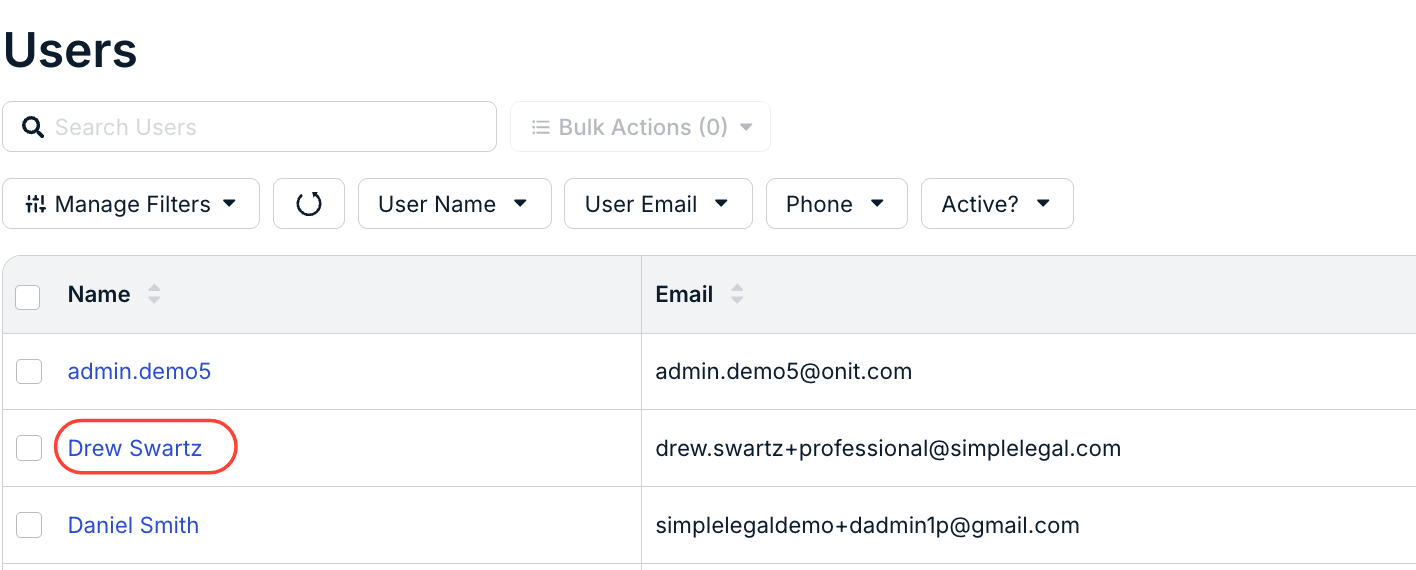
- Click on the user you want to grant access to.
- Click the "Actions" menu in the upper right of the screen and then click "Edit."
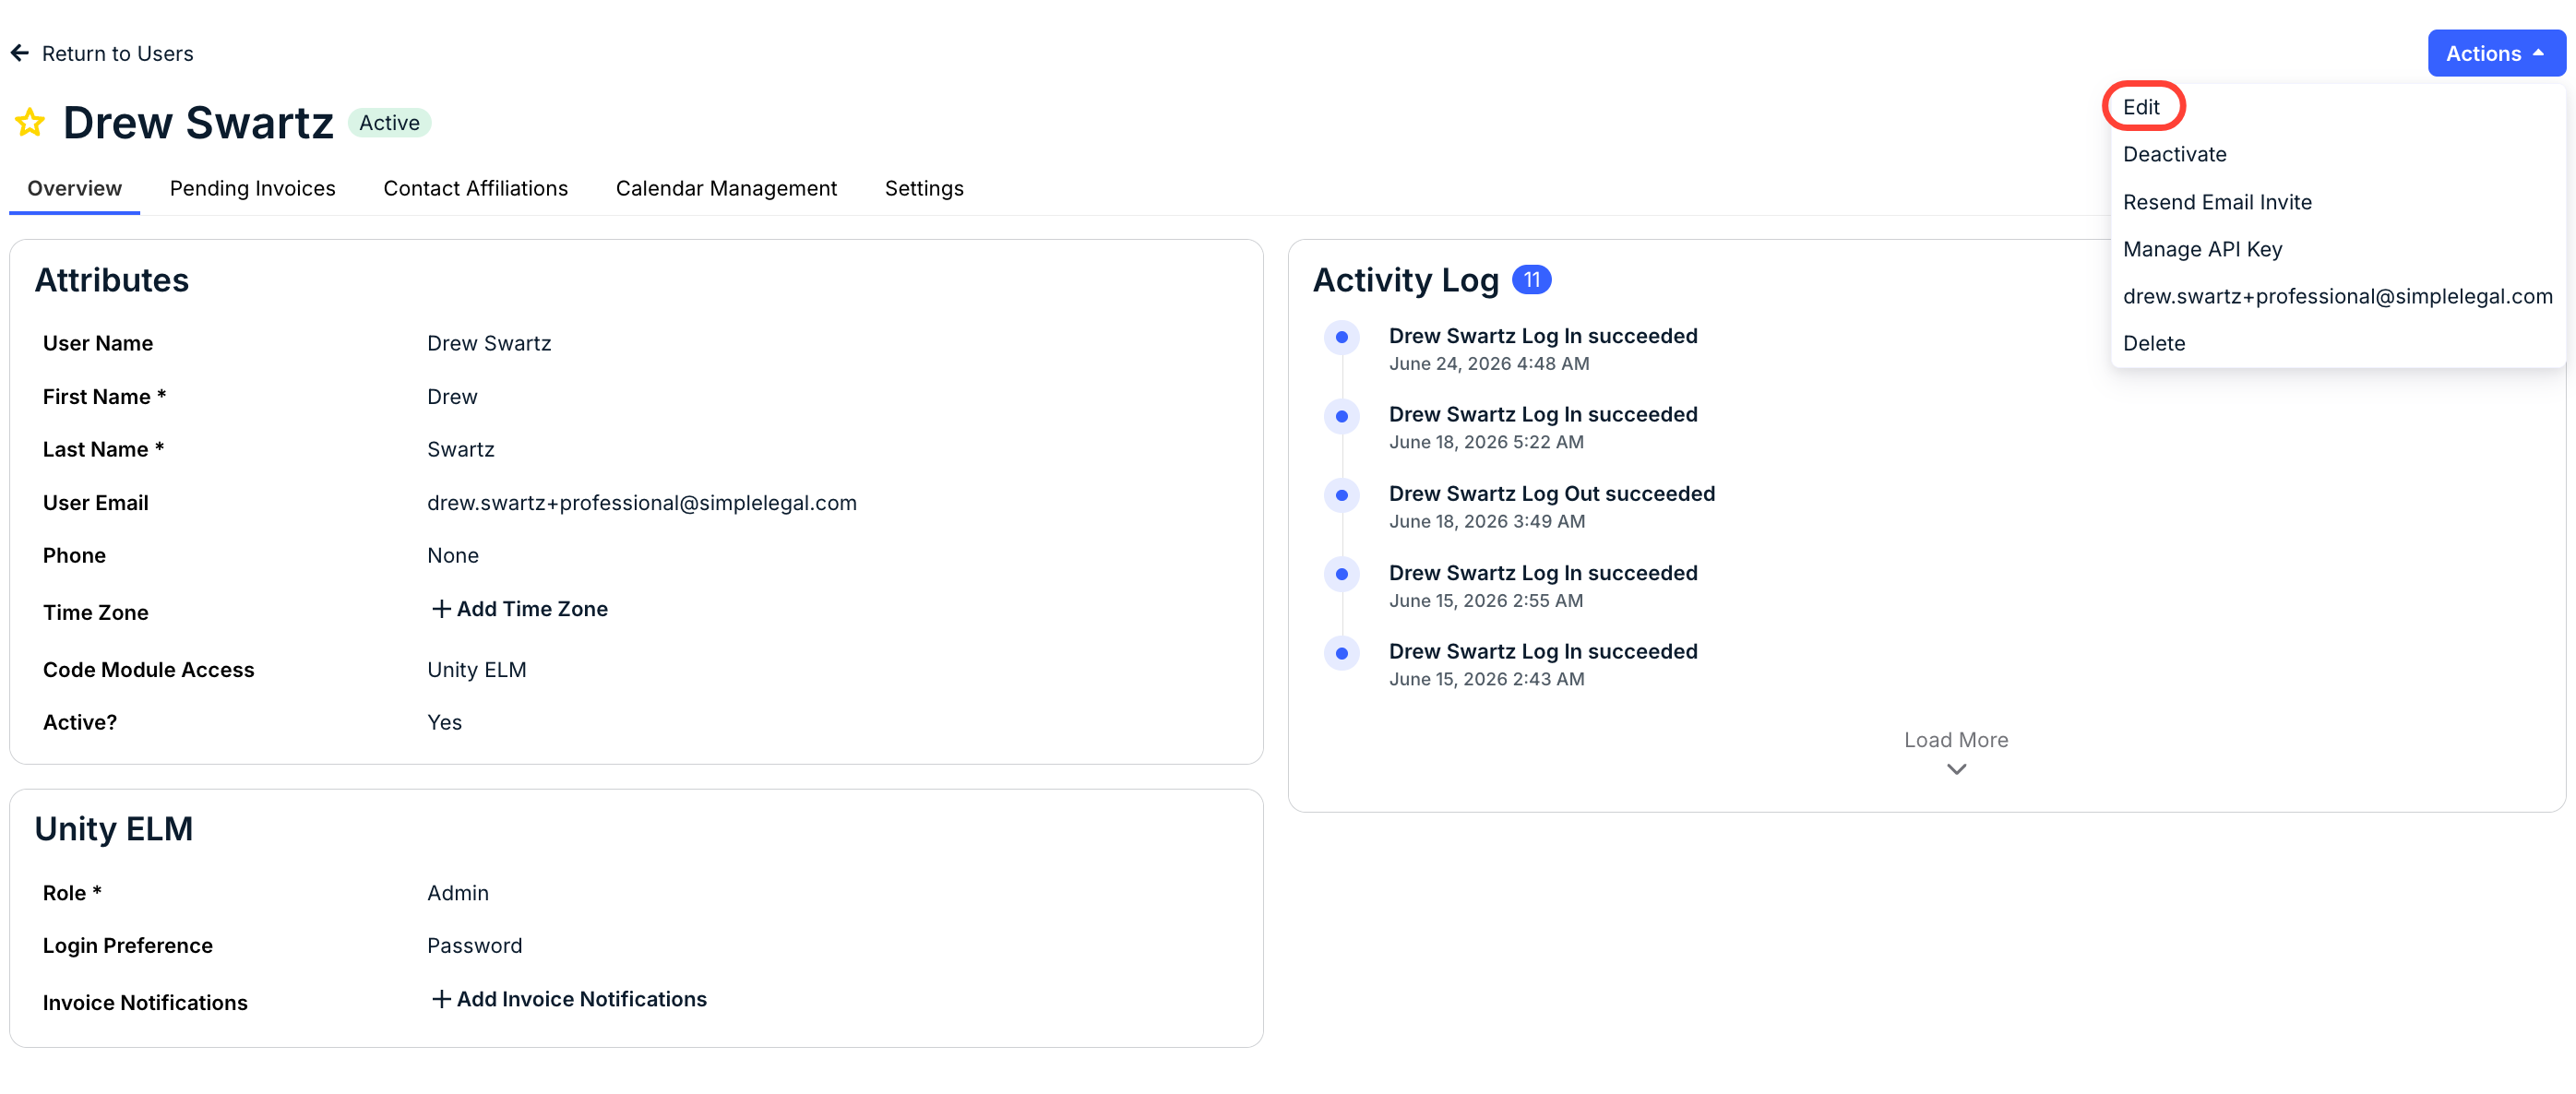
- Click the drop-down menu under "Code Module Access" and add "Unity RFP" to the Access field.
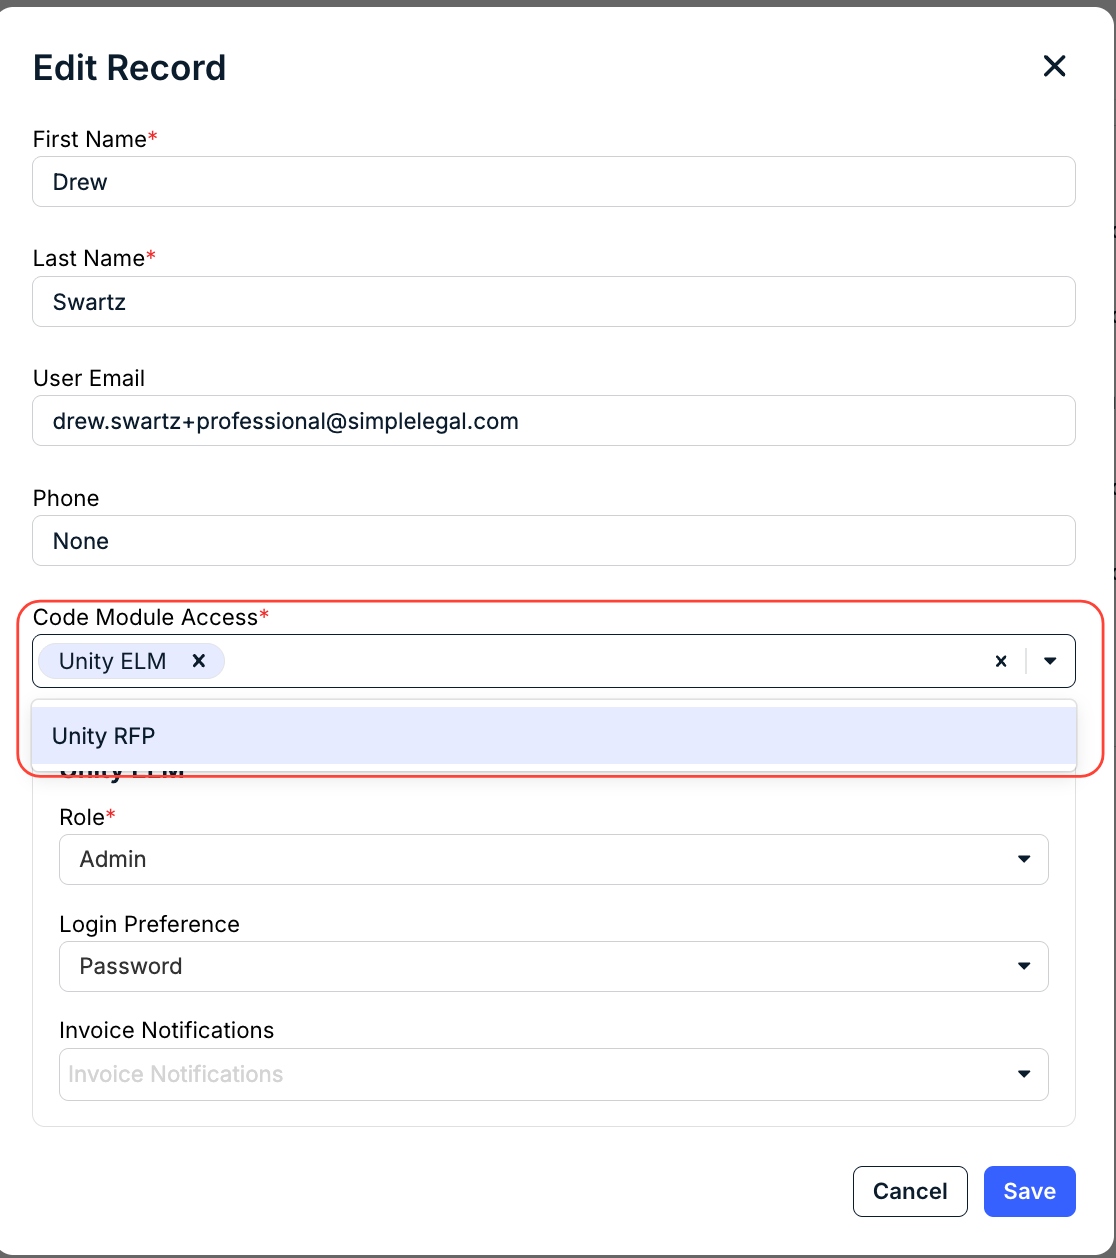
- Once you add Unity RFP to the record, the "Unity RFP" role tab will appear.
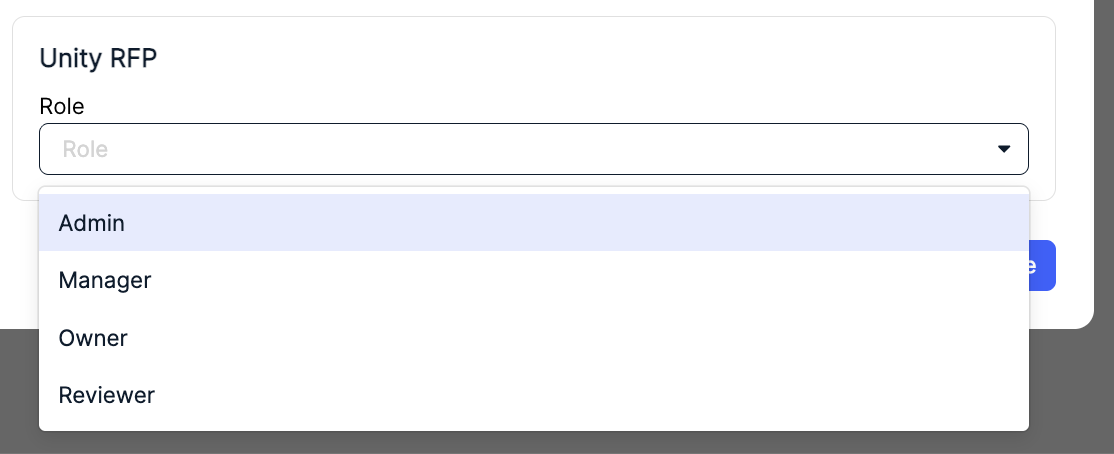
Assign the appropriate RFP Role:
- Admin: Full access to manage all RFPs, vendors, approvals, and user access
- Manager: Full access to create and manage all RFPs and vendors
- Owner: Access to create and manage their own RFPs based on permissions granted
Reviewer: Access to review RFPs and evaluate vendor submissions
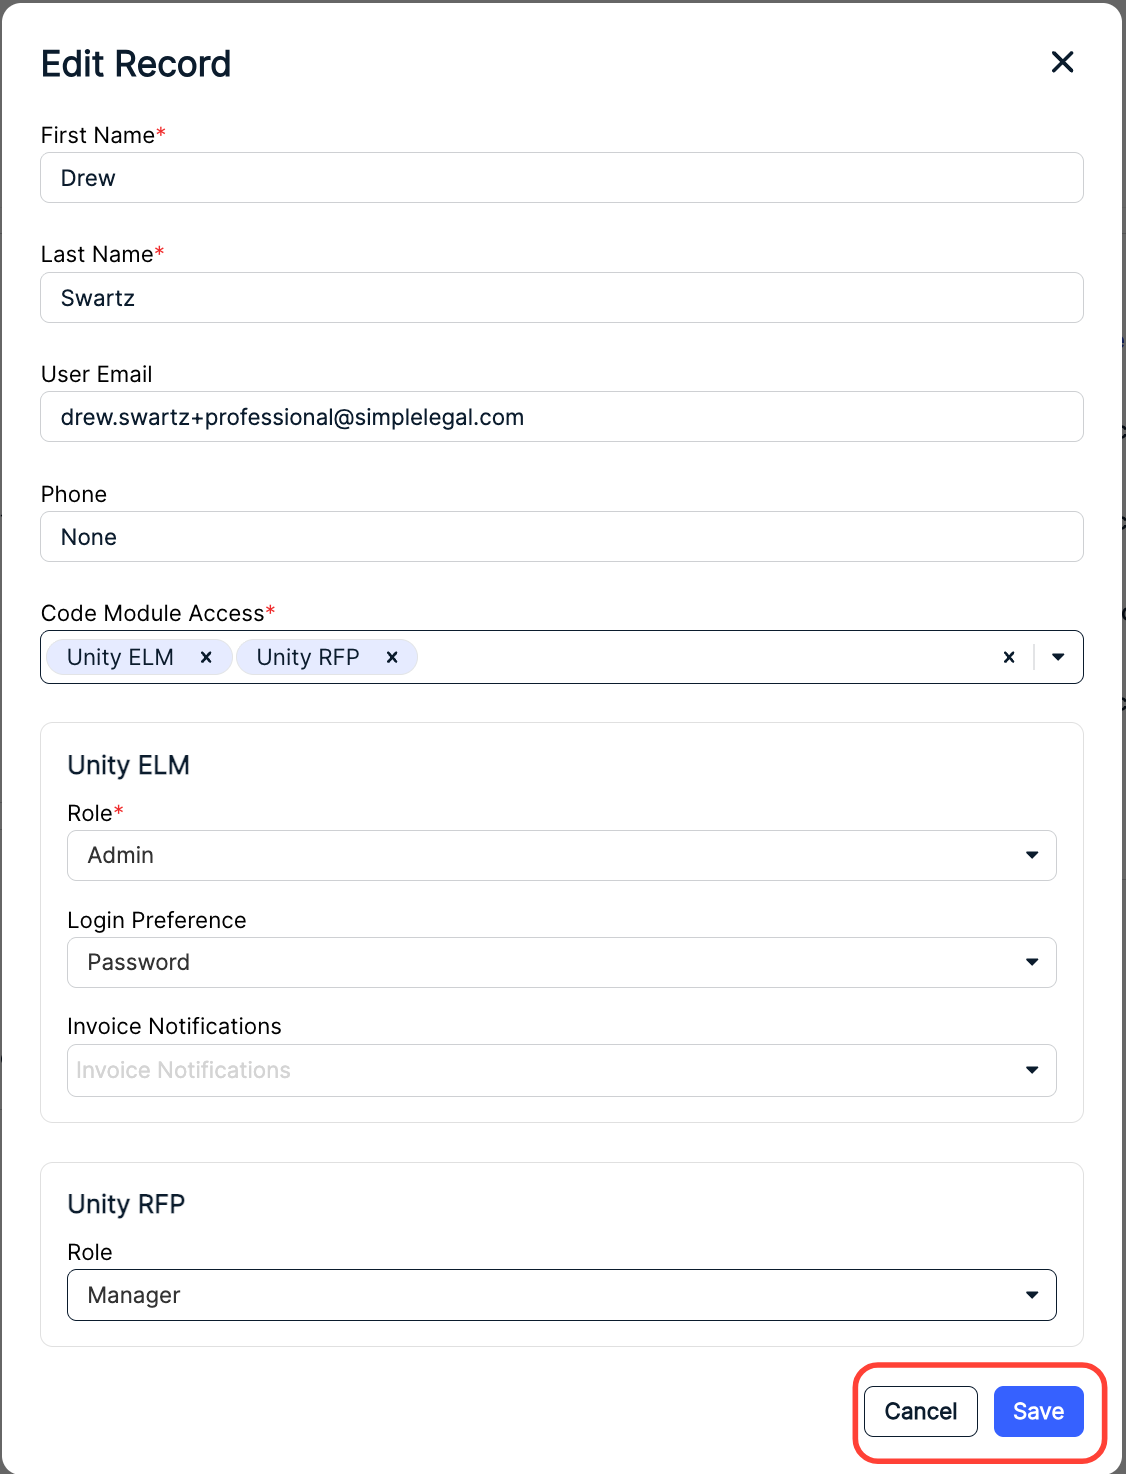
After you've selected the role, click Save to save the updated record or Cancel to back out.
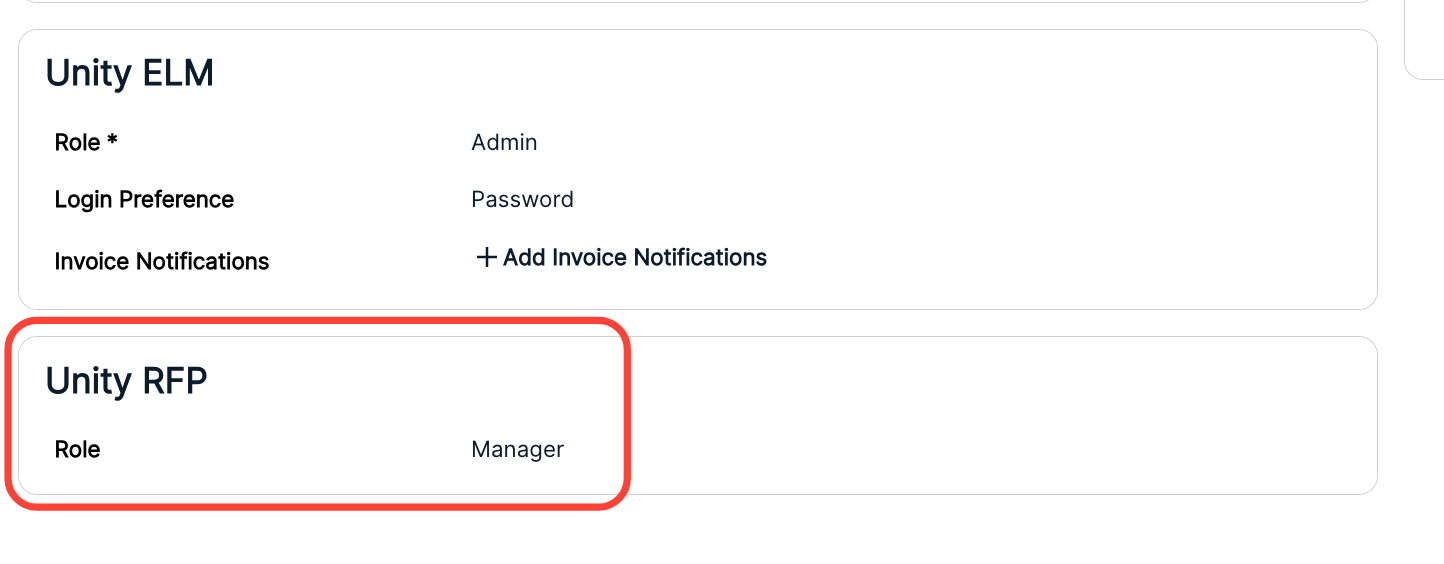
The updated user profile will now have their Unity RFP role.
- Once you add Unity RFP to the record, the "Unity RFP" role tab will appear.