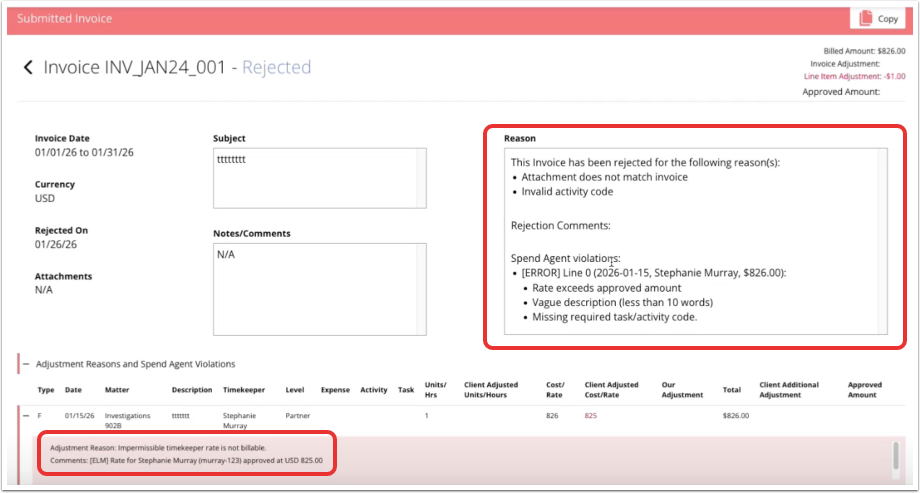
Onit's Spend Agent reviews invoices submitted by vendors against natural-language billing guidelines uploaded by Onit clients. It instantly reviews invoices, providing detailed AI summaries to clients; this enables them to make highly informed decisions on approving or disputing invoices and allows the user to choose whether the AI automatically approves or disputes invoices as they come in.
This guide will take you step-by-step through using Spend Agent in your invoice workflows.
The Spend Agent Dashboard
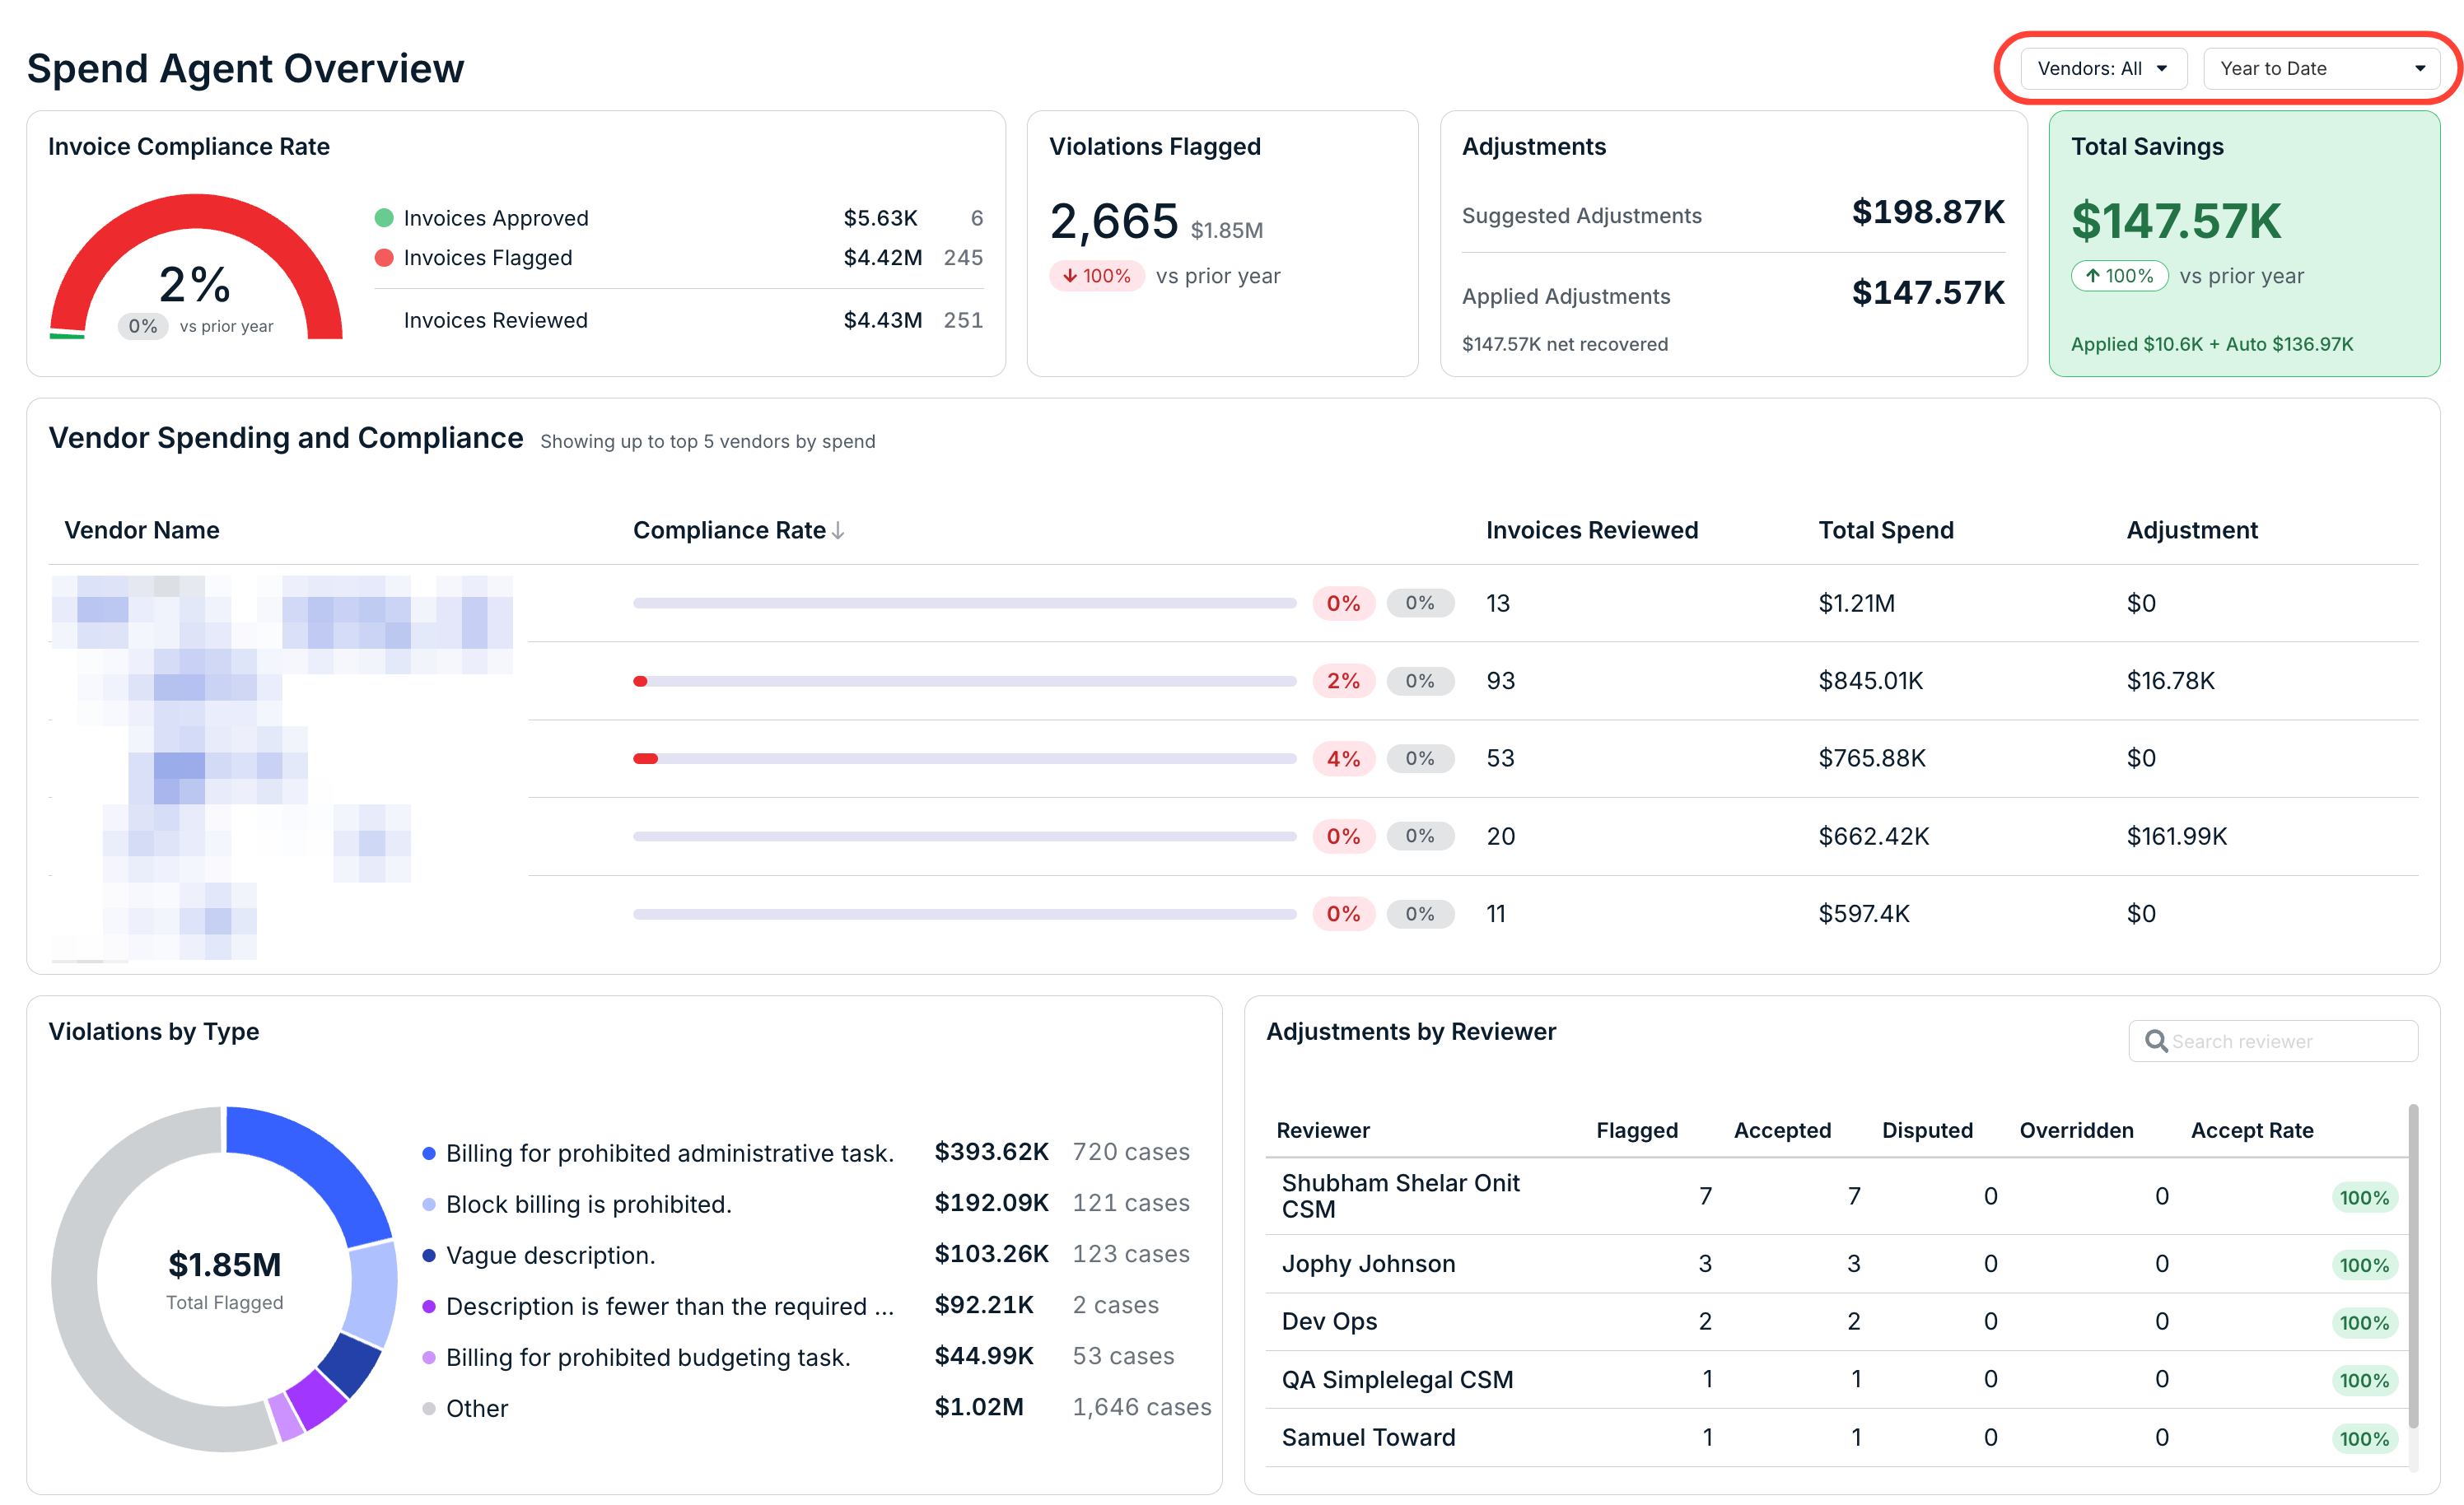
To see the Spend Agent Dashboard, click on the Spend Agent link on the left-hand side menu in Unity.
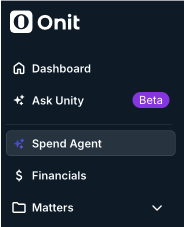
The Spend Agent Overview dashboard will appear. Here, you'll see key statistics and breakdowns, including:
- Invoice Compliance Rate, detailing Invoices Approved and Invoices Flagged and a Year-Over-Year breakdown; this measures invoices that have come through the system through Spend Agent that have been either approved or disputed against the billing guidelines.
- Violations Flagged, along with a percentage Year-Over-Year breakdown
- Adjustments (Suggested and Applied)
- Total Savings (Auto and Applied, along with a percentage Year-Over-Year breakdown)
- Vendor Spending and Compliance (with the top 5 vendors by spend), including Vendor Name, Compliance Rate, Invoices Reviewed, Total Spend, and Adjustment details; click the link on each vendor to go to that vendor's page
- Violations by Type - Click into the circle chart to get a more detailed breakdown of information
- Adjustments by Reviewer, including Reviewer name, Flagged, Accepted, Disputed, Overridden, and Accept Rate; use the Search reviewer search bar to search for a specific reviewer
Use the Vendors and Year to Date drop-down menus at the top of the screen to customize what you want to see on the screen.
Enabling Spend Agent
There are two ways to enable Spend Agent:
The first is to go to the Invoice Settings within your Settings tab.
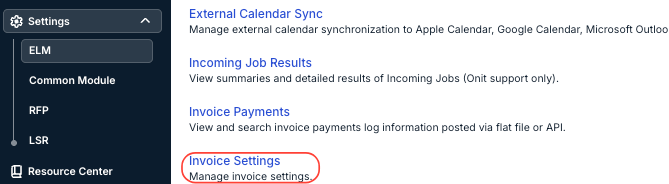
Click Preferences in the Invoice Settings menu.
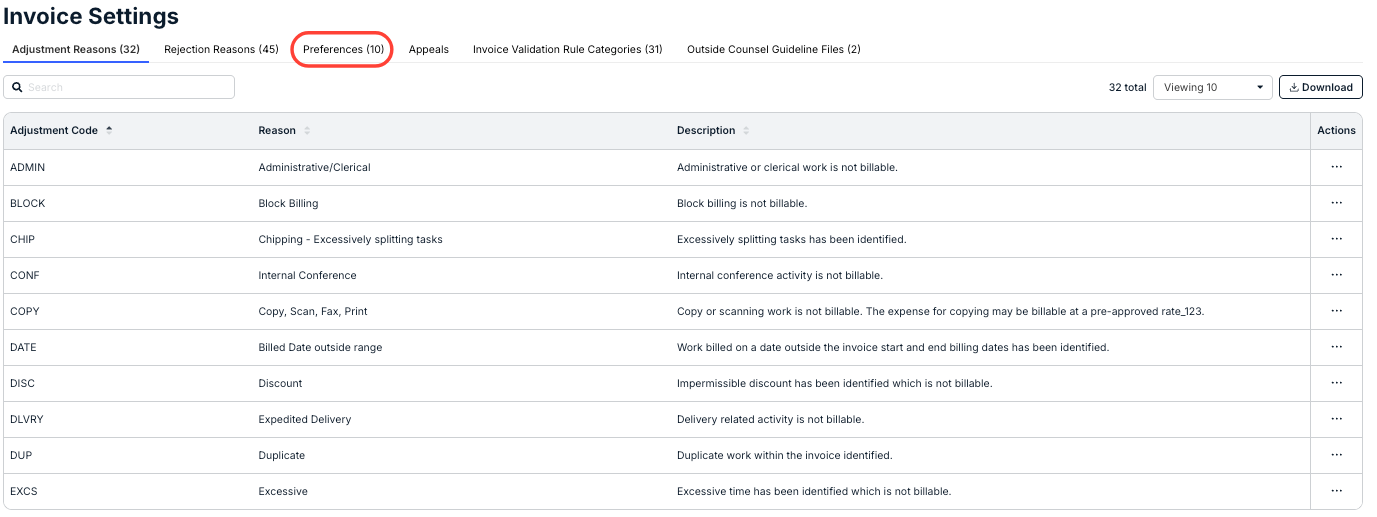
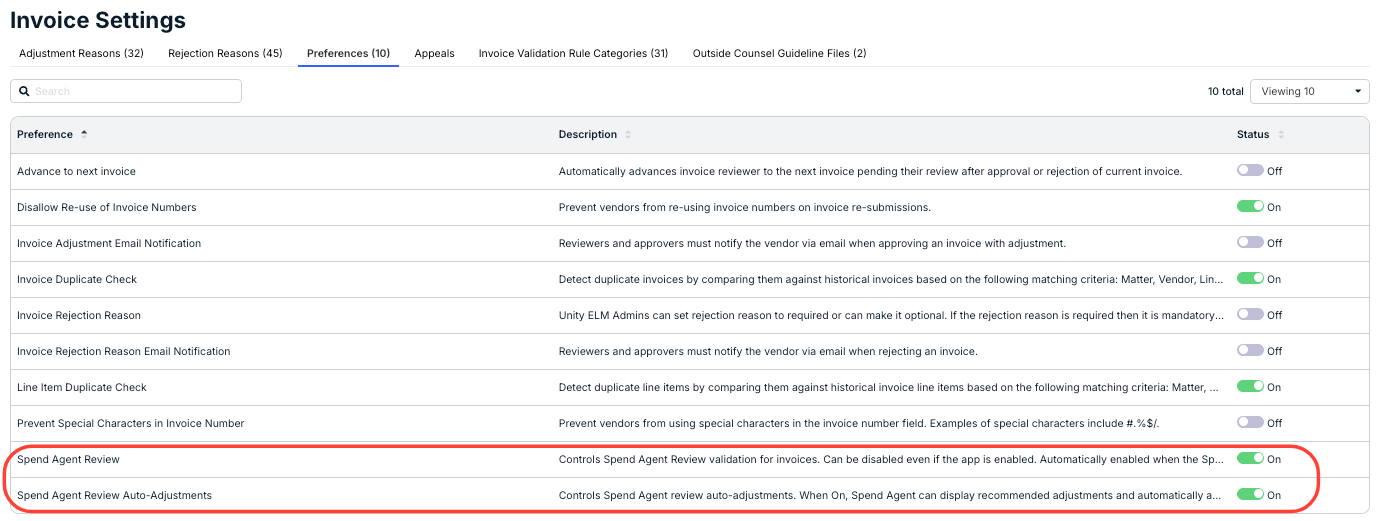
Under Preferences, go to Spend Agent Review and toggle it On to enable Spend Agent.
In this menu, you can also choose to turn on Spend Agent Review Auto-Adjustments. When On, Spend Agent can display recommended adjustments and automatically apply them when applicable. When Off, Spend Agent continues reviewing invoices and showing violations but must not recommend or auto-apply adjustments.
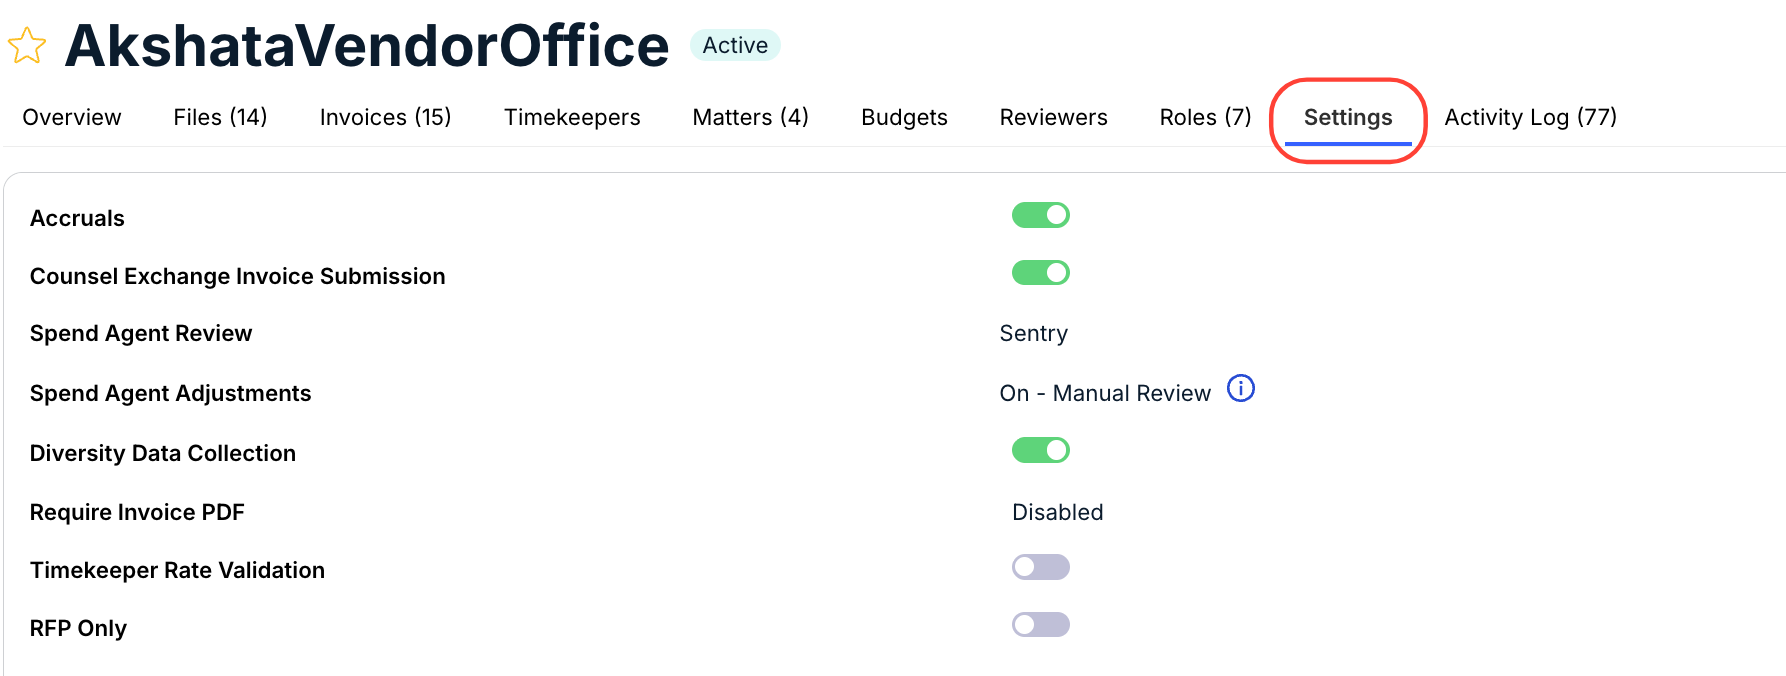
The second way to enable Spend Agent is through the Vendor app. Go into a Vendor profile and click on Settings.
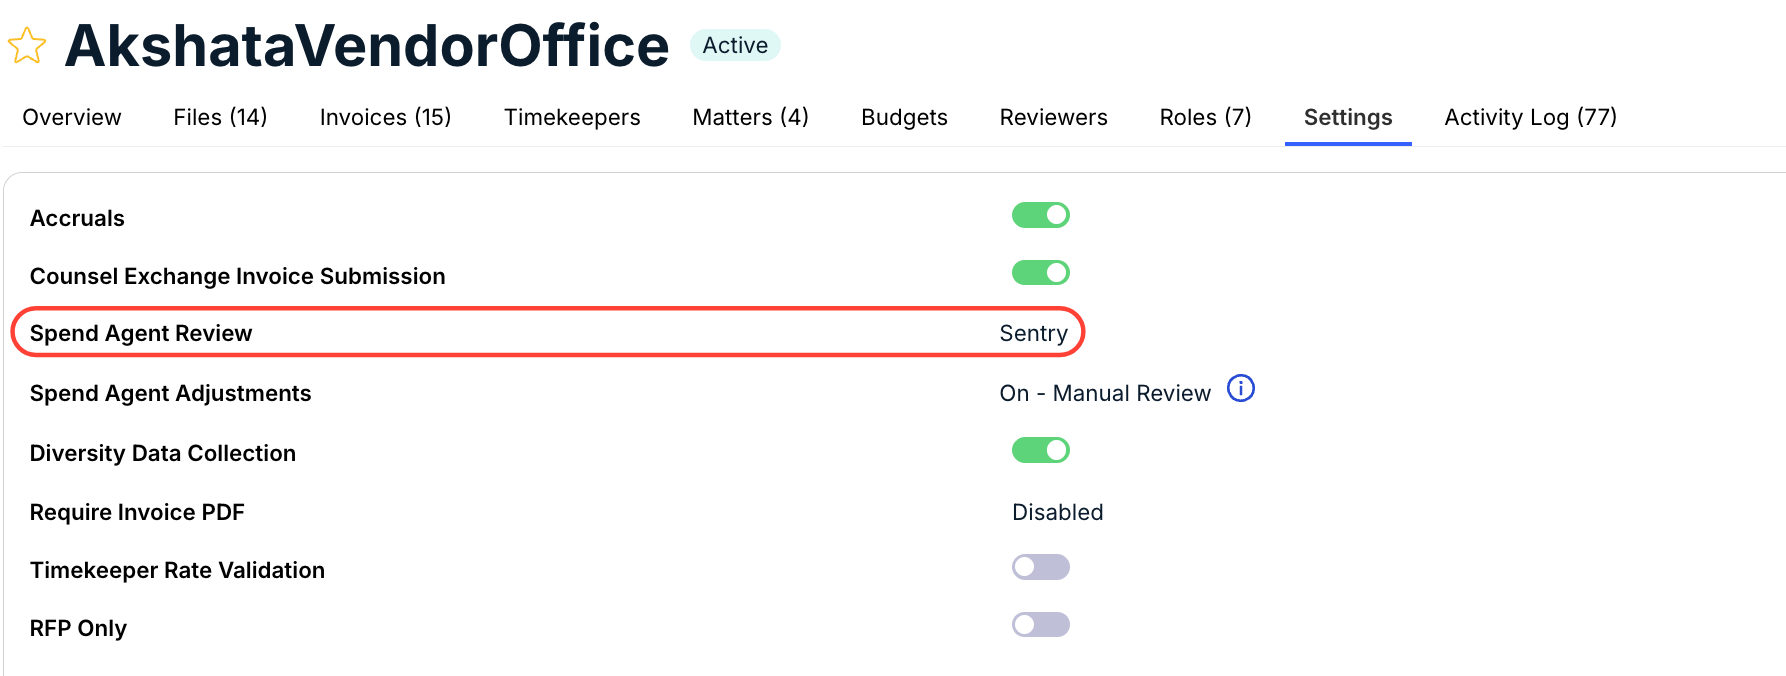
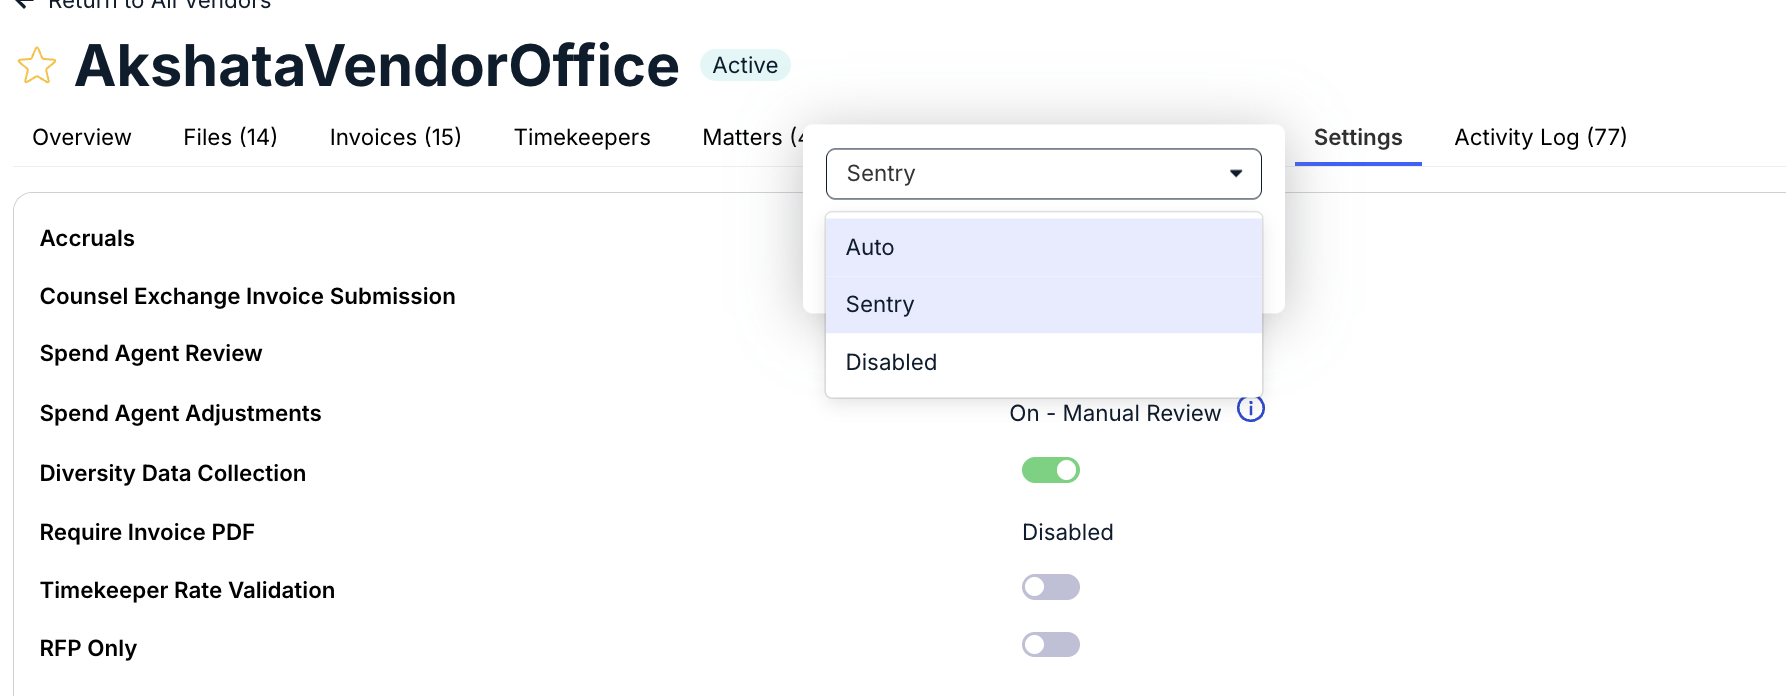
Click the button next to Spend Agent Review (it will show the current Spend Agent Review status of Sentry, Auto, or Disabled).
You'll see three different options pop up:
- Sentry mode: Spend Agent reviews invoices and provides insights to clients; clients are the ones who approve or reject the invoices.
- Auto mode: Spend Agent automatically reviews and approves/rejects invoices. Rejected invoices are returned to the clients with insights into the rejection.
- Disabled: Spend Agent is disabled for the vendor.
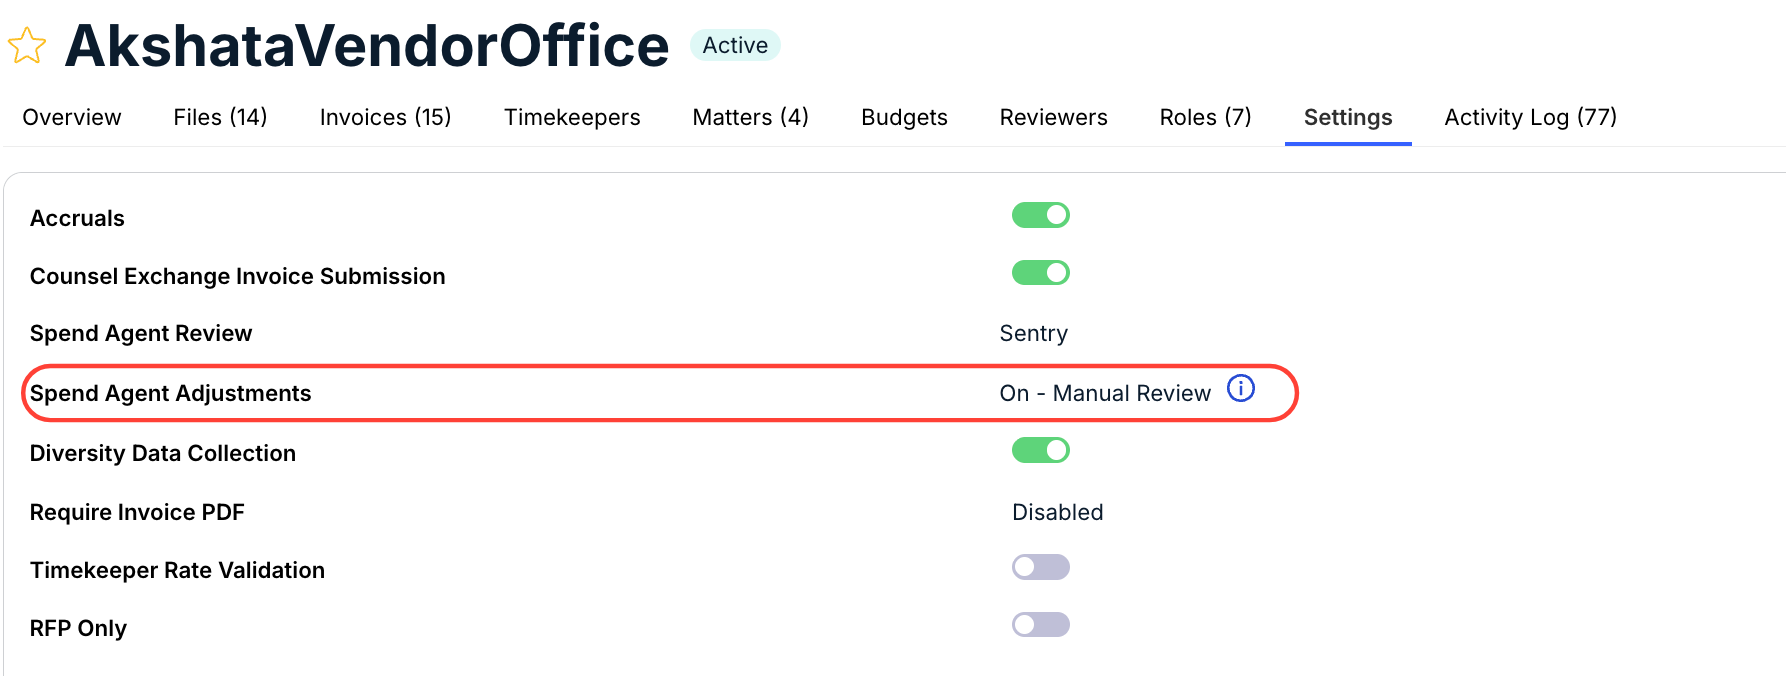
Here, you can also turn on Spend Agent Adjustments.
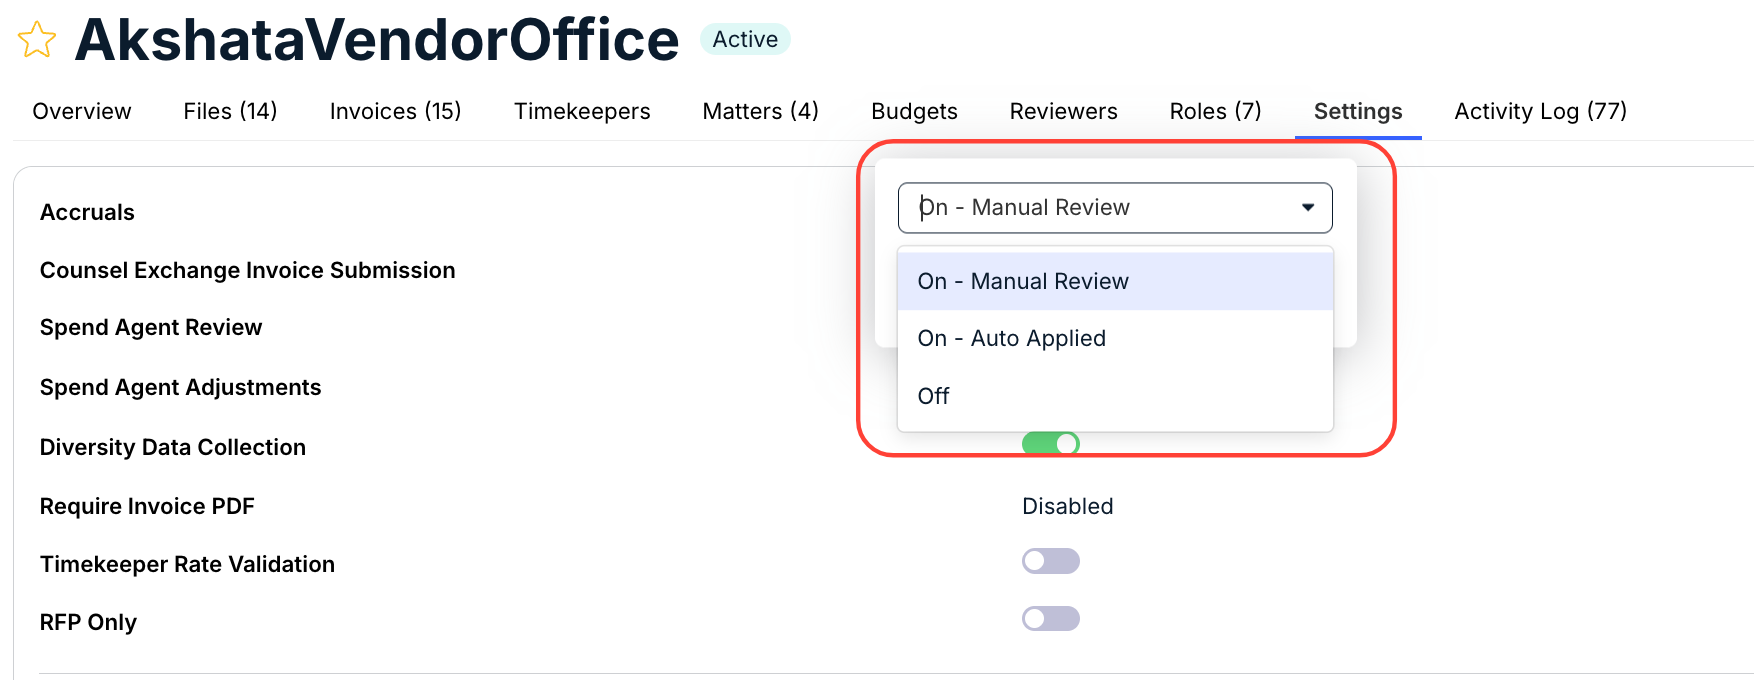
Here, you have three different options:
- On - Manual Review: Adjustments are shown as recommendations for the reviewer to approve or reject.
- On - Auto Applied: Eligible adjustments are applied before the invoice is reviewed. A reviewer still reviews the invoice, unlike Auto mode.
- Off: Spend Agent will not identify monetary adjustments.
Setting up Billing Guidelines
Setting up Account-Level Billing Guidelines
To set up billing guidelines at a high account level—basically, the standard billing guidelines NOT specific to a vendor—here's what to do:
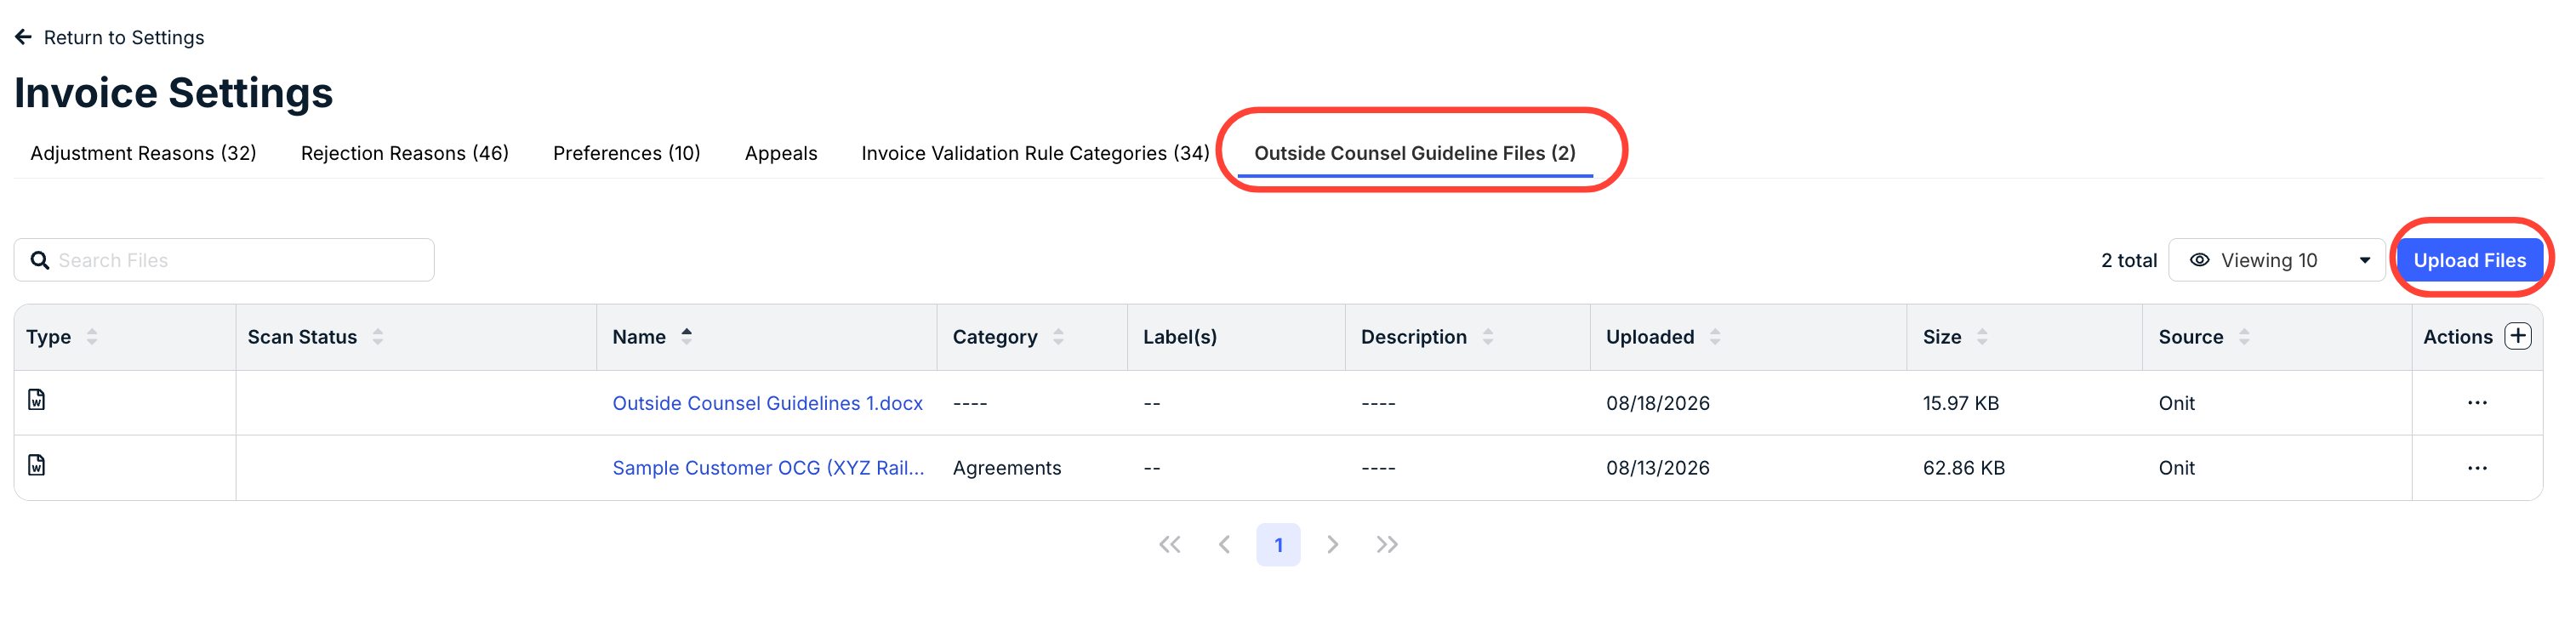
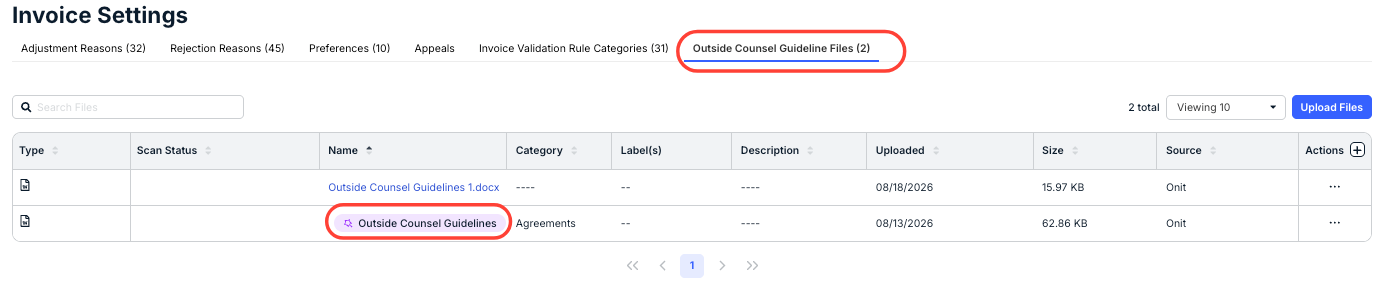
Within Invoice Settings, click on Outside Counsel Guideline Files. There, you can explore the already uploaded guideline files or upload new ones with the Upload Files button.
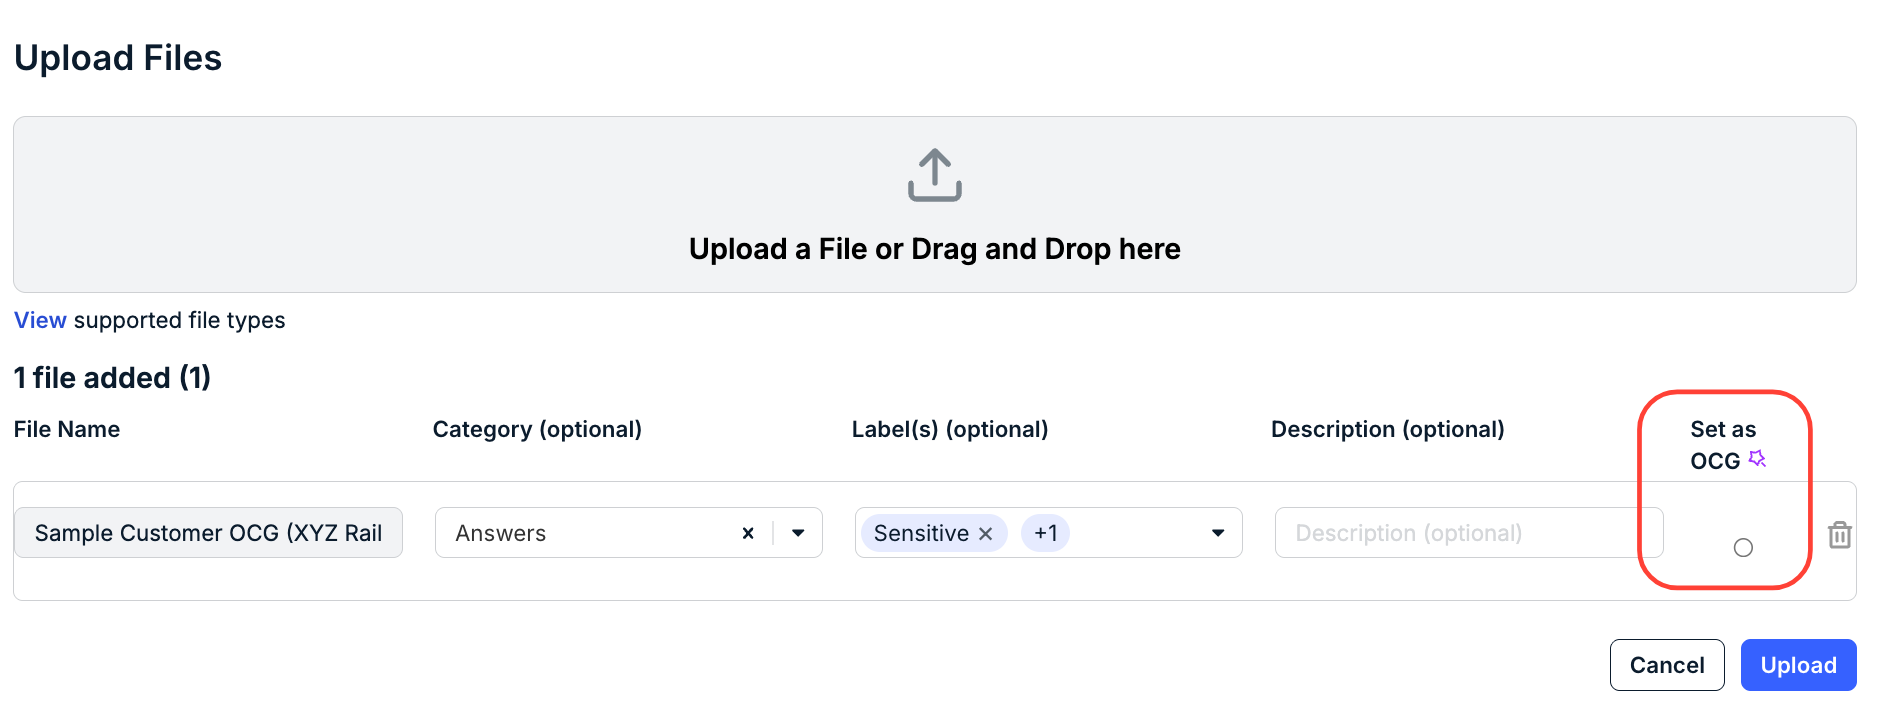
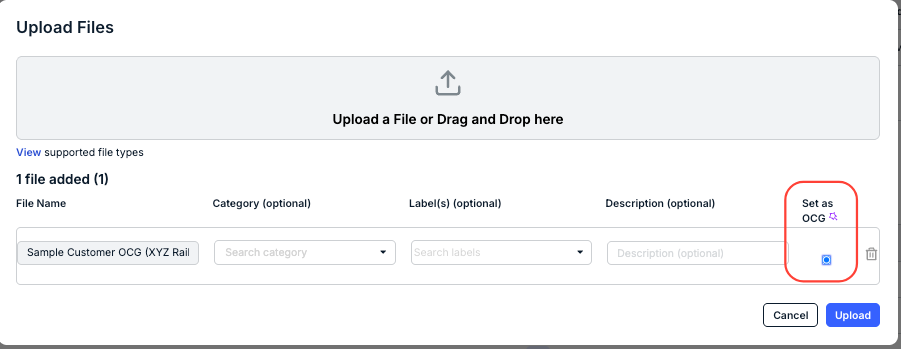
After clicking on Upload Files, find the file on your system to upload or drag and drop it onto the screen. This screen will appear. Here, you can select whether you want to set the file as the Outside Counsel Guideline to use by clicking on the Set as OCG button. Click Upload to finalize. Click the Delete (trash can) option to remove the file.
Note that you can also choose to select a Category and Labels from the drop-down menus and fill in a Description. Click the X next to a drop-down menu selection to remove.
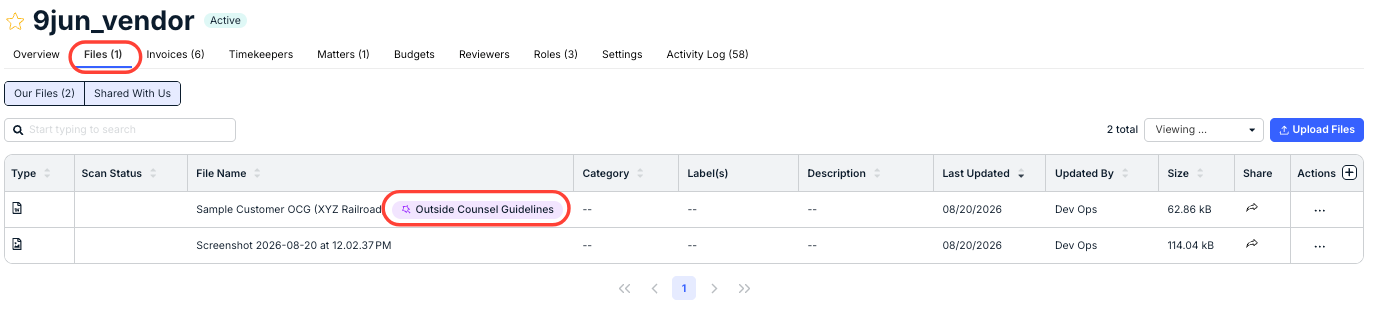
You'll see the file appear in the Outside Counsel Guideline Files directory with the Outside Counsel Guidelines icon appearing next to the file name.
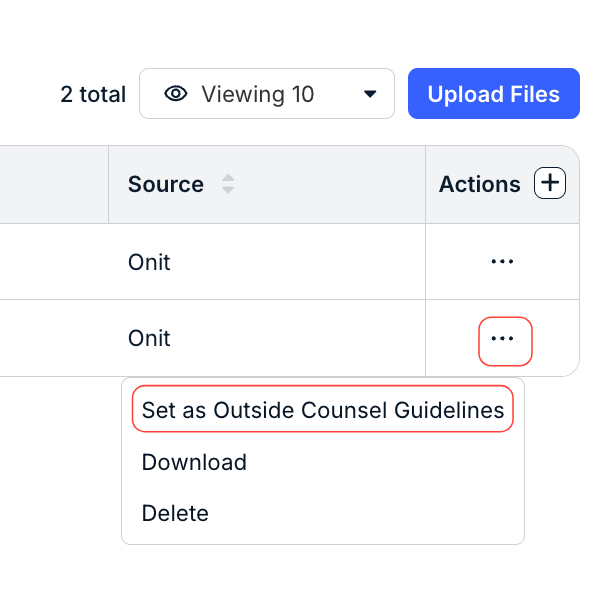
Note that if you upload a billing file, you can also use a selection in the three-button Actions menu to Set as Outside Counsel Guidelines.
Spend Agent will use those designated guidelines to review invoices for all vendors that do not have their own specific billing guidelines set. The next section will cover how to set up vendor-level billing guidelines.
Setting up Vendor-Level Billing Guidelines
To set up billing guidelines for a specific vendor, head into the vendor profile page and go to the Files screen.

Click on Upload Files and find the billing guidelines file or drag and drop it into the screen.
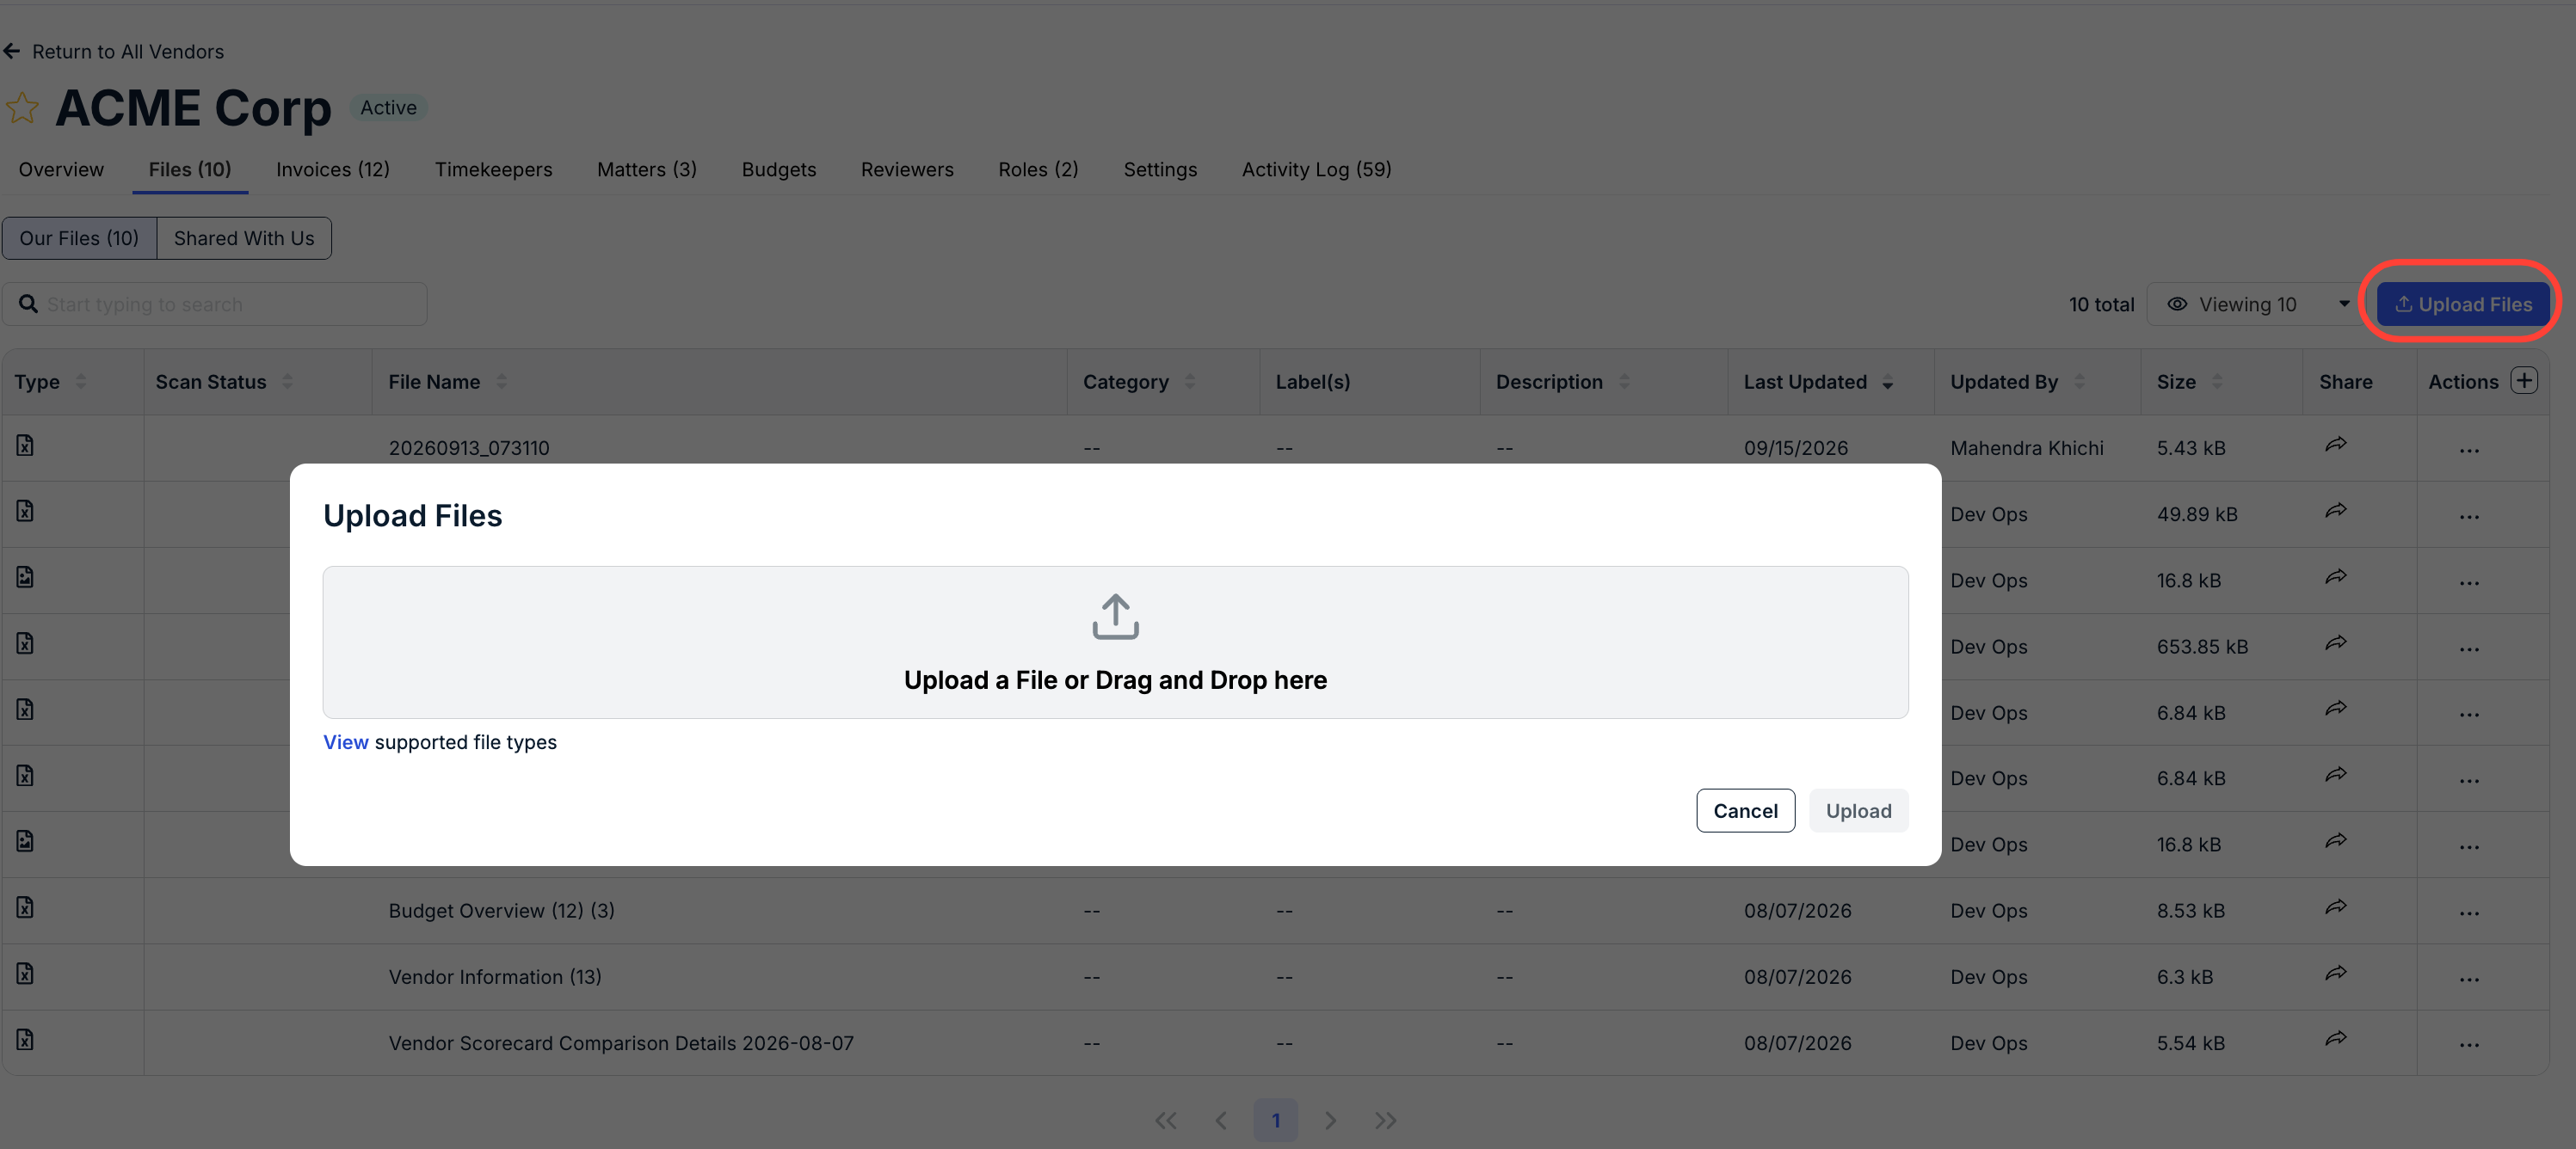
Click on the Set as OCG button to set the file as the Outside Counsel Guideline file; click Upload to upload the file. You can also fill in the Category, Labels, and Description if necessary.
You'll see the Guidelines show up in the Files screen marked with Outside Counsel Guidelines. Going forward, Spend Agent will use the uploaded billing guidelines to review the invoices from that specific vendor.
Engagement Documentation (Matter Level)
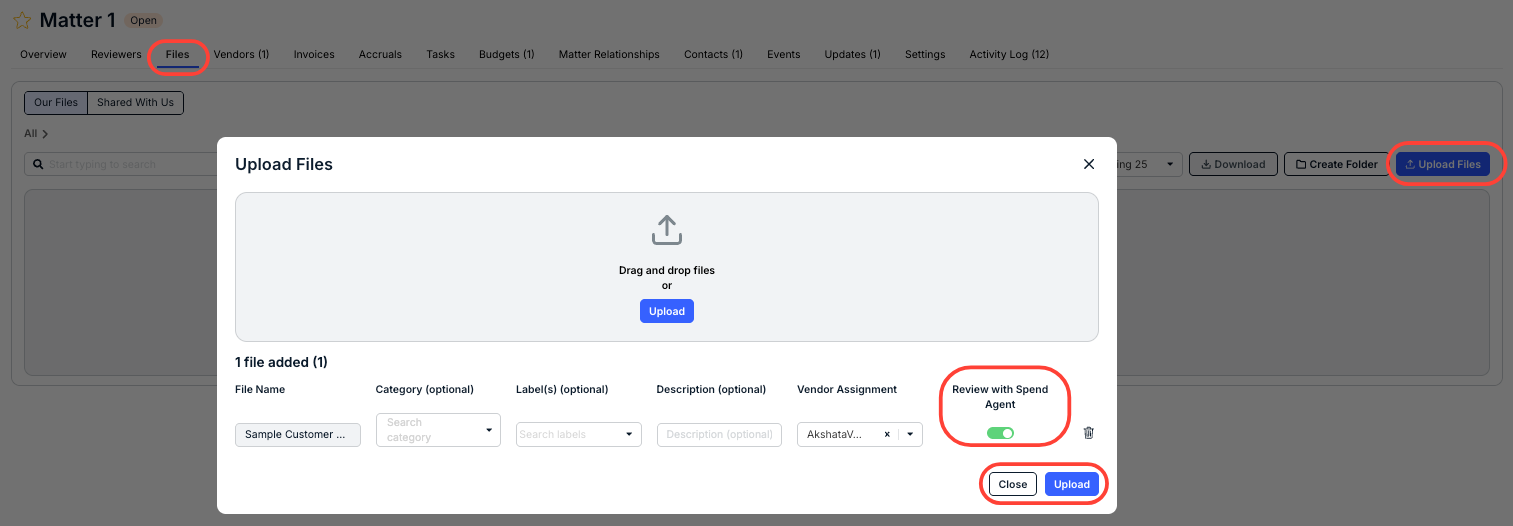
You can also upload engagement documentation on the matter level. To do this, click on the Files tab in the selected matter and click on Upload Files.
Upload the file on the Upload Files screen. Toggle the Review with Spend Agent button to make the file eligible for Spend Agent review; note that the Vendor Assignment selection must be a vendor that has Spend Agent review enabled. You can also select a Category and Label (optional) from the drop-down menu and fill in a Description (optional).
Click Upload to upload the file or Close to back out.
Spend Agent in Action
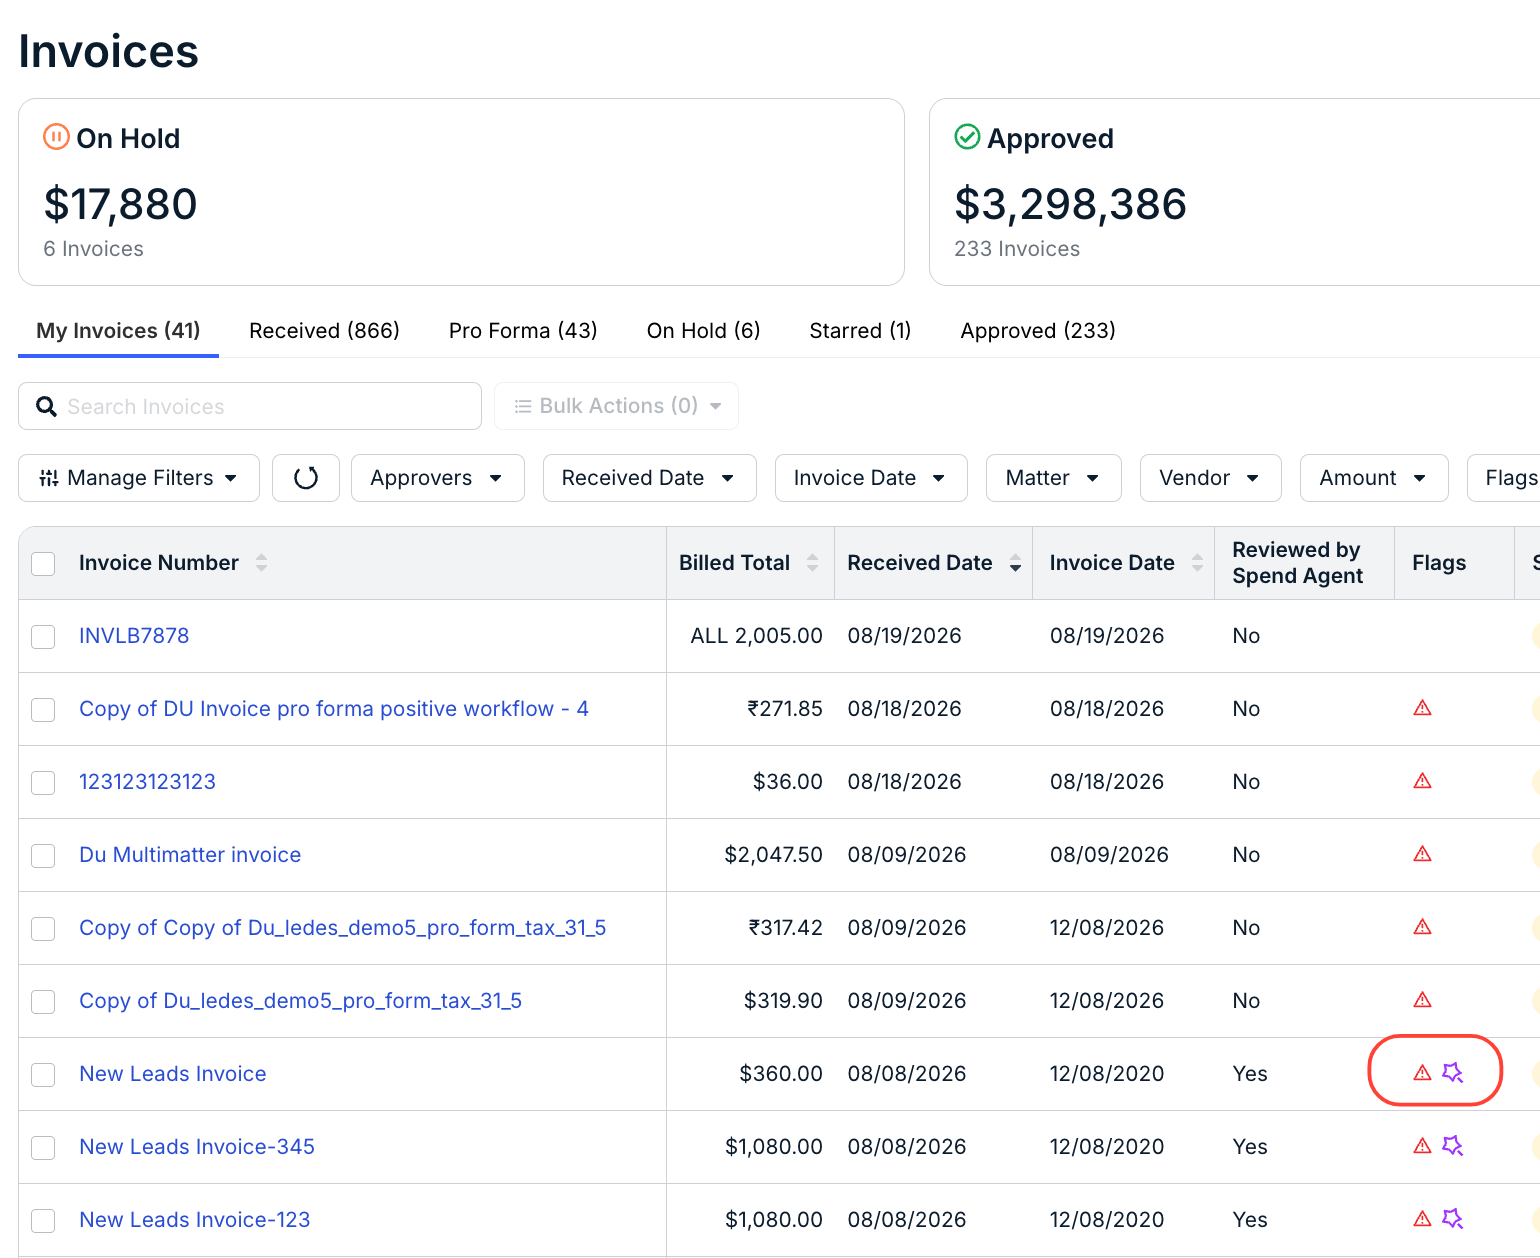
Within the Invoices section, you'll see a note when Spend Agent finds a violation.
Clicking into the Invoice details page will show the Spend Agent Warning at the top of the screen.
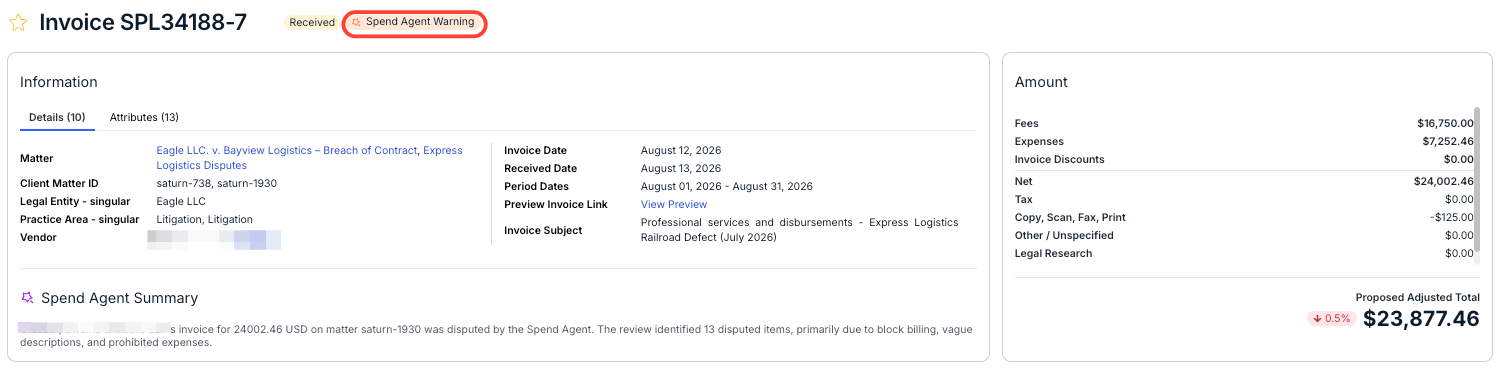
Within the invoice detail, you can click Invoice Flags to see the flagged details.
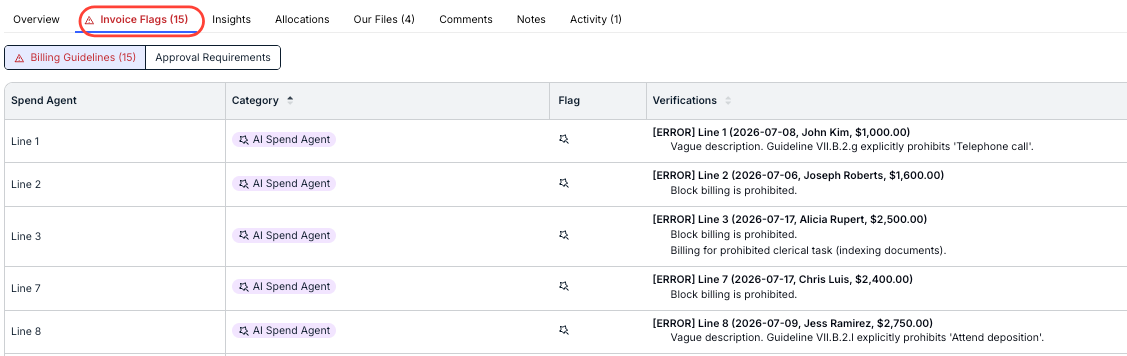
Spend Agent will also provide users with a Summary of the violations within the invoice.

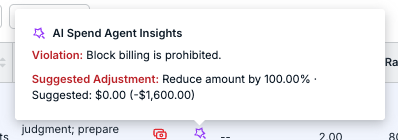
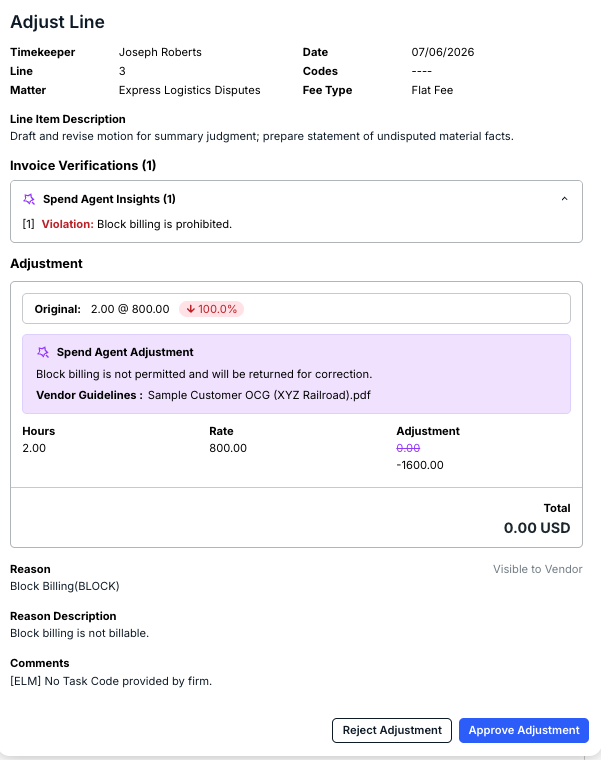
Violations are also listed in the line-item view.
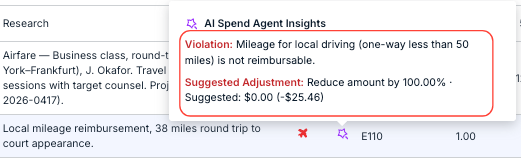
Users can jump from a line-level verification finding directly to the relevant invoice line, see the total number of Spend Agent adjustments, identify where each adjustment came from, and filter adjustments by source such as Spend Agent, user-made, or IVR. Note that this option will depend on the Spend Agent Adjustments settings; See the Enabling Spend Agent section for more detail.
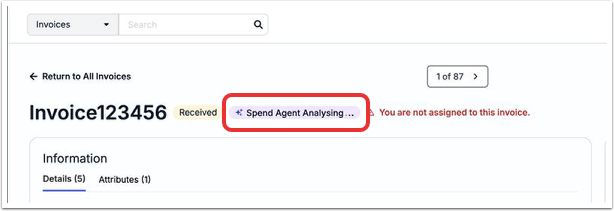
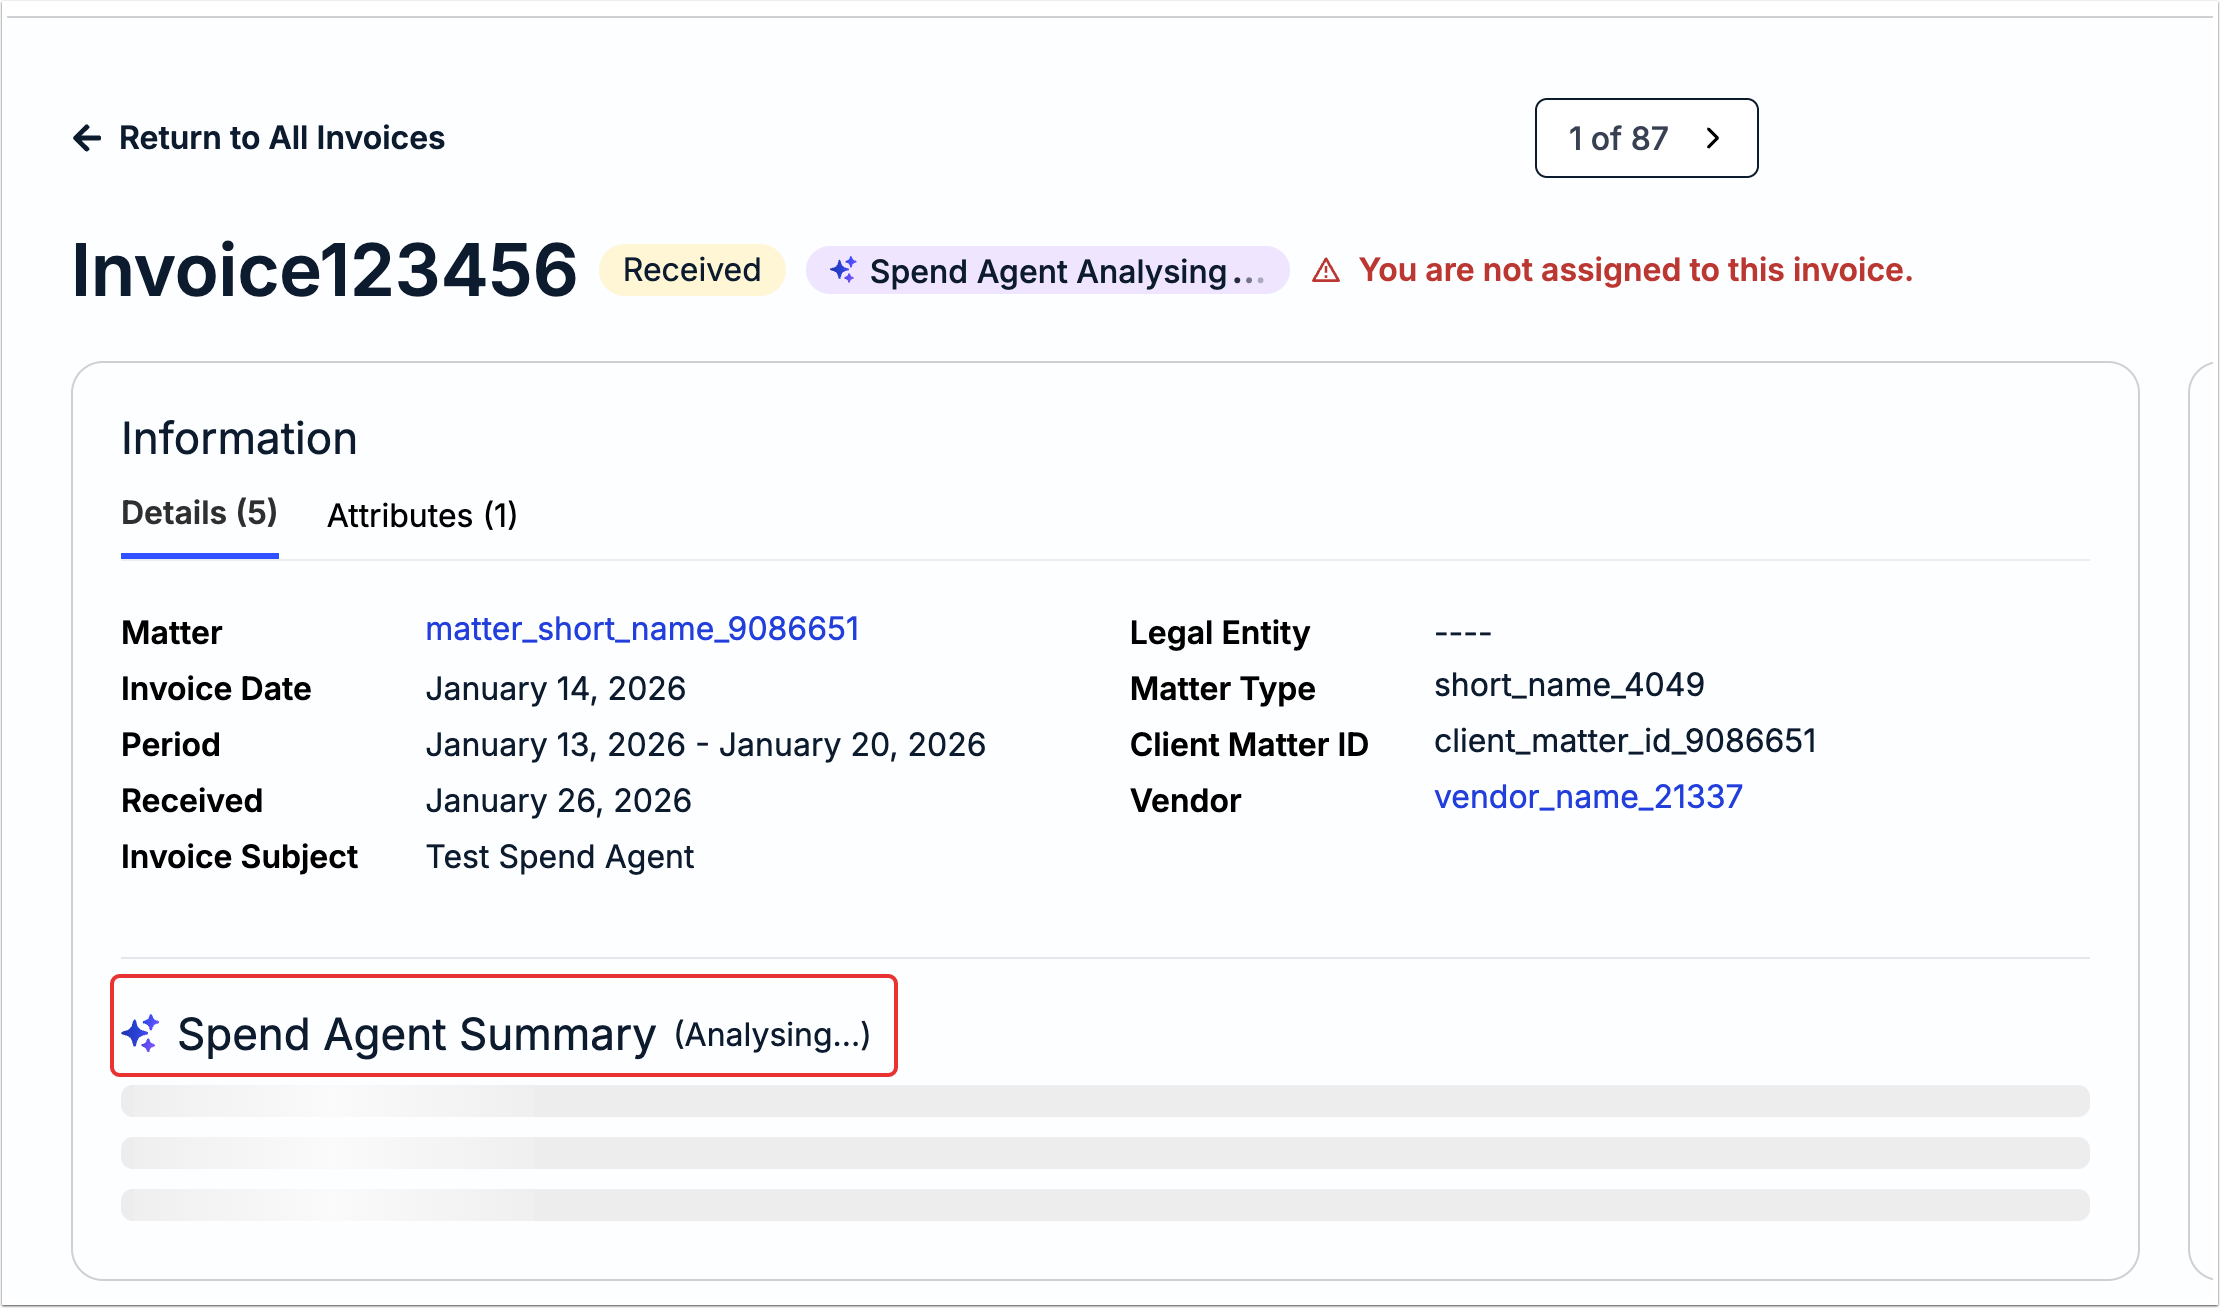
You'll also see a notification when Spend Agent is still analyzing the information.
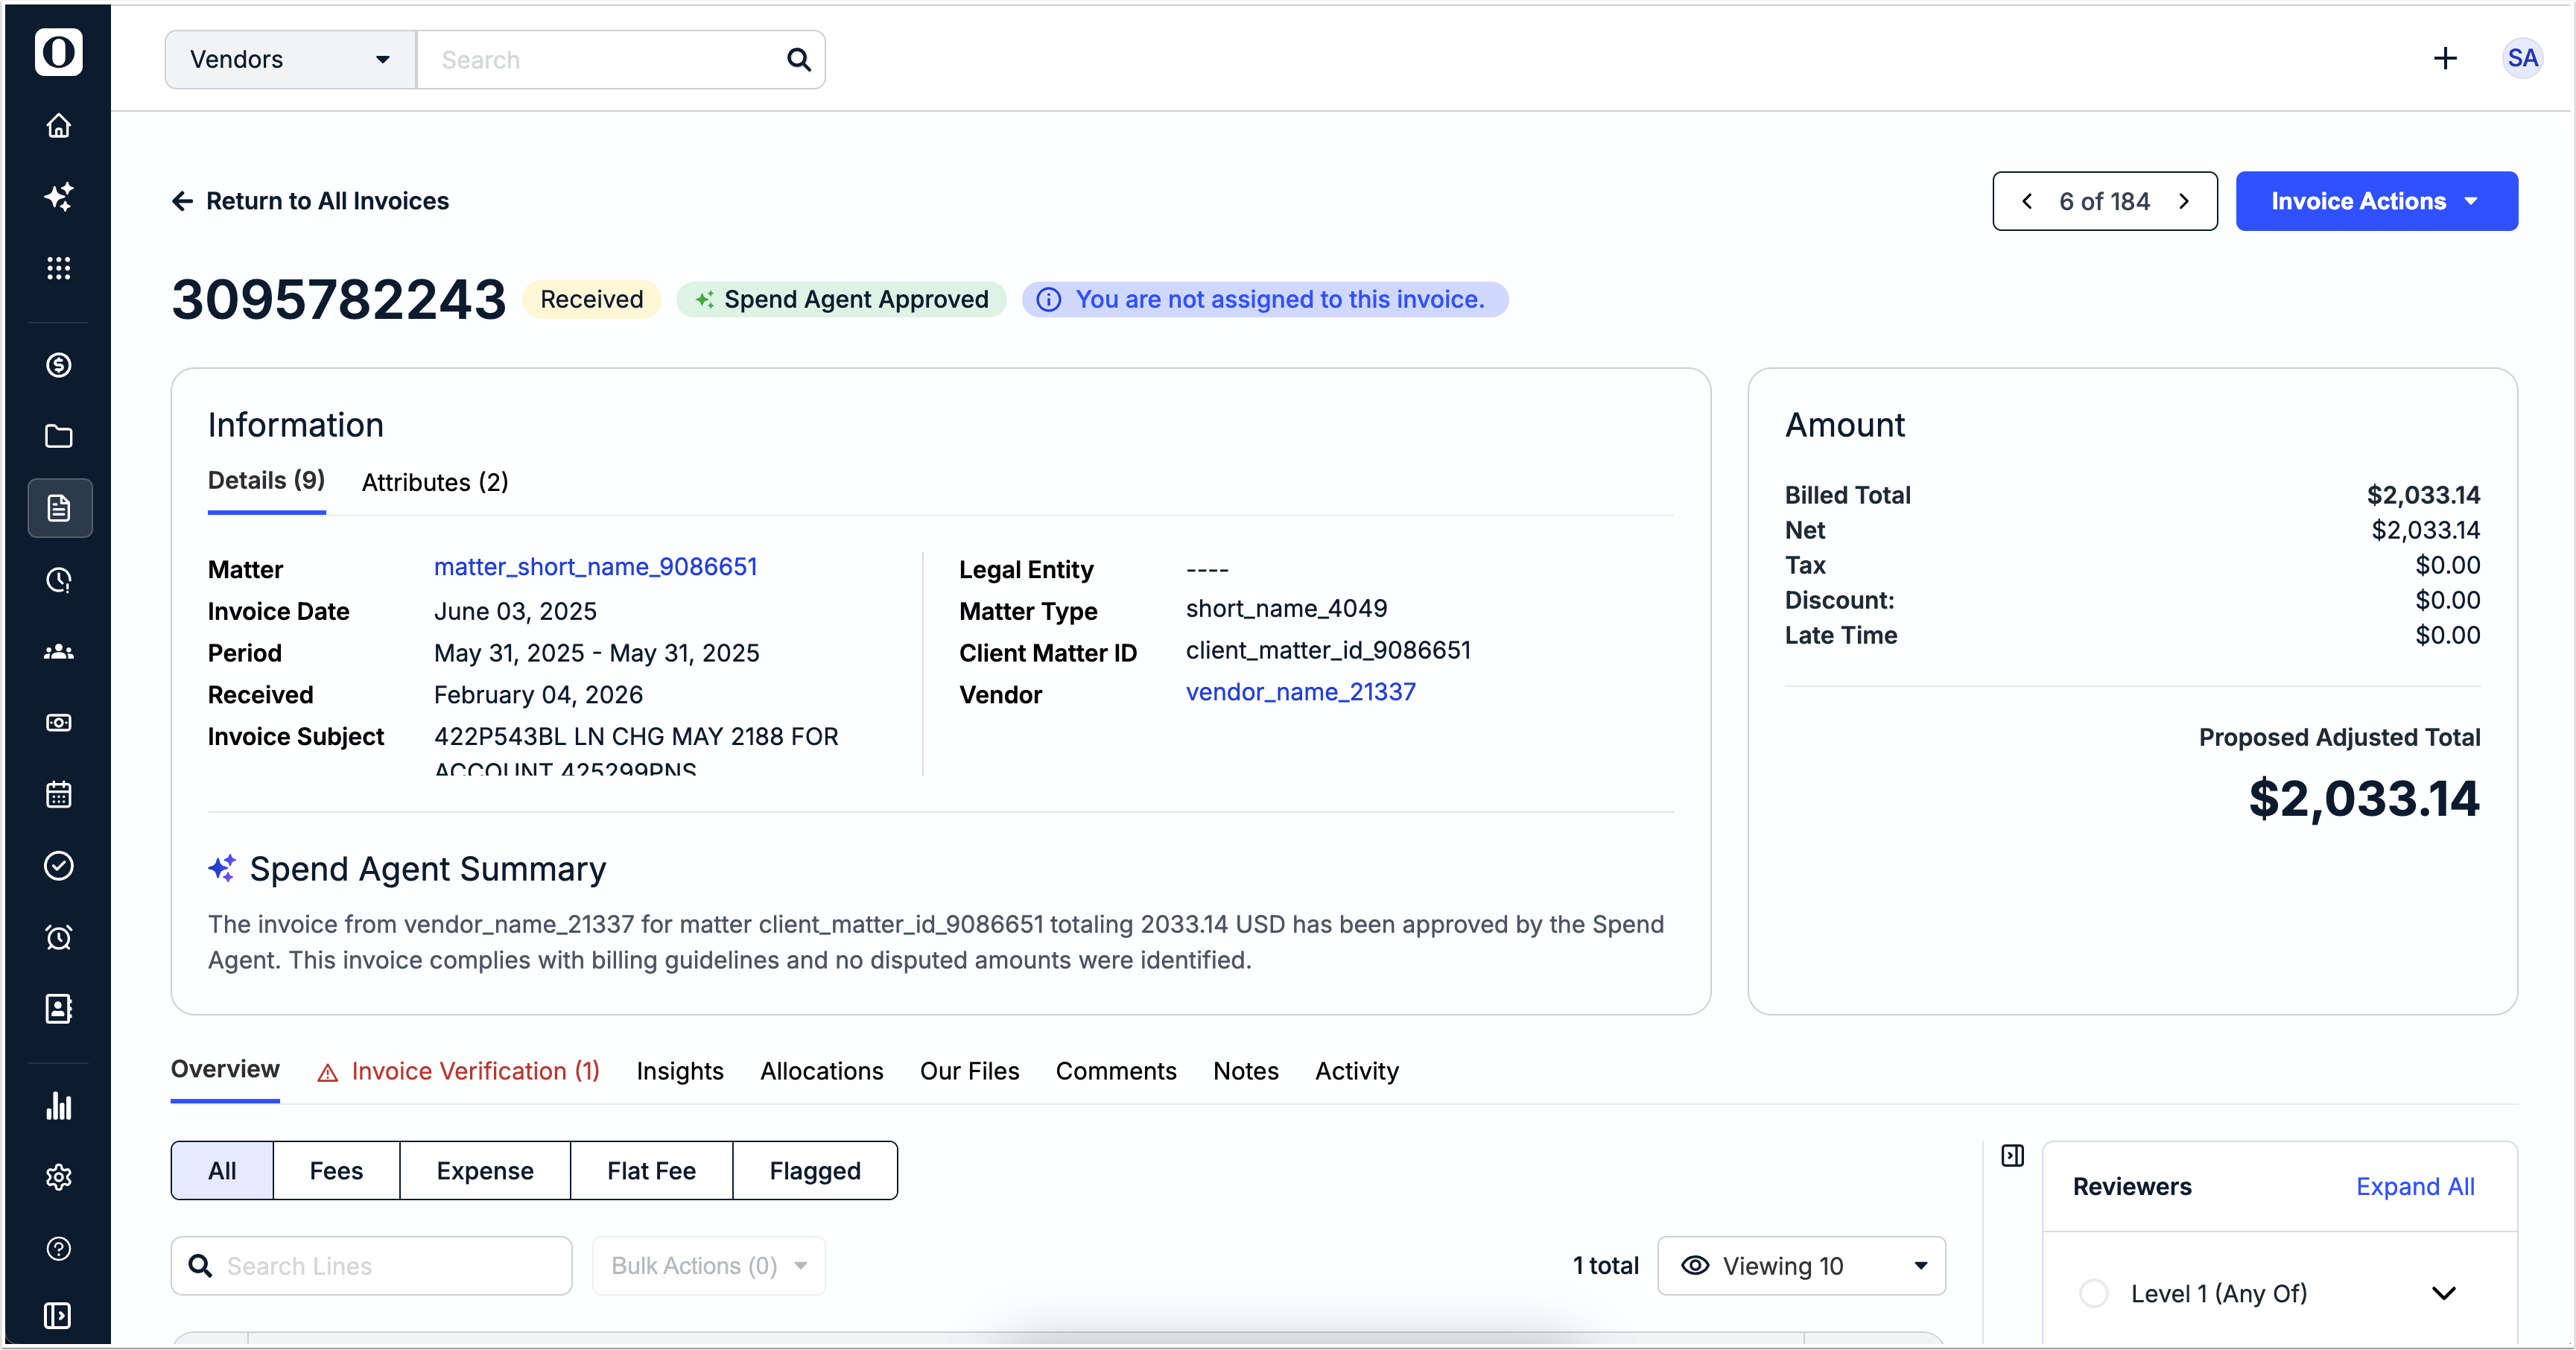
Once the invoice is approved, users will see a Spend Agent Approved note at the top of the screen.
On the Vendor side, vendors will see Spend Agent violations noted on a submitted invoice.
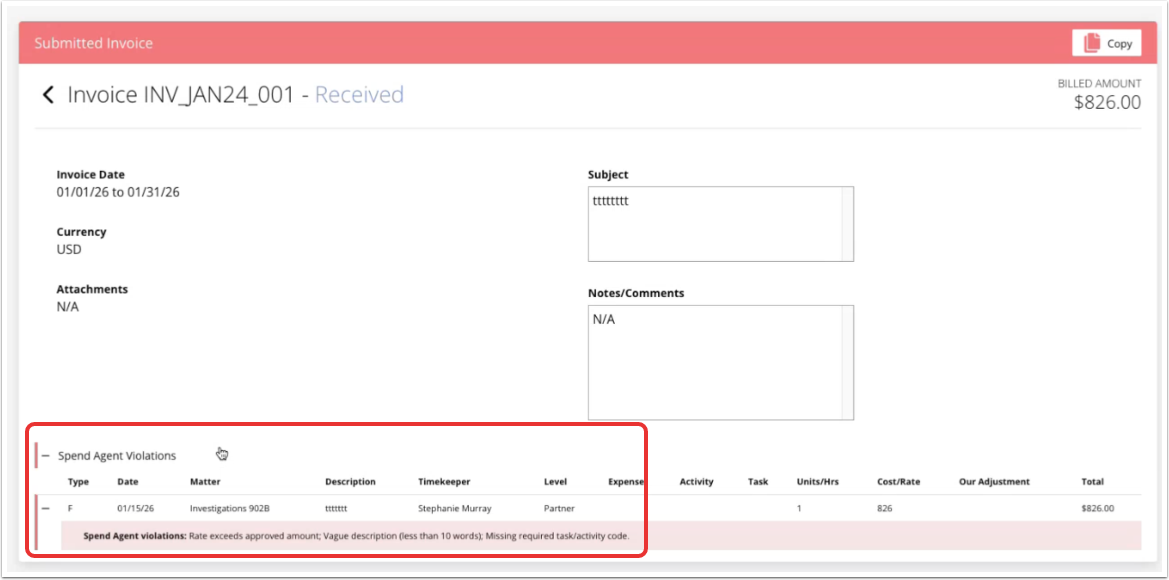
If an invoice is automatically rejected by Spend Agent, vendors will see a full summary of the rejection reasons.