The Vendor Portal is the next evolution of Onit's BillingPoint and CounselGO services. The Vendor Portal brings CounselGo and BillingPoint together with a responsive UI refresh and modern UX, improving speed, accessibility, and intuitive navigation, reducing vendor training time, and increasing adoption.
This guide will take you through the basics of navigating the Vendor Portal.
The Vendor Portal Menu
- After logging into the Vendor Portal, you'll see the Vendor Portal Menu on the left-hand side of the screen.
Click the bottom Collapse option to toggle between the large and small menu options.

- Within the menu, you can access these features:
- Dashboard
- Invoices (Invoice List, Create Invoices, Upload LEDES, LEDES History)
- RFP
- Matter
- Billing Authorizations
- Budgets
- Payments (Payments Collected, Revenue by Client, Aged Accounts Receivable)
- Accrual Processes
- Reports
- Timekeeper Rates
- Rate Cards
- Files (Billing Guidelines)
- Settings (Tax Code Mappings, Client Spot Rates)
- Support
- Within the menu, you can access these features:
Using the Dashboard
- After logging in, you'll start on the Dashboard screen. You can also access the Dashboard through the icon on the left-hand menu.
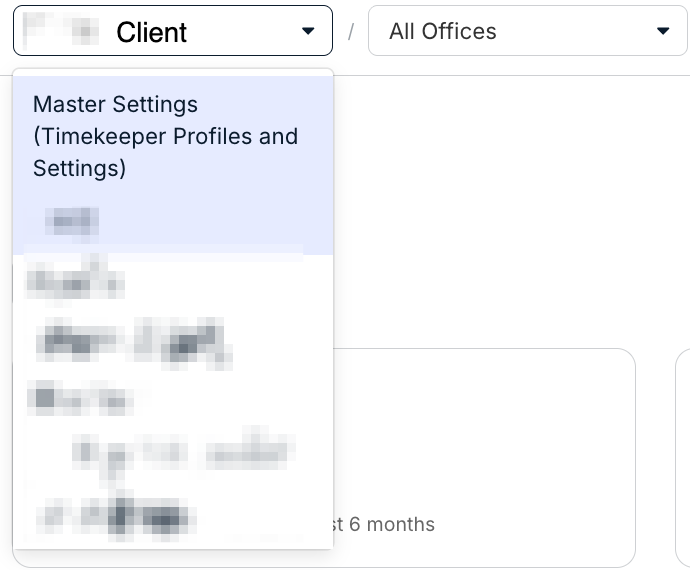
- At the top of the screen, you can switch between clients and offices.
This is also where you can select the Master Settings option.
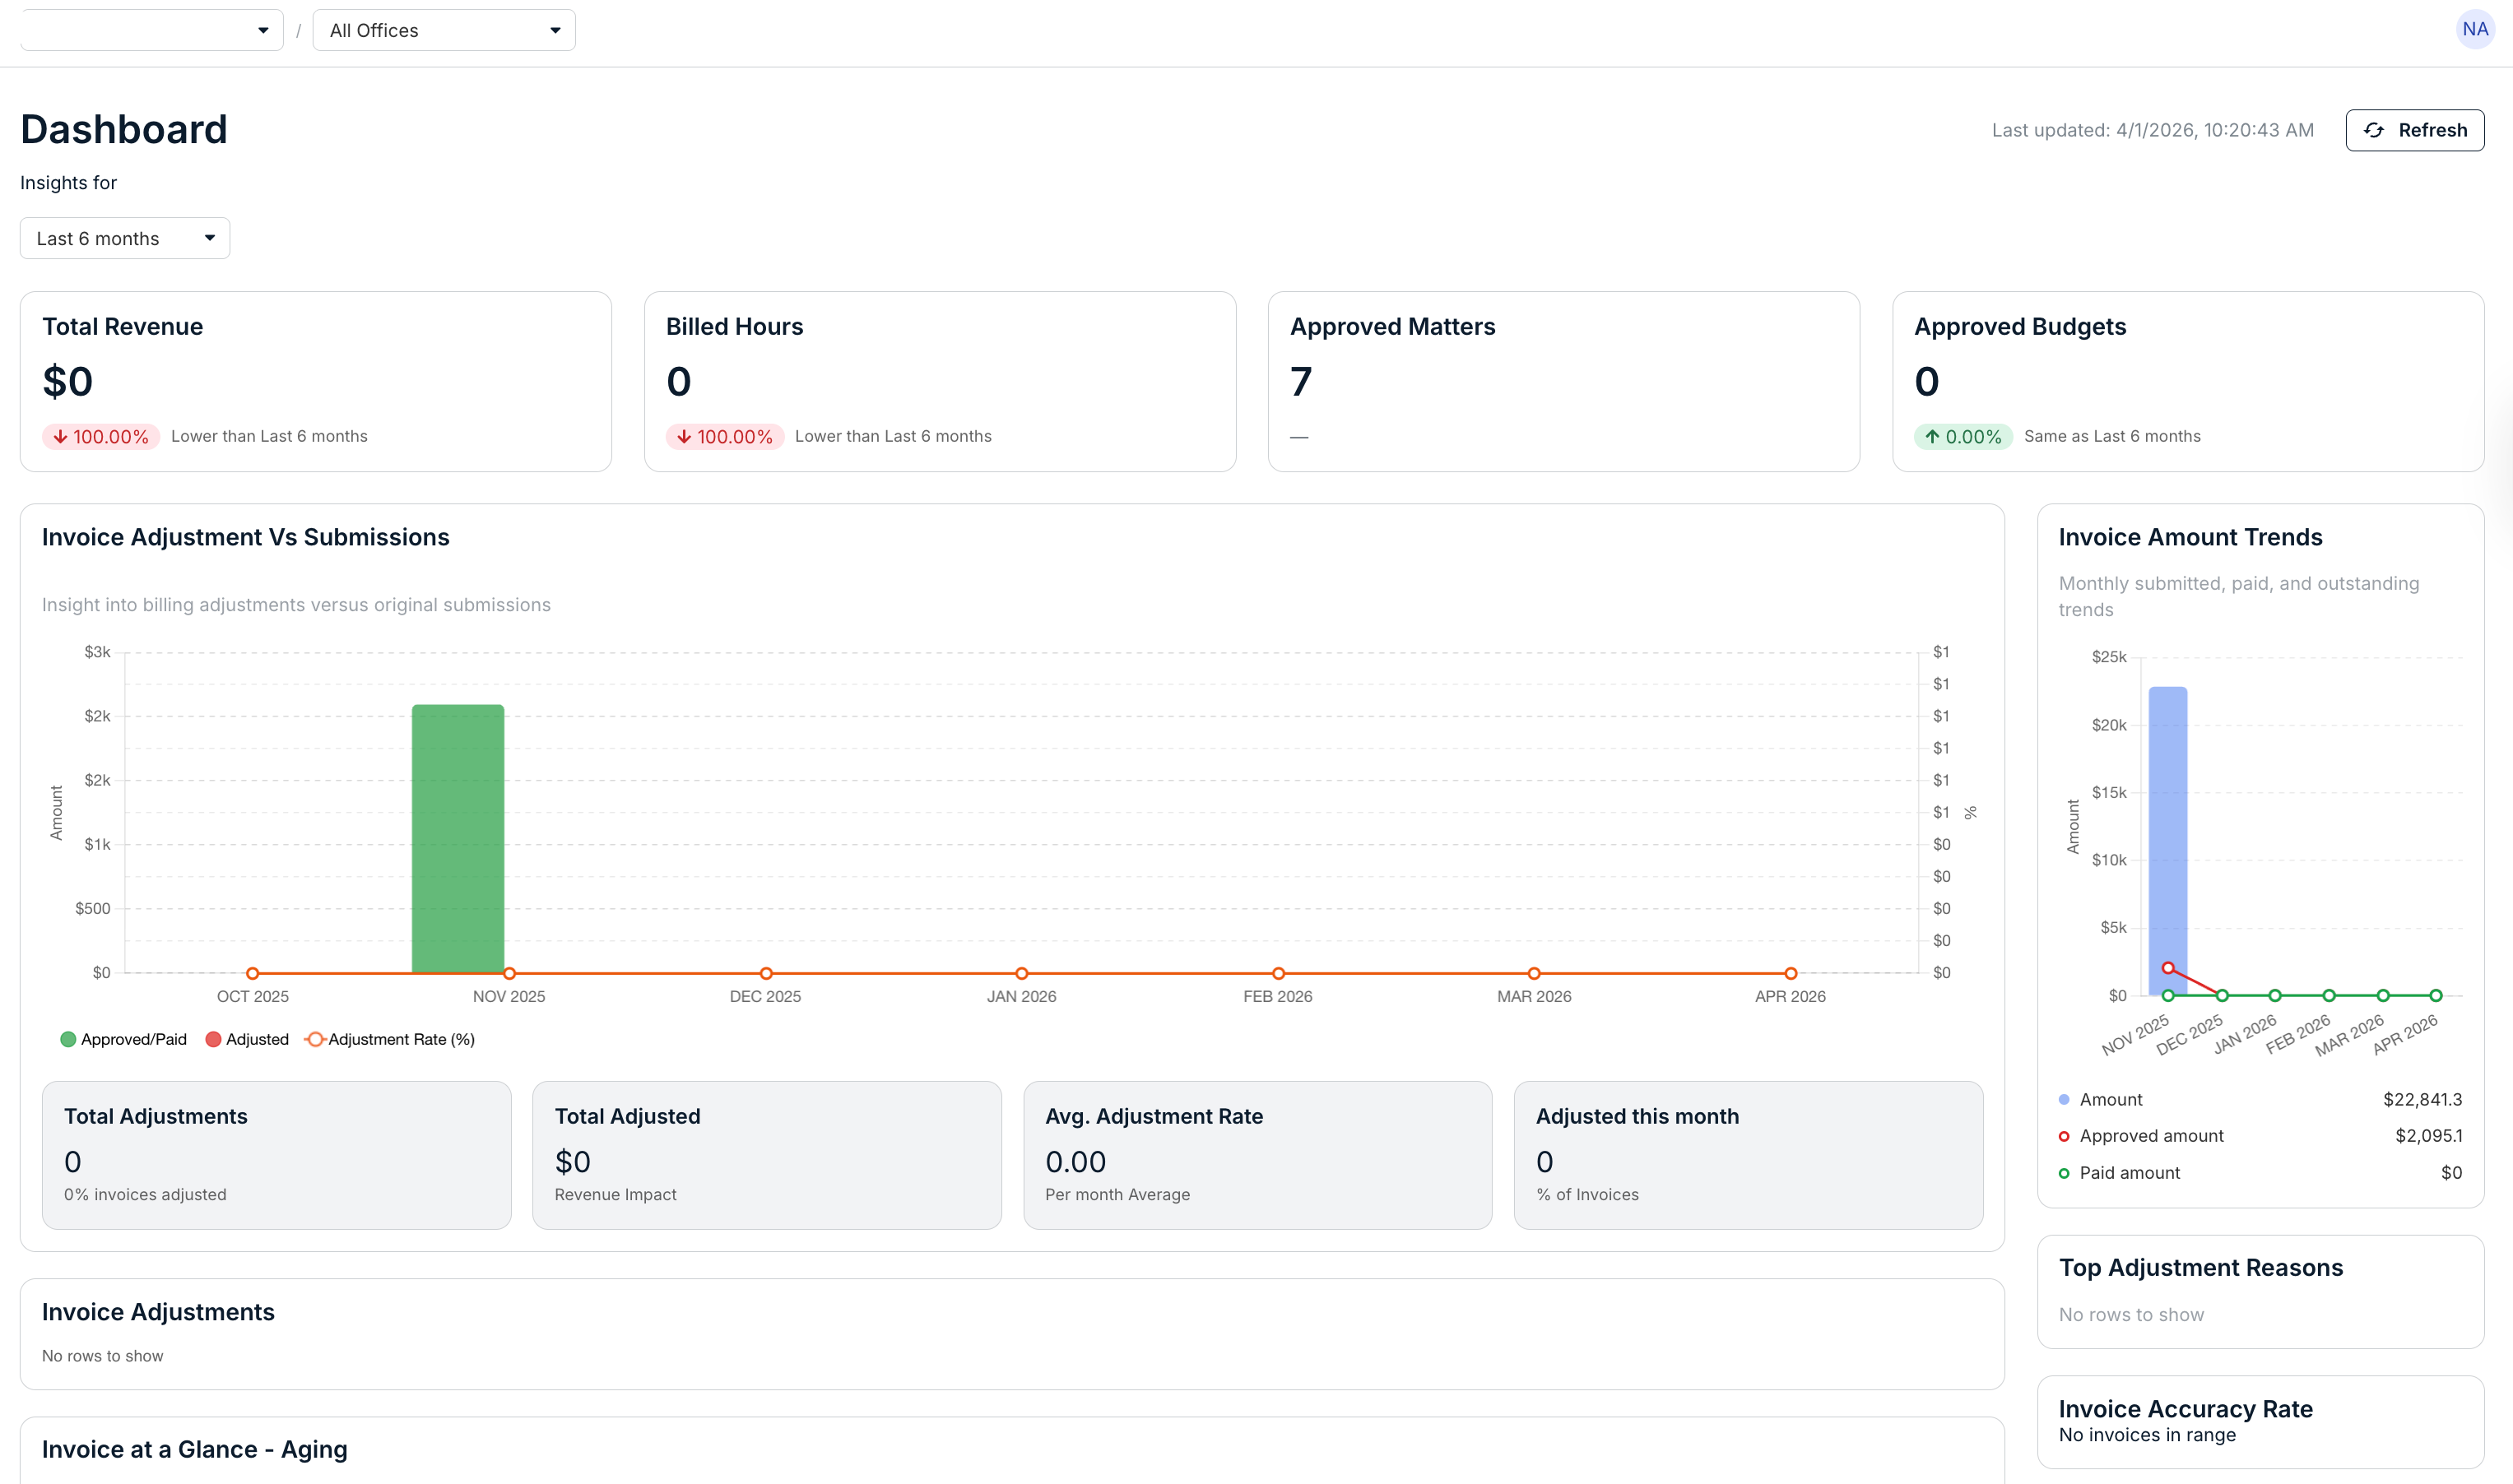
- Under "Dashboard" you'll see the client name and when the Dashboard was last updated.
Hit "Refresh" to refresh the data below; you can also use the drop-down menu to select a data date range (6 months, year-to-date, and custom)

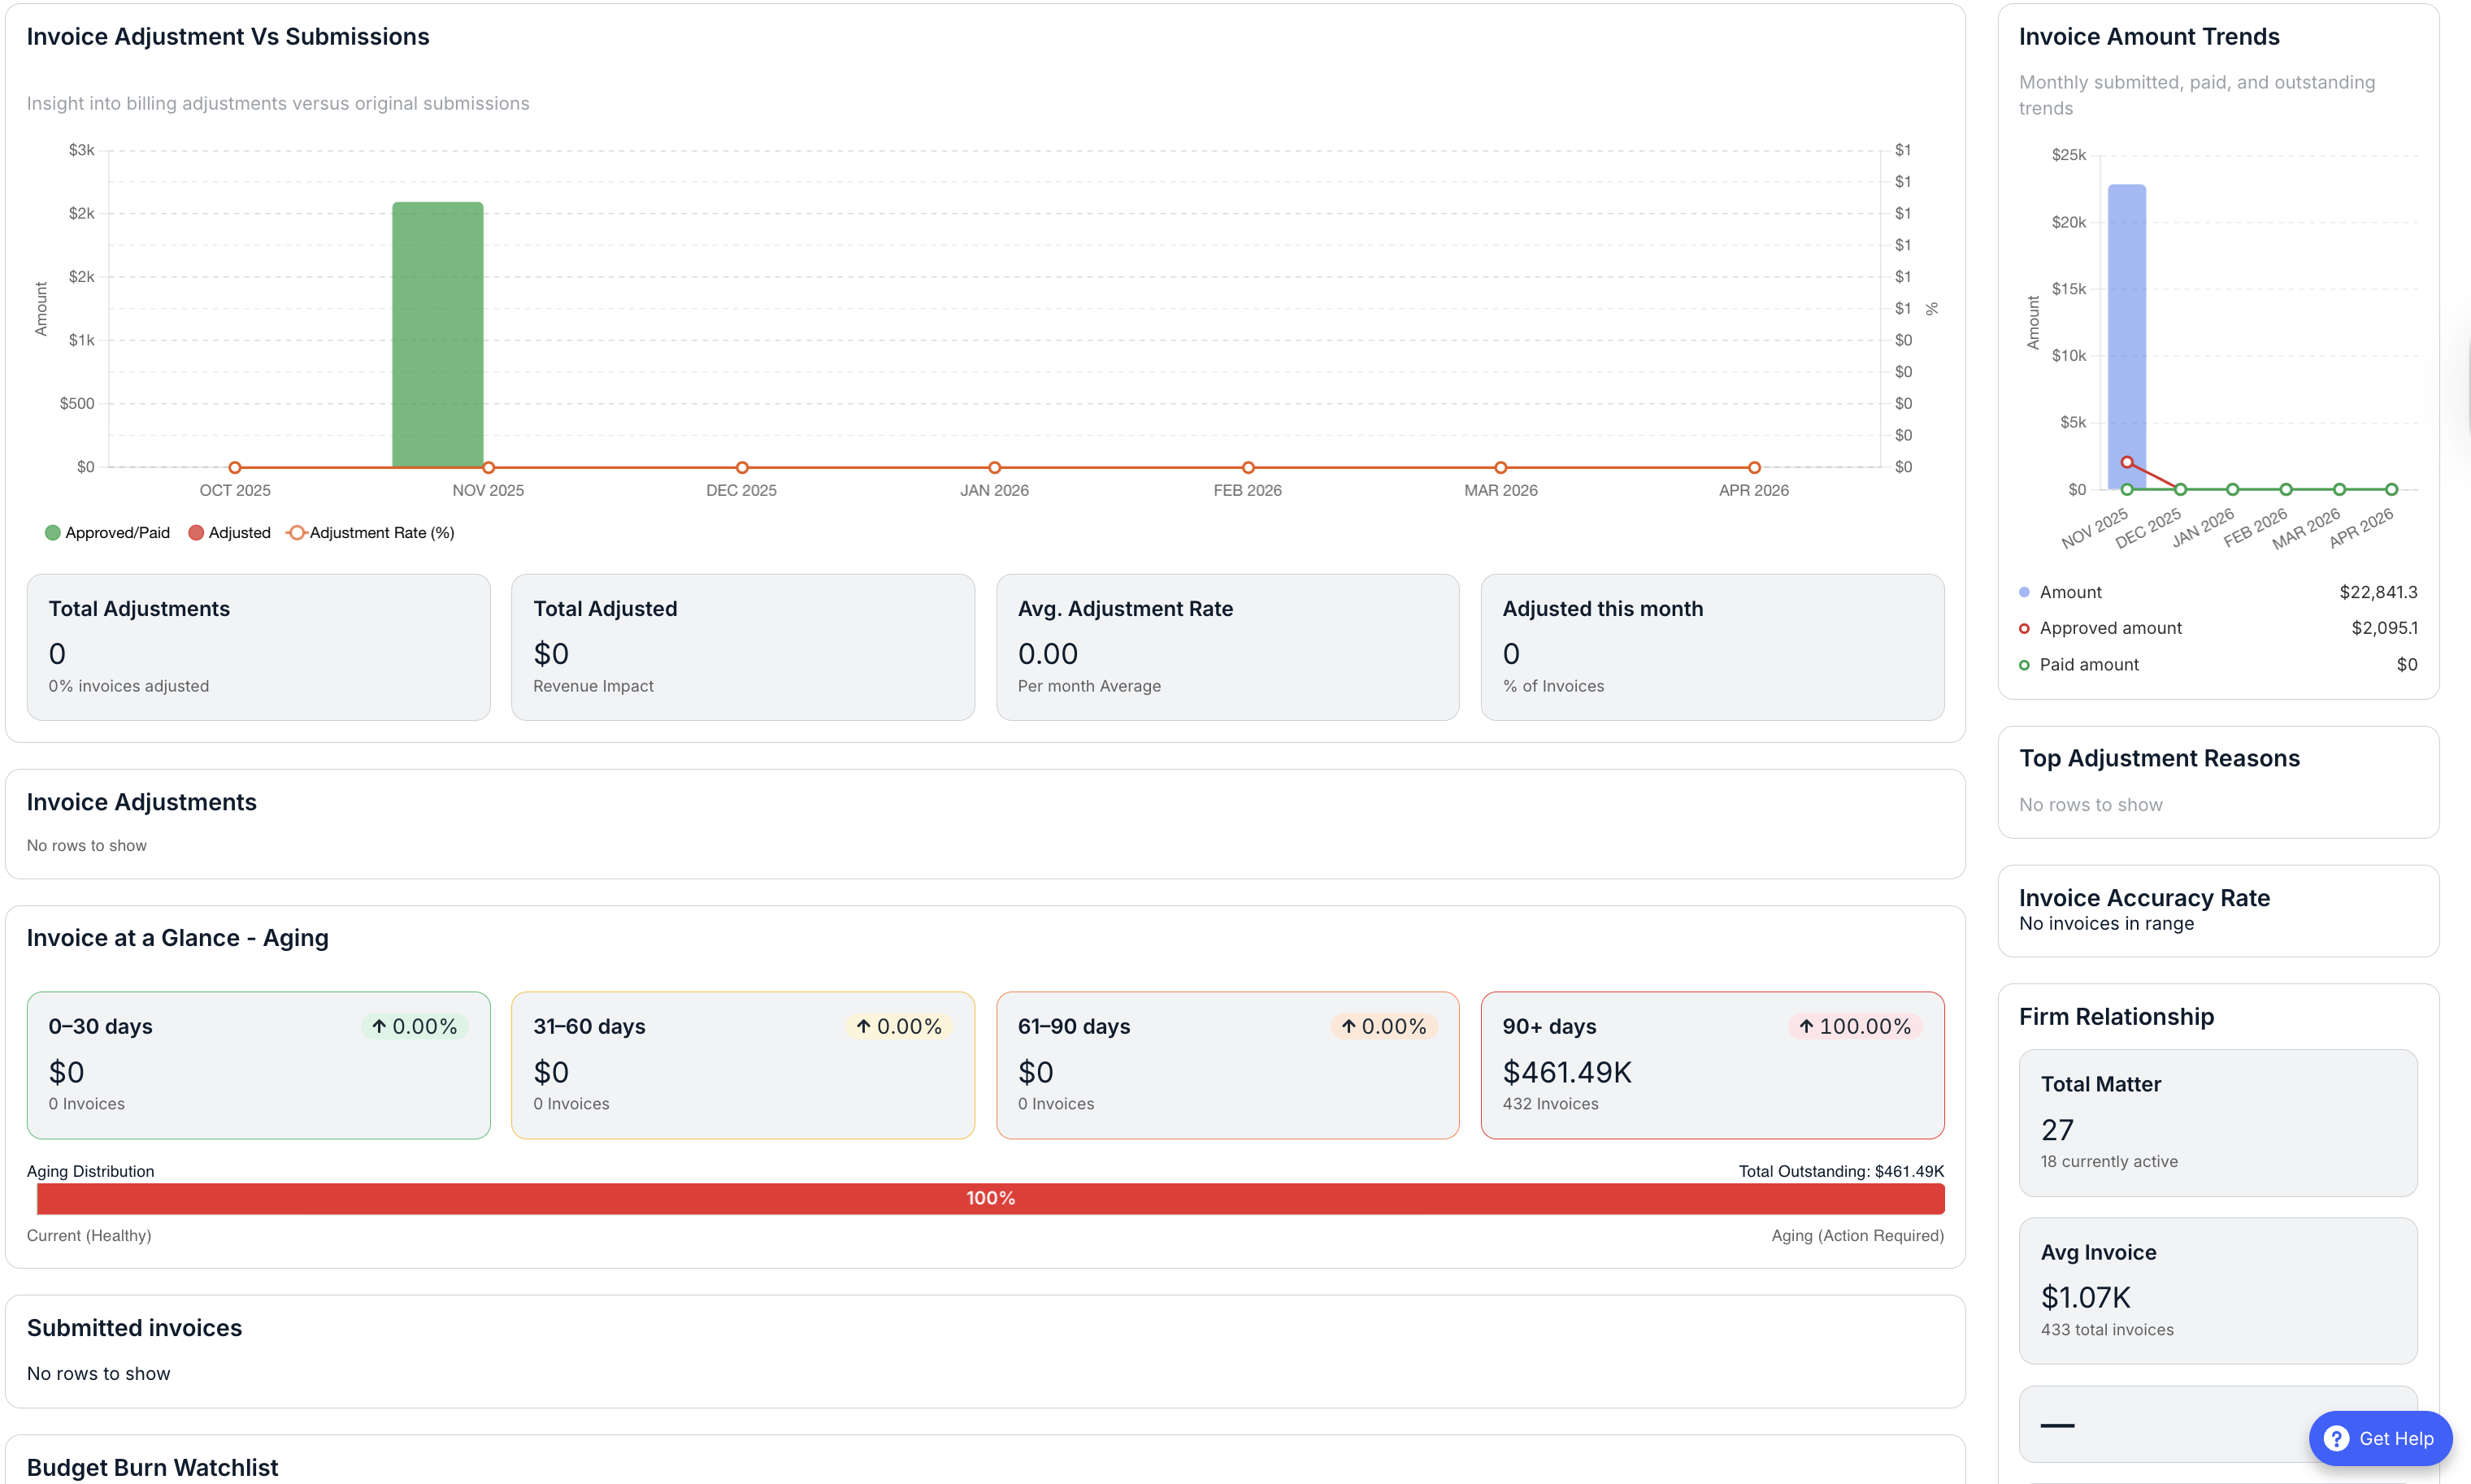
- The rest of the page shows key analytics.
Note that this environment will change depending on your settings.