Onit's Pro Forma Invoicing feature gives vendors an easy way to add tax considerations and calculations to their invoices before submission to the client allowing the client to make any necessary adjustments and edits during the submission process before vendor-side finalization.
Here, we will take you step-by-step through using the Pro Forma Invoicing option within BillingPoint.
Using Pro Forma Invoicing
1. After building your invoice, click the check box next to This invoice is subject to VAT compliance rules.
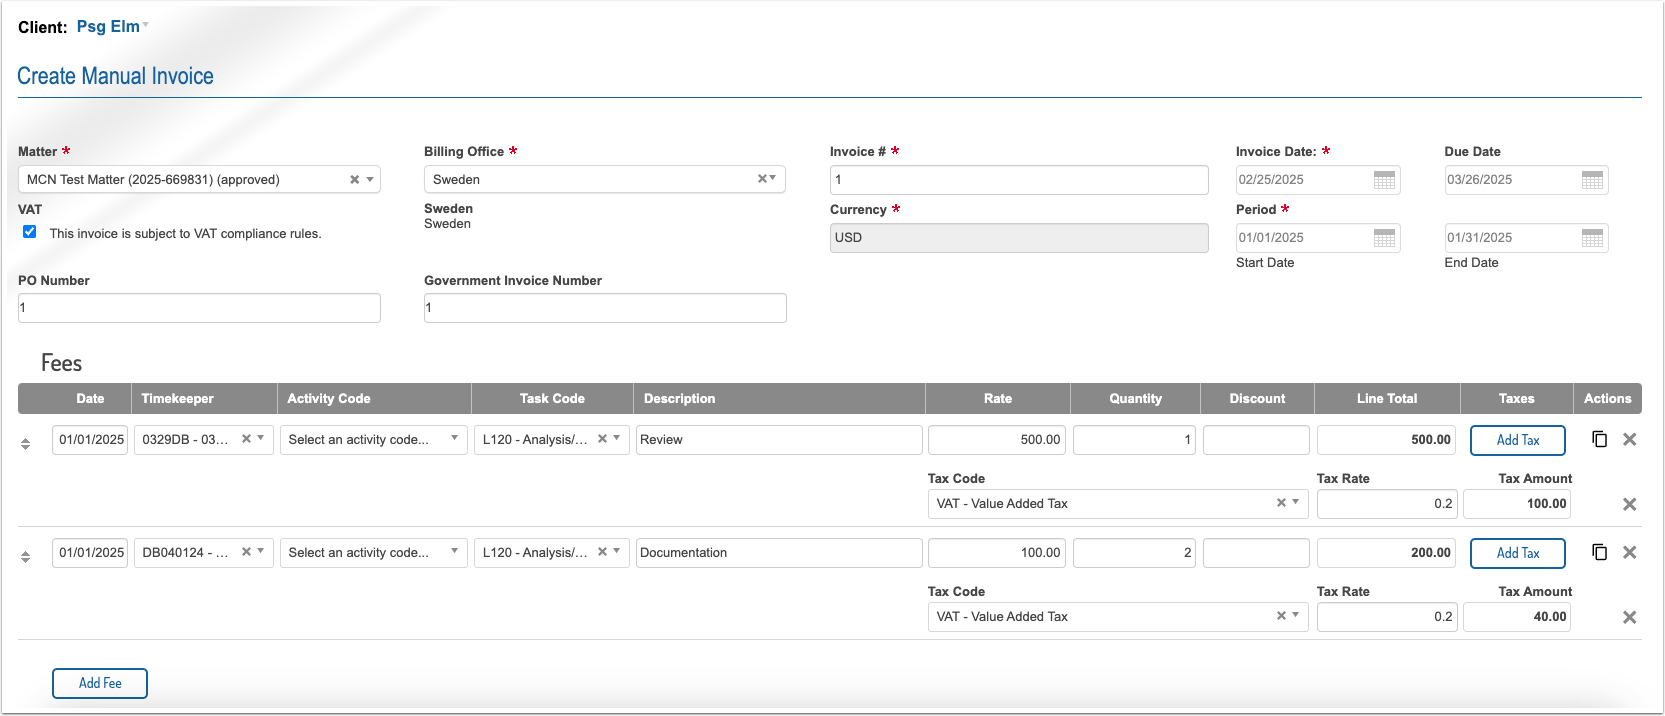

2. Once finished, click Submit to Client to send the invoice to the client for review. You can also click Save as Draft to save your work and finish later or Cancel to delete your draft entirely.

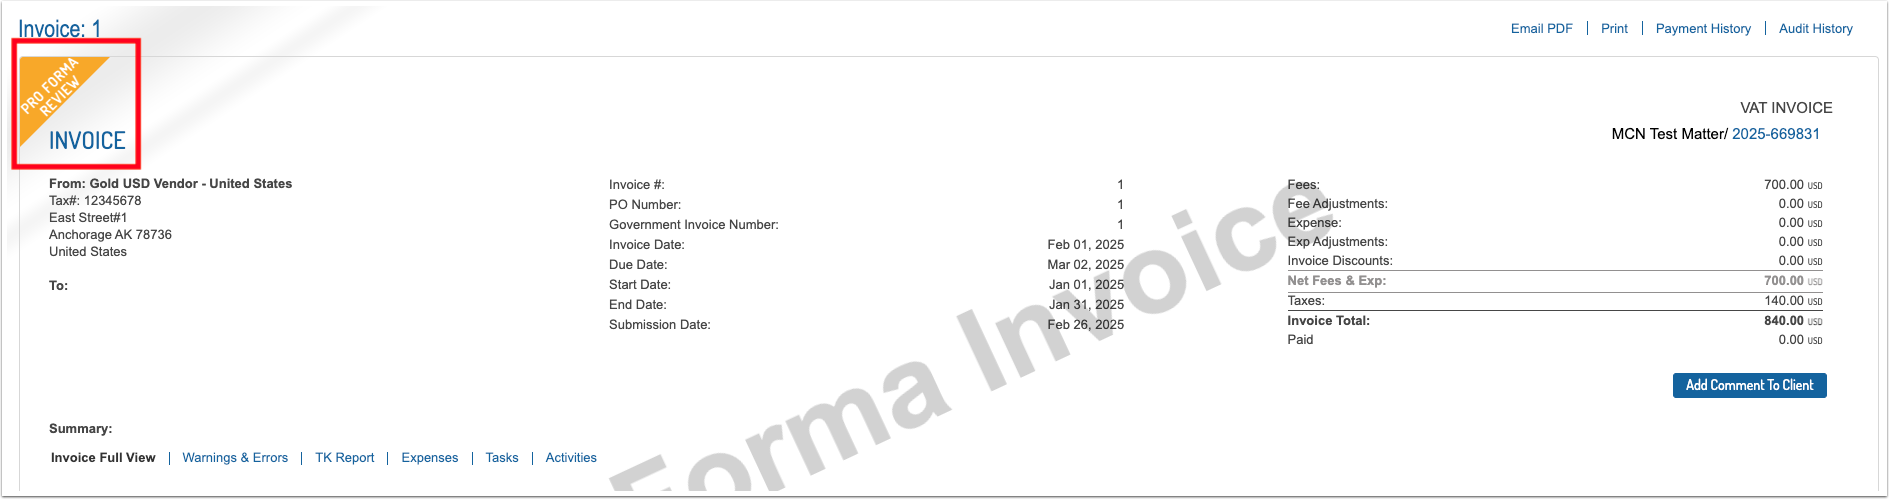
3. The invoice will be sent to the client. The status will appear as Pro Forma Review in the upper-left-hand corner.
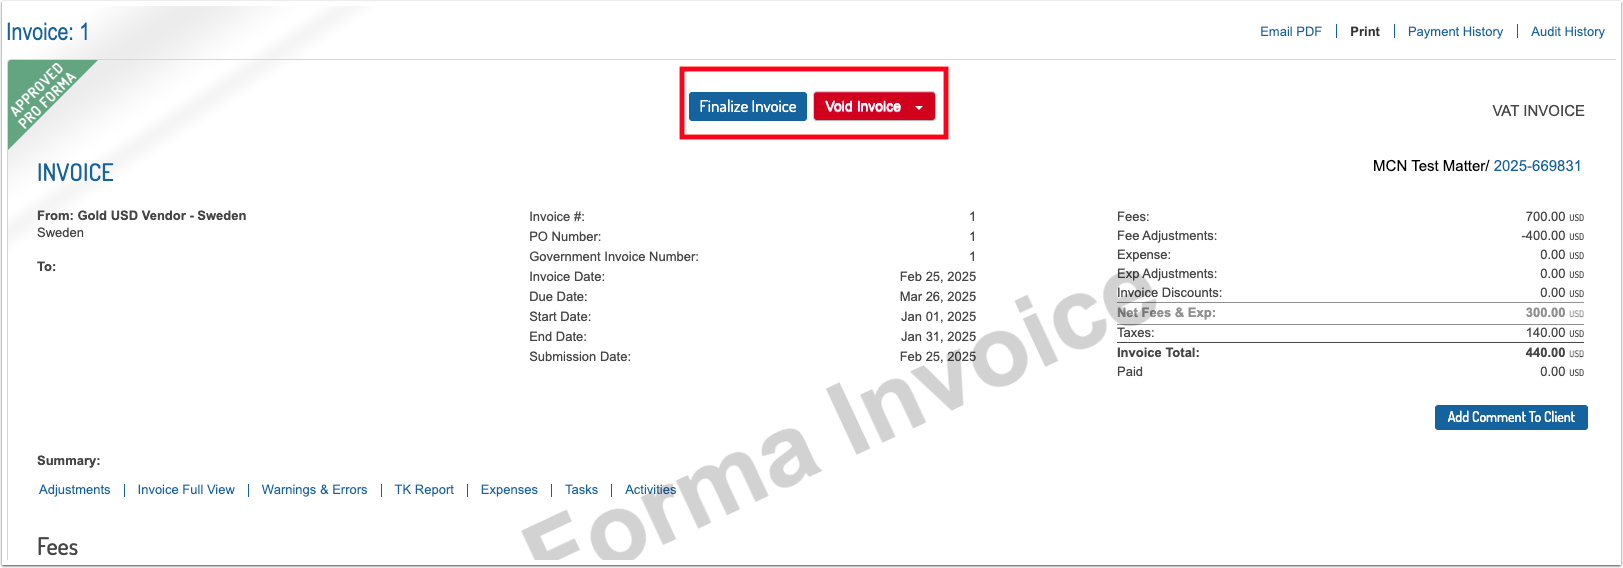
4. After the client makes any adjustments, they will send the invoice back to you. The next time you access the invoice in BillingPoint, you should see this message outlining the next steps (along with an Approved Pro Forma tab at the upper left corner of the screen).
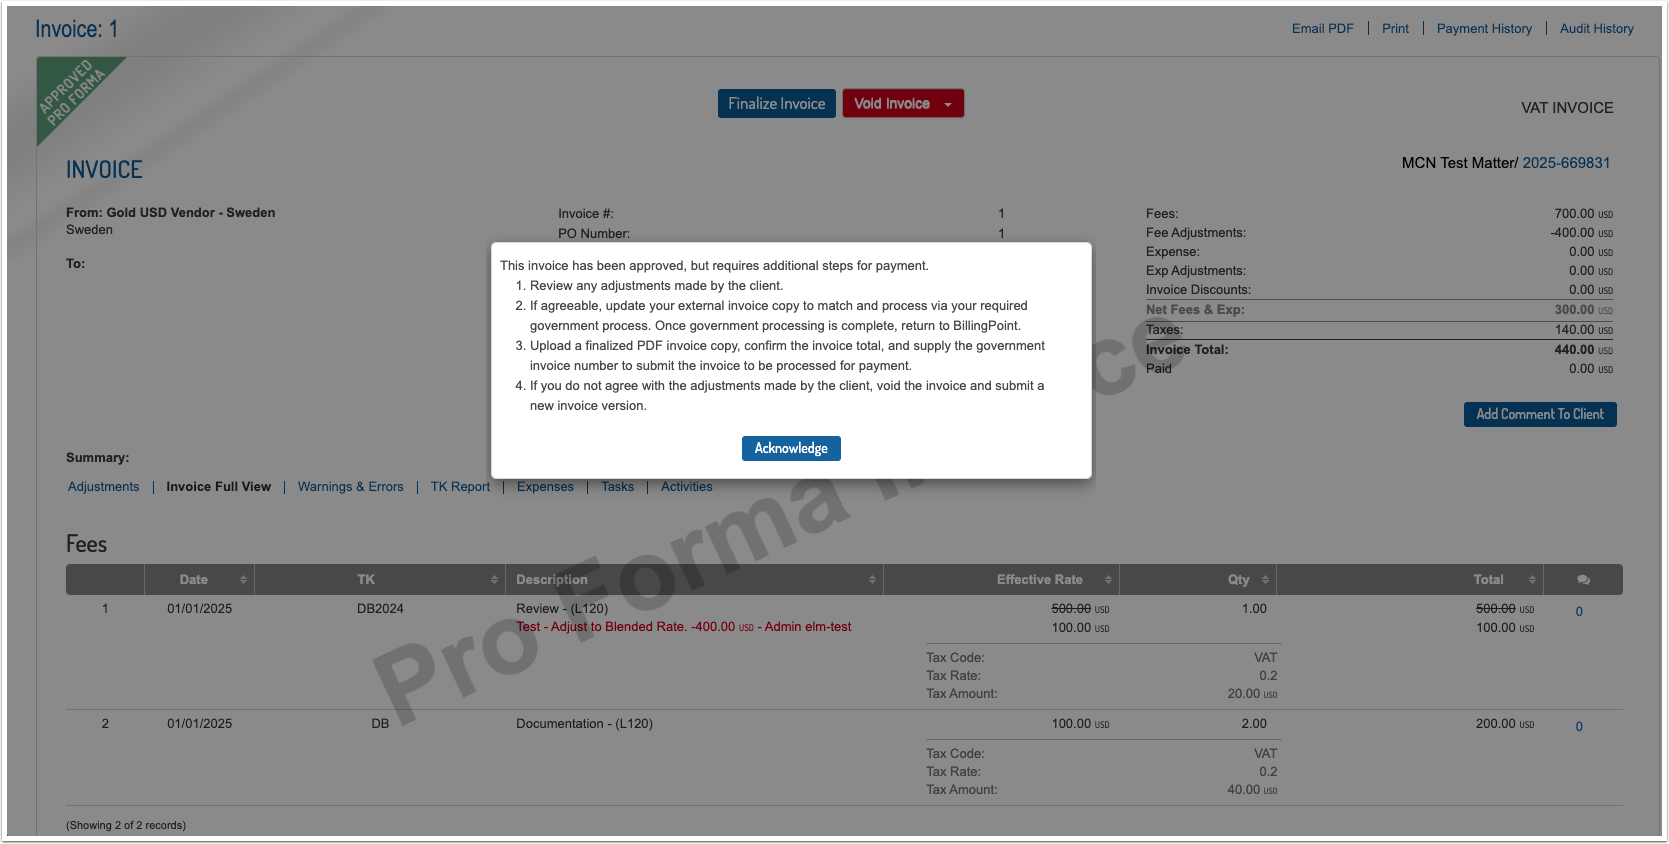
The next steps are to:
- Review any adjustments made by the client.
- If agreeable, update your external invoice copy to match and process via your required government process. Once government processing is complete, return to BillingPoint.
- Upload a finalized PDF invoice copy, confirm the invoice total, and supply the government invoice number to submit the invoice to be processed for payment.
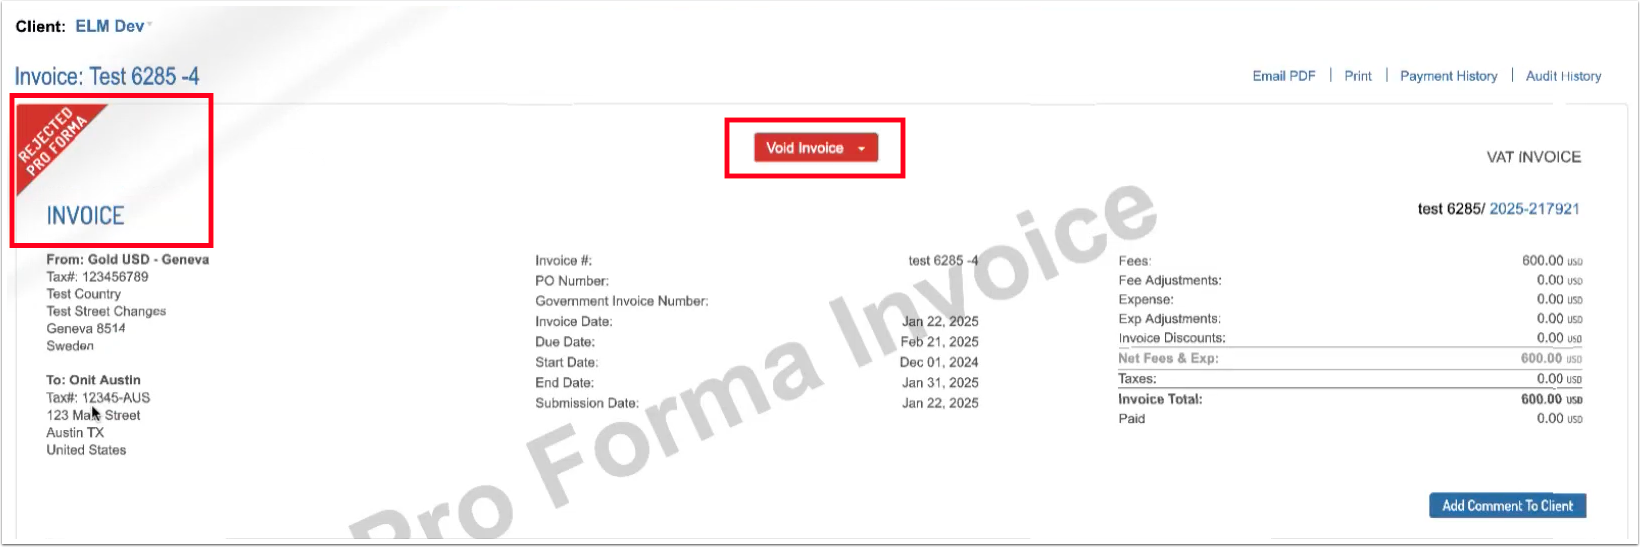
- If you do not agree with the adjustments made by the client, void the invoice and submit a new invoice version.
Click Acknowledge to begin the next steps of the process.
5. Once you have reviewed the adjustments and updated the external invoice copy for your local government's specifications, click on Finalize Invoice.
6. Once you click Finalize Invoice, the Finalize Pro Forma Invoice screen will pop up.
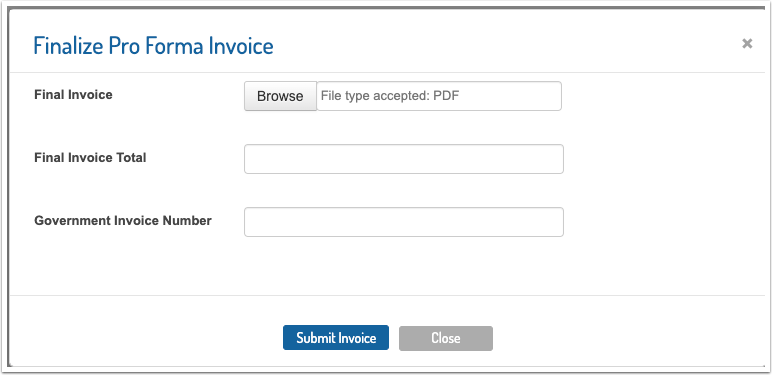
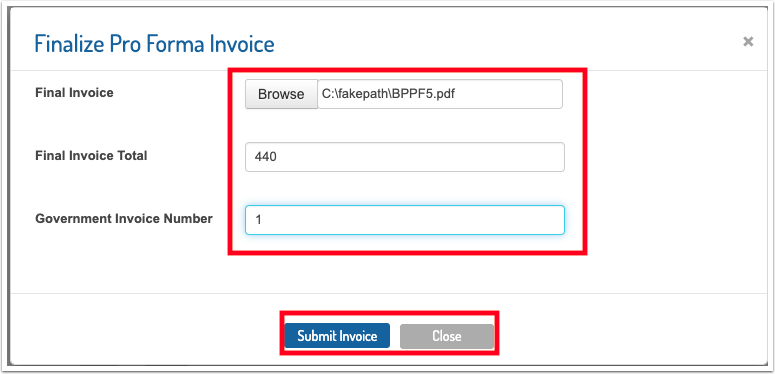
Here, you will have to:
- Upload your Final Invoice (in PDF form)
- Fill in your Final Invoice Total
- Fill in the Government Invoice Number if applicable; if not applicable to the invoicing jurisdiction, fill in N/A.
Once that is set, click Submit Invoice to send the invoice out for payment or hit Close to back out.
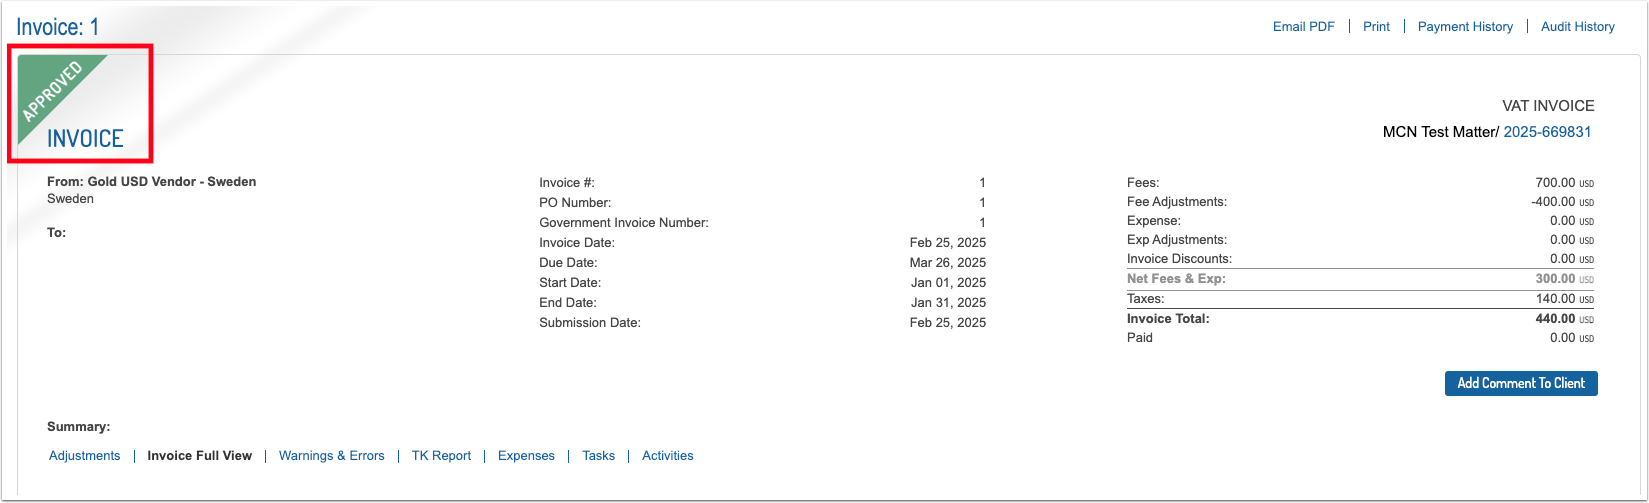
7. Provided the totals match up, you will see the status change to Approved in the upper-left corner. The invoice will go into the client's AP system for payment.